Growing your own food is something of an adventure – and who doesn’t need a detailed map when starting out on an adventure?
Enter square foot gardening – a way to grow food that comes with a built in map!

We link to vendors to help you find relevant products. If you buy from one of our links, we may earn a commission.
You are probably somewhat familiar with this style of growing food already. Square foot gardening is one of the most popular methods used among backyard gardeners, after all.
But did you know that someone actually invented this approach?
As the name implies, this method involves growing crops in carefully measured gardening beds, but there’s so much more to it than that!
So what is square foot gardening, and where did it come from? What’s so great about it? Why do people still use this method today, and why is it so popular?
In this article, we’ll explore the roots of this food growing method, and you’ll learn about each of the steps you need to follow to grow a square foot garden of your own.
Here’s what we’ll cover up ahead:
What You’ll Learn
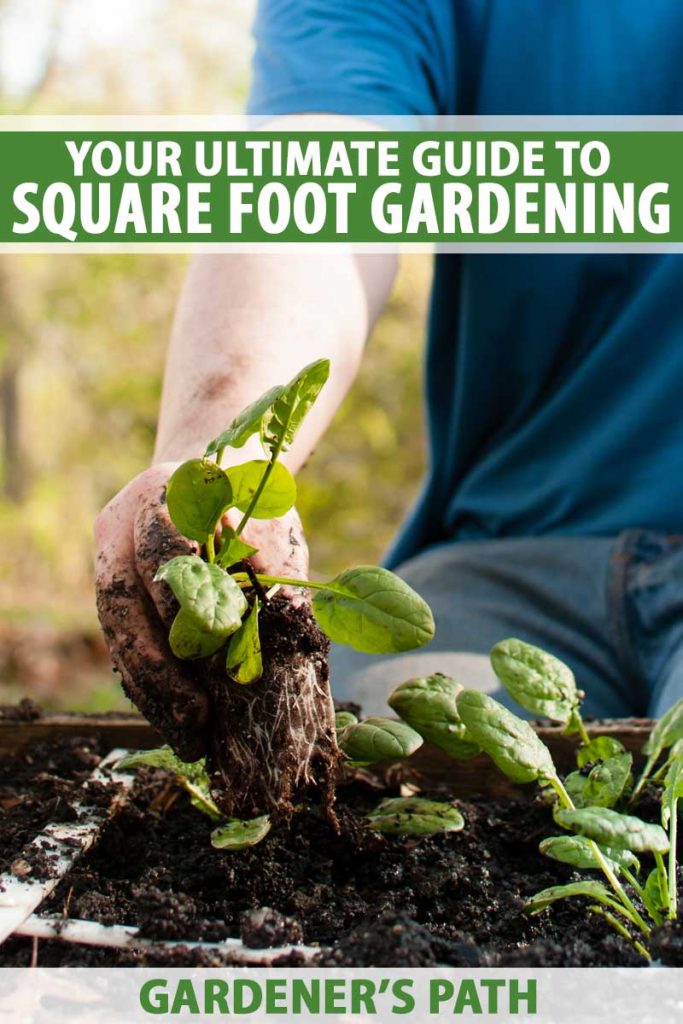
What Is Square Foot Gardening?
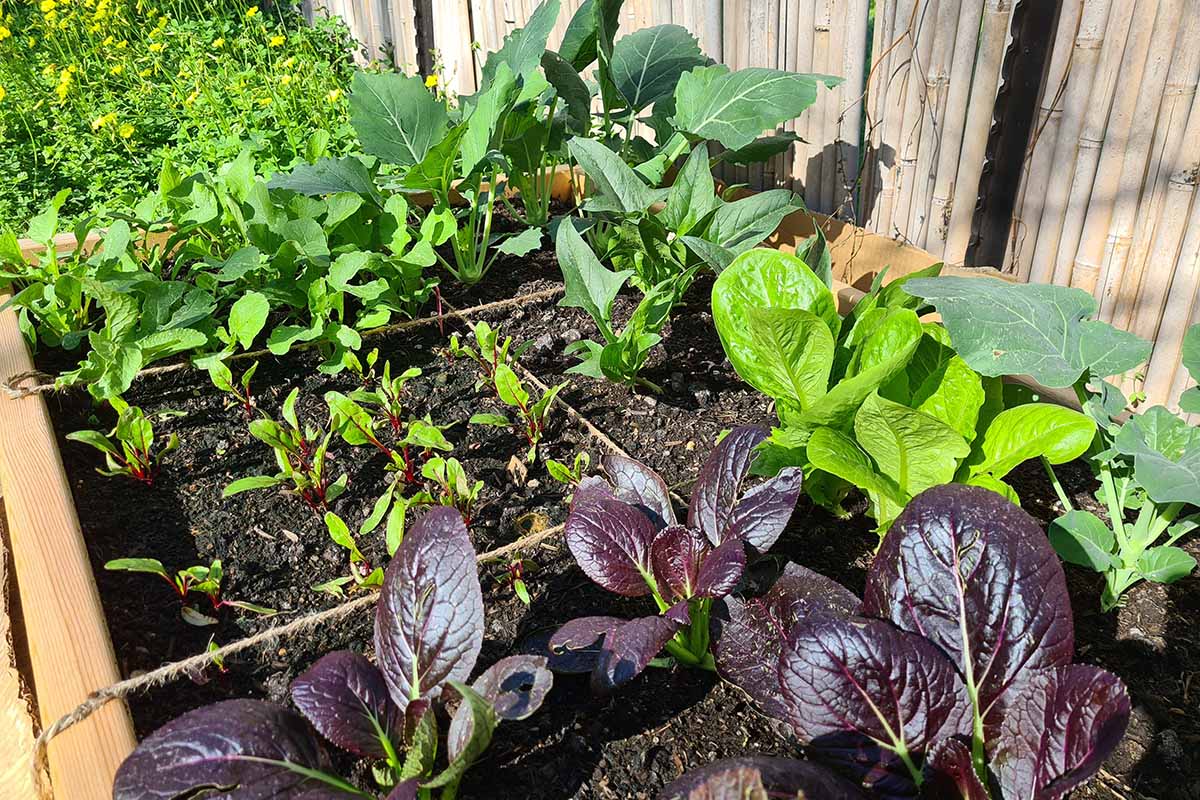
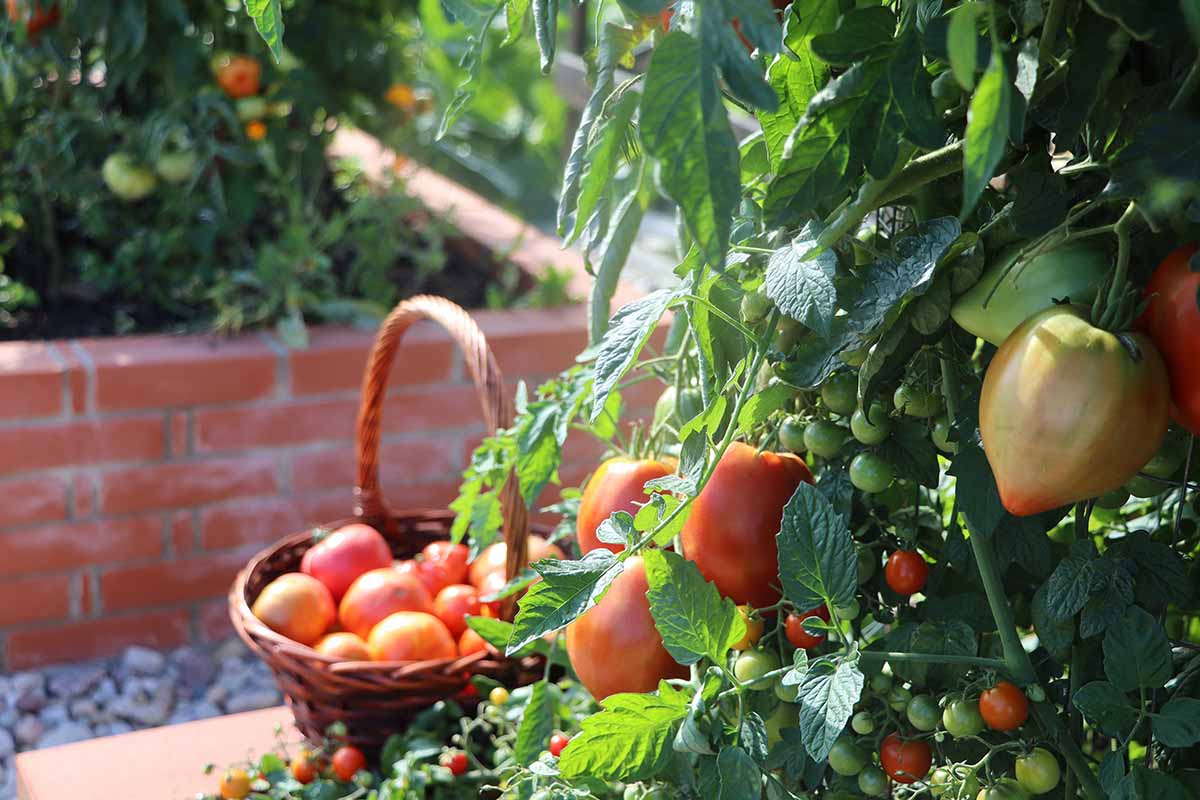
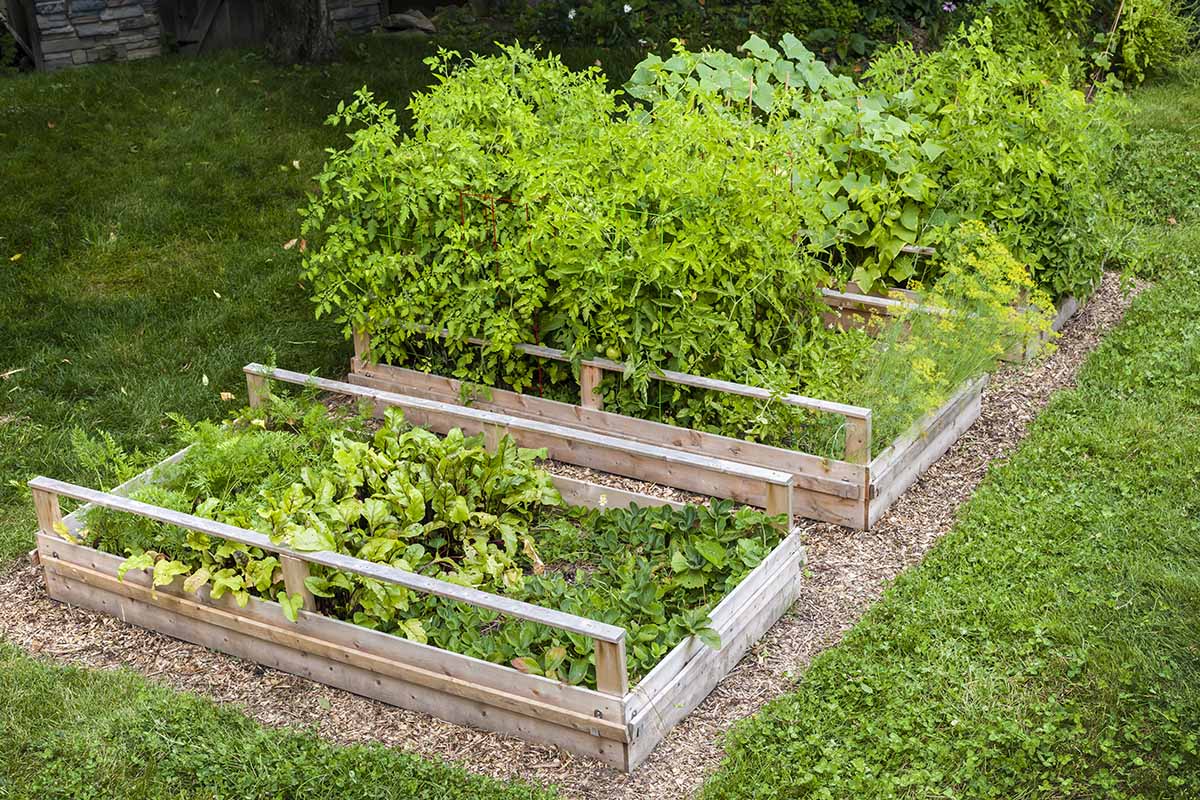
Square foot gardening is an approach to growing food in raised beds in one-foot increments. These one foot by one foot squares are defined with the help of a grid.
This method incorporates polyculture planting, vertical gardening, crop rotation, and intensive spacing, using only 20 percent of the space required in traditional row planting, according to the creator of this system, Mel Bartholomew.
Not only does it reduce the need for space, but it also reduces work – adepts of this no-till method use a weed-free growing medium to reduce time and energy spent on garden chores.
In this food growing method, after a plant is harvested, a new one is sown or planted in its place to keep beds at full occupancy, further reducing the ability of weeds to set up camp.
Compared with traditional row growing, not only is extensive time and energy spent on weed control minimized, tilling and fertilizing are also eliminated, as is the use of pesticides or herbicides.
Watering is also greatly reduced as gardeners are encouraged to provide irrigation only to individual plants as needed.
Although most gardeners use square foot gardening primarily to grow fresh produce, this method can also be used to grow cut flowers or gardens for butterflies and other beneficial insects.
And incorporating pollinator-friendly plants among edibles is certainly encouraged!
Because of its space-saving nature, this approach is great for those who want to grow food in small spaces, but it is by no means limited to those with petite plots of land.
Now that you have an idea of what this approach to growing food is all about, maybe you’re wondering where this method came from?
The phrase “square foot gardening” was coined and the concept developed by civil engineer Mel Bartholomew.
After retiring from his career as an engineer, Bartholomew took up gardening as a hobby, but soon became frustrated by the lack of efficiency and great waste involved in traditional row-based planting.
He came to realize that row-based planting was designed for farmers growing food on a large scale, and that it failed to take into consideration the needs and limitations of backyard gardeners.
So Bartholomew sought inspiration elsewhere – from French intensive gardening, among other systems.
We’ll get into just how Bartholomew created this method later in the article, but for now, suffice it to say that he experimented until he came up with his excellent idea – growing in square foot sections of raised beds.
In 1981 he authored his original, revolutionary book, “Square Foot Gardening.” A version reprinted in 2005 is available on Amazon.

Square Foot Gardening: A New Way to Garden in Less Space with Less Work, 2005
The book quickly took hold of gardeners as an exciting new way to grow more food in small spaces, not only to produce homegrown harvests, but also as a means of improving health, ergonomics, and even food security among populations in need around the world.
The huge success of this book, which sold copies in the millions, led to a TV series, first aired on PBS and then the Discovery Channel, bringing Bartholomew’s ideas to an even wider audience.
With updated methodology based on his decades of experience, in 2006 Bartholomew published a new version of his book entitled “The All New Square Foot Gardening: Grow More in Less Space,” followed by a second edition in 2013.
After Mel Bartholomew died in 2016, the Square Foot Gardening Foundation, started by Bartholomew in 1996, continued his work and released a third version of his book in 2018.
The third edition, authored by Mel Bartholomew with the Square Foot Gardening Foundation, takes a slight departure from the original text.
Compared with the second edition, much of Bartholomew’s personal story and tales of his experimentation have been removed, though blurbs taken from Bartholomew’s original text appear throughout the book.
While less of Mel Bartholomew’s voice is present in the third edition, the text has been tweaked to make it even easier for gardeners to use the info held within as a step by step guide. There are even more illustrative photos, creating an all in one resource for gardeners.
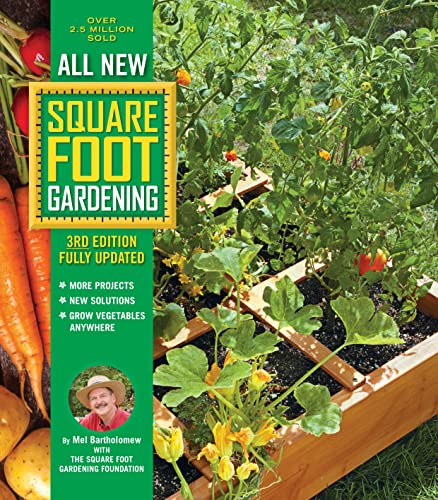
The All New Square Foot Gardening, 3rd Edition, Fully Updated
You’ll find “The All New Square Foot Gardening, 3rd Edition, Fully Updated” on Amazon.
Now that you know where this method came from and have a basic idea of how it works, perhaps you’re wondering how exactly it might help you?
Let me count the ways…
The Advantages of Square Foot Gardening
A stellar food-growing option for multiple reasons, let’s take a look at the advantages of square foot gardening!
Beginner Friendly
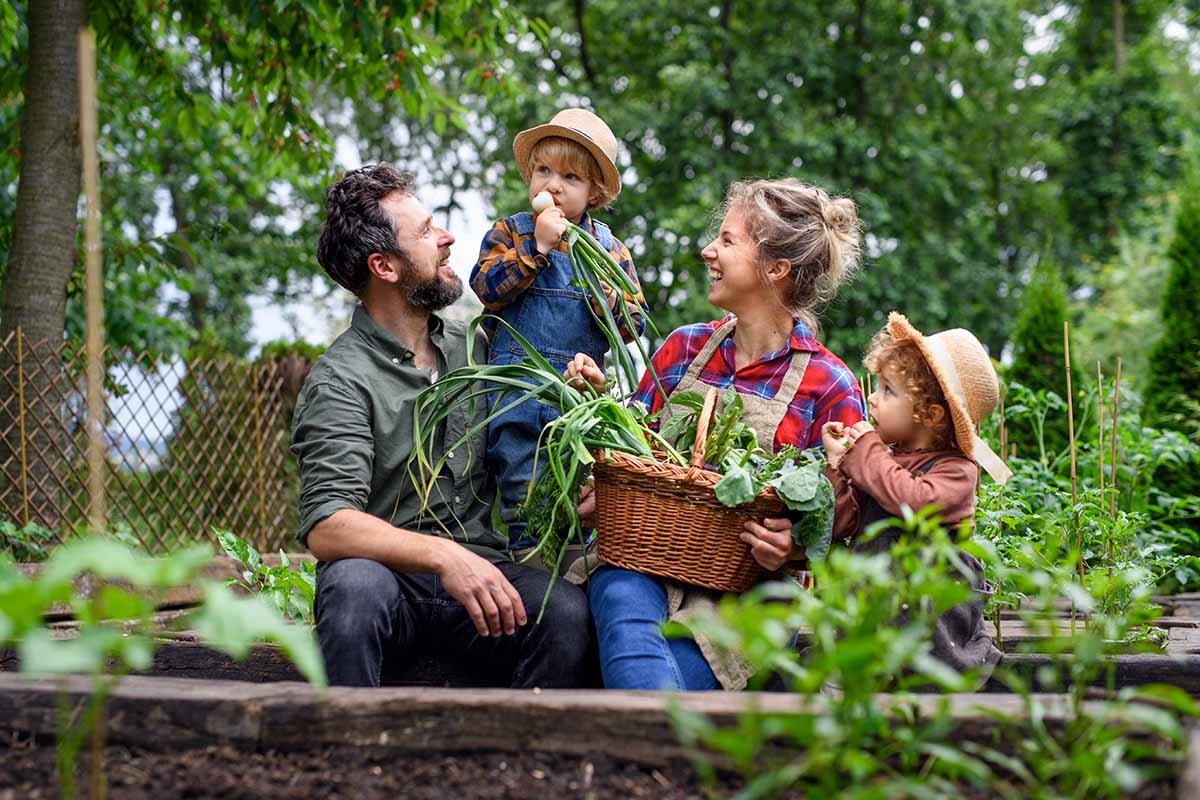
For those who are new to growing their own food, this method offers a supremely easy way to get started.
Would-be gardeners who have been nervous or hesitant to get started will find an easy method to follow here, gaining confidence while producing plenty of organic and homegrown food.
And because of all the other advantages – which we’re about to discover – converts to this method are likely to keep their new hobby going.
Another advantage for beginners – if you want to try edible gardening without changing your landscaping too much, this is the perfect way to give it a try.
All you need is four square feet in the sun, and you won’t even have to sink a shovel into the ground.
Space Savings
One of the most astounding advantages of this method is space savings.
Mel Bartholomew eventually hit on the square foot idea by experimenting with shrinking the space between rows in a traditional row-planted garden.
He found that by doing so, he could produce the same amount of food in just 20 percent of the space needed in traditional row planting.
Want to know how space gets saved with this method?
Basically, the logic goes like this: if you can grow carrots two inches apart in a single-file line in a row, why can’t you grow them two inches apart side by side as well? The answer? You can!
Although the spacing in this method is compact, it still allows for enough airflow to keep plants healthy, as long as you follow the guidelines regarding the number of plants per square foot – you’ll learn more about those later in the article.
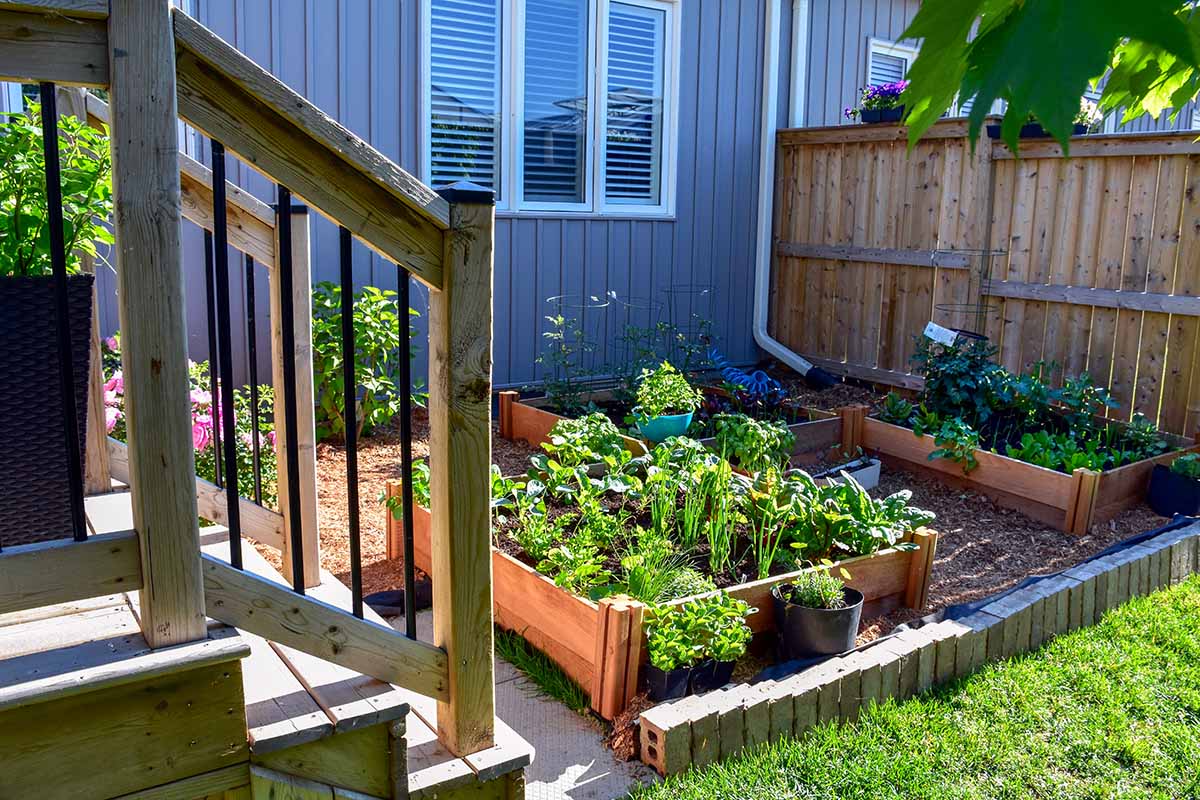
While those with plenty of land to farm might nevertheless want to try this method, this approach makes growing food more accessible to those who live in smaller spaces, such as urban settings on small plots of land.
It can even be put to excellent use on patios or balconies!
Excellent Accessibility
Speaking of making gardening more accessible, this method’s standard four-by-four-foot raised bed growing space is the perfect size for reaching across to just about any spot in the bed, whether for planting, harvesting, or amending.
This is quite the ergonomic option!
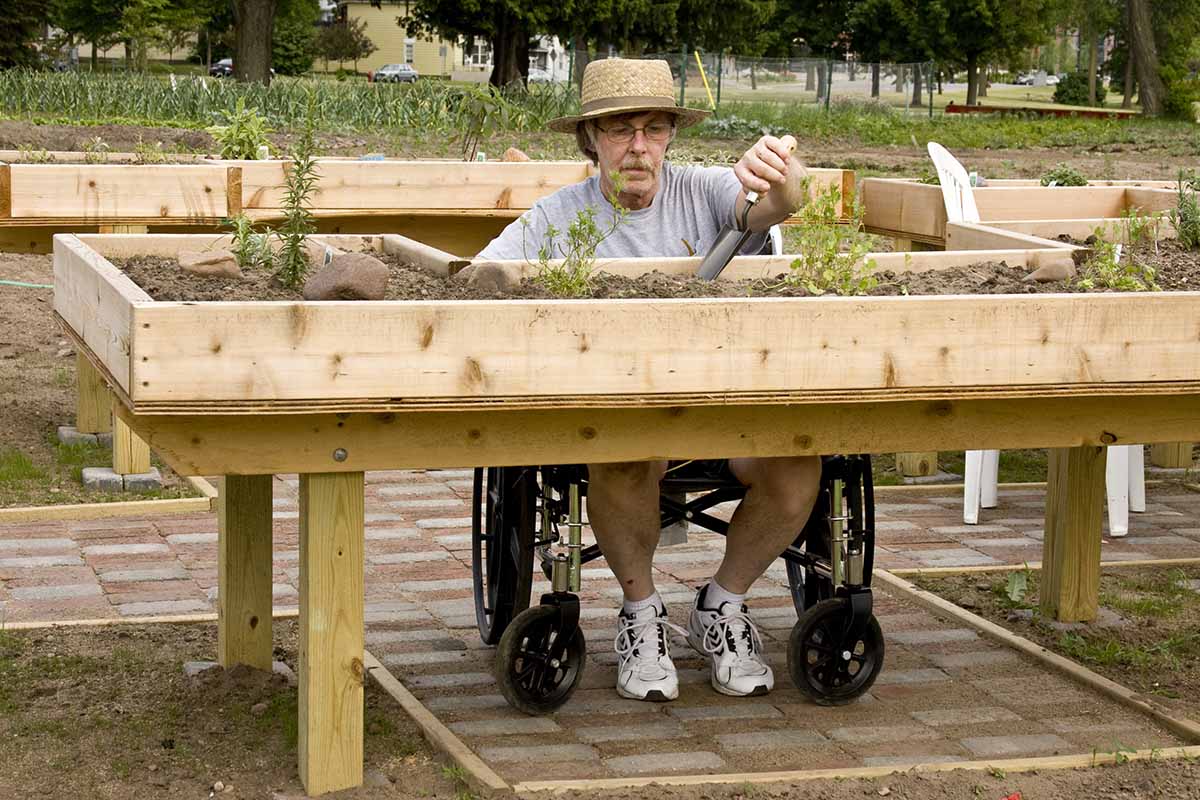
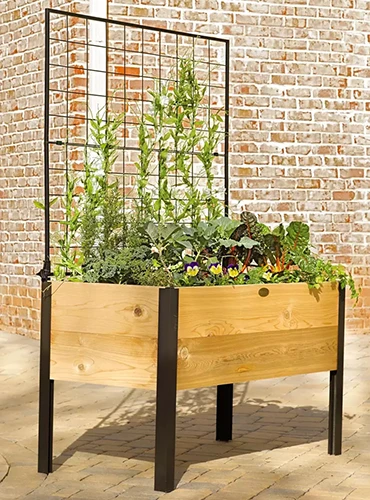
And by raising the beds off the ground and adding bottoms, this way of growing food is easily adapted for those who have trouble bending or squatting. It can even be made wheelchair accessible.
Reduced Work
You know what else makes gardening more accessible? Less work.
Gardening can be so much fun, and Mel Bartholomew wanted to accentuate that by reducing the work involved – work like tilling and weeding.
When a weed-free soil mix and landscape fabric are used as recommended, weeding is reduced to virtually nil compared to growing in the ground.
Sure, wind and birds will still deposit the occasional random seed in the growing medium, but since growers are planting in specific patterns, those uninvited weedy guests are easy to identify and remove.
And since this is a no-till method, there is no backbreaking labor involved in working the soil. The recommended growing medium is light and friable, and won’t require any hard labor to get it to stay that way.
That means more time to lounge on your porch swing, admiring your crops as they grow, and watching the pollinators put on a show!
Less Need for Tools
Since there’s less work involved, there are fewer gardening tools required with this growing method.
Essentially, all you’ll need for a square foot garden in the way of tools is a pair of gardening gloves, your handy trowel or hori hori, and a pair of pruners.
Since this is a no-till method, you won’t need any large machinery like rototillers either.
Less Need for Testing
If you’ve felt nervous about the thought of performing a soil test, that’s one less worry you’ll have with this food growing system, since a specific growing medium is used instead of soil from the ground.
You won’t have to worry about whether you have the right nutrients or minerals in your soil, because everything you’ll need is in the growing medium you’ll add to your boxes.
Keeps Your Plants Tidy
Because of its well-ordered grid system, this gardening method will appeal to those of us who prefer to keep our landscapes looking tidy.

The use of the grid on the raised bed tells you that each crop has a dedicated space.
Growing on the grid will create visual order and keep things neat.
Prevents Compaction
By growing in a raised bed, gardeners avoid the risk of walking on – and thus, compressing – the growing medium.
Even gardeners mindful to avoid walking on garden rows may occasionally forget or accidentally step into a row, which will compress soil and have a detrimental effect on crops. (Not to mention the damage that can be sustained by a plant that gets stepped on!)
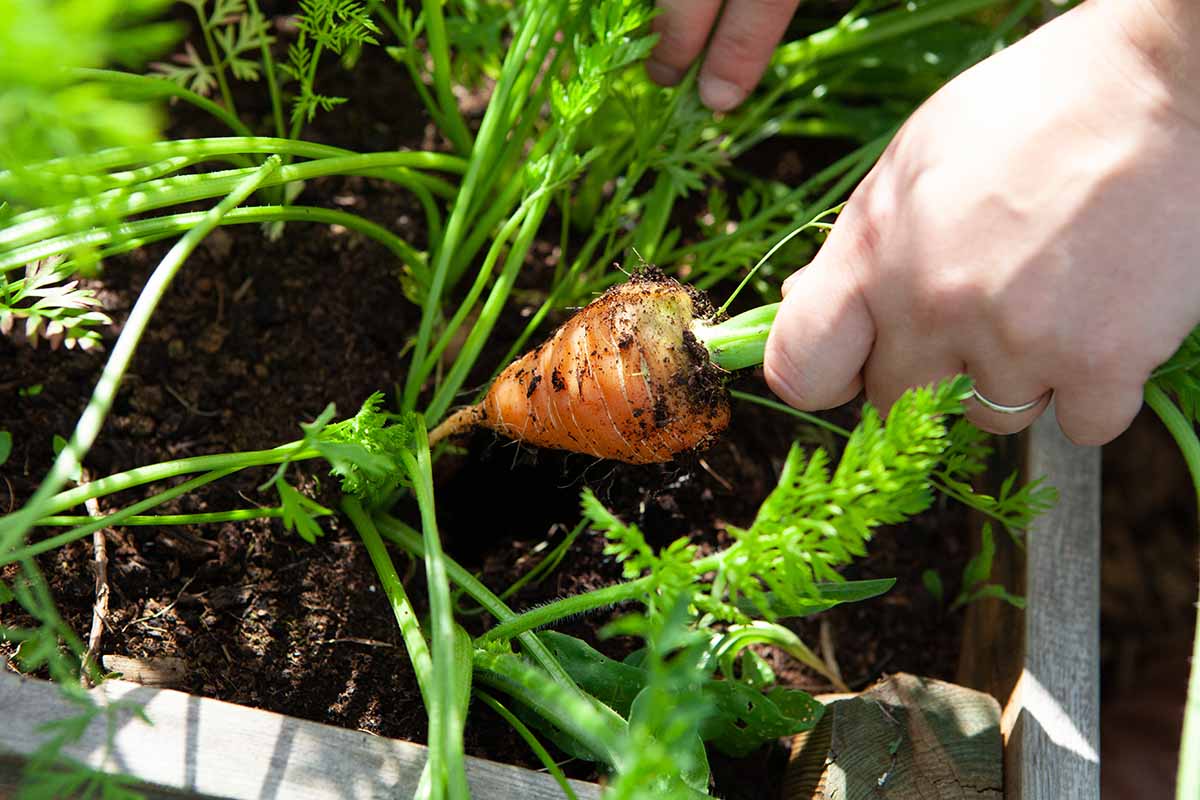
Preventing compaction helps to keep the growing medium light and airy, allowing roots to grow without deforming them, as sometimes happens with crooked carrots.
Are There Any Disadvantages?
Does this method of food production sound like it might be too good to be true?
Some critics of this method argue that, in spite of its space- and work-saving techniques, startup can be expensive. The purchase or construction of a raised bed may be costly, as can the ingredients for the weed-free growing mix.
Certainly, each gardener has to weigh the costs and benefits for themselves to decide which growing method will be the most time-, energy-, and cost-efficient.
But by being creative when it comes to sourcing materials to create raised beds, using reclaimed materials like cement blocks, bricks, or scrap lumber, the cost of startup can be greatly reduced.
It may help you to gauge long term costs and benefits to know that the growing medium, once in place, will last for seven to 10 years.
When you compare the costs of setup, seeds, and plants over a 10-year period to the cost of purchasing fresh, organic produce for 10 years, you might find that the initial investment is well worth it!
Another potential drawback to this method is that it is less functional in arid climates where a raised container will dry out faster than the ground. Yet, even in the face of this problem, there are solutions.
Those in arid climates should use wide beds instead of long narrow ones, which will dry out faster.
Dry climate gardeners may wish to protect beds with wind breaks, and experiment with sinking beds into the ground.
Also, in dry areas, beds should be 10 to 12 inches deep (rather than just six) to allow room for heavy mulching, which will help to slow moisture evaporation and keep the soil cool during summer heatwaves.
Now that you are all psyched up about how great square foot gardening is, let’s get down to business and start taking the steps that will enable you to turn these ideas into fresh, homegrown produce.
Calculate Your Food Needs
One of the hardest things about gardening is calculating how much food to grow to meet your needs.
Luckily, when it comes to square foot gardening, Mel Bartholomew has done the math for us. (Thanks, Mel!)
Mel recommended two four-by-four-foot raised bed boxes per adult to meet the need for two meals worth of vegetables per day during the growing season. A third box could be used to grow produce for preserving or sharing.
For a child’s needs, he recommended two three-by-three-foot boxes for two meals worth of veggies per day during the growing season.
You can use those recommendations to estimate your own growing needs.
If you eat lots and lots of vegetables, want to preserve more food for winter, or want to make sure you have plenty of fresh produce to share with extended family or friends, you may want to add additional boxes.
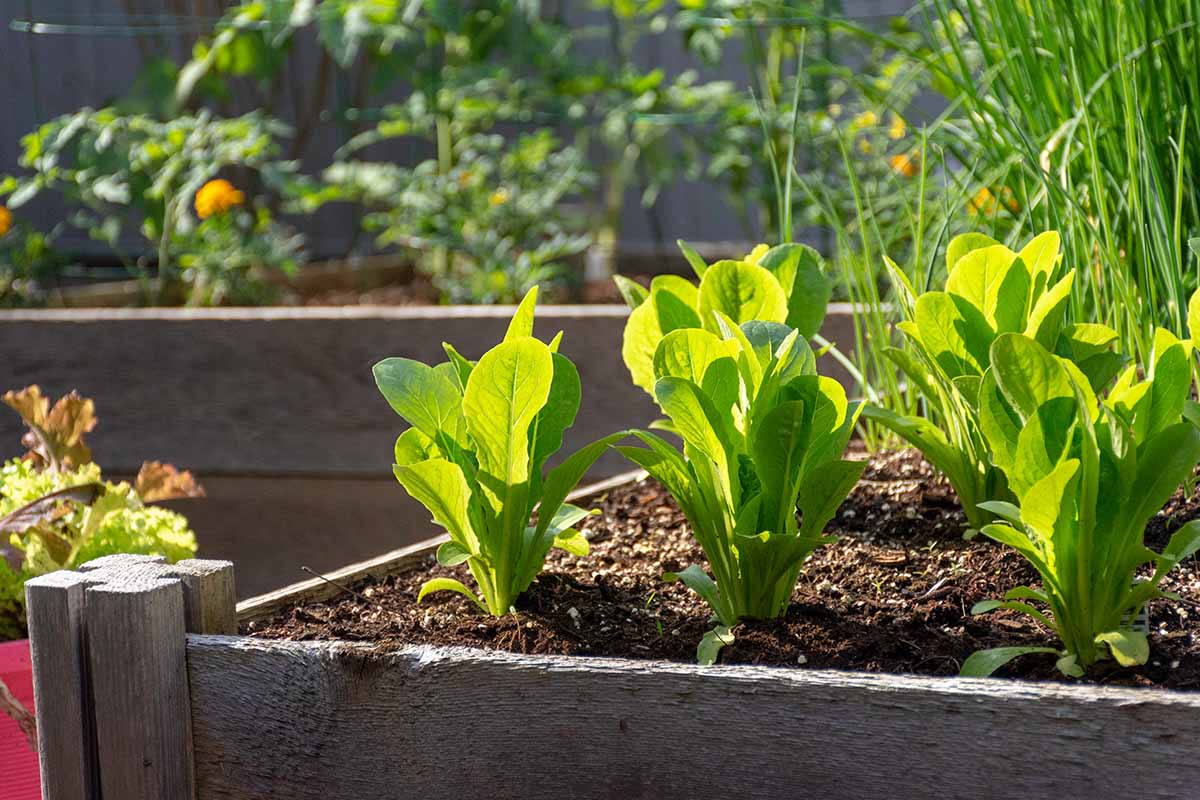
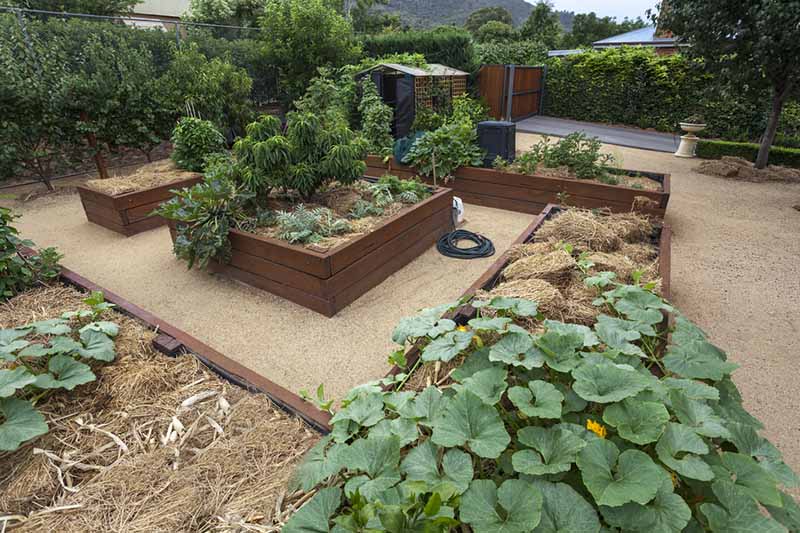
Choose Your Location
One of the most appealing features of square foot gardening is the flexibility it provides – since the raised beds are compact, they can be positioned around your yard wherever is convenient.
First and foremost – look for the sun. Your beds will be most productive if you’re able to locate them in full sun. That’s to say, select a spot that receives six to eight hours of direct sunlight each day.
Next, try to locate your boxes with close access to your home, particularly your kitchen, so you’ll see your raised beds from inside your house and remember to go out and harvest fresh veggies and herbs regularly for your meals.
Be creative when choosing your location, and remember, there’s no need to dig up your garden soil – you can set up square foot boxes on a patio, balcony, or lawn without breaking any soil (or even a sweat)!
However, for any bed you build or buy, it’s important to determine where the best setup should take place without creating drainage problems, rot, or damage to the surface below, depending on your space and the product or design.
And of course, keep in mind that not all raised beds may be appropriate for all surfaces.
Likewise, avoid positioning raised beds in areas with poor drainage so that water is able to drain from them adequately.
In addition to scoping out sunlight, choosing a convenient spot, and avoiding placing your boxes where they might either cause or succumb to problems, you will also want to make sure the ground is more or less level.
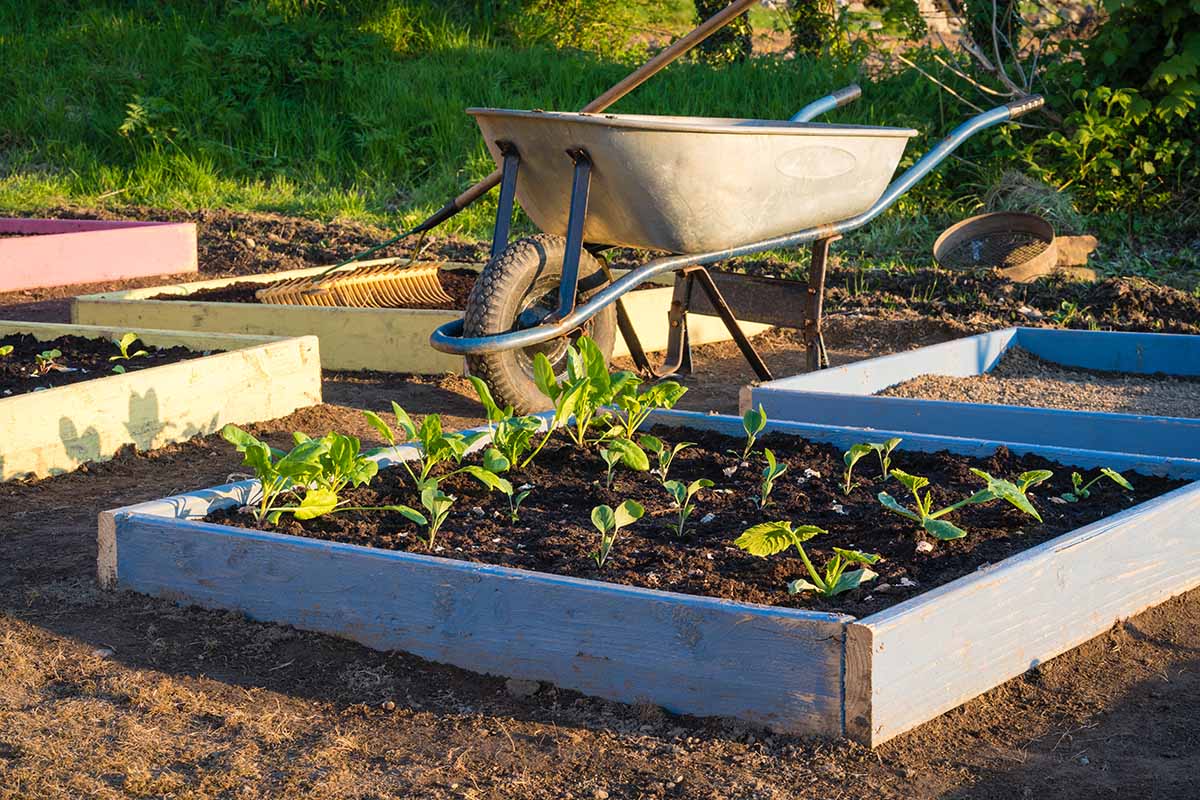
Once you have a good location, make sure to leave an aisle at least three feet wide between beds to allow people to pass easily, to kneel or squat near the raised beds, and to allow the passage of wheelbarrows if needed.
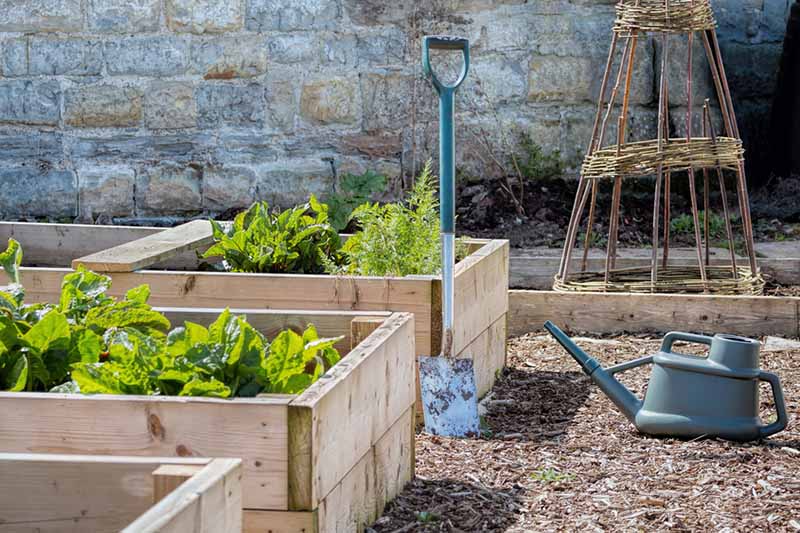
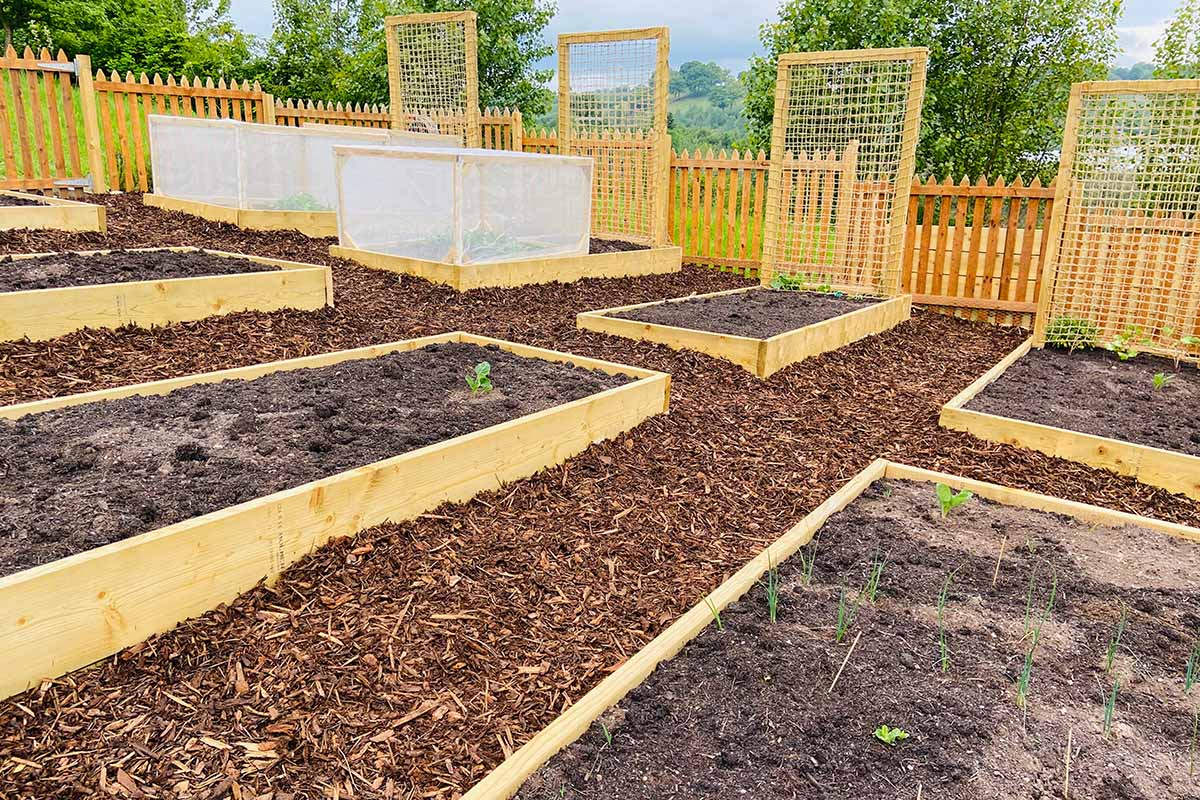
Choose and Install Your Raised Beds
The raised bed size that Mel Bartholomew recommended in his system is four feet long, four feet wide, and just six inches tall.
Why these dimensions?
Even the innermost spot in a four-by-four-foot bed is accessible from all sides by most adults. For children, a three-by-three-foot bed will allow easy access.
However, if you are planning to place your beds alongside a fence, a different shape may work better for you, such as a two-by-eight-foot or a two-by-six-foot bed.
As far as depth goes, six inches will be deep enough for most crops, and most gardeners. Bartholomew didn’t recommend using deeper beds for most crops, for efficiency’s sake.
After much experimenting, he found that six inches was deep enough to grow most vegetables, while crops requiring deeper soil, such as leeks, potatoes, and long varieties of carrots, could be accommodated by adding an additional layer on top of the raised bed.
Perhaps you found the perfect raised beds – but they are 12 inches deep. If you would like to use deeper raised beds and haven’t filled them yet, there is a work-around that will allow you to maintain the recommended depth.
Instead of filling them with growing medium to 12 inches, fill the bottom six inches with sand, a cheaper ingredient, then add landscape fabric liners and fill with growing medium.
Whatever dimensions you choose, remember to plan the width and length of the beds so that you can easily reach the innermost point of the bed – without stepping, kneeling, or sitting on the growing medium.
Walking, kneeling, or sitting on the medium will cause it to become compacted, which is not a great recipe for gardening success!
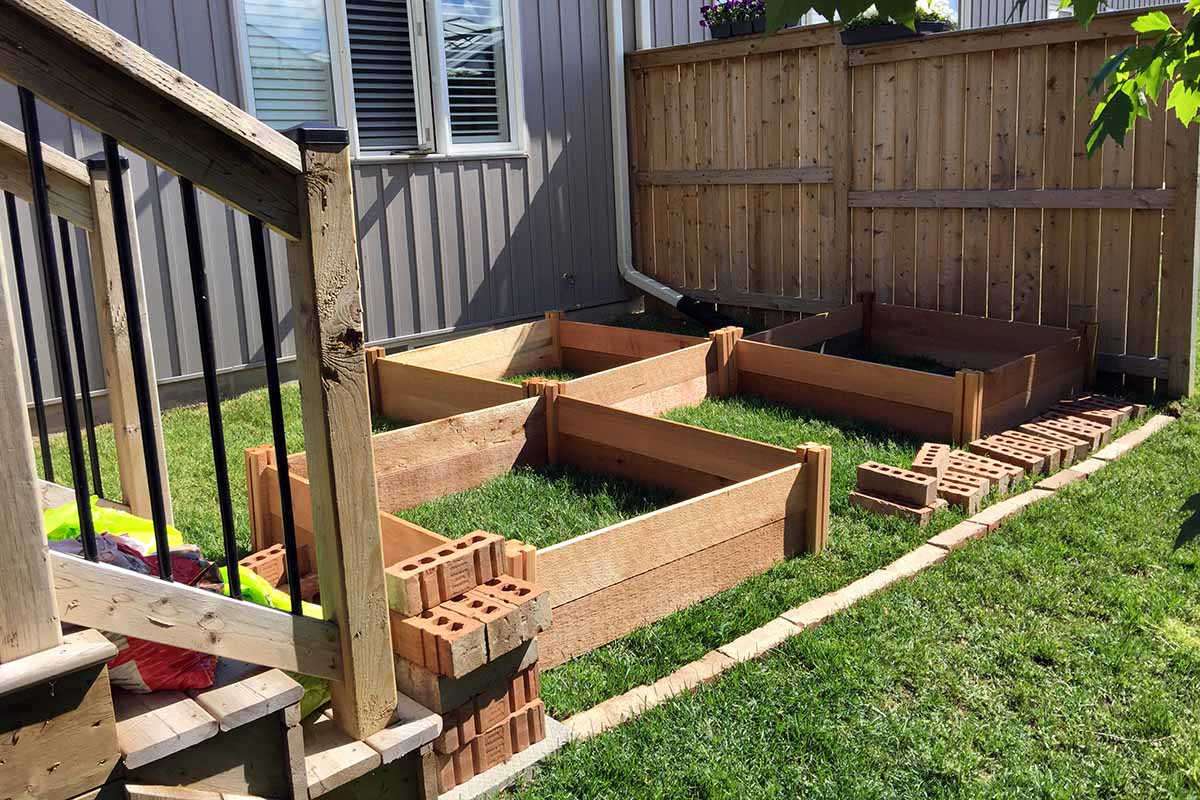
Once you decide on the best dimensions for your raised beds, you can choose to build your own, or to purchase a ready-made kit.
If you’re building your own boxes, you can rely on your sense of creativity and imagination in choosing your materials.
Lumber is the obvious choice, but other materials can work as well, such as brick, stone, or concrete blocks. Whatever material you use, make sure it will contain the growing medium you add to the beds without letting it spill out, and that it will allow water to drain from the bottom.
If you’d like to build your own beds out of lumber, you’re in luck! We have a tutorial on building DIY raised beds for you right here – just adapt the dimensions in that model to the ones you want for your beds.
On the other hand, if you’d prefer to skip the building process and would rather assemble your beds from a kit, there are many options.
Gardener’s Supply offers a raised bed made from rot-resistant cedar that is available in a four-by-four-foot size, as well as a few other sizes.
The 7.25-inch-tall boards are connected with industrial strength aluminum corners.
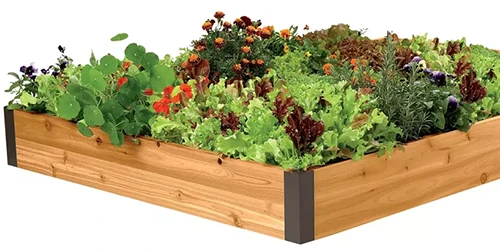
4’ x 4’ x 7.25” Raised Bed in Cedar
Putting this model together requires only a screwdriver and a rubber mallet or hammer.
If a long, narrow box is what you have in mind, it’s Gardener’s Supply to the rescue, yet again!
They also carry a pine raised bed model by Greene’s Fence Company that is two feet wide and eight feet long.
This model is available in either a seven-inch-tall version, which will work for most vegetables, or a 10.5-inch-tall version which will be more suited for crops like leeks, long carrot varieties, and potatoes, as well as gardeners growing in hot climates.
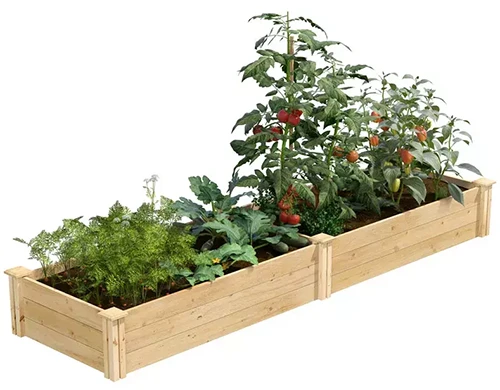
The boards in this model are attached to each other via notches and grooves. A screwdriver and drill are required only for attaching the decorative post caps.
You’ll find this two-by-eight-foot pine raised bed available from Gardener’s Supply.
Let’s look at just one more pre-made option for those who want to skip some of the work involved in setting up and get busy planting instead.
These recycled composite raised beds are 11 inches tall, and are available in various dimensions: two-by-four, four-by-four, two-by-eight, or four-by-eight feet.
They come in two different colors, dark gray or dark coffee, are made from wood fiber and recycled high density polyethylene, and are easy to assemble – all you’ll need is a screwdriver and a hammer.
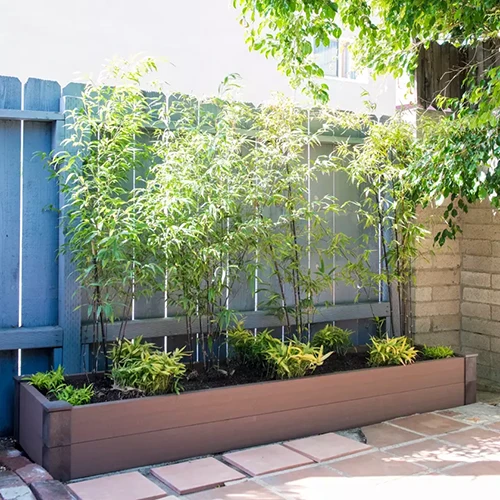
2’ x 8’ Recycled Composite Raised Bed
You’ll find these recycled composite raised beds available from Gardener’s Supply.
Plan to install some landscape fabric in the bottom of the beds to prevent weeds from making their way up through your growing medium.
When choosing a liner, don’t use plastic sheeting – this material won’t permit water to drain from the bed. Landscape fabric is designed to suppress weeds while allowing water to filter through.
Larger amounts of landscape fabric can be purchased in rolls, but if you want to make things supremely easy, you can purchase a liner that is designed to fit right into a four-by-four-foot bed.
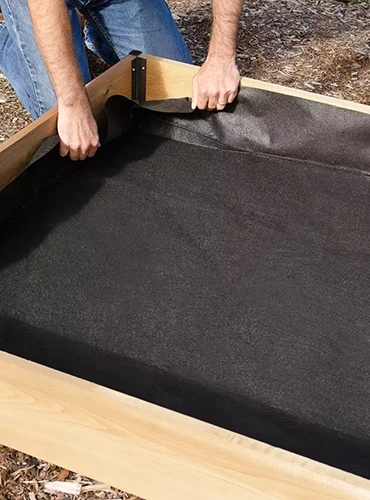
These polypropylene raised bed liners are available in four sizes, including a handy four-by-four-foot size that is six and three-quarters of an inch deep – ready to drop right into your new raised bed.
You’ll find them at Gardener’s Supply.
If you’re hoping to keep your gardening system plastic free and don’t want to use landscape fabric, you can substitute layers of cardboard.
Just be aware that this material will quickly break down and then any weed seeds or grass growing below the bed may be able to infiltrate your grow setup.
Once you have a raised bed in the dimensions you prefer, you can also add additional layers of smaller raised beds on top of it for growing deeper crops.
This is one way to create areas of deeper soil in your bed for growing potatoes or long varieties of carrots, without the extra expense of buying enough growing medium to fill an entire raised bed that is 12 inches deep.
Add Accessories
In addition to a raised bed, you may want to purchase or build some accessories to help in your food growing adventure.
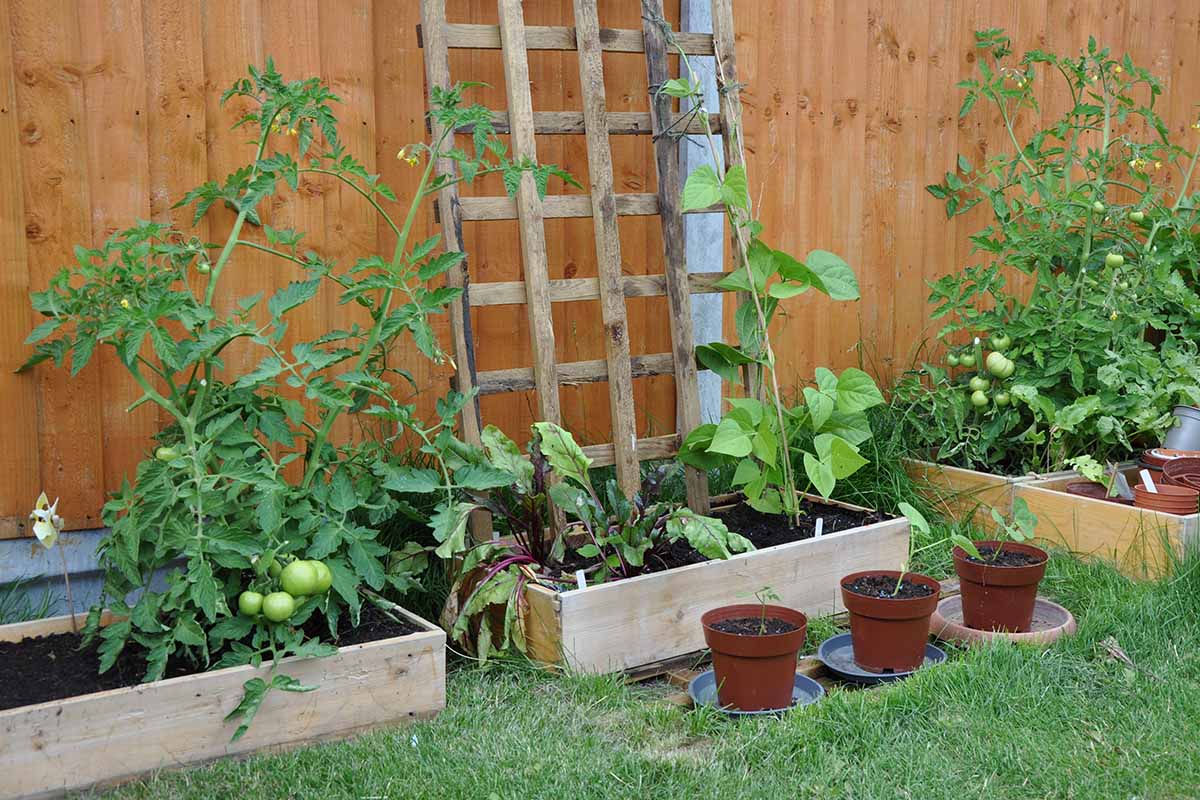
And if there’s one accessory that’s a must, it’s a trellis. One of the ways this method accomplishes its goal of saving space is by incorporating trellises for vertical growing.
A trellis will help you grow vining crops such as pole beans, cucumbers, melons, or peas, and vining varieties of winter or summer squash.
Make sure to position the trellis on the north side of the raised bed so the other veggies in the bed don’t get too much shade.
You can make your own trellis from a couple of metal fence posts and a piece of livestock panel, or any other materials that are sturdy enough to support vining plants with large fruits such as pumpkins and watermelons.
Of course, there are also premade trellises that you can purchase, saving yourself a bit of work.
If you do purchase a trellis, make sure it is rated to hold the weight of the plants you will be growing on it.
And whether you build or buy, if you plan to grow large-leaved vining crops like winter squash, make sure the trellis has wide spaces to accommodate the big leaves of these vines.
The Space Maker Pivoting Trellis is a model that will work perfectly with a four-by-four-foot raised bed and it holds 10 pounds. It can be used in a vertical position, or tilted at a 45-degree angle.
It’s four feet wide and 40 inches tall, and is made from powder-coated steel with recycled polypropylene corners.
4’ Space Maker Pivoting Trellis
You’ll find the four-foot Space Maker Pivoting Trellis available from Gardener’s Supply.
While a trellis is pretty much a must for square foot gardening, there are other accessories you might add to your raised beds as well, depending on your needs.
An A-frame trellis can be used as a support for tomatoes or other vining crops, cages can be used to keep out birds, squirrels, or insects, and cold frames can help you extend the harvest season.
Just make sure whatever accessories you choose match the dimensions of your box.
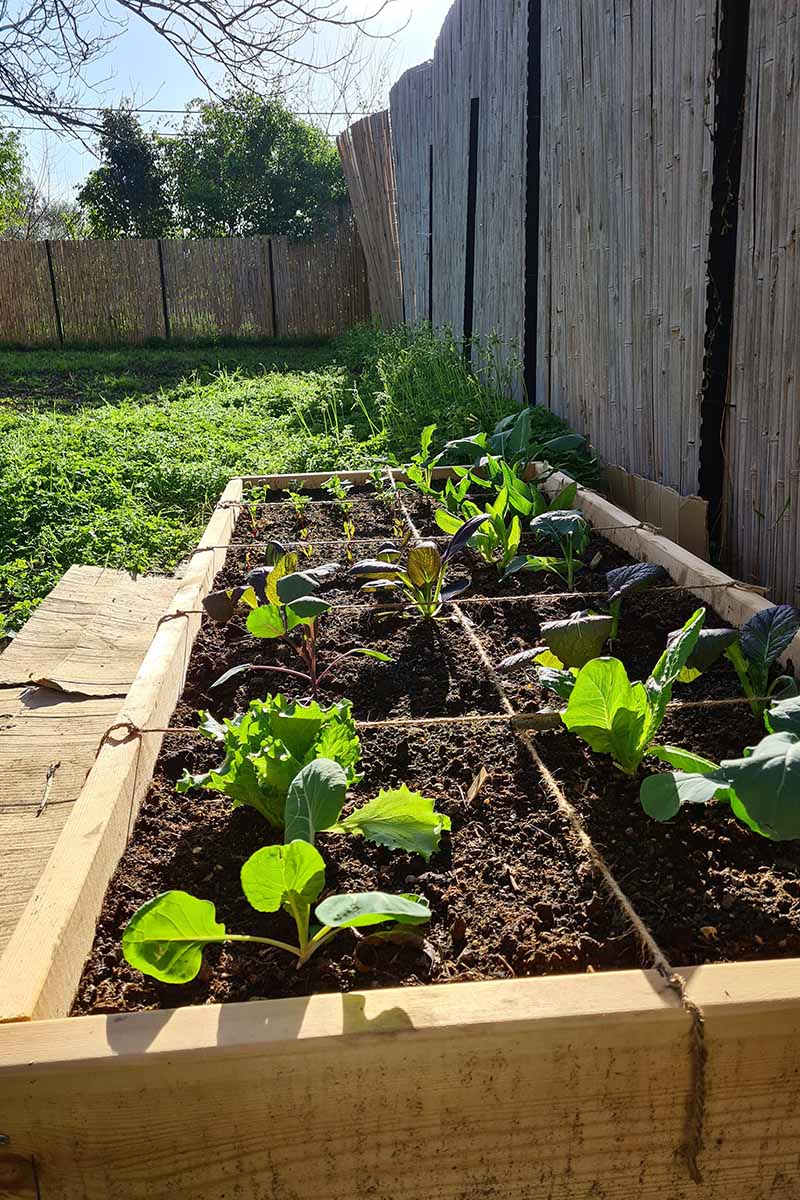
Plan Your Crop Layout
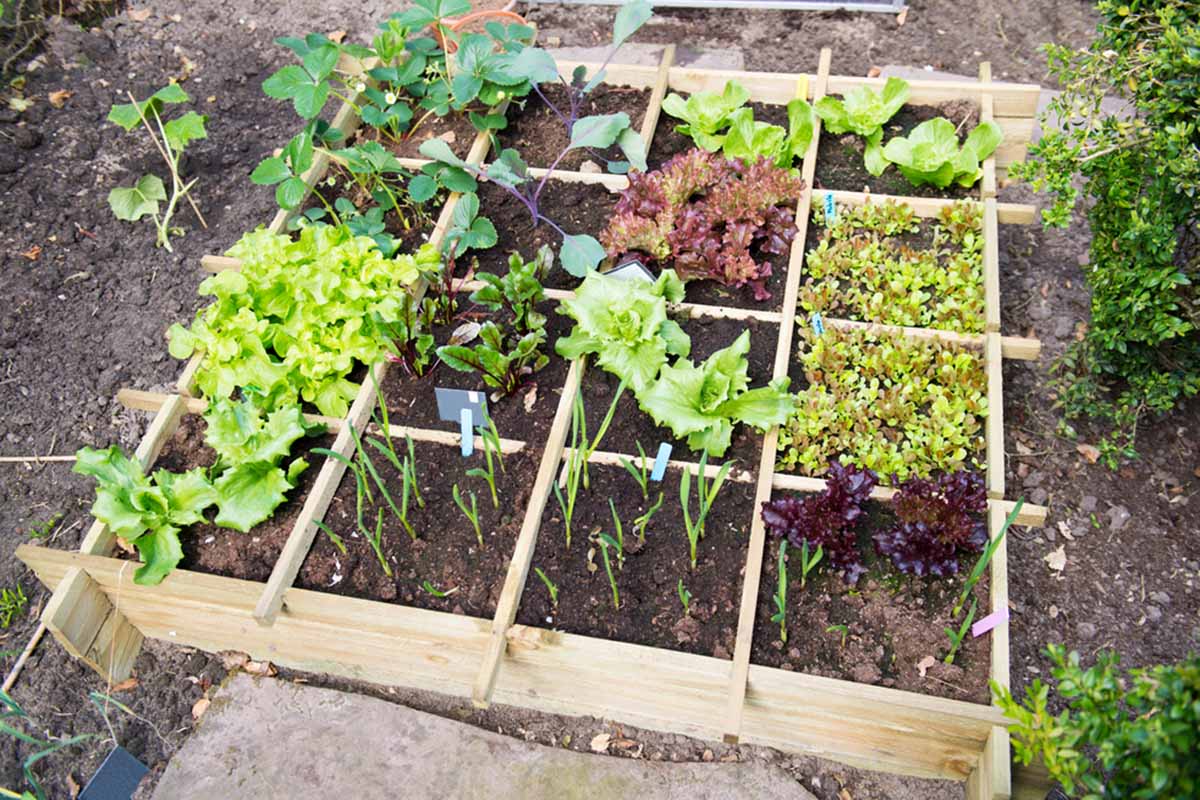
Your square foot garden will be the most productive if you plan the layout of your beds wisely, using a grid design, square foot by square foot.
Playing around with how to lay out the crops in a garden bed can be a fun part of the process of growing food, a great activity to indulge in during late winter while waiting for spring to arrive.
You can create your own plan on a piece of graph paper, but if you have a gardening journal, that would be even better – that way you can chart your progress throughout the years as well, making crop rotation easier.
There are a few different things to take into consideration when making this plan.
We’ve already discussed how the use of trellises can help you take advantage of vertical growing space.
In addition to incorporating a trellis into your plan, you’ll also want to include a mix of crops in each bed, plant them so that the tallest members are on the north side, and grow the right number of plants per square foot.
If this is not your first year growing in your raised bed, you’ll also want to check what you planted in previous years so you can rotate your crops to reduce the risk of pest and disease problems.
And you’ll also want to know how to handle perennial vegetable crops.
Let’s discuss each of these aspects of the planning process so you can confidently design a bountiful and thriving square foot garden bed.
Plan for the Right Number of Plants Per Square Foot
First and foremost when planning the layout of a square foot garden bed, you’ll want to know how many plants of each crop can comfortably fit into one square foot – that’s to say, one square of the grid.
Crops are planted at a certain density within each square, at their ideal distances from one another, maximizing each plant’s space and nutrient use and allowing each of them to act as a living mulch to crowd out weeds.
It’s best to plant or sow each square to maximum capacity to take advantage of the living mulch capabilities of a densely planted bed.
You’ll probably want to draw this design out before the big day, so you can use it to guide you while you’re planting.
Then, once you are ready to sow or plant, mark each square foot of soil with the right planting pattern.
This can be done with your finger, a dibber, or a pencil. To measure out distances, use a ruler, or make things easier with a seed sowing template. (You’ll learn more about those a little later in the article.)
Here are the general number and spacing rules for the most common vegetables, herbs, and flowers you are likely to plant in your raised beds, listed from most densely planted to least densely planted:
16-Per-Square Plantings
Small-sized crops like these are planted 16 per grid section and are grown three inches apart:
To mark a section for sowing, first make a cross to divide it into four equal parts, then divide each of those parts into four equal sections.
Sow seeds or place transplants at the center of each of the four small sections.
9-Per-Square Plantings
These crops are grown nine per grid section, four inches apart:
- Beans (bush)
- Beets (large varieties)
- Garlic (small varieties)
- Kohlrabi (small varieties)
- Leeks
- Onions (large varieties)
- Spinach
- Turnips
To divide up this section for nine plants, make two vertical and two horizontal lines, spaced four inches apart. Plant or sow your veggies In the middle of each small section.
8-Per-Square Plantings
Plant these crops eight per square, at least three inches apart:
- Beans (pole)
- Peas
There is more than one way to lay out an eight-per-square planting.
One way is to divide the square into four equal sections (making a cross), then make two more vertical lines, and poke holes along those vertical lines, spaced three inches apart.
4-Per-Square Plantings
Grow these plants four per square at six inches apart:
- Basil (small varieties)
- Bok choy
- Celery
- Corn
- Dahlias (small varieties)
- Dusty miller
- Garlic (large varieties)
- Kohlrabi (large varieties)
- Jerusalem artichokes
- Lettuce (leaf varieties)
- Marigolds (small types)
- Pansies
- Parsley
- Parsnips
- Petunias
- Potatoes
- Radishes (large varieties)
- Salvia
- Strawberries
- Rutabagas
- Swiss chard
Score a dividing line horizontally across the middle of the square, and then another that runs vertically.
Now you have four smaller squares – mark the center of each of these smaller sections with your finger or a pencil, and sow or transplant in those four spots.
2-Per-Square Plantings
These crops should be planted two per square, growing them six inches apart within the square:
- Cucumbers (trellised)
- Lettuce (head)
For vining crops like cucumbers, sow seeds at the back of the square near the trellis. For lettuce, seeds can be sown diagonally from each other, six inches apart.
1-Per-Square Plantings
The following crops are grown one plant per square foot:
- Asparagus
- Basil (large cultivars)
- Broccoli
- Brussels sprouts
- Cabbage
- Cauliflower
- Cilantro
- Collard greens
- Dahlias (medium-sized types)
- Dill
- Eggplant
For these crops, simply poke a single hole in the center of the one-by-one-foot square of your choice, and sow the seeds or transplant the seedling.
Note: if you include mint in your raised bed, it will likely be there to stay and may take over your entire bed eventually! Instead, you may prefer to plant it nearby in a separate container.
While most crops will fit nicely into one square of the grid, some plants need more space to flourish, and a more complex use of the grid system.
Here are some of the most common types and their spacing requirements:
1-Per-2 Planting Squares
Some crops require two square feet:
- Melons (trained vertically)
- Pumpkins (trained vertically)
- Summer squash, vining (trained vertically)
- Winter squash (trained vertically)
Sow seeds or transplant seedlings into the middle of a group of two grid sections, preferably on the north side of the raised bed where a trellis has been installed.
1-Per-4 Planting Squares
The following crops will need four square feet:
- Tomatoes, bush
For bush tomatoes, place the transplant in the center of a group of four grid sections and provide a tomato trellis or cage support.
1-Per-9 Planting Squares
And the largest of vegetable crops will need a whopping nine square feet to grow:
- Summer squash, bush
For bush varieties of summer squash, place two or three seeds in the center of a group of nine sections.
Keep Height in Mind
If you will be planting short plants with taller ones, make sure to locate taller veggies (for example, tomatoes, corn, and okra) on the north side of your bed to allow shorter ones (like bok choy, chives, and lettuce) to get their share of the sun’s rays.
On the other hand, if you are mixing tall plants with a blend of shade- and heat-loving plants, plant your tall ones right in the middle. Plant shade-lovers on the north side of them, and heat-lovers on the south side.
Shade lovers, as well as any remaining cool-season crops, will appreciate the cooling shade of tall plants as the heat of summer sets in.
As previously mentioned, you’ll also want to position trellises on the north side of raised beds to avoid shading out smaller vegetables.
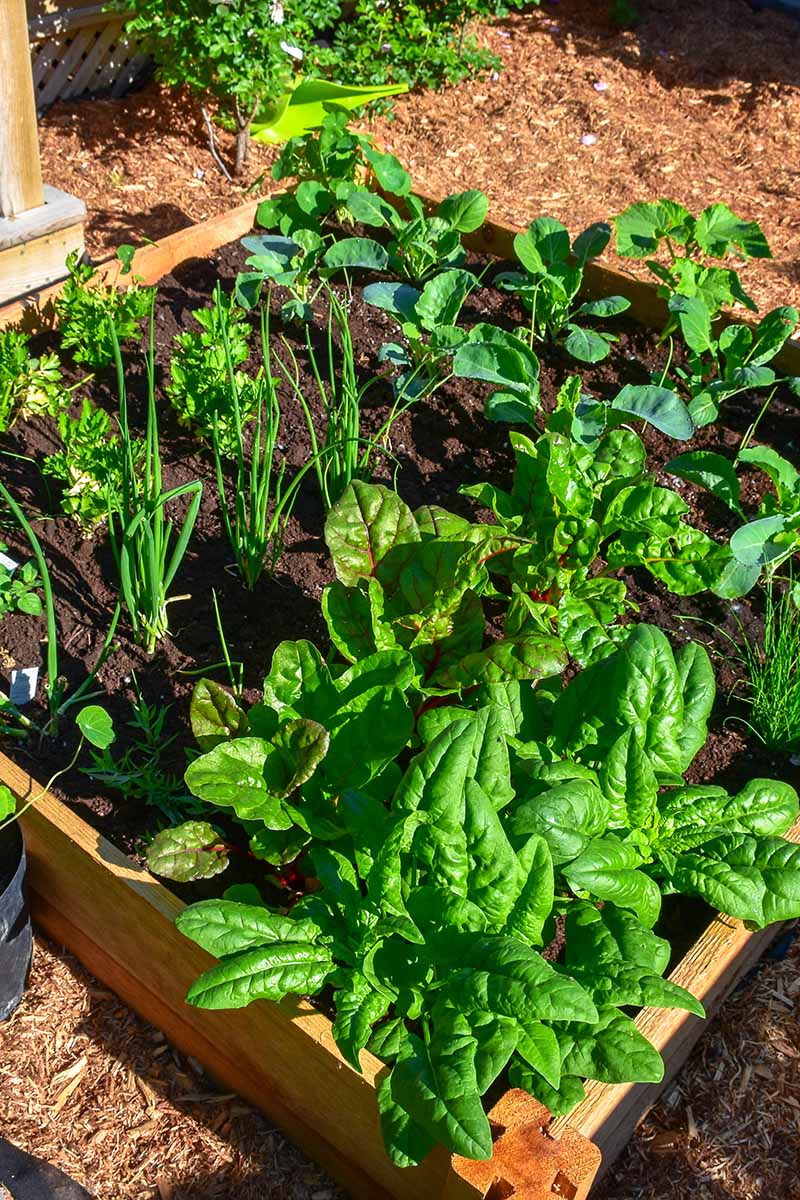
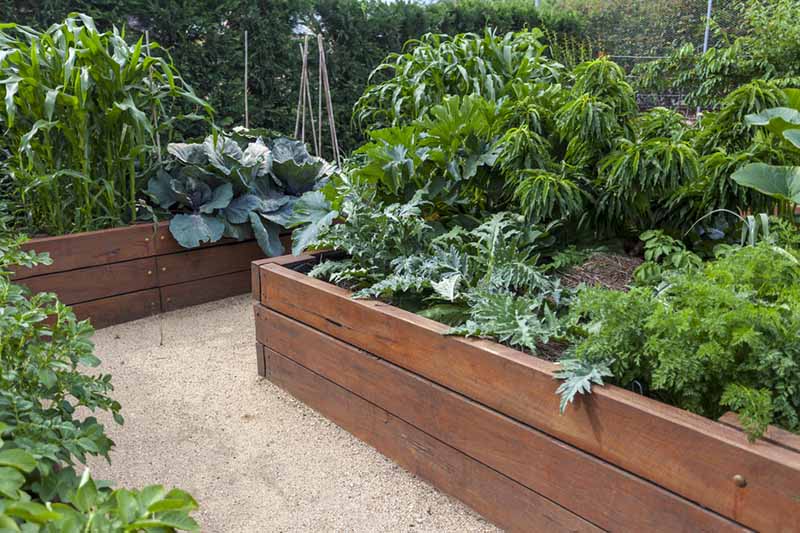
Plan a Polyculture
One of the essential tenets of square foot gardening is to avoid a monoculture growing style.
Not sure what “monoculture” is? Think about Iowa cornfields – nothing but corn as far as the eye can see. In backyard terms, imagine a four-by-four-foot raised bed – where nothing grows but tomatoes. Monoculture is monotonous!
Besides the fact that they are incredibly boring to behold, the problem with monocultures is that they make the spread of pests and diseases far too easy, along with depleting nutrients and minerals from the soil.
The approach you should instead use with your beds is to grow a “polyculture,” a mix of several different crops in one space.
That means if you want to grow several tomato plants, you should aim to spread them out between multiple beds.
That doesn’t mean you can’t grow more than one plant of the same type of crop in one box – you certainly can. Just try to keep things as diverse as possible!
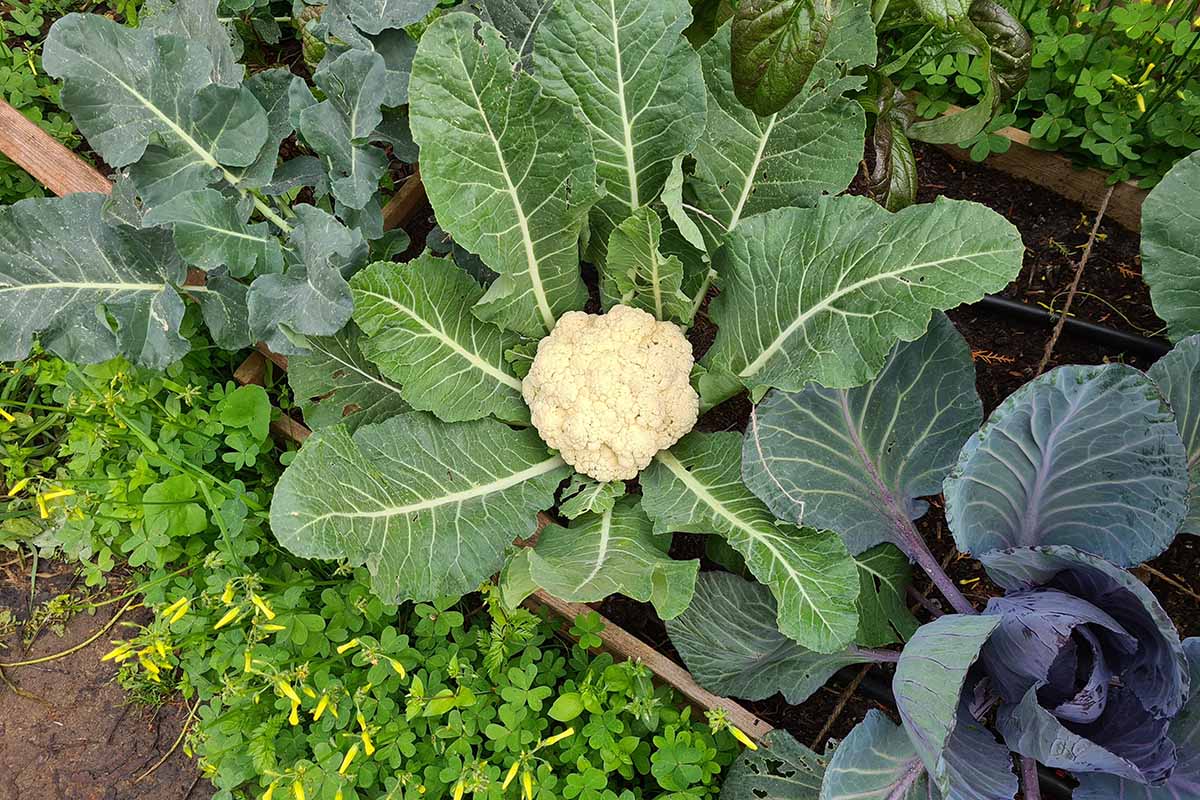
Grown in the square foot gardening style, here’s an example of the types of plants a single polyculture bed might include: one vining tomato, one pepper, one melon, one okra, eight peas, nine bush beans, one cauliflower, one broccoli, one kale, four leaf lettuces, 16 small onions, 16 small radishes, four bok choy, 16 carrots, and four small marigolds (which are also edible) – all in one four-by-four-foot raised bed.
That’s a lot of food!
If you want to take this polyculture technique and up the ante, consider arranging companion plants to grow side by side.
Companion planting, which helps some crops bring out the very best in each other, offers perks like insect resistance and disease prevention.
Read more about the scientifically backed benefits of companion planting in our article.
If you’d like a reference book for your gardening bookshelf on the subject of companion planting, I recommend “Plant Partners” by Jessica Walliser, available at Amazon.
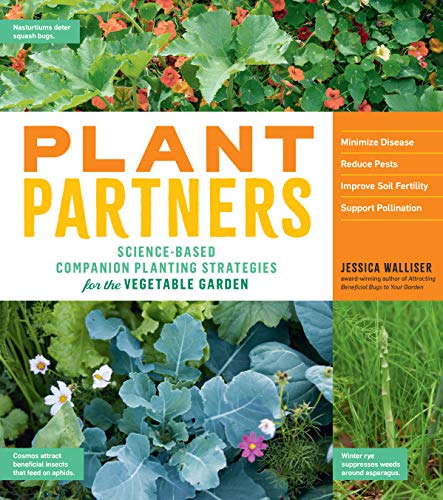
Plant Partners by Jessica Walliser
And you can read our review of this invaluable garden reference book right here!
Rotate Crops
Once you have completed the first joyous year of harvesting crops from your beds, make sure to rotate crops in subsequent years.
Put crop families on a three- to four-year rotation – that means you won’t plant the same crop families (such as nightshades, crucifers, alliums, and cucurbits) in the same location until two or three years have passed.
This is kind of like playing musical chairs with your raised beds and individual grid sections.
Need an example? If you planted tomatoes, peppers, lettuce, and chives in one bed this year, try to switch it up next year and plant okra, pole beans, corn, bok choy, and carrots instead.
If you have only one raised bed, you can do the rotating within that bed. But if you have multiple boxes, you can easily shift planting groups from one box to the next from year to year.
Planning these rotations will be easier if you draw out a plan each year and keep these designs handy in a gardening journal, binder, or notebook, so you can refer to layouts from previous years.
Perennial Vegetables
When planning the layout of your raised beds, you may consider growing a selection of edible perennials as well as annuals.
In fact, you might want to dedicate a permanent bed to perennials like Jerusalem artichokes (also known as sunchokes), asparagus, and cold-hardy herbs.
Just remember that you will need to divide perennials from time to time.
While crops like asparagus, sunchokes, and herbs make good candidates for this growing method, some perennials that require more space simply aren’t ideal, such as globe artichokes and rhubarb.
The foliage of these can easily outgrow a four-by-four-foot bed and may create too much shade to grow other veggies nearby.
Grow these crops separately – or be prepared to devote an entire raised bed to each of them.
Mix and Add Growing Medium
Once you have come up with a planting plan and either purchased or built your square foot boxes, it’s time to fill them with growing medium.
In the square foot gardening method, a very specific mix of ingredients is used to create this medium. It’s called “Mel’s Mix,” named after the founder of this system.
This weed-free growing medium is used instead of garden soil, giving the system that touch of magic which saves so much time on weeding.
This growing medium is composed of equal parts peat moss or coconut coir, vermiculite, and compost. This mix is water retentive, provides excellent drainage, and provides all the minerals and nutrients your crops will need.
You’ll need eight cubic feet of growing medium to fill one raised bed that is four feet long by four feet wide by six inches tall.
And yes, you want to fill it all the way to the brim to start with – the mix will settle, leaving a bit of room between the top of the soil and the rim of the bed.
That means you’ll need 2.66 cubic feet of each of the three ingredients required for each four-by-four raised bed.
This plant mix will last for seven to 10 years before needing to be changed, and it should be refreshed with a trowel-full or so of compost every time a plant is removed.
Peat Moss or Coconut Coir
Peat moss or coconut coir provides a light, water retentive medium for your veggies to grow in.
While peat moss is the traditional ingredient here, I’m going to encourage you to use coconut coir instead, for three good reasons.
The first is that peat moss is a non-renewable resource, while coconut coir is a byproduct of coconut harvesting that has the same light, airy, and water-retentive qualities.
Read our article to learn more about the issues with peat and why coconut coir is a suitable alternative.
Another reason to choose coconut coir instead of peat moss is that coir has a more balanced pH while peat is more acidic, which can be problematic when growing cruciferous vegetables.
Instead of adding an additional ingredient to your mix such as lime to balance out the low pH of peat, just skip it and reach straight for the coco coir instead.
Finally, if you still need convincing, peat moss becomes hydrophobic when it dries out, meaning it can be difficult to saturate it again. This doesn’t happen with coconut coir.
If you’re new to working with coconut coir – also sometimes called “cocopeat” – know that it can be purchased either expanded, in bags, or compressed, in blocks. The compressed form makes storage easier.
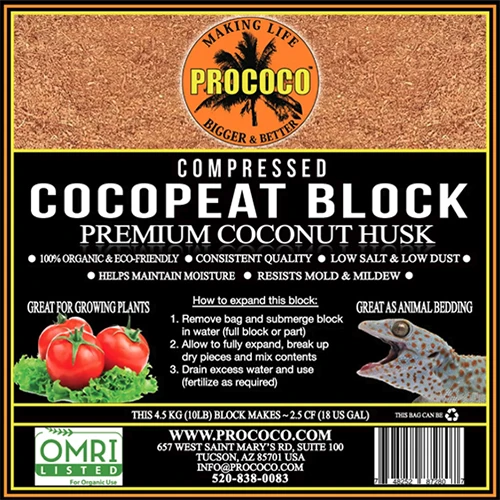
Prococo 10-lb Compressed Coconut Coir Block
If you’d like to pick up a block or two of compressed coir, you can purchase some in 10-pound blocks from Prococo via Arbico Organics.
And, by the way, a 10-pound block of coconut coir will expand into two and a half cubic feet of loose coir.
As a reminder, for a single four-foot by four-foot by six-inch bed, you’ll need 2.66 cubic feet of coconut coir as one of the three ingredients.
Coarse Vermiculite
Coarse vermiculite is the next ingredient in the square foot garden growing medium.
This gardening product provides both aeration and water retentiveness, but make sure to choose the coarse kind, not fine, for this purpose.
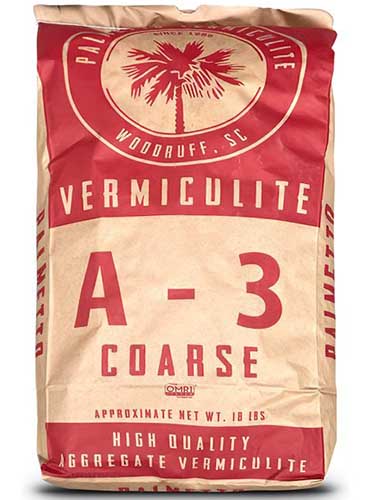
Palmetto Vermiculite 4 Cubic Feet Coarse Vermiculite
Pick up a four-cubic-foot bag of organic grade, coarse vermiculite from Palmetto Vermiculite via Walmart.
Prefer an alternative to vermiculite? Don’t use perlite as a replacement – it doesn’t hold water like vermiculite does.
However, rice hulls can do the job. Learn more about this product and other ingredients often used in houseplant potting soil in our article.
Compost
The final ingredient you’ll need to make your own growing medium is compost, and according to Mel Bartholomew, if you can’t afford or can’t get your hands on the coir or vermiculite to make this growing medium, a bed filled with 100 percent compost will also do the job if you have no other options.
However, using just compost as a growing medium isn’t ideal – so do try to create a more balanced blend if possible. Either way, make sure to use weed-free compost.
Also, ensuring that a wide variety of ingredients went into making the compost is what makes the square foot gardening method function without the addition of added fertilizers.
If you have enough homemade compost, by all means, use your own.
However, if you aren’t yet composting or don’t have a large enough supply yet, the Square Foot Gardening Foundation recommends using a commercial compost that is blended, or a mix of three to five different commercial composts from single sources.
Want to make Mel happy? Go for the gold and choose five different types of compost to mix together – just make sure only one of them is composted manure, and the rest are from other sources.
Blue Ribbon Organics is a blended compost made from composted vegetables, grass clippings, and other natural materials.
1 Cubic Foot Bag Blue Ribbon Organics Compost
You can purchase Blue Ribbon Organics blended compost in one-cubic-foot bags from Blue Ribbon Classics via Walmart.
Mixing the Growing Medium
Once you have obtained each component of the growing medium, you’ll need to combine them.
It’s a good idea to wear a face mask to avoid breathing in particles of dust while you do this task.
Pour equal parts of each ingredient into a large bin, into a wheelbarrow, or onto a clean tarp. Mix them up, then transfer the mix into your lined raised bed.
As you fill the raised bed with growing medium, spray it down with water to moisten it.
Add a Grid
You might have noticed the obvious thing that turns a raised bed into a square foot garden: the square foot grid.
The grid is what defines each square foot section, aiding you as you plan, plant, and resow your bed.
These grids can be made of just about anything – wood slats, bamboo stakes, string, or even sticks.

According to Bartholomew’s canon, this grid is typically an easy-to-make, homemade measuring tool crafted from long, thin slats of wood that are then cross-hatched and fashioned into square-foot-sized squares.
This grid is then fastened atop one’s four-by-four-foot beds, and used to measure and designate specific one-by-one-foot planting areas for various herbs or veggies.
There aren’t currently any widely available options for commercially produced grids to place on square foot garden beds, so you’ll likely have to fashion your own.
Bamboo stakes are my personal favorite material for doing this.
With four-foot-long bamboo stakes, you can lay three horizontally and three vertically with 12 inches between them to create a grid for a four-by-four-foot bed. And of course, any extras can be put to good use as supportive stakes.
Pick up a pack of 25 four-foot bamboo stakes from Dlh Western via Amazon.
While many proponents of this food growing method like to keep a permanently affixed grid on their beds, it’s worth noting that some plants, such as bush varieties of summer squash, require more than one square foot of space, which means a fixed grid will get in the way.
Using loose bamboo poles to form the grid provides flexibility when planning around such plants, since they can be cut if needed.
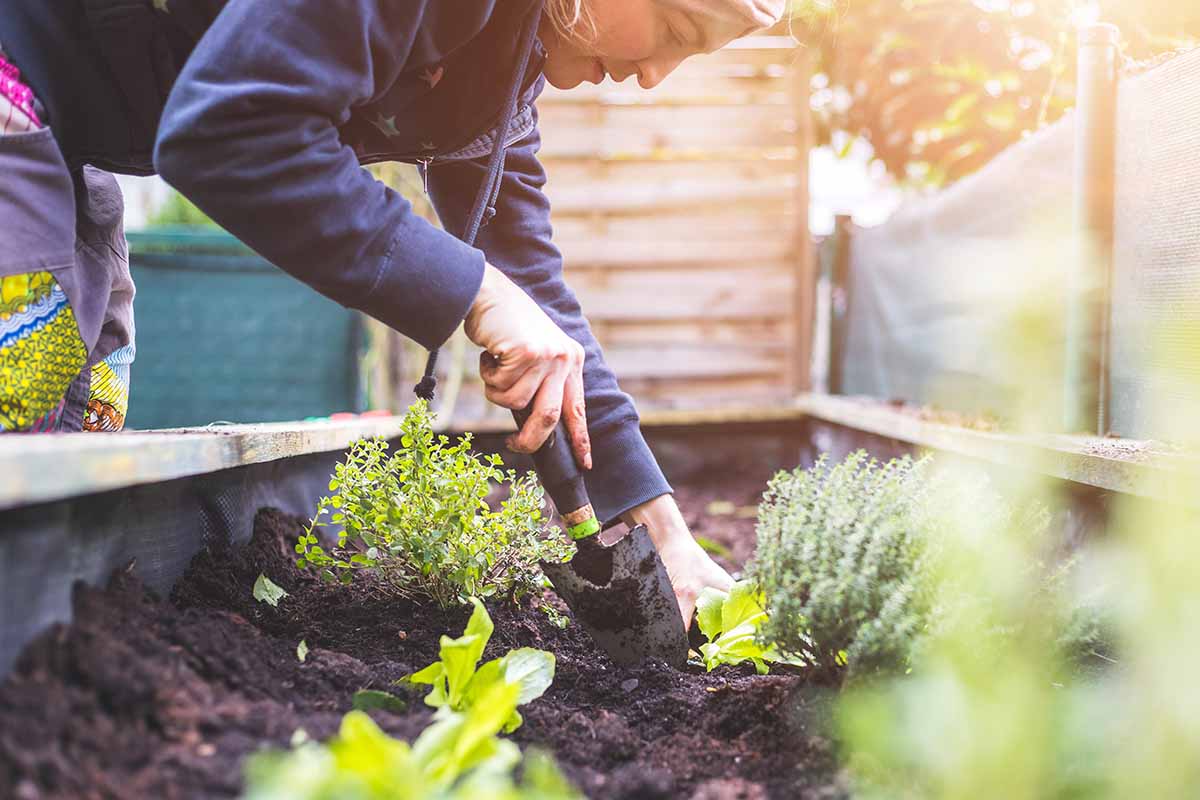
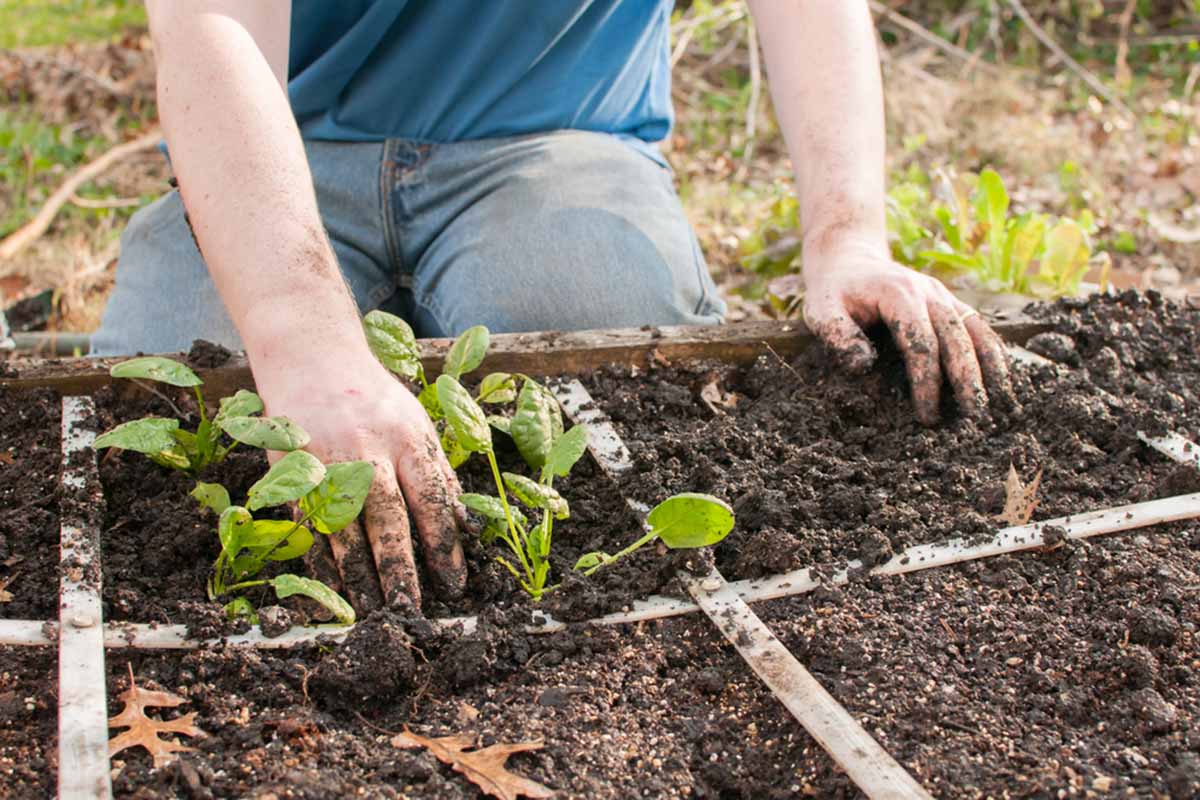
Sow and Plant
At this point your beds are filled with growing medium, there’s a grid at the ready to show the boundary of each square foot, and you have any accessories you’ll need, such as a trellis.
And now, finally, it’s time to sow your seeds or put in transplants.
When you’re ready to plant, go ahead and water in the growing medium if it hasn’t rained recently – I like to do this a day ahead of time, so that the medium is moist but not sopping wet.
Sowing Seeds
Mel Bartholomew was interested in reducing waste in the garden, so one of the tenets of his method is to sow only the seeds you need.
For most vegetables, you will sow just one seed per intended plant. This approach differs from traditional row planting, which often involves sowing many seeds and then thinning once seedlings are established.
One of the exceptions to this is with carrots and lettuce – rather than sowing just one seed per intended plant, sow two or three seeds.
Likewise, if the crop or variety you want to grow has a low germination rate, plant more than one seed, then thin as needed, leaving the strongest looking seedlings and removing the others.
Also, before you get started, be sure to sow your seeds at the appropriate time, since some vegetables grow best in spring or fall and others need the heat of summer.
If you need a refresher on which ones are which, check out our article on sowing vegetable seeds, where you’ll also learn which seeds you should start indoors rather than direct sowing.
Each square is going to have a planting pattern with seeds sown in one, two, four, eight, nine, or 16 spots, apart from the few exceptions listed above which require more room.
Using the guidelines listed above, find the sowing distance and pattern for any given crop, then poke holes in the growing medium to receive the seeds. You can do this with the help of a dibber, a pencil, your finger, or even a twig.
Next, drop in seeds at the recommended depth – check your seed packet for this information – then close up the hole over the seed.
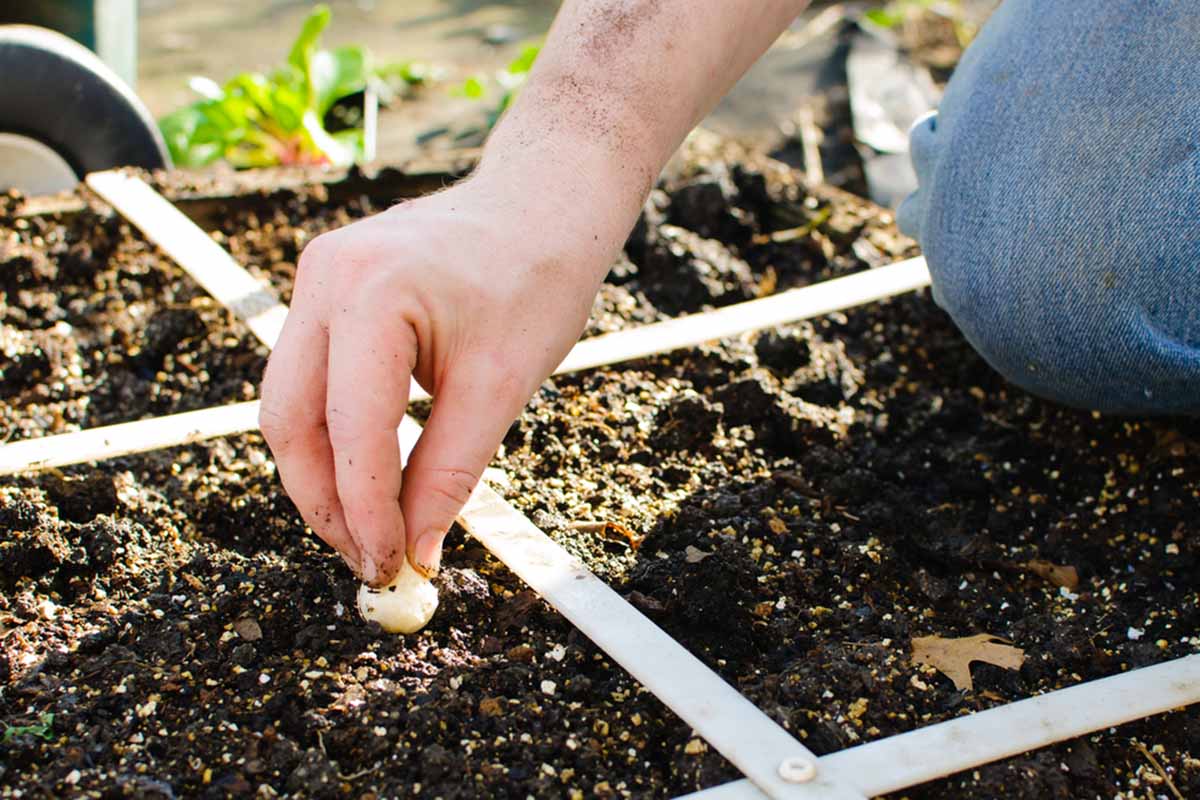
While you can complete this process of poking holes and dropping in seeds either by just roughly estimating distances, or with the help of a ruler, there’s a nifty product that works as a seed sowing template that makes the job much faster and more precise.
This color-coded seeding square will help you lay out the sowing pattern for each square foot. It also comes with a dibber (a hole-poking tool) and a small funnel.
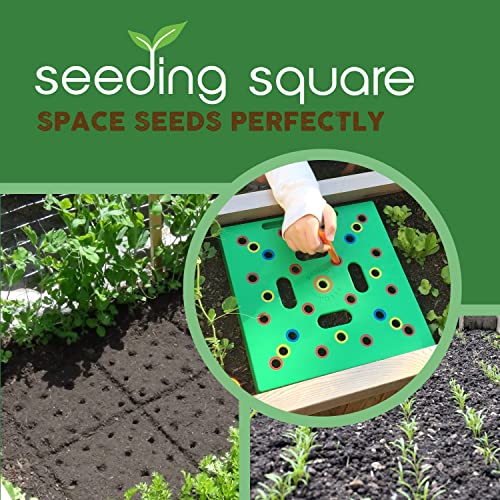
Color Coded Seeding Square Seed Sowing Template
If you want to save time on sowing precisely spaced seeds, this product will provide you with the means to achieve that perfection. You can purchase the Seeding Square via Amazon.
Transplanting Seedlings
Rather than direct sowing all of your crops, you will undoubtedly want to either purchase transplants or grow your own seedlings indoors, in a greenhouse, or in a cold frame, especially with tender crops such as tomatoes, peppers, or basil.
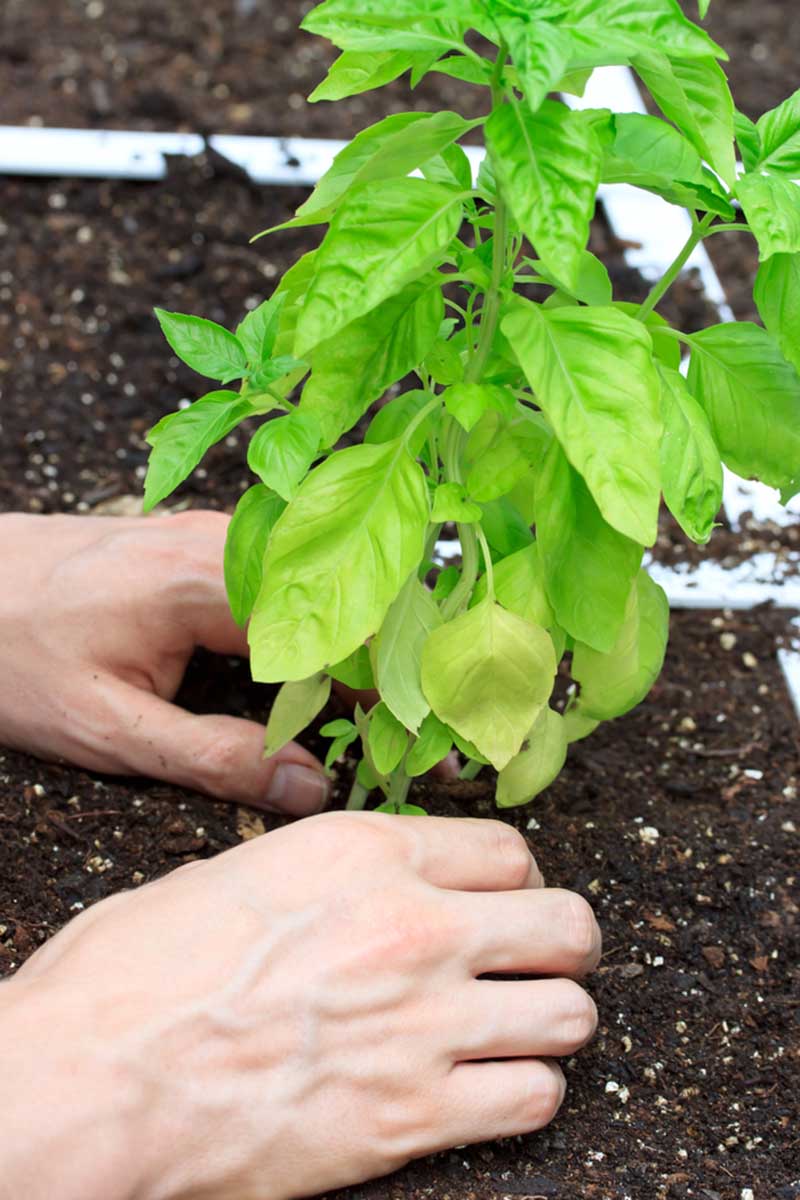
The same pattern advice holds true for transplanting seedlings as for sowing seeds – check the crop’s recommended growing density, poke holes to establish the pattern for that individual square, then insert the plant in the appropriate location.
Need more tips? You can learn more about starting and transplanting annual plants in our article!
Maintain Your Plantings
Maintaining your square foot garden will be much like caring for any other form of garden, but with the promise of less work!
Mulch
Plant growth will eventually cover the soil, forming a living mulch. But you’ll want to consider adding a layer of mulch anyway.
To assist with water conservation, place a layer of mulch about one inch thick around plants once seedlings are established, leaving about an inch around the stems of plants that is mulch-free. This will help prevent fungal problems.

Use mulch made from organic materials, such as bark, leaf litter, straw, coconut coir husks, or pine straw, rather than inorganic mulches such as pebbles or recycled rubber chips.
Learn more about different types of mulch with our article.
In more arid climates, deep mulching – a layer of two to four inches of mulch – will be needed to prevent drying out and to keep soil temperatures lower during heat waves.
Watering
Mel Bartholomew’s recommended watering method is rather quaint – using a cup to scoop up sun-warmed water from a bucket then applying it to the root zone of each individual plant.
Gardeners may wish to emulate his preferred way of watering, or use other watering methods, such as watering with a hose and watering wand or using drip irrigation.
Read our article to determine which type of watering is best for you.
Weeding
With this method of growing food, weeding will be reduced to a minimum – only seed that the wind blows in and what birds scatter will be available to germinate in your growing medium.
Plus, if you are using the planting patterns recommended, you’ll easily be able to recognize any uninvited guests to the garden soil and quickly remove them before they become a problem.
Make sure to line your beds with landscape fabric to prevent grass from growing up into them, as well as the roots of nearby shrubs or trees.
To prevent plants from dropping seeds in your weed-free growing medium, snip off flowers before they go to seed.
Fertilizing
Compost is the only fertilizer used with this system and the recommended soil medium contains a hefty dose.
To replenish the nutrient content of your raised beds, add scoopfuls of compost when harvesting plants from the bed, adding just enough compost to replace the soil that has been removed.
Harvest and Resow
Once you’ve put in your work creating, filling, and planting your beds, before you know it you’ll have produce to harvest for a fresh summer salad or a satisfying main course.
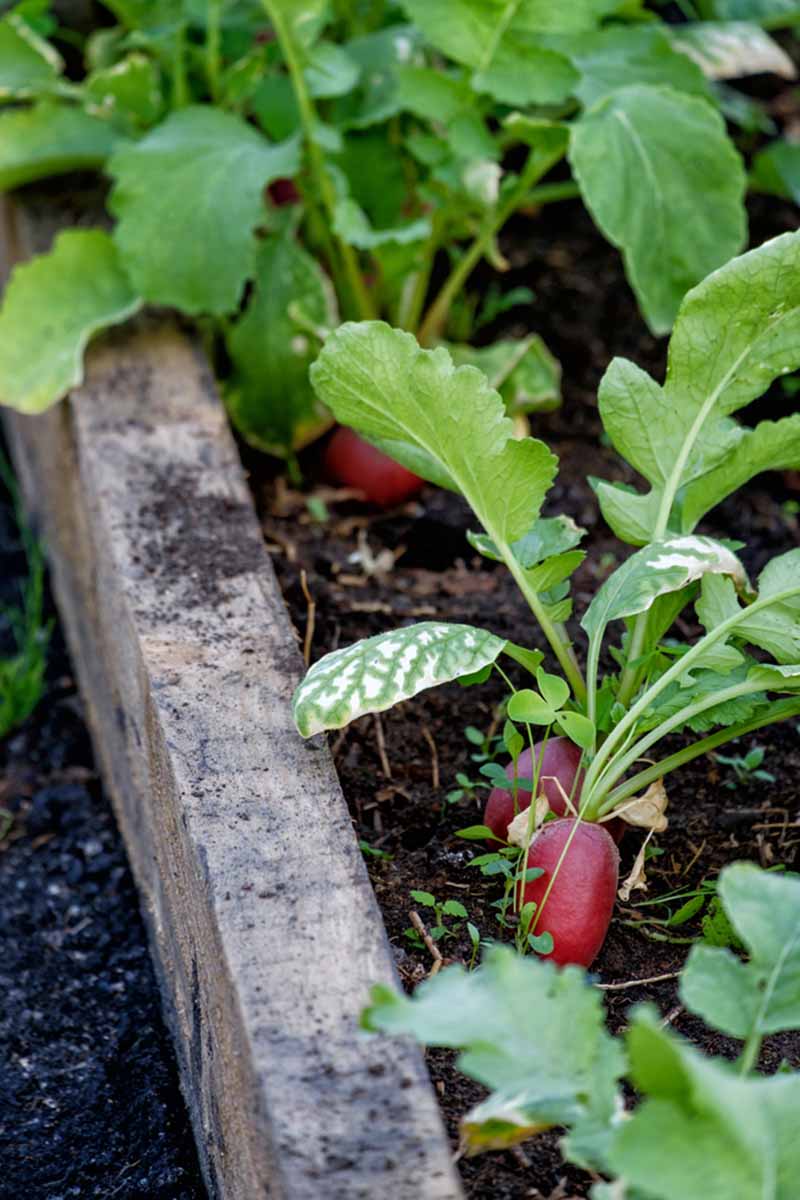
While some plants can be harvested to cut and come again, such as when harvesting lettuce or picking kale, other crops like radishes and carrots are plucked from the soil once they are ready to pick, leaving an empty space behind.
These vacancies can be filled by sowing another round of seeds. But before resowing, remember to mix in a trowel full of compost to replace what has been harvested.
Once you’ve harvested everything you can eat, it’s simple to plant another succession and have delicious veggies again in no time, provided the length of your growing season will permit it!
And if some seedlings don’t do so well the first time around, you can just plant new seeds in their place.
However, it’s wise in more crowded squares (such as in eight-, nine-, and 16-plant spacings) to wait for other successful veggies in the same plot to reach maturity and harvest first, so they don’t overshadow and crowd out your tiny new plant introductions.
Growing on the Grid
This article has walked you through all the steps you’ll need to follow to get started with your own square foot garden: from the excitement of planning, to the fun of setting up, and finishing with the delicious payoff of a bountiful harvest.
And although this article is coming to an end, your food growing adventure is just getting started!
For even more details, handy charts, and well-illustrated instructions for building beds and accessories, be sure to read Mel Bartholomew and the Square Foot Gardening Foundation’s book, “All New Square Foot Gardening: 3rd Edition, Fully Updated” – you’ll find it for purchase at Amazon.
All New Square Foot Gardening, 3rd Edition, Fully Updated
As you think about the details of your own square foot garden, I’d like to point out that as with any truly great idea, this method can be adapted to your own needs and situations.
Purists might disagree, but no one’s stopping you from applying some of the ideas of this method without implementing every single part of it.
You might try implementing the planting density, but in rows. (You’ll still have to fight the weeds, though.)
Living in an arid climate? You might try experimenting with sunken beds (rather than raised beds) in order to slow evaporation.
In the spirit of Mel Bartholomew, let’s all keep experimenting to see what new great ideas we might stumble upon!
Are you new to square foot gardening and just getting started? Or are you a seasoned practitioner of this method with tips of your own to share?
What special challenges are you dealing with as you cultivate homegrown produce “on the grid?” Be sure to let us know in the comments section below!
And if you’ve enjoyed this guide, continue on your food growing journey right here with some of our other articles:
“Even now, Bartholomew sporadically updates his concept with new techniques and information to be more informed with modern gardening methods and fads that befit today’s gardeners.”
You might want to amend this statement. Bartholomew passed away almost 3 years ago, long before this article was written. There are undoubtedly others continuing development with this method of gardening, but I’m pretty sure he’s no longer involved.
The rest of this article is pretty well informed, and serves as a nice introduction to square foot gardening.
Hi Kate, thanks for the heads up on this. Adrian originally wrote this guide in August of 2016. The date at the top of the article is the last date it was updated. Apparently we missed this and will amend it on our next update (we try to go through all of our content once or twice a year and tweak things).
I like to think he’s looking down at us enjoying the continued love for his amazing gardening concept. I like to think maybe he is involved in a way. :-).
Hi All, I have been using the square foot gardening method for about 6 years now and really in my opinion, there is no other better way to grow fresh vegetables for your family. I started off using a 4×4 method and as the first couple years went by, I had so much luck with it, i wanted to be able to grow more. I ended up with 2-4×4 beds and a 4×6 two tiered squash bed. After those 4 years went by I had a menagerie of different beds in my backyard and decided it looked too cluttered so… Read more »
Hi Brad, it looks great! I went ahead and converted your photo to a JPG and am reattaching it so folks can easily see it without a download.
That is a thing of beauty…..I am definitely considering trying this gardening style!
What are the dimensions of this set up?
Thanks for your message, Greg. Square foot gardening plots can be set up in a variety of ways, depending on your needs and available space. Many are a standard 4-by-4-foot square per plot, but these can be constructed in whatever format best suits you. I recommend consulting Mel Bartholomew’s book for guidance – it includes plans and tips for getting started.
16×8 are the dimensions of the raised bed in the picture
Are your raised beds filled with soil? I love the height of your beds but can’t imagine plants need soil that’s 4-feet-deep not to mention the cost. Would you elaborate on the underground watering system you used?
I can’t speak to the specifics of what Brad may have done but many with these elevated beds place containers of some sort to take the room of 1-2 feet of the bottom of the container. A friend used old milk crates which were covered with landscaping material to prevent the soil from dropping below while still allowing good airflow throughout. She had trouble with her back and wanted to continue her garden without the need of bending down and it has done well for her for several years
Hi, Brad here. I filled the bottom of the bed with 12” of pea gravel for excellent drainage and then stacked about 6” of cardboard in it as I was also dumping our worm farm that my son and I had started the year before. Knowing that the worms would work that cardboard Into excellent soil for the garden base. I used Mel’s mix to fill but to this day, it’s not filled to the top, it’s down about 13” or so from the top. Every year, I add more composted leaves, composted manure and peat moss to just “… Read more »
Deep raised beds like these often make use of hugelkultur: burying wood on the bottom and covering it with soil. Over time, the wood breaks down and gets porous, allowing the bottom of the bed to hold a lot of nutrients and water. With larger hugelkultur, the need to water regularly is greatly reduced – or even completely removed.
Eagerly awaiting the follow up article on companion planting mentioned here!
We’re still working on it, Good Life! In the meantime, you can read more here about companion plants that pair well with garlic, dill, and kale.
I would love to hear about watering a square foot garden effectively with a drip system. I have used one but I don’t seem to get water to multiple plants in the entire square which leaves some plants wilting or dying.
What type of soil mix are you using, Gen? Something like Mel’s Mix, described in Mel Bartholomew’s book “All New Square Foot Gardening,” makes it possible to water less often, since it both holds moisture and drains well. Watering at the soil level (rather than from overhead) is the best method, and drip irrigation is excellent for this – though Bartholomew would argue (if he were still with us) that watering by hand is an even better method. Are you using a backflow preventer and a pressure regulator with your drip system? Attaching 1/2-inch feeder tubing along the length of… Read more »
I have an SIP (sub irrigation Planter) watering system by albopepper.com. Can also find it on youtube. This is my first year and I have a 4×8 raised bed. I also have a 30 gal tote SIP system. He’s easy to follow and responds to emails immediately.
Hi, great article. I am wondering whether you can clarify one thing…. tomatoes appear in the 4 per square (with cage) and again in the 8 per square (unsupported) surely both of these are incorrect? I was surprised to see 1 per square higher up in the list as I usually see my tomatoes taking up the equivalent of 4 squares, Let alone many in a single square? I am very interested in turning some of my beds over to sfg to try and get a better ongoing supply rather than the feast famine I sometimes achieve. I currently grow… Read more »
Hi Andy, I’m glad you enjoyed our article. Thanks for your questions! As for your tomato question – I believe the different options for the number of tomatoes per square foot were suggestions from the Mel Bartholomew book mentioned in the article. Personally, I think that giving one tomato plant one square foot of space is a good rule of thumb. However, I would say that the number of tomatoes per square foot depends not just on how you are supporting (or not supporting) the plants, but what your climate is like. I can plant my tomatoes more closely together… Read more »
I am really, really confused by the suggestion you plant multiple tomatoes in a square. How on earth can 8 or 9 tomatoes be grown in one square?
Hi Kate,
Sorry for the tardy reply. I agree with you that one tomato plant per square foot would be the better choice. I believe this article is due for an update, and we’ll make sure we look at that recommendation during the update process!
My Dad always recommended 1 vining tomato plant per square foot
Thanks for weighing in, Stephen! Great to hear it from close to the source!
Do I need to do raised beds? I have a large garden: 25’x 45′ and would like to implement the 4′ square method using boards between beds.
Hi Monica, Raised beds are not a requirement for square foot gardening. Raised beds are a good option if you want to to elevate your garden or if you want to bring in new soil. They can help keep weeds out (for a time, anyway). They can also help visually define different spaces in your garden. However, if you live in a dry climate, they aren’t a great idea as they will dry out more quickly than the ground will. Instead of creating raised beds, another option is to just lay something on the ground to create a four by… Read more »
Monica- what you’re suggesting is exactly what’s on the cover of the original SFG book- Go for it!
Thanks for your comment Stephen!
I live in a fairly dense urban neighbourhood and have only a 2’x10′ gardening spot in my back”yard” area. But it is a full-sun location and I had a very successful growing season last year, using the Square Foot Gardening method. One tool worth mentioning in your article is the Seeding Square — it takes the guesswork out of the seed grid component and allows for even a completely novice gardener to use this method.
Critters began digging and chewing in my garden. May have been cats, rabbits, racoons, groundhogs, terrapins, or who knows? The thing that finally worked to keep them out was planting plastic forks, tines facing outwards, densely in the beds. White ones drew quite a bit of attention from the neighbors. Clear plastic was less noticeable. Cheap ones with sharp points work best. Metal forks would last longer, but be expensive.
Thanks for your tip, Mary!
Excellent article, Kristina, very thorough and clear. The salient word here is “beginner” because this is perfect for one. However, after gardening for many years, by many methods, including raised beds, it is apparent to me that when Mel wrote his first book, though he was an engineer, he was not a master gardener. True, 6 inches may do for many plants, but most of them will put down roots much deeper than that if allowed to. I never grew in less than 12″ of soil. For example, tomatoes will easily put down roots in excess of 18″ and even… Read more »
Hi Roger,
Thanks very much for sharing your insights. I enjoyed reading your comment and I’m sure our readers will too.
Happy gardening!