
Cichorium intybus var. foliosum
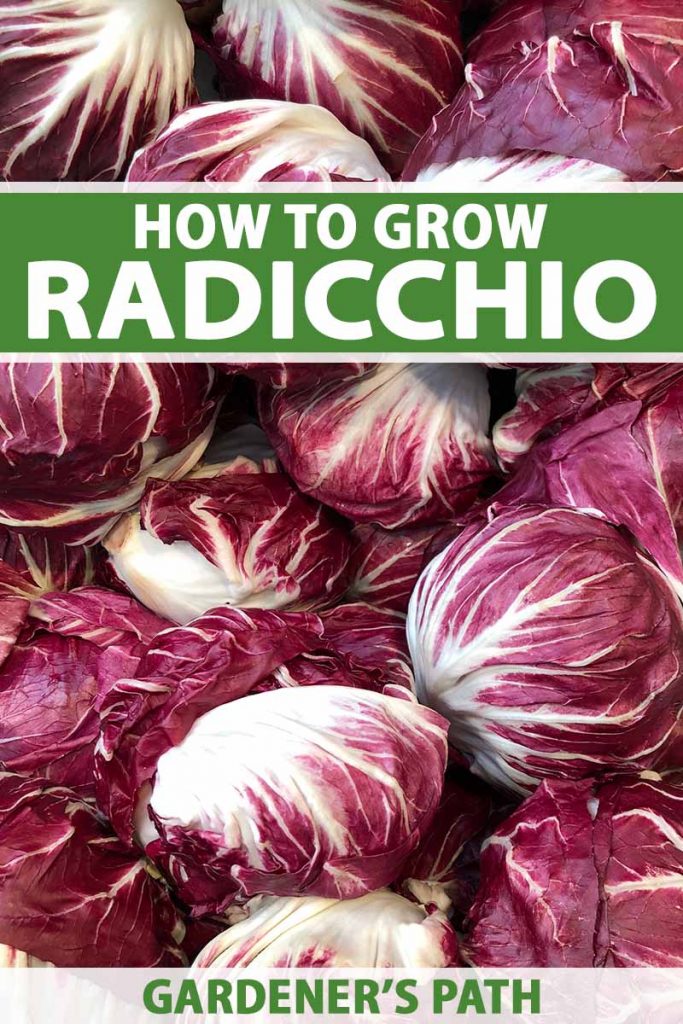
More than once, I’ve chatted with a friend who has picked up a head of radicchio thinking it was a tiny red cabbage.
I don’t blame my American pals. Radicchio hasn’t gotten its due in the States. I suspect that’s because of its distinctly bitter flavor.
In Italy, growers have mastered the art of breeding these plants over decades. And the production of certain types is considered an art form.

We link to vendors to help you find relevant products. If you buy from one of our links, we may earn a commission.
Chefs and home cooks use the leaves in everything from risotto to soup, or they might simply drizzle them with high-quality olive oil before serving fresh.
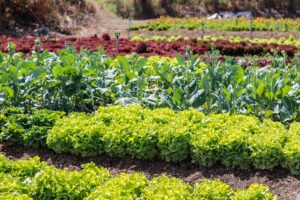
Success growing radicchio is all about timing as these veggies are a bit fussy, but when you know what they need, you will do just fine.
Curious about what you’re in for? Here’s what we’ll cover:
What You’ll Learn
Also known as Italian chicory, radicchio (pronounced rah-DEEK-ee-oh) is a cultivated variety of the wild chicory plant, Cichorium intybus.
In Italy, foragers search the countryside for tender young chicory greens, while the cultivated varieties are revered by chefs.
The radicchio plant is actually biennial, but it’s often treated as an annual and harvested in its first year of growth. Left to its own devices, it will bloom in its second year, go to seed, and die.
Quick Look
Common name(s): Radicchio, red endive
Plant type: Leafy biennial vegetable
Hardiness (USDA Zone): 4-10
Native to: Eurasia
Bloom time / season: Spring and fall
Exposure: Full sun to part shade
Soil type: Organically-rich loam, well draining
Soil pH: 6.5-7.5, slightly acidic to neutral
Time to maturity: 55-90 days, depending on variety
Spacing: 8 inches between plants, 12 inches between rows
Planting depth: 1/4 inch (seeds)
Mature size: Up to 12 inches wide x 12 inches high
Water Needs: Moderate to high
Taxonomy
Order: Asterales
Family: Asteraceae
Genus: Cichorium
Species: Intybus
Variety: var. foliosum
Many of the heirloom varieties are named after towns in the Veneto region of northeastern Italy where they were first cultivated.
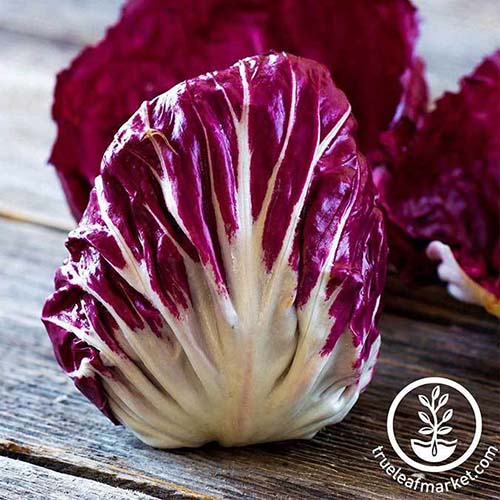
Chioggia is the most common type found in the United States, and is easy to identify because it looks like a small red cabbage, with a spherical shape.
It’s not clear when wild chicory was bred to become the cultivated radicchio that we know today.
But the technique of blanching may have started in the 15th century in the Veneto region of Italy, and has since been refined and perfected in various regions of the country.

To produce radicchio rosso di Treviso IGP tardivo, the plants are harvested in autumn, roots and all.
After cleaning off the soil and removing the outer leaves, the heads are bound together and placed in vats of cold running water for a few weeks, in the dark.

The main root grows new, tender leaves in shades of white and ruby red.
The root is cleaned and shaved to be used separately, and the vegetable that remains is the world-famous treat that is prized in Italy.
If you’re lucky, you can sometimes find this variety outside of Italy, but make sure it’s the real thing by looking for the EU’s IGP designation.
How to Sow
Radicchio can be propagated by seed or from transplants.

However you decide to grow yours, most varieties will do best with eight inches of space between plants, and 12 inches between rows.
From Seed
You can sow seeds in the ground in the spring, three to four weeks before the average last frost date in your area.
If you choose to sow in the fall, your goal is to sow the seeds so they will mature about four weeks after the first frost.
Prepare the soil in your chosen location and rake the surface so it is even.
Scatter the seeds on the surface of the soil then press them down so they are a quarter of an inch deep – you can thin them after they sprout.
Seeds will typically germinate in about a week.
If you wish to start your seeds indoors, put a few seeds in each cell of a seed starting tray filled with a soilless seed starting medium, and sow about a quarter of an inch deep.
Keep the planting medium moist until they sprout, and then thin them so the strongest seedling in each cell remains.
Transplanting
Put transplants in the ground in the spring right around the time of the last average frost date in your region.
For a fall planting, determine the time to maturity for your chosen cultivar, and aim for a harvest date that is about a month after the first frost date.
If you started your own seedlings indoors, be sure to harden them off for a week or so before planting them out in the garden.
When you’re ready to put them in the ground, dig a hole slightly larger than the container each seedling was growing in. Unpot the plant and set it in the hole.
Then, gently fill in around the root ball and water well.
How to Grow
Let’s take a look at the cultural requirements of these plants:
Light
Radicchio needs full sun or partial shade to grow best. If you live in a warm climate, ensure the plants have partial shade during the hottest part of the day.
As they grow, some radicchio types turn from green to red, while others start out red, and some stay green. This may be impacted by the amount of sun they are exposed to.
Temperature
Heat is radicchio’s worst enemy. When air temperatures climb above 75°F, chances are high that your plant will bolt or growth will be stunted.
Conversely, temperatures all the way down to 20°F won’t hurt them.
Water
Radicchio plants need moist soil. If you let the soil dry out, the leaves will turn bitter, the plants may bolt, and growth could be slowed.
Imagine a well-wrung out sponge. That’s how wet the soil should be at all times.
This generally translates to an inch or two of water each week, depending on how much rain you receive. Not sure? A rain gauge can help!
Make sure you water at the soil level instead of drenching the foliage to avoid encouraging fungal issues.
Soil
Radicchio can tolerate a range of soil types, but organically-rich loam, with a pH of about 6.0 to 7.5 is best.
Water retention and good drainage are key. If you don’t have the right kind of soil naturally, amend it with compost or sand as needed.
Mulching and Weeding
Weed control is an important element of growing radicchio, as these plants can’t compete with weeds.
After you’ve put them in the ground, add a two-inch layer of organic mulch such as leaves or grass to help retain water and to suppress weeds.
Fertilizing
Side dress plants with a nitrogen-rich fertilizer a month after planting.
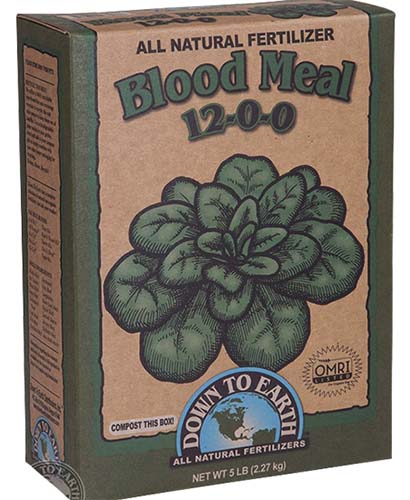
Blood meal is a reliable option, and you can find it from Down to Earth at Arbico Organics. Don’t fertilize at all after the heads start to form.
Forcing
Whether you call it forcing, blanching, bleaching, or whitening, some radicchio types benefit from this extra step if your aim is to produce a crop with the most crisp texture and complex flavor.

Similar to the way celery is often produced, or white asparagus, preventing your plants from producing chlorophyll prior to harvest is key.
The tightly packed inner leaves that result when growing red varieties of radicchio in this way are typically more vibrant in color as well.
To force radicchio, you can leave the plants in ground after a hard freeze and either tie up the outer leaves or cover the plants with a pot or some other type of opaque container.
You could also cover the radicchio with straw for a few weeks towards the end of the growing season, to block sunlight prior to harvest.
After harvest, simply pull away the dead outer leaves to find the tender hearts inside.
Another option is to cut away the initial growth that each head has produced about one inch above the crown, shaping it carefully.
Then dig up each plant, roots and all, and wrap it in burlap or newspaper.
Place the package in a cool, dark spot with a temperature that is above freezing but below 50°F. These will form new, tighter heads with sweeter leaves within a few weeks.
Cultivars to Select
You can generally group radicchio into two types: red heading and green heading. Some reds only turn that color in cool weather.
They can be further divided by shape, with chioggia types being round, like a small head of cabbage.

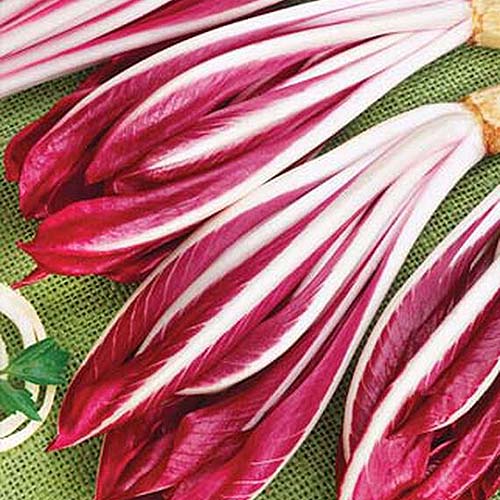
Treviso is elongated, and looks kind of like a Belgian endive that has been dyed red. It is sometimes referred to as red endive.
Radichetta is a loose leaf type, and it’s sometimes categorized separately from head-forming varieties.
There are also forcing and non-forcing cultivars available.
Here are a few to get started:
Palla Rossa
This is a non-forcing type with dark green exterior leaves, and red leaves with white ribs on the interior.
It has a rounded shape, with slightly elongated leaves, sort of like an egg. This cultivar matures in 90 days.
You can find seeds available from True Leaf Market.
Red Verona
Also known as ‘Rouge de Verona’ or ‘Rossa di Verona,’ this variety has a round, cabbage-like shape and is ready for harvest in 90 days.
Note that this is a type that needs forcing, so you’ll need to do a little extra work for your harvest.
You can find packets of 500 seeds available at Burpee.
Red Treviso
‘Red Treviso’ is an heirloom variety, closely related to ‘Early Treviso.’
Opting for this variety is the closest you’ll be able to get to growing the famed ‘Rosso di Treviso’ at home.
Forcing is required to achieve the slender shape and vibrant red color, and the leaves are generally less bitter than those of other cultivars.
Ready to harvest in 60 to 80 days, you can pick up a packet of seeds at Burpee.
Managing Pests and Disease
As much as I’d love to say that you can just set and forget radicchio, you’ll probably end up facing some kind of pest or disease issue at some point.
Keep an eye out for these common issues.
Herbivores
Radicchio is delicious, and we aren’t the only ones that think so. You’re going to have to fight off some mammals, as well.
Deer
Deer like to eat radicchio and all types of chicory, but it might not be the flavor that they’re after.
A study by N. M. Schreurset et al of the Institute of Veterinary, Animal, and Biomedical Sciences at Massey University in Palmerston North, New Zealand found that chicories could reduce populations of internal parasites in ungulates.
You’ll need to protect your garden with fencing, row covers, or other deterrents if deer are a problem in your area.
Rabbits
Rabbits will take a nibble of your radicchio if they get the chance.
Use raised beds, fencing, or any of the other techniques we recommend in our guide to keeping rabbits out of the garden.
Voles
Voles love radicchio.
They dig little freeway systems just under the surface of the soil that they use to travel to food sources. Unlike moles, they don’t leave behind mounds of dirt as they dig.
Controlling voles usually takes a multi-pronged approach, including good garden hygiene and not planting crops too close together.
Add to that fencing, repellants, or live traps and you can likely save your harvest.
Insects
Insects not only attack plants, but they can spread diseases as well. Here are the most common ones to watch for:
Aphids
Aphids suck the life out of your plants, plus they can spread bacteria and attract mold too.
Chicories are usually attacked by green peach aphids (Myzus perisicae), lettuce aphids (Nasonovia ribisnigri), and plum aphids (Brachycaudus helichrysi).
Blast them off your plants with a spray of water from the hose and prune away the outer leaves. Applying reflective silver mulch can help to deter these sapsuckers.
Insecticides aren’t usually necessary, but you might need to resort to an application of neem oil if the infestation is bad.

Mix it with water and spray it on any infested plants. You can find Bonide neem oil at Arbico Organics.
Read our full guide to aphid identification and control.
Cabbage Loopers
Cabbage loopers (Trichoplusia ni) are green caterpillars that inch along leaves, nibbling as they go. Look for ragged holes in the leaves of your plants.
The easiest way to deal with them is to hand pick them off the foliage. You can also use Bacillus thuringiensis, a natural form of pest control.
Read more about cabbage looper control here.
Leaf Miners
Leaf miners (Liriomyza spp.) chew zig-zagging, maze-like tunnels into the foliage of plants.
You can go outside and press along any tunnels that you find to smash the leaf miners to death. But that’s not going to be feasible if you have a lot of plants.
Regular applications of neem oil is generally effective.
Read more about leaf miner control here.
Slugs and Snails
Slugs are never ideal garden visitors, but when they’re attacking edible plants that you prize solely for their foliage, they’re really the worst.
Handpick them off plants in the evening and put slug traps out in your garden.
Learn more about how to manage snails and slugs.
Disease
There are a handful of diseases that you need to watch out for, but all of them can be avoided to some degree if you practice crop rotation, water at the soil level, and avoid overcrowding.
Alternaria Leaf Spot
Alternaria leaf spot is caused by fungi in the Alternaria genus. It shows up as reddish-brown spots with gray centers. These spots can form on the stems as well, and cause the leaves to wilt.
This type of fungi thrives in wet, humid, hot weather, so if you stick to growing your crop in the cool months as is recommended, you’ll be less likely to come across it.
You can treat an infection with a copper fungicide, which is suitable for use up until the day of harvest.

You mix it with water and spray it onto any part of the plant that has been impacted.
Pick some up at Arbico Organics.
Damping Off
Damping off caused by various fungi and oomycetes, Pythium spp., Rhizoctonia solani, and Fusarium spp is extremely common.
Seedlings may fail to emerge, or once they do, they may become thin and yellow or appear water-soaked at the base, before collapsing.
These pathogens prefer warmer temperatures close to 70°F, soil that is excessively moist, and over-fertilized soil.
Find more information about damping off here.
Downy Mildew
This disease is caused by a water mold, Bremia lactucae.
It starts out as fuzzy patches on the underside of the foliage then moves to the upper sides of the leaves.
Rotate your crops, water at the soil level, keep weeds away, and be careful to maintain good air circulation to help prevent infection.
You can use a copper fungicide to control this disease.
Harvesting
It’s time to harvest when the heads have reached the size recommended on your seed packet and when you squeeze them gently, they should feel firm.

It is always better to err on the side of harvesting too early rather than too late, because the leaves will become increasingly bitter as long as the plants remain in the ground.
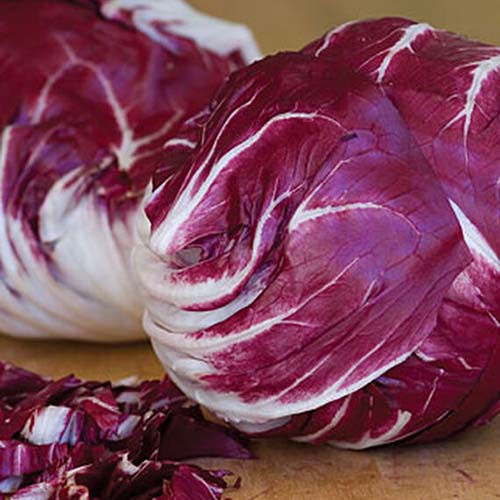
To harvest, separate the heads from the roots by cutting the stem below the leaves with a clean knife. The leaves of the head should stay together.
Preserving
You can store your harvest in the crisper drawer in the refrigerator in a perforated plastic bag for two to three weeks, but the leaves will turn bitter as they age.
Don’t store radicchio near apples or pears as they release ethylene, which can cause your harvest to develop an even more bitter flavor.
Cooking Ideas
Radicchio is one of those ingredients that can be prepared as simply or as intricately as you want, and you can cut the bitterness down a bit with the right balance of other flavors.

If you don’t want to go to too much trouble, wash and tear the leaves and dress them in a bold and fruity olive oil, along with some salt and pepper. That’s all you need.
Here is my version of a delicious radicchio salad:
Combine one two-ounce tin of anchovies (including the liquid) with three tablespoons of white wine vinegar, three quarters of a cup fruity olive oil, one small garlic clove, and freshly ground black pepper to taste.
Muddle it together in a bowl or mash everything in a mortar and pestle. Then add two tablespoons of capers with the brine. Set aside to let the flavors meld for an hour at room temperature.

Chop up four cups of radicchio into small pieces. You want tiny bites covered in a rich layer of dressing to balance out the bitterness.
Toss the dressing and the leaves together, and top with slices of parmesan and croutons.
My advice when dreaming up ways to use your harvest is to combine the bitter leaves with ingredients that have rich, fatty, or salty flavors.
You could combine it with something sweet like honey, which will mellow out the bitter bite, but I find that fat and salt really let the bitterness shine without being overpowering.
Ditch the Lettuce and Embrace Chicory
Bitter flavors don’t always get their due, but once you know how to make the most out of radicchio it’s easy to become a convert and start loving this unique veggie.
Avoid the heat, stay on top of the water, rotate your crops, and keep those weeds off the scene. If you make the effort, you’ll be enjoying a delicious crop in no time.
Are you growing radicchio? Share your tips in the comments section below!
And for more information about growing chicory in your garden, check out these guides next:


Wow, that was very comprehensive! Impressive. One question – large outer leaves that fall away from the centre, can they be removed?
Hi Marc, yes. You can absolutely remove those outer leaves. Some growers do this as a rule to improve air circulation, while others like to leave them in place to provide the more tender interior leaves some protection. You can also use those exterior leaves to blanch the interior towards the end of the growing period, but there are other ways to blanch (buckets, cardboard, etc.). The outer leaves are, of course, edible. If you do remove them, you can eat them rather than toss them.