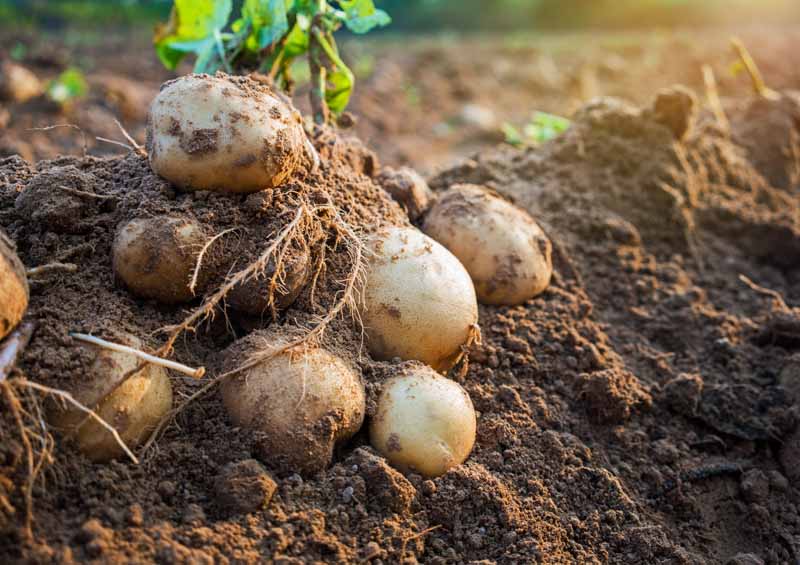
Solanum tuberosum
When I told a friend I was writing an article about how to grow potatoes he said, “What’s to tell? You throw ‘em in a bucket, pile up the soil while they grow, and wait until you have spuds.”
I objected at first at his suggestion, but then I realized that he’s right.
Potatoes are about as easy to grow as a radish, so if you’ve got the patience of King Kong at a banana factory you can stop reading this article now and take that bit of advice with you.
Enjoy your harvest and let me know it is!

We link to vendors to help you find relevant products. If you buy from one of our links, we may earn a commission.
But there is so much more to growing potatoes that you can learn.
While the impatient spud grower will plop some plants into a pot and hope for the best, the individual who reads this feature from start to finish will be prepared for whatever might come.
Spend some time learning about these vegetables and you’ll call yourself the Potato Expert in no time.
Po-tay-tow, Po-taw-tow
I taught a new employee about how to grow spuds and her response was, “Why would anybody go through this effort if you could just buy them at the grocery store?”
Good question, but she’s clearly never tasted a spud straight from the ground. Like everything else that’s grown from home a fresh and homegrown spuds is as close to heaven as you’re going to get in this lifetime.
And like most everything else in life, a good understanding of where something comes from adds to its appreciation.
What You’ll Learn
A World-Wide Food Staple
Like the unrelated sweet potato our “plain Jane” spud was domesticated in South America, more specifically in Peru and Bolivia. That history extends as far back as 8000 BC, making these tuberous vegetables older than the entirety of Ancient Egyptian civilization.
This was a main food crop of the Inca civilization and its significance was not lost upon the Spanish conquistadors who explored across South America in the 16th century. They introduced this root tuber to Europe in the second half of the 16th century. The rest of Europe found the potato to be an exceptional produce and introduced it around the rest of the world.
History students will be familiar with the potato blight in Ireland and Scotland that devastated the population in the mid 19th century, and readers with a multi-ethnic palette will find that the spud is a mainstay in worldwide dishes.
Let that sink in for a moment. This mundane plant was introduced to Europe and the rest of the world in the 16th century, but it almost immediately became a food source of exceptional importance. The spud is a powerful and significant plant, don’t let anybody fool you otherwise, especially those folks who suggest you’re better off buying them in a grocery store than growing your own.
Getting Started
Spuds are easy to grow, but the wise gardener will benefit from some forethought and preparation.
Like most vegetables this one benefits from plenty of sunlight, but it also benefits from a cold and harsh winter to kill off pests and parasites. That places regular potatoes in a cooler growing zone than the sweet, so even if it’s grown as an annual vegetable harvest it’s still at its best in cooler climates.

They also prefer to get about 1-2” of water per week; deep, nighttime soaking is far superior to day time surface watering. Ultimately a consistently moist soil is vital to good crop health and production.
When and Where to Plant
Try to get those spuds into the ground as early as you can, as soon as the soil is workable. They can handle a bit of frost so capitalize on that and plop them in when you’ve got an itch of spring fever.
Old school farmers would plop their plants into the ground when the dandelions started to bloom, and that’s as accurate a calendar as I’ve ever followed.
They prefer soil that is slightly acidic (pH 5.8 to 6.5 if you care to precise) and want it to be a well-drained bed. If your beds are heavy with clay and rocks you should till and amend them in the fall.
At most clients homes, I’ll plant potatoes within a week or two of the last frost date; if it’s before or after doesn’t seem to matter. The plants will get busy underneath the soil and won’t show their heads until they’re ready to, so if I can give them a chance to harden off ahead of time I do.
In areas that have long and cold winters, the gardener will want to plant in early or mid-spring for a midsummer harvest. In areas with a more mild winter an additional late spring or midsummer crop can be planted, but an early harvest variety should be selected if planting in the summer.
In areas that have very hot summers you could get away with three crops: one planted in late winter for an early spring harvest, a second fast-maturing crop in mid spring, and a later summer crop for a fall harvest.
How to Plant
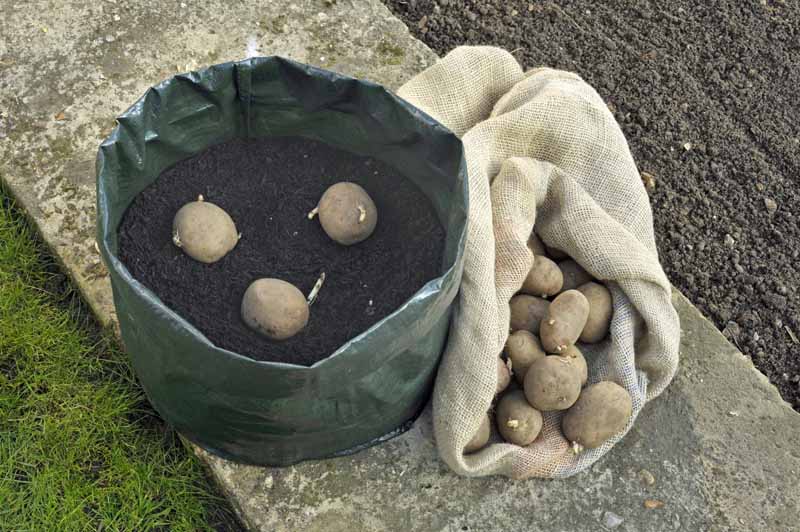
Most grocery store bought spuds won’t be viable for growing because they are treated not to be. If you’ve got a spud that’s popping out green vines and leaves it just might take, but you are always safest to purchase seed potatoes.
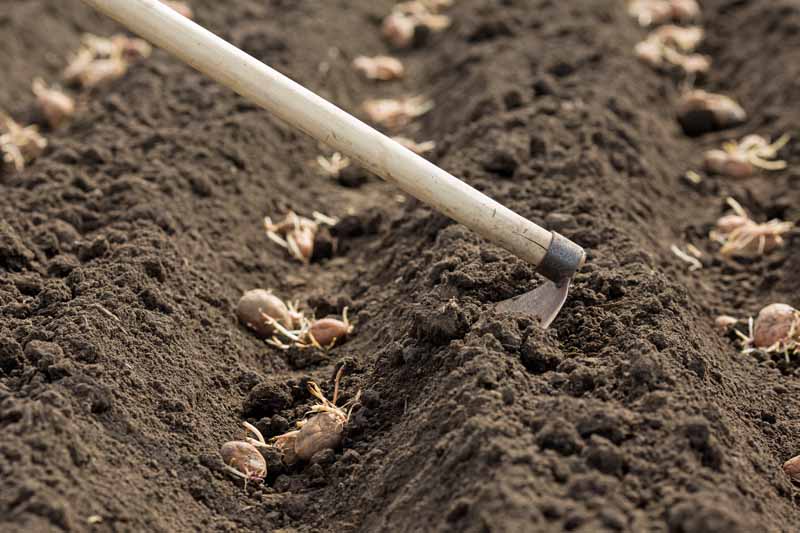
You’ll want to plant your spuds when they’re the size of a golf ball or so. Some seed varieties are sold at this size while others are much larger; if they’re too big just cut them down to the right size and let them sit overnight to develop a nice layer of rind over the cut area to help minimize infection. Make sure that each piece you cut has at least two eyes.
Plant these pieces so that the eyes are facing upwards.
In the Ground vs In Containers
I’ve had equal luck when growing spuds in the ground or in containers, but I prefer the ground because the soil is more consistently moist.
When planting in the ground I am a fan of the trenching system. The secret is in the name; dig a trench about 6” wide by about 8” deep. Taper it so that bottom is about 3” wide. If you’re planting multiple rows they should be about 3’ apart.
Add a small layer of compost to the bottom of the trench, an inch or so will do you fine. After the potatoes have been planted about 4” beneath the surface, you’ll need to wait awhile until they start to grow to do anything else. Keep an eye on them because they’ll rocket up before you know it.
After they reach a height of about 8”, you’ll want to mound up the soil dug from the trench and cover about half of the step. This is to keep the root tubers cool and protected from the sun; excess heat and exposure to sun will make potatoes bitter and inedible, so be diligent about this!
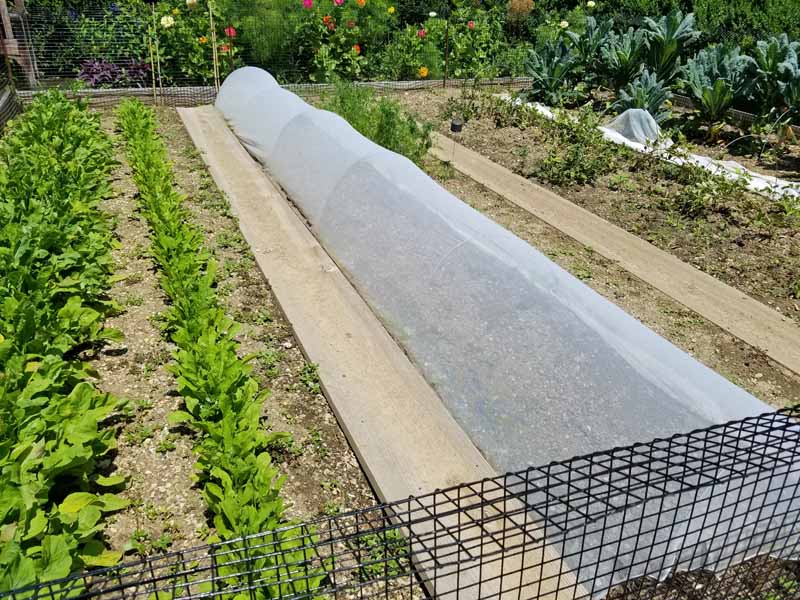
I grew mine this year under the cover of a hoop and mesh protection identical to what’s below. It helped my plants get a good head start and minimized insect damage. It’s a great option if you’re growing more than a couple spuds!
Alternatively you can pile straw instead of soil over the potatoes. Studies show that a 6” layer of straw can reduce soil temperature by as much as ten degrees. It also helps keep weeds away, but I’ve always found the soil method to be effective.
You’ll repeat this mounding process every 2 to 3 weeks. The last time you’ll mound the plant is just before its blooms open.
As a perk watering is less intensive and the spuds will grow to their largest size. As a drawback you have less control over what is in the soil and need a more careful eye on what your plant is telling you.
We have a detailed guide for planting in straw here.
When planting in containers the process is far simpler and less intensive, but it requires more diligent care and attention.
Almost any size container will do, from an old 3-gallon nursery pot to garbage bags to round wire enclosures lined with coco fibre. Garbage cans can hold about 4 plants while speciality sacks and similarly sized objects hold about 3 plants each.
A good rule of thumb is to plant one plant per 2.5 gallons of container space.
Put down a good base of soil with a top layer of compost and plant the spuds to a depth of about 4 to 6”. When the plants reach a height of about 8”, add more soil and bury about half of the growing stem. Continue the same 2-3 week cycle as described above!
You get to have guaranteed soil quality when planting in containers and can usually place the plants at a more desirable location, but you’ll need to water much more carefully. The size of your harvest seems to be inhibited when grown from a container, but that’s a minor issue if the harvest in question is perfect in every way but its size.
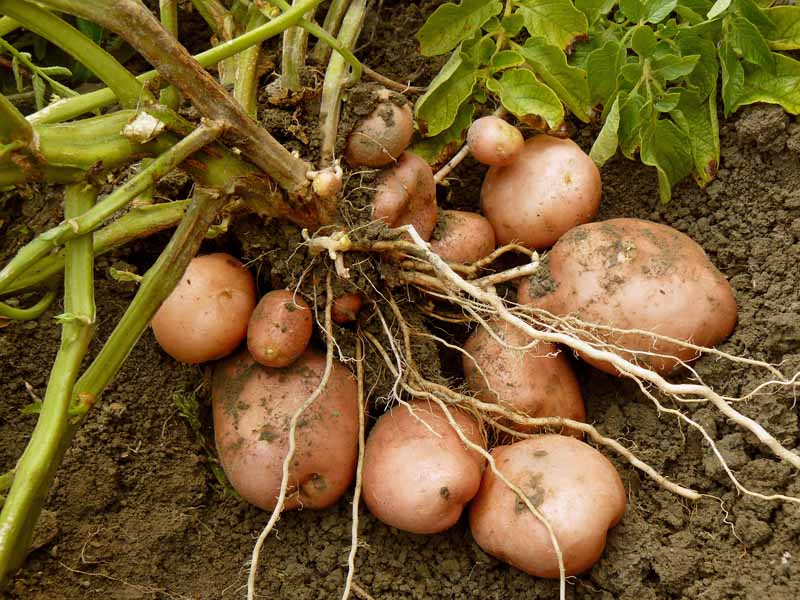
Either way, spuds tend to stop growing when soil temperatures reach about 80 degrees fahrenheit. You can lovingly monitor your spuds and make sure they’re healthy and happy, or you can harvest them before it gets too hot out; for the softest spuds harvest them about 2-3 weeks after the plants bloom.
Either way the harvesting process is almost identical. You can read our excellent and detailed guide on how to do it here. You’ll also find that as long as your spuds are composted and mulched well they don’t require much in the way of fertilizing!
Potato Problems
The only trouble to growing something that is largely underground is that it’s hard to figure out how it’s doing with a brief glance. Luckily most of the issues you’ll find with your spuds are evident and are easily diagnosed.
Most of these problems can be minimized with an active crop rotation plan. I’ve found great success with a “three year plan” where you rotate your spuds between three different beds over three years.
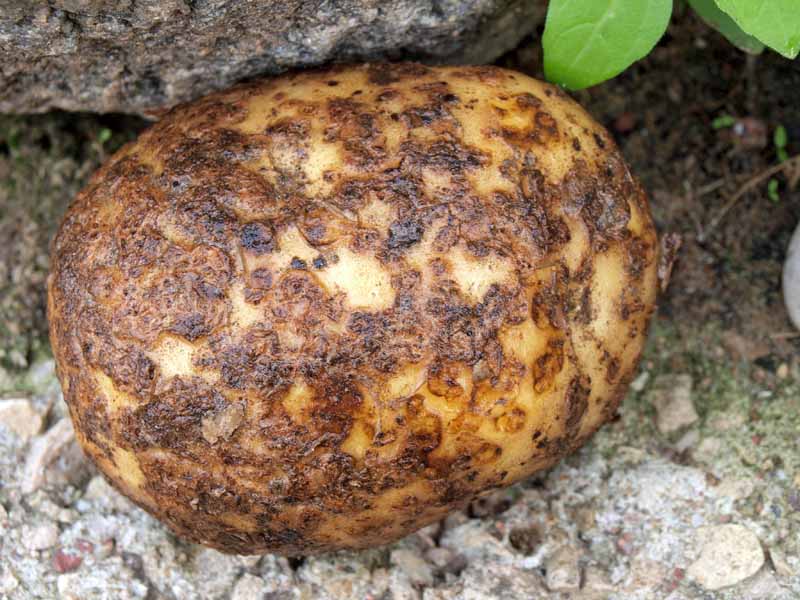
Potato scab can be an issue in dry and alkaline soil. You’ll identify it by the ugly concentric rings on the surface of the spud. Proper watering practices help minimize or eliminate this issue entirely, but control during the growing season can be a problem. An application of agricultural gypsum before the growing season has had some luck for folks.
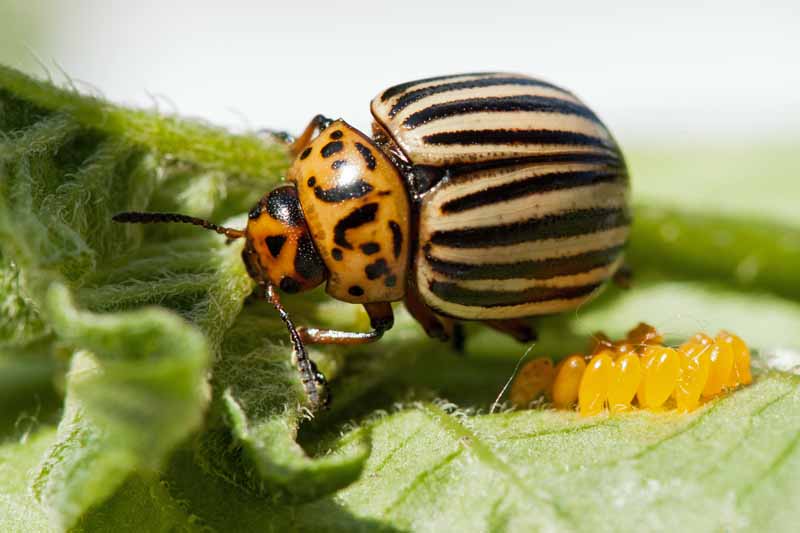
The Colorado potato beetle can decimate crops, and their best method of control is to actively and aggressively hand pick them. Diatomaceous earth can work too as a preventative measure.
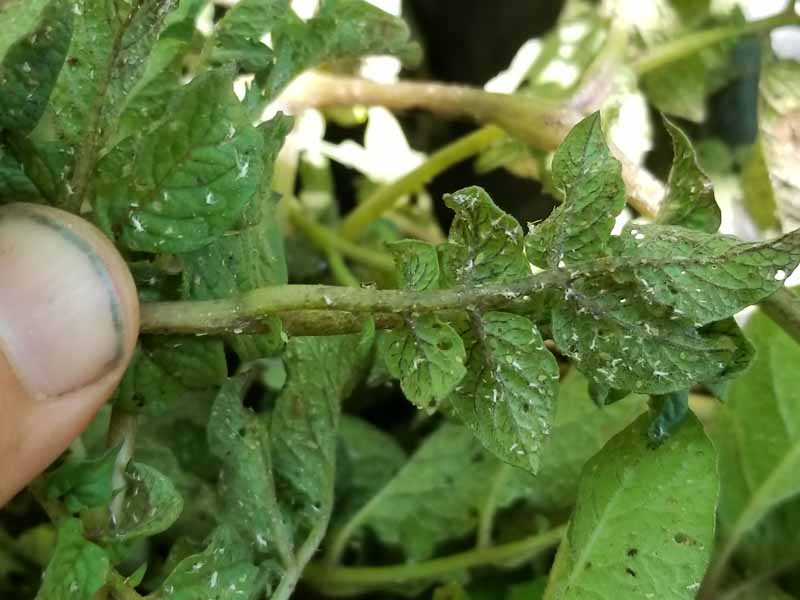
Aphids and flea beetles can be controlled with insecticidal soap, but something like early or late blight is a very serious ailment to encounter. The only protocol here is to remove and destroy the infected plant and hope for a better crop next time.
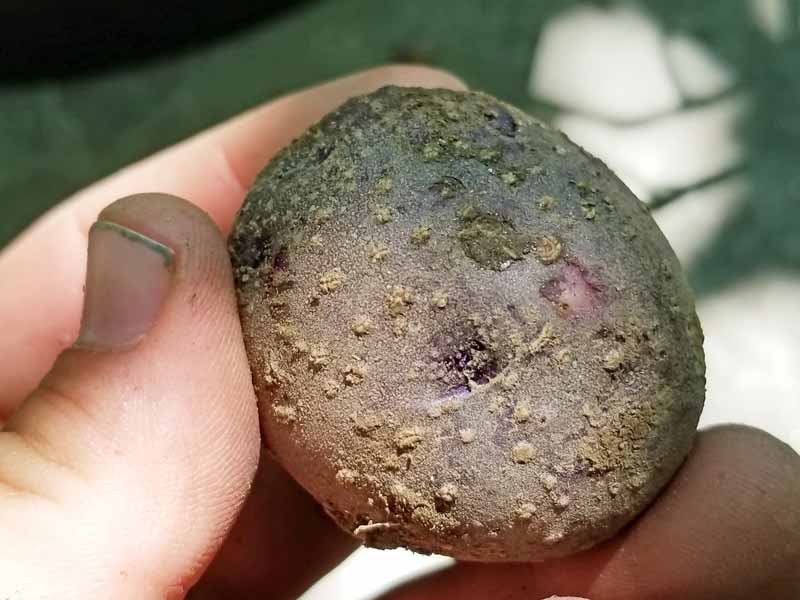
You may notice upon harvesting raised white bumps on your spuds. These are engorged lenticels and indicate that the plant is sitting in soil that is too wet. The fruiting body develops these pores to aid in water exchange; they aren’t unsafe to consume but it’s a good indicator that you need to go over your watering practices again!
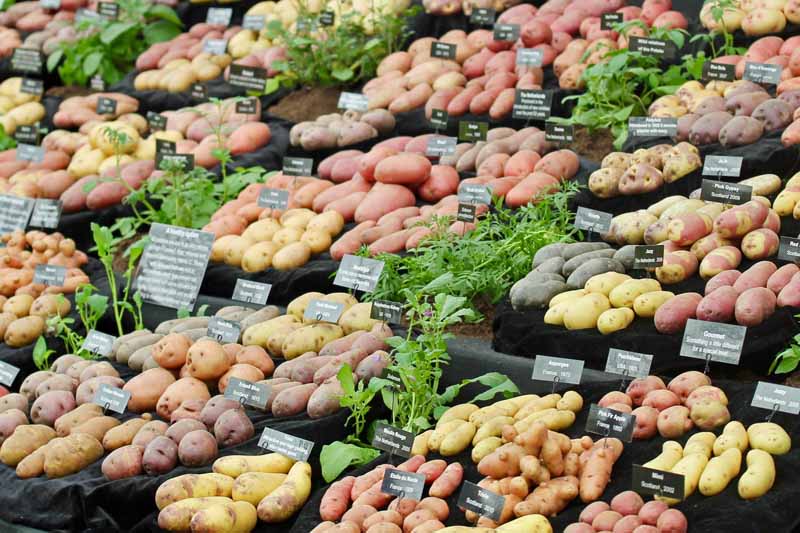
Suggested Spuds
Early season are ready in 75-90 days.
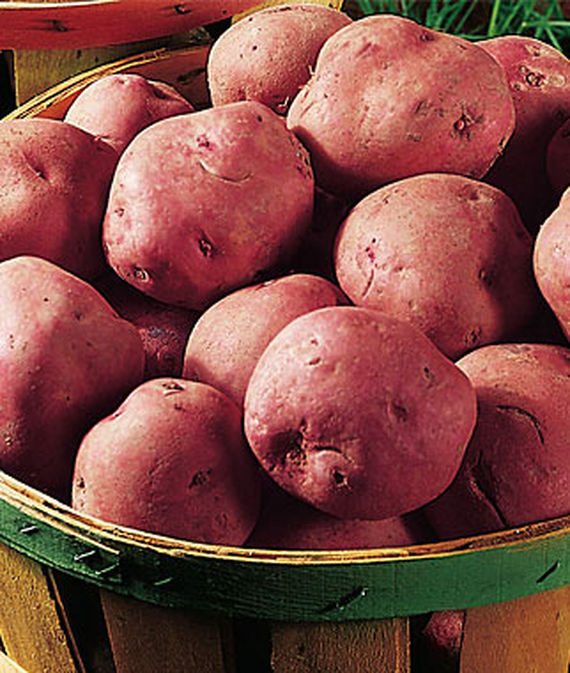
Red Pontiac Mini-tubers via Burpee
The red pontiac are a popular spud for starting and harvesting early and are usually ready for harvest in the neighborhood of 80 days.
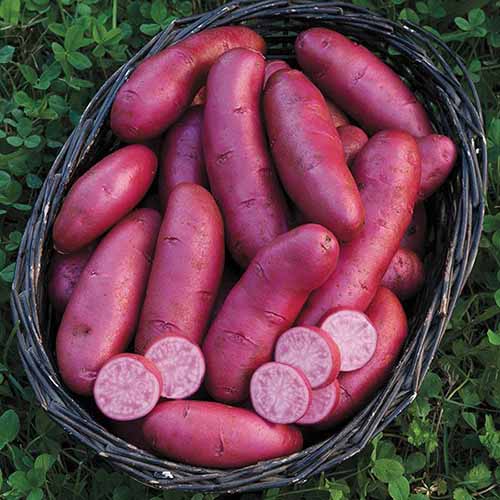
Midseason are ready in 95-110 days. This fingerling Amarosa type, available from High Mowing Seeds, is quite tasty, and it’s attractive too.
You’ll be able to eat tiny spuds as early as about 70 days after planting, but they reach their peak in the 95-110 day range.
Late season are usually ready in 120-135 days (plus most fingerlings), and the Kennebec is one of my favorites in this variety.
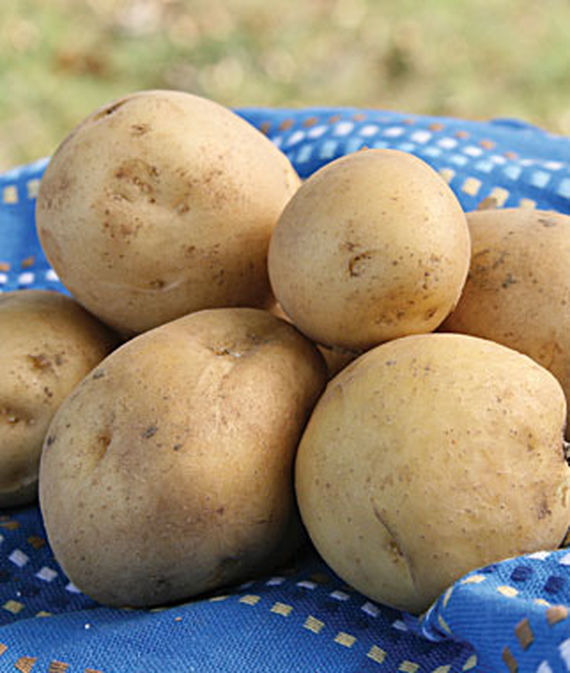
Kennebec Mini-tubers via Burpee
They’re buttery and tasty, probably because it takes them so long to fully mature!
Did You Dig It?
Let us know what you think about our potato growing guide! Hopefully you’ve got the confidence you need to start growing these tubers in your garden or on your deck, and if you don’t then reach out and ask us questions!
And once you’ve got a crop you’ll need to cook them. My new go-to recipe for spuds is this cast iron herb roasted potato recipe you can find here on our sister site Foodal.
Thanks for reading, we look forward to your next visit to Gardener’s Path!
Photos by Matt Suwak © Ask the Experts, LLC. ALL RIGHTS RESERVED. See our TOS for more details. Product images via Burpee, High Mowing Organic Seeds, and Easy to Grow Bulbs. Uncredited photos: Shutterstock.
I’ve successfully grown potatoes in my garden over the years and have even tried potato towers which work well in limited spaces. In the past 3-4 years though I have had problems with wire worms, which are from click beetles. They attack carrots and radishes too, and in your early spring garden, when you first put out your tender plants, they will eat those too and you will have a much less productive garden. I have learned to put my plants out when they are well established. This is the only thing I have done to enable growing potatoes without… Read more »
I lost my crop of potatoes this year, but you can bet I’m going to try this next year to see how effective it is for me!
Extremely informative information!! I’ve got potatoes growing in a container now!!