Ipomoea batatas
It seems like my family nearly lives off of sweet potatoes.
In a clean eating household these root tubers are like dessert, even without the added brown sugar. And if we go more than a few days without including them in a meal, we notice.
So, if you’re looking for a garden crop that’s nutritious and indulgent, sweet potatoes are the answer.
At breakfast, lunch, and dinner, this easily stored warm-season edible is delicious and versatile.
And although it requires a good amount of space in the garden, it’s a relatively easy crop to grow.
We link to vendors to help you find relevant products. If you buy from one of our links, we may earn a commission.
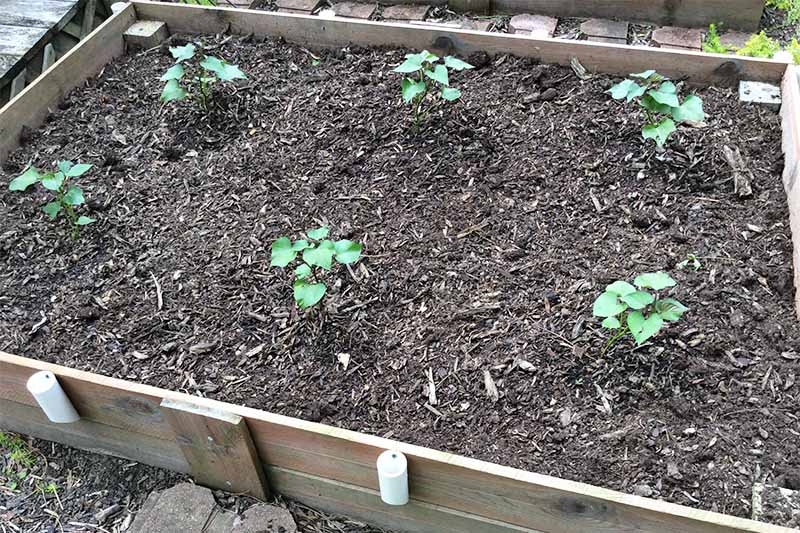
Last May, I purchased six slips, popped them in a raised bed, and admittedly paid little attention to them.
Come September, I had more than 30 medium-sized root tubers. I will definitely be growing these delicious beauties again this year.
To get even better results, keep reading. I’ve dug into the details about what it takes to grow this amazing root crop for the best harvest possible. Here’s what’s in store:
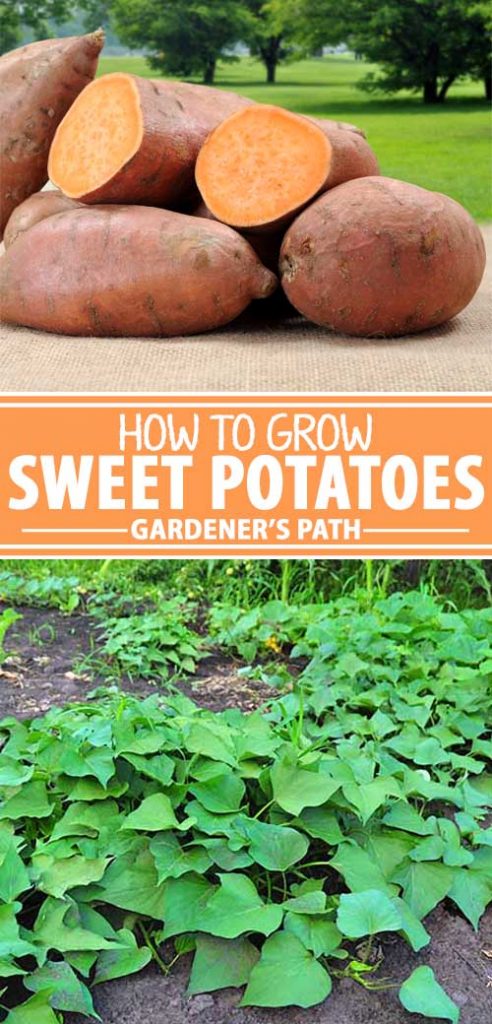
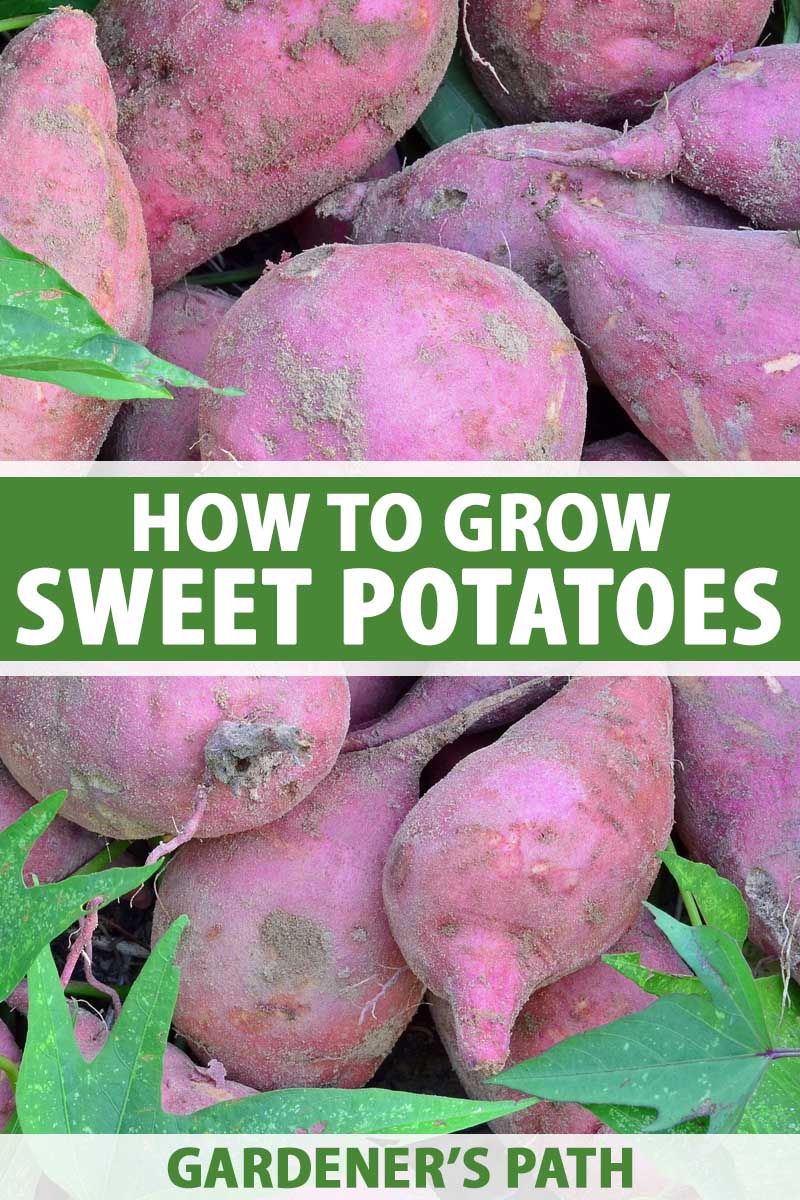
How to Grow Sweet Potatoes
What They Aren’t
It’s important to realize that sweet potatoes (Ipomea batatas) aren’t related to regular potatoes (Solanum tuberosum) or yams (Dioscorea sp).
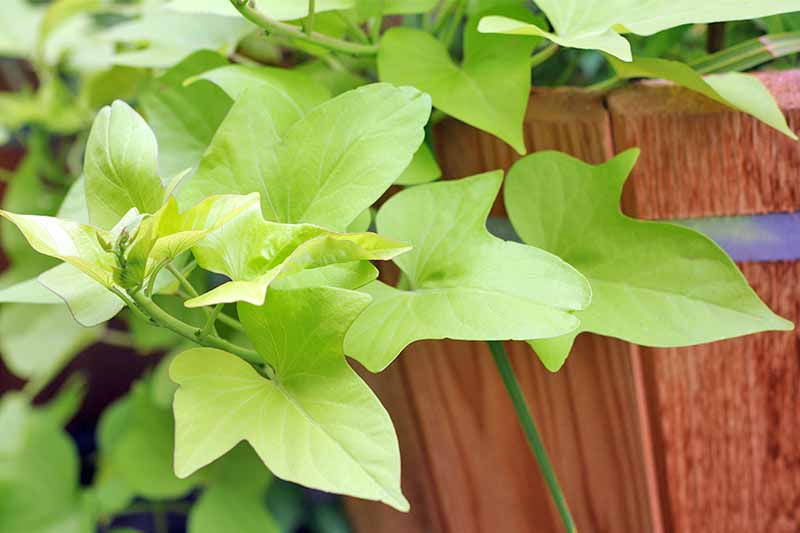
They are a tropical plant, hardy only in zones 9 through 11, and are actually a relative of the morning glory.
Ornamental varieties are sold nationwide for their attractive, colorful leaves.
The edible part of the plant is an enlarged storage organ that forms on the root, referred to as a root tuber. Irish potatoes, on the other hand, are stem tubers.
This is why methods for growing sweet potatoes and Irish potatoes are very different.
For Irish potatoes, you encourage the stems to develop through a method such as hilling. But with sweet potatoes, it’s all about encouraging root growth.
Getting Started
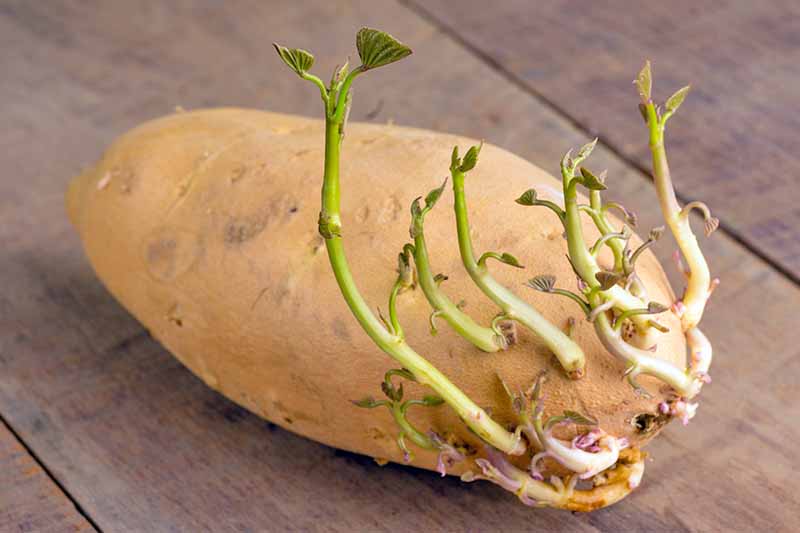
Sweet potatoes rarely flower outside of their native range so they are generally propagated from slips, or new growth that sprouts from the ends of the root tubers.
If this is your first attempt, it’s best to order slips from a nursery or trusted purveyor, since they are less likely to carry diseases.
In subsequent years, you can use your own parent plants to start new slips. To avoid diseases, think about purchasing new slips every three years or so.
There are a ton of tutorials out there on starting slips, but I’ll just share one option with you:
In early spring, move a healthy parent potato to a warm place. Soak the entire tuber in warm water overnight about a month before your area’s last frost date.
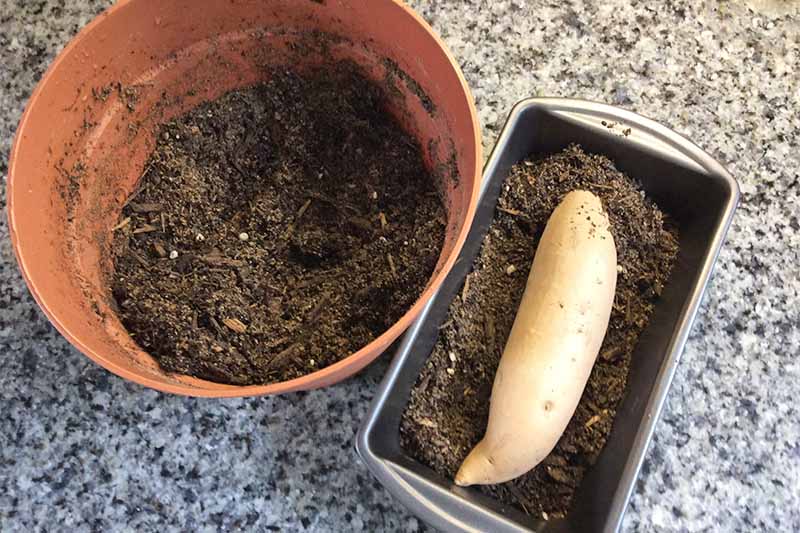
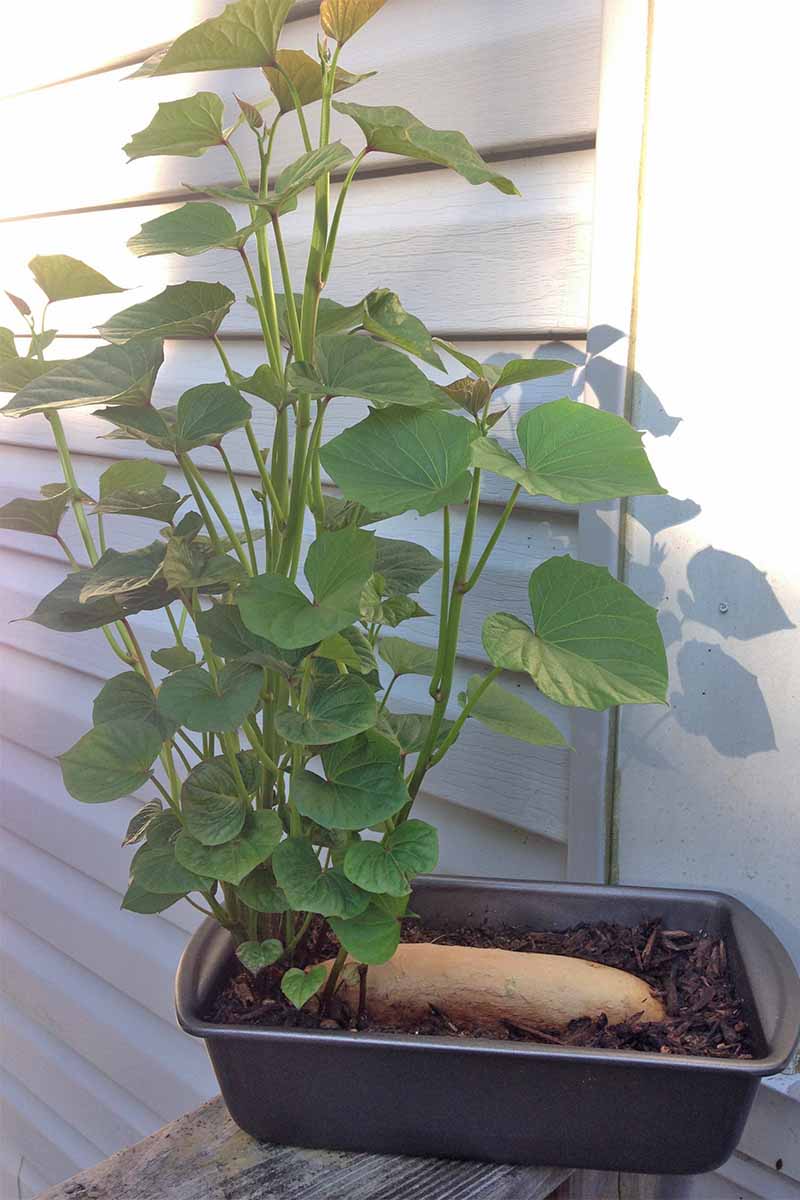
Then, find a container large enough to fit the number of potatoes you want to use. I stuck a single potato in a loaf pan and it was the perfect size.
Feel free to get creative with your container. You can use whatever is handy that’s the right size.
A deep seed tray is fitting if you’re trying to sprout more than one.
Fill the container just an inch or two with a mixture of potting soil and sand.
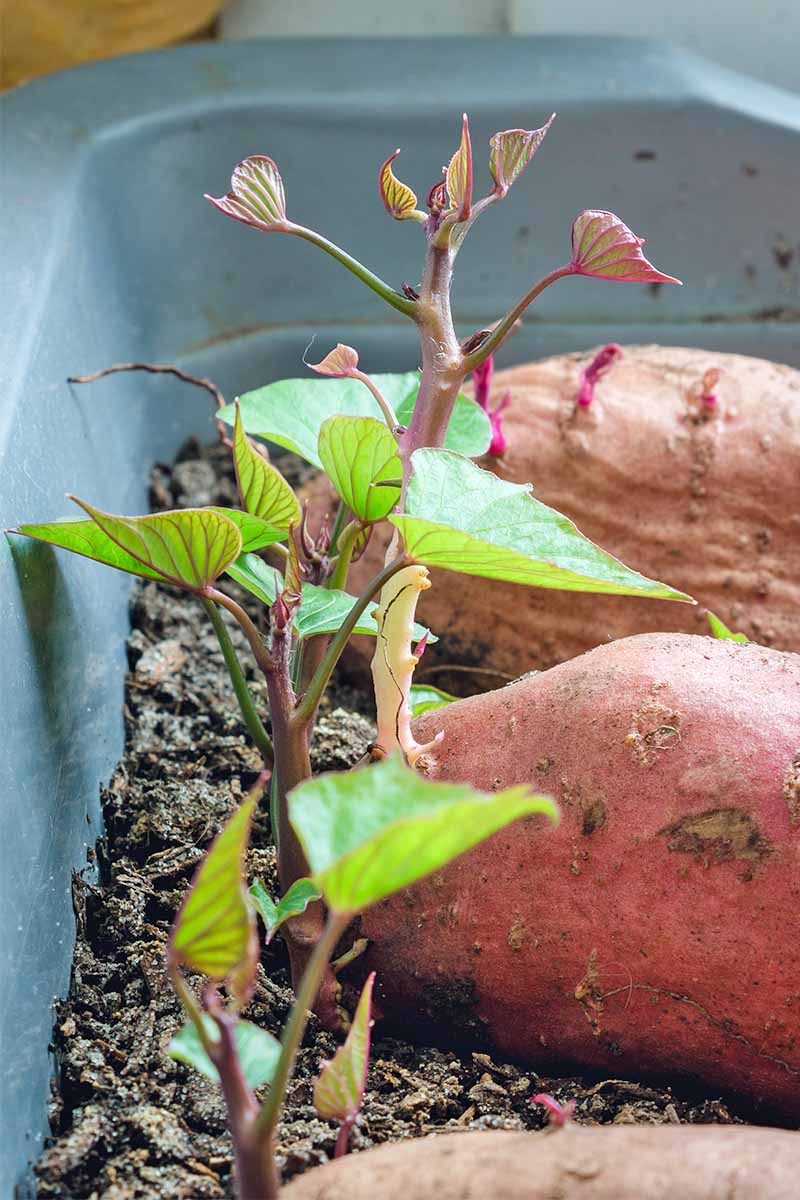
Place the sweet potato into the container horizontally and cover it with soil. It’s okay if it peeks through the soil a bit.
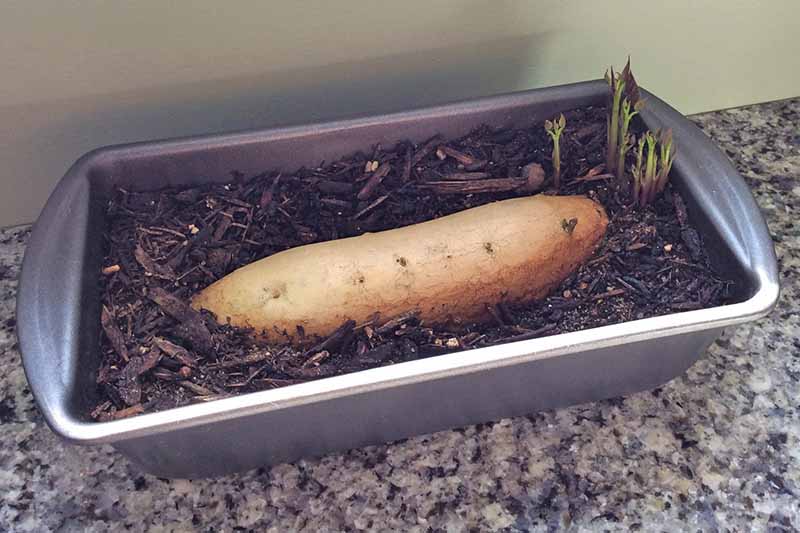
Keep the soil moist and warm, and wait for slips to form. This will likely take a few weeks, and you can expect to get at least 6 per tuber.
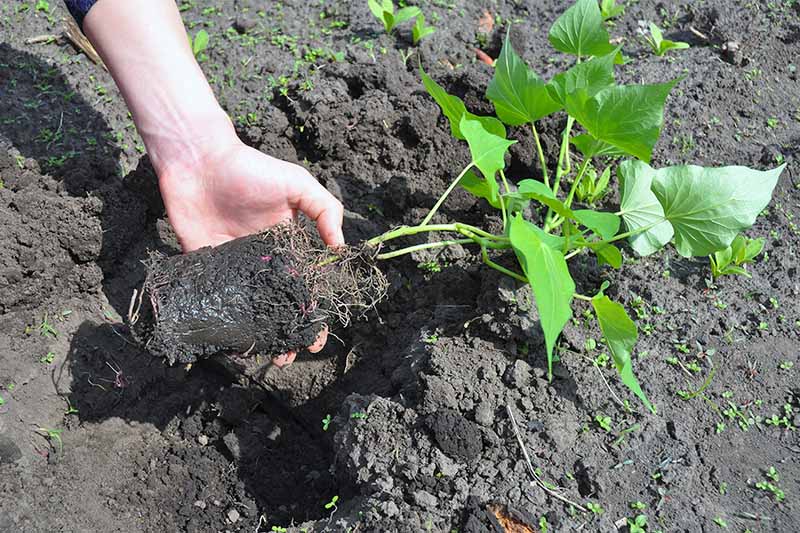
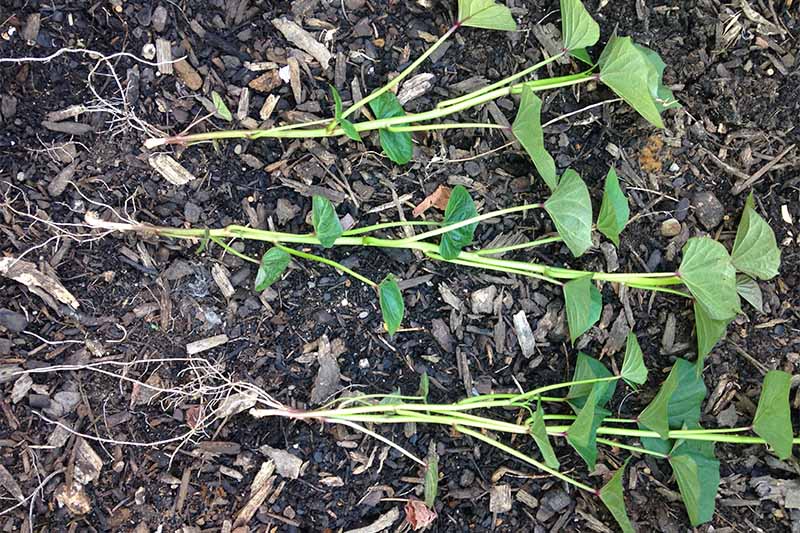
Once the newly formed slips are at least 4 inches long, carefully break them off.
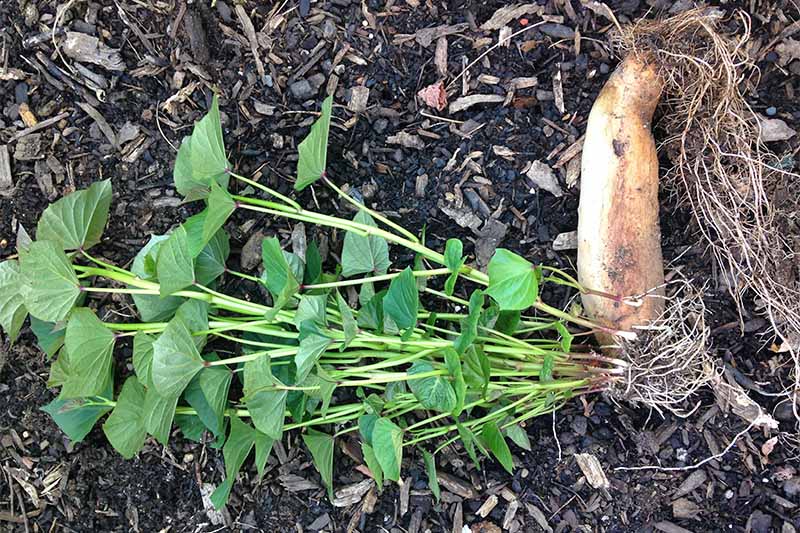
One of the benefits of sprouting sweet potatoes in soil rather than water is that slips tend to have pretty well formed roots from the start.
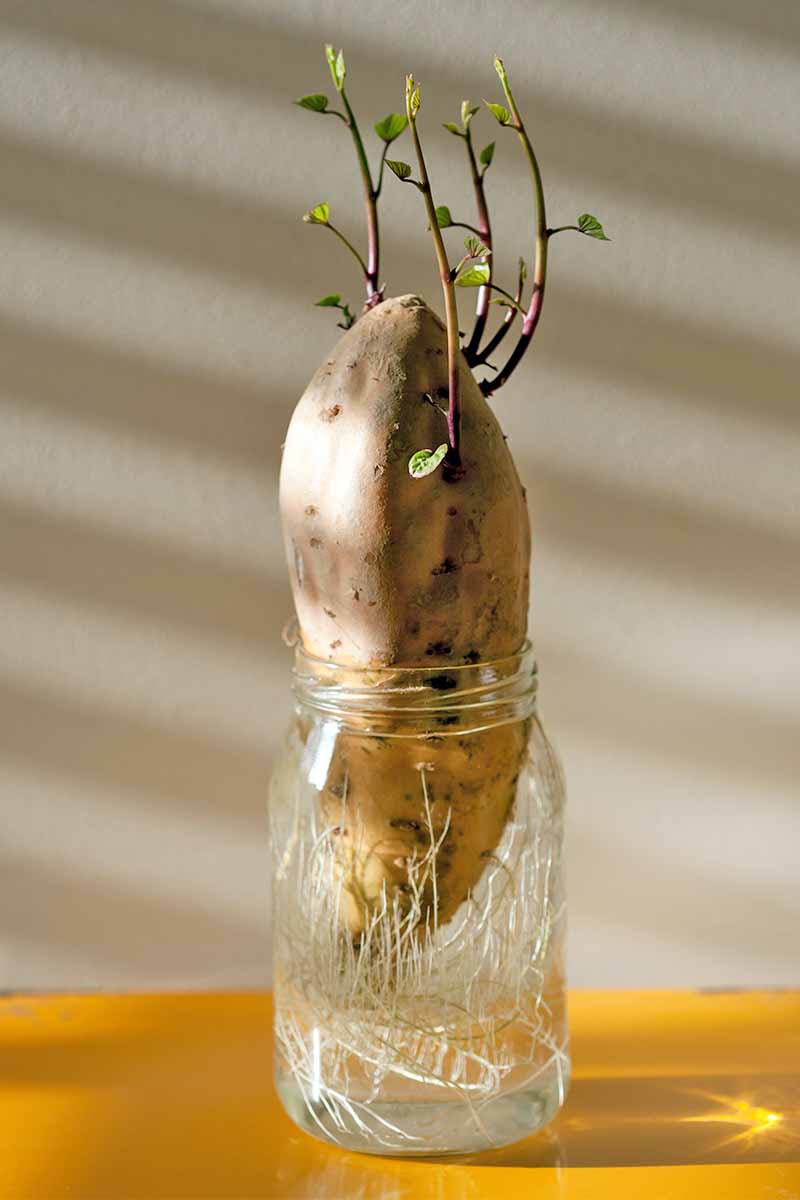
If you don’t find this to be the case, however, you can root them in water. Fill a glass with just a couple of inches of clean and, ideally, chlorine free water.
The bottom inch or two of the slip’s stem should be submerged, while the leaves stick out of the top.
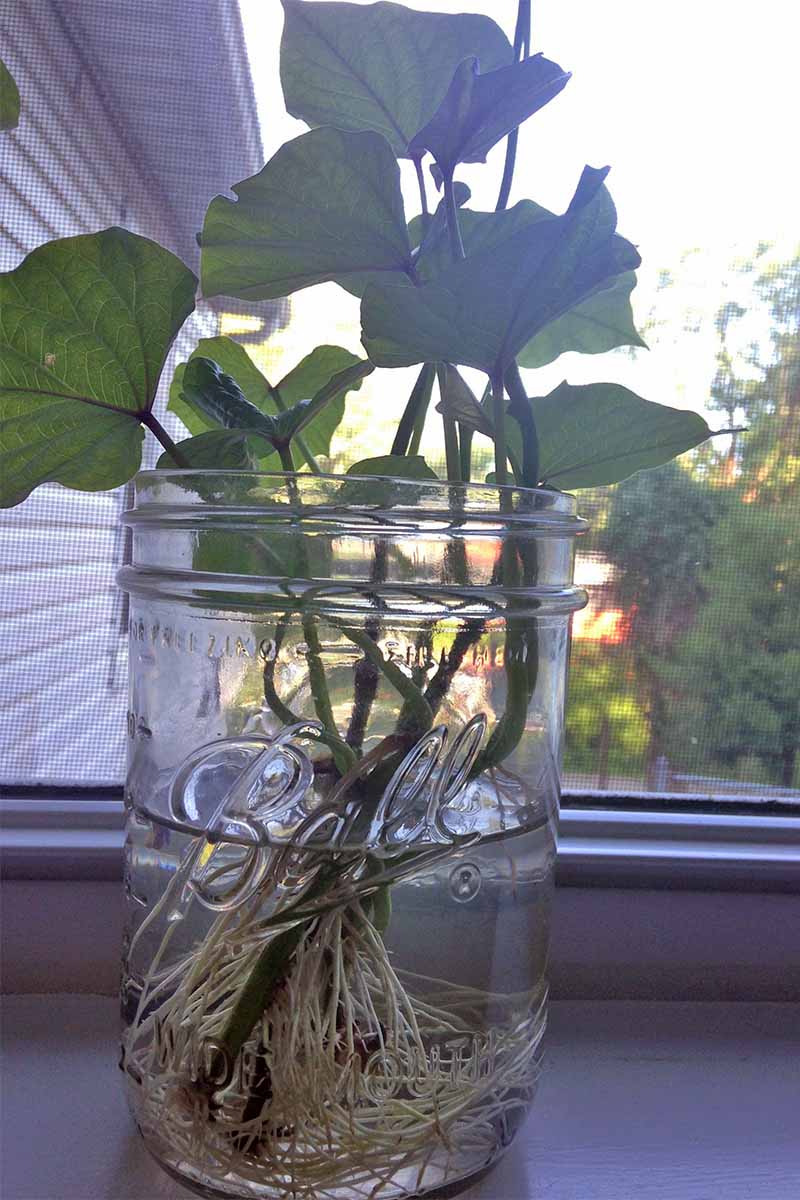
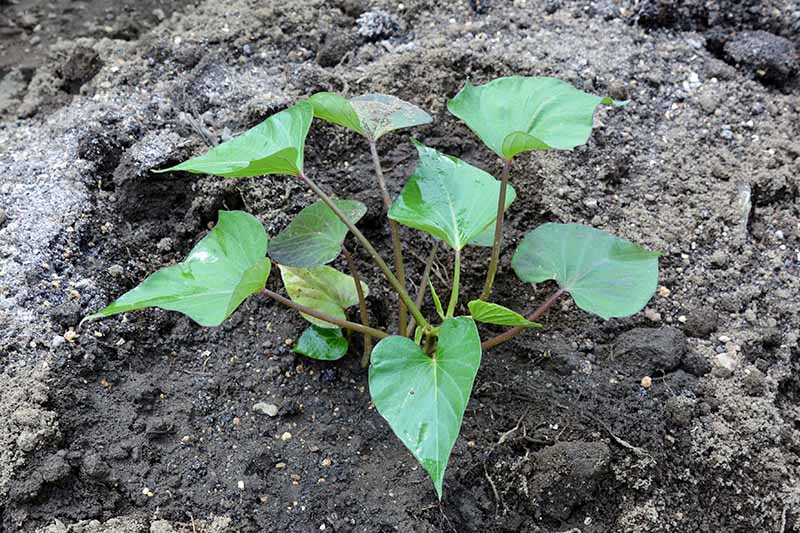
Within a week, they will develop roots and be ready to plant out in the garden, given that all chance of frost has passed and the soil temperature is around 70°F.
You’ll want to get them out in the garden as soon as possible because, depending on the variety, plants will require 90 to 120 days to mature.
Without a long growing season, chances are you’ll be disappointed with your harvest. If you’re desperate for more time at the end of the season, try using floating row covers.
Ideal Growing Conditions
Sweet potatoes are pretty tough. The one thing they won’t tolerate, however, is cool weather. Even the slightest frost will take them out.
But they handle heat and drought really well.
Still, the better the growing conditions, the better the harvest.
Being a root crop, soil health makes a big difference. Slightly acidic soil with a pH between 6.0 and 6.5 is ideal.
Sandy loam that’s well draining but nutrient dense will make this sun-loving tropical vine happiest.

Raised beds are a great option too, since they warm up quickly and are typically filled with a loamy soil mixture. Loose soil will allow roots to grow freely.
Add fresh organic compost a week or two before planting, for added nutrients and organic matter.
If you prefer chemical fertilizers and don’t want to have your soil tested, stick with an N-P-K (nitrogen, phosphorus, potassium) ratio of 5-10-10.
Keep in mind that too much nitrogen will result in vigorous vines, but a small harvest.
Space plants at least 24 inches apart to give vines adequate room to sprawl. Keep them well watered until they become established.
Apply a layer of organic mulch, such as pine bark or grass clippings, which will help to retain soil moisture and temperature, as well as reduce weeds.
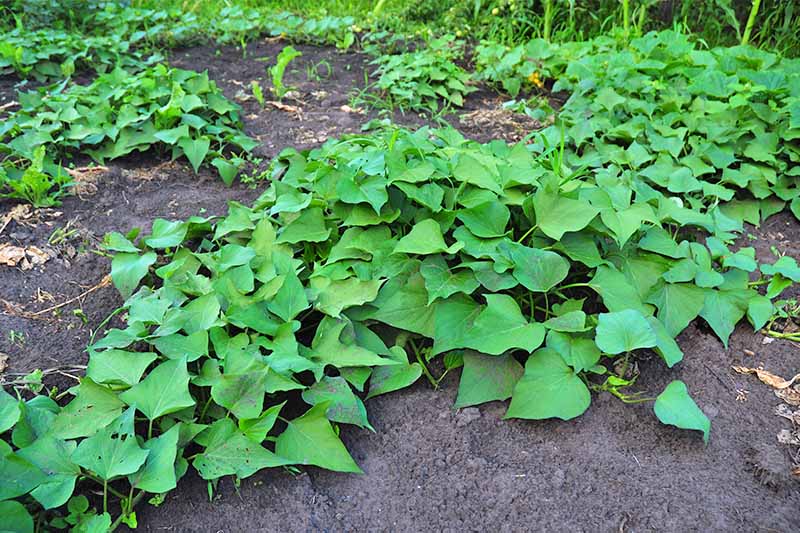
Once vines start taking off, you can assume they’re established.
Containers work well, too, but don’t try to cram a small area with too many slips. If you do, you’ll dramatically decrease the number of tubers that develop per plant.
Instead, plants with enough room to grow produce a much larger harvest.
In the absence of rain, water regularly. Even though plants will tolerate drought, your harvest will be larger if they aren’t subject to water-related stress.
If allowed to wilt, root development will likely suffer.
About three weeks or so before harvesting, stop watering. Overwatering at the end of the season can cause tubers to split.
Once vines fill in, weeds will have a harder time becoming established. Avoid cutting vines back if possible.
If space is an issue, consider growing a more compact bush variety.
If you live in an area that has mild summers, try laying heavy-weight garden fabric over the soil to increase temperature.
Raised beds warm up faster and are especially appropriate if cooler temperatures are common.
You can also consider laying black plastic over the area in spring to get soil temperatures up.
Pests and Diseases to Know About
Underground pests might be the worst of them all because you often don’t know they’re a problem until harvest time.
What a disappointment when you go to harvest, only to find your crop has already been a meal for underground dwellers.
If growing plants in an area that was recently growing grass, wireworms (the larvae of click beetles) and root-knot nematodes might already be present. Both of these critters like to munch on the tubers.
Keep an eye out for any vines that are stunted or yellowing. It may be worth digging a bit to do some investigating if you suspect underground pests.
Crop rotation, cover crops, and planting in raised beds where soil material is more controlled can help to prevent infestation by soil-dwelling pests.
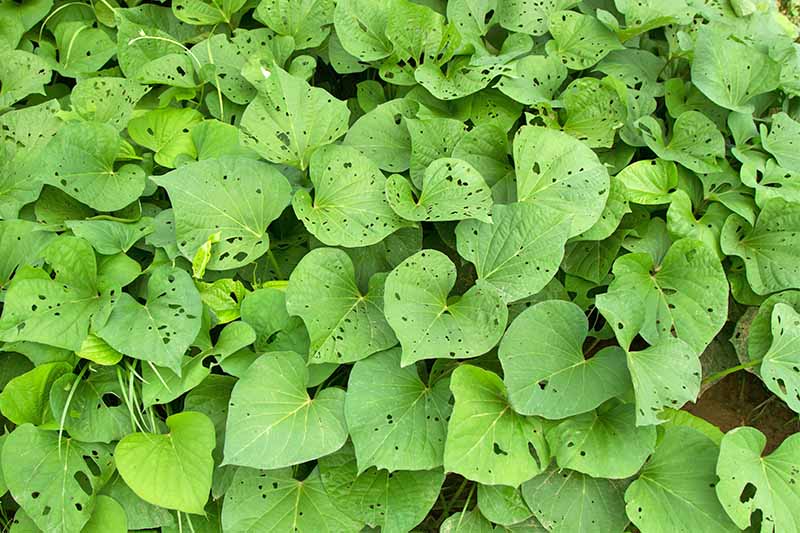
Tiny holes in the leaves may be the work of flea beetles. If vines are healthy and vigorous, they should be able to handle some damage.
Sweet potato scurf is a somewhat common disease, resulting in black spots on the skin of tubers. Although it might be unsightly, it doesn’t really affect the quality of the crop. Remove the affected skin and eat them just the same.
Choose disease resistant varieties and healthy slips from the start, and provide adequate growing conditions, and you likely won’t experience any disease issues at all.
Minimal Effort, Large Reward
Overall, sweet potatoes are a forgiving crop to grow.
And, even if you only get a small harvest your first season, you can save one or two tubers as parent plants for next season.
In this way, you’ll need to spend very little money while honing your sweet potato growing skills.
Learn more about harvesting and storing your sweet potatoes here.
This long-season, heat-loving tropical is beautiful and low maintenance. And the delicious, easy to store root tubers are a satisfying reward for minimal effort.
Have you grown sweet potatoes before? Fill us in on your secrets to a guaranteed harvest below!
Photos by Amber Shidler © Ask the Experts, LLC. ALL RIGHTS RESERVED. See our TOS for more details. Uncredited photos: Shutterstock. With additional writing and editing by Allison Sidhu.

Hello Amber, a very informative article. I’m a new organic “kitchen gardener”. I’ve successfully grown red skinned potatoes in containers. Two months ago I put down some sweet potato runners which I secured from a few sprouting sweet potatoes from my veggie bin. So far so good, they are growing wonderfully and producing several more runners and filling up the allotted garden area. My question, do I pin down the runners to encourage rooting and the possibility of a larger harvest? Or should I clip the runners and replant them as a new plant? I await your reply and advice.… Read more »
Welcome to organic kitchen gardening, AC! Unlike regular potatoes, the secondary roots that sweet potato runners put out don’t go on to produce a very substantial harvest if you bury them under additional soil. The vines will continue to grow like ground cover, covering a wide area. Lifting the vines to keep them from continuing to put out new roots is actually recommended, to keep them from putting energy into producing new, smaller tubers- you want that energy to be focused at the base of the plant, where the main roots are growing. New plants need to be started from… Read more »
Hello, Amber,
I live on sweet potatoes and am dying to grow them, but it’s later in the season than
I would like so I’m thinking of using containers. (I live in New England.) What size and depth container would you recommend? And how many slips per container?
Also – any way of getting a printer-friendly version of this informative article?
Thank you so much!
Thanks for your questions, Jean. Slips should be planted about 12 inches apart, so the bigger the container, the more you’ll be able to grow. Anything from a large terra cotta planter or wooden barrel to a potato grow bag can work. Since the roots develop below ground, you want to ensure that they have plenty of space, as well as excellent drainage.
If you have a choice of cultivar, bush varieties are excellent for container growing.
We don’t currently have a printer friendly option- maybe saving as a PDF would be a good option.
Happy gardening!
Hi Amber. I’d like to know more about planting them in a raised bed – where do you get that kind of soil? It doesn’t look like anything I’ve seen at Home Depot. Also, what are the white PVC pieces on the side of your raised beds?
Hi Marti,
These pieces of PVC are built-in holders to create supports for row covers. The soil mixture that Amber recommends is sand and loamy garden soil mixed with compost – you can make your own mix at home with these elements, or try “Mel’s Mix” for raised bed vegetable gardening (created by Mel Bartholomew, who developed the square foot gardening method): combine equal parts compost, peat moss, and coarse vermiculite.
nice info. this is very useful for me thanks
The Irish potato is from Peru!!! Why take away credit where credit is due?
You are absolutely correct, Jason, and to be frank, I’m not quite sure why the author of this article refers to Solanum tuberosum repeatedly as Irish potatoes. This article is in need of an update to meet our current format, and we hope to post a new version soon! Though it’s true that this root crop is widely associated with the Irish potato famine and use of this particular common name may be a convenient way to differentiate them from sweet potatoes (which are of a different species), to me, “Irish potatoes” are a sweet cinnamon and coconut candy. Sometimes… Read more »
I’m trying to grow sweet potatoes in my kitchen. The roots planted in the garden were eaten by squirrels and rabbits and we did not the harvest. I got 2 tubers with roots and snips coming out and both are soaked in water. Should I leave both in water or transfer in another container with soil? They are budding beautifully and I do not want to disturb my tubers.
Where are you located Julieta, and how long is your growing season? Like Amber described above, you can grow new slips for planting from your harvested roots, and break them off when they have their own established roots and leaves. Rooted slips should be transferred to soil, each in its own individual pot, for planting out next spring.
Sorry to hear the squirrels and rabbits have been a problem! Check out our article for tips to keep them away from your edible crops. Good luck!
Hi! Can I put the vines on a trellis to keep them off the ground?
Hi Darrel! You technically can, but then you’ll only get sweet potatoes growing in one spot, at the original planting location. This is because the vines put out nodes that, if buried slightly, will grow new roots. You can actually cut this new rooted node away from the parent plant, which will drive the new plant into tuber-producing mode, giving you more of a harvest. But if you have a shorter growing season and really are just expecting tubers to grow from one place (the original planting location), you can absolutely trellis the vine. For more tips on that, check… Read more »
Hello,
What do you do with the actual sweet potato that has grown roots after the tubers have been removed?
After it’s served its purpose and you’ve removed the slips for replanting, you can dispose of it. The slips themselves should have green foliage growing at the top, with intact roots on the bottom – if you find it’s difficult to remove them, you can actually cut up the original sweet potato into portions with intact leaves and roots for planting.
How do you know when the sweet potatoes are ready to harvest?
It’s hard to figure out when to harvest plants that mature underground, isn’t it? The rule of thumb is to watch the vines. The ends will start to turn yellow when the roots are ready. At that point, dig down and pull them up. Don’t worry if you wait too long, though. As long as you harvest before the frost, you’ll be fine.
I grew some sweet potato vines in my flower plant containers, when cleaning up the pots for fall, I pulled out red tube sized bulbs size of a baseball out of the ground…are these edible potatoes…I have only grown reg. Potatoes so I am not familiar with these..
thanks
Treece
Hm, not sure what you’re seeing – want to send us a picture? Sweet potatoes have pencil roots (they’re thin and long), storage roots (that’s the one you eat) and fibrous roots (the fine, hair-like ones). It could be a mis-shaped/colored storage root.
Hello! I am brand new to growing sweet potatoes. I do eat them daily and have accidentally grown what I now understand to be the beginning of slips before-how wonderful! I am excited to try but by following your article. However I would like to know if I will have enough time to grow them this spring? I live in zone 10, San Diego inland area. Also if so when should I begin with the slip sprouting? Thank you!
Sweet potatoes are a good pick for your zone, since they need a long, warm growing season. But remember that “spring” in southern climates is not quite the same thing as what fits this category in gardeners’ terms in climates with cold winters. If you’re having a cold snap currently and temperatures are nearing freezing at night, I’d hold off. But you should be able to plant slips in your area from February through May.