Phaseolus vulgaris
Bush beans are one of the best crops for the beginning gardener to grow. Starting them from seed is easy, they don’t require trellising, and they will give you an easy return on your investment.
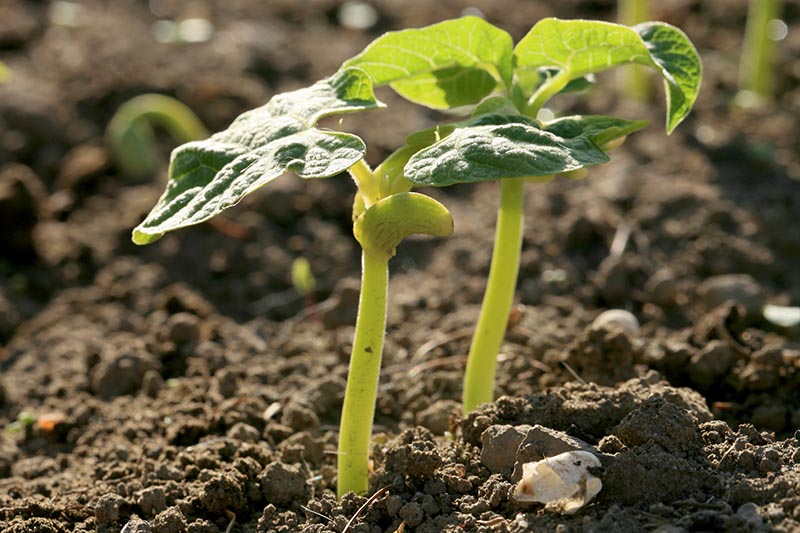
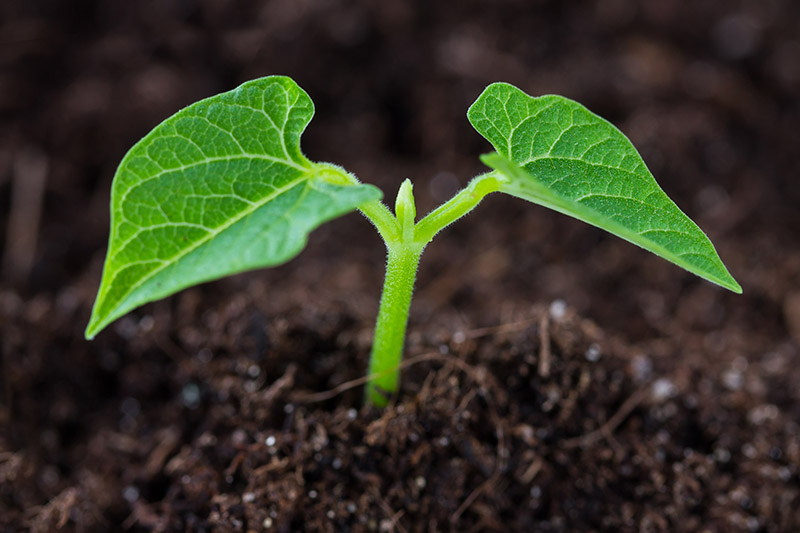
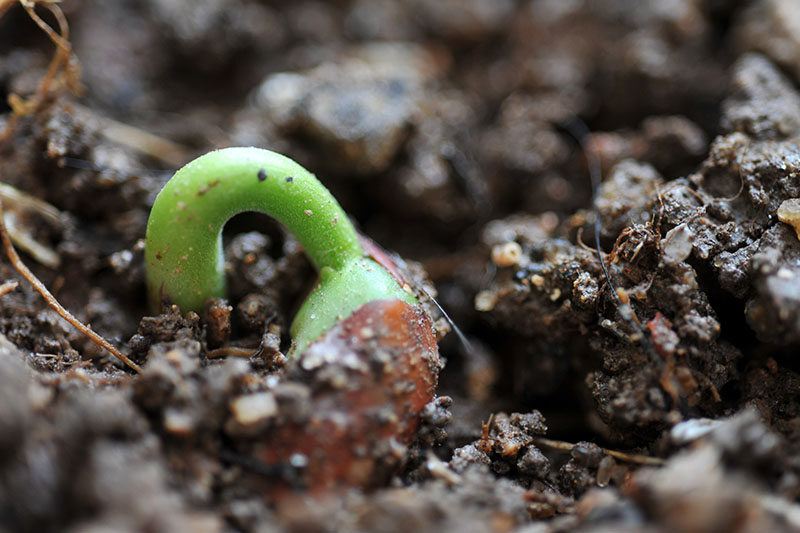
And there’s really nothing like watching bean sprouts emerge from the soil.
While the smaller seeds of other garden plants may leave you guessing as to whether each tiny sprout is a weed or not, these seedlings leave no doubt – they are easy to recognize.
We link to vendors to help you find relevant products. If you buy from one of our links, we may earn a commission.
I’m going to cover everything you need to know about growing bush beans in your veggie garden.
Before we get started, here’s an overview of what’s to come in this guide:
What You’ll Learn
What Are Bush Beans?
Both bush and pole bean cultivars are members of the same species, Phaseolus vulgaris, also called “common beans.”
What distinguishes these two types of plants is the way they grow – with a general tendency towards determinate or indeterminate growth, terms you may be familiar with from reading about tomato cultivars.
Determinate plants tend to grow into smaller, bushy shapes, and all of their fruits come to maturity at once.
On the other hand, indeterminate plants just keep growing, requiring trellising or cages, and keep producing until something stops them – usually cold weather.
Common beans, which are grown as annuals, have this distinction as well.
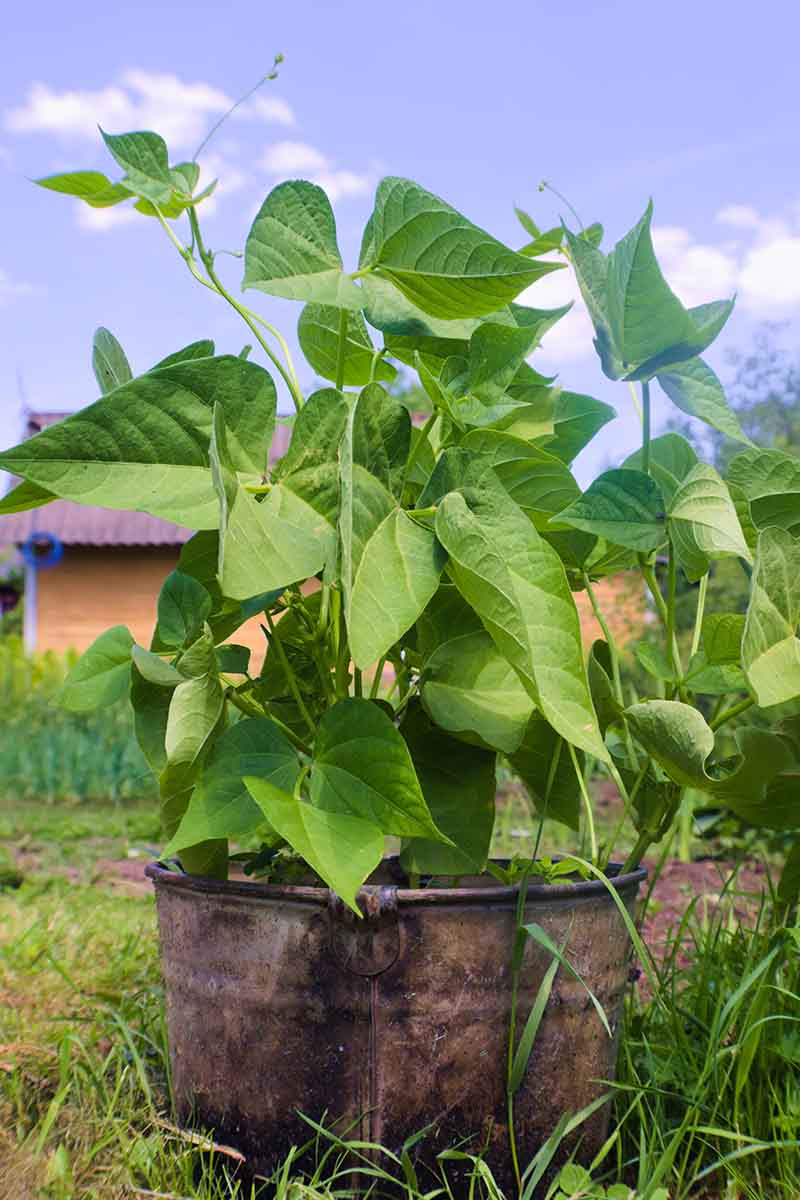
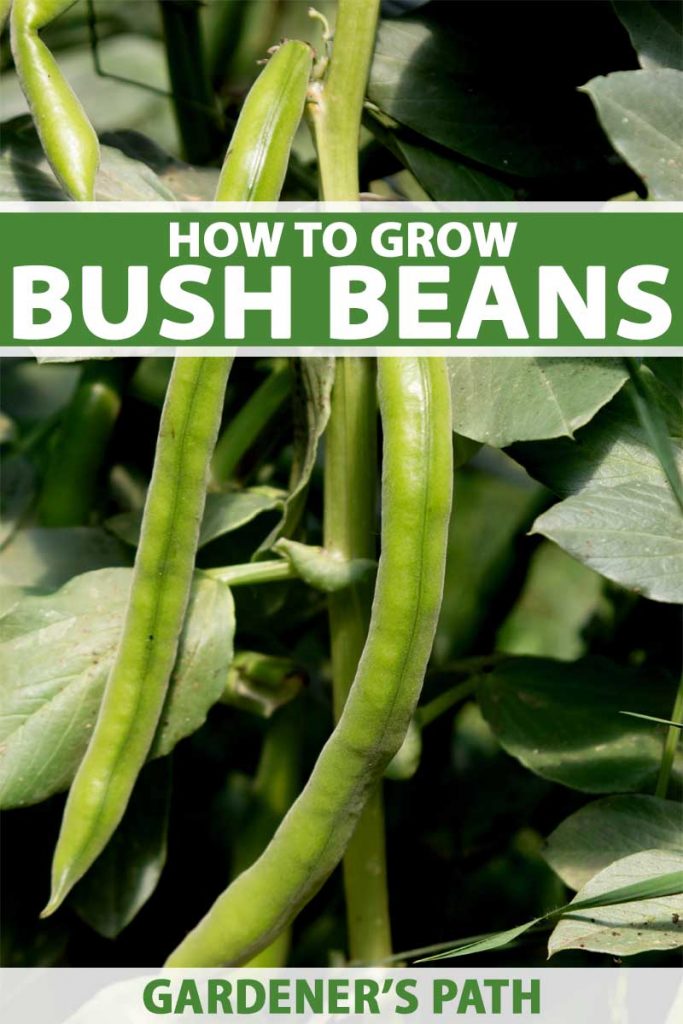
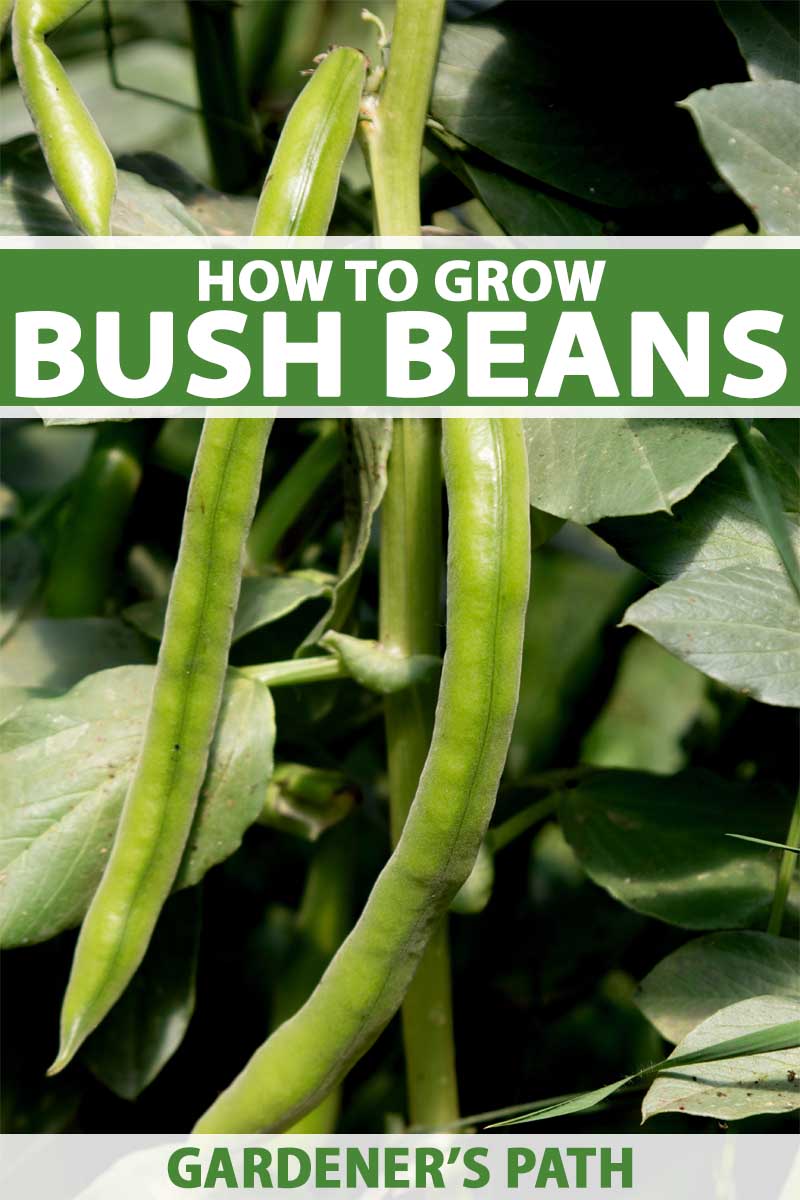
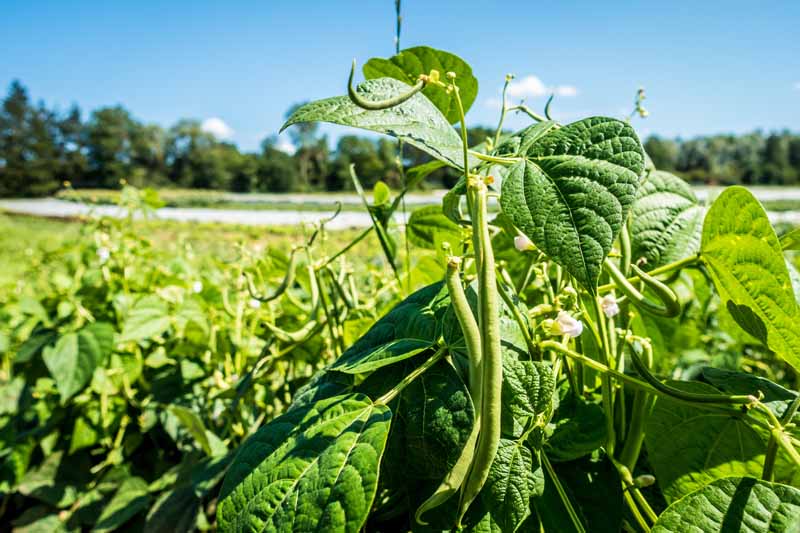
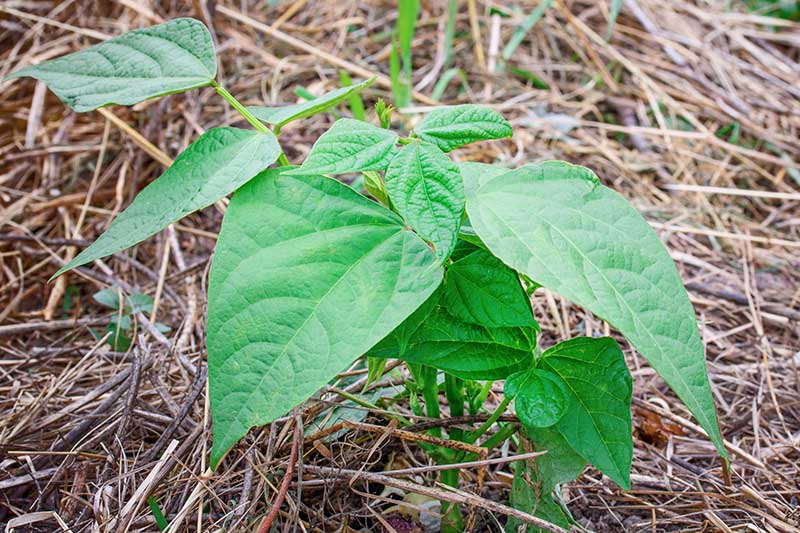
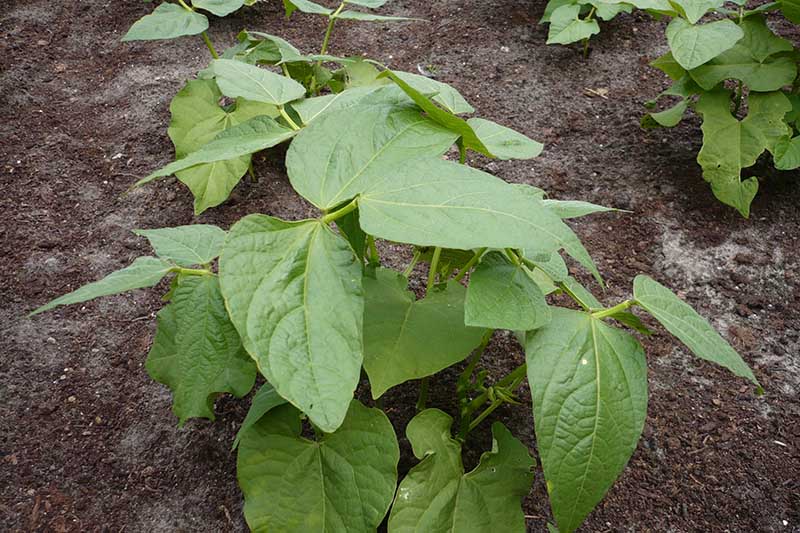
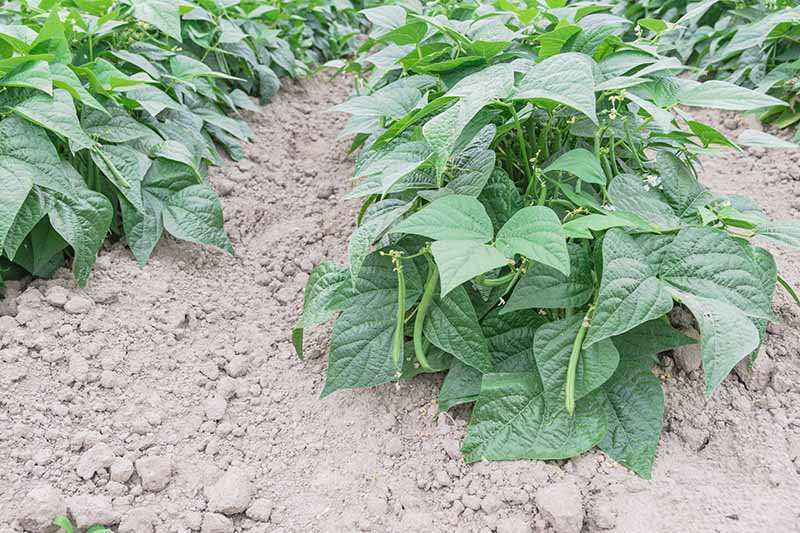
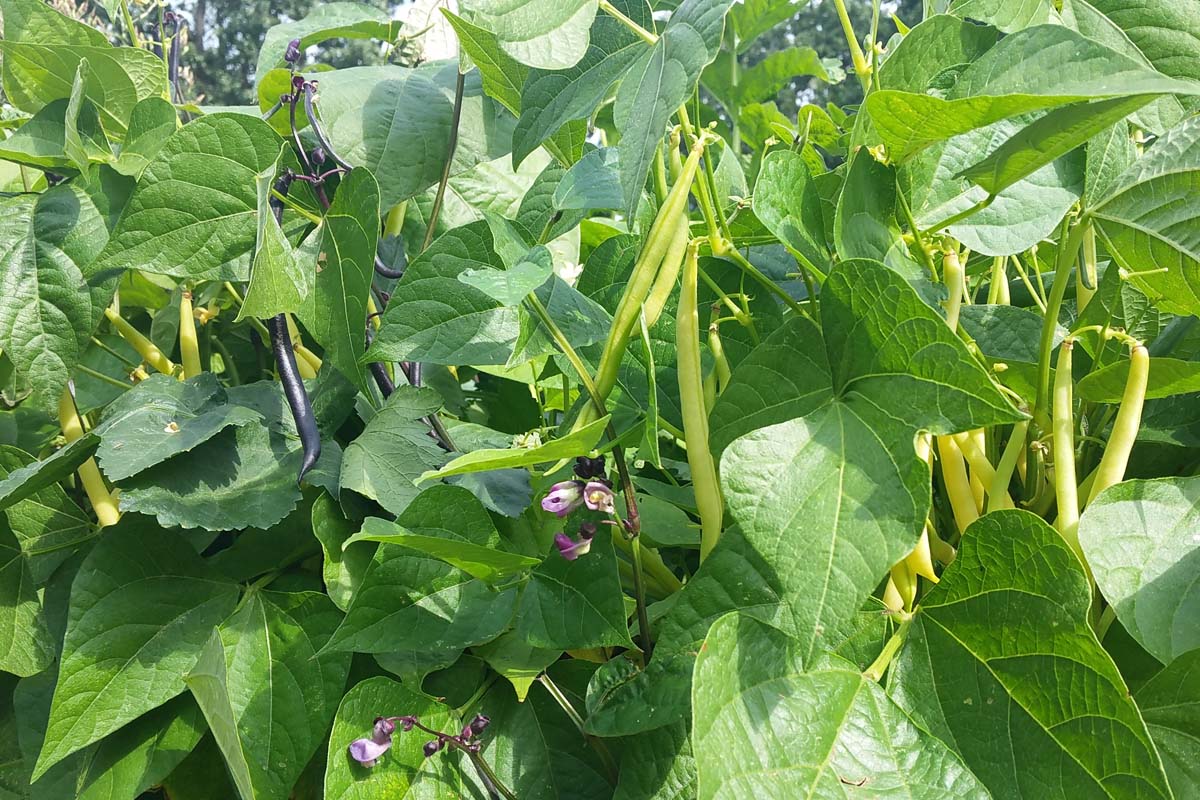
Instead of vining and climbing like pole cultivars do, bush beans grow into a small, bushy shape, usually two feet tall or less.
They are more practical for beginning gardeners who are just getting into the groove, or those who simply don’t want to incorporate trellising into their garden design.
Cultivation and History
Common beans are domesticated varieties of a species of wild plant, P. vulgaris, that is native to a large area of Latin America ranging from northern Mexico all the way down to the Andes Mountains in northern Argentina.
In their native range, wild beans grow in temperate or subtropical climates as annuals or short-lived perennials, and they are vulnerable to frost damage.
Common cultivated beans (including both bush and pole varieties) are descendants of this wild plant.
When you grow these vegetables in your garden, you are following in an ancient tradition. According to a growing guide published by Cornell University as a supplement to their garden-based learning program, they have been cultivated by humans for over 7,000 years.
How to Sow
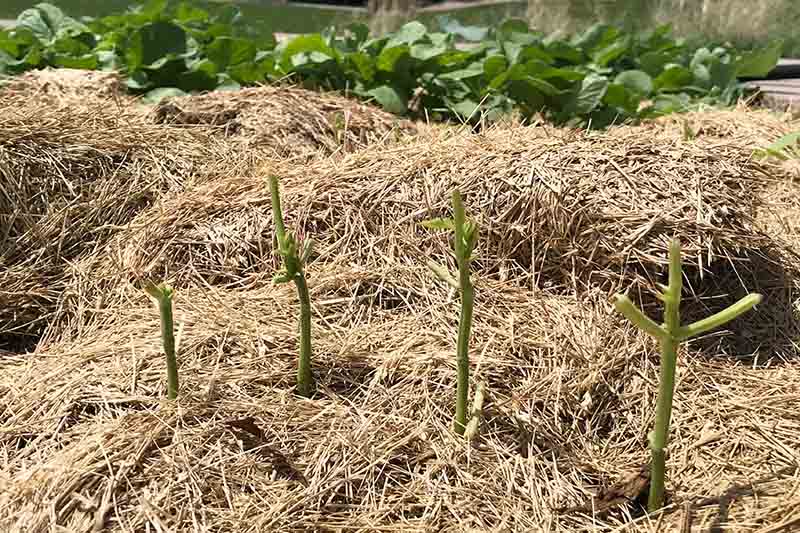
Moving on to more practical knowledge, when you are ready to grow, it is best to sow bush and other types of beans directly into your soil – they do not do well when transplanted.
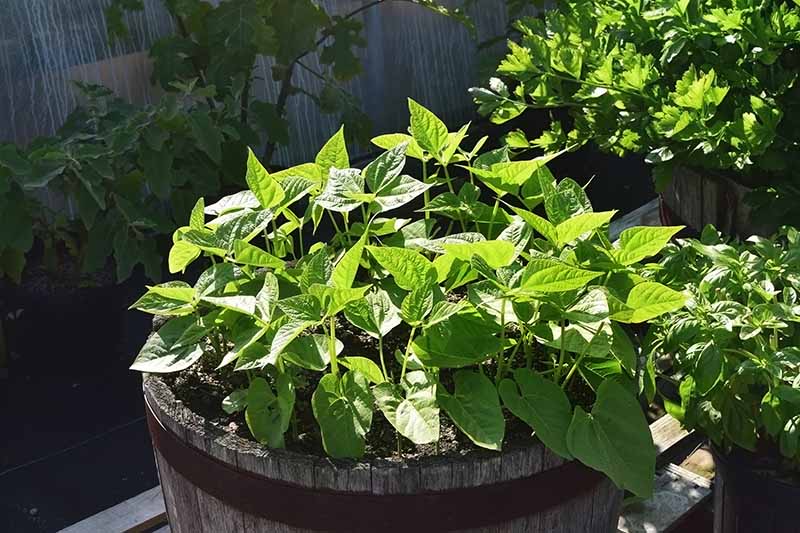
They can be grown successfully in containers with a minimum depth of eight inches. The width or diameter of your pot will determine how many plants you can grow. See our article to learn more about growing beans in containers (coming soon!).
Also, they are warm season plants that should not be planted until after your last frost.
These seeds germinate best in soil temperatures of 70 to 80°F. If you have doubts about the temperature of your soil, you can check it with a soil thermometer.
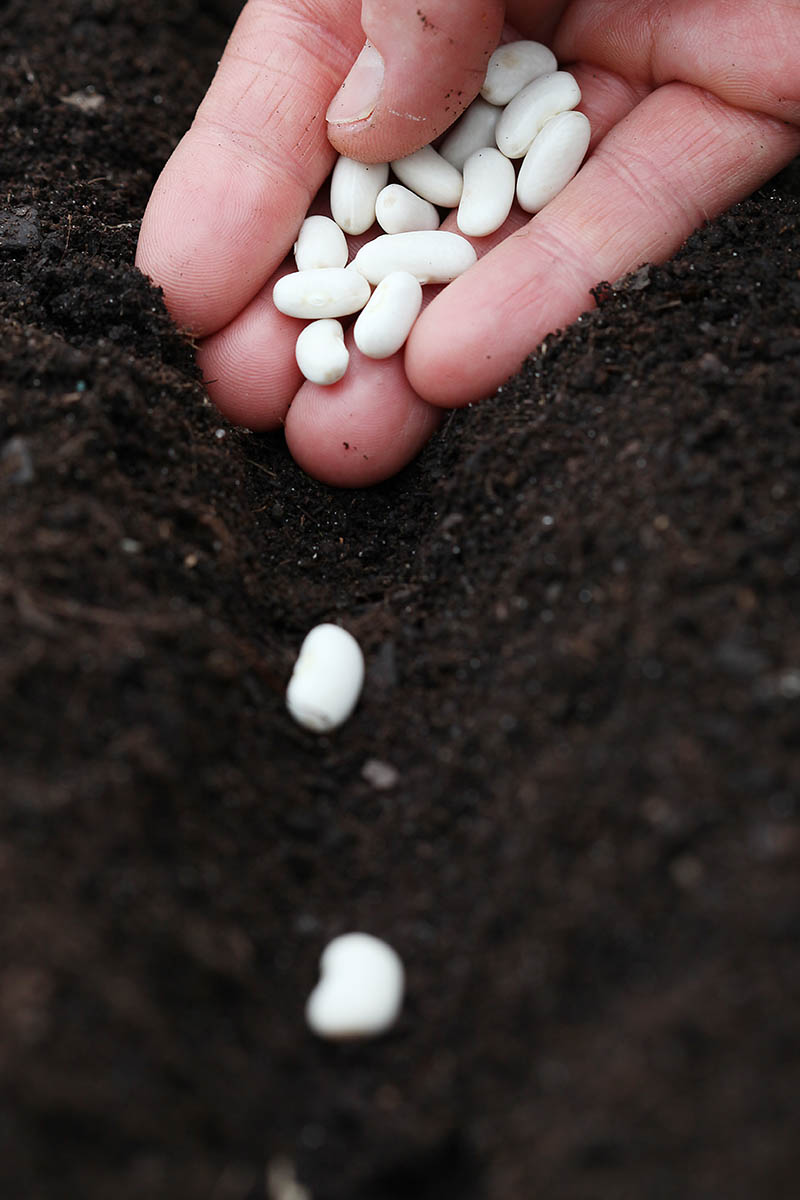
When you’re ready to plant, sow seeds one inch deep and three inches apart. Rows should be spaced 18 to 24 inches apart.
If you are sowing in containers, space the seeds three inches apart and at least two inches from the side of the pot.
I like to use my finger to poke inch-deep holes in my soil, drop one seed into each hole, and then fill the holes with soil.
Pat the soil gently after covering your seeds. This technique – ensuring contact between the seed and the soil – helps to improve chances of germination.
Next, water your newly sown seeds gently, using the sprinkler setting on your watering wand or hose attachment.
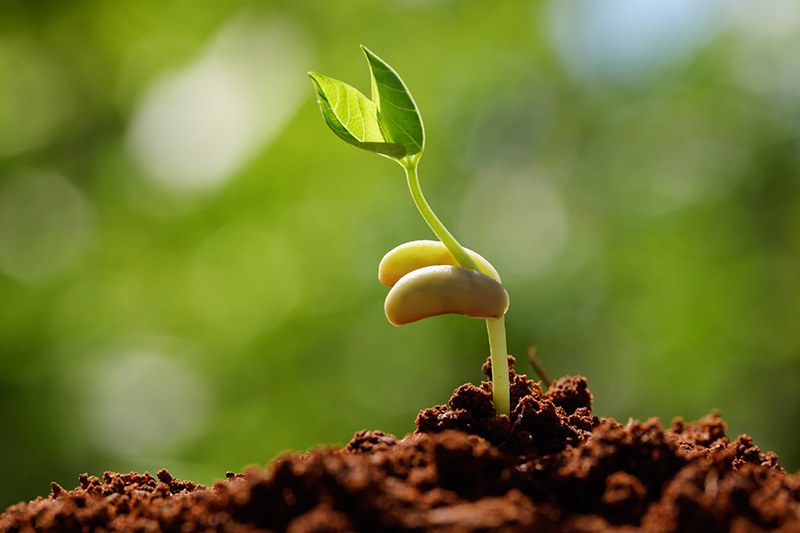
Generally, these seeds will germinate in eight to 10 days. If the soil is below 60°F when you plant, germination will be delayed, and seedlings may take two weeks or more to sprout.
How to Grow
These veggies are fairly easy to grow, but your chances of bringing in an abundant harvest will be greatly improved if you provide your young plants with the conditions they prefer.
Climate
Bush beans grow best when the ambient air temperature is in the 65 to 85°F range.
As mentioned above, soil temperatures should be between 70 and 80°F for germination. If your soil is below 60°F when you sow, the seeds can rot in the ground before they get a chance to sprout.
If you are experiencing cool spring weather, be patient. It’s better to wait and sow your seeds once temperatures warm up.
You can also succession sow every two weeks for a continuous harvest through the summer months.
Just make sure you sow your final crop at least 60 to 70 days before your average first frost date, depending on the days to maturity of the variety you have selected.
Sun
These plants require full sun – that means between six and eight hours a day of direct sunlight in most regions.
Like most garden vegetables, bush beans can tolerate some shade, but they will be more productive and vigorous if grown in full sun.
Soil
Bush beans prefer clay or silt loam soil that is either neutral or slightly acidic, with a pH between 6.0 and 7.0.
Conduct a soil test to learn more about your garden soil and determine its pH – or you can use pH strips to test your soil’s pH yourself.
Your soil should be well-draining and rich in organic matter, so work some compost down into the soil about six inches deep before you sow your seeds.
Your garden soil should also be crumbly – not compacted – so your sprouting seeds can emerge easily from the ground.
To avoid compaction, practice low or no-till gardening, and always avoid walking or standing on your planting beds.
Fertilizer
Legumes like bush beans harvest the nitrogen they need from the air. Adding too much fertilizer will promote leafy growth instead of pod production, so don’t use fertilizer that is nitrogen heavy.
I use well-rotted sheep manure, organic compost, and worm castings to provide my crop with extra organic matter, organic fertilizer, and beneficial soil microbes that aren’t found in synthetic fertilizers.
That’s right, you may not need to use synthetic fertilizer if you are mixing compost into your soil. Jon Traunfeld, Extension Specialist at the University of Maryland, endorses the following mantra:
“Feed The Soil First! The surest way to improve plant growth is the regular incorporation of organic matter such as composted yard waste. Organic matter improves soil structure, slowly releases nutrients, and increases beneficial microbial activity.”
To make up for any deficits in your soil, refer to your soil test and amend accordingly.
Watering
Although this crop requires good drainage, it also needs consistent moisture.
After sowing, keep your raised beds or other planting area moist – but not waterlogged – until they germinate.
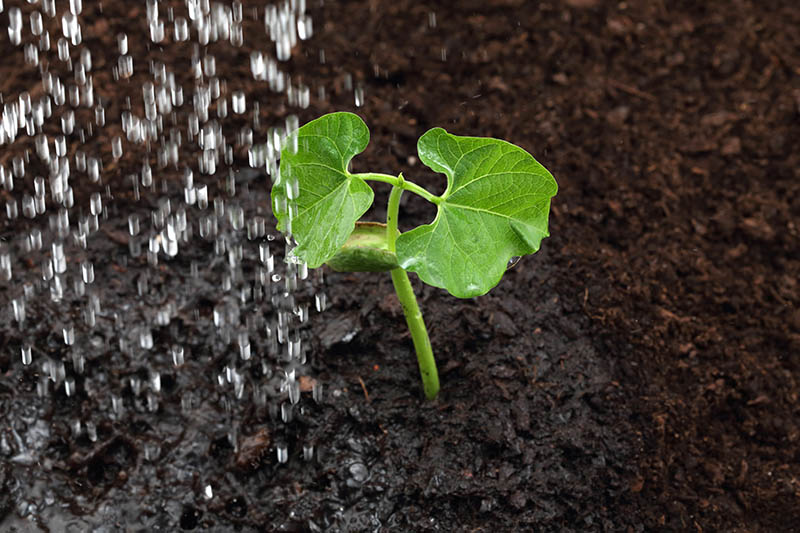
If you aren’t getting much rain, you should be irrigating at least twice a week after plants are established.
However, since these plants are prone to fungal disease, be sure to water them early in the day so that the foliage has time to dry before nightfall, and aim to direct water at the roots of plants rather than watering from overhead.
Growing Tips
- Spread mulch three to four inches deep below plants to prevent weeds from growing.
- Dense plantings help to prevent weeds from growing.
- Don’t be in a hurry to plant your crop if temperatures are still a bit chilly.
- Inoculate seed with Rhizobium bacteria before sowing.
- Frequent harvesting will encourage continued pod production.
- Traditional companion planting lore recommends avoiding growing legumes with alliums.
- These veggies can be grown in containers.
Cultivars to Select
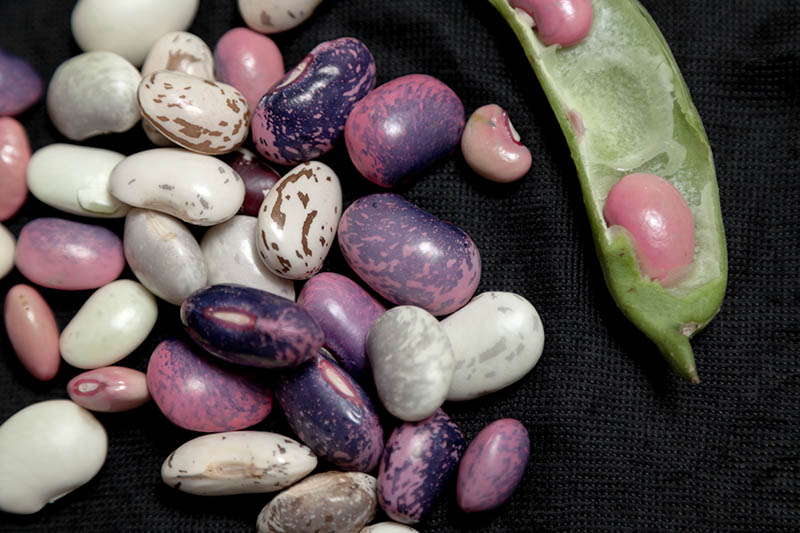
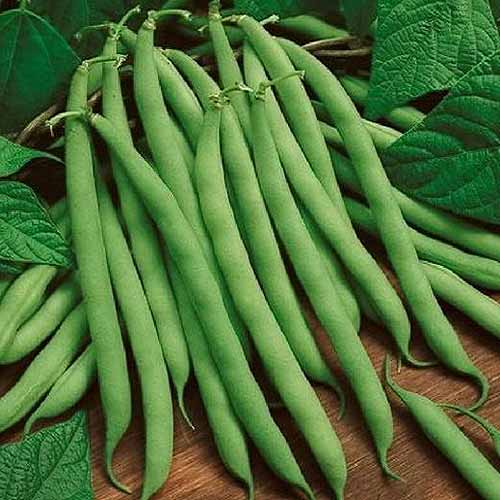
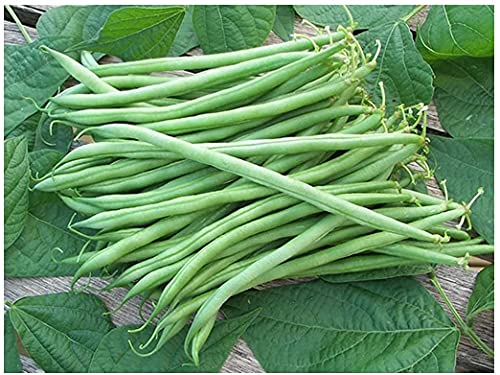
Bush beans come in a variety of colors – various shades of green, yellow, and purple, as well as mottled combinations of two of these hues.
These cultivars also fall into the following categories:
- Snap – Also known as green beans, these varieties are for fresh eating.
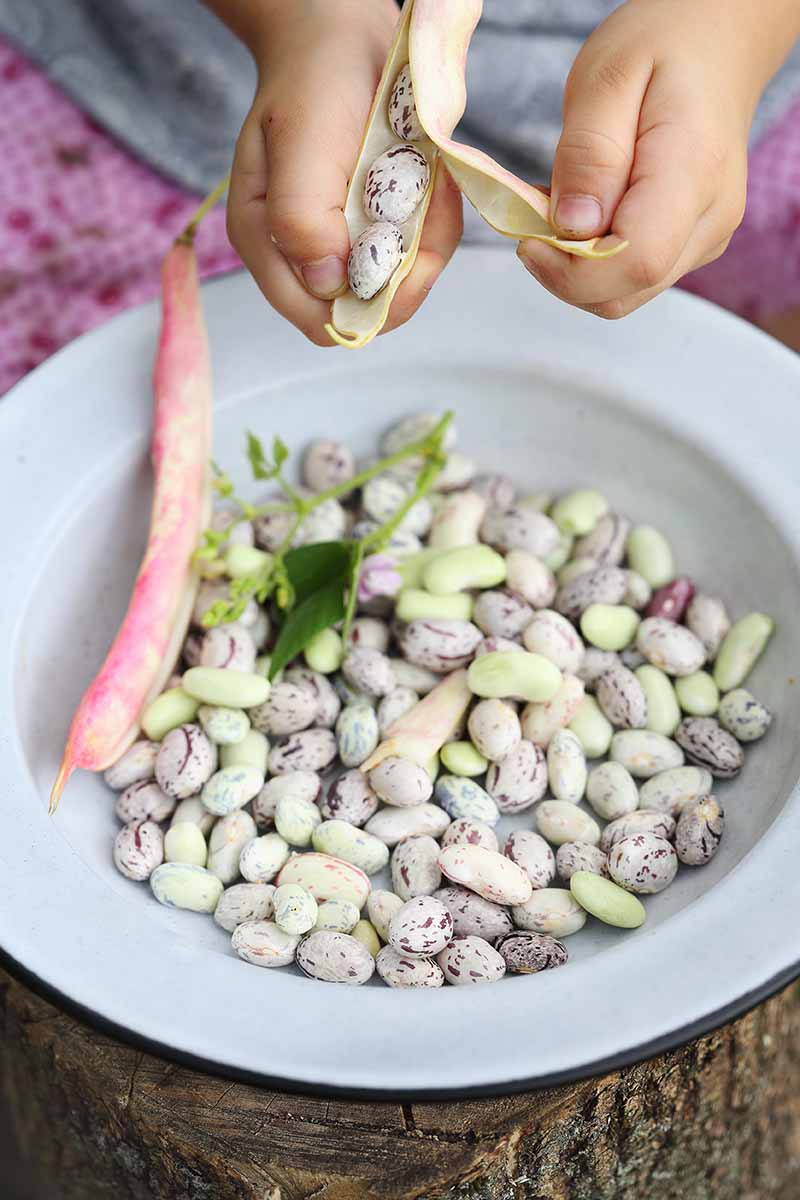
- Shelling – Pods are tough, so only the seeds are eaten.
- Dry – Pods are allowed to fully ripen and dry on the plant before harvest, and can be stored as a winter food source.
- Dual purpose – Some cultivars can either be eaten young, as green pods, or allowed to mature and used for either shelling or drying.
While there are many intriguing shelling and dry cultivars available, in this article, I’ll keep my recommendations to snap varieties intended for fresh eating.
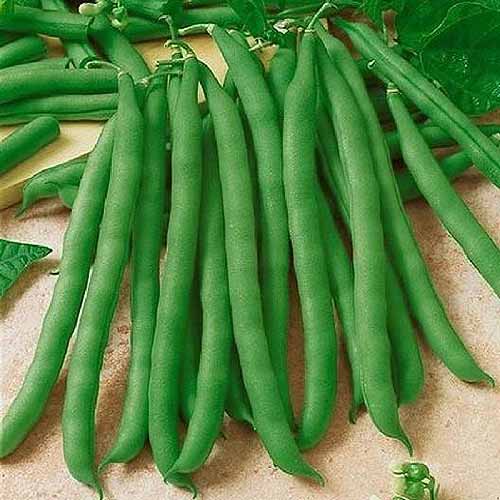
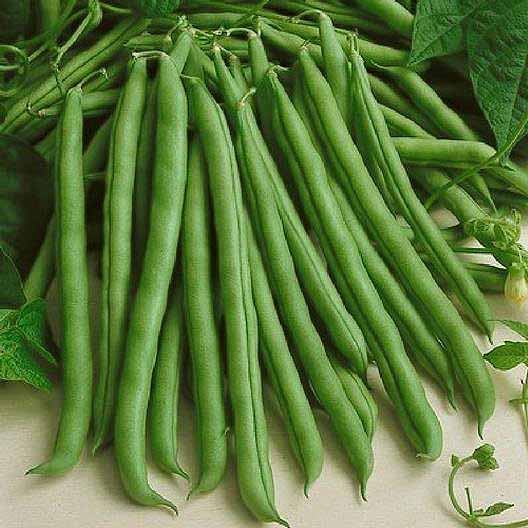
Blue Lake 274
Well known and loved by commercial green bean producers, ‘Blue Lake 274’ was introduced in 1961, developed from a pole variety.
One of the reasons for the popularity of this cultivar is that it is determinate – all of its pods are ready to harvest at the same time. It’s also very high-yielding, another reason commercial producers and home gardeners love it!
The green pods of this heirloom, open-pollinated cultivar are six inches long, plump, and stringless when picked young. They have a firm texture and rich flavor.
Since the pods are typically ready for harvest all at once, they are excellent for canning – but also great for cooking up delicious veggie-centric dishes in the kitchen.
Upright plants grow to 15 to 20 inches tall and have a 10-inch spread, making them well suited for growing in containers as well as in garden beds.
This cultivar is resistant to bean common mosaic virus (BCMV), and matures in 50 to 70 days.
You can find seeds for ‘Blue Lake 274’ at True Leaf Market, Eden Brothers, or Burpee.
Contender
‘Contender’ is a heavy producer that does well in areas with short summers, producing just as well in cool weather as in hot weather.
This open-pollinated heirloom produces green pods that are five to six inches long, round to oval shaped, and stringless, with a strong, distinctive flavor.
Heat-resistant plants grow to 18 to 30 inches tall and wide, and like ‘Blue Lake 274’, they are resistant to mosaic virus.
You’ll have a crop ready to harvest in just 55 days.
You can find seeds for ‘Contender’ at Eden Brothers, True Leaf Market, or Burpee.
Golden Wax
Love wax beans? ‘Golden Wax’ is a cultivar that was introduced in 1959 in Idaho by the Rogers Brothers Company of Idaho Falls.
This heirloom, open-pollinated variety is very productive, and its yellow pods make harvesting easy, since they stand out against the plant’s green leaves.
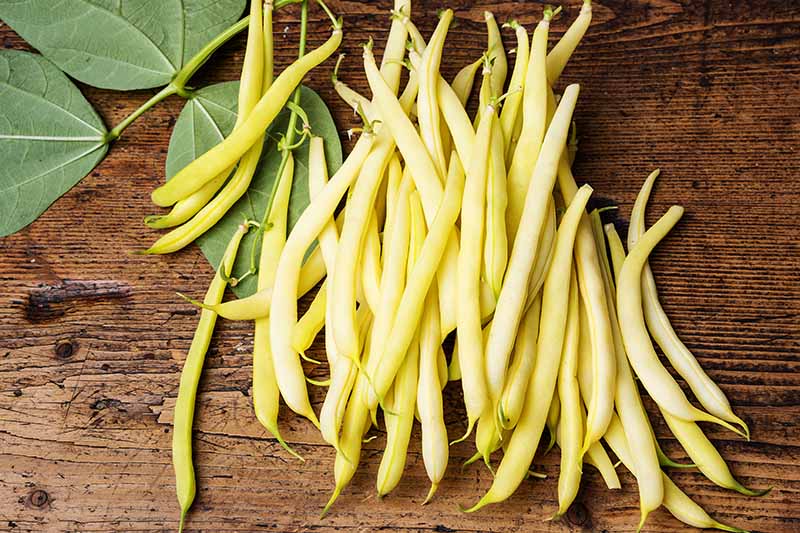
The pods of this variety grow to be five to six inches long. They are straight and stringless.
Making this cultivar even more interesting, the slightly flattened pods contain white seeds that have brown eyes.
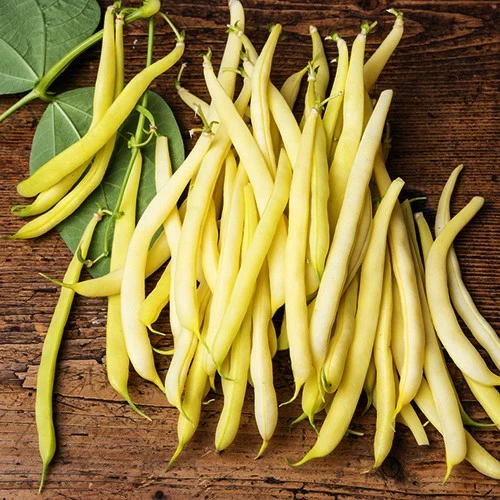
Plants are upright and compact, reaching 16 to 18 inches tall, and they come to maturity in 50 to 60 days.
You can find seeds for ‘Golden Wax’ at Eden Brothers or True Leaf Market.
Provider
An heirloom dating from 1965, ‘Provider’ is a stringless cultivar that is also tolerant of cooler weather and soil temperatures, and it can be planted earlier than most varieties.
This high-yielding, open-pollinated cultivar produces four- to six-inch-long pods that are tender, round, straight, and fleshy.
And when you take a bite of this rich and meaty bean, you’ll find a surprise inside: purple seeds.
Once harvested, ‘Provider’ stores well in the fridge.
Vigorous, compact plants reach 18 inches tall, have a 10-inch spread, and are well anchored by strong root systems.
A real champion of disease resistance, ‘Provider’ is resistant not only to mosaic virus, but also to powdery mildew and downy mildew.
You’ll be harvesting pods from this cultivar in just 50 to 60 days.
You can find seeds for ‘Provider’ at Eden Brothers, True Leaf Market, or Burpee.
Tavera
‘Tavera’ is an open-pollinated filet bean that is described as “extra fine.”
The slender pods of this cultivar reach four to five inches in length, and are a medium dark green color.
Pods are tender, round, and stringless with white seeds.
Plants are medium-sized and resistant to both anthracnose and mosaic virus.
The tasty haricots verts of the ‘Tavera’ cultivar will be ready to harvest in 60 days.
You can find organic seeds from David’s Garden Seeds via Amazon.
To discover even more types of bush beans, see our roundup of the best bush bean varieties.
Managing Pests and Disease
Bush beans are among the easiest garden veggies to grow – as long as you can protect your crop from disease and keep pests out.
Herbivores
Deer, rabbits, and voles might nibble on the buds of your beans. Other culprits who may not dine quite so daintily are raccoons, skunks, and groundhogs, aka woodchucks.
If woodchucks get into your bean patch, your plants may be trampled or look as though they’ve been mowed down.
The best solution for keeping these critters out of your garden is by installing fencing, at least six feet tall to keep the deer out, and sunk six inches under the soil to keep the rodents out.
You can learn more about keeping deer and rabbits out of your garden in our helpful guides, or learn how to build and install your own DIY deer fence.
Insects
Insect damage can make it feel as though all your gardening efforts have been in vain. And when bugs chew on your plants, they can double their damage as they spread disease throughout your garden.
Check your plants regularly for insects and signs of damage, such as holes chewed in leaves.
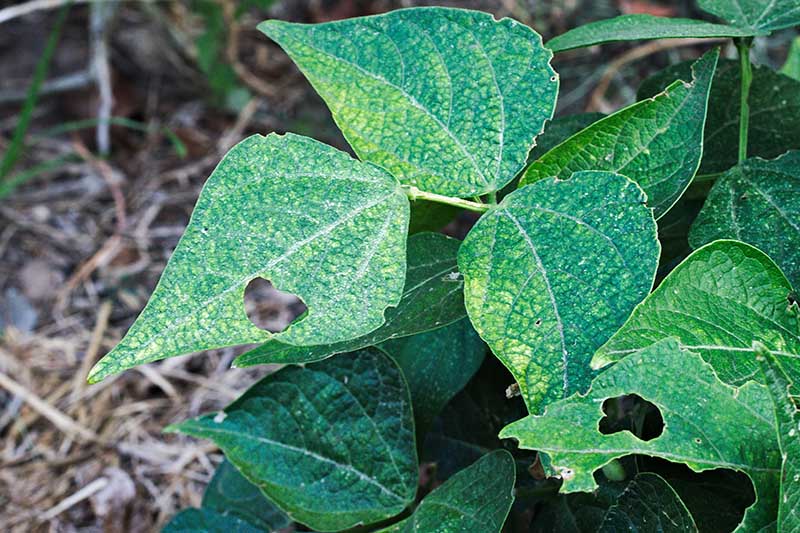
But before you see a bug on your plant and assume it is up to no good, make sure you properly identify it first. You may just have a beneficial predatory insect there, who is doing an excellent job of keeping pests in check.
Planting herbs such as dill and cilantro nearby will help to keep pest populations low, and if they are allowed to flower, they will attract predatory insects.
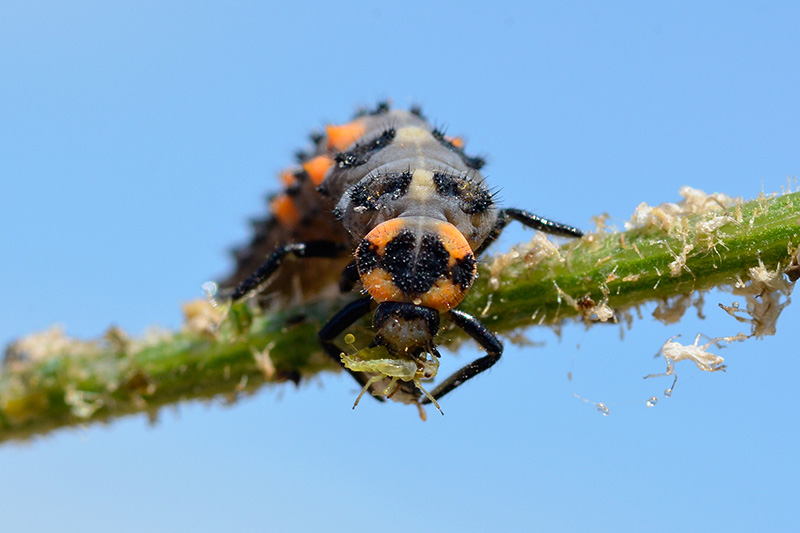
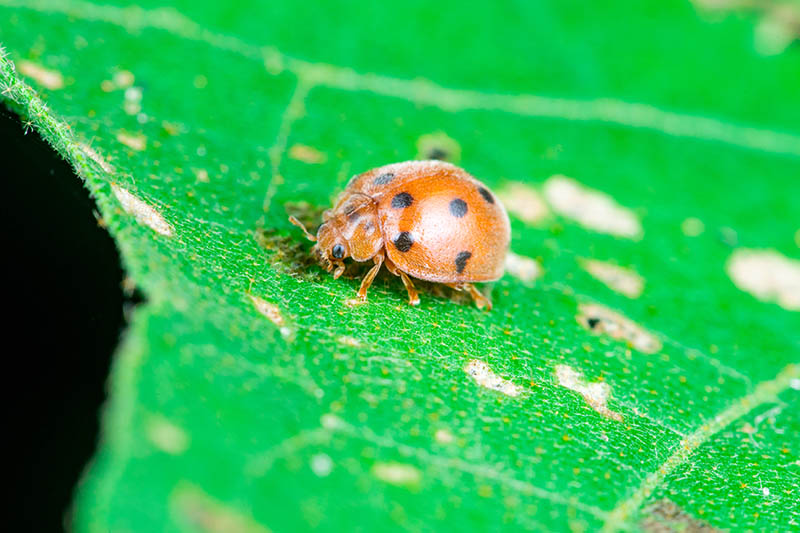
Aphids
Aphids (Aphididae spp.) are one of the smaller insect pests that might target your crop. You’re more likely to find these pests when the weather is dry and cool.
There are hundreds of species of aphids that can affect agricultural crops. Insects may be green, yellow, pink, brown, white, or black.

When colonizing your crop, aphids will suck juices out of the leaves, stunting growth.
Aphid outbreaks can be controlled by washing plants with soapy water, or by spraying leaves off with strong jets of water from the hose.
Beneficial ladybug and lacewing larvae will feed on aphids and help keep their populations in check.
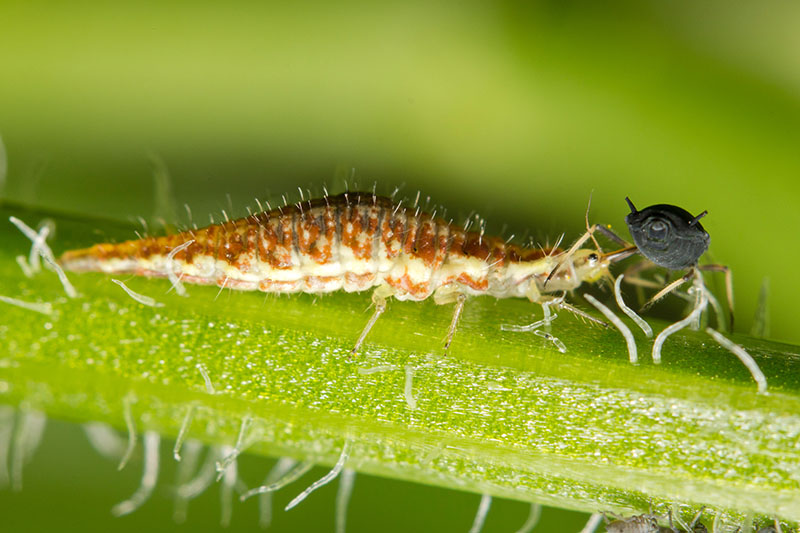
Bean Leaf Beetle
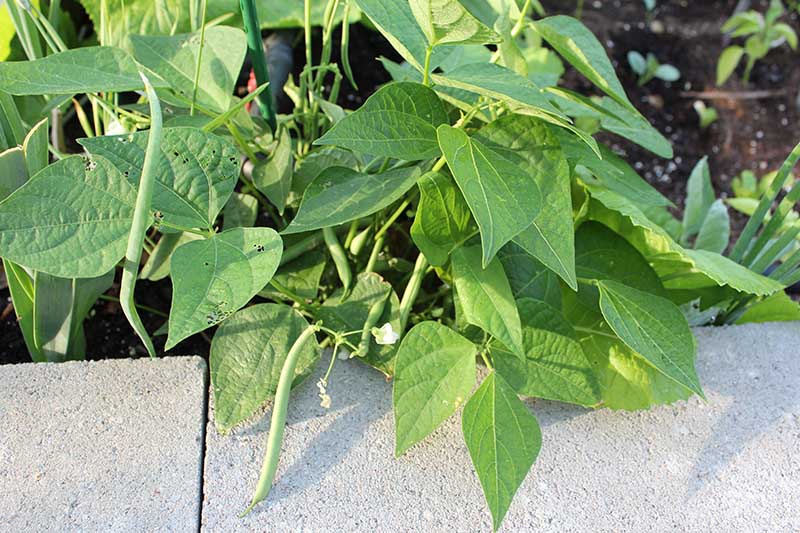
If you find tiny holes in the leaves of your crop, the culprit might be the bean leaf beetle (Cerotoma trifurcate). These insects usually feed on the undersides of leaves, but are also known to chew on pods.
These oval-shaped insects can be yellow, orange, or red with black markings, and mature adults have a black triangle at the top middle of their wing covers.
Bean leaf beetles are common in the Midwest, and prefer areas with poorly drained soils.
They can be controlled by hand picking them off your plants and dropping them into a jar of soapy water.
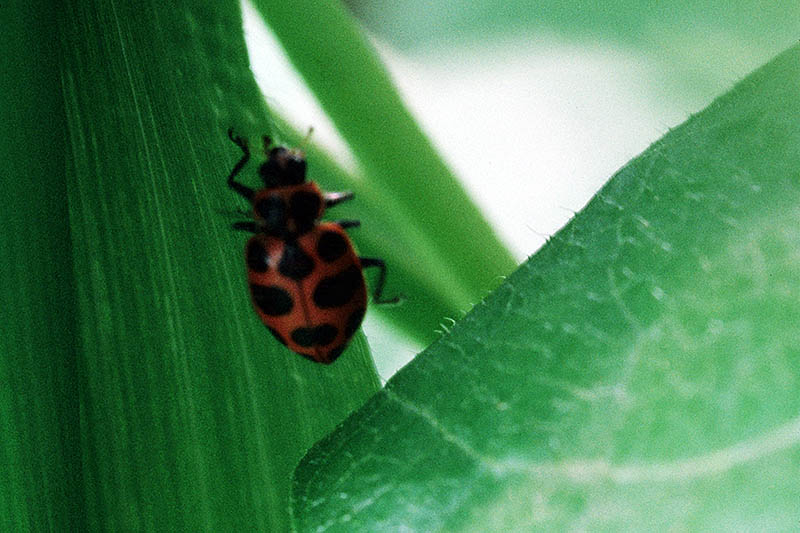
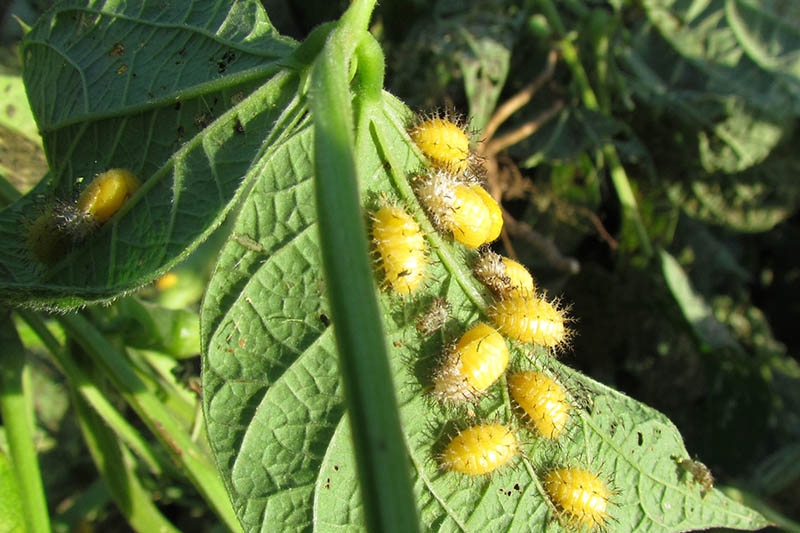
Mexican Bean Beetle
Do the leaves of your plants look skeletonized? It could be the work of the Mexican bean beetle.
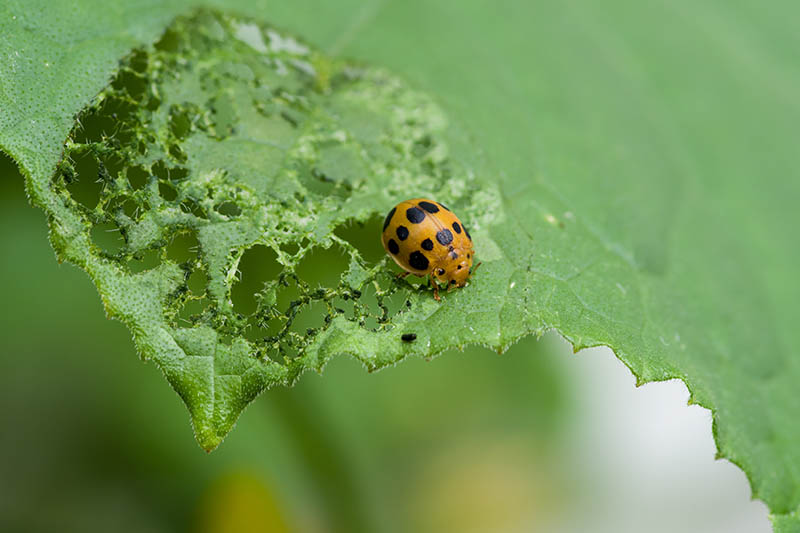
Mexican bean beetles (Epilachna varivestis) look very much like ladybugs, and are a related species. But instead of being red, they are usually yellow or orange in color.
The larval form of this insect is yellow with spikes that eventually turn black.
Since the color of the mature insects can vary, another way to differentiate the good from the bad is by noting that the Mexican bean beetle’s head is the same color as the rest of its body, while ladybugs have black heads with white patches, and they don’t feed on leaves.
In certain climates, you can give your crop a jump-start in defense against this pest by starting your crop early, since these beetles don’t emerge until early summer.
If you notice this pest on your plants, pick them off by hand and destroy them.
Read more about Mexican bean beetle control here.
Disease
Tips for avoiding disease in your bean crop are similar for most diseases. Here are some tips for preventing disease – and how to handle it if it does occur:
- Immediately pull any plants with puckered leaves or strange coloration. Remove the entire infected plant and dispose of it in the trash. Wash your hands and sanitize tools before handling other plants.
- Don’t harvest your crop when plants are wet – you may inadvertently spread bean bacterial blight.
- Practice crop rotation with legumes and other types of crops to reduce disease.
- Plant resistant varieties. Some cultivars have been bred for resistance to specific diseases, like mosaic virus.
- Water close to the soil and avoid overhead sprinkler irrigation.
Here are a few diseases to be on the lookout for:
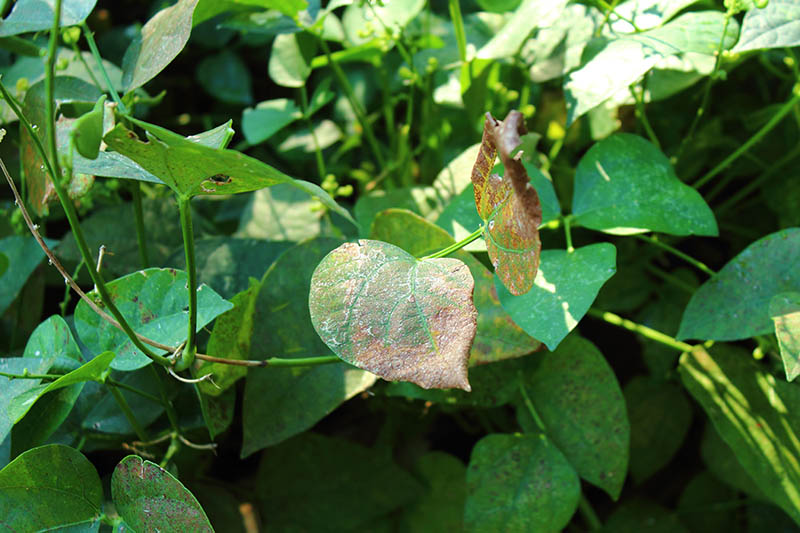
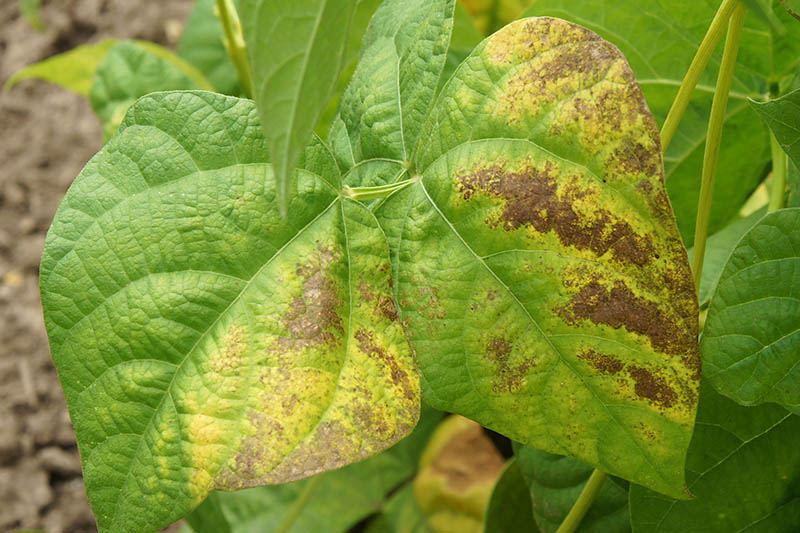
Anthracnose
Anthracnose, caused by Colletotrichum spp. fungi, is more problematic to gardeners when conditions are cool and moist.
Symptoms of infection include red, purple, or black leaf veins; reddish brown spots and streaks on stems, petioles, and leaves; and oval lesions on seed leaves, stems, pods, and seeds.
Since the fungi can overwinter in the soil, crop rotation is important. While there are some resistant cultivars, none are resistant to all strains of fungi that may cause this disease.
Remove and destroy all infected plants, do not place on the compost pile, and disinfect your pruners and gardening equipment to avoid spread.
Bean Common Mosaic Virus (BCMV)
Symptoms of this virus include mottled patterns on leaves in dark and light green, distorted leaves, yellow spotting, and stunted plants.
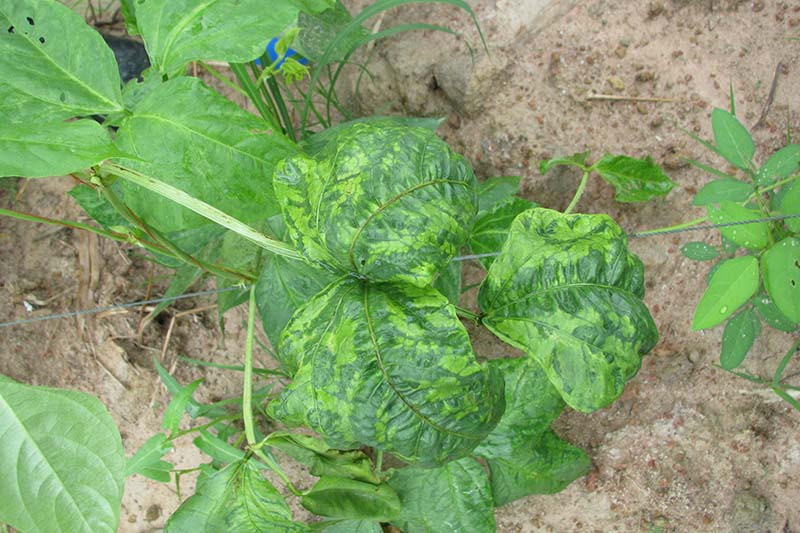
This virus is predominantly seed-borne, so consider planting a resistant cultivar. It can also be spread by aphids. Remove and destroy all plant debris, including the roots, and burn it.
Cultivars that are resistant to this virus include:
- Blue Lake 274
- Contender
- Golden Butterwax
- Improved Tendergreen
- Lancer
- Provider
- Royal Burgundy
- Tavera
- Tendercrop
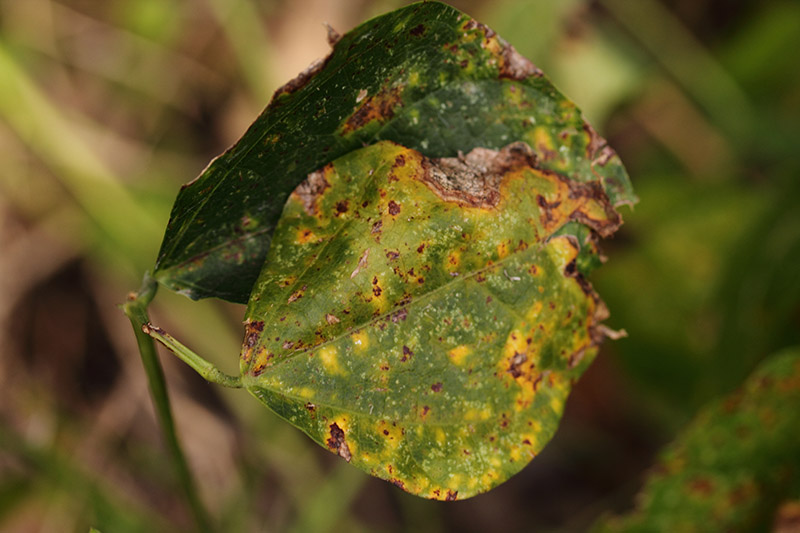
Bean Rust
Bean rust is caused by another species of fungi that can affect your crop, Uromyces appendiculatus. It will cause leaves to drop if the disease is severe.
This fungus thrives in overcast, humid conditions, when temperatures are between 60 and 75°F and exposure to sunlight is limited.
Symptoms include small yellow or white spots on leaves that later turn into rust-colored pustules with yellow halos around them. Spores from infected plants can overwinter in the soil, so crop rotation is essential.
Prune out the diseased sections and dispose of them, then apply a fungicide according to the package instructions.
It’s important to ensure adequate airflow between plants, and to water at the soil level to prevent splashing, which can spread fungal spores.
In the case of a bad infection, remove and destroy all plants. Do not place infected plant debris on your compost pile.
If there is a higher probability of rust due to your local growing conditions, consider planting one of these resistant varieties:
- Boone
- Concesa
- Crockett
- Hickok
- Jade
- Lewis
- Lynx
- Roma II
- Sea Biscuit
- Valentino
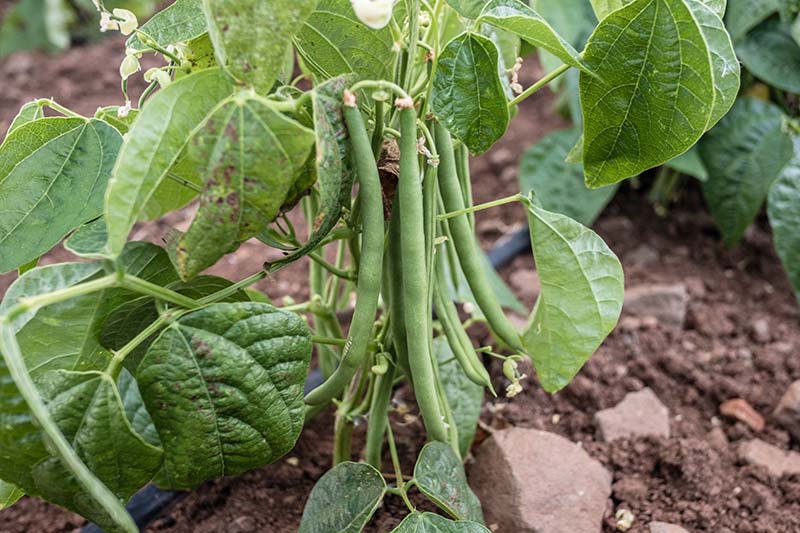
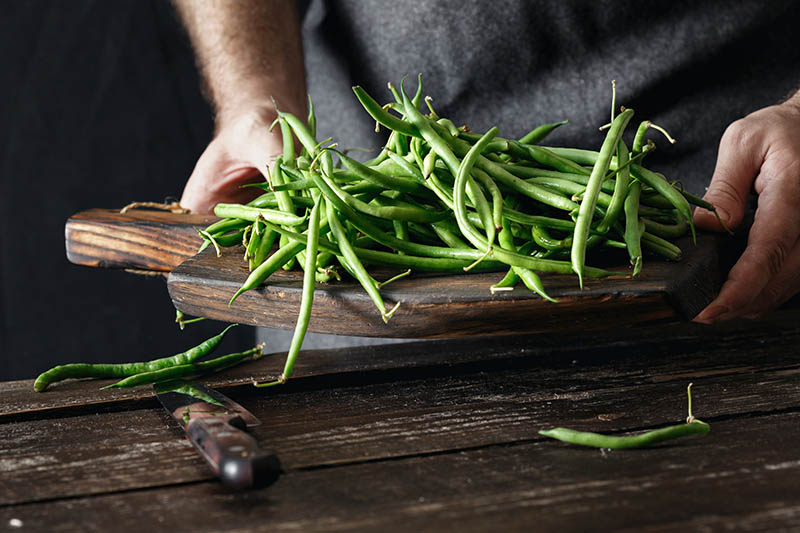
Harvesting
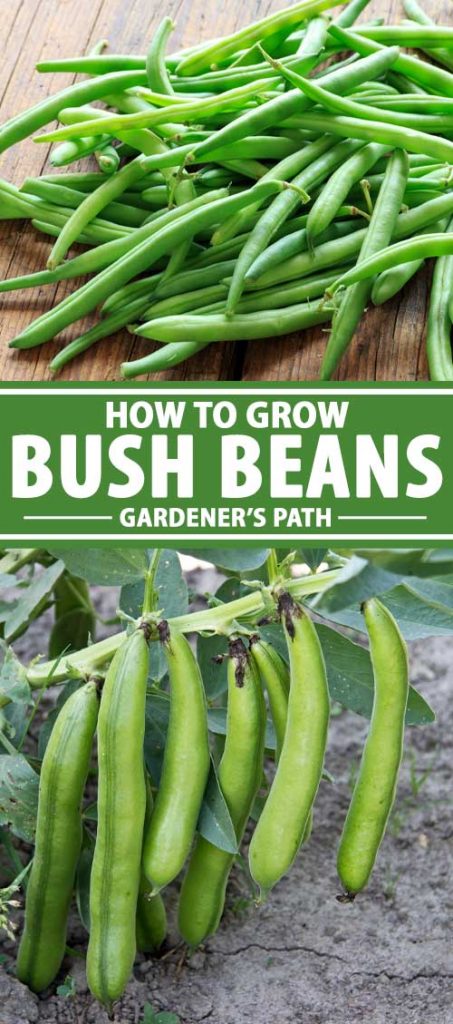
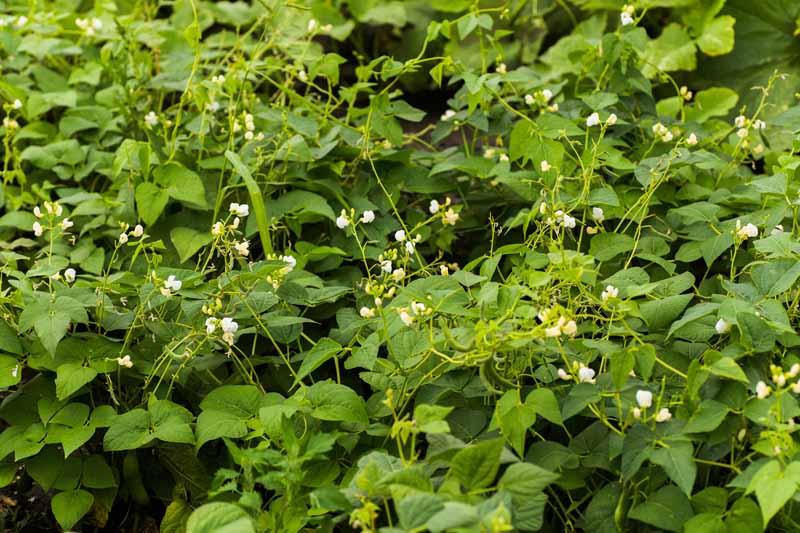
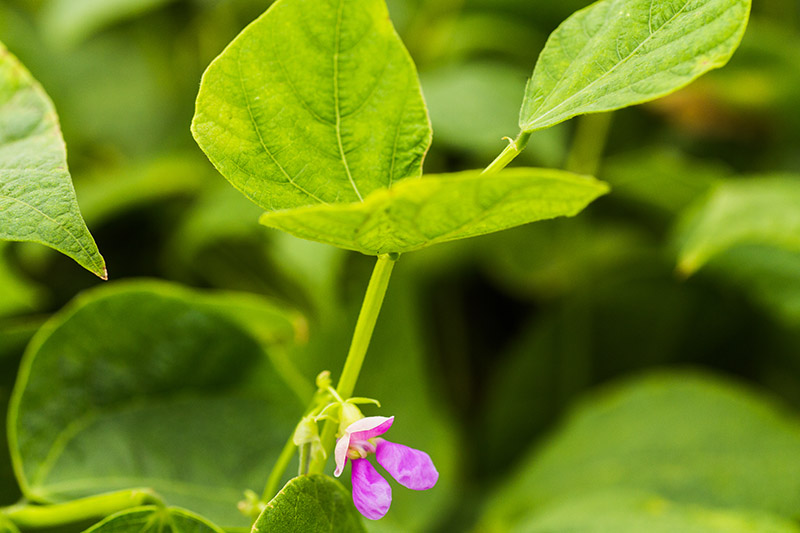
Pods are usually ready to pick 45 to 65 days after planting, or one to two weeks after blossoms appear.
This crop is harvested for its green pods before they are fully mature – pick them before the seeds make the pods bulge, unless you are planning to save some of the seeds from heirloom varieties to plant again next year.
The pods should be long, firm, and crisp.
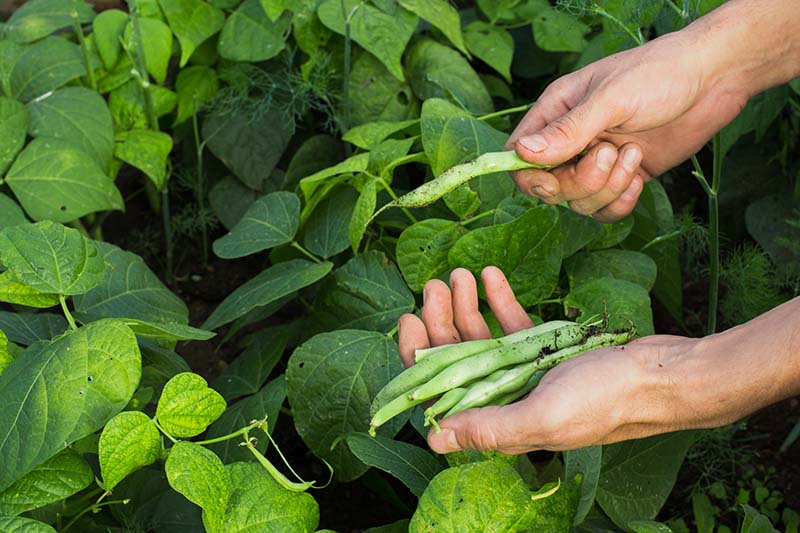
Make sure to wait to harvest your crop until morning dew or irrigation has dried, to avoid spreading disease.
Picking pods frequently will encourage continued production on indeterminate plants – the more often you pick, the more pods you get!
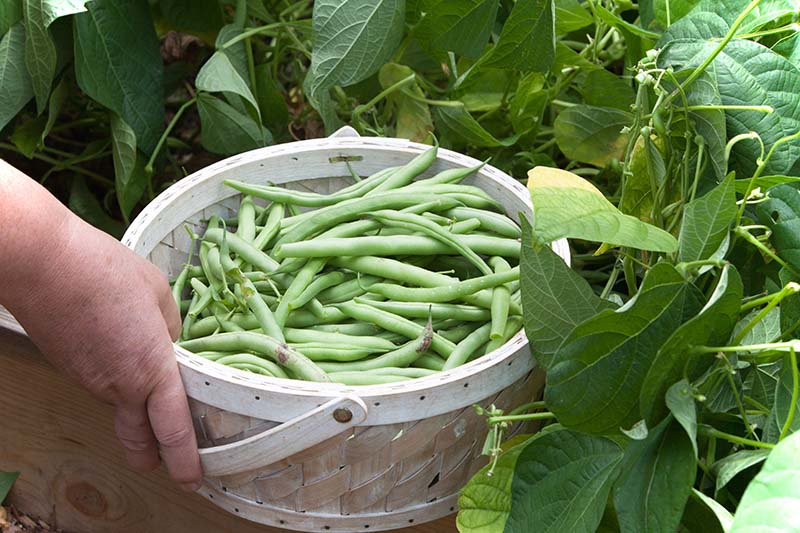
Ideally, you should use your harvest quickly – store it in the fridge in a perforated plastic bag and use within a week.
According to Daniel Brainard, Vegetable Extension Specialist at Michigan State University, and fellow authors, these veggies should not be stored under 41°F, because chilling injury can occur.
Chilling injury causes general discoloration or pitting of the surface, and makes your harvest more susceptible to pathogens that cause decay.
Find more tips on harvesting here.
Preserving
I generally don’t keep these veggies for long term storage – they all get cooked and eaten as soon as they are harvested. But if you do end up with a bumper crop, there are several ways to keep your beans to enjoy later.
Freezing
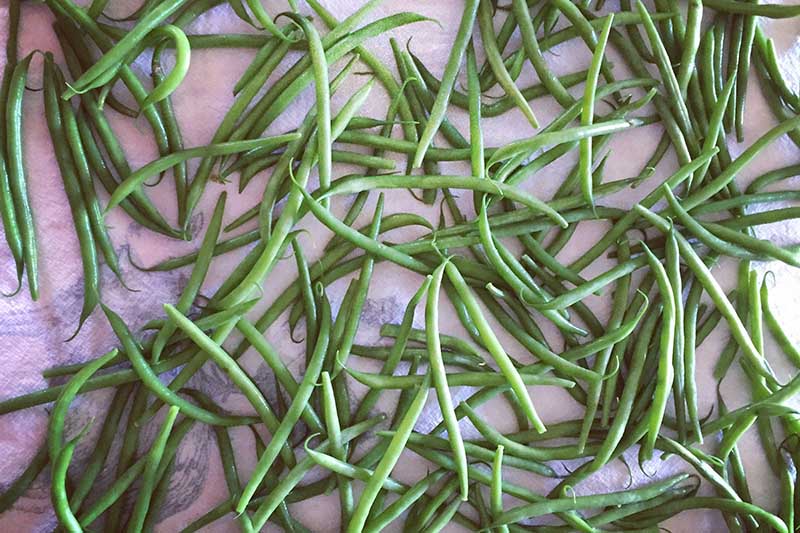
If you’d like to freeze your crop, clean the pods, trim the ends, snap them in half, and then blanch them quickly in boiling water. Cool in ice water, drain, and freeze for up to three months.
You can learn more about freezing vegetables and fruits on our sister site, Foodal.
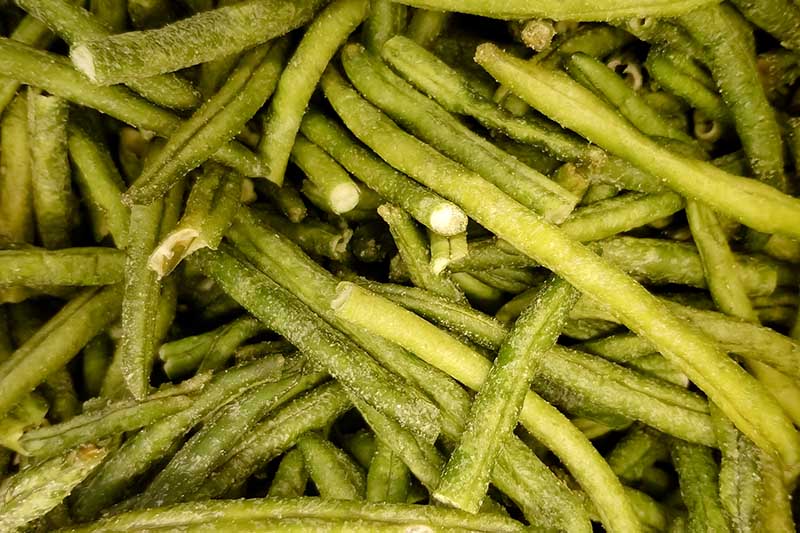
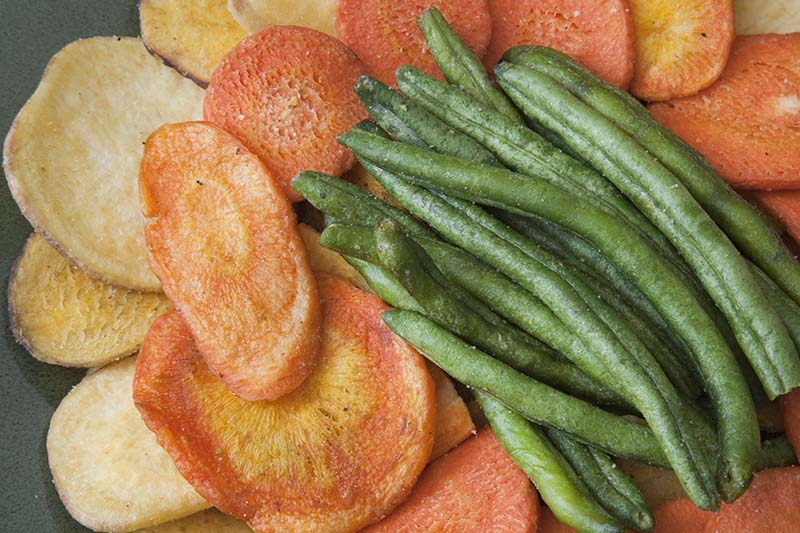
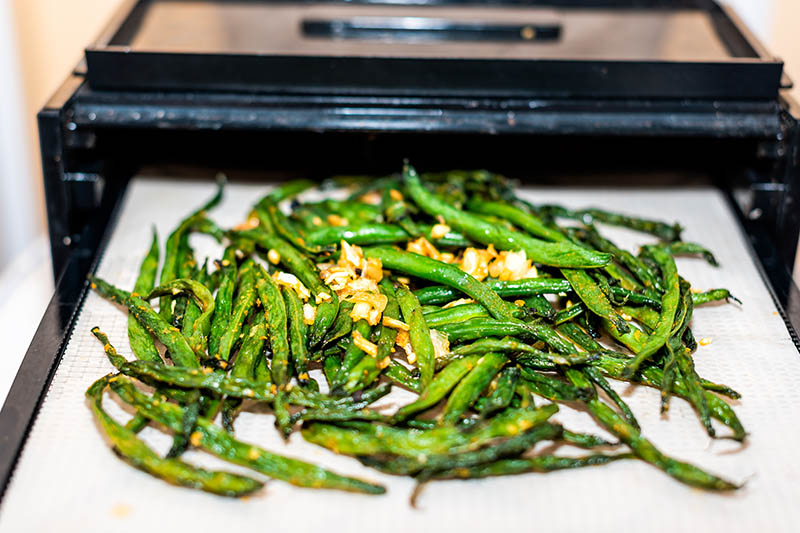
Dehydrating
Dehydrating is another excellent method of long-term storage. Dehydrated pods make a nice snack – and they are a healthier alternative to potato chips.
You don’t even need any special equipment to dehydrate your harvest! You can use your oven.
If you do have a dehydrator, this will be a more efficient way to dehydrate larger batches than the oven.
Dehydrators vary from model to model, so make sure to follow the directions for your particular appliance.
After drying, they’ll last for up to a year when stored in an airtight container in a cool, dark pantry.
To learn more about dehydrating these and other vegetables, see our complete guide to dehydrating your garden’s bounty.
Canning
For long term storage, canning your bumper crop is a great way to preserve the fruits of your labor so you can enjoy them year-round, even in the middle of winter.
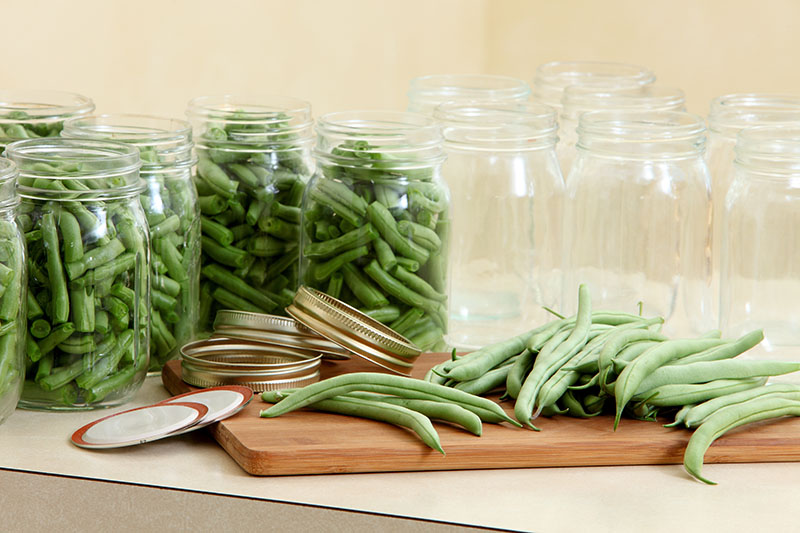
To make sure you can your veggies safely, check out this guide to canning on Foodal.
Fermenting
My favorite way to prolong the life of my green beans is through fermentation.
Fermented veggies have an exceptionally long shelf life, as long as they are kept cool and uncontaminated by dirty utensils.

One of my favorite ways to eat these veggies in the summer is as fermented dilly beans. To make your own, follow this recipe for lacto-fermented dill pickles from Foodal, and switch out the cucumbers for homegrown bush beans.
Recipes and Cooking Ideas
Going beyond preservation, this veggie has so many uses in the kitchen.
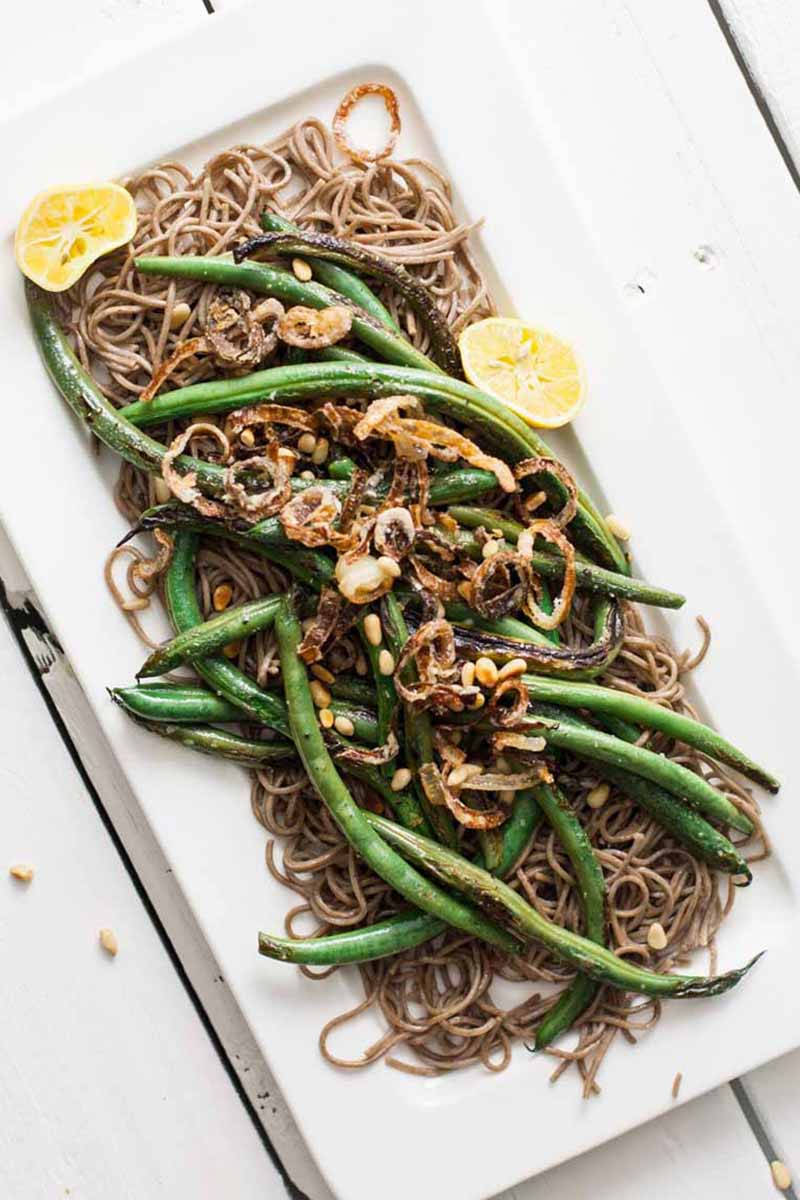
I love mixing them with ingredients that highlight their flavor – and this recipe for soba noodles with green beans and crispy shallots from our sister site Foodal does just that.

Or take your culinary adventure in a slightly different direction and try this recipe for charred green bean salad from Foodal, which also features tasty fried tofu.
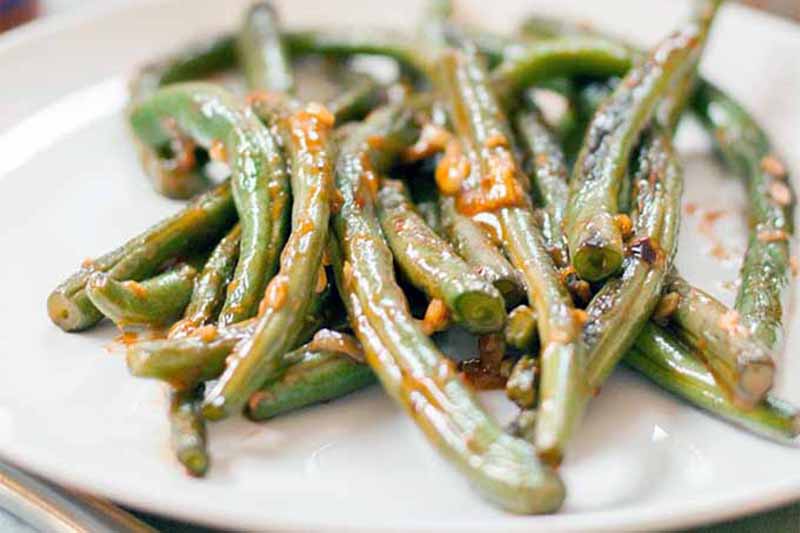
And when all you want is a simple side dish, I recommend this recipe for spicy garlic green beans, also on Foodal.
Quick Reference Growing Guide
| Plant Type: | Annual vegetable | Water Needs: | Moderate |
| Native to: | Latin America | Maintenance: | Low |
| Hardiness (USDA Zone): | 3-10 | Soil Type: | Clay or silt loam |
| Season: | Summer | Soil pH: | 6.0-7.0 |
| Exposure: | Full sun | Soil Drainage: | Well-draining |
| Time to Maturity: | 50-70 days, depending on cultivar | Companion Planting: | Beets, borage, cabbage, carrots, catnip, cauliflower, chamomile, corn, cucumbers, dill, eggplant, kale, marigolds, nasturtiums, radishes, sage, savory |
| Spacing: | 3 inches | Avoid Planting With: | Alliums |
| Planting Depth: | Seeds: 1 inch | Family: | Fabaceae |
| Height: | 18 inches | Genus: | Phaseolus |
| Spread: | 18 inches | Species:: | vulgaris |
| Common Pests: | Aphids, armyworms, bean leaf beetles, corn earworms, cutworms, European corn borers, leafhoppers, cabbage loopers, Mexican bean beetles, seedcorn maggots, soybean looper, spider mites, stink bugs, thrips, vegetable leafminers | Common Disease: | Alternaria leaf spot, anthracnose, bacterial blight, bean common mosaic virus, damping off, downy mildew, gray mold, halo blight, powdery mildew, root rot, rust, white mold |
Beating Around the Bush
Alright gardener, if you’re ready for fresh bush beans, it’s time to get planting. And you’ll be ready to harvest your crop in just two quick months or less.
Are you ready to grow your own? I would love to hear from the first-time bush bean planters out there, particularly new gardeners, young and old. Let us know in the comments if you’re going to go for it and plant your own!
And if you’re looking for more bean growing help, learn more right here:
Thank you for the beautifully designed website with all the detailed pertinent information for the gardening season. The more info I can gather and ingest, the more confident I feel in gardening again after years without growing vegetables. God bless you and your efforts to educate gardeners of all levels of experience.
Hi Pat! What a lovely comment! I’m so glad our work here is helping and inspiring you. Best of luck with your efforts to grow your own food, and always feel free to check in with us and let us know how it’s going!
Thanks for the comprehensive article! I have some bush bean seedlings and will be planting them soon. What is a good spacing for these seedlings when putting them into my beds? Also, if these are considered as a determinate variety, will the bushes simply begin to wither and die after reaching full bloom?
Hi Michael! Glad you enjoyed the article. It’s a good idea to leave at least 3 inches between plants but you can give them more room if you have it. Some bush beans, apparently, will die after they have finished producing beans. But this has not been my experience with most bush bean varieties – as long as you keep picking the beans, they will keep producing up until frost, insects or disease kill the plants. Many garden plants are stimulated to keep producing fruits when you pick them – and if you don’t pick, they might slow down or… Read more »
I’m new to vegetable gardening, having started at the beginning of the pandemic. I have Improved Tendergreen beans growing and would like to know whether it is necessary *at any time* to prune them (assuming good health) or if I just let them do their thing. Thanks.
Hi Michael,
Good for you for growing a garden! There are lots of new gardeners right now, so you’re certainly not alone!
Nope, you don’t need to prune your beans. Just let them grow, produce beans, and then harvest the beans before they get too big and stringy.
Good luck and let us know if you have any other questions come up!
MY PLANT IS GETTING SOME TYPE OF BLUE BERRY ALONG WITH THE WHITE FLOWER. THE BEAN ITSELF IS AT THE BOTTOM HANGING. END OF SEASON HARVEST – JUST WONDERING.
Hi Wayne, Would you be able to share a photo so I can better understand what’s going on? Thanks!
Hi Sipho,
Thanks for the message, glad you found the article interesting!
Very excited to start the beans!
Hi Debra,
I’m with you, beans are probably the seeds I get the most excited about sowing in my own garden!
Have fun and hope you have a bountiful harvest!
I’m a semi-new gardener! First time for beans. Awesome article and great information! Thank you!!
Hi Erika,
I’m so glad that you found the article helpful. Best of luck with your garden this year – and enjoy your fresh bean harvests!
our “bush” beans have long tendrils coming out. do we pinch them off or leave them. I’m almost positive they are not pole beans.
Hi Thomas,
Some bush beans might be a bit more viney. There’s no reason to pinch off the tendrils. If you have some garden stakes, you could put them in near the beans for them to grab on to.
Hope this helps!
Hello! Thank you so much for all of the wonderful information! I wish I would’ve started my research before I started the sees indoors in under grow lamps, but my bush beans are actually growing beautifully. I planted them on Aril 8th. I am just worried about transplanting them as I read they don’t like to be transplanted. I do have a question however. Should I put these directly in my gardening bed (8×4), and with what other legumes? Or should I keep it separate in a large barrel of some sort? I don’t want to over crowd or cause… Read more »
Hi Carolina, Congrats on growing your own bean transplants! They are really easy to grow by sowing them directly in the soil, so next year I would recommend that, but for this year, you’ll want to give transplanting them a try. You may not achieve 100% success with transplanting them (some plants may not make it), but don’t take this as a personal failing if it happens – next year you’ll know what to do. And who knows, maybe you’ll get lucky! It will help to be gentle with the roots when handling them too. Beans (with a couple of… Read more »
My bush beans are very moist underneath. This causes mold on lower leaves and beans. I am thinking about putting raised fencing underneath to allow good air flow. Please advise.
Hi Cheryl, If you are getting a lot of rain at this time of year (I know I am!), conditions will be wet and since we are moving into cooler weather, the moisture may not be evaporating as quickly. I’m not 100% sure I am envisioning your plan for raised fencing. Do you have a photo you could share? Perhaps you are thinking of putting something under the beans foliage that would help prop them up and keep them further from the soil, is that it? If so, I think that might help. If the beans are planted together densely… Read more »