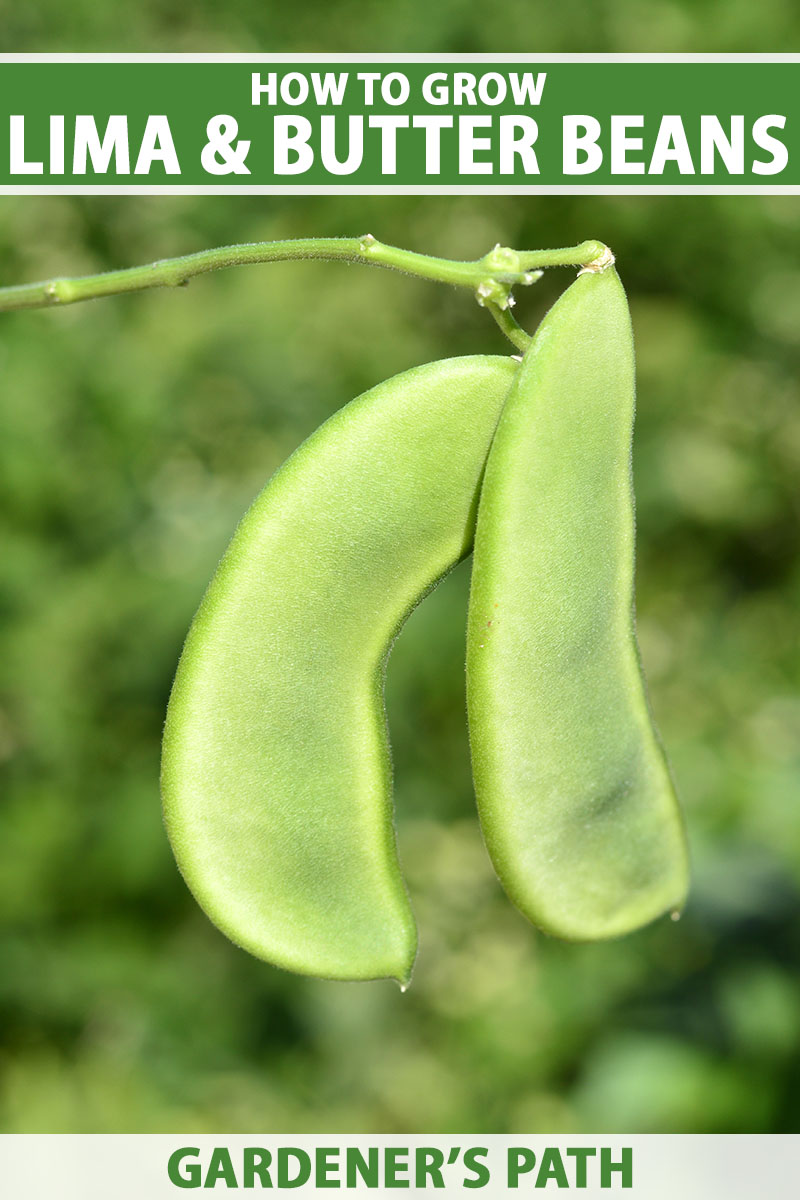
Phaseolus lunatus
Saving money on groceries and tapping a source of stress relief are two reasons home gardeners love to have a veggie patch. But when you grow limas, also known as butter beans, there’s another advantage.
With many Phaseolus lunatus cultivars, growing your own is by far the best way to get a taste of the varieties you just can’t find fresh, or even frozen or dried.
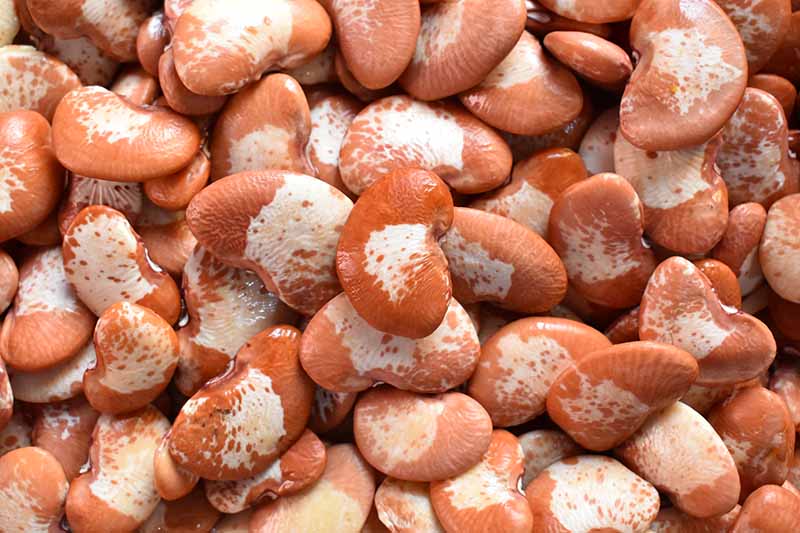
When was the last time you saw shelled buff and maroon ‘Florida Speckled’ limas in your grocer’s produce aisle, for example?
We link to vendors to help you find relevant products. If you buy from one of our links, we may earn a commission.
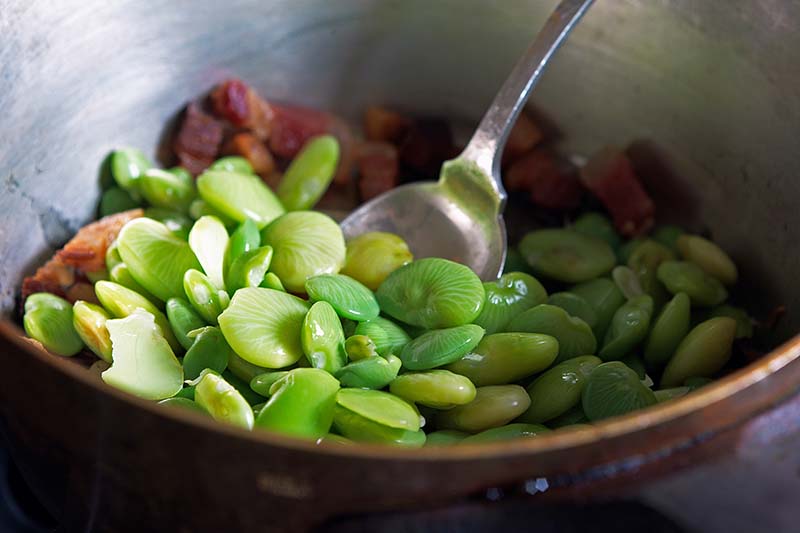
Steamed or boiled, butter beans from a nearby garden are delectable.
Even when you’re lucky enough to live near a farmers market or subscribe to a CSA box that includes fresh limas in season, they cost someone else dearly to grow and shell, and tend to sell out quickly.
When you plant your own, you have a reliable supply to cook fresh as a side dish, or use as an ingredient in bean salads, hummus, or summery soups.
They’re also super easy to dry to stock the pantry for the winter, or to save for planting next year’s crop of open-pollinated heirlooms.
Because the seeds are relatively inexpensive and far easier to find than fresh shellies, you’ll be able to grow lesser-known heirloom varieties to your heart’s content.
I currently have four in my own garden, one bush and three vining types.
You should probably start with just one or two, but it’s great to know there are dozens of options for home gardeners who want to grow butter beans from seed, each with its own growing quirks and unique flavor profile.
I guess you can tell I’m a big fan of these legumes, and not just because I live in the south, where people consider frozen limas a standard side dish, and succotash made with corn, cream, and butter beans is a rite of summer.
If you grow them yourself, I think you’ll learn to love them, too.
I say this even if you despised that flavorless mush that passed for lima beans on the 1970s dinner table, or the limp ones languishing on a steam table in your school cafeteria.
These aren’t just different, they’re sublime – a delicacy that doesn’t cost a lot, but is only reliably available when you’re a home gardener.
Coming up, I’ll detail all the steps you should follow to sow, grow, harvest, and cook with pole and bush varieties of P. lunatus. Here’s what to expect:
What You’ll Learn
What Is a Lima Bean?
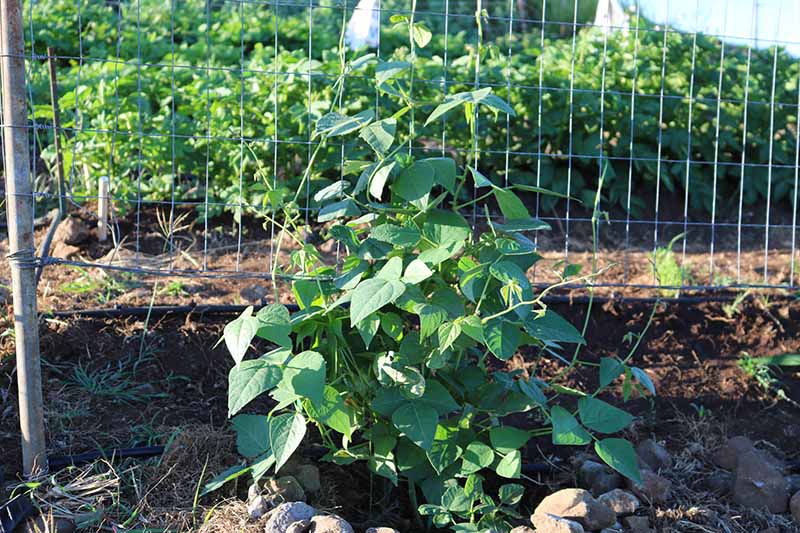
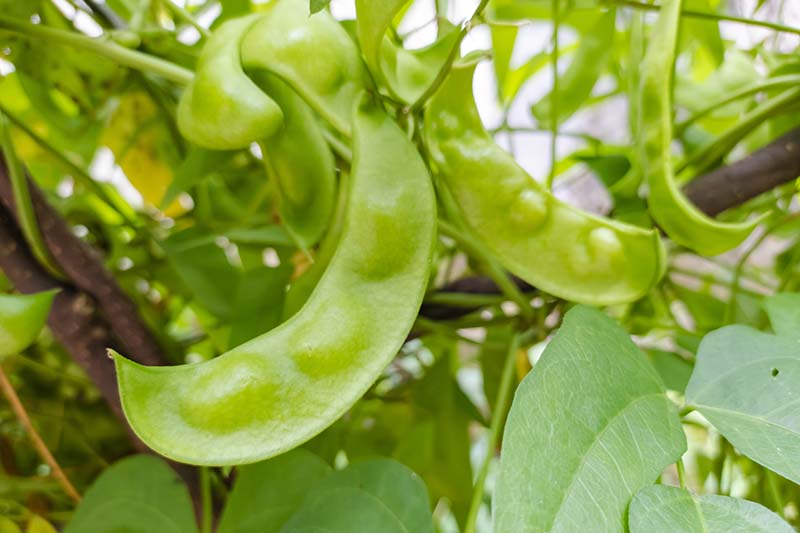
A nutritional powerhouse chock-full of protein, fiber, and trace minerals, lima beans grow on bushes or vines just like common beans (Phaseolus vulgaris).
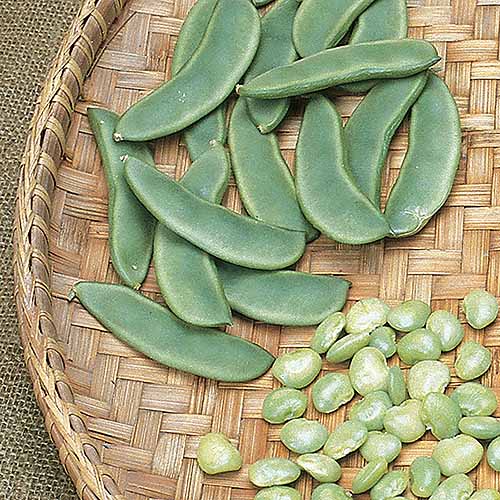
But unlike the common varieties, people only eat the seeds from P. lunalus, not the immature green beans. Nor do we eat the fibrous exteriors – just the succulent seeds inside the green or dried pods.
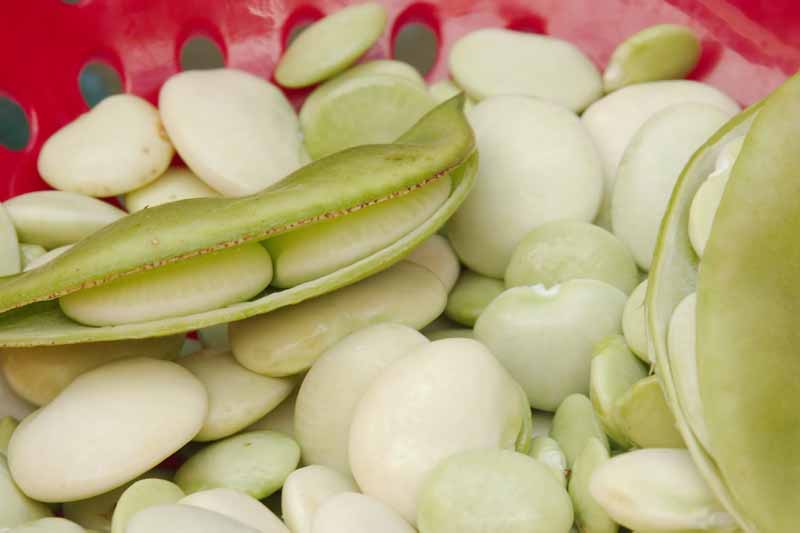
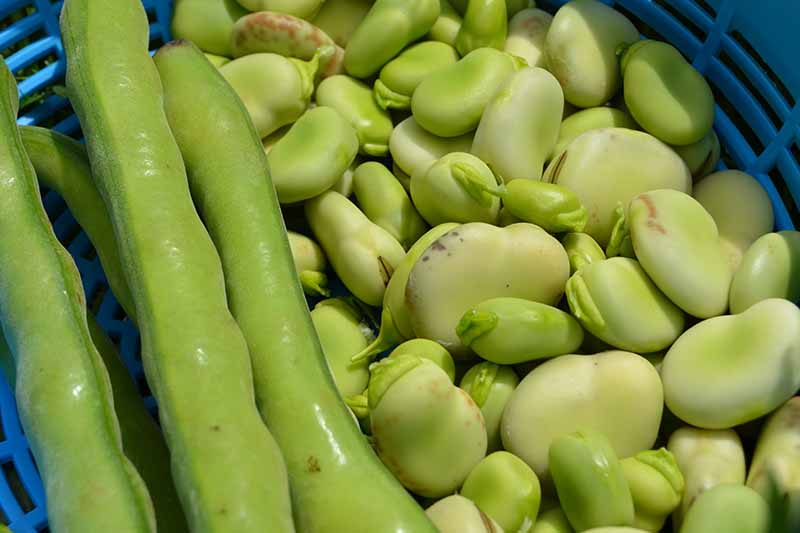
These seeds vary in size from the quarter-inch and spherical butterpea varieties to the half-moon-shaped ‘Big Mama’ seeds that can exceed an inch in length.
The bigger seeds, sometimes called “potato beans,” are starchier, while the “baby” types are more velvety.
Strictly a warm-weather crop, this species originated in Peru, taking its name from that country’s capital.
The plants benefit the entire garden plot by fixing nitrogen in the soil, and adding biomass if you till them under at season’s end.
What’s nice for beginner gardeners who are trying to go organic or at least limit their chemical use is the way these legumes tend to be disease- and pest-free.
Put a few preventive measures in place, like good air circulation and well-draining soil, and they won’t usually require the use of any type of pesticides.
This species is often mistaken for other legumes that produce large, edible seeds in pods, including scarlet runner beans (P. coccineus), kidney beans (P. vulgaris), fava beans (Vicia faba), and soybeans harvested as edamame (Glycine max).
All of those types do share similar growth habits, but butter beans have a unique flavor.
Larger lima seeds are almost earthy, with a baked potato-like texture when cooked, while the baby lima varieties with smaller seeds are sweet and velvety after simmering, with a distinctly vegetal flavor.
Considering you’ll reap such an outstanding taste sensation for your efforts, I’d say growing your own limas or butter beans is a pretty simple process.
Just pay attention to a few of the caveats I’ll share, like waiting for warm weather to sow and never working the plot just after it rains, and you’ll be forking up these tender, savory vegetables before you know it, to enjoy as a summer delight.
Cultivation and History
I’d say these legumes came by their name honestly. The ones with the largest seeds were originally domesticated in Peru, where they’ve been growing for about 7,500 years, and take their name from the country’s capital.
In AD 100-800, the Moche tribe lived near Trujillo in Peru’s Moche River Valley, about 340 miles northwest of modern-day Lima.
In that culture, these legumes were viewed as a status symbol and used in ceremonies. They were regarded as a symbol of eternal life in Moche artwork.
From South America, traders and growers carried seeds for these legumes to the north and into Mexico, where the smaller-seeded “baby” varieties were domesticated. They also made their way east to Spain, then on to Portugal. The Portuguese later carried them to Africa.
Today, limas are a staple food in the American South, where they’re often cooked with ham or other smoked meats.
They’re a key ingredient in Kentucky burgoo, which also includes venison, chicken, or sausage, and is a popular dish to serve on Derby Day.
This type of legume is widely available canned, sometimes labeled as butter beans, with or without pork included. Bush’s brand shows a southern influence and is headquartered in Knoxville, Tennessee (I am, too!).
Growing vine cultivars requires a frost-free season of at least 90 days, which ruled out growing them in areas with short growing seasons up until the early 20th century.
With the introduction of ‘Fordhook,’ released by Burpee in 1907, bush varieties made it possible for far more gardeners in colder climes to begin growing limas. They tend to mature almost a month ahead of their pole variety cousins.
Care to join the home gardeners who are bringing in bumper crops of these legumes? Keep reading for the how-to’s.
Propagation
Before you even think about planting any P. lunatus varieties, check the seed packet or online catalog for details first!
Deciding whether to grow pole or bush types is a decision best made when you’re perusing seed vendors’ offerings, and before you’ve made any firm decisions about which type to grow.
The first consideration is the number of days to maturity. Pole varieties can save you space since they grow aerially and don’t need much distance between plants.
But they can also take 90 to 110 days to produce yield of fresh beans to shell, much less dried seeds, so that’s a big consideration.
Mind you, those are frost-free days, not just “not too chilly” days, so check your calendar and count from your average last frost to your average first frost before committing to a variety that takes a long time to grow.
Now, bush types do tend to mature more quickly, some in as few as 60 days.
The only caveat there is that bush types tend to spread further, getting at least four inches wide and possibly spreading as much as 20 inches per plant.
So, while you’ll have fresh veggies more quickly, you won’t be able to grow as many plants in your garden, which can be a drawback when you have a small space and are looking for high yields.
As for containers, you may be surprised to learn that some pole varieties can grow just as well in them as they do in garden plots.
The key is to pick a pole bean that won’t exceed six or eight feet tall, and then grow it in a pot that’s at least 18 inches deep and wide, so it can support a pole or trellis.
Or, you can opt to grow in containers that you place near a fence for support, instead of installing the support within the planter.
Once you’ve got the selection of pole versus bush variety out of the way, you’ll need to scout out a garden locale with full sun. Six hours a day is the bare minimum for these legumes.
You’ll also need a spot with well-draining soil amended with plenty of organic material, and soil that’s crumbly, not heavy, so the seedlings can break through the crust.
If you only have clay or compacted soil, consider a raised bed or container for the first year, while you make amendments that will make your soil more friable in future growing seasons elsewhere in the garden.
It’s also key to have a soil test performed. The recommended pH for butter beans is between 6.0 and 6.8, and they won’t produce well outside that range.
It can take a few weeks or even months for the soil to respond when you amend it to increase or decrease the pH, so the further ahead you can test, the better.
Like most legumes, limas do need compost tilled into the soil to retain moisture, but you can usually dispense with the supplemental fertilizer. In fact, if you use a nitrogen-enhancing fertilizer, that can make them get leafy at the expense of forming pods.
Once temperatures are reliably warm, about three weeks after your average last frost, plant the seeds.
Don’t jump the gun here. Cold air can damage beans, and cold soil can make them grow so slowly that they can’t outpace disease.
These legumes germinate best when the temperature is between 60 and 70°F.
And this is extra important: Don’t soak the seeds first! There are some bean varieties that benefit from a soak, but limas just come apart.
As a general rule of thumb, plant all lima cultivars an inch to an inch and a half deep, in soil that’s already moist but not soggy.
Some of the larger seeds should be planted deeper, and the seed packet should specify that.
Firm the soil afterwards with the heel of your hand or by stepping on it. You don’t want the seeds to float up and away, but neither do you want them to be planted too deep in the soil to break through as they germinate.
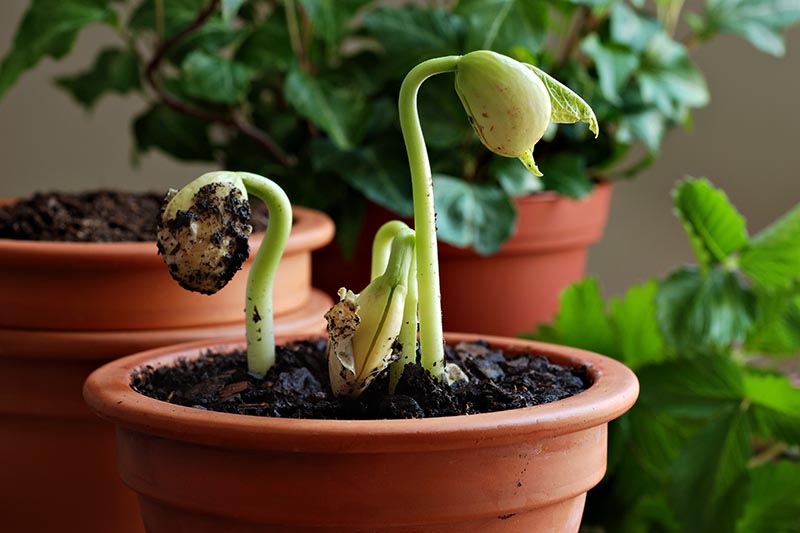
Water the soil well after planting, and keep it moist until you see sprouts.
Germination usually takes about seven days, but can sometimes take two weeks or more, depending on soil temperatures, weather, and the variety you’re growing.
For vines, put supports in place before you plant, and plant the seeds about two inches away from each other so it’s simple to train the runners up the poles, fence, or trellis.
It’s usually not necessary to thin pole varieties, since they grow aerially and you probably won’t get 100 percent germination. If sprouts are closer than about three or four inches apart, though, thin a few of the stragglers.
Space bush types four to six inches apart to start, and plan to thin them later.
If you’re growing them in a garden plot, you might want to plant rows about 18 inches to three feet apart to give yourself a walkway for weeding and harvesting.
For growing bush varieties in a raised bed, you can save space by planting each seed six inches away from the others on all sides.
Once the bush types have sprouted, thin to the healthiest seedlings, spaced 12 inches apart, or further away if the variety you’ve selected spreads more than that.
Instead of pulling the unwanted extras, snip them with scissors at the soil line and compost the clippings. This helps you to avoid accidentally pulling more than one plant up.
When the roots decompose below the soil line, that also adds biomass to the dirt.
How to Grow
“Jack and the Beanstalk” is obviously a folktale, but you may have a lima bean growing experience that is almost that fast and carefree.
Your main obligation is to make sure your growing beans have enough water, particularly when the plants are shorter than six to eight inches, and as they bloom and produce pods.
Ample moisture helps them to become robust enough to resist common diseases, and it improves yields.
Sufficient water also makes the plants grow more quickly, so they’re able to compete with weeds for water and nutrients sooner.
Once the plants grow about a half foot tall, they’re not as vulnerable to weeds taking over and inhibiting their growth.
In the hot summer, the plants need about an inch of water per week. On weeks when it doesn’t rain, give the plants supplemental water at the soil line.
To determine if the soil needs more moisture, stick your pinky in the ground near the stem of one of the plants. If it’s dry to the touch an inch or more down, it’s time to water.
Be sure to water deeply, to keep the roots from growing towards the soil line in search of moisture. Shallow roots can weaken the plants and reduce yields.
I like to stay ahead of the game, so I water in anticipation of predicted dry weather or drought. That way, the growth cycle isn’t interrupted, and I don’t have to slosh great buckets over the soil trying to revive wilted plants after the fact.
Weeding is the second most important chore.
These legumes have shallow root systems, so you don’t want them to have to compete with weeds for water.
Keeping the area weeded will give your plants better odds of accessing available moisture, and applying a two-inch layer of untreated mulch like straw will suppress weeds and keep more moisture in the soil.
If you have a problem with lots of weeds in the garden bed, or lack the will to weed consistently, pole varieties are a good option for you. They are easier to weed and have less ground space for weeds to infiltrate.
With bush varieties, stop trying to weed when they have spread out and the plants have grown six inches tall.
At that point, the risk of uprooting the plant or encouraging waterborne pathogens is greater than any benefit of weeding.
I usually just ignore the occasional weed at that point, because the larger plants are better able to compete for sunlight and water than smaller seedlings.
There’s another way to keep your limas growing strong later in the season: Keep up with the harvest. Picking the mature green pods encourages the plants to produce more.
This also gets back to planning, though. Most of the bush varieties produce their whole harvest within a two- or three-week span, while the vines start late and then produce for a couple of months.
The bush types can be a godsend if you don’t want to keep up with week after week of picking.
If you want to pick within a shorter span, find a bush variety you like. Just make sure to plant it so the two- to three-week harvest window doesn’t occur at the same time when you’re on vacation or have a huge work project due.
Growing Tips
- Plant in full sun.
- Mulch the plants to suppress weeds.
- When the leaves are wet, don’t work the plants or pick the pods.
- Give plants supplemental water ahead of time when heat or dry spells are predicted.
- Keep young seedlings well weeded until they’re six inches tall.
- Pick mature pods often to promote the growth of new ones.
Cultivars to Select
When you’re choosing which cultivars to grow, remember that terms like “baby” describe lima varieties that produce small, pale green seeds, not necessarily small plants.
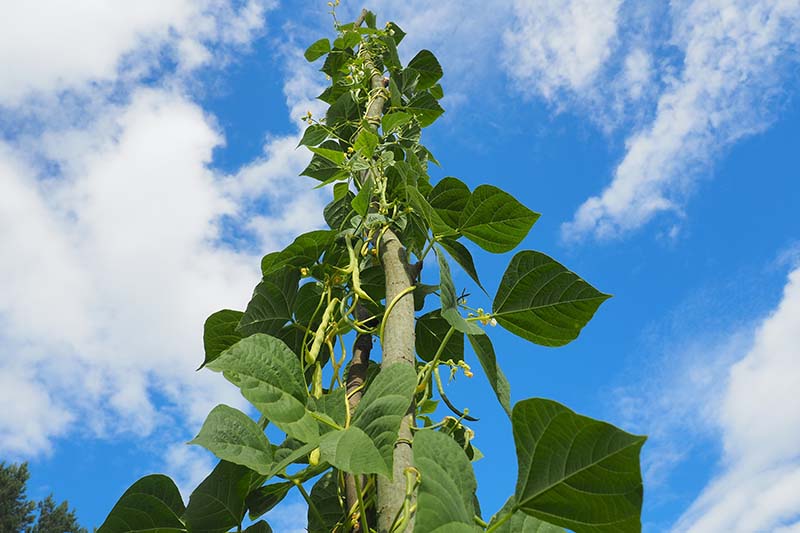
Make sure to check whether your selection is a vine or pole variety, as opposed to a bush. These vining types can grow taller than 10 feet and will definitely need support, whether stake, post, fence, or trellis.
If you select a bush variety, like ‘Thorogreen’ or ‘Henderson,’ it needs more ground space to spread, but can usually do without trellising.
Bush varieties also take less time to yield a crop than vine types, which can help if you want to plant successive crops or are growing in a location with a short season.
Here are a few varieties that might work well, depending on your needs:
Burpee’s Bush
A bush variety that reaches just 15 to 20 inches tall, this is a good choice for containers and other places where you don’t want to fool with supports.
It matures in a relatively short 75 days, yielding clusters of slightly curved, five-and-a-half-inch pods with four or five large, pale green seeds each.
‘Burpee’s Bush’ is available in two- and four-ounce packets from Burpee.
Dixie White Butterpea
A southern favorite due to its tolerance for heat and drought, this “butterpea” is a meaty, white, pea-shaped lima.
In my opinion, northerners should give this one a chance, too, since it takes just 70 days to mature on 20-inch bushes.
The fresh shelled seeds are hearty and savory simmered in broth with a bit of pork and onion. While the beans don’t hold their shape after long cooking, they’re creamy, not mealy, and perfect for use in hummus.

And the plants are prolific, so you can experiment with the harvest and have plenty left over to dry.
‘Dixie White Butterpea’ is available in 50-seed packets from Everwilde Farms via Walmart.
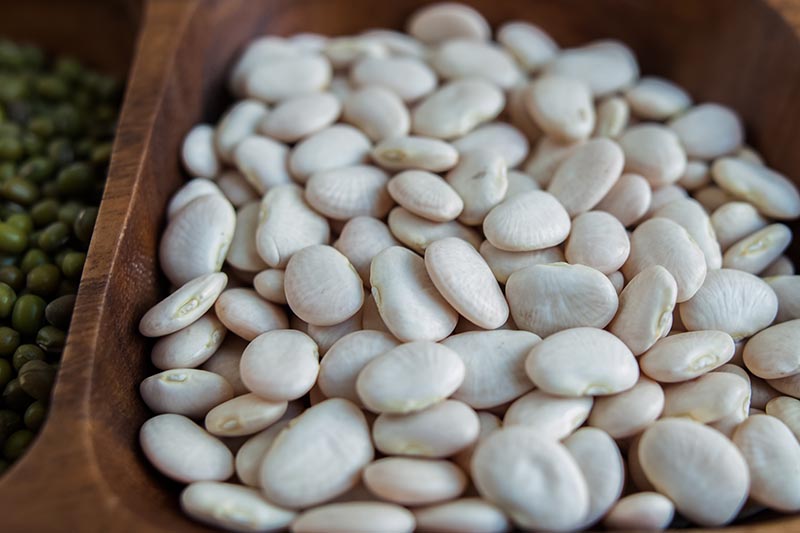
King of the Garden
A pole variety that climbs to 12 feet tall, this classic lima produces large, white butter beans with a hazelnut flavor.
‘King of the Garden’ seeds are available in eight-ounce sacks from Burpee.
Want More Options?
Check our our favorite varieties in our supplemental guide, “13 of the Best Lima and Butter Bean Cultivars to Grow in Your Garden.”
Managing Pests and Disease
When you see the long list of pests and diseases that can plague P. lunatus, you may fret that your crop’s not going to grow well for you.
Don’t worry too much! There are a handful of steps you can take to prevent most problems before they occur.
For example, it’s a good idea to give your plants ample water and keep them weeded, so they’ll be healthy enough to resist disease.
Also make sure to buy seed from a reliable source, since some diseases spread through infected seed.
Proper spacing will improve air circulation and cut down on the pathogens that thrive in humidity, and never working in a bean patch while the plants are wet will deter bean rust and many other waterborne diseases.
Rotating crops to avoid growing any legumes in the same space two years in a row, and eradicating all infected plants if you do encounter disease, can really help to keep overwintering insect pests and soilborne pathogens at bay.
With that said, here are the butter bean pests and diseases to watch out for, along with a few ways to handle those that are the most prevalent:
Herbivores
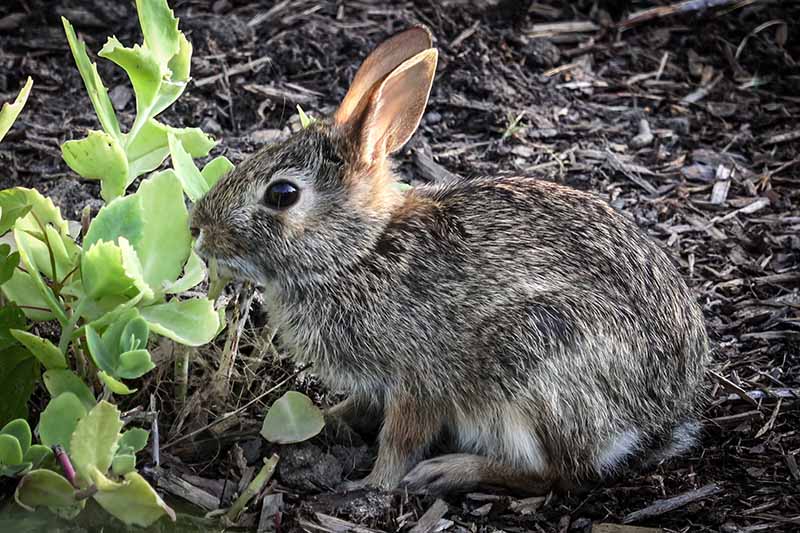
From the time those tender sprouts poke through the garden soil, herbivores may come after your plants.
Deer and rabbits are more likely to eat the younger seedlings and nibble on the flower buds, though if food gets scarce, they’ll eat the mature plants, too.
Raccoons and groundhogs can decimate an entire patch, breaking branches and consuming whole plants.
If you have such wildlife in your area, you can protect your crop with fencing that’s six feet high or taller for the deer.
When you’re trying to deter rabbits or other woodland critters along with or instead of deer, you’ll want to make sure to sink the fence six inches into the ground around the garden’s perimeter.
That may take care of voles that strike beneath the soil, too.
Check out our guides to learn more about keeping rabbits from eating flowering plants, and how to build a deer fence.
Insects
Bugs love beans! But if your plants are healthy and growing quickly, most of them can’t inflict much damage, or it’s only cosmetic.
If you’ve had problems with insects before, or anticipate an influx of bugs that are common in your area, it could pay to investigate some beneficial predatory insect options.
They’ll help you create an environment where the good bugs take care of those that may harm limas.
Here are some of the most prevalent insects to anticipate:
Aphids
Aphids (Aphididae spp.) are itty-bitty and come in many hues, including pale green, pink, white, and black. They tend to strike in cool, dry weather, and have the nasty habit of stunting growth by sucking juice from the foliage.
Along with encouraging the aforementioned beneficial insects, including ladybugs, you can handle an outbreak of aphids with a strong blast of water from the hose. Or, wash infested plants with water mixed with dish soap.
Just be sure to do this only when the leaves will have plenty of time to dry before nightfall, or you can incur further damage from fungi that spread in damp conditions.
Learn more about managing aphids in the garden in our guide.
Bean Leaf Beetles
Any time you spot leaves with multitudes of holes the size of pinheads, you may be dealing with the bean leaf beetle, aka Cerotoma trifurcata.
To check, turn to the undersides of the leaves, where these oval-shaped red, orange, or yellow bugs with black markings like to feed. They’ll also go after the seed pods.
These beetles proliferate in gardens that don’t have well-draining soil, and are particularly prominent in the Midwest.
They can usually be conquered simply by handpicking them. It’s optional to announce, “No, beetle, my plant!” as you drop them in a container of soapy water to perish, but I find it makes the distasteful chore go more quickly.
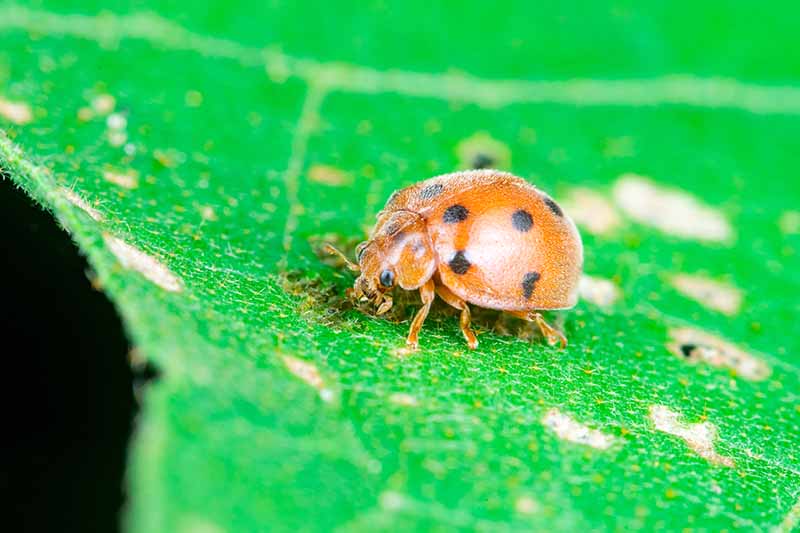
Mexican Bean Beetles
When leaves have been eaten to the point where the damage forms lacy patterns you can peer through, you probably have the dreaded Mexican bean beetles (Epilachna varivestis) in your garden.
One issue here is that they look so much like orange or yellow versions of their distant cousins, beneficial ladybugs.
To tell them apart, see if the perpetrators have heads the same color as their bodies, instead of having the ladybug’s distinctive black head.
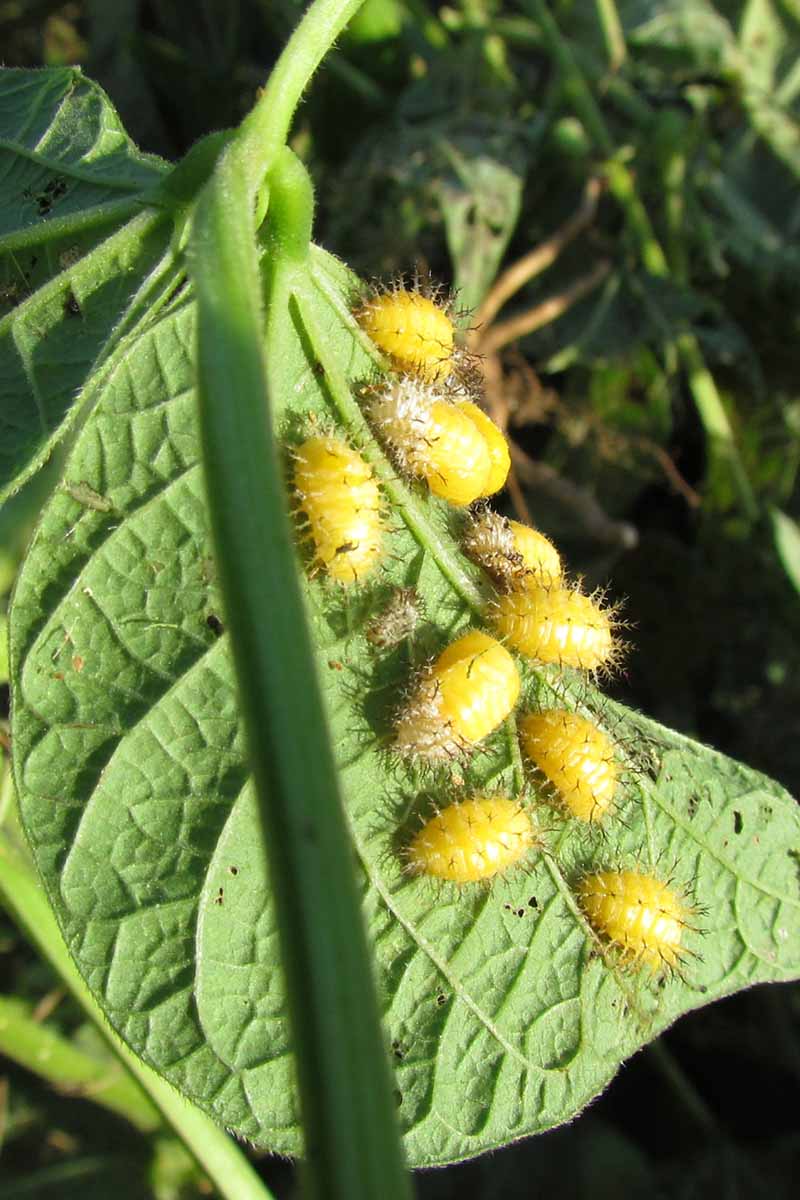
These pests can decimate leaves to the point that the plant can no longer photosynthesize, and you should get rid of them!
Pick the beetles off by hand.
You’ll find the orange-yellow, oval-shaped insect eggs on the undersides of the leaves, in clusters of 40 to 75 that cover about a square inch of surface. Make sure to destroy them, too.
To prevent reinfestation, remove and destroy infested plants or plow them beneath at least 10 inches of soil at season’s end.
Find tips on combating Mexican bean beetles here.
Two-Spotted Spider Mites
These little dudes are tiny and red, black, tan, or white.
Not to scare anyone, but they are arachnids, Tetranychus urticae, and look like spiders close up. From a few inches away, they look like crawling bits of pencil eraser, or maybe off-brand weevils, depending on the color.
Spider mites feed on the undersides of leaves, and spin protective webs that are easy to mistake for dew in the morning. Just a few of these are not a big deal, although the webs are unappealing, looking like sticky, clear dryer sheets with little bugs stuck in them.
But in larger numbers, spider mites will nibble at the pods and can affect your harvest. In the case of a big infestation, they can even kill plants.
To get rid of them before they become problematic, gently wash them off with water and a soft cloth early in the day, but after the plants’ leaves have dried. Or, spray them with a hard stream of water.
Learn more about spider mites in our guide.
Disease
Most lima and butter bean diseases can be kept under control with preventive measures, like rotating where you plant from season to season to prevent soilborne diseases from recurring.
It’s also a good idea to wash your hands and tools before and after working with the plants, in order to halt diseases that spread via soil or water.
And if your plants do become infected, get rid of them quickly. Uproot the whole mass and destroy it before the bacteria or fungi can spread.
Don’t add infected plant parts to the compost pile, or you’ll be helping the pathogens to infect next year’s plantings.
Here are some of the most common diseases that strike limas and butter beans:
Anthracnose
Caused by Colletotrichum species of fungi, anthracnose is especially problematic in cool, humid weather.
Red, purple, or black veins in the green leaves and rust-colored spots on the rest of the plant can indicate anthracnose. Also look for oval lesions on the pods and even the seeds inside them.
Anthracnose gains a foothold by overwintering in soil, so this is one disease you can prevent by only planting legumes in a spot where you didn’t plant that type of vegetable in the past two seasons.
If it strikes, hustle to remove all the damaged plants so the anthracnose doesn’t spread.
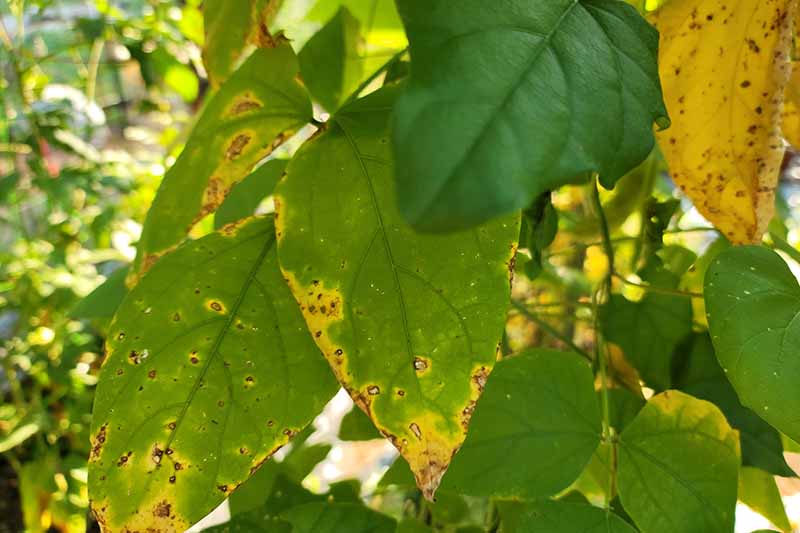
Bean Bacterial Blight
This one is a downer. Not only does the bacteria Xanthomonas axonopodis pv. phaseoli cause misshapen leaves that become dry and papery with yellow borders, it can discourage the plants from producing as well.
A plant that’s already formed pods may develop water-soaked spots on them as a sign of bacterial bean blight, too.
Plan ahead to prevent this blight. Try to purchase seeds that are resistant, since the disease is primarily seedborne, though aphids will also spread it.
If it’s too late to choose a resistant cultivar, prevent bacterial blight by never working in the garden when plants are wet.
If it strikes, make sure to remove and destroy all the debris from the infected plants, without adding any of it to the compost pile.
Bean Mosaic Virus
This virus, also known as BMVD, can make plants turn a sickly yellow and produce few or no pods.
To avoid it, be sure to plant mosaic-resistant varieties. Prevent infestation by insects like aphids, which spread the disease. And remove or destroy any plants that are infected.
Bean Rust
Bean rust is one garden affliction I’m all too familiar with, and it is one of the many reasons I constantly harp on not touching legume plants when they’re wet.
Caused by the fungi Uromyces appendiculatus, it thrives when conditions are both cloudy and humid.
It manifests as tiny light spots on the leaves that grow into rust-colored blotches edged with yellow.
The fungal spores that cause this rust spread via water, so it can infect neighboring plants if you harvest the pods or work the plot while the leaves are wet from rain or overhead watering.
The fungus also overwinters in soil, which is yet another reason to make sure not to plant legumes in the same spot two years in a row.
If your crop is somehow infected with rust despite rotating crops and working only when plants are dry, be sure to eliminate all of the infected plants pronto.
Either burn them or throw them in the trash (not the compost) to stop the spores from spreading to other plants, or into next year’s garden via the soil.
Harvesting and Storage
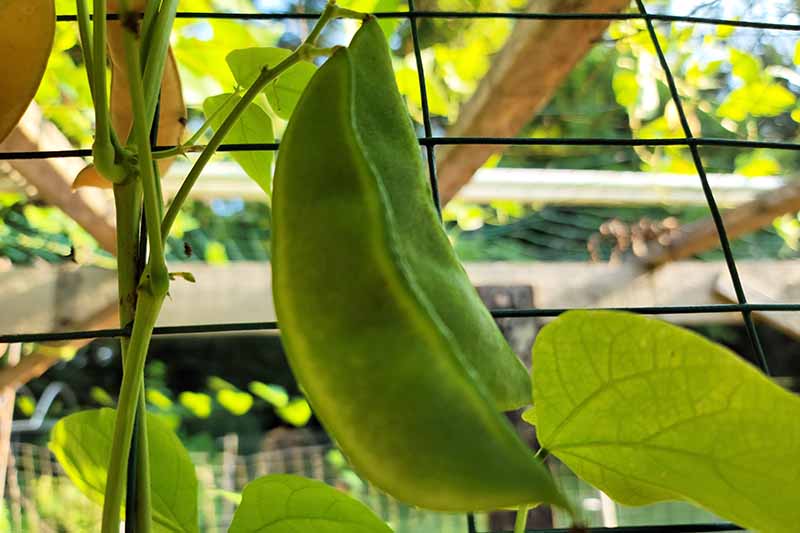
It’s so gratifying to see butter bean pods filling out! It’s like nature is making a birth announcement.
Here’s how to maximize both yield and quality for your lima harvest, along with ways to store what you’ve collected:
Pick Fresh Pods
Start watching for signs that edible seeds are inside when the plants are 10 to 15 days from the estimated number of days to maturity for that variety.
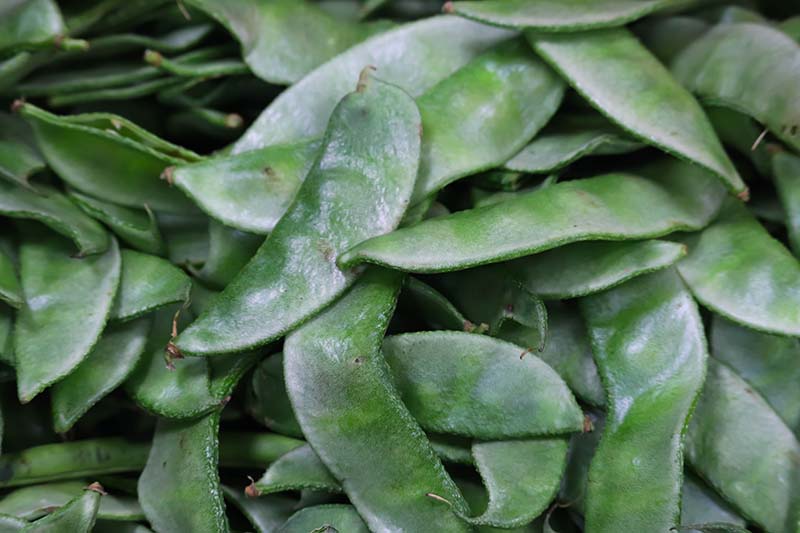
The idea is to pick when the beans are full-grown, but before the pods turn brown and dry, which would mean the seeds inside are hard and dry, too.
You can pick limas for fresh shelling a little early, but wait until the pods have plumped out to be at least two-thirds full. Pick the whole green pods.
Only harvest when the plants are free of moisture, not when there’s dew on the foliage or after a recent rain.
Any time when you handle a P. lunalus plant that’s wet, you run the risk of waterborne pathogens decimating your crop.
The “don’t work wet plants” adage does sometimes make it difficult to keep up with harvesting the mature pods, but give it your best shot.
When even one or two overly mature pods stay on the plant, it will start turning its energy toward forming dry seeds, rather than creating more delicious fresh shell beans.
Either snip the pods where they’re attached to the stem with clean kitchen shears, or use both hands to pull them off.
That gives you one hand to hold the stem steady and the other to pluck the pod. If you tug with just one hand, you risk snapping a whole branch, or worse, accidentally uprooting the plant.
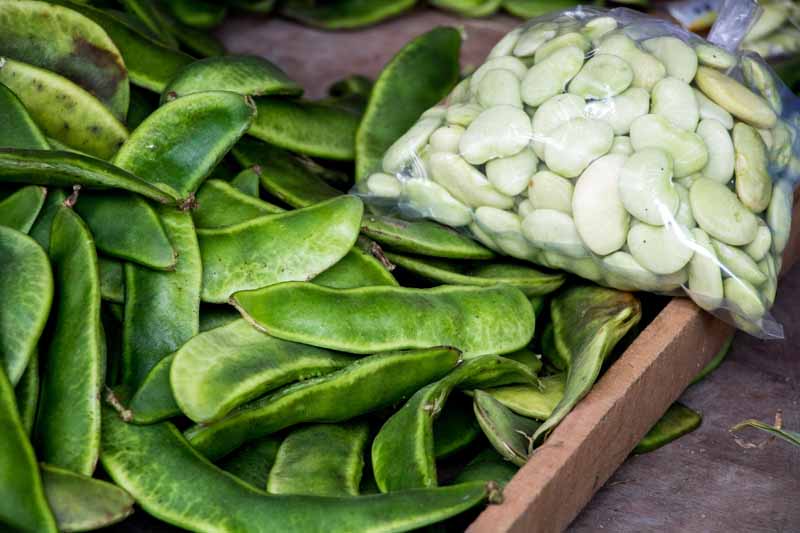
As for shelling, well, this is probably the only time when I’m not super appreciative of homegrown limas. It can be a chore to remove the fresh beans from the pods.
One way is just to break the pod in two vertically, and dig the seeds out with a fork, nut pick, or your nimble fingers.
Sometimes, I confess, I need a sharp paring knife or kitchen shears to make that cut. And the longer the green pods have been filled with seeds while they’re still growing on the vine, the tougher they get.
Oh well, that’s a mild drawback to an otherwise wonderful vegetable growing experience.
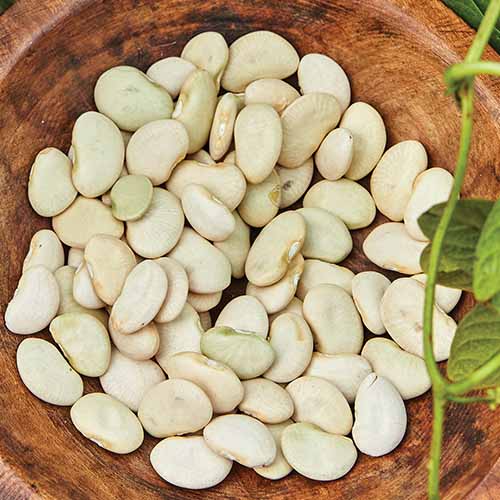
Harvest Dry Limas
This may sound like overenthusiasm, but I consider it a joy to harvest lima beans for next year’s seed or to keep as a dry kitchen staple as well.
These legumes literally dry themselves on the plants!
You can tell they’re ready when the husks are dry and brown (but not withered) and you can hear the seeds rattling around inside.
At that point, you can either cut the pods from the plant with scissors or, if it’s about the end of the season, pull up the whole plant.
Then merrily crack the crisp, dry shells open and pull out the dried seeds. They’ll probably be completely brittle, but if they’re not, spread them out on a baking sheet and place them in a cool, dry place to finish drying out.
If you’re working with the whole plant, shake the seeds loose onto a clean sheet or tray, and compost the foliage, stems, and chaff from the dry pods if the plant is healthy.
Storage
I can’t resist saying, “Don’t let this happen to you!”
If at all possible, don’t get in that less-than-ideal situation of needing to harvest the fresh pods but not being ready to cook them.
On the off chance that you do, they can be stored for a couple of days in the fridge. They just won’t taste quite as fresh as the ones that go straight from the plant to the cooking pot.
Keep fresh butter beans that you can’t cook right away in their pods. Place them in the vegetable crisper in a clean dish towel or plastic zipper bag and use them within three days.
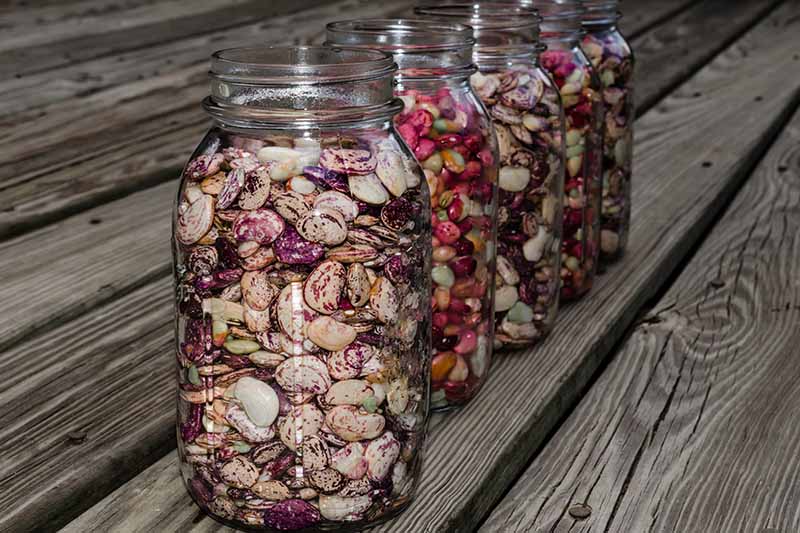
Store dried seeds that have been removed from the pods in an airtight container, adding to it as you go if they’re not all ready at once. Place the container in a cool, dark, and dry place.
If you can maintain those conditions and avoid moisture and humidity, you’ll be able to save the dried beans for cooking for at least a couple of years after harvesting.
The same seeds should also remain viable to plant for at least three years.
Preserving
This is one of my personal definitions of luxury: Having so many fresh butter beans that you can’t eat them all during the harvest window.
If you’re fortunate enough to find yourself in this situation, there are a couple of ways to preserve the abundance.
The first, which I mentioned above, is drying the surplus. But you don’t do this with a dehydrator.
Instead, at the end of a season that’s produced a bumper crop, leave the mature pods on the plants and harvest them when they are already dry.
You can also freeze any extra fresh-shelled ones, and I think it’s a good idea to grow so many you’ll have enough for this purpose. Like I said, it’s a luxury!
I would never tell you this if I wasn’t confident they would still be high quality after freezing, and will give you a fresh taste of summer in the cool months.
Go ahead and shudder if you didn’t like how the overcooked limas from the freezer tasted when you were a kid. But this will be different.
It is possible to freeze homegrown butter beans and retain both the flavor and the texture, without a lot of hassle. I promise.
First, though, be sure to blanch the shelled beans, a process also known as parboiling.
Bring a large pot of water to a brisk boil, reduce the heat to medium, and submerge up to four cups of shelled limas at a time while the water is still boiling.
I like to use a stainless steel colander to contain the seeds, holding it by the handle to place it in the water, and fishing it back up using tongs or a silicone glove.
You can also place them directly in the water if you’re only preparing one batch to freeze. Otherwise, you’ll want to reuse the boiled water.
Let baby limas boil for two minutes and larger ones boil for three, then pull the colander up and let the water drain back into the pot. (Or, drain the contents of the pot in a colander placed in a clean sink).
Immediately after draining, submerge the colander in a bowl of ice water. Drain again and allow the produce to dry on a clean dish towel.
Then freeze the beans in a single layer on a baking sheet. This quick-freezing step keeps the individual seeds from clumping together while stored in the freezer.
Remove them from the freezer as soon as they’re firm, and store them in freezer bags or airtight, BPA-free plastic containers. Freeze in portion sizes you’re most likely to use in recipes.
You can also bring cooked limas to room temperature, and then seal them in airtight containers and freeze them.
If you use this option for preserving, make sure to leave an inch or so in the top of the container for the frozen food to expand.
It’s also possible to preserve lima beans by canning, but only using a pressure canner – not a water bath, or Instant Pot.
For more information on the risks, safety measures, and procedures involved in pressure canning vegetables, see the basic home canning guide on our sister site, Foodal.
Recipes and Cooking Ideas
It’s satisfying to watch the pole bean vines zip up the supports, and the bush varieties leaf out, flower, and form pods. It’s even kind of fun to struggle to pry the pods open, if you’re in the mood for it…
But who am I kidding? All that enjoyment places at a distant second to the pleasure of cooking and eating these delicious legumes!
Now, some do worry about the cyanogenic glycosides in limas that release traces of a cyanide compound when you chew.
But modern, domesticated versions contain just a smidgen of these “cyanogens” compared to the early Peruvian varieties, so you can sample one or two of the fresh beans straight from the pod without harm if you so wish. Cooking destroys the harmful compounds.
Here are my favorite preparations:
Cook Fresh Shellies
For that taste sensation only available to those willing to grow their own heirlooms, cook shelled limas immediately after harvesting.

Bring about two inches of water to boil in a medium saucepan with a stainless or bamboo steamer basket inserted. Add the beans, cover, and steam for 12 minutes until they’re just tender.
You don’t have to add them to the breakfast menu, the way I do, but I definitely recommend serving them with a pat of the freshest butter (or a teaspoon of the fruitiest extra-virgin olive oil if you’re going vegan), and salt and pepper to taste.
If steaming isn’t your thing, it also works to add the shellies and a half teaspoon of salt to three cups of boiling water.
Reduce the heat to medium-low and simmer them for about 20 minutes. Test one at 15 minutes to see if you have the texture you’re after, and at five-minute intervals after that.
Drain them, and top them with a sprinkle of your favorite seasoning mix or freshly ground black pepper. Add a pat of butter or a dollop of creme fraiche, and welcome summer’s best eating from the garden.
Dried Lima Cooking Instructions
One caution for my fellow home gardeners: Don’t overcook your home-dried limas.
Butter beans dried from a garden harvest cook much more quickly than most of the ones you can purchase, because they’re considered “new crop.” The older the beans get in storage, the longer the cooking time will be.
This is also one of those processes you should tweak to your own preferences. Be sure to sample a lone bean about an hour into simmering, and then every 20 minutes or so until you’ve got the consistency that suits you.
If you’re going to use the limas in a recipe that requires further cooking, like a stew or casserole, cook them just until they’re tender.
As for the basics of cooking dried lima or butter beans, proceed the way I do:
You can soak them overnight or for a few hours to speed the process, but I like the convenience and flavor of cooking them without that extra step, especially since some of the larger types split in two and get ragged at the edges after prolonged soaking.
Keep in mind that the cultivars with smaller seeds, like ‘Dixie Speckled Butterpea,’ tend to fall apart during cooking.
So plan to use them in hummus or bean soup, but don’t count on them to hold their shape for chilled salads, or adding to stews. For those types of recipes, you’ll want to use the larger dried limas.
To cook them on the stovetop, add several cups of dried beans and enough water to cover them by about two inches to a large, heavy pot. I like to add a bay leaf and dried chili pepper, but they’re optional.
Bring the mix to a rolling boil and let it boil for about 10 minutes. Reduce the heat to medium-low and simmer until a sample bean is done to your satisfaction. This usually takes about an hour.
Watch the pot, and once the beans are beginning to get soft, add about a teaspoon of salt to the water.
As the beans expand, add more water as needed to keep them submerged. I recommend adding already-boiling water to the pan from the microwave or a tea kettle, so as not to slow or interrupt the cooking process.
You can also cook dried limas in the slow cooker. Add three cups of water for every cup of beans, and add a teaspoon of olive oil and one bay leaf to the water as well.
I cook them on high for four hours, adding a teaspoon of salt when they’ve been cooking for three hours, and checking to make sure they stay covered with water. Add more if you need to.
You can also cook them on high for an hour and switch over to low for another five or six hours after that until they’re done.
Whether you’re preparing them on the stovetop or in a Crock-Pot, avoid adding any acidic ingredients like vinegar, lemon juice, or tomatoes until after the beans are fully cooked, or they’ll become tough.
Once I’m done cooking a big pot of these dried legumes, I divide them among several airtight, smaller storage containers, let them cool, and store them in the fridge in a bit of their own broth, or drain them first. Then I use them the same way I would shelled and cooked fresh butter beans.
Cook Frozen Limas
There’s no need to thaw your frozen stash of plump, tender limas. Instead, add a cup or two of the frozen beans to about a cup of boiling water or broth. My favorite is vegetable broth with a little dried or minced onion added to it.
Return the liquid to a boil, reduce the heat to medium-low, and simmer for 25 minutes. If you use broth, don’t drain, just serve!
Otherwise, drain, season to taste, and add a bit of butter or your oil of choice. This will produce a side dish that will make you forget the overcooked, mushy monstrosities of childhood dinners or the school cafeteria.
Recipes
There are so many delicious ways to savor cooked homegrown limas, I could never hope to do justice to them all in this space.
But I definitely recommend using them simmered or steamed in place of chickpeas for a fresh, light twist on your favorite hummus recipe.

Don’t have such a recipe? Swap cooked limas for the chickpeas using this take on roasted garlic hummus from our sister site, Foodal.
Cooked fresh butter beans also add a velvety texture and delicate taste when used in place of the canned beans in this curried corn and cabbage soup recipe from Foodal.

Or use them instead of peas in Foodal’s paella de marisco recipe, or in addition to or in place of the chickpeas or kidney beans in a homemade three bean salad, also from Foodal.

Try them cooled and tumbled into your favorite tossed or dinner salad, instead of edamame or croutons, too!
For traditionalists, let’s not forget succotash, the nostalgic summer-fresh dish that showcases your lovely garden harvest.
Here’s my recipe for succotash:
For every two cups of cooked lima beans, heat a tablespoon of butter and teaspoon of extra virgin olive oil in a heavy skillet over medium-high heat.
Add one and a half cups of fresh-cut corn kernels to the pan, sprinkle with salt and pepper to taste, and stir to coat, using a wooden spoon or silicone spatula.
Cook for one minute, gently stir in the limas, and cook just enough to heat through, about two minutes more.
Add a quarter cup of half-and-half to the pan, stir gently, and reduce the heat to medium. Cook for another four or five minutes, stirring occasionally, until the succotash sauce has thickened and reduced to about two-thirds of the original amount.
Remove from the heat, season to taste, and serve. I like to add about half a teaspoon of bacon salt as the final seasoning, or give it some extra zip with a sprinkle of Old Bay.
Some people like to heat a cup of slivered baked ham pieces with the butter beans, or to use bacon drippings in place of all or part of the butter and oil.
Quick Reference Growing Guide
| Plant Type: | Annual legume | Tolerance: | Heat, drought |
| Native to: | Peru | Maintenance: | Low |
| Hardiness (USDA Zone): | 3-9 | Soil Type: | Average |
| Season: | Summer | Soil pH: | 6.0-6.8 |
| Exposure: | Full sun | Soil Drainage: | Well-draining |
| Time to Maturity: | 60-100 days | Attracts: | Bees and other pollinators |
| Spacing: | 2-6 inches | Companion Planting: | Beets, borage, cabbage, carrots, catnip, cauliflower, chamomile, corn, cucumbers, dill, eggplant, kale, marigolds, nasturtiums, radishes, sage, savory |
| Planting Depth: | 1-2 inches | Avoid Planting With: | Chives, garlic, onions |
| Height: | Up to 24 inches (bush), 6-12 feet (vine) | Family: | Fabaceae |
| Spread: | 6-20 inches (bush); 2-6 inches (vine) | Genus: | Phaseolus |
| Water Needs: | Moderate | Species: | Lunatus |
| Common Pests: | Aphids, armyworms, bean leaf beetles, corn earworms, cutworms, leafhoppers, cabbage loopers, Mexican bean beetles, spider mites, stink bugs, thrips, vegetable leafminers; deer, moles, rabbits, raccoons, voles, woodchucks | Common Diseases: | Alternaria leaf spot, anthracnose, bacterial blight, bean common mosaic virus, downy mildew, gray mold, halo blight, powdery mildew, root rot, rust, white mold |
Growing Limas for the Good Life
I feel fortunate to be able to slip out to my trellised raised bed and harvest a handful of tender, sweet ‘King of the Garden’ white limas to steam for breakfast on a summer morning.
I also am grateful for the bags of ‘Henderson’ I stash in the freezer at season’s end, and the beautiful ‘Christmas’ beans I harvest dry and keep in readiness for stews and next year’s planting.
I hope you’ll be able to have a similar experience at some point in your vegetable gardening journey, on whatever scale makes you feel content.
Already a dab hand at growing this legume? We’d love to have your tips and favorites added to the comments section below. That’s also the place for further questions.
And if you’d like to learn more about growing and caring for other beans, here are some guides to read next:

Hello Sir,
I am Charan from INDIA, I need some seeds of LIMA BEANS ( diff verities and colors ) . I have my sister in California.
Please let me know, if you can share me some seeds of LIMA BEANS (( DOUBLE BEANS / BUTTER BEANS )). I here may diff names here online, with reverence to diff county’s .
Thanks
Charan