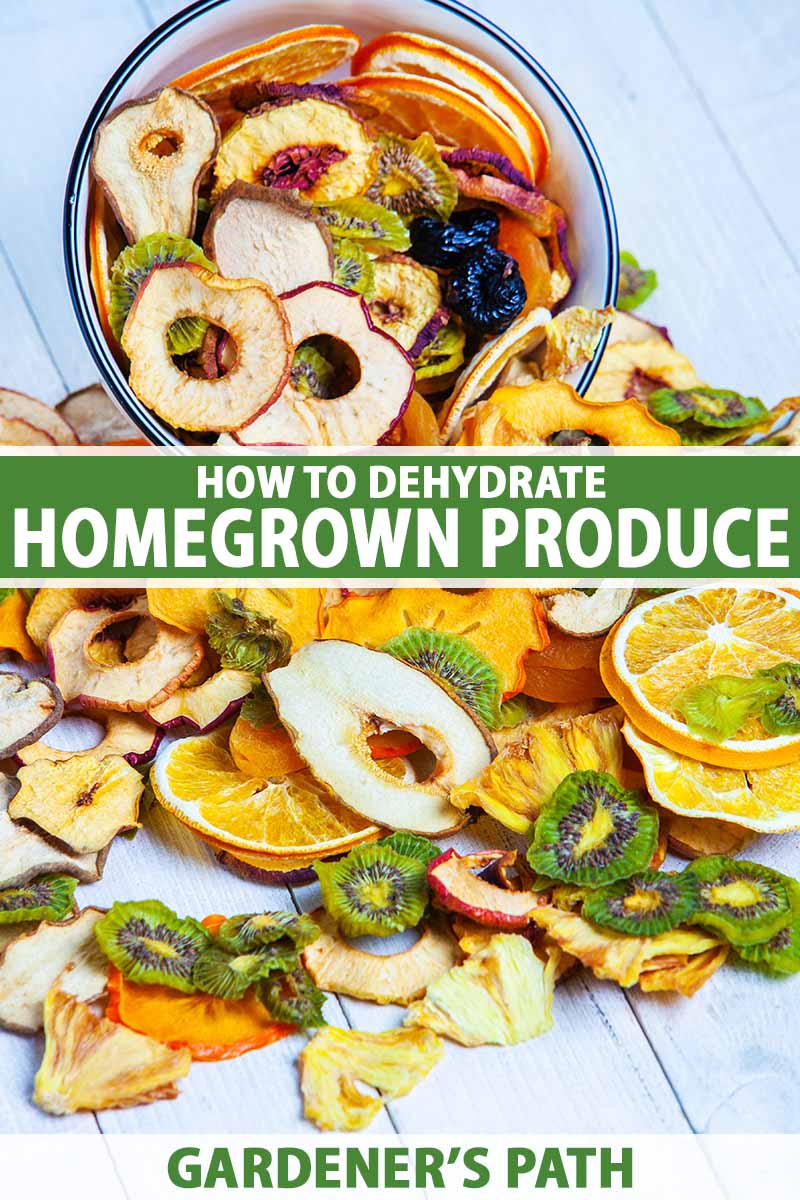
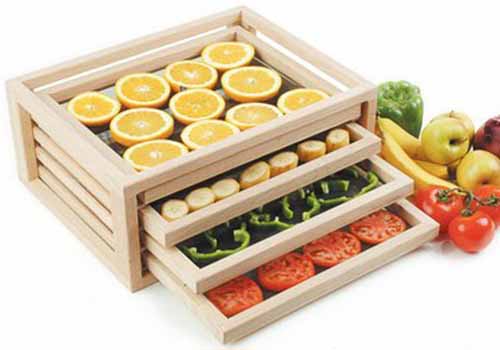
Oftentimes, we gardeners are met with a dilemma – I’m talking about the burden of too much homegrown produce. (Yeah, don’t expect anyone’s pity for this predicament!)
When harvests of a seemingly endless supply of cucumbers, zucchini, or tomatoes have us wondering who else besides friends, family, and neighbors we can bestow this excess upon, the next logical thing to ponder should be, “Can I preserve some of this bounty for later?”
Well, of course we can! And dehydrating is one of the easiest ways to do just that!
We link to vendors to help you find relevant products. If you buy from one of our links, we may earn a commission.
If slaving over a hot stove to can endless jars of tomatoes or pickles doesn’t sound that appealing to you during the dog days of summer, drying your homegrown produce may just be the solution you need to keep some of this abundance for later use.
Once you have the basics down, dehydration is an easy skill that will come in handy as long as you continue to cultivate your garden – as well as when you’re on the lookout for screaming deals on bulk produce at the farmers market or grocery store.
In this article we’re going to cover all the steps of dehydrating produce. By the time you finish reading, you’ll feel ready to preserve your bounteous homegrown fruits and vegetables like a pro.
Here’s what we’ll discuss:
What You’ll Learn
Why Dehydrate Produce?
There are many reasons why gardeners may want to learn to dry their homegrown produce, a process which removes moisture in order to prevent food from spoiling.
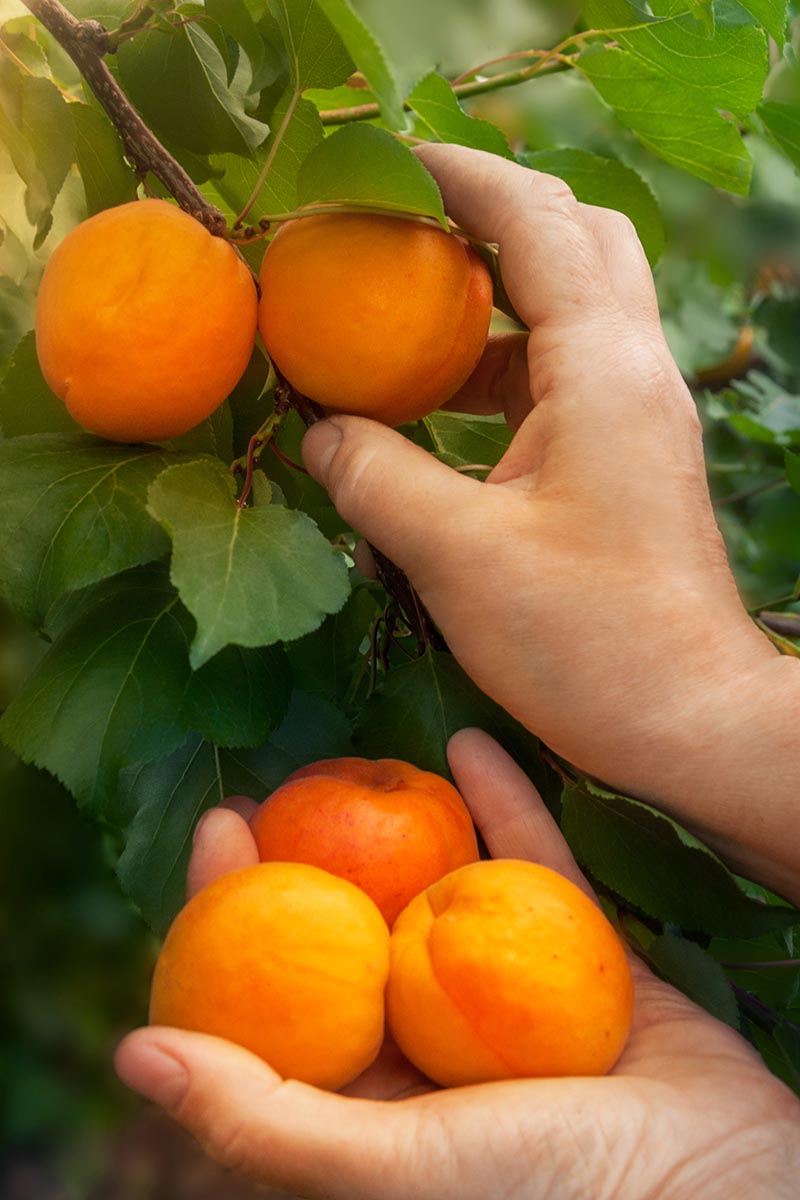
Dehydrating a bumper crop – baskets of cucumbers, buckets of tomatoes, bushels of apricots – is one way to put up food for later use.
But there are other reasons as well!
Some crops, like tomatoes, take on a new flavor profile when they’re dried. Ever tried sun-dried tomatoes? They are quite different in taste than either fresh or cooked tomatoes.
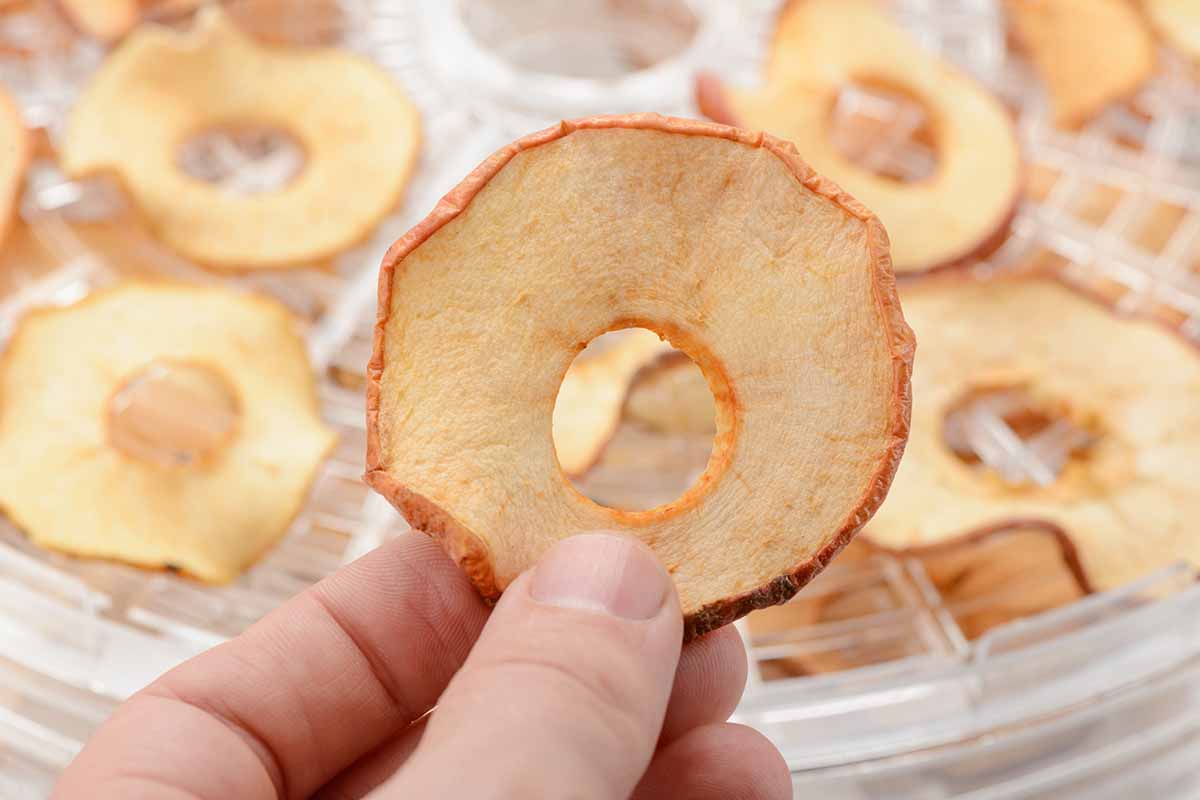
And then there are fruits like apples which, when dried, become concentrated bursts of sweetness.
Another reason you might want a stock of dried fruits or vegetables on hand is that being lightweight, these make a great food source when traveling, hiking, or camping. For instance, 14 pounds of tomatoes can be dried to just half a pound.
There’s a final benefit to knowing how to dehydrate fruits and vegetables that is particularly close to my heart – or gut, rather.
Those of us with food sensitivities may have a hard time finding particular varieties that we can tolerate, or additive-free dried foods to purchase.
Making one’s own dehydrated fruits and veggies can help expand one’s eating possibilities throughout the year – and this is truly a godsend when dealing with a restricted diet.
So, that’s it for my pep talk! If you weren’t already, hopefully now you are really motivated to learn this skill! And finally, it’s time to get down to business.
What Fruits and Vegetables Can Be Dehydrated?
If you can grow it, it’s quite likely it can be dehydrated!
Fruits to consider dehydrating include (but are not limited to):
- Apples
- Apricots
- Blueberries
- Cantaloupe
- Citrus fruits
- Cranberries
- Figs
- Goji berries
- Ground cherries
- Grapes
- Peaches
- Pears
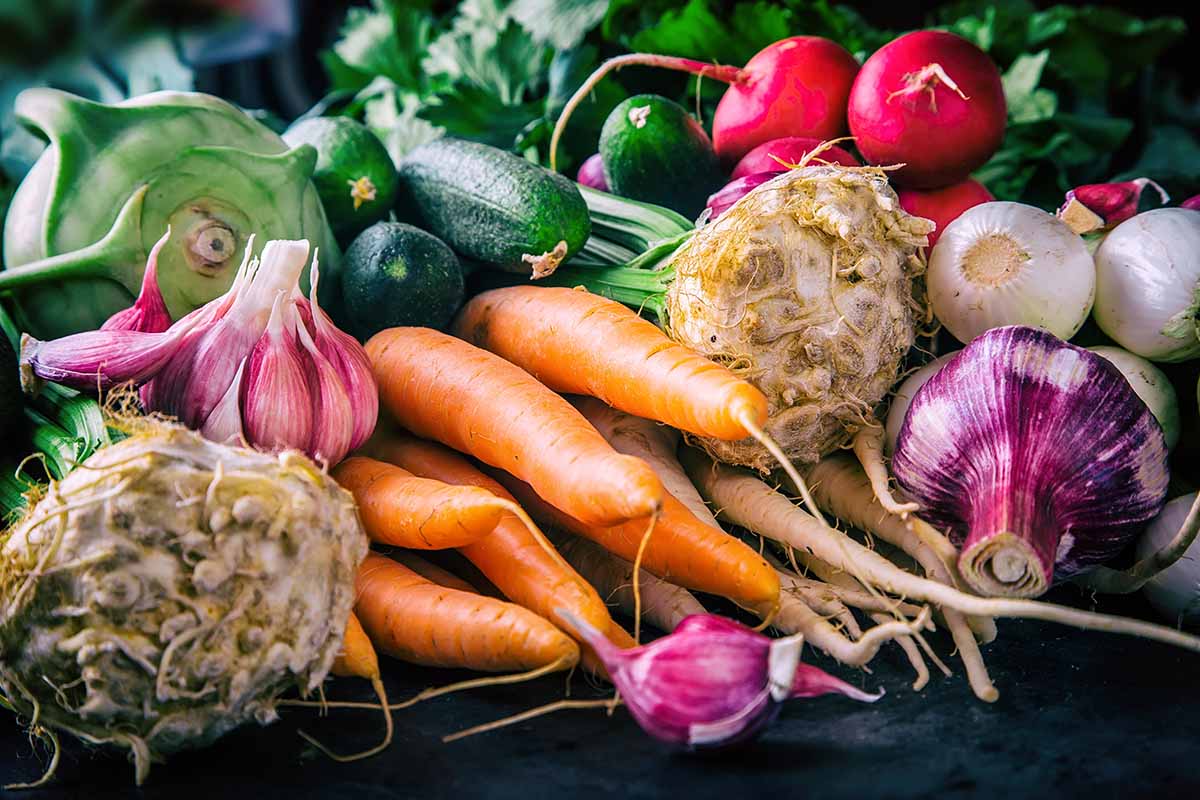
As for vegetables, you might consider preserving the following in this way:
- Radishes
- Summer squash
- Sweet corn
- Sweet peppers
- Sweet potatoes
- Tomatoes
- Turnips
But don’t limit yourself to fruits and vegetables – you may also want to consider preserving herbs such as dill, oregano, parsley, rosemary, and thyme in this way, as well as making homegrown herbal teas like mint, lemon balm, chamomile, and verbena – and even drying home-cultivated mushrooms!
Now that you have an idea of the vast array of produce you may wish to preserve, let’s look at the different moisture removal methods at your disposal.
Different Types of Drying Methods
Before we share our tips for preparing food for dehydration, let’s first take a look at several different ways to dry fruits and vegetables from the garden for long term storage.
We’ll start with the most low-tech and cheapest options, and work our way towards the more high-tech and expensive.
Air Drying
Air drying is a minimalist, energy-free approach that harnesses nothing more than air movement to do the job – and it’s great for those of us who are trying to limit our environmental impact by reducing energy consumption.
This is an ideal method for dehydrating homegrown herbs, medicinal plants, and herbal teas, and freshly-picked ingredients can be spread out on a mesh screen or hung from string to assist the moisture removal process.
You can learn more about drying fresh herbs from the garden in our article.
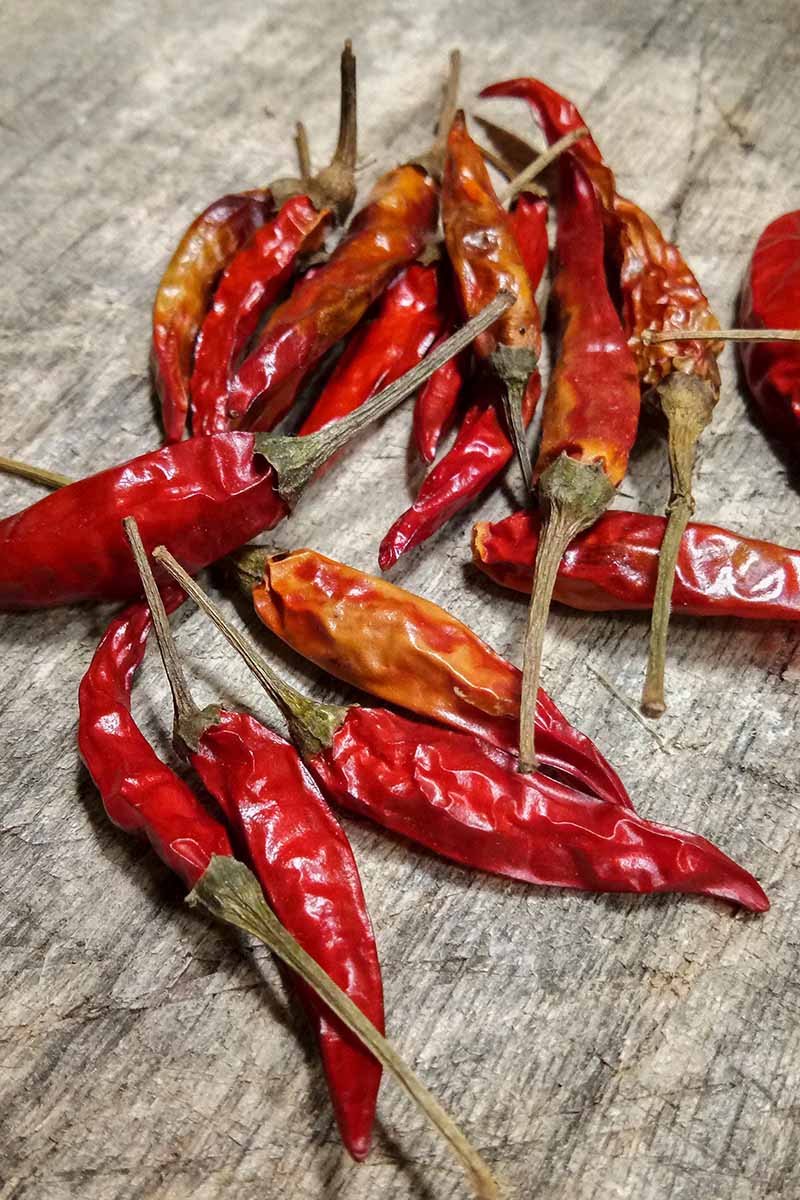
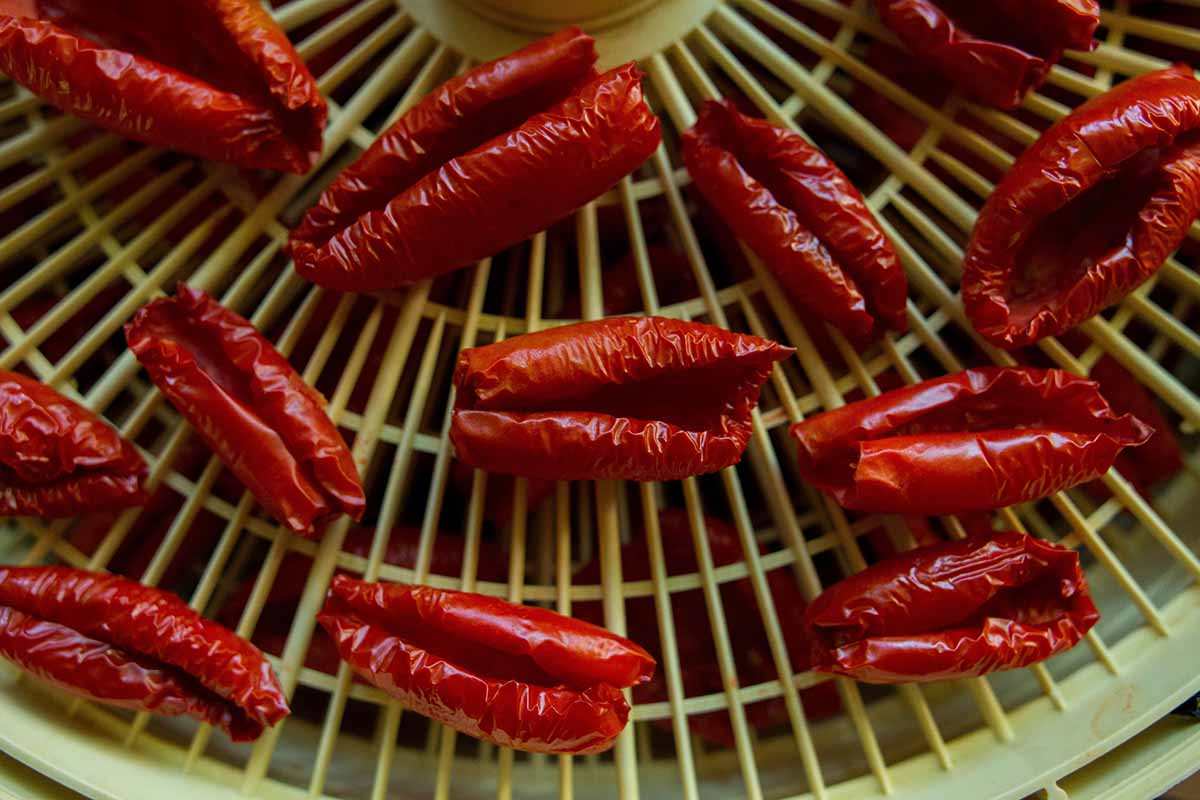
And if you live in a hot, arid climate, this method can also be used for dehydrating hot peppers.
In regions such as the southwestern US, where relative humidity typically remains under 60 percent, temperatures are warm, and there is plenty of air movement, this method makes a lot of sense.
Mushrooms can also be dehydrated in this manner.
When air-drying hot peppers, aromatic or medicinal herbs, and mushrooms indoors, this method will work best during the summer in buildings that aren’t air conditioned, but instead have natural ventilation via open windows.
But this technique can also be used outdoors in protected, shady locations – using the sun to assist in this process will be our next method.
Sliced mushrooms, herbs, and whole hot peppers can be spread out in a single layer on plates, or on racks specifically designed for this purpose, such as this four-tiered model from Gardener’s Supply.
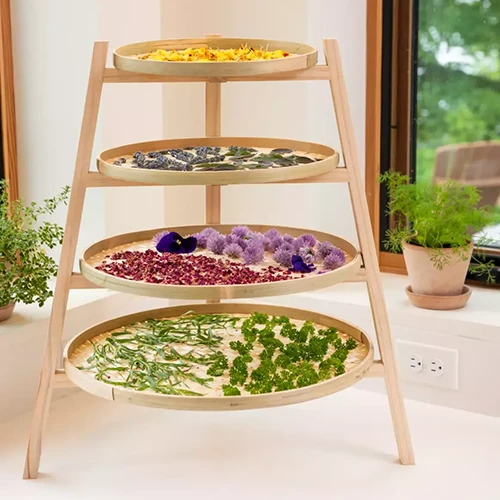
Four-Tiered Bamboo Herb and Tea Drying Rack
This pine rack holds four flat, woven bamboo baskets that are set five inches apart from each other, providing excellent air circulation.
Another option for drying hot peppers is to string them on a thread ristra style and hang them somewhere that is warm, dry, and well-ventilated.
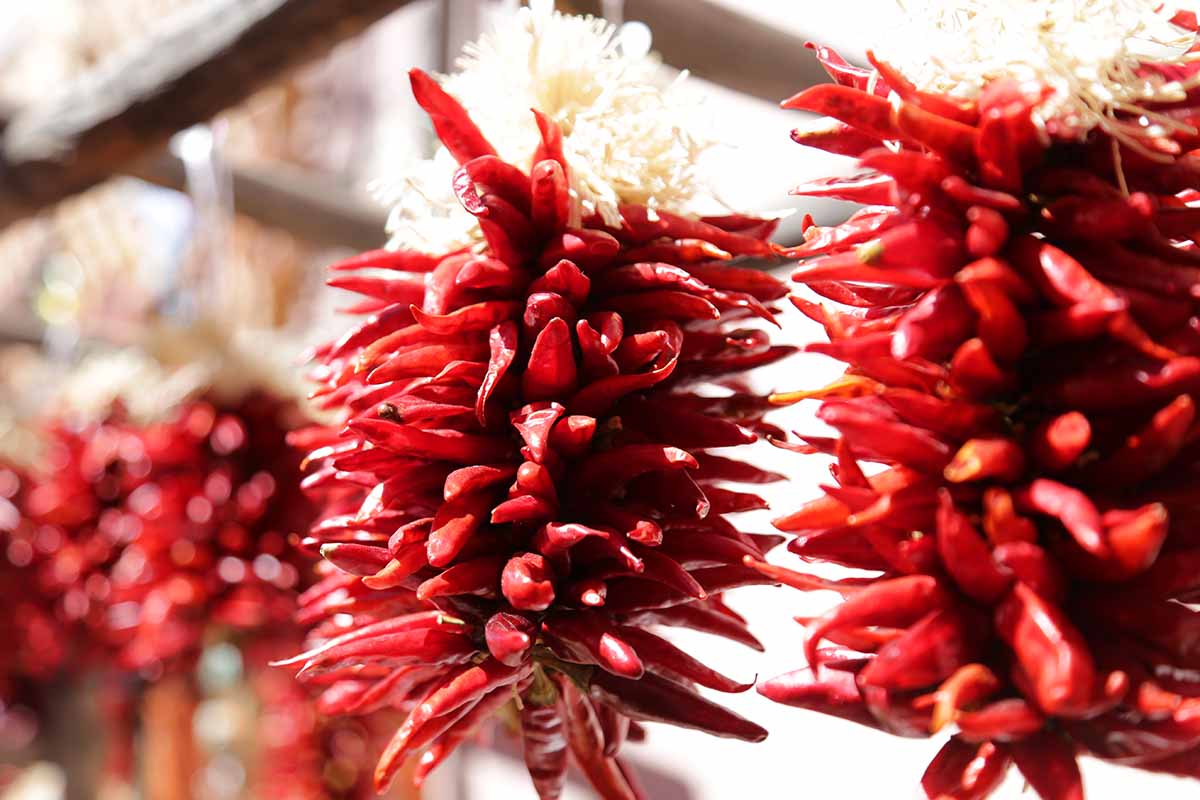
Just remember when working with hot peppers that it’s a good idea to wear gloves!
Processing times for mushrooms, herbs, and hot peppers will vary depending on conditions, ranging from a few days to a few weeks.
Sun Drying
Another energy-free option that works best in arid climates is sun drying. This works best for fruits, and not as well for vegetables.
Why, you might ask?
Fruits can be sun-dried successfully because of their high sugar and acid content, while vegetables tend to spoil too easily with this method. There are exceptions, of course – and we’ll certainly be considering a tomato a fruit in this case! Sun-dried tomatoes, anyone?
This method requires humidity levels below 60 percent and daytime temperatures above 85°F.
This method, sometimes referred to as “direct solar drying,” is similar to the previous one, but foods are placed outside in full sun for this process rather than being kept in the shade.
Pieces of produce should be arranged in a single layer, and exposed to direct sun and warm winds. To protect produce from insects, place beneath a mesh covering.
In some locations, this easily accessible method is carried out by simply laying a tarp on the ground and spreading out a layer of fruits on the tarp.
Fruits treated in this way will likely need several days in the sun to reach full dehydration.
After foods are dry, pasteurize them to kill insects or insect eggs by placing them in an oven preheated to 160°F for half an hour, or freezing them at 0°F for two days.
If foods were contained under mesh or some other protection during the process, you may be able to skip the pasteurization step.
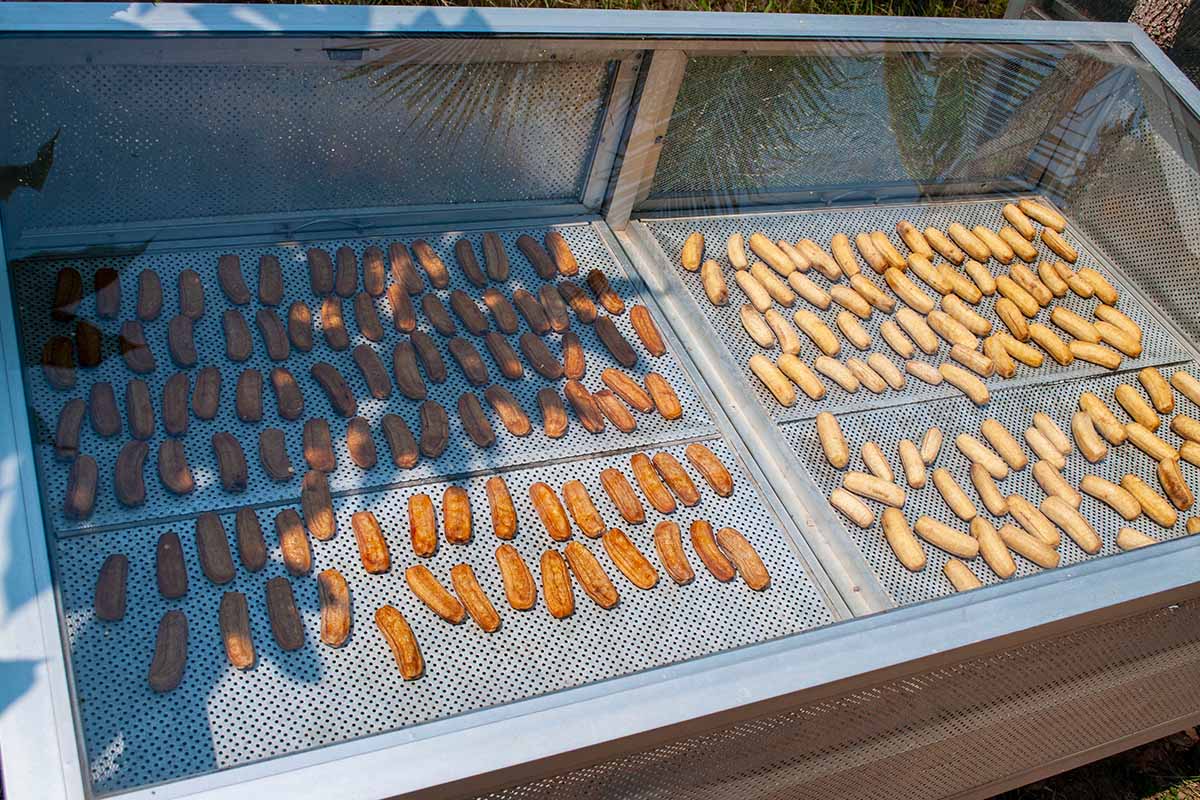
Indirect Solar Drying
Indirect solar drying is another option that can be used for both fruits and vegetables, and it can be implemented in humid as well as arid climates.
With this method, the sun isn’t desiccating the fruits and vegetables directly. Instead, it does so indirectly.
Produce is placed on mesh sheets, much as you would expect to find in an electric dehydrator (we’ll get to those shortly.)

But rather than getting hot air from an electric source, a black surface positioned at an angle heats air coming in through a glass panel, then the hot air passes over the food and leaves through a vent.
That means these contraptions can be used on days that are sunny but cold, and in climates that are too humid for dehydrating directly under the sun.
The downside to this method is that it will only be accessible to those with the DIY skills (or initiative!) to build their own devices, since these are not widely available for purchase currently.
Oven Drying
Our next method uses a piece of equipment that you are likely to already have in your home – an oven!
However, before deciding to try this technique, it’s important to make sure your oven can maintain a temperature between 140 and 150°F. Higher temperatures will cause the outside of the food to form a crust, preventing the moisture inside from escaping, and resulting in a failed batch of dried foods.
Some ovens can only be set as low as 170°F, and if that’s the case with your kitchen appliance, you’ll need to consider another method.
But even if your oven can be set at the desired 140°F, it’s a good idea to test it and make sure the oven is really holding at that temperature.
To test your appliance, use an oven thermometer, such as the Taylor Precision Products Large 2.5-Inch Dial Kitchen Cooking Oven Thermometer, available at Amazon.

Large 2.5 Inch Dial Kitchen Cooking Oven Thermometer
Perform this test by hanging the thermometer in the middle of the oven, then turn on the oven and set it somewhere (your choice!) between 140 and 150°F. Place racks three inches apart, and leave the oven door cracked open two to six inches.
Allow the oven to heat up for 20 minutes before checking the thermometer.
If the thermometer reading is accurate, you’re good to go. If it’s reading higher than the desired temperature of 140 to 150°F, consider some of the other options presented in this article.
You may also want to avoid this method for safety reasons if there are children or mischievous pets in your household who may want to explore an oven left slightly open.
Once you’ve determined this is a viable option, there are a couple of ways you can use your oven to dehydrate food.
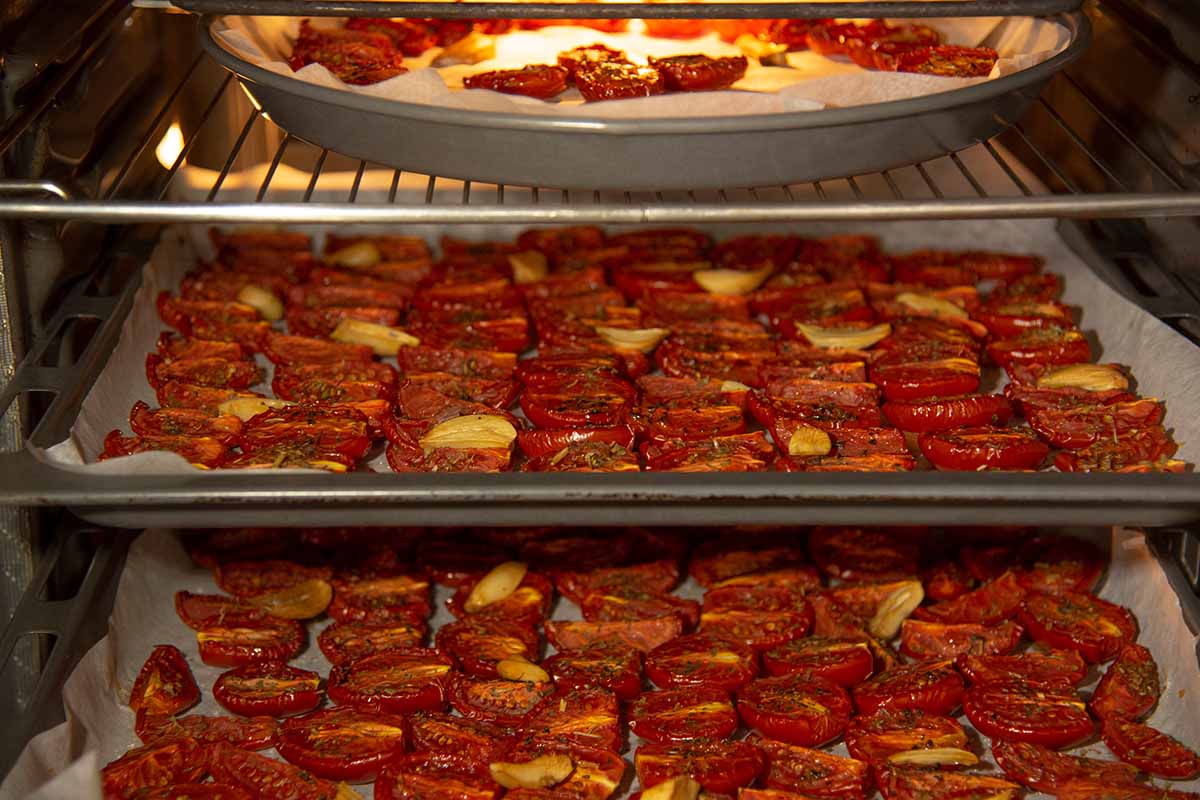
The first way is to place the produce on baking trays lined with parchment paper.
The other way to use your oven as a dehydrator is to place the fruits and vegetables on a specially designed rack such as this handmade oak rack.
Sun and Oven Food Drying Rack with Four Trays
With four trays topped with fiberglass screens, the Sun and Oven Food Drying Rack is made in the USA, and available for purchase via Lehman’s.
Here are a few tips for preserving food in this way with an oven:
- Keep the oven door open to ventilate moist air
- Leave 3 inches of space between oven trays
- Preheat the oven to 140-150°F
- Convection ovens work better because they have a fan built in to move air
One of the downsides to this technique is that ovens are big energy users compared to dedicated electric dehydrators, so if you’re feeling committed to your food preservation endeavors, you may want to consider the next option instead.
Electric Dehydrators
If you plan to preserve more produce than will fit on your oven racks or you want to be able to dehydrate without worrying about the whims of the weather, an electric dehydrator is an excellent investment.
If the weather cools down, night falls, or a rain shower passes through, an electric option will keep on doing its job.
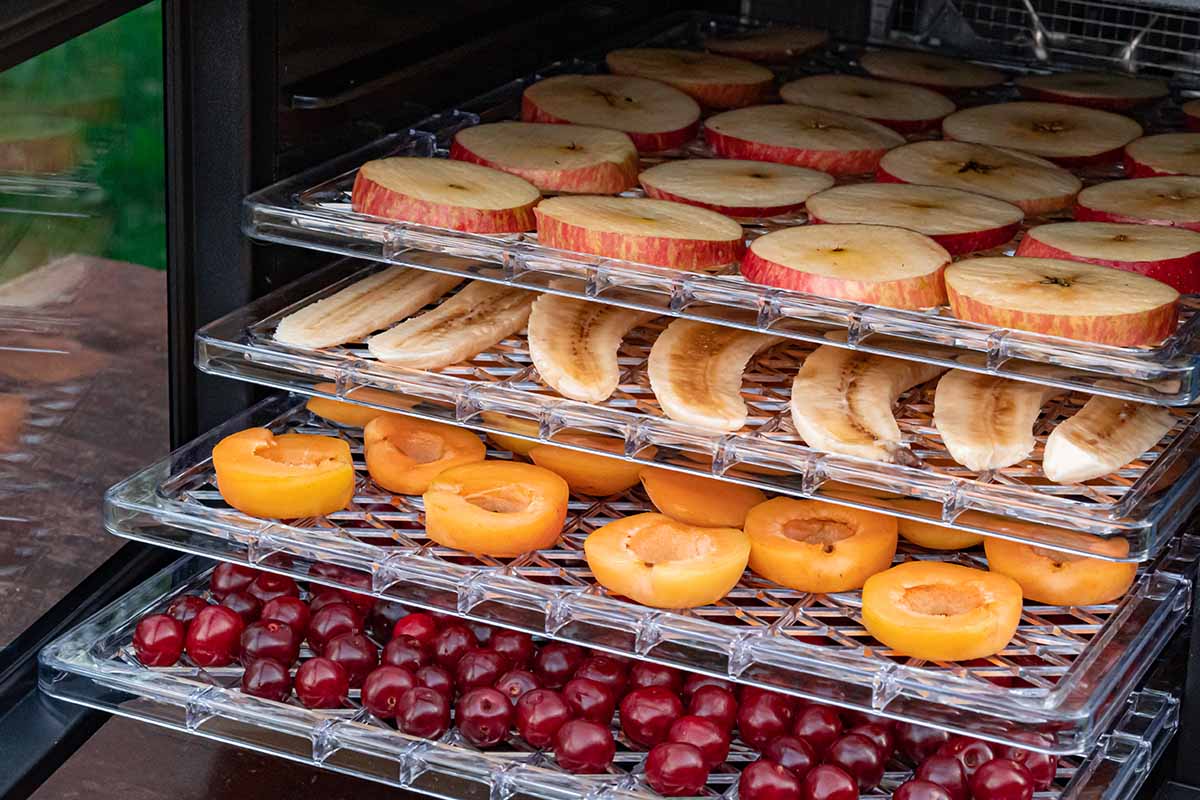
And because these models blow hot air over the produce, they can be filled densely, processing a lot of food at once in a small amount of space.
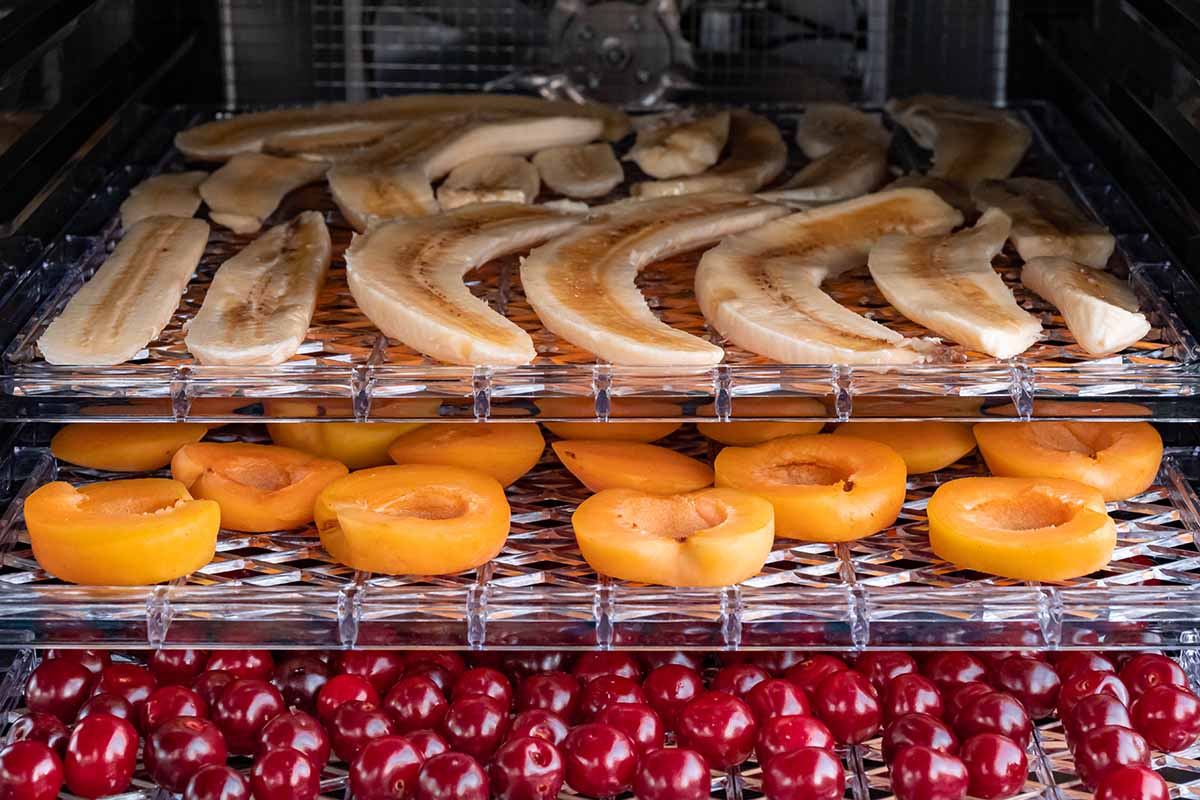
With this method, spread produce in a single layer across the dedicated mesh sheets, load the racks into the electric dehydrator, and set the temperature and processing time as indicated in the user manual.
My own trusty dehydrator of choice is the Excalibur 9-Tray Economy Model.
It doesn’t have a timer, but this hasn’t been a problem for me personally – I just set a timer on my phone or make a mental note of what time I need to check my racks of dehydrating fruits or veggies.
This model can be adjusted between 105 and 165°F. It has nine trays which provide 15 square feet of processing capacity, is made in the USA, and comes with a five-year limited warranty.
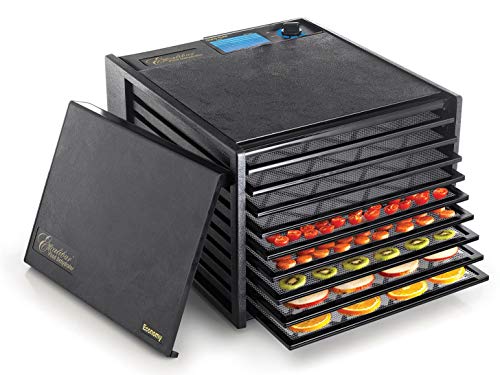
Excalibur 9-Tray Economy Model 2900
You can find the Excalibur 9-Tray Economy Model 2900 available for purchase via Amazon.
Want to explore more options before you make a decision on which electric dehydrator to purchase?
You can read about seven of the best dehydrators out there at our sister site, Foodal.
Freeze-Drying
Up to this point, we have contemplated five different methods of preserving food through moisture removal. This final method removes moisture in a different way than dehydration – I’m talking about freeze-drying.
While this article aims to provide you with a guide to dehydrating produce, which is different from freeze-drying, I thought it worthwhile to provide you with some of the basics of this method as well.
Freeze-dryers, as their name suggests, subject food to freezing temperatures, then use a vacuum pump to remove the air and water vapor from the chamber.
So that’s the difference in the process, but what about the difference between the finished products?
First, the moisture content in dehydrated foods is removed by up to 95 percent, while that of freeze-dried foods is removed by up to 99 percent. This results in a significant difference in texture.
While dehydrated fruits and vegetables have a solid, sometimes leathery texture, freeze dried produce is extremely airy – it feels like it will easily crumble between your fingers if you press hard, and it will!
Beyond the textural differences, there are pros and cons to this method. Let’s consider the negatives first.
Freeze-dryers use more energy than electric dehydrators. They are significantly larger and heavier, often weighing 100 pounds or more. And some models require regular upkeep because their vacuum pumps require oil.
These machines are fairly noisy, producing a noise similar to that made by vacuum cleaners. They need to be elevated so that the moisture removed from the food can drain with gravity’s help. They are also significantly pricier than electric dehydrators.
They are also slower than electric dehydrators, with a single batch requiring 20 to 52 hours, depending on the type of produce.
But of course, there are plenty of positives as well.
With freeze-dryers, the shapes and colors of the foods are retained better than with dehydrators, and when stored properly, foods will last much longer – up to 25 years, according to some estimates.
Freeze-dried produce also has extremely concentrated flavors, and using powders made from freeze-dried foods can be a fun way to add bursts of flavor to homemade culinary creations.
If you decide to pursue this avenue of preserving food, the Harvest Right Home Freeze Dryer is a model you’ll want to check out that comes in medium, large, or extra-large sizes.
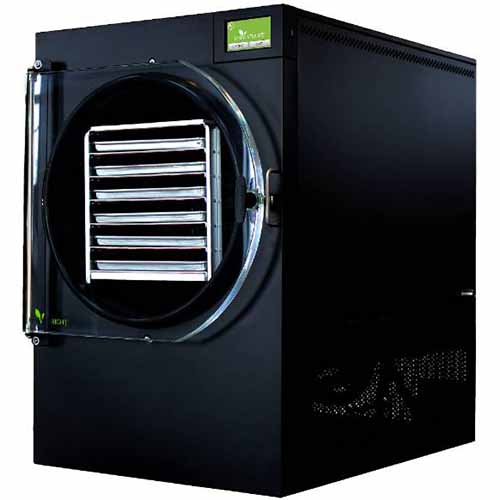
Harvest Right Home Freeze Dryer
Ready to splurge on the food preservation machine of your dreams? You can find the Harvest Right Home Freeze Dryer available for purchase via Lehman’s.
Prepping Produce for Drying
Now that you’re aware of the many options you have when it comes to the way in which you might dry garden produce, let’s look at the details of how to actually proceed, starting with preparing produce for its transformation into a long-keeping foodstuff.
To start with, choose produce that is at peak ripeness and quality, and prepare it for moisture removal as soon after harvest as possible.
Trimming and Slicing
After washing your produce well and patting it try with towels or allowing it to air dry, remove any seeds or peels you don’t want to eat once the food is dehydrated. (However, if you’re going to blanch it – and we’ll get to that step shortly – there’s no need to pat it dry.)

Next, in general, you’ll want to cut chunks or slices that are 1/8 to 1/2 inch thick – however, there are exceptions.
Higher-moisture foods like cucumbers and watermelons need to be thicker. If you’re using an electric dehydrator, check your user manual for the recommended thickness of your selected fruit or vegetable.
Cut pieces that are the same thickness, so the slices will finish drying at around the same time.
Blanching
Once the produce is cut into properly sized slices or chunks, you may want to consider blanching vegetables and certain fruits. This isn’t obligatory, but I’ll let you know why you might want to take this step.
Since we’re getting the produce wetter before drying it, blanching may sound counterintuitive. But this step actually speeds up the moisture removal process since blanching allows moisture to escape from produce more quickly.
And that’s not the only benefit – blanching vegetables stops enzymes from breaking the food down.
Fruit with waxy skins like grapes, blueberries, cherries, figs, and cranberries need to be dipped in boiling water before processing to allow moisture to escape.
Herbs don’t require blanching and neither do garlic, onions, or peppers.
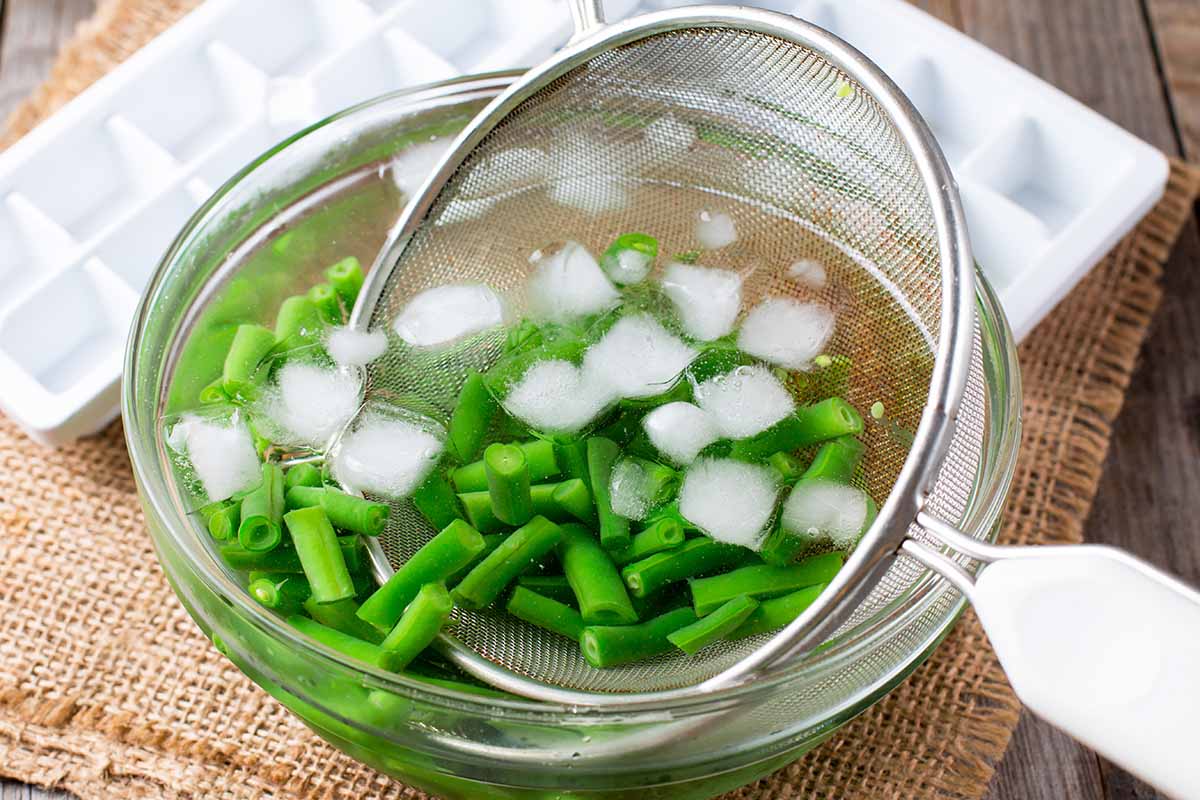
To blanch your produce, heat water to boiling, dip trimmed and cut produce into the boiling water for the recommended amount of time, then move the produce to an ice water bath to cool it off.
Each type of vegetable will have a different amount of time recommended for blanching – generally between one and five minutes.
For waxy-skinned fruits, dip them in boiling water for just 30 to 60 seconds, then cool in a bowl of ice water.
Pretreating
After blanching, there’s an additional step that some food preservationists like to take before drying fruit – pretreating it in an acid bath.
Make a solution of equal parts bottled lemon juice and water for this, and soak fruits in the solution for 10 minutes prior to drying.
This step will help fruits like apples, pears, peaches, and apricots retain their color and lengthen shelf life.
However, you are free to skip this step for simplicity’s sake – it’s not obligatory.
Tips for Dehydrating Produce
Now that you know what you can dehydrate, the different methods, and how to prep your produce, let’s go over some tips for the moment that you’re ready to lay out your slices of produce and let them start giving up their moisture in the name of longevity.
First of all, successful moisture removal requires good air circulation, so you’ll want to lay food out in a single layer.
Next, when it comes to setting the temperature on your device, hotter isn’t necessarily better. As previously discussed, hot temperatures can desiccate the outer layer of the food too quickly, sealing in moisture.
If you’re using a machine, follow the guidelines in your user manual. In general, 125 to 140°F is a good temperature range for most fruits and vegetables.
For those using ovens, preheat to 140 to 150°F, then reduce to 140°F if possible.
The amount of time needed to dry a batch of fruits or vegetables will depend on which method you’re using, as well as the thickness of the pieces or slices.
Electric dehydrators will come with a manual and should include processing times for each type of fruit or vegetable.
For instance, my Excalibur calls for seven to 15 hours at 135°F for apple slices.

For air or solar drying, the process will usually take three days or longer, depending on the produce and the weather conditions.
If dehydrating in an oven, times will vary depending on the fruit or vegetable and its thickness.
Processing in an oven can take two to three times longer than processing in a dehydrator if the oven doesn’t have a fan.
Depending on the oven, apples may only take a few hours, while juicy fruits such as peaches may take up to 24 hours.
Check the food for doneness – dried fruits should be bendable but not sticky, while vegetables should be crisp or even brittle.
Fruits can also be dried to brittleness if that’s your preference!
Next, you’ll want to take a step called “conditioning.”
This process helps ensure that food is uniformly dry. If too much moisture remains, mold can be a problem, and it may ruin a whole jar of food.
To condition your dehydrated produce, store it in an airtight container and shake it daily for a week. If you notice moisture buildup in the container at any point, return the food to the dehydrator for a bit more processing.
If no moisture buildup is noticeable after a week passes, the food can be packaged for long term storage, unless you’d like to pasteurize it first.
When should you pasteurize your produce? If the fruits and vegetables could have been contaminated by insects while dehydrating – such as may have happened if they were outdoors during this process.
To pasteurize the preserved food, either place it on a baking sheet and heat it in an oven set to 160°F for half an hour, or place it in a container in a freezer set at 0°F or lower for 48 hours.
Storing Dehydrated Produce
Dried produce should be packaged in airtight containers and stored in a dark location that is on the cool side – between 60 and 80°F is the ideal temperature range.
As for storage containers, I like to use wide mouth mason jars for this purpose, such as these 16-ounce mason jars from Ball.

Pack of 3 Wide Mouth 16-Ounce Ball Storage Jars
They’re available for purchase in packs of three from the Ball Store via Amazon.
To help keep produce mold-free while in storage, desiccant packets can be added to the jars. These are particularly helpful if you live in a more humid climate.
I like to save desiccant packs from jars of supplements for this reason, but food-grade moisture absorbers can also be purchased expressly for this purpose.
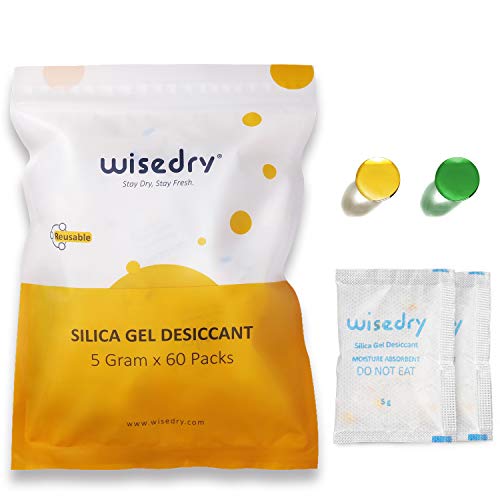
You can purchase a 60-pack of food-grade moisture absorbers from the Wisedry Store via Amazon.
While most references advise using dehydrated food within six to 12 months for the best quality, in reality, dehydrated foods can last much longer, especially when stored in ideal conditions.
If a container of dried fruits, vegetables, mushrooms, or herbs develops mold or off-flavors, discard the entire container of food.
A Plenty of Preserved Produce
The aim of this article was to provide you with a guide to get you started with preserving the bounty of your garden with dehydration.

The Ultimate Dehydrator Cookbook
For more details, including handy guides to food processing times, we recommend checking out “The Ultimate Dehydrator Cookbook: The Complete Guide to Drying Food, Plus 398 Recipes, Including Making Jerky, Fruit Leather & Just-Add-Water Meals” by Tammy Gangloff, Steven Gangloff, and September Ferguson, available via Amazon.
Now that you have the tools you need to start preserving your garden produce in this way, let us know what plentiful crops you’re planning to preserve!

Do you have any further questions about the dehydration process or any of your own tips you’d like to share with our readers? Let us know in the comments section below.
Want to keep exploring how you can preserve the abundance of the garden? Read more right here: