

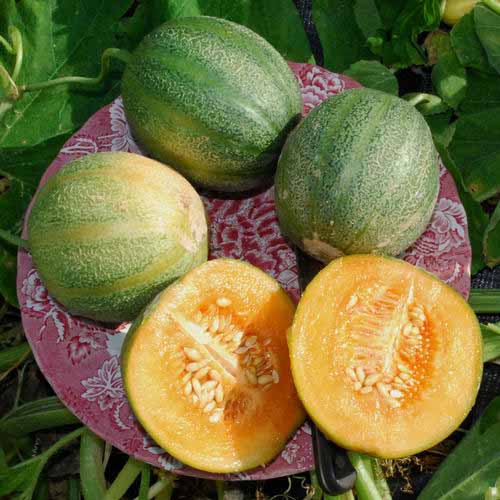
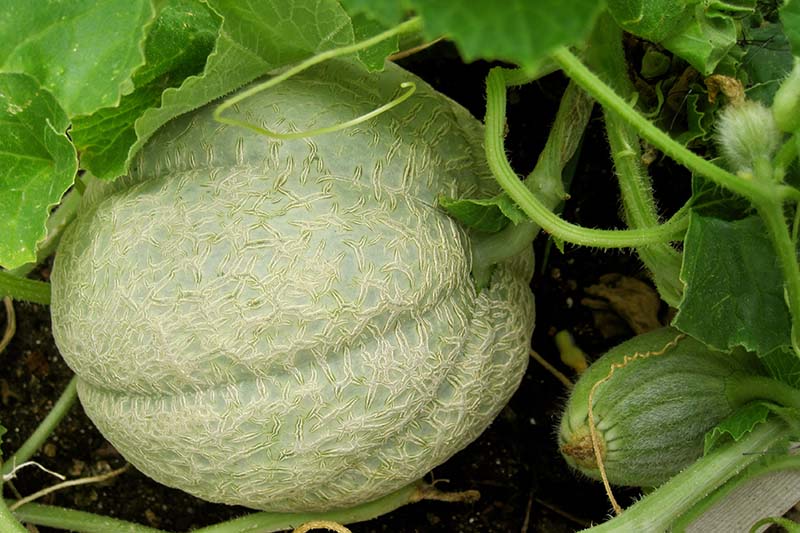
Cucumis melo var. reticulatus
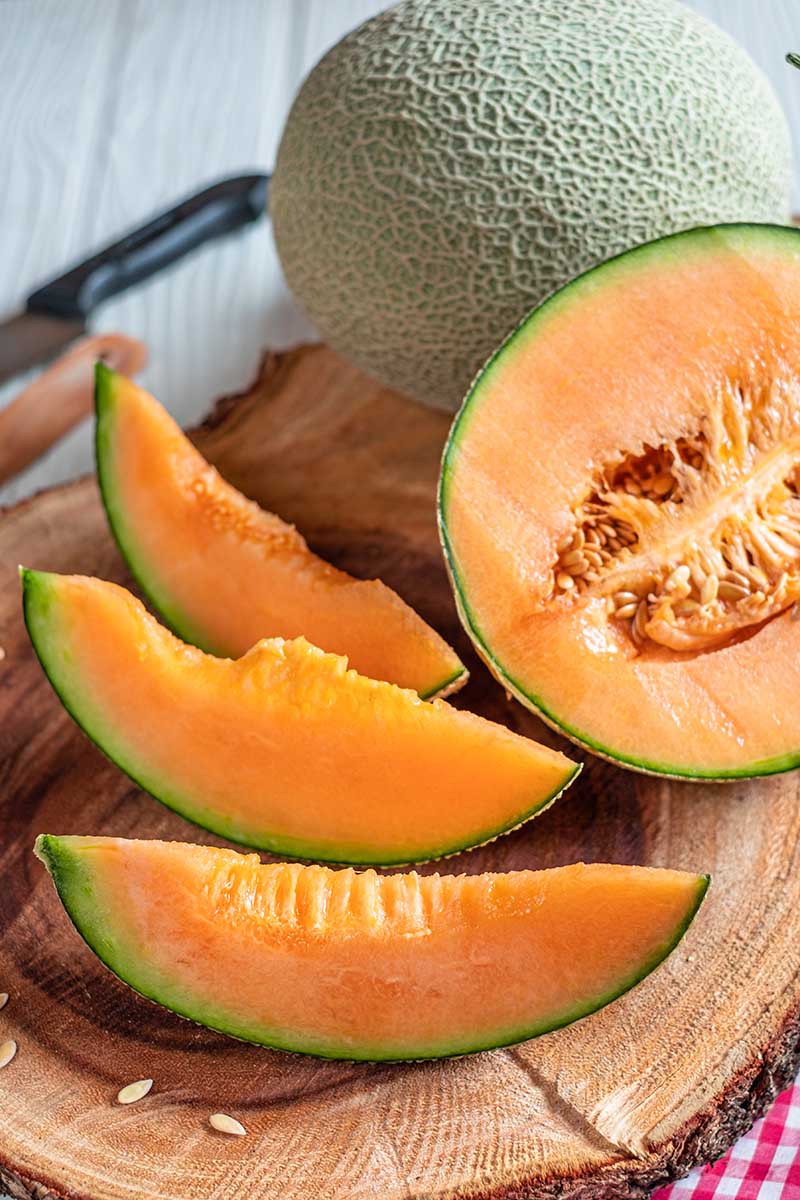
Cantaloupe is like candy in melon form.
For some reason, watermelon gets all the summertime hype. Some of that needs to go straight to cantaloupe, which in my unpopular opinion, is much tastier than watermelon.
With a strange texture, slimy seeds, and an abundance of, well, wateriness, the watermelon just isn’t my type of fruit. Cantaloupe, though, is one of my favorites.

We link to vendors to help you find relevant products. If you buy from one of our links, we may earn a commission.
A juicy American cantaloupe, that is, because I’ve never tried the European variety. There are differences, which we’ll talk about in a moment.
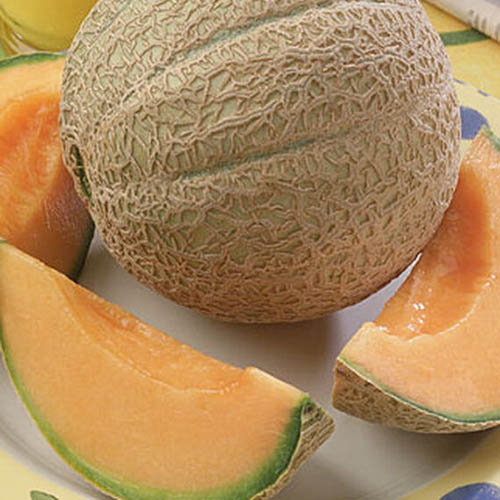
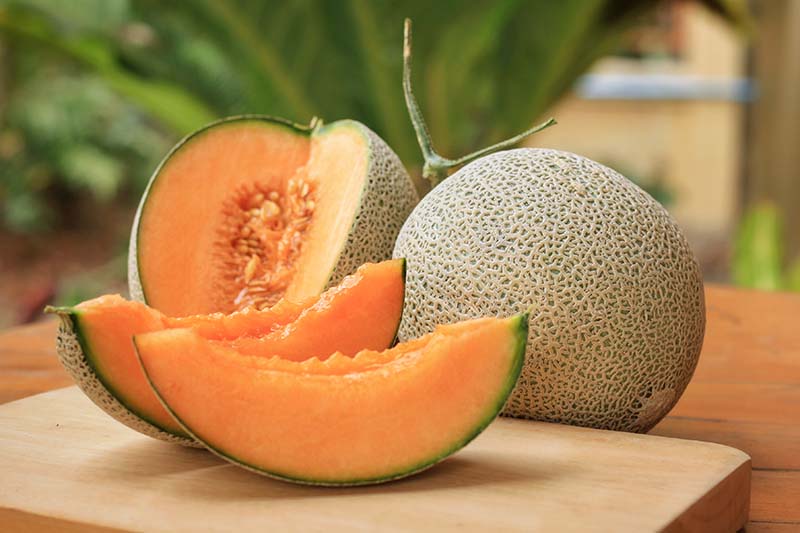
No melon can beat the sweet orange flesh of the cantaloupe. It’s intensely sweet, but healthy too, with robust levels of vitamins A and C, potassium, folate, and beta carotene.

Because I love cantaloupe so much, I decided to grow it here in Alaska. Seeing how this fruit thrives in balmy summertime climes, this is an audacious choice.
But I must have garden-grown cantaloupe.
Feel the same way? Read on!
What You’ll Learn
Cultivation and History
This delicious fruit belongs to the genus Cucumis and is a member of the Cucurbitaceae, or gourd family.
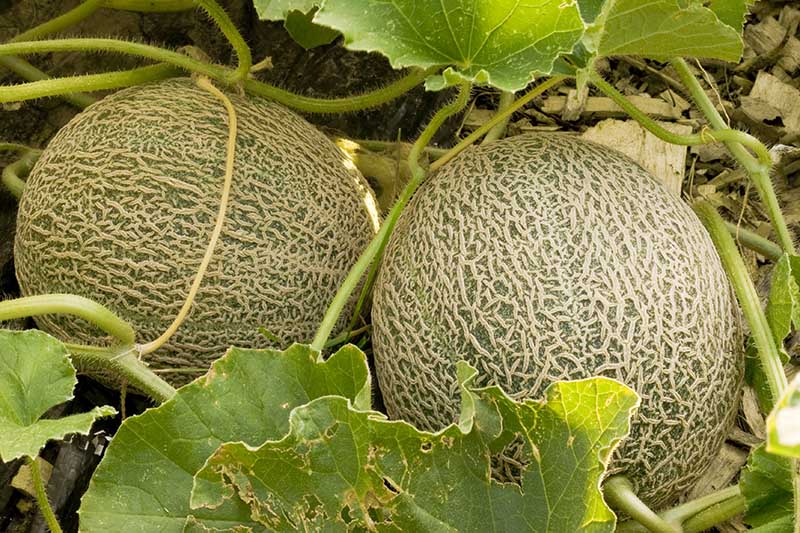
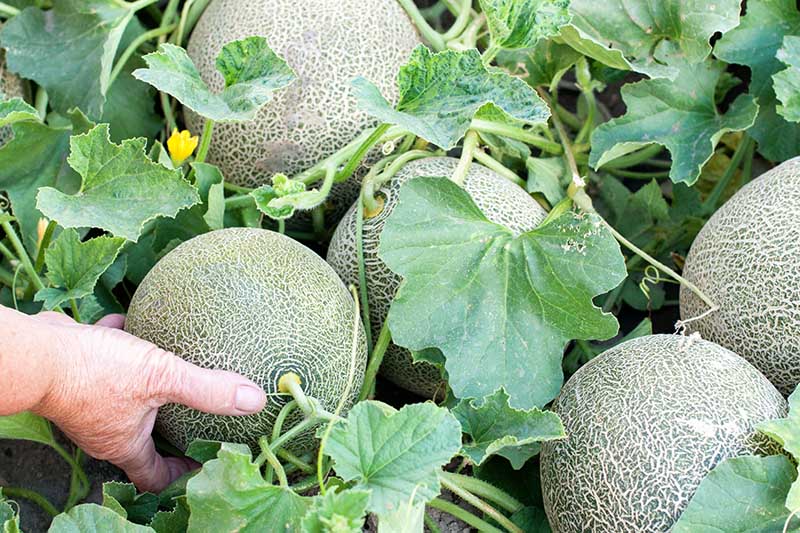
Pumpkins, squash, honeydew, and zucchini are also star members. Grown as a summer annual in USDA Hardiness Zones 4 to 10, the fruit develops on a trailing vine, which can trained up a trellis to save space.
Most varieties mature in 65 to 90 days and produce round fruits that weigh up to four pounds each.
Cantaloupe melons are a variety of the muskmelon, C. melo, and the name “cantaloupe” refers specifically to the North American variety C. melo var. reticulatus, and the European type, C. melo var. cantalupensis.
This orange-fleshed fruit is known as rockmelon in Australia and New Zealand, and spanspek in South Africa.
Early versions of the melon originated in Persia, India, and the surrounding area, and then in the 1700s seeds from Armenia contributed to the cultivation of the European cantaloupe we know and love.
The name came from one of the first places to grow this version, Cantalupo, a town near Rome where the Pope enjoyed a villa retreat.
As for the North American variety, Columbus brought seeds of early cultivars on his 1494 voyage to the new world, and introduced them to the Americas.
In 1881, the W. Atlee Burpee company cultivated the North American variety as we know it today, calling it the “Netted Gem,” for its webbed skin and deliciously sweet fruit.
In their 1896 book, “Vegetables for the Home Garden,” available at Amazon, the author writes, “Burpee’s Netted Gem was first named and introduced by us 15 years ago. In shape this melon is almost a perfect globe, with green skin, regularly ribbed, and thickly netted.”

Vegetables for the Home Garden
A nice blast from the past that first sentence is!
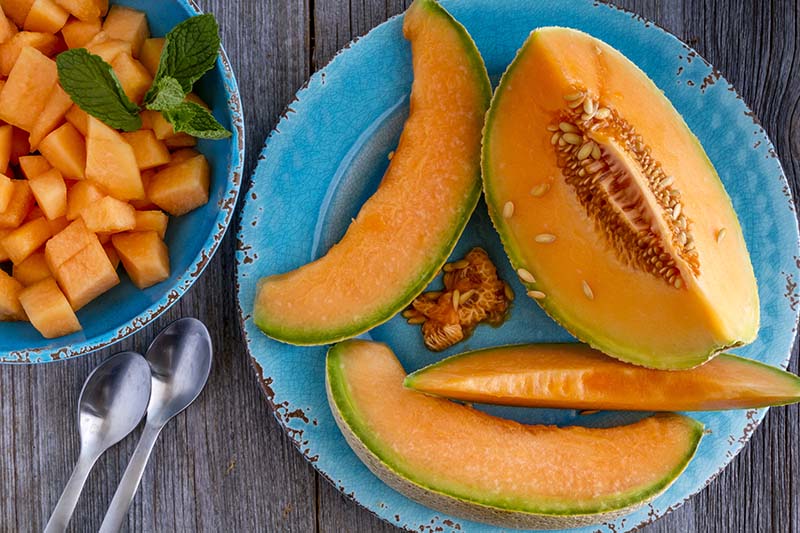
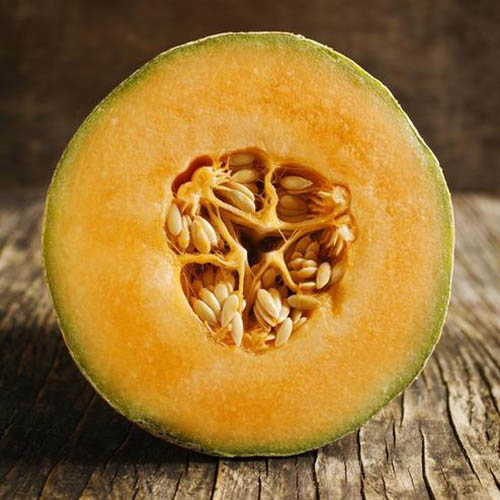
Today, people all over the world favor cantaloupe over watermelon – oh wait, maybe that’s just me! – and use it in fruit salads, wrap it in prosciutto for a popular antipasti, and eat it on the rind for a delicious summertime snack. You can also roast and snack on the seeds.
Propagation
You can start this fruit from seed indoors or outdoors, or from seedlings purchased at a garden center.
In the north, with the shorter growing season, it’s an ideal summer crop as long as it’s got some help to stay warm.
Southern states can grow the melon earlier in the spring or even during the fall in some areas.
From Seed
Those of you who live in colder climates, like I do, should sow seeds indoors at least four weeks before your average last frost date.
Since melons require a long growing season, and take time to ripen, a head start like this helps guarantee that you’ll get to harvest your melons before fall frosts kill the plants.
In warmer climates, you can sow seeds directly outdoors as soon as all danger of frost has passed.
In somewhere like Florida, plant as early as February or March. Those in Zones 9, 10, and 11 can even sow seeds in the fall for a winter crop.
Most cantaloupe cultivars take between 65 to 90 days from germination to reach maturity, so let that be your guide.
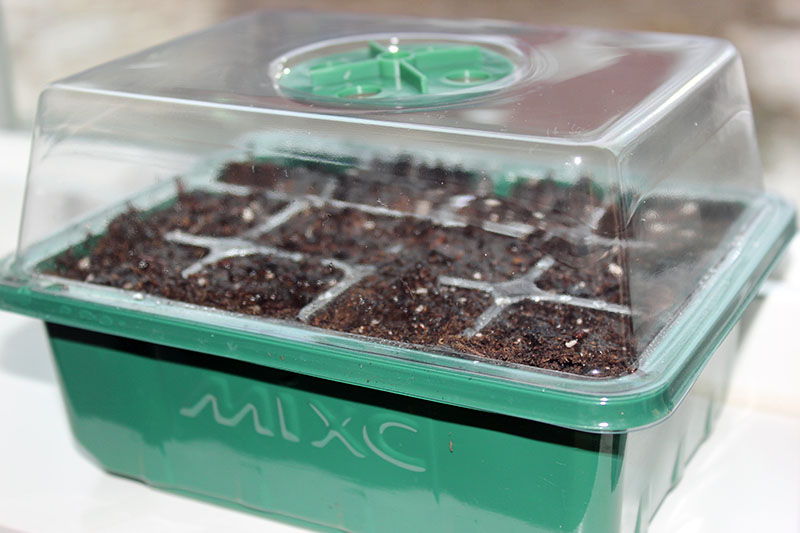
To sow in seed trays, add a good quality potting mix to each cell and then use your finger to make a 1/2-inch-deep hole in each one.
Add two to three seeds per hole, and make sure you place the pointy end of the seeds down.
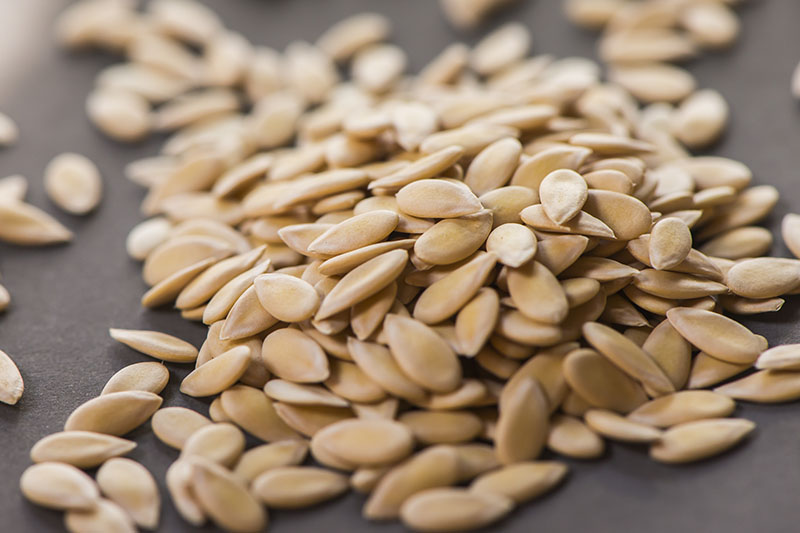
The roots emerge from the point, and while they may still germinate if you place them rounded-side-down, the seedling will have to work that much harder to figure out which way is up and which is down.
Trust me on this one. Embarrassingly, I learned this lesson the hard way.
Tamp the soil back over the seed and give it a nice misting with a spray bottle or a gentle watering with a watering can.
If your seed trays come with a lid, that’s helpful as it helps to trap in moisture, resulting in the perfect humidity for germination.
You can also use a layer of plastic wrap to achieve a similar effect, but be sure to remove it as soon as seeds germinate.
Germination usually takes about a week, sometimes longer if soil conditions aren’t quite at 70°F. You can use heat mat to ensure the soil stays at a consistent 70°F – the ideal temperature for germination.
Make sure to keep that spray bottle nearby – cantaloupe seedlings need constant moisture in the early days.
A few days after germination, thin to one seedling per cell, keeping the one that looks the strongest.
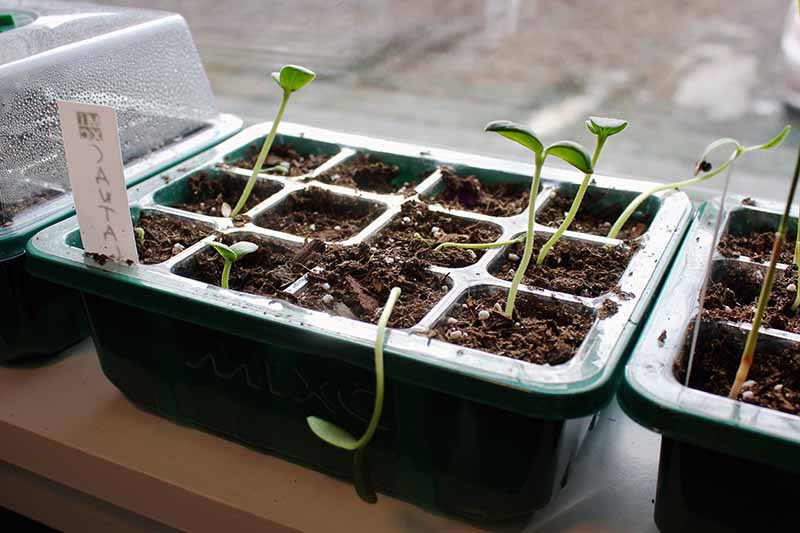
Keep your seed trays near a sunny window or place them under a grow light.
Once they’ve got two or three sets of true leaves, you’ll need to harden them off for seven to 10 days before transplanting outdoors.
A quick note: sometimes the seed casings won’t come off the seedling immediately it pushes out of the earth, especially if you accidentally plant the seedlings the wrong way up.
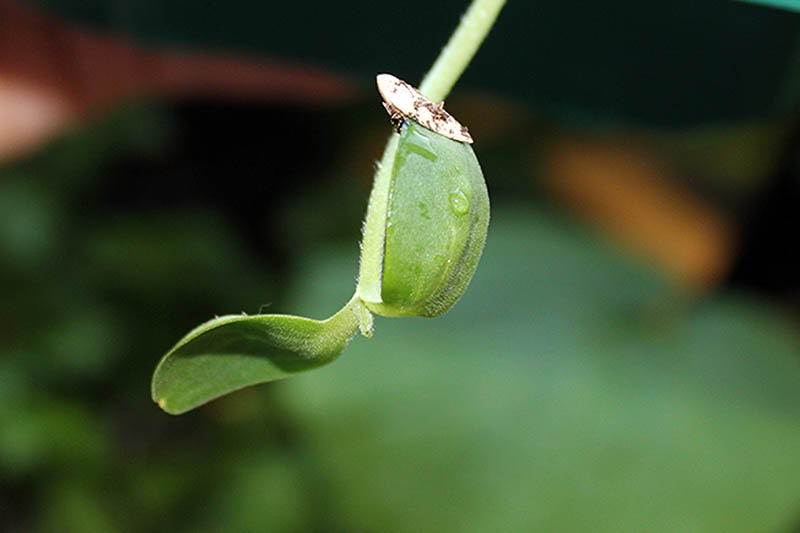
If these casings don’t fall off within a couple days, gently tug them off with your fingers. Leaving them on can inhibit the plant’s growth.
Those of you living in warmer climates can direct sow outdoors in full sun as soon as the danger of frost has passed.
To sow outdoors, plant three seeds in 1/2-inch-deep holes, 18 to 24 inches apart. Keep them evenly moist until germination.
Once seedlings have two sets of true leaves, thin them so that there’s only one plant every 18 to 24 inches.
From Seedlings and Transplanting
Did you pick up a tray of starts at your local nursery? Or are your seedlings big enough to transplant out? Here’s how to make sure they settle nicely into your garden.
Pick a sunny spot for planting, as melons need eight to ten hours of full sun in order to thrive.
You’ll first need to make sure that the soil in your raised beds or old-fashioned row garden is loose, well-draining, and ready for the melons.

I like to amend garden soil with well-rotted manure and compost, or with a nutrient-rich raised bed soil like this one from the Home Depot.
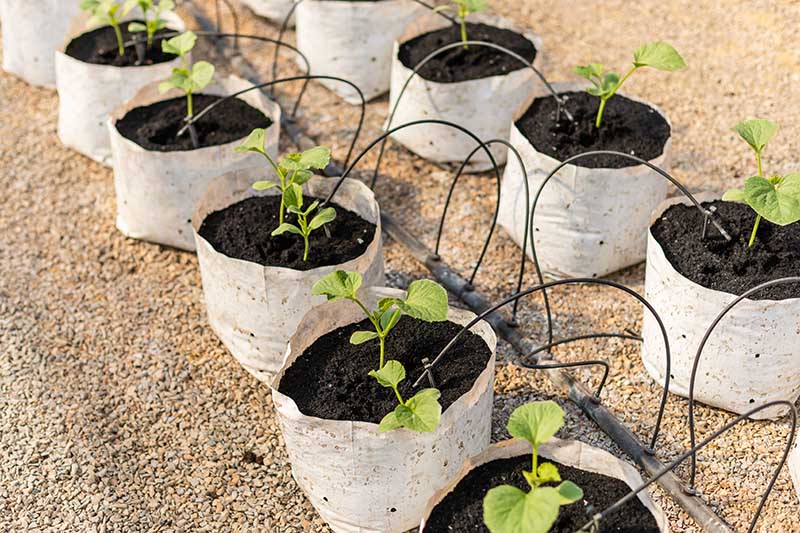
Next, dig a hole the size of the root ball, place the plant inside the hole, backfill with soil, and water thoroughly. Space each plant 18 to 24 inches apart.
How to Grow
Cantaloupes grow best in organically rich, well-draining soil, with a mildly acidic pH of 6.0 to 6.5. You can conduct a soil test and amend accordingly.
While cantaloupes love warmth, they don’t love too much of it. If the temperatures rise above 95 to 100°F or so for several days in a row, your plant might get cranky and let its flowers fall.
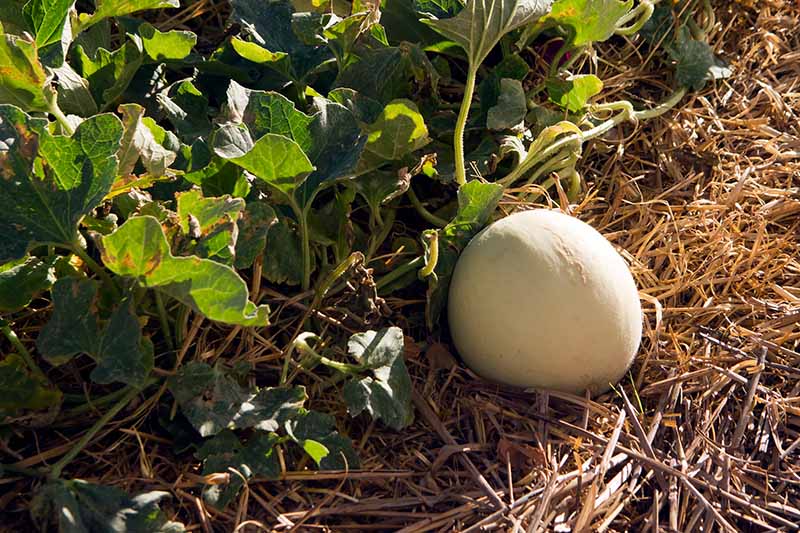
To help keep the plant happy during heat waves, mulch with straw or other light-colored material to keep the roots cool.
As for those of us in colder climes, we’ll need to do everything in our power to keep our melons warm.
First, avoid setting plants out until the soil temperature is a reliable 70°F. Using raised beds for cantaloupes helps, because the soil in raised beds and containers often thaws earlier than the ground.
Another important step? Mulch with black landscaping fabric, or dark-colored bark chips. Only use dark mulch in colder growing zones, though, or the plants may overheat.
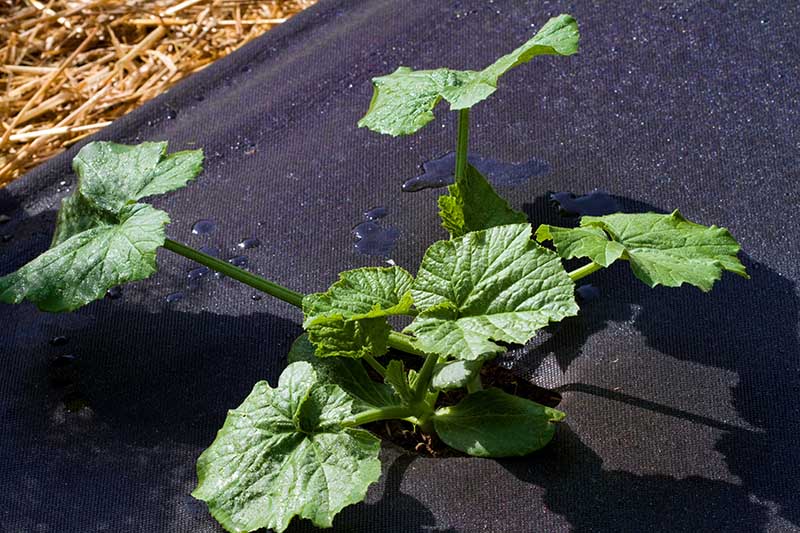
For extra warmth, you can insert hoops and floating row covers over your garden to act as a greenhouse during the early days of growth.
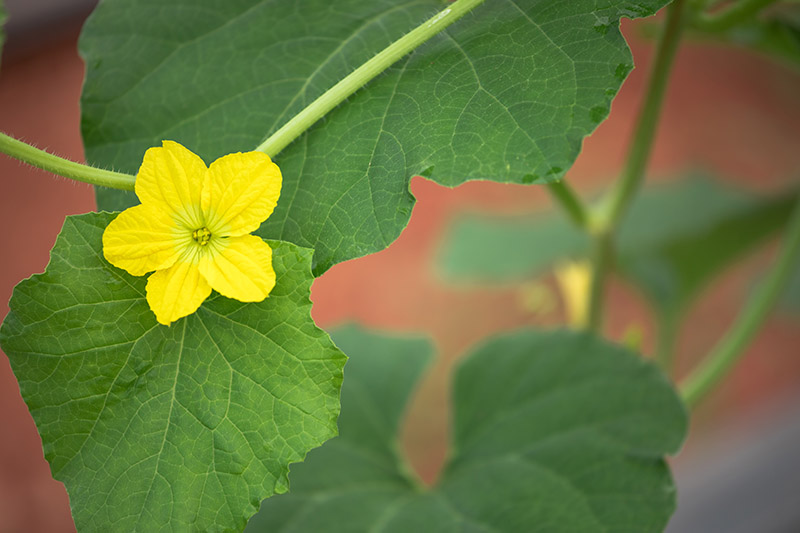
You’ll want to remove the cover as soon as outdoor temperatures remain above 50°F at night, especially as your cantaloupe begins to flower – usually about 30 to 40 days after germination.
The row covers can keep out bees and other pollinators needed to make that delicious fruit.
Another important component of a happy cantaloupe is to keep it well watered, especially in the growing and flowering stages.
During this stage of its growth, it’ll need one to two inches of water per week. Avoid watering from above to prevent the leaves getting wet and potentially spreading disease.
To check soil moisture, stick your finger an inch down into the soil. If it feels dry, it’s time to add water.
But once the vines have set fruit, it’s time to scale back the watering a bit to just one inch per week.
As the melons get closer to maturation, provide just half an inch of water a week. Too much water at this point can cause the rinds to swell and split.
Cantaloupe vines spread wide and thick, so if you’ve got limited space, use a plant support to encourage them to grow upwards.
A tomato cage can work, as can a trellis, a simple tent made of four bamboo poles tied together at the top, or a vertical growing frame.
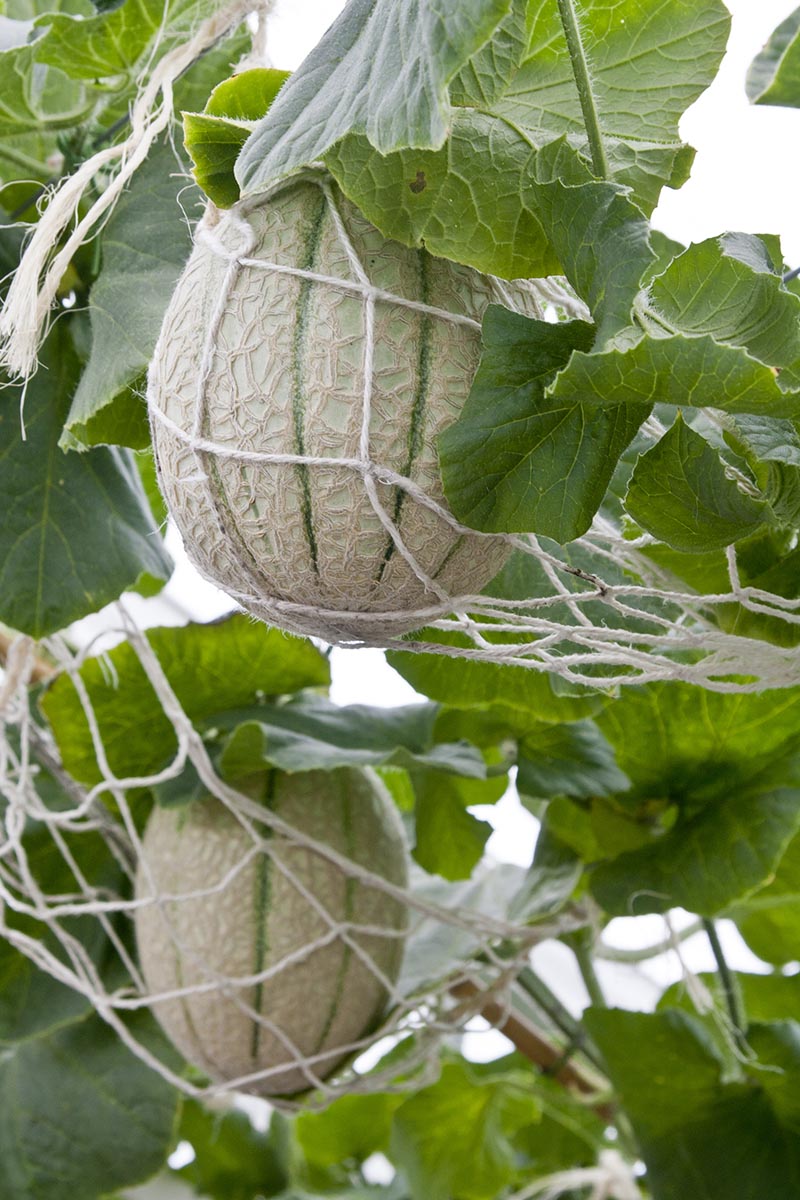
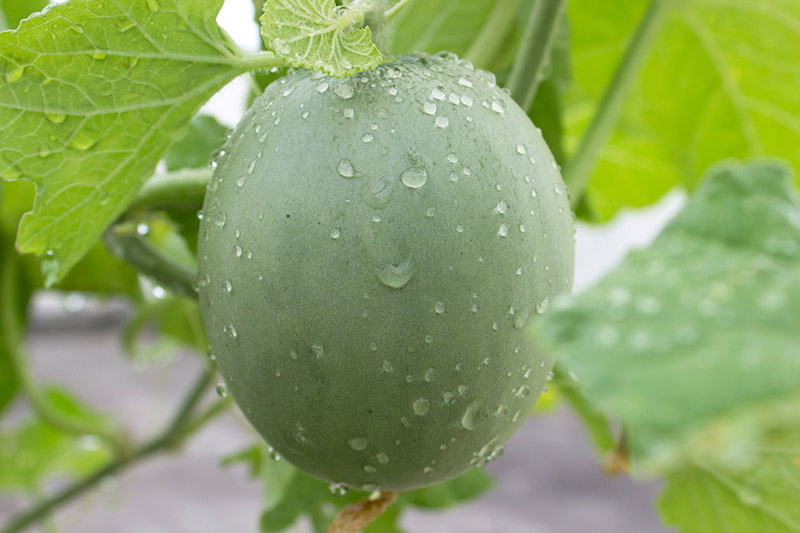
Just be sure to provide support for the hanging melons once they’re about the size of a fist.
Use old pantyhose if you have some on hand, or netted, stretchy produce bags, like these ones available from Amazon.

Support Bags for Growing Melons
Make sure that the material you use is breathable. You don’t want to accidentally rot the melons by sticking them in a plastic bag.
Simply put the net around the melon and tie it to the trellis, frame, or pole. As the melon grows, the sling will expand and support it so that it does not break the vine.
Also, remember to trim the vines to encourage the plant to focus its energy on making big, juicy melons.
Like strawberries, melons send out runners.
To grow large melons, trim each plant at the leaf node just past the one bearing the fruit and consider only keeping two to three fruits on each plant.
The plant will then put all of its energy into growing those fruits to a nice, large size.
But if you don’t mind smaller melons and want a fuller crop, you can let the vines grow as they will and only trim them back if they are spilling over the edge of your raised bed or encroaching on other plants.
As frosty fall weather approaches and your melons begin ripening, pinch off any new flowers to allow the energy to focus on ripening existing fruit.
Growing Tips
- Make sure to plant in organically rich soil
- Keep melons warm in cold weather and help them stay cool if temps rise above 95°F to 100°F.
- Provide one to two inches of water per week until fruit appears, and then scale it back to one inch and then half an inch about a week before harvest.
- Trim to just two to three melons per plant for large fruit or not at all for lots of smaller fruits.
Cultivars to Select
Here are my favorite cantaloupe varieties for your home garden:
Hearts of Gold
This sweet, medium-sized cantaloupe grows well in Zones 3 to 10, which is why I chose it for my Alaska garden. Back in the 1900s, when it was cultivated, this was the most popular commercial melon in the United States.
It’ll mature within 80 to 90 days and weigh in at two to three pounds. Vines will spread up to 72 inches and grow 15 to 18 inches tall.
With just a touch of ribbing and a thin, netted rind, this is a classic cultivar to suit those of us who adore super-sweet melons. Plus, they’re resistant to one of cantaloupe’s most prolific diseases: powdery mildew.
Find packets of 50 seeds at Burpee or up to one pound of seeds at True Leaf Market.
Honey Rock
For a big, three- to four-pound beauty with sweet, rich flesh, try ‘Honey Rock,’ an heirloom cultivar that matures in 75 to 90 days.
Hardy to Zones 4 to 11, these delicious melons were winners of the All-American Selection Gold Medal in 1933, for their robust size and sweet flavor.
Find anything from a small packet to a five-pound sack of organic seeds at Eden Brothers.
Minnesota Midget
Perfect for those in cold climes – or for container growing – ‘Minnesota Midget’ (C. melo var. cantalupensis) matures in just 65 days and is hardy to Zones 3 to 10.
Introduced by the University of Minnesota in 1948, the vines produce sweet, juicy, four-inch fruits and plants are resistant to fusarium wilt.
Unlike other varieties, the vines only spread up to three feet. Each plant can produce anywhere from four to eight delicious melons.
Find seeds today available at Eden Brothers.
Managing Pests and Disease
Cantaloupe isn’t terribly susceptible to pests and disease, but there are a few different critters and maladies to watch out for.
Let’s take a look.
Insects
Which bugs bother cantaloupes the most? These four pesky creatures.
Aphids
Because of course.
What leafy thing is immune from this persistent pest? Not just any aphids love this melon, though: peach aphids (Myzus persicae), which are green to yellowish-brown, and melon aphids (Aphis gossypii), which are creamy white.

While small, they’re easily visible on leaves upon close inspection. Aphids suck the sap out of the leaves, causing them to turn yellow or stop growing. They also contribute to the spread of mosaic virus.
If your outbreak is limited to a few sturdy vines, you can hose the bugs off with water and sprinkle diatomaceous earth atop the fallen pests, and on the soil around your plants.
Alternatively, spray the plant with neem oil or insecticidal soap – or make your cantaloupe patch a happy home for ladybugs, a beneficial insect that eats aphids.
Cucumber Beetles
These rather beautiful beetles come in three pertinent forms: the Western striped cucumber beetle (Acalymma vittata), the Western spotted cucumber beetle (Diabrotica undecimpunctata), and the banded cucumber beetle (Diabrotica balteata).
These brightly colored bugs can damage vines and leaves and contribute to bacterial rot. They also munch on the fruit and leave behind ugly scars.
The best way to manage them is to apply kaolin clay or neem oil to the affected areas (and catch them early before they spread!).
Cutworms
These plump, segmented, brown worms (I’m shuddering as I write this) can kill cantaloupe seedlings and eat holes through the melons. Not cool!
Cutworms, Peridroma saucia, are most active at night, and in the daytime these one- to two-inch beasties curl up and hide in the soil at the base of the plant. They know they’re not welcome.
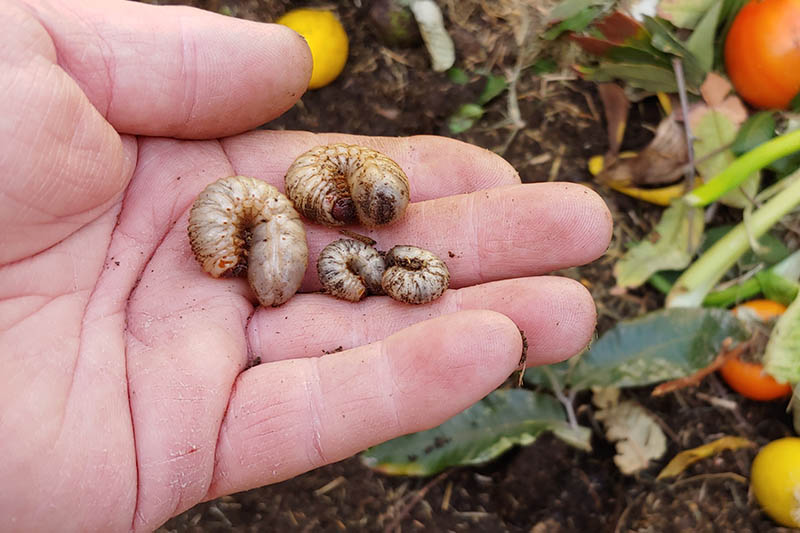
To control them, hand-pick them off your plants at night (fun, fun!) or spread diatomaceous earth all around the base of the plant.
You can also try spraying neem oil or insecticidal soap on the affected areas.
Read more about cutworm control in our guide.
Squash Bug
The most dreaded pest to melon-growers around the world, the squash bug (Anasa trisis) feeds on the leaves, turning them speckled and brown, and causes vines to wilt and even die. It also kills otherwise healthy, ripening fruit.
Nymphs are greenish with black legs; adults are gray-black-brownish.
Diatomaceous earth can help kill or slow the spread of these devastating bugs, but some determined gardeners actually use a wet-dry vacuum to suck them off the vines, leaves, and fruits.
Cantaloupes grown on a fence or trellis can sometimes escape infestation, so that’s something to consider.
Find more tips on combating squash bugs here.
Disease
Check your plants daily to make sure they aren’t developing symptoms of any of these five common cantaloupe maladies.
Alternaria Leaf Blight
If you live in a hot, humid, rainy area, watch out for Alternaria leaf blight caused by Alternaria cucumerina. This fungal infection begins as small yellow-brown spots on the oldest leaves and spreads to new growth.
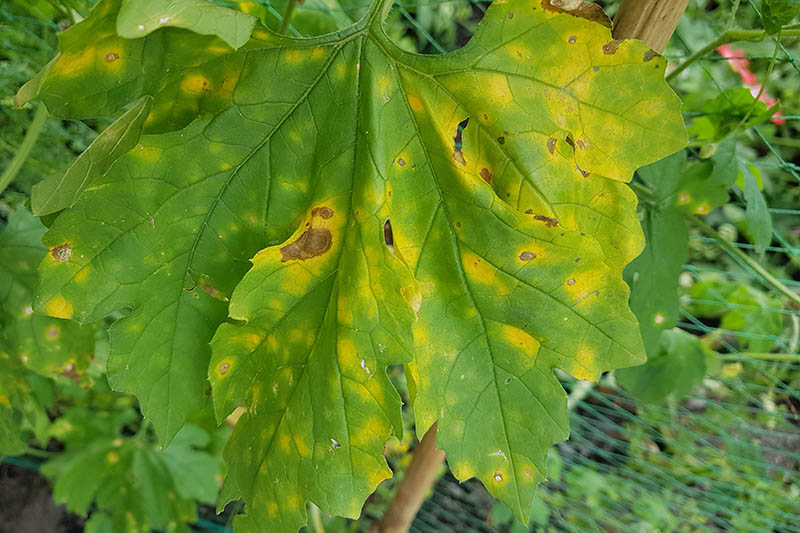
It can also infect the fruit, causing it to crack.
To prevent this unpleasant fungus, avoid overhead watering and consider covering your crops with rainproof tarp if wet conditions last longer than a couple days. Use fungicide on affected plants.
Downy Mildew
This pesky fungal disease is caused by Pseudoperonospora cubensis. Brown spots appear on leaves, eventually killing them.
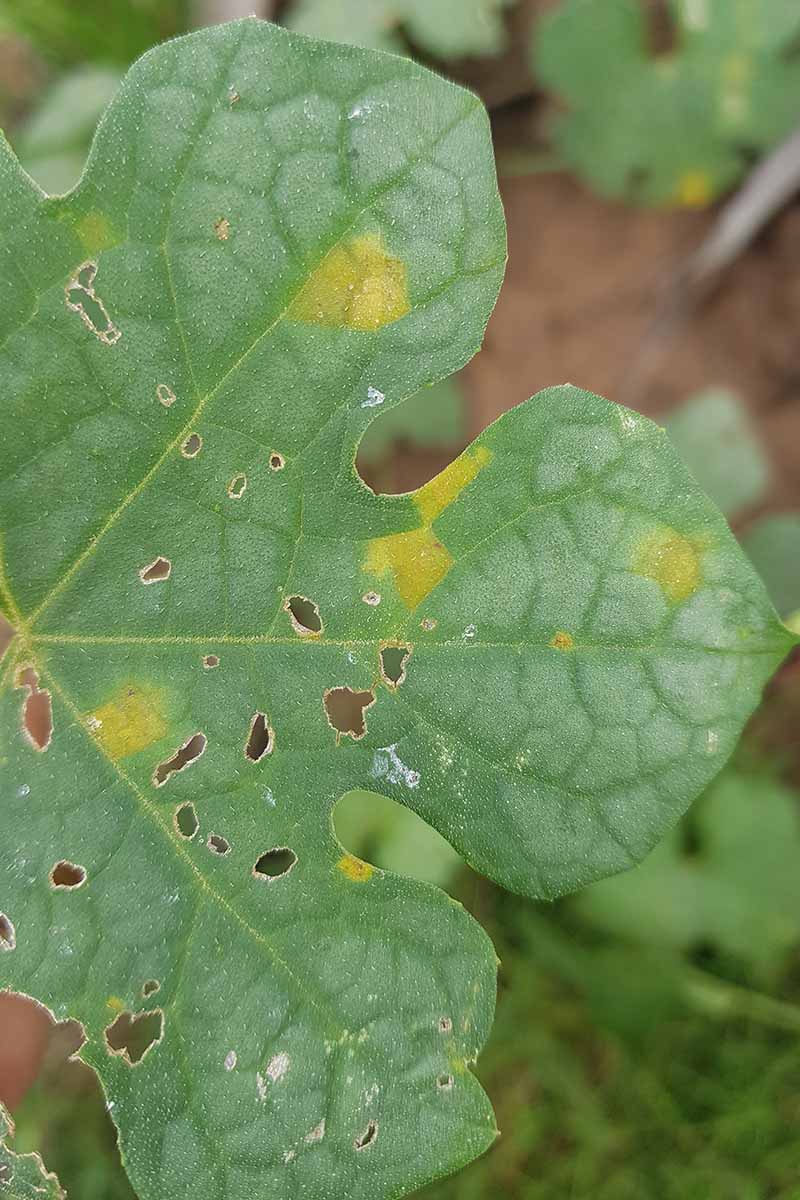
Avoid overhead irrigation and treat with fungicide when needed.
Fusarium Wilt
Fusarium wilt is caused by a soil-borne fungus, Fusarium oxysporum, that will cause the runners to turn yellow and wilt and weakens the overall health of the plant.
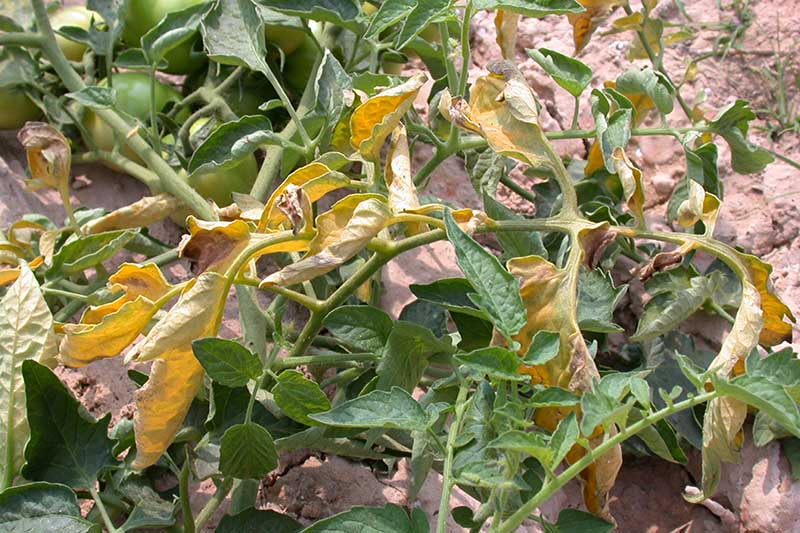
To avoid it, rotate all Cucurbitaceae crops every four years and keep the soil moist but not waterlogged. If needed, apply fungicide.
Mosaic Viruses
One of the main reasons to keep aphids out of your garden is that they spread mosaic virus. The types that damage cantaloupe are: cucumber mosaic, squash mosaic, watermelon mosaic, and zucchini yellow mosaic.
These viruses cause a yellow pattern on leaves, killing them, and can even stunt and deform fruit. Buying mosaic-resistant seeds is ideal if these viruses are a known problem in your area. They spread very quickly, devastating entire crops, and there’s little to be done once that happens.
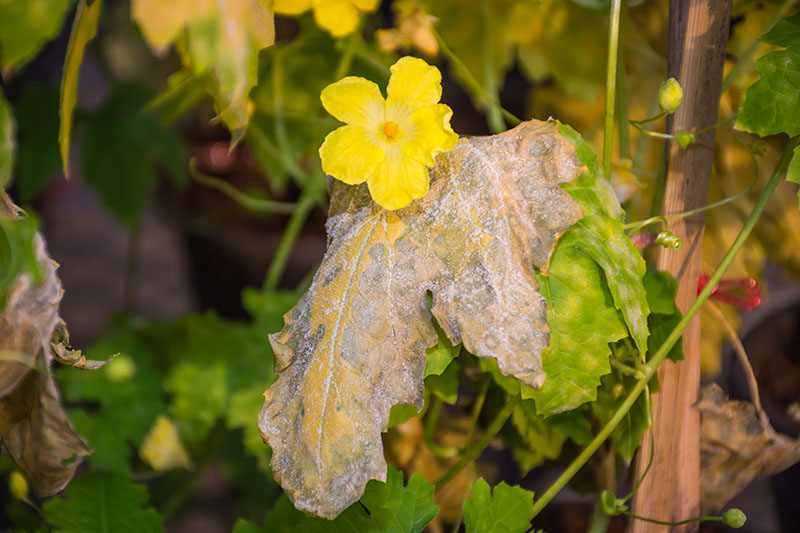
Powdery Mildew
This common disease, powdery mildew, caused by Podosphaera xanthii, promotes the spread of white fungus all over your leaves.
While it rarely kills plants, it looks unsightly and can alter the flavor of the fruit because it doesn’t allow it to ripen fully.
To prevent powdery mildew, make sure you sanitize your gardening tools before using them to plant melons.
Also, make sure to allow for air circulation if you’re growing them in a partially enclosed space, like under floating row covers.
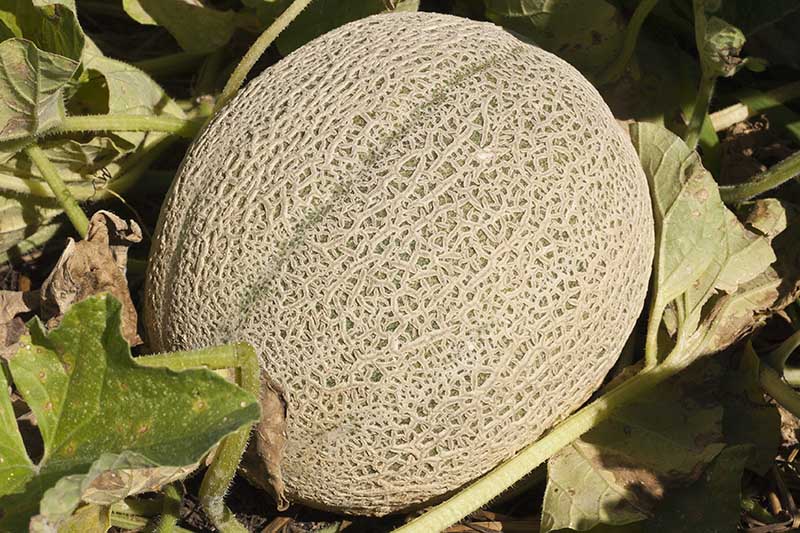
Harvesting
There are three main things to look for when you’re thinking about harvesting your hard-won melons.
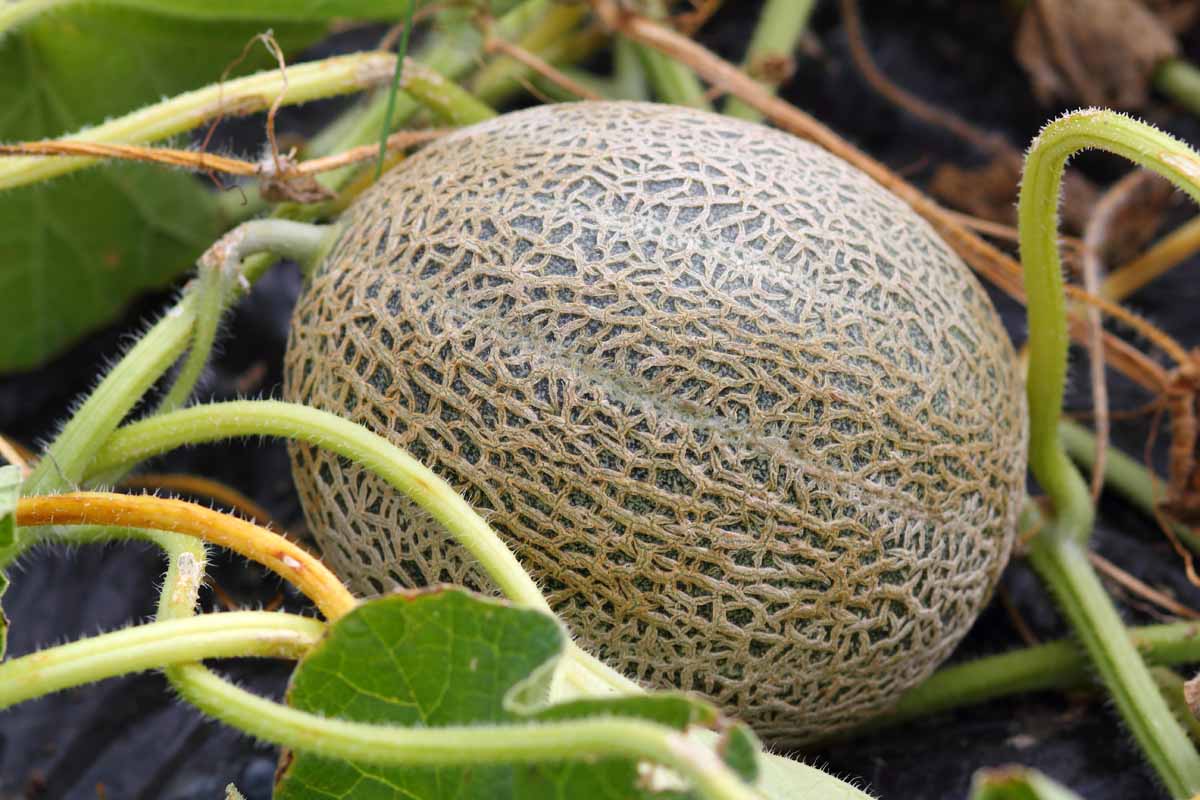
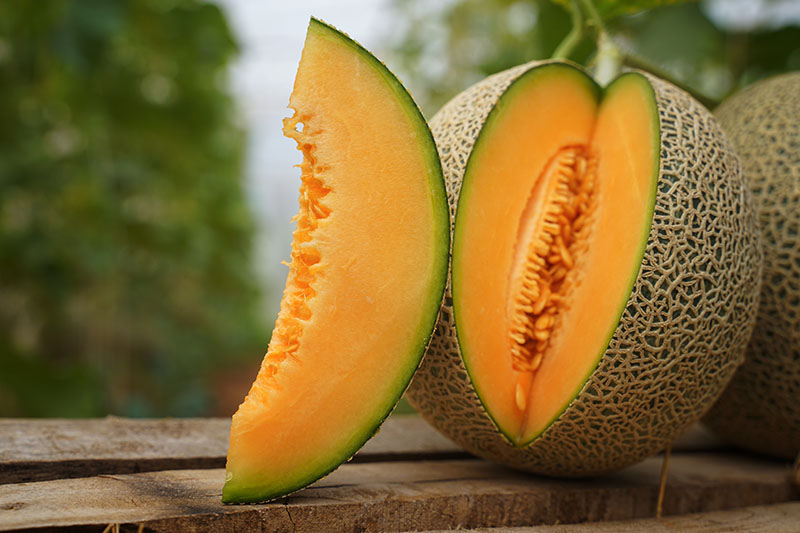
First, watch the color. Is it turning from white to a peachy-gold, yellow, or cream color? If so, it’s probably ready for harvest.
Second, get up close and personal to the melon and take a sniff where the vine meets the fruit. Does it smell sweet? If so, it’s picking time!
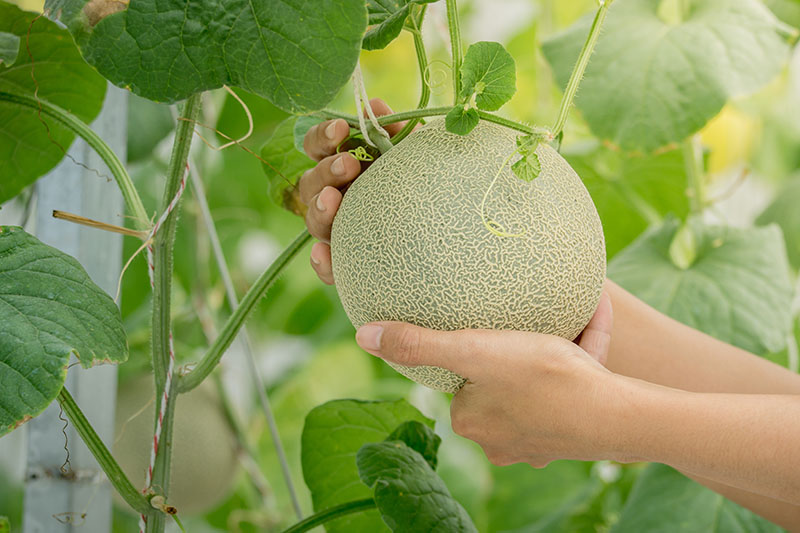
And third, while you’re sniffing away, check the attachment between the stem and the melon.
If you see a slight gap where the melon is beginning to pull away from the vine, this is a good indicator that you can grasp it with both hands and gently tug.
A ripe melon will come away with ease.
Once harvested, take your melon indoors and out of the sun to prevent water loss and over-ripening.
Read our full guide on cantaloupe harvesting here.
Preserving
Let’s be real: cantaloupes are best enjoyed fresh off the vine. After you thoroughly scrub the rind with soap and warm water to remove bacteria, which can contaminate the flesh when you cut into it.
To do this, take a clean vegetable brush and clean the whole of the outside of the melon under running water. Before slicing, dry with paper towels to remove excess water.
You can store unwashed, uncut melons in the refrigerator for up to one week, and seal cut melon in a plastic bag and store for three days.
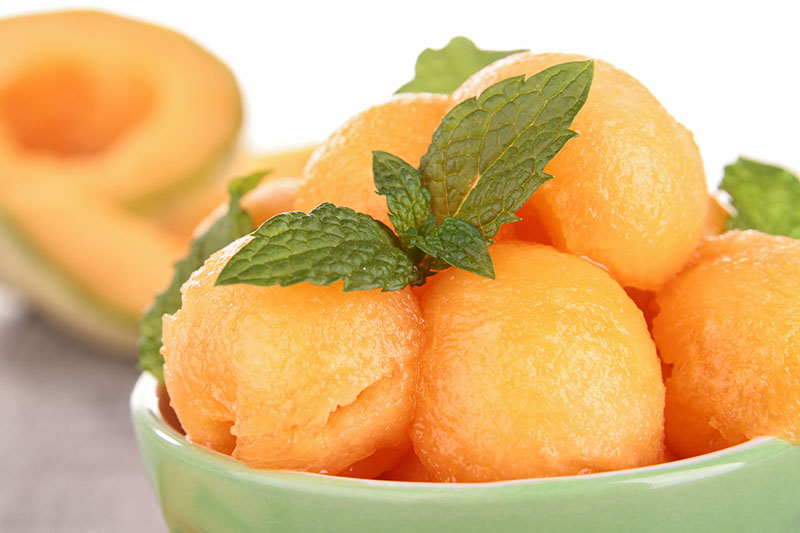
The other option is to cut the cantaloupe into cubes or balls, layer it on wax paper and freeze.
After two to three hours, put the cubes in resealable containers or bags and keep them in the freezer.
Use cubes while still frosty, whether you toss them into a smoothie or eat them fresh out of the freezer like a little dollop of ice cream.
Try sprinkling sugar on the cubes before freezing for an extra-sweet treat. Use your frozen cantaloupe within one month for best results.
As for any other methods of preservation, those are pretty much nonexistent.
According to Tracy L. Parnell, Trevor Suslow, and Linda J. Harris, food scientists at the University of California, it’s unsafe to can the melon due to a high risk of botulism, and unpleasant to attempt to dry it.
Recipes and Cooking Ideas
For tips on how to properly cut cantaloupe, check out this article from our sister site, Foodal. It’ll tell you everything you need to know!
You can add fresh or frozen cantaloupe to smoothies or eat it as is. Combine with other fruits for a tasty salad, or eat it fresh with a touch of mint.
And remember those frozen cubes of cantaloupe? Try making this watermelon daiquiri recipe, also from Foodal, but use cantaloupe instead of watermelon.
Quick Reference Growing Guide
| Plant Type: | Annual | Water Needs: | Moderate |
| Native to: | Middle East, Europe | Maintenance: | Moderate to high |
| Hardiness (USDA Zone): | 4-11 | Soil Type: | Organically rich |
| Season: | Spring, summer, fall (depending on region) | Soil pH: | 6.0-6.5 |
| Exposure: | Full sun | Soil Drainage: | Well-draining |
| Time to Maturity: | 65-90 days | Companion Planting: | Marigold, oregano, pumpkin |
| Spacing: | 2-3 feet | Avoid Planting With: | Beans, cucumber, potatoes |
| Planting Depth: | Seeds: 1/2 inch | Family: | Cucurbitaceae |
| Height: | 12-18 inches | Genus: | Cucumis |
| Spread: | 3-6 feet | Species:: | melo |
| Common Pests: | Aphids, cucumber beetle, cutworms, squash bug | Common Disease: | Alternaria leaf blight, downy mildew, fusarium wilt, mosaic viruses, powdery mildew |
Everyone’s Favorite Melon
Okay, maybe it’s not everyone’s favorite, but it sure is mine, and I can’t wait to see my plump melons thrive in the garden.
Have you ever grown cantaloupes? Did they thrive or just barely survive? Let us know in the comments below!
If you’d like to add other summer fruits to your garden, check out these articles next:
Hi! I’m a first time cantaloupe grower, I’m doing it in a greenhouse. What I’m wondering is what fertilizer should I use and when… my plants have reasonably good well draining soil, my greenhouse stays below 30c and above 25c, but my plants look anaemic and aren’t thriving like my tomatoes and cucumbers are. I live in northern B.C.,
Thank you!
Hi Betty! Thank you for reading, and I’m sorry to hear your plants are struggling a bit. It sounds like the temperatures are just right for the plants, so that shouldn’t be the issue. Are the plants about four inches tall yet? If so, you can fertilize them. You can use a 5-5-5 or 10-10-10 NPK granular fertilizer to give them a nutrient boost. Just make sure the granules don’t touch (and burn) the plant; mix them into the soil according to the instructions on the package. Once blossoms appear, you can fertilize again, this time with a fertilizer that… Read more »
I started a raised garden in March and I threw a rotting cantaloupe inside. The leaves and flowers took over everything. I didn’t know what it was… Found my first melon (July). Surprisingly thrilled. Can’t wait to taste.
My leaves are taking over the entire raised garden. Yellow flowers all over – will they be the cantaloupes?
Hi Gloria! Melon leaves definitely tend to take over. You can try trellising the vines to leave some space for other plants — check out our guide to trellising cantaloupes for step-by-step help. And yellow flowers are a good sign! Do some have tiny baby fruits at the base? If you have a mix of male and female flowers and plenty of bees around, you’ll most likely have fruit soon. If you want to try hand-pollinating your melons, we have an article on hand-pollinating pumpkins that also applies to cantaloupes.
Let me know if you have any questions!
Wow, that’s amazing! I love garden surprises like that. Enjoy!
I tried and succeeded with cantaloupes this year -yeah! I learned a lot about spacing and a lesson about planting next to watermelons. Overall glad I stepped out on faith. Wondering if it is too late to plant another round from seed here in NC.
Woo hoo! I learned the same lesson about growing mine near pumpkins. Ha! I’m glad your efforts succeeded.
You should definitely have time to plant another round of seeds if you start them right now. They’d be ready somewhere in mid to late October, and if typical temps in NC are warmish during those months, they’ll be fine.
I have a melon that seems to be ripening but about a third of it is still green and smooth, no netting formed. Should I just harvest it or give it more time?
And by the way, it’s HUGE! Like, seedless watermelon sized 🙂
Ooh, that’s exciting! It’s pretty common for a ripe melon to still have a bit of green, so I’d say give it another day or so and then smell the area where the vine meets the rind. If it smells sweet and musky, go ahead and harvest!
Laura, Great article! I wish I had seen this before I planted my cantaloupe, they may have turned out better. I have bookmarked this article for next year.
I probably shouldn’t say this, but I don’t like cantaloupe. Don’t cry though, my wife loves them, and I was growing them for her. She was able to get her fill of them, so that was good. We will see how it goes next year. 🙂
Have you made a video of this?
That’s very kind of you to grow them even though you don’t like them! No videos, but feel free to ask any questions while you’re growing them next year, either here or on our forum.
Hi
Tried growing this year (Canada); started really late from seed but I have 2 fist sized green melons and really healthy vines; after reading this I will be trimming back the vines this weekend. Between 2 cantaloupe vines and one zuchinni plant I am amazed the green beans are still growing underneath all of that. I now have some great tips for next year.
Thank you for reading! I’m glad this guide was helpful. It’s definitely tricky growing melons in colder climates. Everything here in Alaska is already dying back with our multiple frosts.
Great information here. I learned a lot as I also am a first timer. I basically bought a melon from Walmart, ate it and through all the seeds straight into a pot with vegetable growing soil. After a week I now have like 40 x 5 inch flowers super green and growing like crazy. I did have to remove about 4 seed shells from the plants but other than that they are super healthy. Cant wait till they start producing, will separate them into a raised bed. Anyways thank you so much for this valuable information!
Thank you for reading, Michael! If you run into any issues, feel free to pose a question here or on our forum.
I never leave comments on the web, but I had to for this! What a well-written and through article about growing cantaloupe!!! I have been gardening for 10 years and have tried to grow cantaloupes several times. I have had plants bear fruit, but none have ever reached maturity. (The squash bugs usually destroy them.)
Ah, those dratted squash bugs! Thank you so much for your kind comment. I’m glad you enjoyed the article!
Hi Laura!
I tried growing cantaloupe late summer to get an idea of what to expect for upcoming growing season. My questions are; Do you pinch some leaves for better production? Do you limit the amount of melons per vine for better quality? Do you punch off first flowers for better production?
I have read many articles, but none have addressed my questions. Please advise me if this is even a way or is there a way or tips for growing melons.
Eileen
Hi Ellen! You can definitely allow just a few of the melons to stay on the vine and prune away others in order to allow all the nutrients to go to the melons you want to let thrive. What happened to your cantaloupes you grew last summer? Did they not grow very big, or not pollinate at all?
You can also read more about training pumpkins on a trellis in our guide.
To tell the truth, cantaloupe is my favorite kind of fruit because it is so fresh and it has its own special taste. It is so good that I came across your article because I would like to know how I can grow it for the reason that I would eat it practically every day. It is so wonderful that these tips are applicable not only for people who have fully favorable conditions to grow cantaloupe but for almost any person. Frankly, I wasn’t aware of the fact that there are such a variety of cultivars of cantaloupe and they… Read more »
Thank you for reading, Marina! I’m glad our guide was helpful and informative. ????