
Wouldn’t it be nice if we all had gardens so big that we could give the cantaloupe their own big old patch to spread their vines?
If you do have a garden that large, I am sincerely glad. The thought of a massive melon patch is immensely cheering.
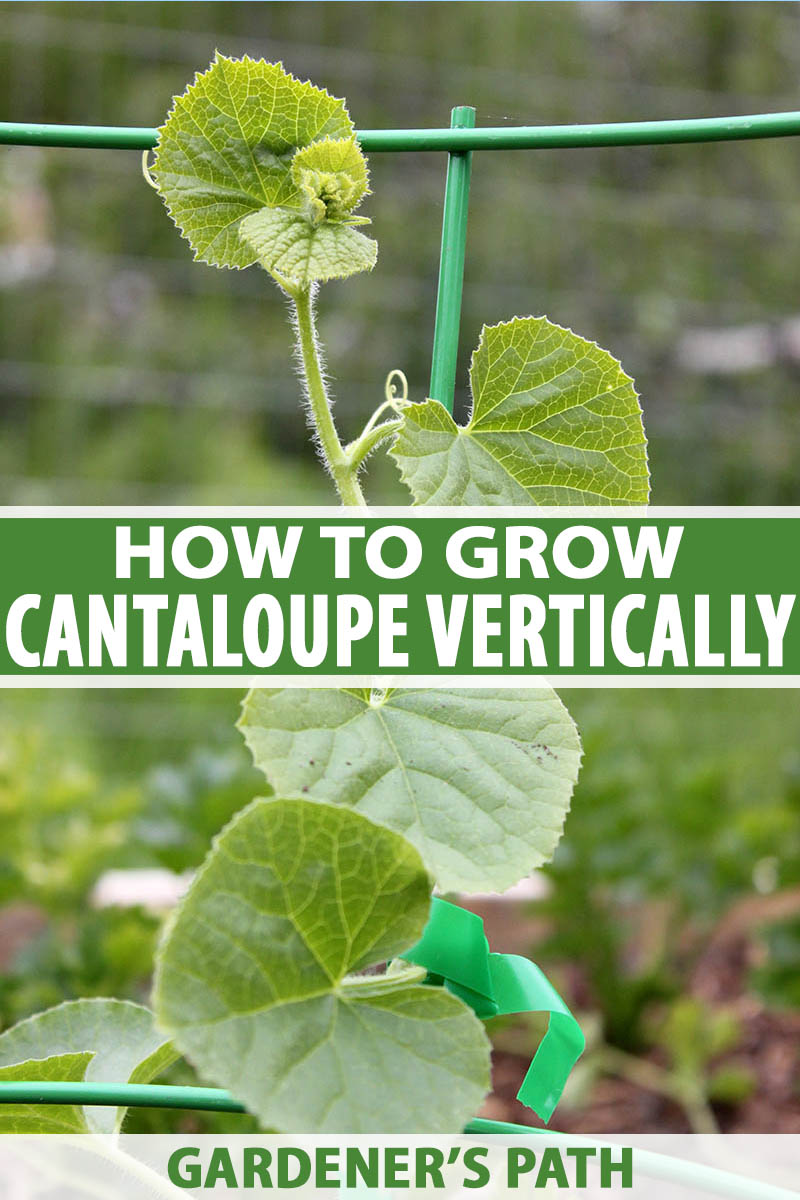
But those of us with limited space need to get creative. We’ve got to train our melons to climb skyward.
We link to vendors to help you find relevant products. If you buy from one of our links, we may earn a commission.
The good news is that with a pinch of creativity and a dash of careful setup, anyone can train cantaloupe to grow vertically on a trellis of nearly any type.
So don’t shy away from growing these delicious melons (Cucumis melo var. reticulatus), which you can learn more about in our growing guide.
Even those of you with small or even tiny growing spaces can grow these juicy fruits.
Are you ready to get started?
I thought so.
Here’s what you’ll learn:
How to Grow Melons Vertically
Why Melons Need Space
Cantaloupe, like other Cucurbits, grow long vines. These can reach anywhere from four to seven feet, depending on the variety. And they can quickly take over your garden, leaving little room for anything else.
By training the vines to climb a vertical structure, you save space in your garden while still giving the melons plenty of space to stretch.
Plus, training them on a trellis keeps the fruits, vines, and leaves off the damp soil, helping to prevent fungal infections and pest infestations.
Even better, the leaves won’t have to compete with weeds or surrounding plants for sunlight.
Keep reading to learn about the best structures to support your climbing cantaloupe!
The Best Structures for Vertical Growing
Because vines grow so long – well, tall, if you will – it can be helpful to choose a structure that’s tall as well.
If you’ve got the building skills, create an arched trellis that people can walk under when they visit your garden.
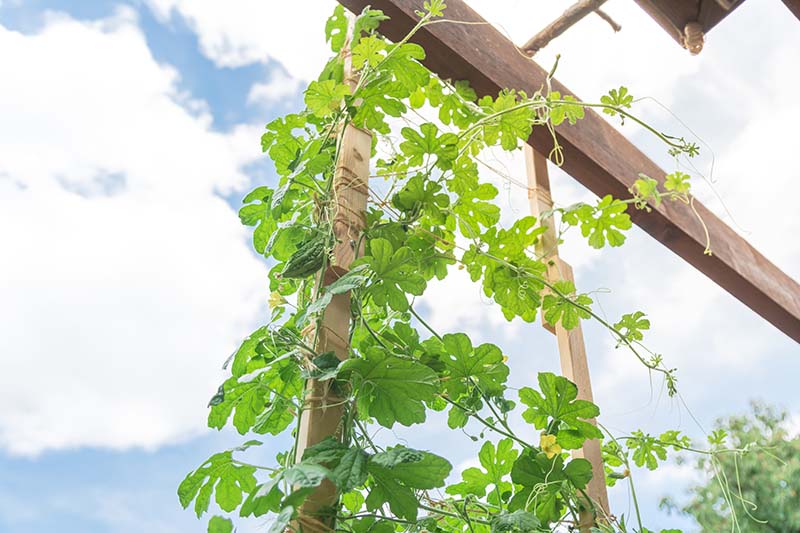
The vines will climb all over it, giving the feeling of entering an enchanted wood whenever you pass under your archway.
You could even put together one of these gazebos and train the vines to loop around them.
If you don’t have space or the building skills to create an arch or gazebo, any of the following structures will work:
- A sturdy tomato cage
- A fence
- A trellis
- Bamboo hoops
- Two sturdy poles with twine strung between them
- Zip ties and wire fencing
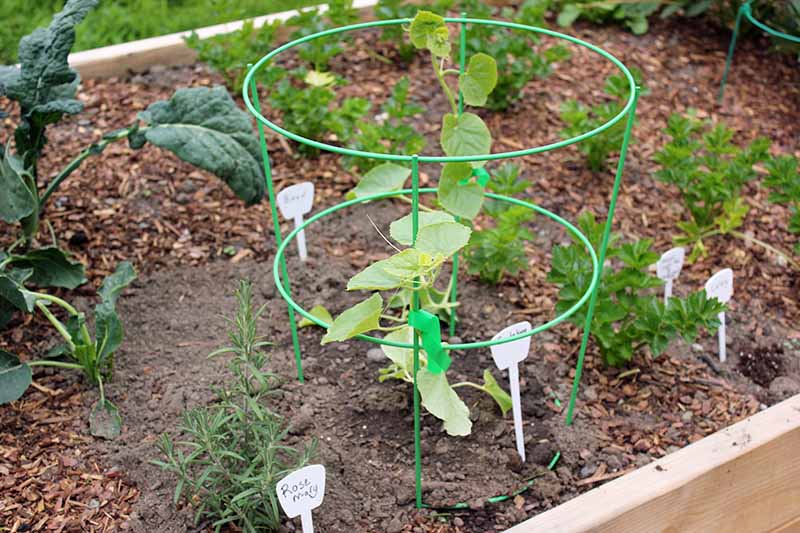
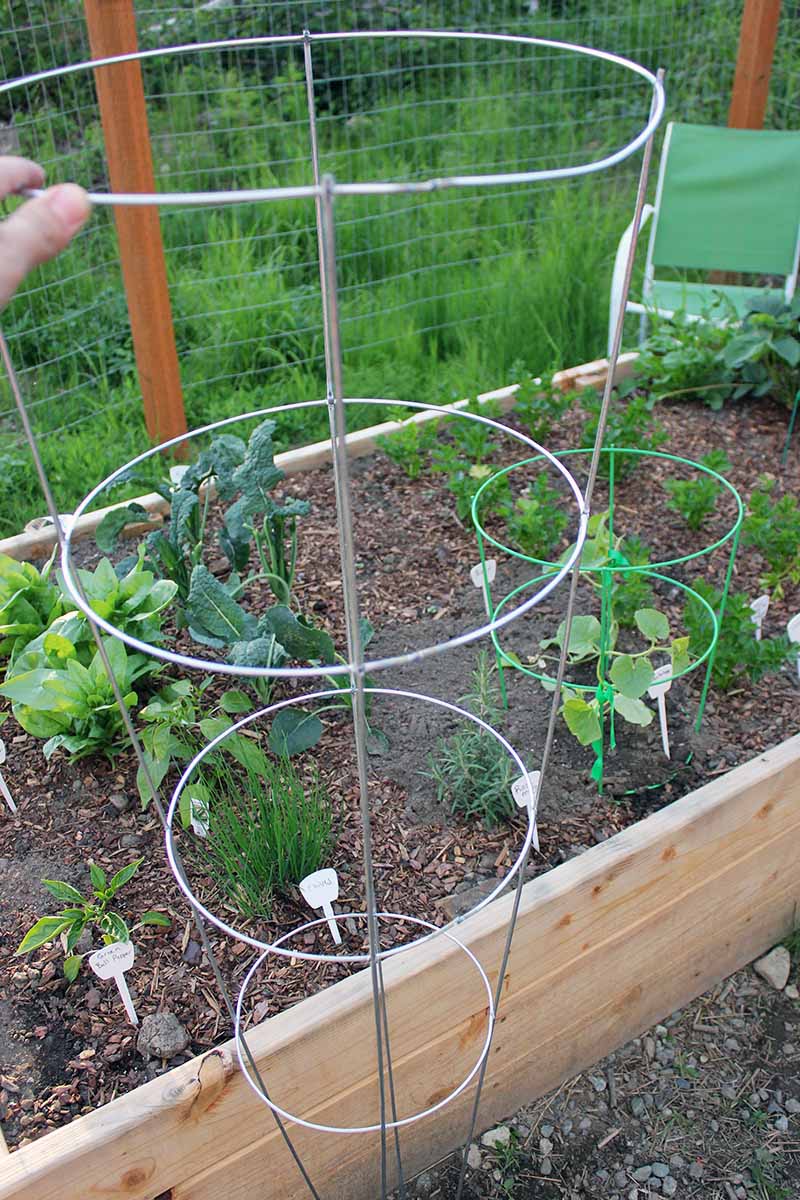
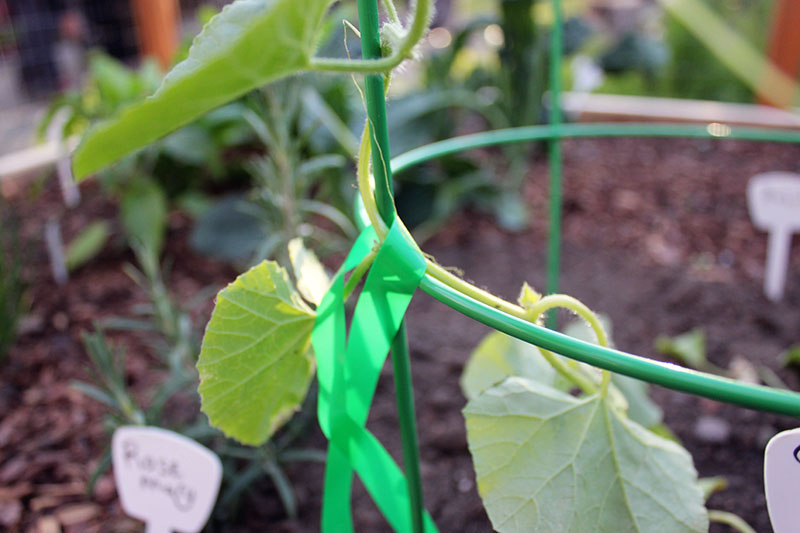
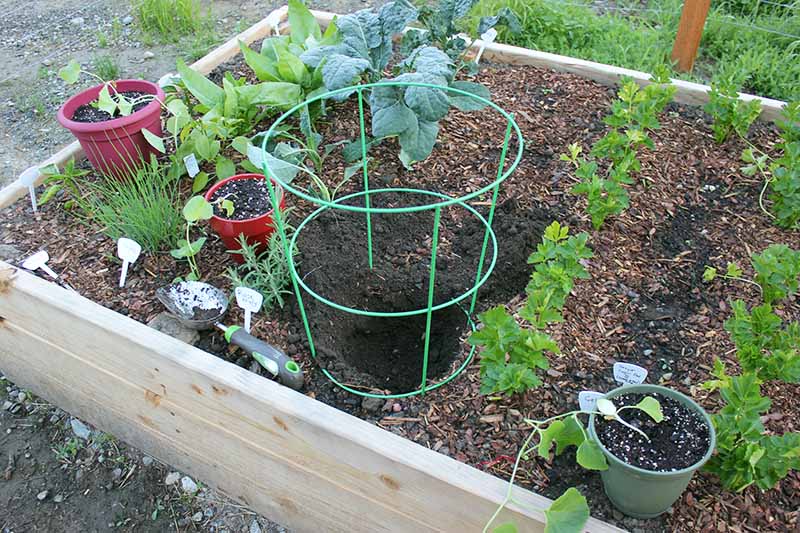
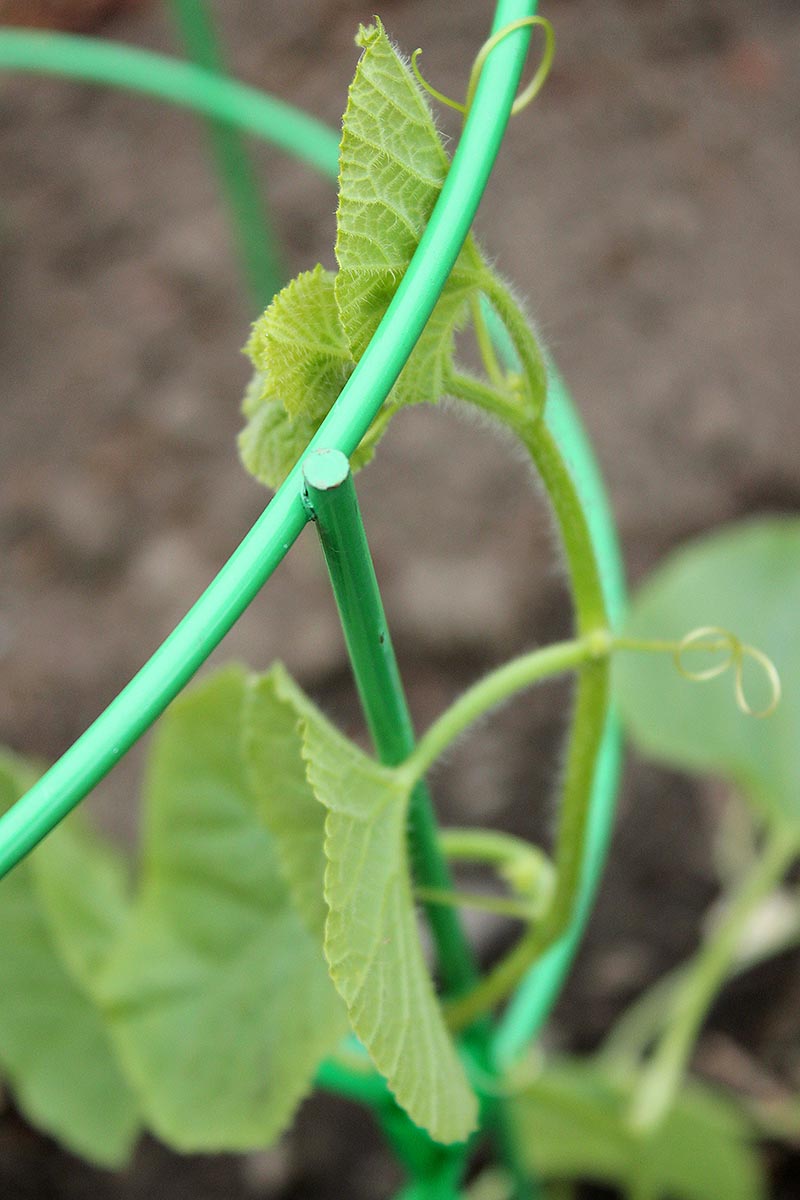
You get the idea. And while a tall structure may be ideal for some, you can use a smaller one, like this little green cage I got for some of my cantaloupe to grow on:
You’ll just have to keep an eye on the vines and make sure to manage them correctly. I’ll show you how to do this in just a moment.
And if you do feel like you need to use a bigger cage, it’s easy to carefully snip off any plant tape you use, gently remove the old cage, and insert a taller one in its place before re-wrapping and organizing the vines.
This is exactly what I had to do when I realized the miniature tomato cage I was using wouldn’t be tall enough to support two vines.
I bought a 52-inch cage instead.
Because I’d only loosely tied the vines to the wires, it was easy to unwind them.
Some of the soil under the first wire ring came loose, which made my breath catch in my throat for a moment, but ultimately I don’t believe the roots were disturbed.
Then, I patted the dirt back down and watered the roots before covering them with mulch.
My vines are now much happier, with lots of space to grow.
If you have the same issue, you’ll want to fix it before the melons start forming so you don’t disturb the fruit. In gardening, there are plenty of mistakes to be made, but plenty of these can be fixed.
Planting the Melons
Whether you’re growing cantaloupe from seed or from a transplant, we’ve got you covered.
From Seed
If you live in a warmer climate – around Zone 7 and up – direct-sow your seeds right next to your trellis as soon as there’s no threat of frost in the forecast.
Make a half-inch divot in the soil and put the seed in the hole, pointy side down.
Cover with soil and water thoroughly, keeping the soil moist but not waterlogged until germination.
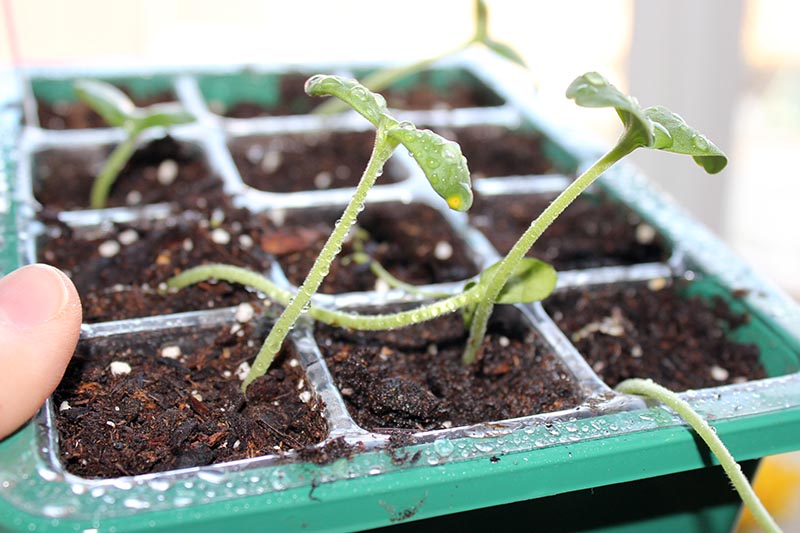
Once the first true leaves emerge, you’ll notice that the plant is already becoming bendy and viny.
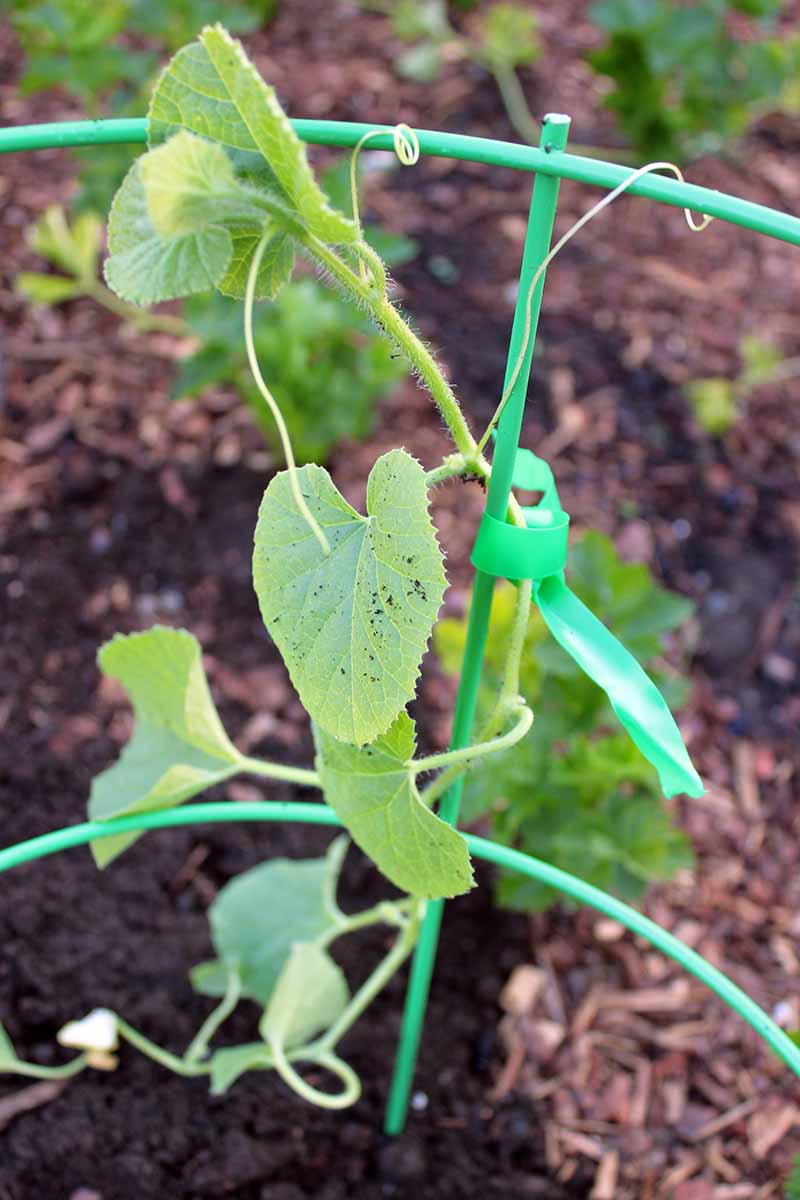
As soon as the vines are long enough to reach, gently tie them to the trellis.
I used this stretchy plant tie tape from the Home Depot.
Don’t tie it tightly at all. You don’t want to crush the vine.
All the tape is there for is to help the vine learn to wind around the trellis. As the plant grows, keep tying the growing vines to the wire as needed.
From Transplants
If you’re like me and live in a colder growing zone, you’ll start your seeds indoors about four weeks before your last frost date. Or maybe you’ll buy starts from a nursery.
Once the seedlings have two sets of true leaves, start hardening them off. I kept mine on the back porch for about a week before moving them to the garden.
I first left them out there for a few hours, then for most of the day, and then all day and all night.
My final step was to leave them in the garden, which receives a ton of sunlight, keeping an eye on them to make sure they didn’t wilt.
They flourished.
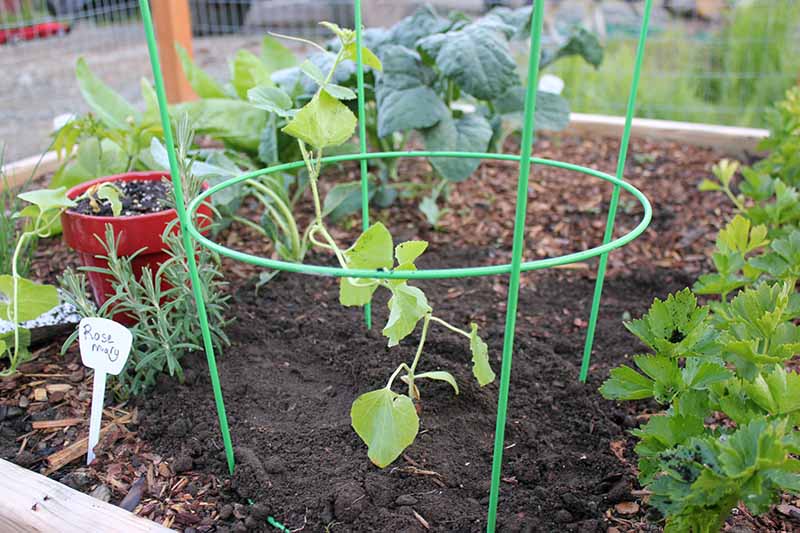
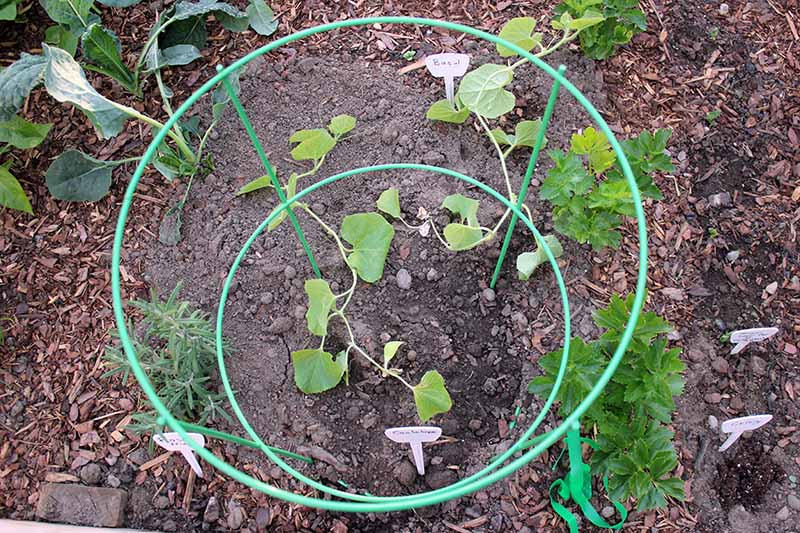
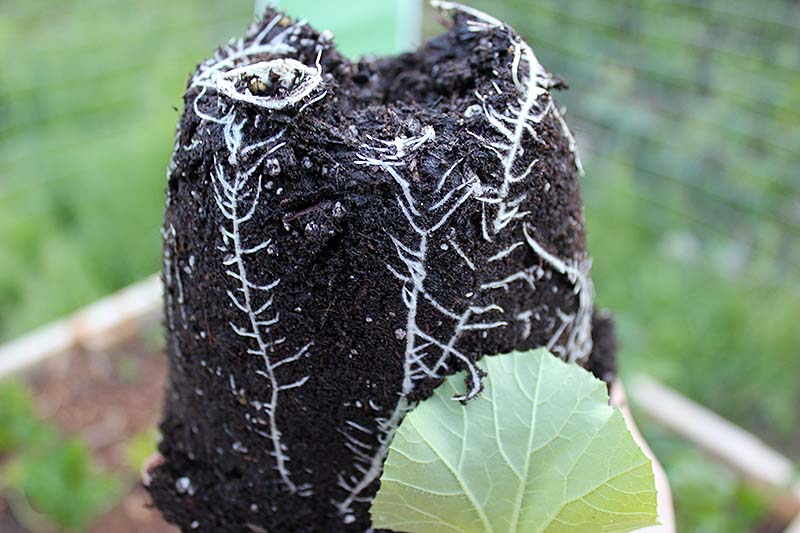
To transplant them into the garden, I secured the cage in the soil and dug a hole in the middle as deep and wide as the pot I started the plant in. You should do the same if you purchased your starts in nursery pots.
I gently removed it, taking a moment to appreciate how neat the roots looked.
I also dug a hole for a second plant on the outside of the cage.
Then, I took both of the plants’ vines and gently secured them to the trellis.
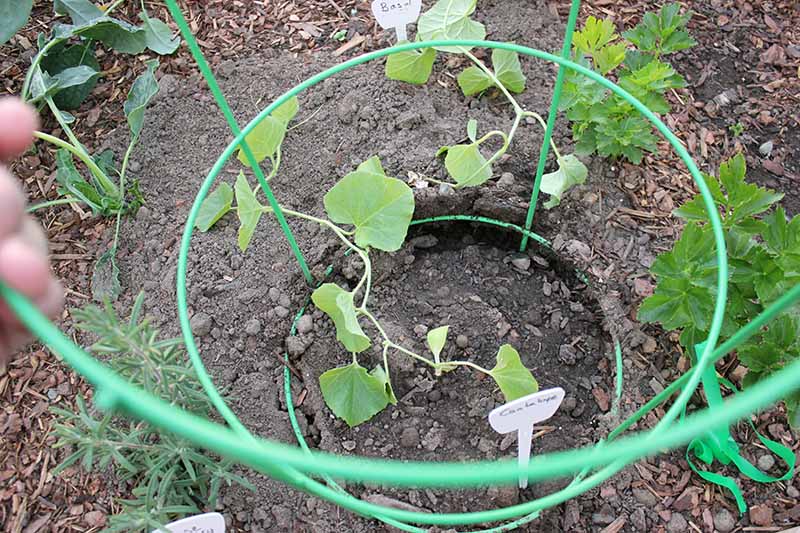
Keeping the Melons Trained
As the cantaloupe grow, I’ll simply keep winding the vines around and around the cage until it’s just a bounty of leaves, vines, and fruit. It’ll be a little crowded, but that’s okay.
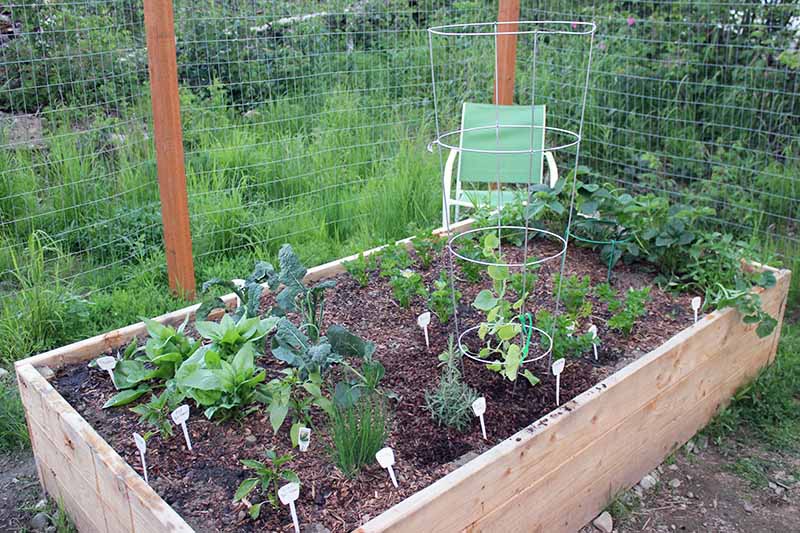
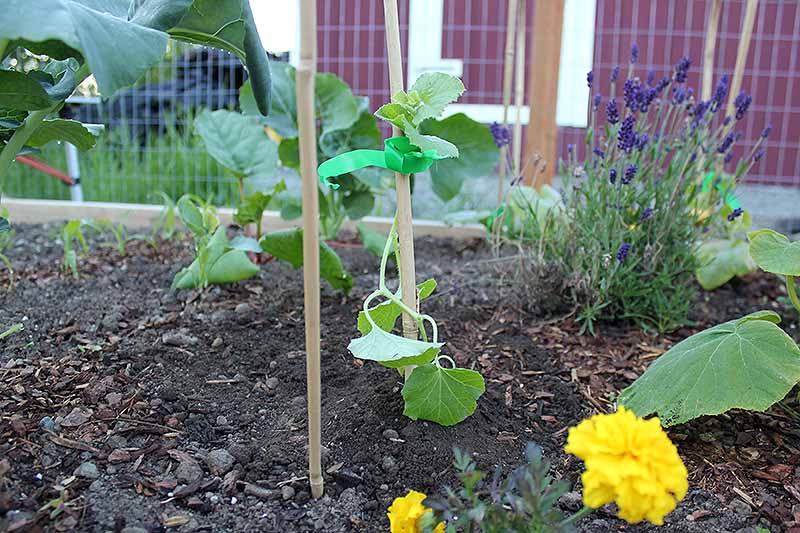
Since I still had one more plant to put in the garden, I planted it next to a sturdy bamboo hoop and secured the vines the same way I did for the melons trained on the cage.
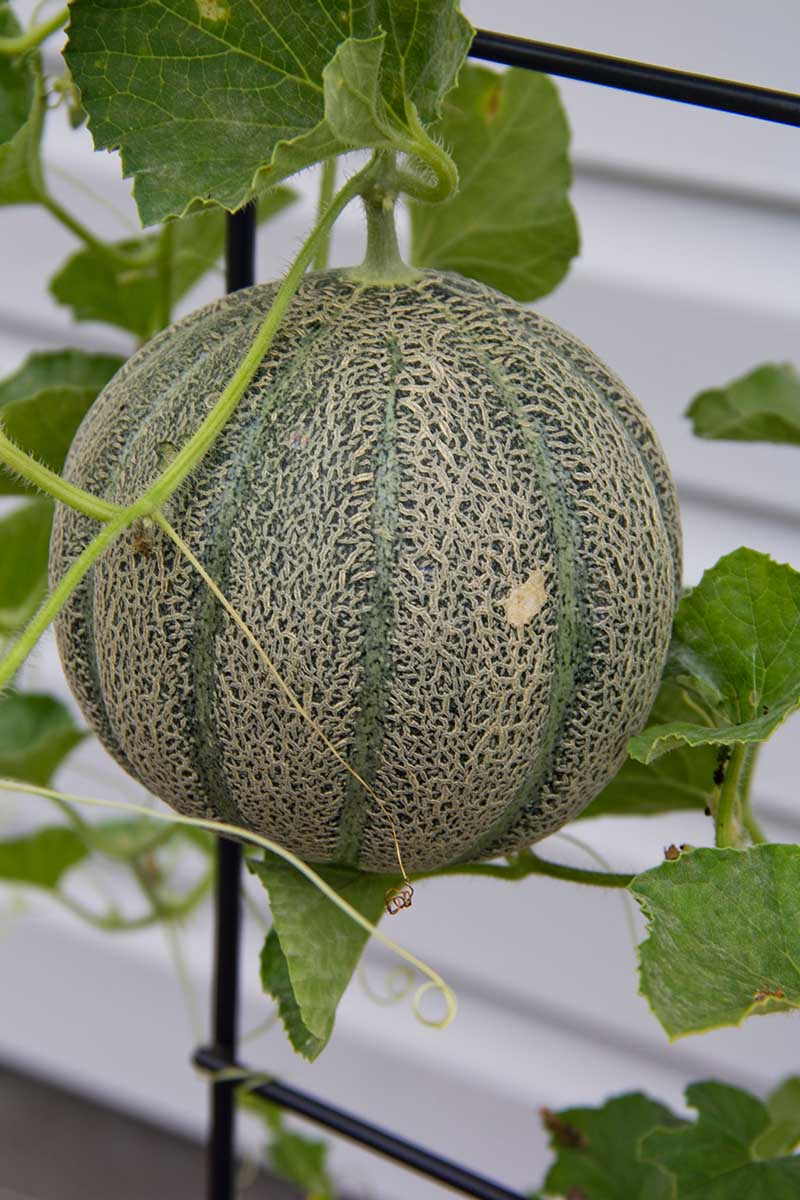
Once baby melons begin to form, I’ll keep an eye on the structures to make sure they can support the fruit.
When the fruits reach the size of a small fist, I’ll put them in these melon nets from Amazon, wrapping the mesh around the wires and the bamboo hoop for extra support.
Melon Nets, Available from Amazon
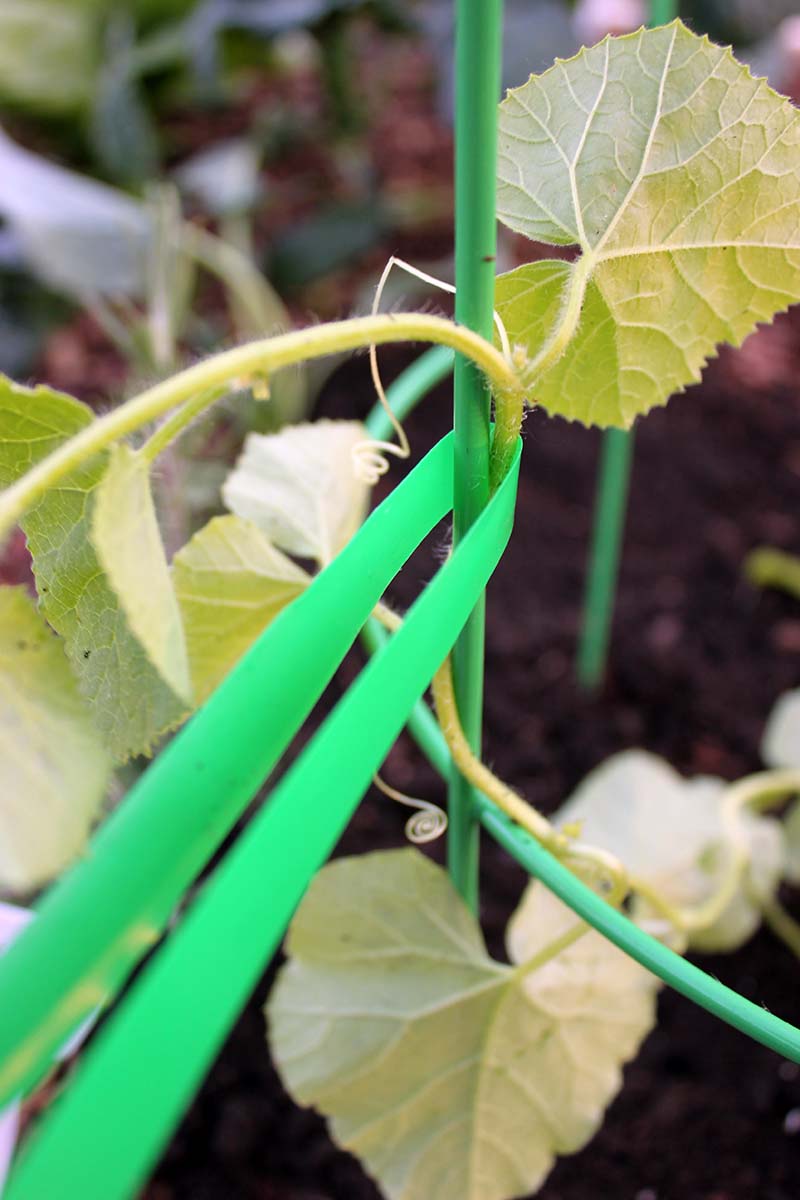
The vines will naturally weave through whatever you train them onto, whether it’s a lattice fence or a bamboo pole.
But if you notice any wayward vines, simply move them back where you want them to go and secure them with stretchy plant ties.
You can also use those curly tendrils that shoot off the vines to help with training by wrapping them around the wire.
Those tendrils are there to help the vines and fruit stay balanced when they’re growing on the ground, and they’re perfect for helping to support trellis growing too.
Harvesting Cantaloupe Grown on a Trellis
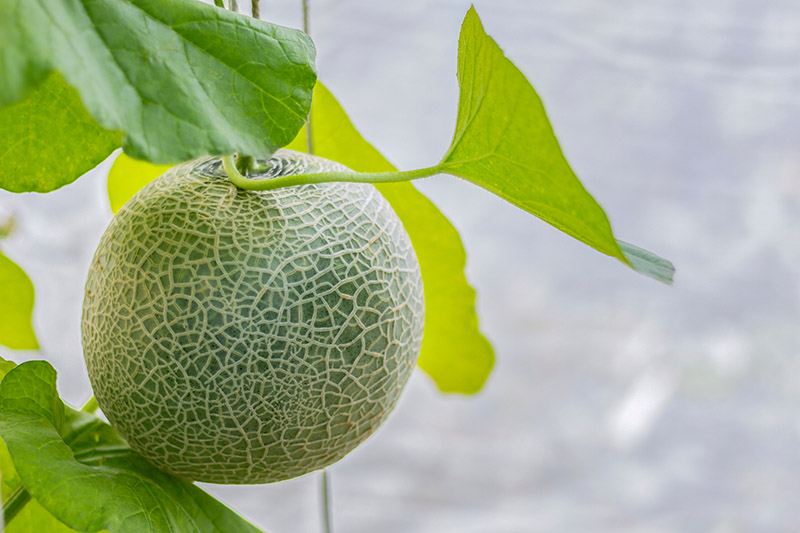
Once the rinds turn from white to gold, your cantaloupe are ready for harvest. They should also smell fruity, and easily detach from the vine.
The convenient thing about raising them on a trellis is that you’ll be able to see them more easily than you would if they were growing on the ground, and make sure to catch them at the perfect point of ripeness.
Learn more about how to harvest cantaloupe in this guide.
Vertical Bliss
You won’t regret the gorgeous sight of verdant vines climbing whatever trellis you dream up. And your cantaloupes will thank you for giving them all the necessary space to stretch and grow.
Have you ever grown cantaloupe on a fence, pole, or lattice archway? I’d love to see your comments – and photos – below.
And don’t forget to check out these helpful articles on growing melons next:
- How to Grow Cantaloupe in Containers
- 33 of the Best Melon Varieties
- The Taste of Summer: How to Plant and Grow Watermelons
- 11 of the Best Cantaloupe Cultivars to Grow at Home
Photos by Laura Melchor © Ask the Experts, LLC. ALL RIGHTS RESERVED. See our TOS for more details. Product photos via Amazon and Home Depot. Uncredited photos: Shutterstock.
Laura,
Your vlog found me just in time. I’ve started a garden with many fruits and veggies including cantaloupe. I’ll definitely use the vertical raising idea. One mistake that I’ve made was planting the melons too close together. Would it be a good idea to dig a few and replant? I’ll attach pics soon
Hi Sherneice! I’m so glad you found us here at Gardener’s Path. You can definitely dig up a few plants and transplant them a bit further away. Very carefully loosen the soil around the plants you want to move and take your time in untangling any roots that are bound up with the roots of their neighbors. Replant in the desired area, tuck soil back over the roots, and water thoroughly. Let me know if you have any further questions! Also, would love to see those photos. It’s possible that you don’t even have to move the plants… Read more »
Glad I found your cantolope trellis post. And glad to see you trying somewhere not as hot. I am in Northern Ontario and hoping my cantolope do okay. I started indoors. I have not yet trained them to a trellis but know I need to do something. Is it too late, did I wait too long?
Also, how do I know which flowers are male and female? And is there a way to manually pollinate if it doesn’t happen on its own?
Hi Candice! That’s one gorgeous cantaloupe plant. You’re doing great, and it’s definitely not too late to train it on a trellis! You can transplant it out to the garden and put a tomato cage around it, or set the container next to a fence or other similar trellis and train the vines straight from the container. As for pollination, we have an article on hand-pollinating pumpkins which also applies to cantaloupes, as they’re in the same family. The female flowers will have a visible ovary, like a mini fruit, at the base of the bloom, while the… Read more »
Hey again, thought I would follow up on this post. I posted above asking about train up the trellis. While my plants seemed to thrive, I only have 1 cantaloupe on three plants that are ready and two more that are about golf ball and double that size. So pretty sad, but a great experience. Can’t wait to try the fresh fruit. I think my containers may have not been large enough and my plants may be getting root bound. Learning experience.
So that’s my new growing cantaloupe (hopefully not too late), my almost ready one, and my biggest plant probably about a month ago at least, and is much larger now.
They do look beautiful, and I bet they will taste amazing. Thank you so much for sharing photos! The trellising you did looks really nice, too. If you add a few tablespoons of phosphorus (bone meal) and one or two teaspoons of potassium (kelp meal) every two weeks or so, that should help the fruits keep growing. And more flowers may even develop, although it may be too late in the season for them to produce full-sized fruit before frost hits.
Hello, quick question about this: does potassium and phosphorous benefit all plants in this way? Are there some that may not? Please let me know!
Great question, Alyssa. Check out our article on plant nutrients for a quick primer. Different plants have different NPK requirements, but a general rule of thumb to keep in mind is that nitrogen primarily encourages leafy growth while potassium and phosphorus do more in terms of root and flower/fruit deveopment.
Hi. I’m Ann. I started growing what I thought was squash, but turns out it’s cantaloupe. I have 4 on the vines. My leaves are turning brown. We have had an abundance of rain here. The little cantaloupes are small and hard. One is getting bigger. I’m a first time patio gardener. I have also grown cucumbers which I have harvested about 6 from the vines. I can hardly wait until next year when I can do it right!! But I’m happy with myself and have so enjoyed reading and watching others videos. Please let me know if you can… Read more »
Hi Ann! Thank you for your comment. What a fun surprise that must have been! Hmm, brown leaves…what zone are you in? It sounds like they might be getting a little too much rain (and potentially cold), so if you can shelter them somehow to let them drain some of that water away, try it. Also, now’s a good time to feed them some kelp meal for potassium, which helps the fruits develop, and perhaps even some bone meal, too, for phosphorus. For more tips on fertilizing Cucurbits, check out our article on fertilizing pumpkins. Cantaloupe are much like pumpkins… Read more »
I live in SW Florida, Zone 10A. Our growing season begins in the fall to early winter. I have only a 4 foot square raised bed to which I have been adding kitchen scraps all summer for compost.
Around August 25, a couple of days after I buried some cantaloupe scraps, about 75 seedlings appeared. I thought I would let a couple of the grow since I have never grown them before. I have them on extra tall tomato cages. Here are photos I took today, September 26.
Debra, that is so neat that you got all those free seedlings. The plants look beautiful. Thanks so much for sharing! (And lucky you with that long growing season! Ours in Alaska is over.)
This is great. Cantaloupe is my favorite fruit but I never have the space to grow them in my yard.
Thank you for reading, Logan!
How close together can you plant trellised cantaloupes?
12 inches at the very closest. Each plant needs adequate room for its roots to grow and thrive, so you don’t want to crunch them together. Planting the melons too close can result in less vigorous fruiting.
Hi Laura Melchor, I found your post very interesting, just in time that I am preparing for this year’s planting in my yard, I got curious about cantaloupe and I found your post that I think described it all. I am living in Mongolia for quite a long time and from last year I started to be interested in what you can obtain from nature and my own effort by planting veggies and greens for eating healthy. Here the climate is quite harsh, esspecially this season of spring where is cold and windy, but summertime is very hot, so I… Read more »
Thank you so much for reading! I hope you’re able to grow some tasty melons in your green house or garden. I would love to visit Mongolia one day!
Laura—I planted cantaloupe seeds and now I have seedlings—in cardboard egg crates—tons of them. When do I plant them in my garden or do I transplant them in bigger containers? Same question for my butternut seedling—
Thanks
Marco
Hi Marco! What growing zone are you in? You can transplant them into the garden about 3-4 weeks after your area’s average last frost date.
Thank you for such brilliant ideas. I live in a location that has an arid and dry climate. I’ve been searching around online, and in big-box stores, for organic mulch and can’t find any. Is there an organic mulch that you’d recommend that I can purchase and use for container-vegetable gardening? Thank you!
-Phyllis
Hi Phyllis! I should have clarified what I meant by “organic” — not necessarily organic in the USDA Organic sense, but in the sense that the material used is organic material. Think bark chips, straw, and the like. At big box stores, look for bark chips that have not been dyed or treated with chemicals. I like these 100% natural cedar chips, available from Amazon.
I hope this helps!
Hi, I am growing my cantaloupe on a trellis and I have several that are about softball size or bigger. I put a mesh bag around them for support and hooked the bag on the trellis. Will this hinder the growth of the melon? I bought specific bags after I read that you need the support the melon due to the weight. We have had so much rain that many of our melons we grew on the ground ended up rotting on the bottom. I had to throw over 15 out.
Oh, I’m sorry about the melons you had to throw out! But you are doing the exactly right thing by putting the melons in the mesh bags. This will help support them and keep them off the ground during those rainy spells.