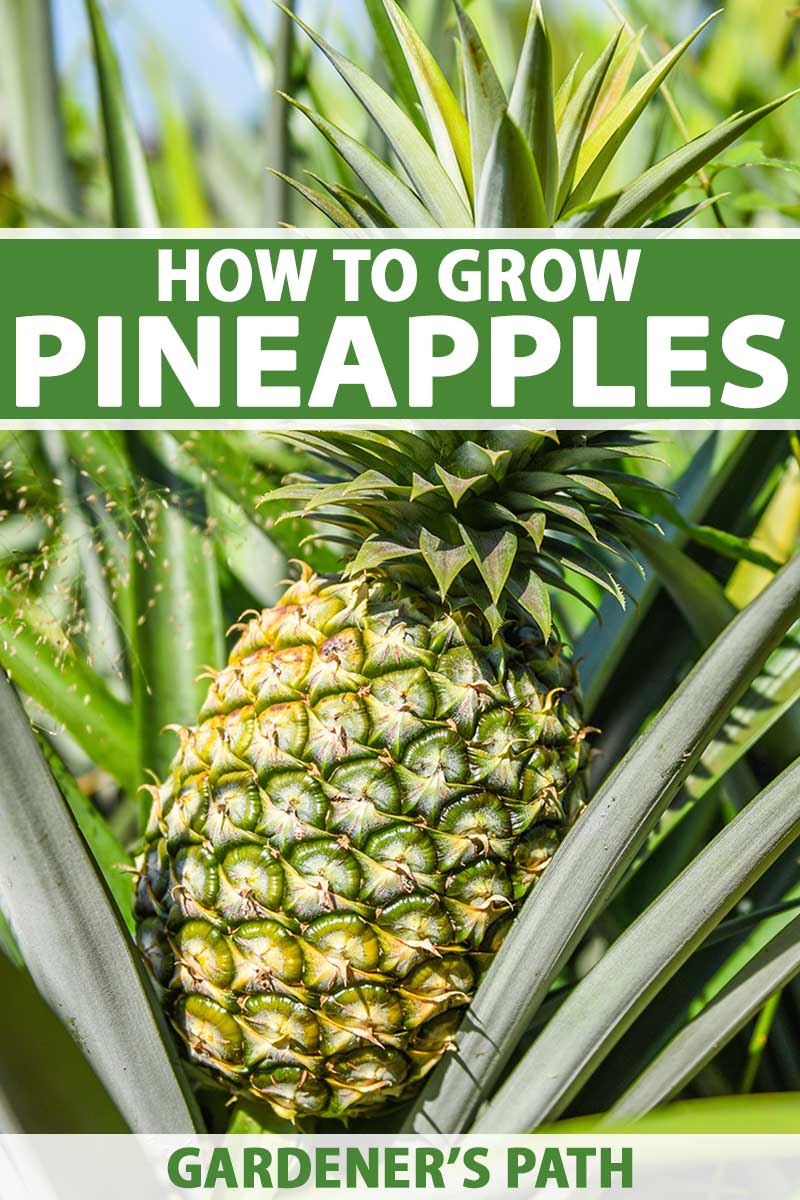
Ananas comosus
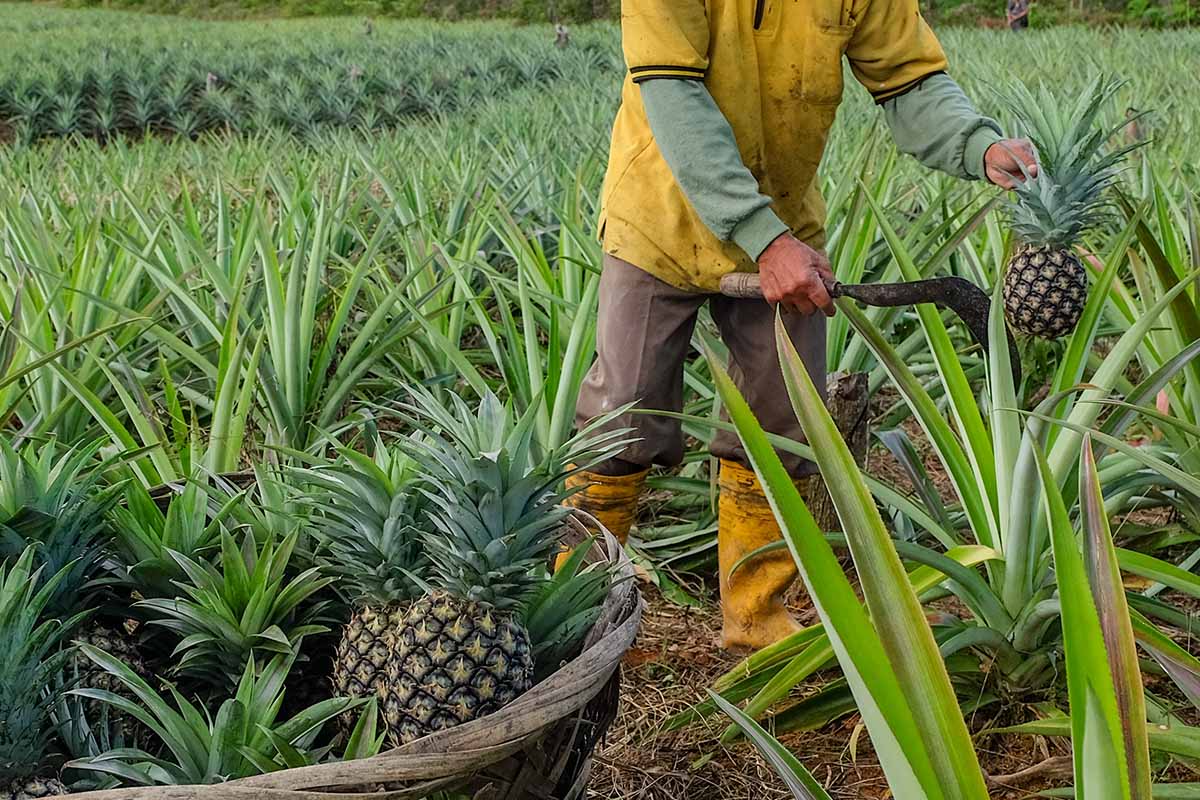
I need to let you in on a little secret: With minimal effort, you can grow pineapples right in your own garden.
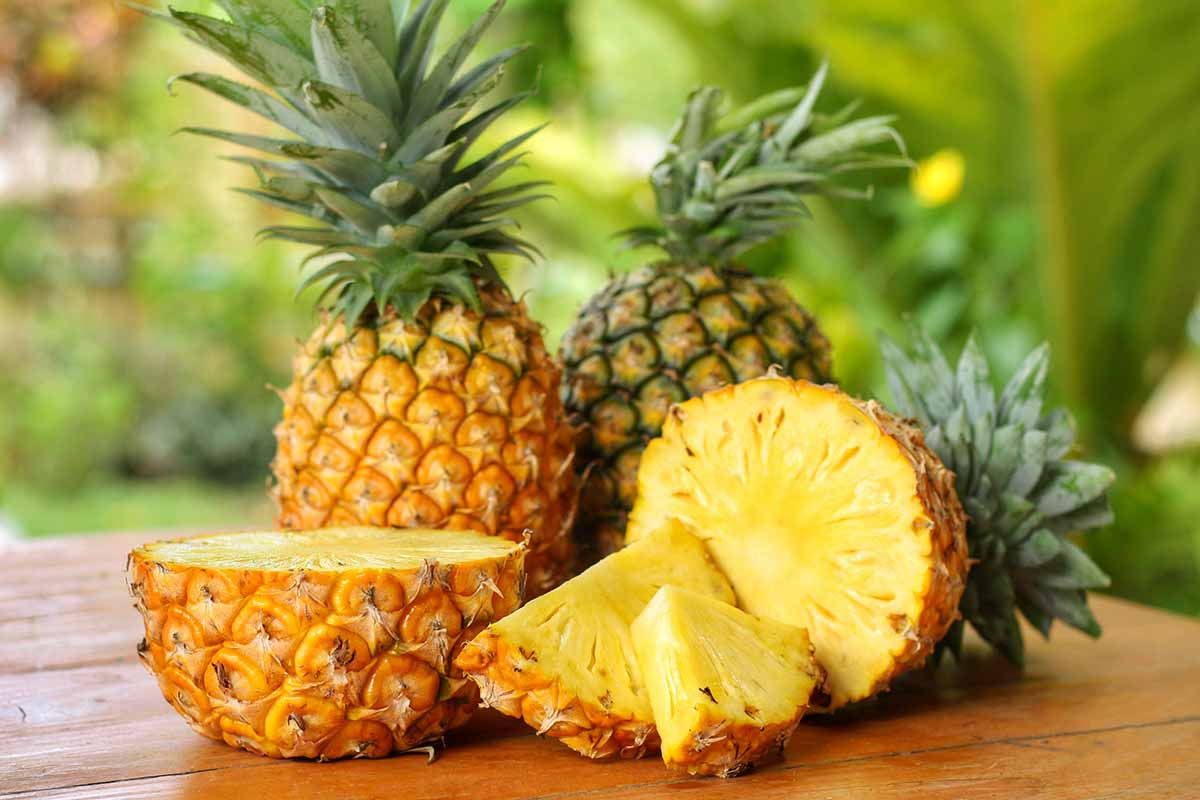
And I don’t blame you for wanting to – the taste of commercially produced pineapple pales in comparison to freshly picked, homegrown fruits.
We link to vendors to help you find relevant products. If you buy from one of our links, we may earn a commission.
Commercial produce is often harvested prior to full ripeness to keep it from deteriorating in shipping, spending days or weeks in boxes or crates as it’s transported to your local store. This can result in harder flesh that is acidic and tart.
Growing your own at home means cutting out the shipping process, allowing you to give the fruit more time to ripen before harvest.
This additional time can increase sugar content while improving texture and richness of flavor at harvest time. You may never want to buy a pineapple from the store again after tasting the difference.
Even though they’re native to tropical climates, pineapples make a good choice for container growing almost anywhere, and can be grown by simply rooting the crown foliage from an existing fruit to propagate a new plant.
In warmer zones, they can be planted outdoors in the ground.
No matter which method you use, it can take some time for fruit to form – at least two years before your first pineapple is ripe for the picking.
Luckily, these plants also add unique visual interest to the landscape while you’re waiting.
Increase your yield without waiting ages by adding several plants to the landscape or garden, if space is available.
This is easily done when offshoots are produced since they can be rooted much like succulents. We’re going to cover it all!
So, let’s get to it – what does it take to grow pineapple at home? Here’s everything you’ll find up ahead:
What You’ll Learn
What Is a Pineapple?
If you don’t know much about the unique anatomy and growth habits of A. comosus, you are in for a treat! Ready for a crash course in botany?
The first thing you should know is there are no pineapple trees. These plants produce long, grassy leaves that sprout from a central point like many other members of the same plant family.
Pineapples belong to the Bromeliaceae family, otherwise known as the bromeliads. This group also includes Spanish moss, which you might recognize as a signature of the southern United States where it hangs from trees.
Unlike other members of this family, these herbaceous perennials are the only type of bromeliad that is cultivated for food, producing an edible inflorescence. Others are commonly grown in tropical and subtropical environments as landscaping features or ornamental potted specimens.
Some bromeliads are epiphytic, rooting in the crook of tree branches or in spaces in the bark, but pineapples do not fall into this category and must be grown terrestrially.
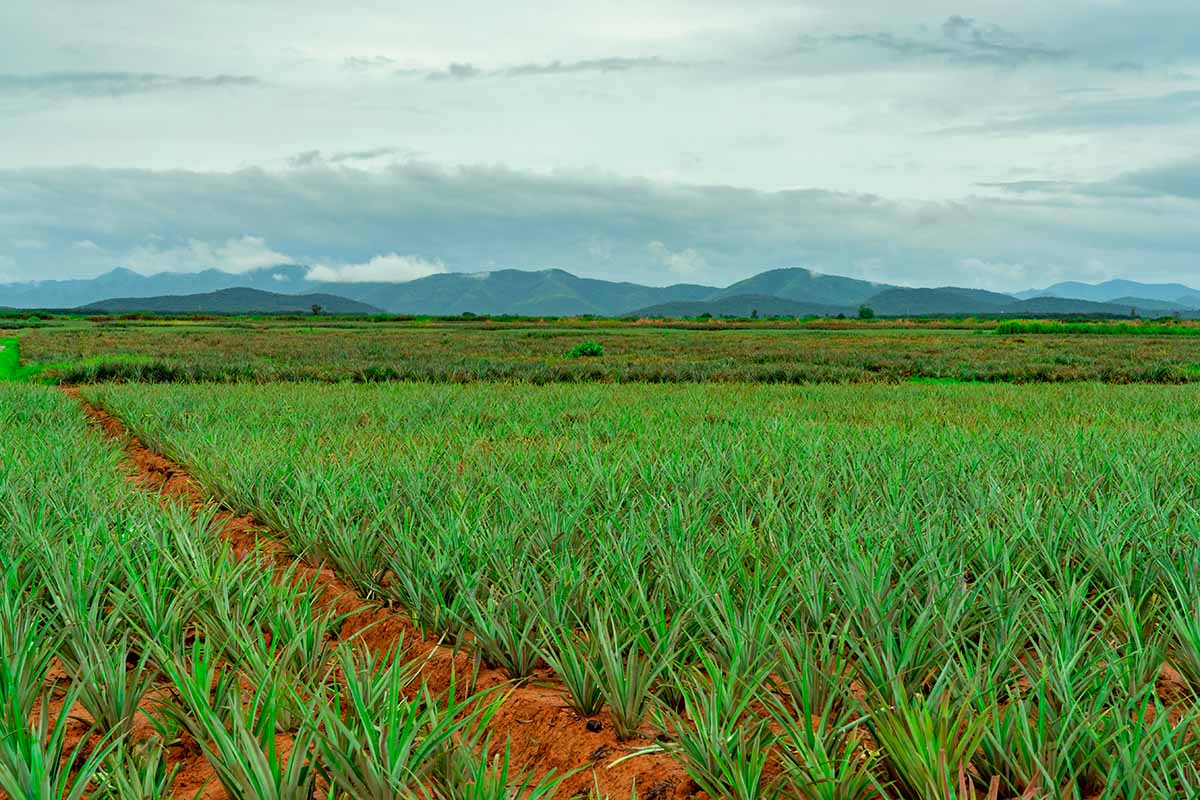
Native to the rainforests of Brazil, Paraguay, and the West Indies, they’re commonly grown for commercial sale in Mexico, Hawaii, southern California, and Puerto Rico today.
They’re also grown in and exported from parts of Asia and Africa to other parts of the world.
There seems to be some widespread confusion among the general public about where exactly pineapples hail from.
Understandably, many people seem to associate them with the Hawaiian Islands since they’re commonly represented in the culture of the islands and given as gifts of hospitality, much like leis made from plumeria blossoms – another nonnative plant that was introduced to the Hawaiian Islands.
Though the dates of this species’ first introduction to the area is not known, migrants from California, followed most notably by James Dole, produced the fruit on plantations in Hawaii starting in the late 19th century.
The often hot and humid temperatures in USDA Hardiness Zones 10 and 11, and parts of Zone 9, provide the best environment for growing these distinctive fruits – although they can be grown outdoors in almost any Zone as a container specimen that can be relocated to a protected area when temperatures take a nosedive.
Pineapple plants, like other bromeliads, are also xerophytes.
This classification indicates that they’re comfortably at home in regions where they generally receive less rainfall throughout the year. Learn more about xerophytic species in our guide.
Anatomy
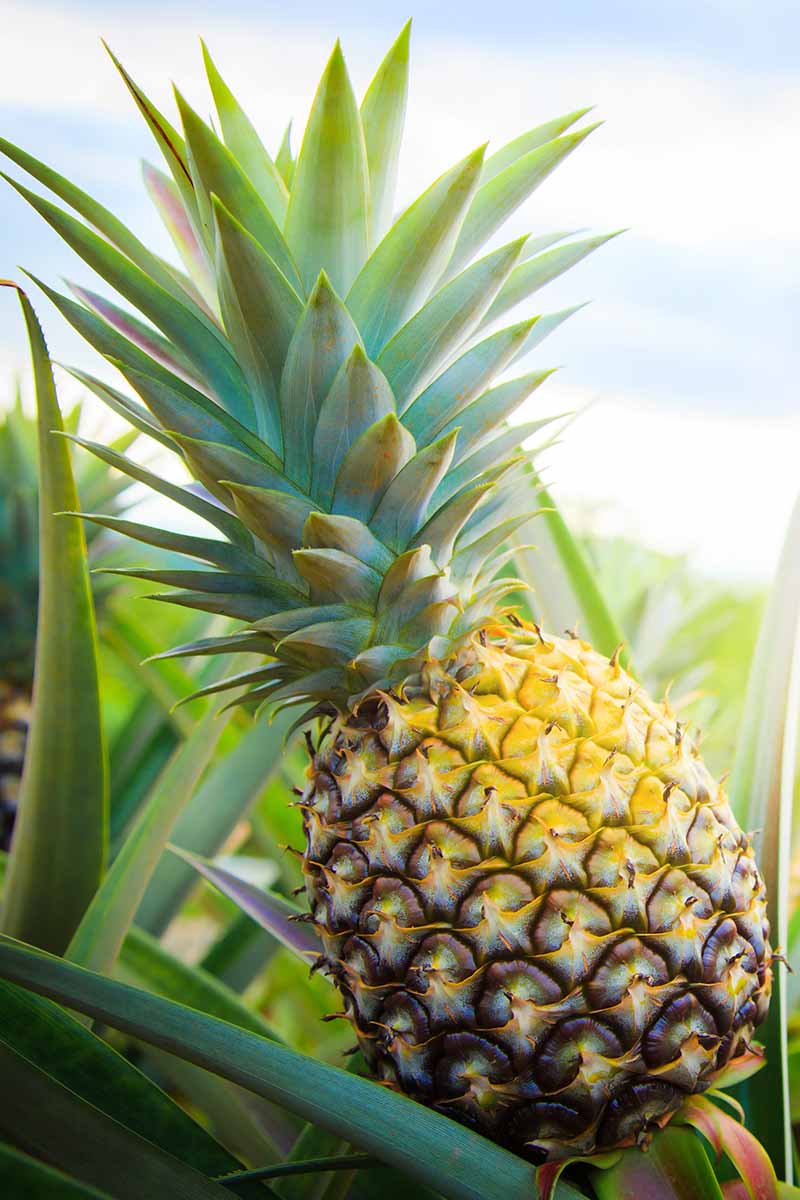
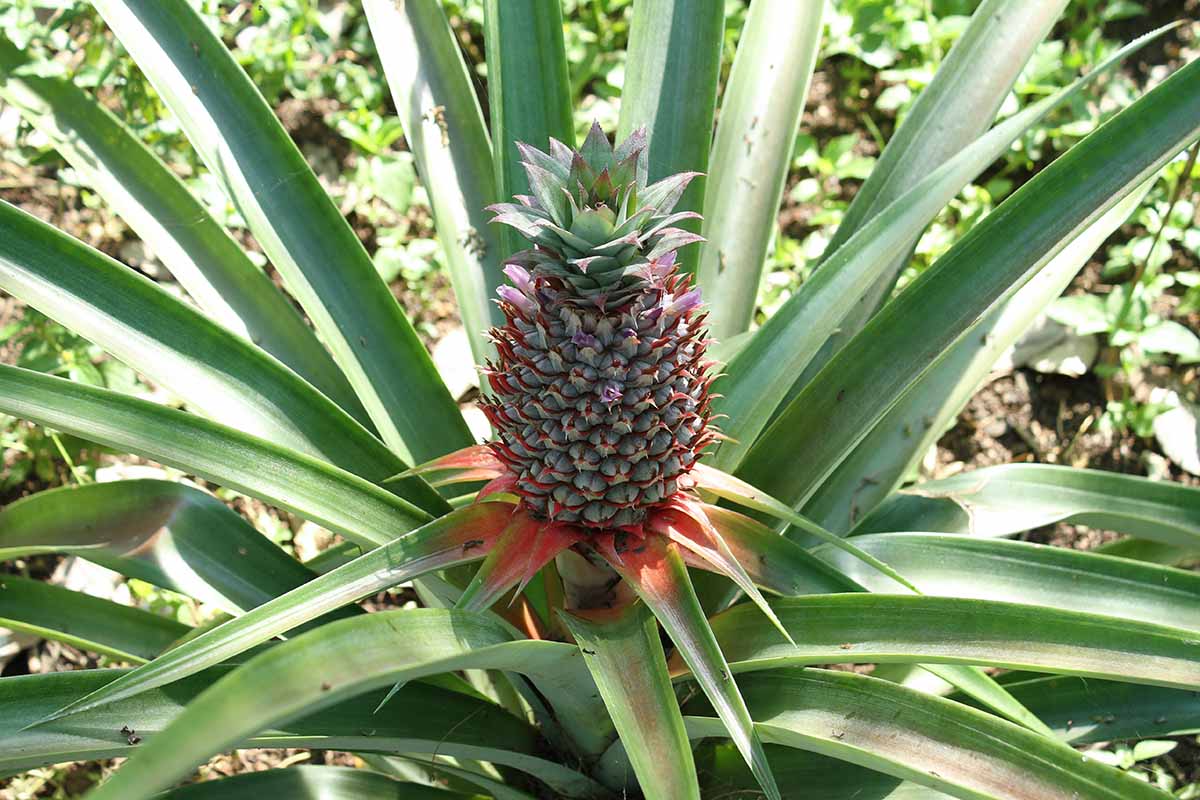
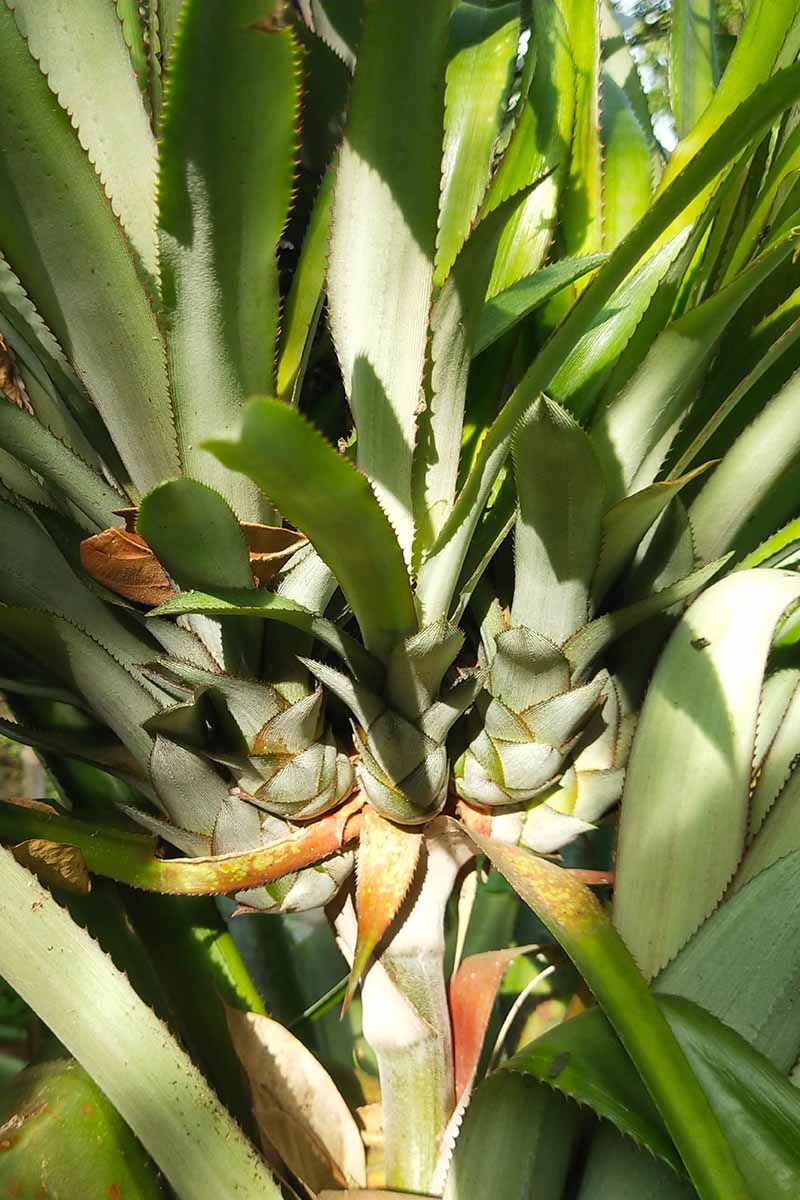
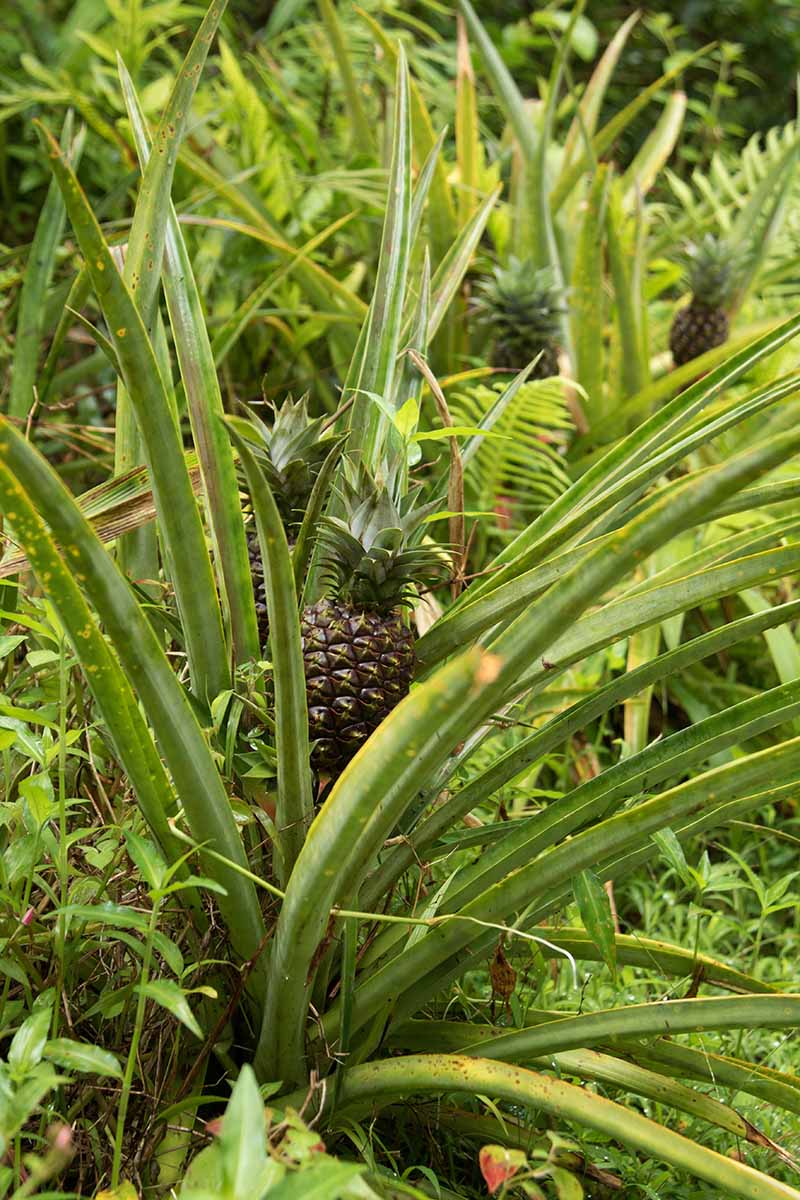
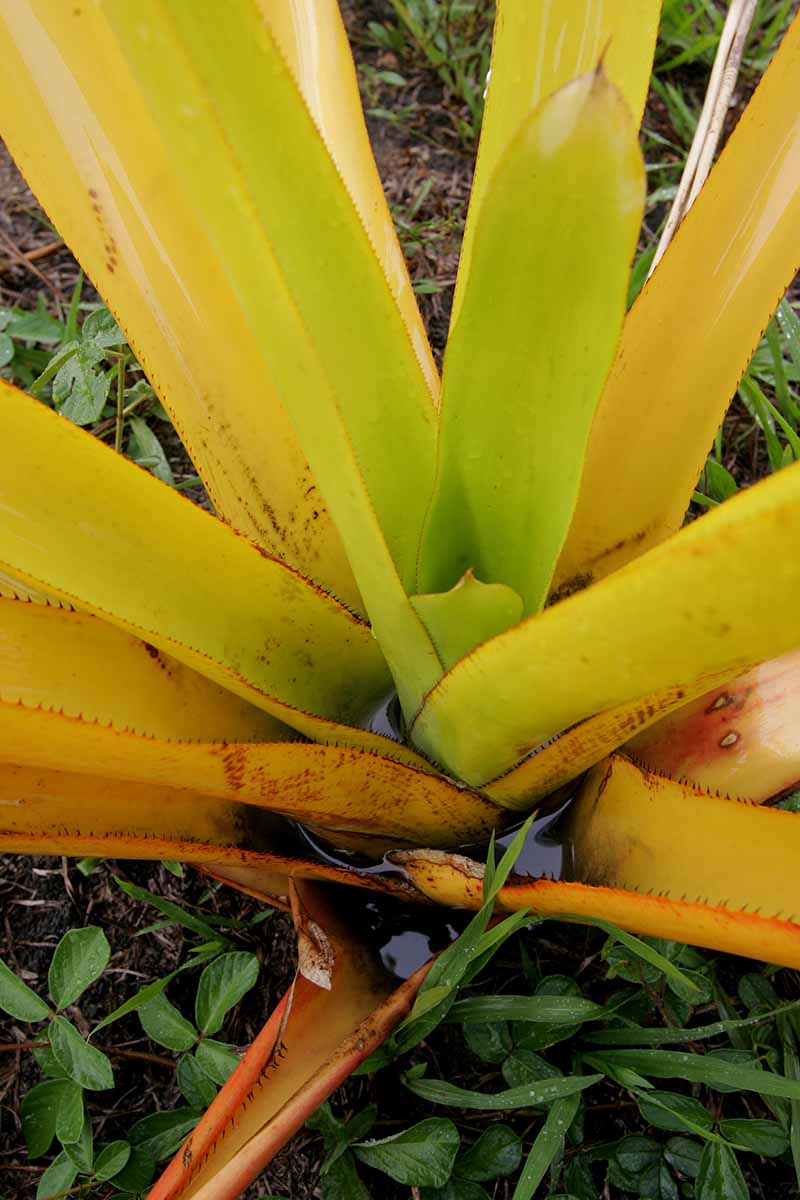
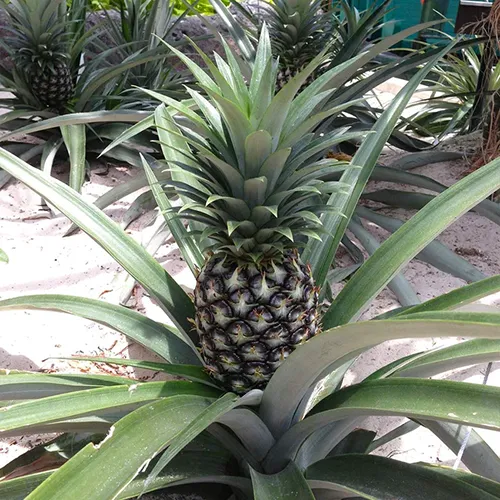
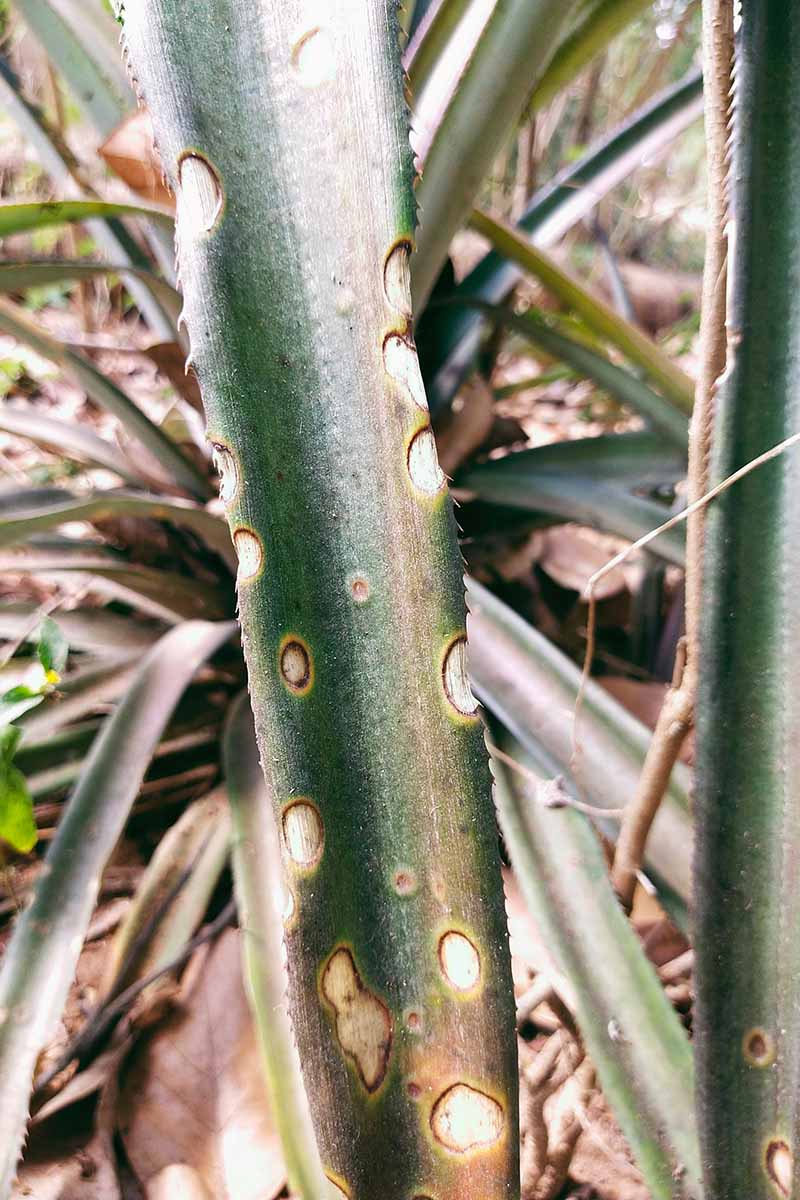
These bromeliads produce long, straplike leaves in a rosette pattern, sprouting from a central stem.
The leaves of most cultivars typically feature saw-toothed margins that can deliver a mild poke if mishandled, whether by the gardener or by kids or pets that venture too closely into their midst.
There are some spineless species and varieties that are close relatives, such as A. lucidus, or the red spineless pineapple. This species stands out not only for its more friendly foliage, but also for its striking crimson red leaves.
Fortunately, despite their pokey nature, all parts of the plant are nontoxic.
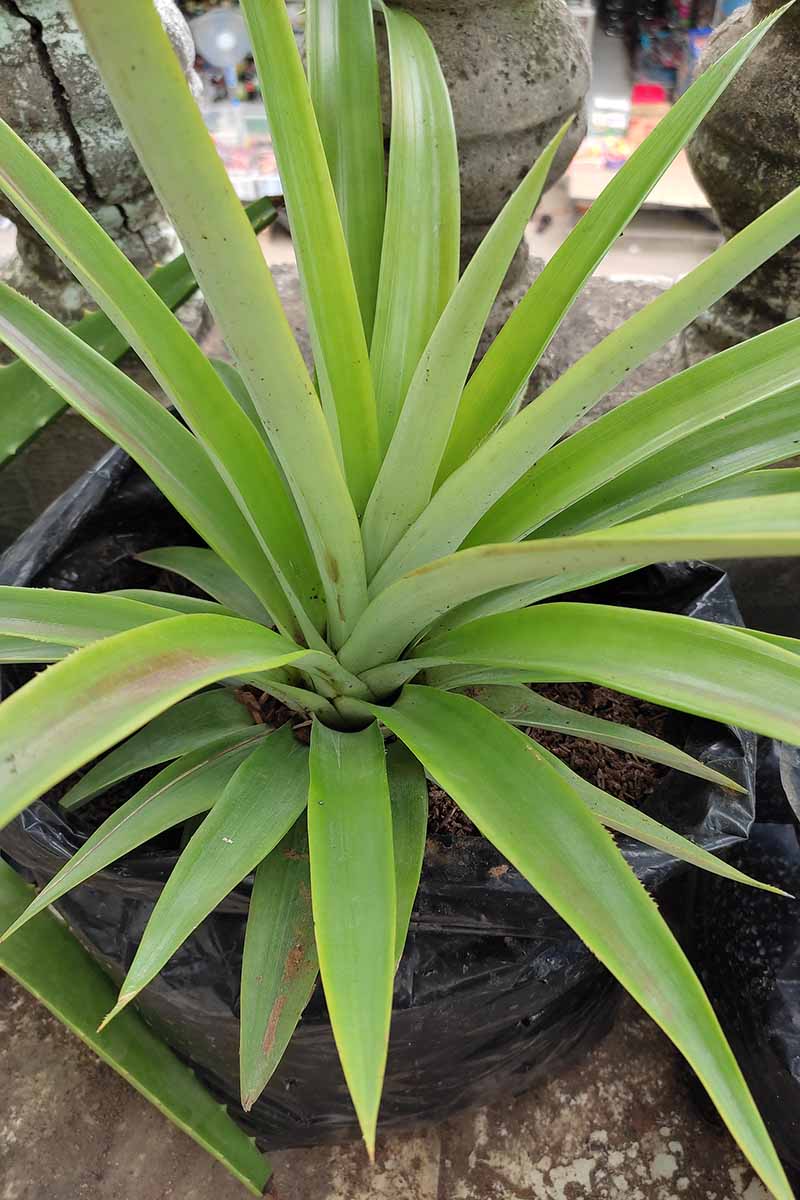
Before pineapple plants produce fruit, you’ll note a resemblance to some species of agave or aloe, although the leaves are thinner than those of either of these succulents.
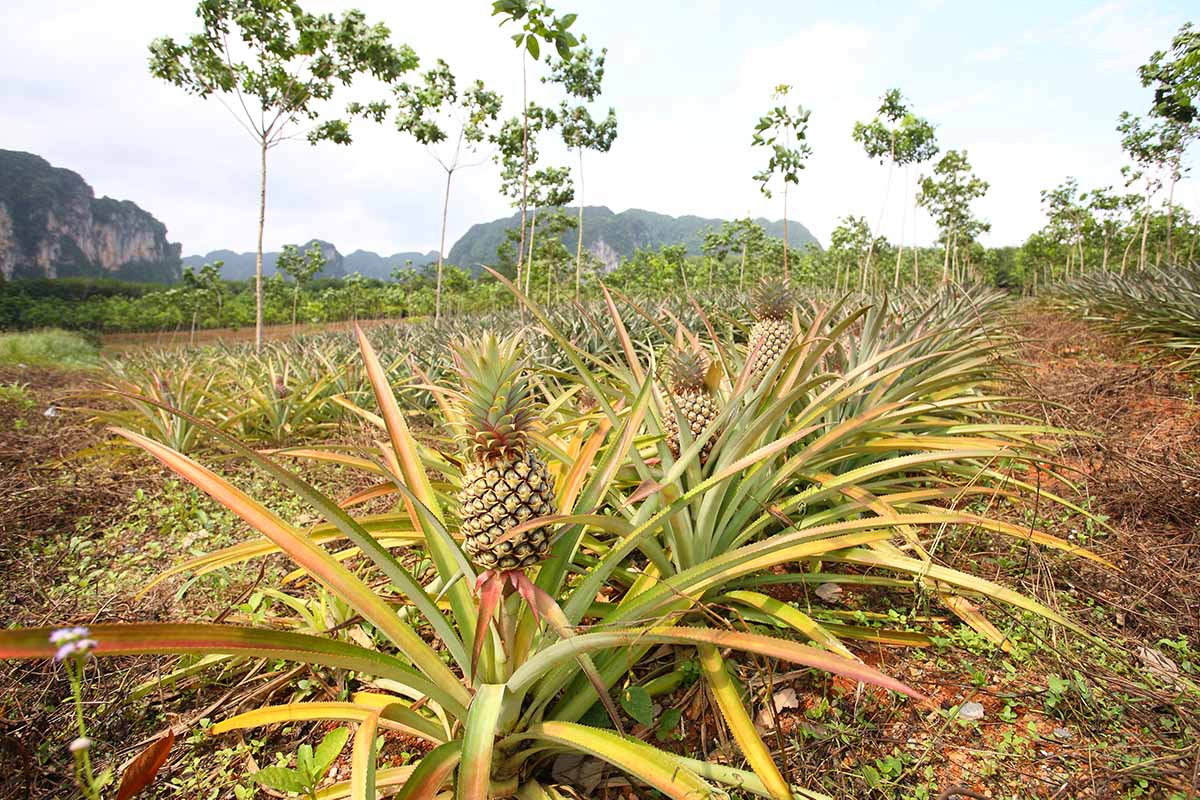
Plants that have 70 or more leaves may produce a thick central stalk that can grow to heights of over five feet. The foliage spreads to well over three feet in mature specimens, sometimes reaching six feet in diameter under ideal conditions.
Bear in mind that it can take two to three years for the first crop to come in, so patience is a must.
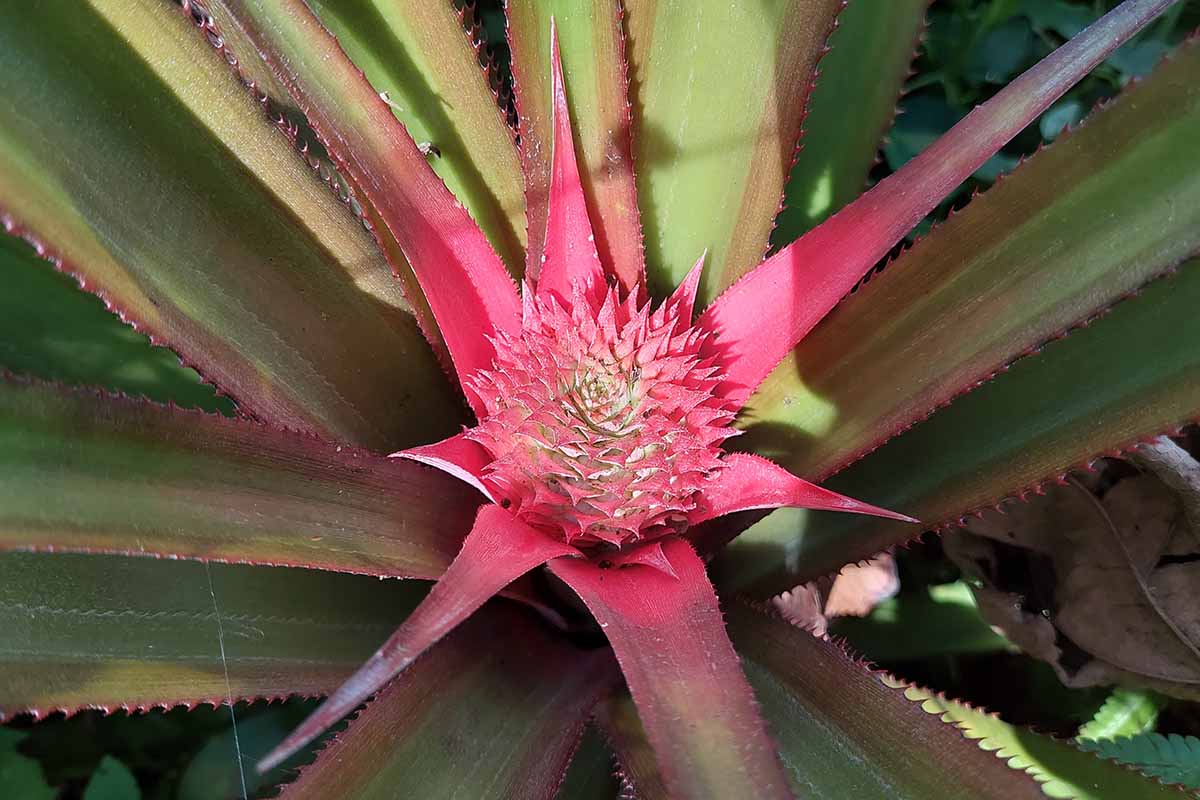
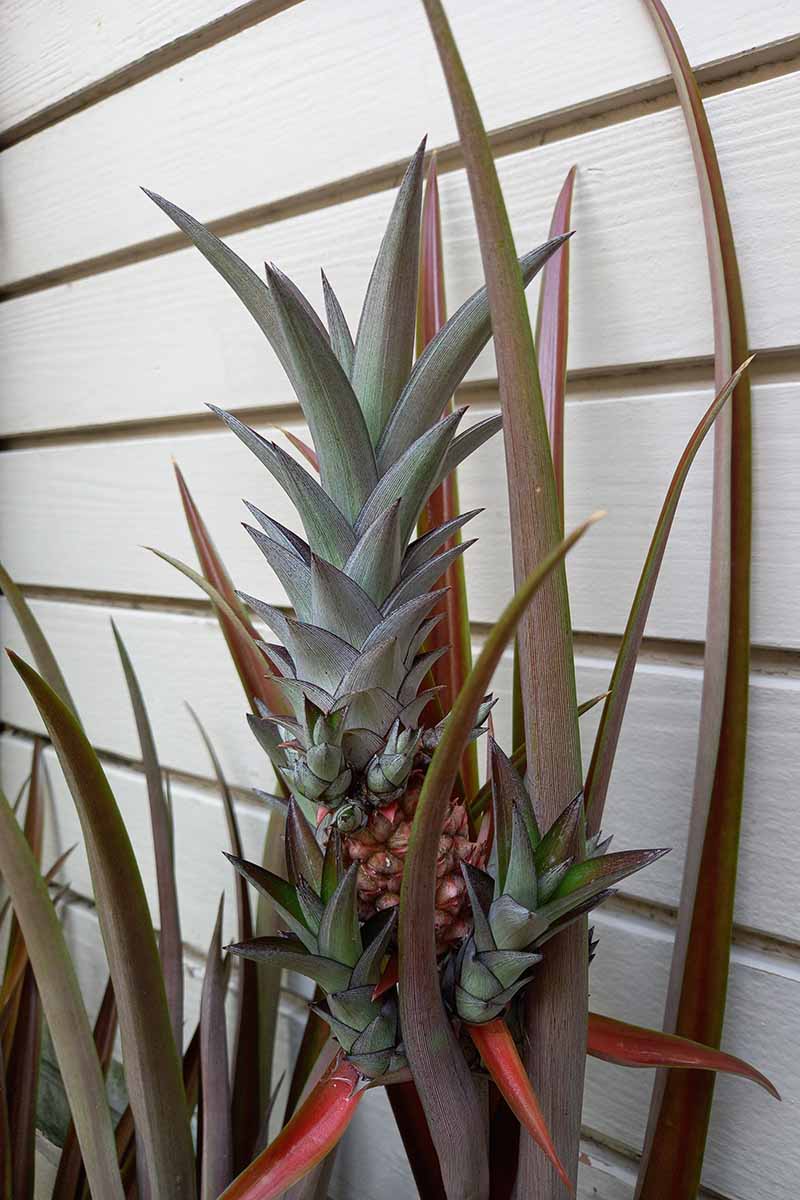
A bud forms in the center of the crown at the base of the leaves and will eventually rise on a stalk that holds it above the foliage.
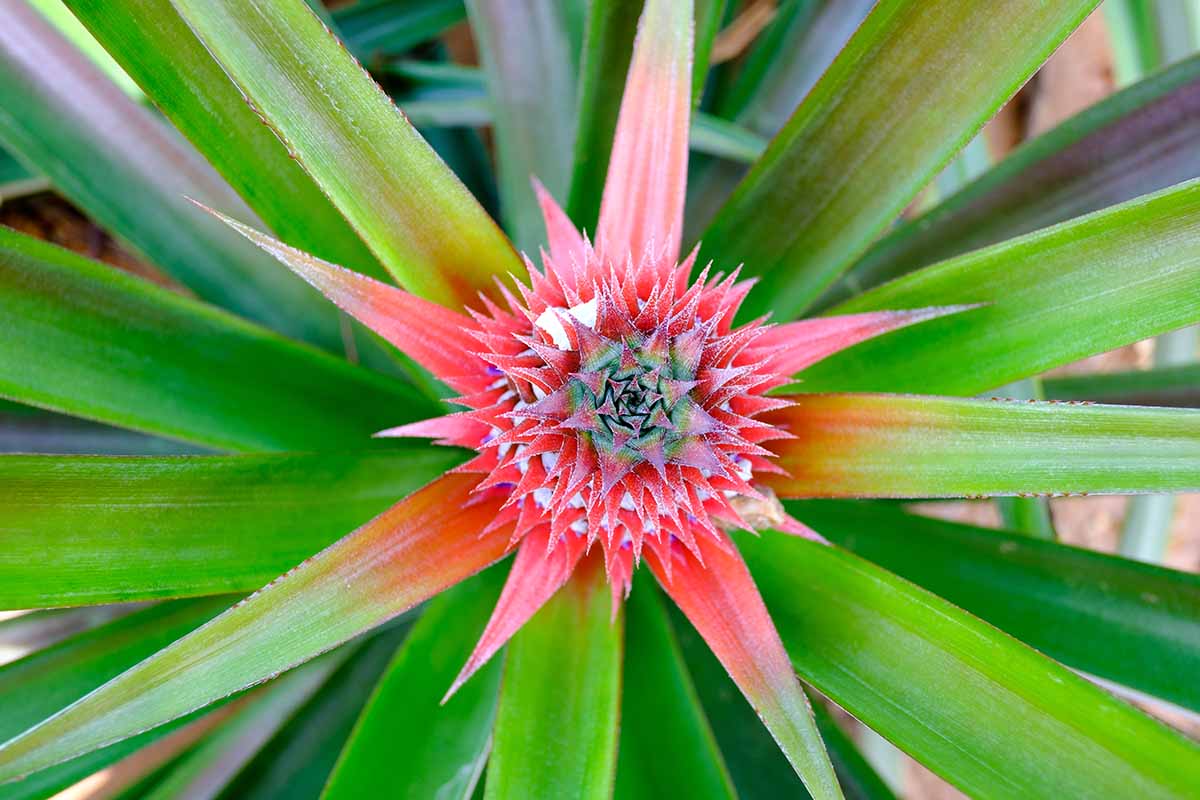
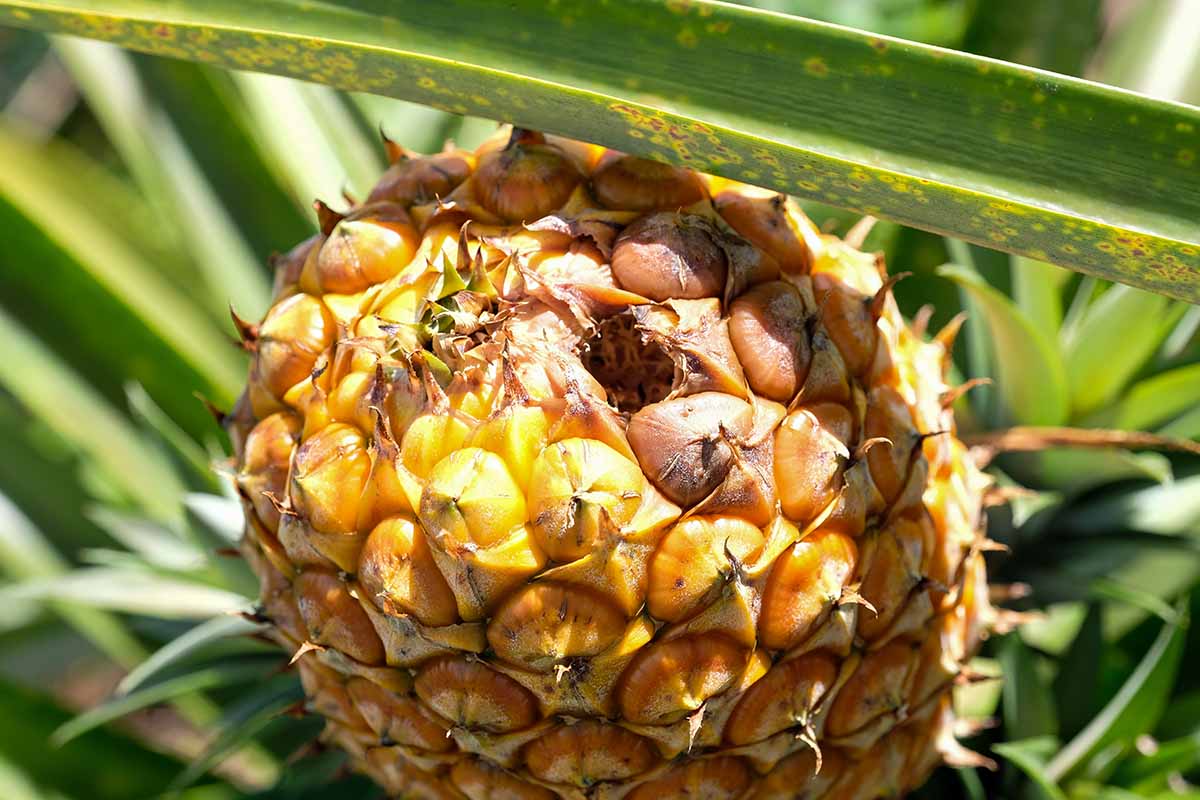
At the top of the stalk, a clustered, terminal inflorescence develops.
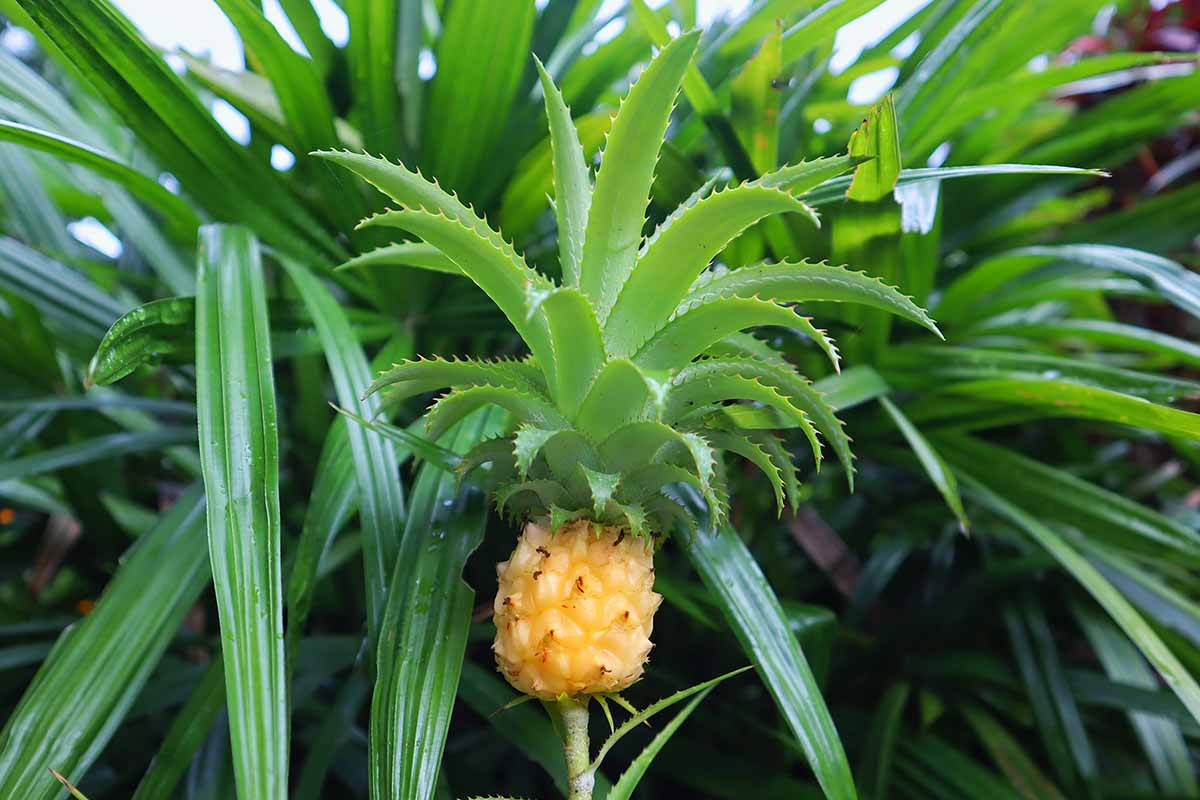
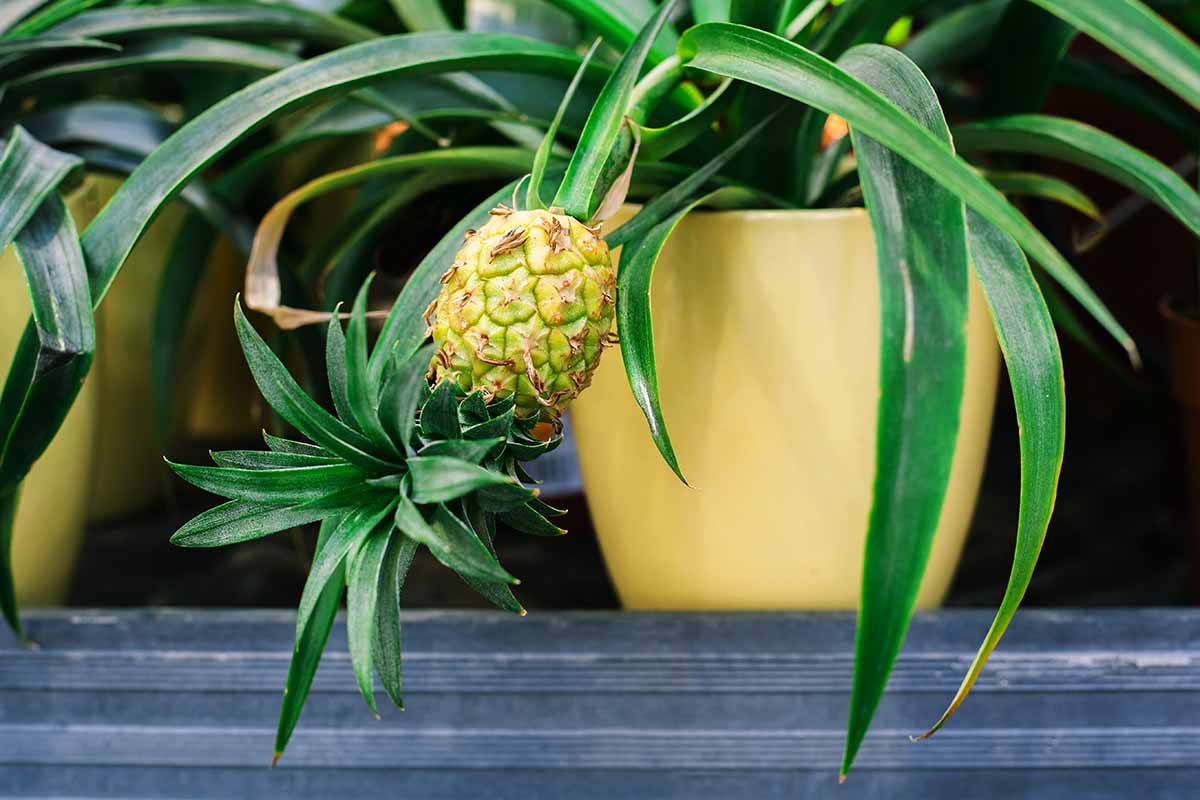
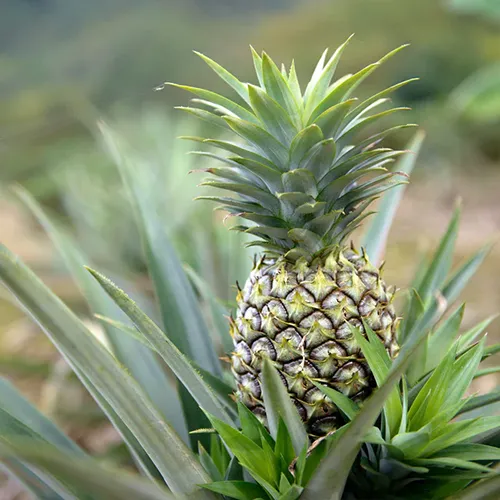
The size and structure of the immature fruit resembles that of a colorful pinecone with a tuft of leaves growing from the crown. This structure is typically composed of between 50 and 200 blossoms.
Flowers open in succession from the bottom up beginning about two months after the buds develop. As new blooms open, older ones shrivel.
Blooms are violet to purple at the outer edges and fade to white at the base. They begin to open in the evening with blooming continuing for two to three months.
Pollination is completed almost solely by hummingbirds, although some species are also visited by bats, particularly in their native environments.
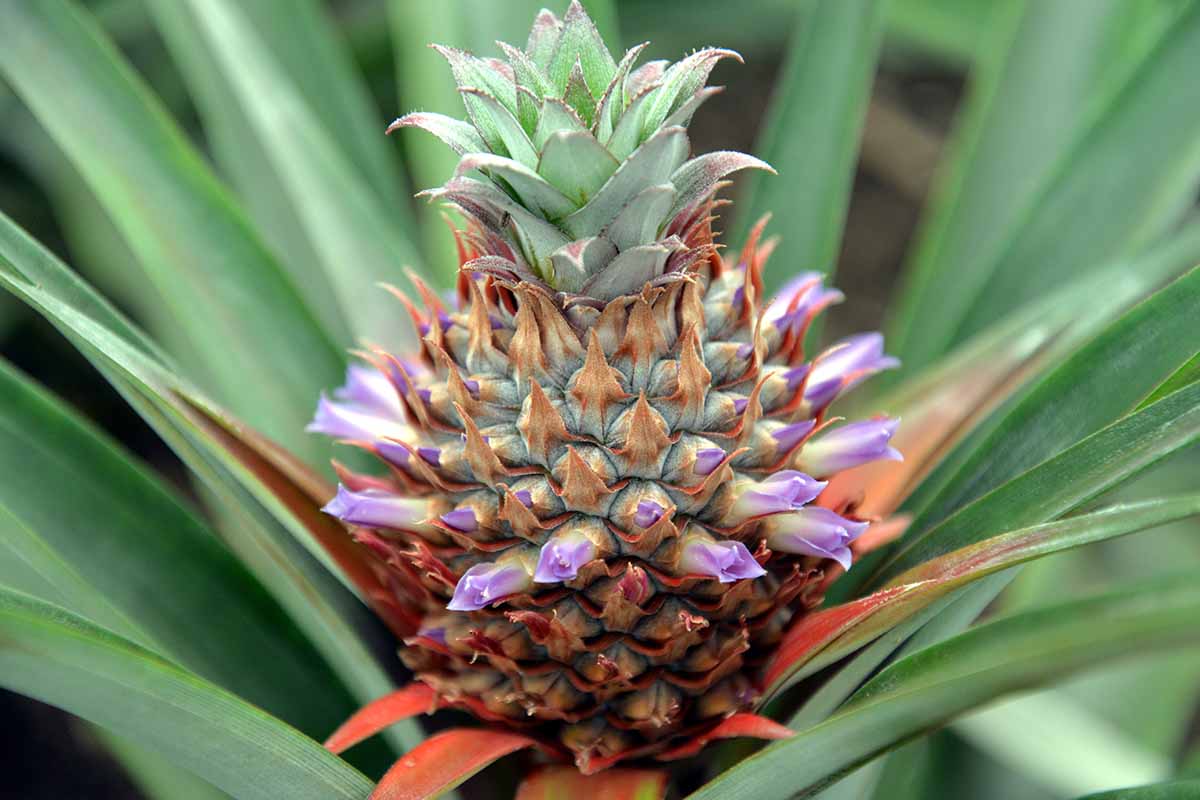
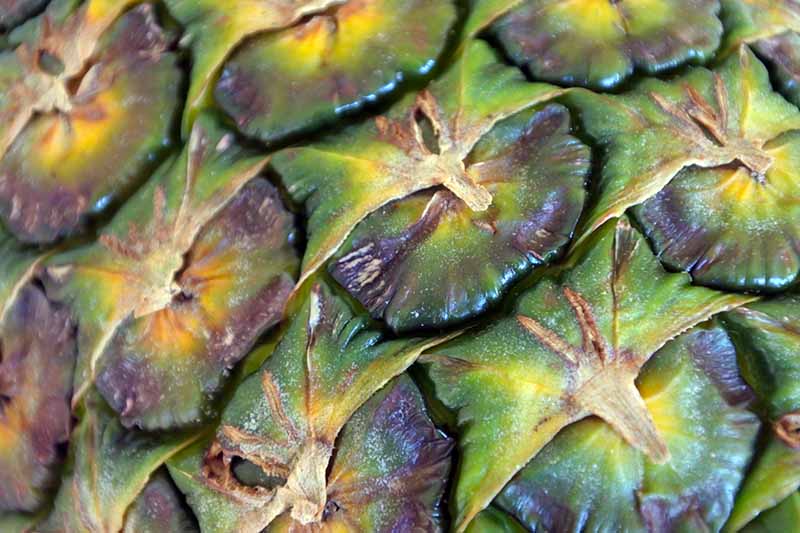
First, fruits grow at the top of the stalk like a royal scepter in what’s known as a syncarp, or a bundle of fused blossoms.
After pollination, each flower produces a separate berry – if you observe a ripe pineapple, you can see how each one has formed and fused together to form the fruit’s distinctive diagonal grid-like pattern.
Fruits will continue to mature for four to six months, growing larger and ripening slowly – but they rarely ripen fully post-harvest if picked prematurely.
Each specimen will produce only one primary fruit that’s able to mature fully per season.
While many specimens produce fruits that weigh between five and 10 pounds each, some have been known to reach up to 20 pounds! How many upside-down cakes could you make with that?
After the initial crop of fruit has been harvested, the shoots that are produced may be left to mature and continue producing fruit. This secondary harvest is known as a ratoon crop, and these fruits tend to be smaller in size even when they’re fully mature.
New shoots will often develop on the stalk or sprout from the base of leaf axils. Shoots that grow from the stem below the crown are known as hapas or slips.
Others that appear at leaf axils or sprout from the roots below ground are known as suckers.
It’s possible for any of these structures to remain attached as they continue to produce but they can also be carefully pulled free and replanted separately to propagate new plants.
Replanting reduces the taxing effects on the parent plant of supporting so much growth as well.
Next, let’s talk a bit about origins and common uses for this species, beyond serving up a citrusy sweet treat.
Cultivation and History
As I mentioned, pineapples are native to parts of South America and the West Indies.
There is some evidence that the fruits may have originated in the rainforests of Brazil, with further evidence that crops were grown by indigenous peoples for centuries prior to distribution by foreign explorers.
In the late 1400s, Spanish conquistadors traveling with Columbus observed the strange pinecone-like fruits and assigned them the Spanish nickname “pina,” in reference to this resemblance.
Fruits were harvested and brought along on the return trip to Spain where botanists began cultivating the species in greenhouses.
Because the climate there was not suitable for production of this crop, fruits were scarce, and access was reserved for the wealthy.
Spanish explorers kept crates of pineapples and other fruits onboard their sailing ships, which aided in fending off scurvy, an illness which develops from a lack of vitamin C – though they were not likely aware of the correlation at the time.
By the 1600s, pineapples were widely cultivated throughout Europe thanks to the increasing popularity of greenhouses and solariums.
The Spanish first introduced the fruits to Portuguese Guinea on the western coast of Africa.
Throughout the 17th century, cultivation continued to spread with continued exploration and trade by Europeans further into neighboring African countries and the Middle East, where environmental conditions were ideal for production.
Cultivation of the crop also gained popularity further north in the Americas, from Central America to the United States.
Europeans brought the fruits to the Philippines in the late 1500s where they became an important part of the local culture. Not only a food source, they became a source of textile materials as the long leaves of the plants were woven by skilled artisans into expensive fabric known as nipis.
Ananas varieties were introduced to other parts of the world by explorers and missionaries, such as Don Franscisco de Paula Marin, a Spanish military officer who deserted his ship to settle in Hawaii in the early 1800s.
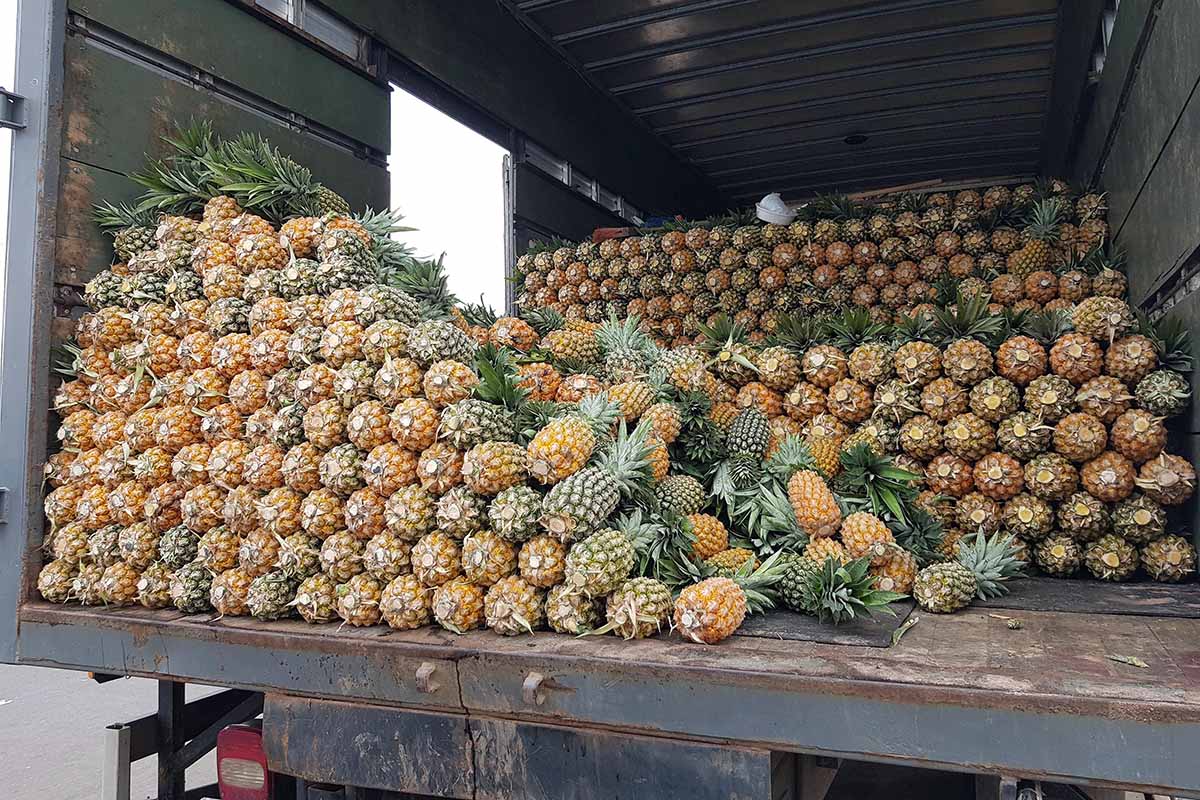
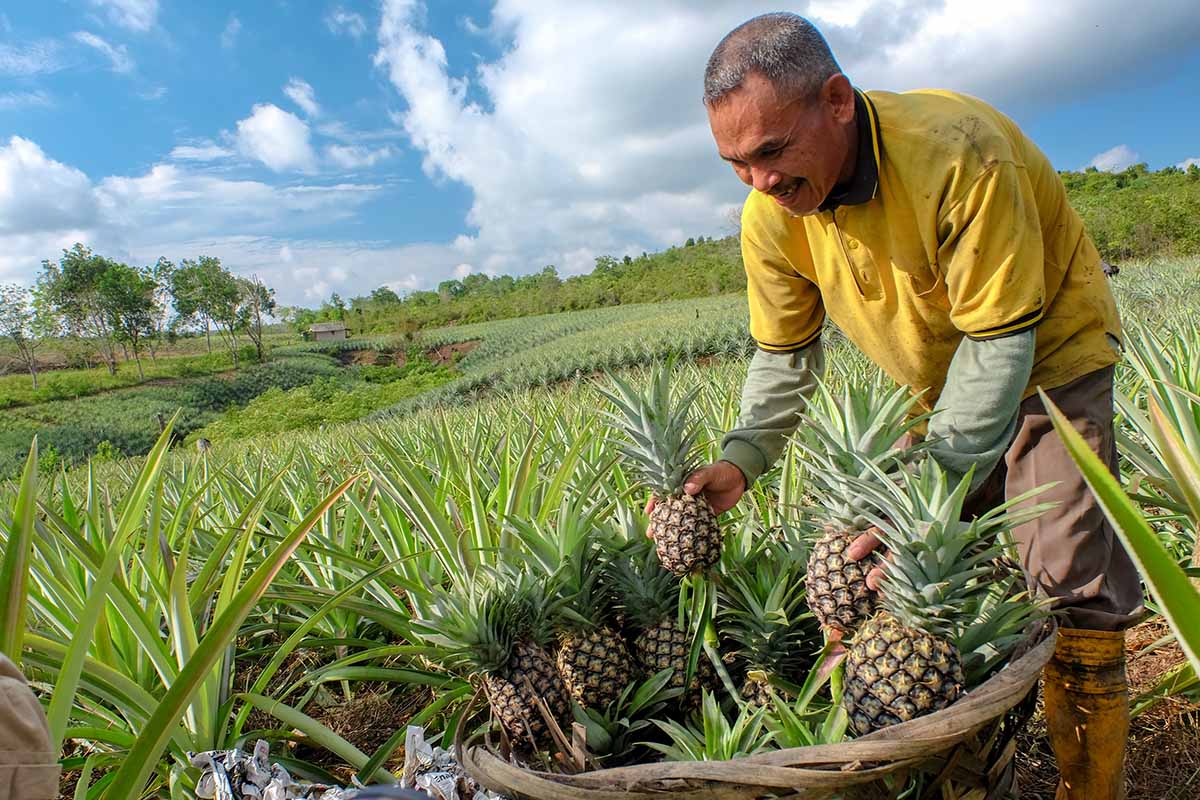
Until the early 2000s, the majority of pineapples commercially grown and distributed throughout the world were produced in Hawaii, where the Dole company based its operations.
Sadly, commercial production is often dangerous to the laborers who care for the crops.
Due to the high rates of chemical exposure associated with large-scale production, workers often fall victim to a multitude of ailments such as allergies, migraines, birth defects among their children, and more.
Fortunately, home growing eliminates these dangers if chemical interventions aren’t overused.
While many fruits and vegetables contain high levels of vitamin C, there are only a few greater sources than pineapples, at nearly 80 milligrams per cup. Pineapples also contain bromelain, a group of enzymes that help to break down and digest proteins.
Just don’t overdo it when you snack – consuming too much pineapple can result in stomach upset and heartburn in some people due the fruit’s high level of acidity.
It can also interact negatively with certain types of medication, and its bromelain content can lead to a stinging, tingly tongue.
According to a publication of the National Center for Complementary and Integrative Health, bromelain is commonly used to tenderize meat, but is also added to cough medicine and other medications as it has properties that reduce swelling and pain, particularly of the sinuses and digestive tract.
Some self-fertile cultivars have been developed, but most pineapple plants are not self-fertile.
They can be interplanted with other Ananas species if you want them to potentially produce viable seed – but then again, many find seedy fruits to be less palatable or more difficult to process.
Instead of relying on seed for the propagation of new plants, there are several other preferred methods that are both easier and more reliable.
That said, let’s take a look at which methods of propagation work best for the home gardener.
Pineapple Plant Propagation
Small, brown seeds may be visible inside a pineapple when you cut it up, but it can be challenging to find viable ones, especially if they’re derived from commercially produced crops which are often hybrids.
Since starting from seed is an uncommon method, we’re not going to cover that here.
Instead, let’s talk about the two best ways to propagate new plants at home: dividing suckers, hapas, and ratoons, and rooting crowns.
Dividing Hapas, Ratoons, and Suckers
Begin with a pot that is at least four inches deep with good drainage.
Fill it to the brim with sandy loam – one part potting soil for citrus plants to one part coarse sand is perfect. Don’t compact the soil densely into the pot; it should remain loose and aerated.

Carefully remove an offshoot from the parent specimen, making sure that it has several leaves.
This can often be done simply by wiggling it back and forth until it comes free, but a clean knife can also be used if there is resistance.
Press the shoot into the soil just until the base is deep enough to provide stability and keep it from falling over. Mist the soil and place it in a sunny location where temperatures remain consistently above 70°F.
If you don’t have a consistently warm area in your home, you might want to use a heat mat such as this MET-certified heat mat available from the Seedfactor Store via Amazon.
It can take a couple of weeks for roots to begin to develop, but once they do, you’ll notice new growth forming. Continue to mist the soil when the surface feels dry to the touch, but don’t drench it.
After a healthy set of roots has developed, transplant the new specimen to its permanent location, whether in the ground or in a container.
From Crowns
If you’re starting off with a fruit that you purchased and you want to propagate it at home, using the crown of leaves at the top of the fruit is a great option.

If you’ve cut a pineapple open, you may have noticed that the core is stiffer than the surrounding fruit.
This is because the core is part of the stalk of the plant, which also continues into the base of the crown.
Rooted crowns will often generate a stalk, though this is not guaranteed and it can take several years.
Crowns may be rooted in water or soil. Those started in soil can be grown in the container they’ll remain in to cut out the added step of transplanting.
Learn all about starting your own pineapple plant at home using kitchen scraps in our complete guide.
How to Grow Pineapples
Since each specimen will produce only one mature fruit per season, you may want to add more than one to your garden, space permitting.
If you’re growing them simply for the novelty, or as a fun project with the kiddos, one might be enough.
Location, Location, Location
Pineapple plants tend to grow rather large – up to six feet in width – so it’s best to allow at least 24 inches of space around plants, preferably 36 inches or more, to provide room for growth and proper airflow.
They can reach up to six feet tall at maturity as well, so overhead space is another consideration. Bear this in mind when choosing a location as mature plants can take up quite a bit of room.
The root system won’t grow very deeply, but because of the size of the mature plant, it’s best not to install yours close to any structures.
And if you’re not a fan of bats visiting your garden, you may want to place them away from the busiest areas – although bats are a vital part of the ecosystem, and they typically avoid contact with humans.
Rest assured that the bat species that are responsible for pollination in the wild rely on a primarily nectar-based diet, such as American leaf-nosed bats of the Phyllostomidae family and Old World flying foxes of the Pteropodidae family.
Choose a location with a slight incline to allow for good drainage as plants from the Ananas genus can not tolerate soggy ground. This is particularly important if you live in a region that experiences very wet rainy seasons.
A location in your landscape or garden with at least eight hours of sun exposure per day is best, but be aware that hot sun exposure for long periods coupled with high temperatures above 90°F can easily scorch the fruit.
If you’re adding a spiny type to your garden or landscape, you may want to choose a location that is out of reach, and away from paths or other high traffic areas.
Growing at high elevations is not recommended as this type of environment increases acidity to an undesirable level. In fact, many fruits grown at higher altitude can experience changes in ripening, flavor, acidity, mature size, and color.
Choosing and Planting Your Specimen
If you are beginning with a nursery specimen, be sure that the one you select is free from pests and disease, and that it has been grown in a pot of adequate size. A large specimen in a small container can be rootbound and unhealthy.
A homegrown specimen should be about eight to 12 inches in height with a developed root system at the time of transplant. Be sure to harden off any transplants that have been grown indoors prior to moving them outside permanently so they don’t wilt or become scorched in harsh sunlight.
Amend the site with compost prior to installing your pineapple plant to provide important organic material and nutrients. Compost can be added every two to three months throughout the year – we’ll cover fertilizing more in the next section.
Create a hole about the same size as the root system and carefully turn the plant out of its nursery container.
Place it in the hole just so the base is level with or slightly above the soil surface and fill in with soil around it, but do not firmly compact it. Water it in well but don’t drench it.
Soil and Climate
A soil pH of 4.5 to 5.5 is preferred for best results. If you need some guidance in achieving this range, check out our guide to understanding garden soil for tips.
The soil at the site should be a mix of sand and loam, and it should be raked or tilled to loosen it up to a depth of about twice that of the root system prior to planting. Don’t compact it or drench it with water as aeration will be reduced.
If your region doesn’t experience low temperatures under about 50°F or high temperatures above about 90°F, you can plant your specimen directly in the ground.
If growing in cooler Zones like 6 or 7, seasonal low temperatures will result in slower growth or potential cold damage.

Container or greenhouse growing will be necessary to protect them from freezing as exposure to temperatures below about 30°F will almost certainly result in death.
Even though pineapples are intolerant of wet ground, they also dislike prolonged drought conditions, so it’s best to provide consistent watering.
One to two inches of water per week should be plenty in the absence of rain when the soil surface feels dry to the touch, but again, avoid overwatering.
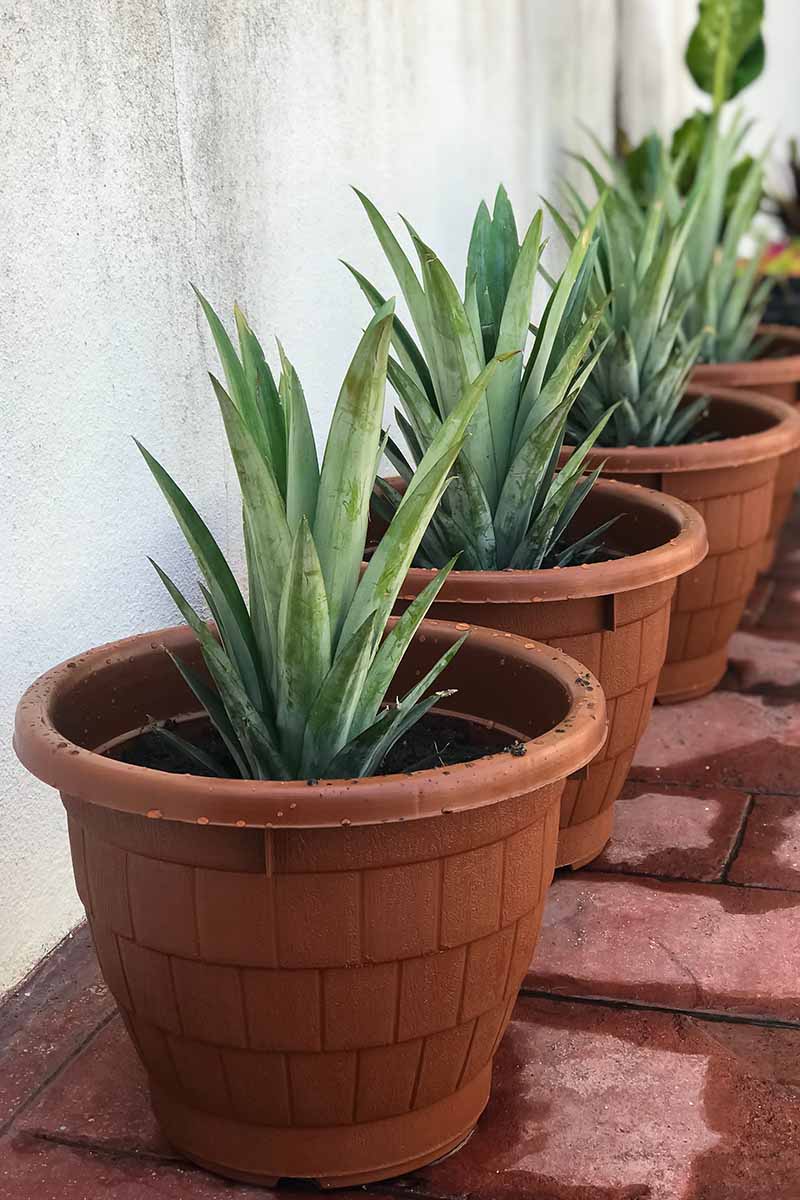
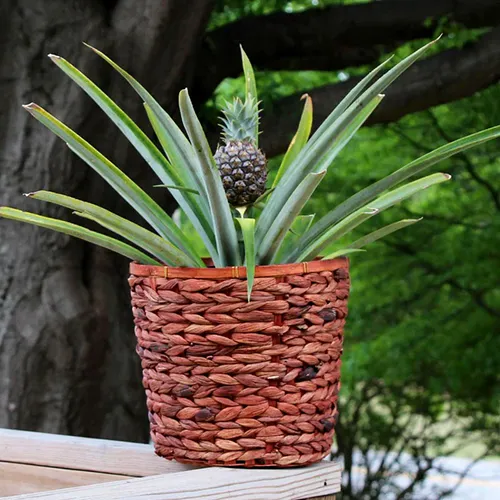
Container Planting
Containers are an excellent choice for growing pineapples in any region.
They have the advantage of being easy to move to shelter as needed in severe weather or relocate to more spacious areas of the yard if they attain a larger than expected size.
For most species, the general rule of thumb is to select a container that is twice the size of the root ball of the specimen, although beginning with a slightly larger one can help to reduce the number of times you’ll have to repot in the future.
The container should have several drainage holes in the bottom to allow excess water to run out rather than collecting, which can lead to rotting and disease.
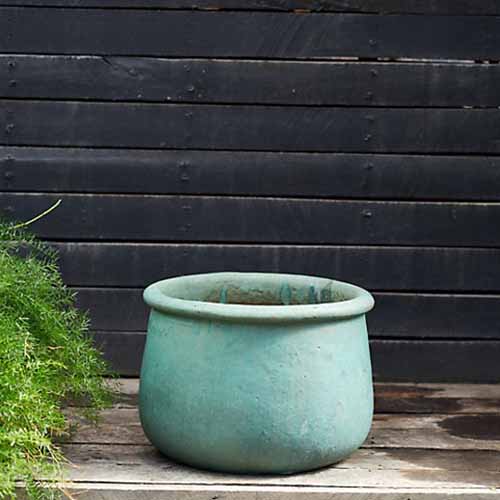
A pot made of porous material such as clay is the best to use for pineapple plants. One such as this Roll Top Low Ceramic Planter in a 19-inch size is available from Terrain.
Fill the vessel with just enough soil to keep the base of the plant level with the rim of the container.
Use two parts sandy loam from the garden mixed with one part compost added, or equal parts sand, potting soil, and compost. Avoid pressing and compacting it any more than is necessary for stability.
Backfill around the roots with loose soil to the brim. Water in well and make sure to add additional soil as needed if it has settled after watering.
You’ll need to install a stake to support the stalk as the maturing fruit becomes heavier. It’s better to do this early on rather than waiting for signs that the stalk is struggling with the weight, such as leaning to the side.
Relocate the container indoors or move it to a protected area during cold snaps, or through the winter in cooler growing zones.
Be sure to continue to provide adequate light and water until it can be moved back outdoors.
Fertilizing
Fertilizing is a necessary step in growing pineapples. They’re particularly heavy feeders, drawing nitrogen and potassium constantly. Container growing increases the rate of depletion.
If these nutrients are lacking, the telltale signs may become apparent quickly.
Reddening of leaves and stunted growth are common symptoms, as well as thin, weak leaves and stems. Budding and blooming may cease if essential nutrients aren’t available.
Begin by weeding around the growing area thoroughly to reduce competition for available nutrients.
Adding a top dressing of compost every three to six months can help to keep the weeds at bay and boost soil nutrition.
Use a product with a 6-4-6 NPK ratio, such as Dr. Earth Exotic Blend Organic Palm, Tropical, and Hibiscus Fertilizer, available from Amazon in one- and four-pound packages.
Dr. Earth Organic Palm, Tropical, and Hibiscus Fertilizer
Apply about two ounces of fertilizer to young plants every two weeks and gradually increase the amount to the recommended application on the label as the specimen prepares to set fruit.
Dilute any fertilizers used for container-grown plants to 50 percent strength to avoid burning or buildup.
After the stalk develops and the inflorescence appears, discontinue fertilizer application.
Magnesium is another crucial mineral that can be lacking by the end of such a long growth period. A foliar fertilizer spray can provide a much-needed boost.
One such as Bloom City Professional Grade Cal-Mag Fertilizer, available in one-quart, two-gallon, and five-gallon bottles, from Amazon, would be suitable.
Prepare the fertilizer according to package instructions but dilute it to 50 percent strength for use as a foliar spray.
Apply it once every one to two months during spring and summer, in the evening after sunset, for best results.
Forcing Blooms
Even though you could have patience and wait it out for an inflorescence to appear, there is a way to speed up the process that works well enough for commercial growers to rely on it.
In commercial fields, ethylene gas is applied to crops. At home, there is a smaller-scale method available.
When you see at least 70 leaves present on your plant, you can attempt to induce blooming.
Forcing too early often results in smaller fruit with a less desirable flavor. Wait until a cooler season, such as fall or spring, as high heat can have a negative impact on the process.
This next part may seem a bit odd, but stick with me – it works!
If you’re lucky enough to have an apple tree in your yard, you can simply pluck one of the fallen, rotting apples from the ground when you’re doing your orchard cleanup.
If you don’t have any growing, you can leave an apple purchased from the store out on the counter or in a warm place and allow it to begin rotting.
You’ll need one rotten apple and a large, transparent plastic bag per specimen. Place the apple in the center of the rosette of leaves, where the stalk emerges at the base, and cover the entire plant with the plastic bag.
Secure it loosely in place around the stem, under the leaves. Move the container to a shaded location or provide shade overhead.
Leave the bag in place for three to four days. The rotting fruit releases ethylene gasses that act as a stimulant, encouraging induction of the next phase in the life cycle, which is bloom production.
After the third or fourth day of ethylene exposure, remove the bag and the apple.
Move the container back to a sunny location, or remove the shade cover. Blooms should develop soon after, followed by fruit within about six months.
Growing Tips
- Pineapples can be grown in-ground in warm climates, but they should be grown in containers in climates with temperatures below 50°F.
- Place specimens in areas with a slight incline to allow for drainage and avoid overwatering.
- Maintain consistent moisture for best results.
- Apply fertilizer regularly throughout the growing season for these heavy feeders.
Pruning and Maintenance
As I mentioned earlier, suckers and ratoon shoots will continuously appear throughout the growing season.
Whether you plan to propagate more plants or not, it’s best to remove new shoots as they develop to allow the energy to be diverted to the primary fruit.
If you’d like to produce a ratoon crop, leave one of the ratoons – or the shoot that develops from the root system – intact so it can grow a secondary fruit.
As I mentioned, this secondary crop will generally be smaller than the first.
Be aware, however, that removing new growth will encourage the production of more new shoots.
These shoots can be removed and used to generate additional crops or discarded if you don’t intend to plant them – or, you could simply give them away to others who may want to use them.
Pineapple Cultivars to Select
There are many A. comosus cultivars that have been bred to showcase certain enhanced features.
Some of these are self-pollinating, improving the likelihood of bearing fruit, while others were bred for flavor or color, or to withstand temperature variances or resist disease.
Pineapple cultivars are often organized into five main classes or groups – the Abacaxi (aka Pernambuco), Cayenne, Queen, Spanish, and Mordilona – but there are some others that don’t fit into any of these groups.
For trading purposes, commercial cultivars are generally organized into four main groups – Abacaxi, Smooth Cayenne, Red Spanish, and Queen. Even within a particular group, the characteristics of different cultivars can vary widely.
Plants sold in nurseries and online will typically not specify the group a cultivar belongs to.
Let’s take a look at a few different cultivars you can find on the market.
Elite Gold
A. comosus ‘Elite’ features golden flesh, with an exceptionally sweet flavor.
A popular commercial cultivar, this Abacaxi type is self-pollinating. This reduces the chances that fruit may fail to set due to incomplete pollination.
Compact plants reach two to three feet tall and three to four feet wide, making them ideal for growing in containers.
Fruit is typically ready to harvest in early fall. Plant in-ground in Zones 9 to 11, or grow in containers in Zones 4 to 8 and move plants to a protected spot when temperatures drop.
You can find Elite Gold available at Fast Growing Trees.
Florida Special
Just as its name implies, this cultivar was developed in Florida – or Immokalee, Florida, to be exact – by the Libby fruit company.
To contend with the cold snaps that central Florida sometimes experiences, A. comosus ‘Florida Special’ was developed to withstand temperatures down to about 30°F.
Another advantageous feature is its ability to self-pollinate. It also has spineless leaves, so there’s no danger of an accidental poke with this variety.
This sugarloaf or Abacaxi cultivar reaches three to six feet in height and spread, producing fruit with golden flesh that ripens in early to mid-fall in most regions.
‘Florida Special’ can be grown in containers throughout Zones 4 to 8 and moved to protection when temperatures dive, or grown in-ground in Zones 9 to 11.
You can find plants available from Fast Growing Trees.
White Jade
A favorite among consumers who have tasted it, A. comosus ‘White Jade’ isn’t typically available in stores in places where it is not grown locally because it doesn’t ship well.
This cultivar has soft flesh that bruises and rots very easily, and it’s primarily grown in Hawaii. The fruits don’t fare well on that long journey to the mainland.
Because of their scarcity, they’re often much more expensive than most commercially available types. And they’re highly sought after thanks to their softer, less fibrous texture, high sugar content, lower acidity, and edible cores.
Even though it achieves the same three- to-six-foot height and spread as most varieties, like ‘Florida Special,’ it’s safer to include in the landscape than many other cultivars because of its spineless leaves.
While this cultivar is touted as being cold hardy down to 30°F, it’s best to plant in containers in regions with temperatures that fall to freezing or below so plants can be moved to protection.
You can find ‘White Jade’ pineapple plants available from Fast Growing Trees.
Managing Pests and Disease
Unfortunately, there are several maladies and difficulties that can befall members of the Ananas genus. Most of these are restricted to warmer climates.
Herbivores and Omnivores
Most animals will steer clear because of the spines and the relatively small amount of food available, as each specimen only produces one or two fruits, choosing instead to go for easier access and more abundant crops.

However, the occasional, adventurous (or hungry) raccoon, squirrel, rat, or opossum might venture a nibble here and there. If you live in a region where monkeys roam in the wild, they can also pose a problem for this crop.
If hungry animals manage to break through the rind, that fruit’s a goner. There’s no way to salvage a pineapple if it has been chewed. They tend to quickly rot and sour, and will have to be discarded.
For this reason, it’s easiest to plant in containers so you can relocate them out of reach, either inside a greenhouse or enclosed in a protected area such as in the garage or a sunroom.
Otherwise, mesh netting may be an option, although squirrels in particular may not be deterred from chewing their way through.
Insects
Just as with furry, four-legged pests, insects can pose a problem.
There are quite a few that can appear in some environments; however, the most significant pest is the mealybug.
Other pests to be wary of include thrips, beetles, borers, grubs, mites, moths, and termites.
Mealybugs and Other Scale Insects
Scale insects are a group which includes mealybugs.
These are sucking insects (in more ways than one, if you catch my drift) that attach at the mouth to stems and leaves, feeding on juices from the interior.
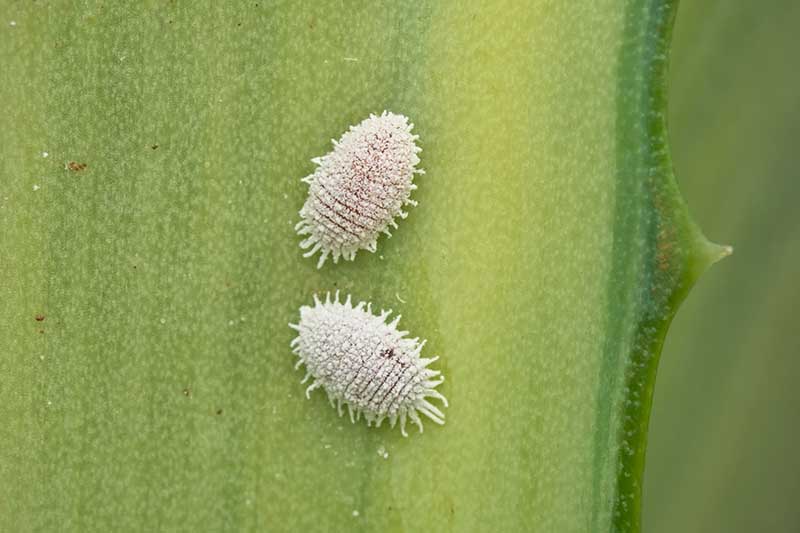
The pineapple mealybug, or Dysmicoccus brevipes, is very close in appearance to other species that appear on tropical plants such as bananas.
This species is spread by ants, so if you see a trail of them leading across the leaves of your plant, it’s time to investigate.
Pineapple scale (Diaspis bromeliae) and brown pineapple scale (Melanaspis bromiliae) affect this crop as well, causing similar damage.
Signs of infestation include cottony deposits across the fruit rinds and foliage, stunting, and discoloration and die-off of leaves. Excreted honeydew may also attract sooty mold.
Once these pests pierce the flesh of plants, they often introduce disease, which can spread rampantly as the insects breed out of control in ideal conditions. And it doesn’t take much for conditions to be ideal for these guys.
Learn all about them and how to deal with an infestation in our guide to identifying and controlling scale insects.
Disease
There are fortunately fewer diseases than types of pests to be on the lookout for… but the bad news is that the ailments of concern have no known cure.
Heart Rot
Caused by Erwinia chrysanthemi bacteria, heart rot can appear as soggy lesions on foliage, followed by pitting and rotting of the fruit, and discoloration of foliage and stems.
You may also see sap leaking from the rind of the fruit.
This bacterium is spread by ants and mites, so paying careful attention to infestations can tip you off that there may be a disease issue developing.
As I mentioned, there is no known cure for heart rot.
Once signs are present, it’s best to destroy the plant in its entirety, and refrain from replanting crowns or offshoots from infected specimens.
Place all infected material in a garbage bag and seal it well before disposing of it.
Be sure to sterilize any tools you use to mitigate the issue to avoid spreading the disease to other specimens.
Black Rot and White Leaf Spot
Both of these diseases are caused by the same type of fungi, Ceratocystis paradoxa.
Black rot infections appear as discoloration and dark spots on the rind, sinking into pits of rotting flesh.
Initially, the spots may appear brown and watery, but over time, they turn black and slimy.
There may also be similar brown spots on foliage that develop gradually into grayish spots as the leaves die off.
White leaf spot begins developing in wounded leaves. Cream to light brown spots become visible near damaged areas, spreading quickly during warm periods of rain or high humidity.
As the fungi spreads, the entire leaf may be affected and discolored.
After conditions dry, spots typically fade to white with a papery look and feel. Margins surrounding the spots may remain brown.
The only method of preventive control that’s available for these issues is to spray or dip young plants or separated offshoots in fungicide prior to transplanting.
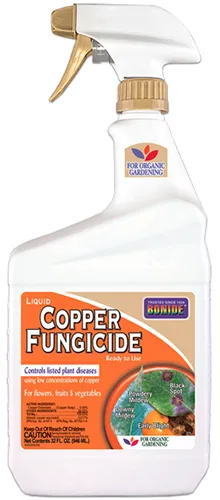
Bonide Liquid Copper Fungicide
Bonide Liquid Copper Fungicide is a suitable option. It’s available in ready-to-use 16- and 32-ounce bottles, and 16-ounce concentrate from Arbico Organics.
Once symptoms appear, it’s too late for treatment and the entire plant must be destroyed.
Be sure to wrap it up tightly in a sealed trash bag and disinfect any tools that may have come into contact with the fungus.
Harvesting Pineapple Fruit
Pineapples take several months to mature and ripen. It can be tricky to tell when the best time is to harvest, but there are a few key features to look for.
At the base, where the stem is attached, you may notice a stronger, sweeter aroma emanating from the fruit at peak ripeness. Otherwise, watch for changes in coloration – ripeness tends to bring about a brighter color in the rind.
You may want to pull on some gloves before you pick if you’re growing a spiny type.
Carefully use a sharp knife to cut the fruit free from the stalk as close as possible to the base. Handle the fruit gently to avoid bruising it.
Before you bring your harvest indoors, check the foliage carefully to make sure there are no mealybugs or other hitchhikers bumming a ride that will readily infest your houseplants.
Fresh pineapples can be stored on the kitchen counter for three to five days prior to eating or processing.
Ripening Post-Harvest
If you accidentally break a pineapple off before it’s ripe, it won’t ripen much on its own.
Rather than discarding it, place it in a paper bag with a banana for a day or two, and then check to see if the color has changed.
The ethylene gas released by the banana can help to ripen the fruit, although pineapples picked early may still have a more acidic and tart flavor.
Preserving
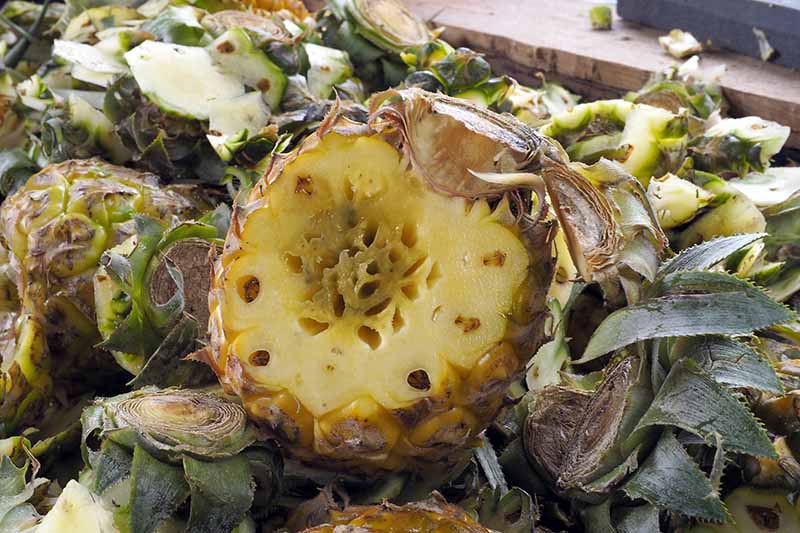
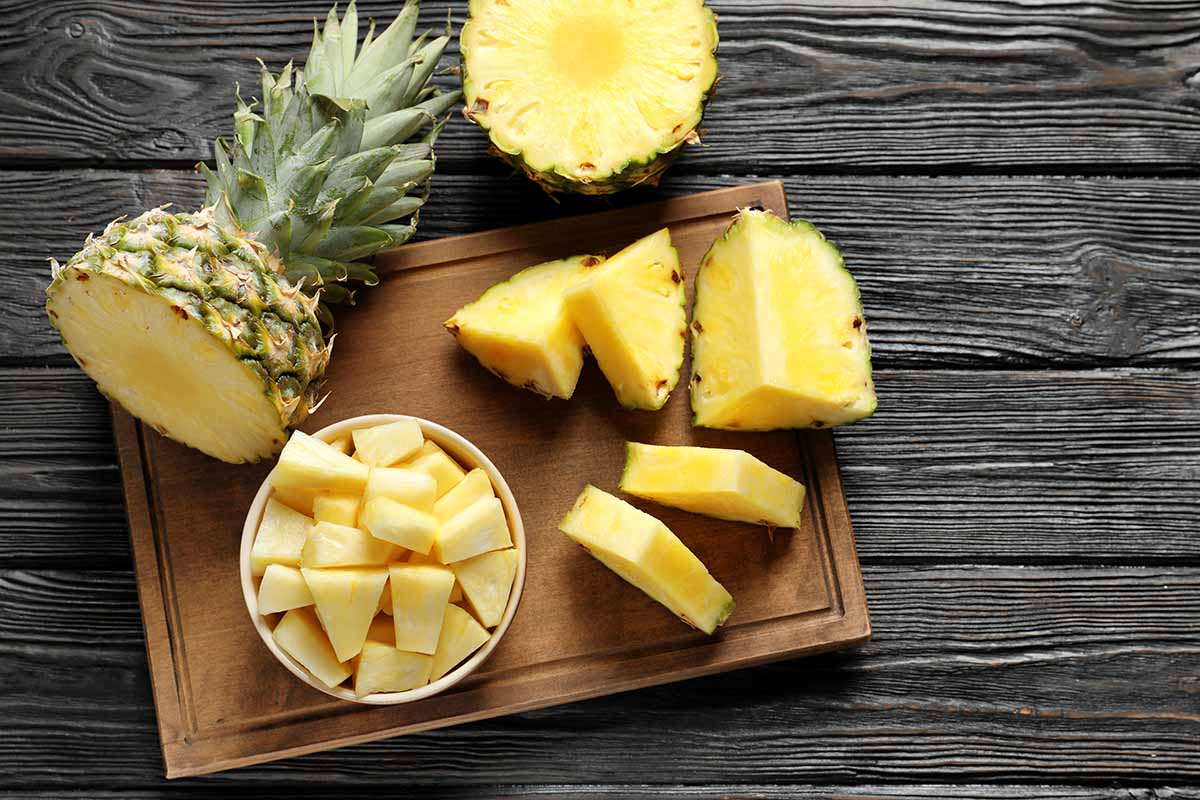
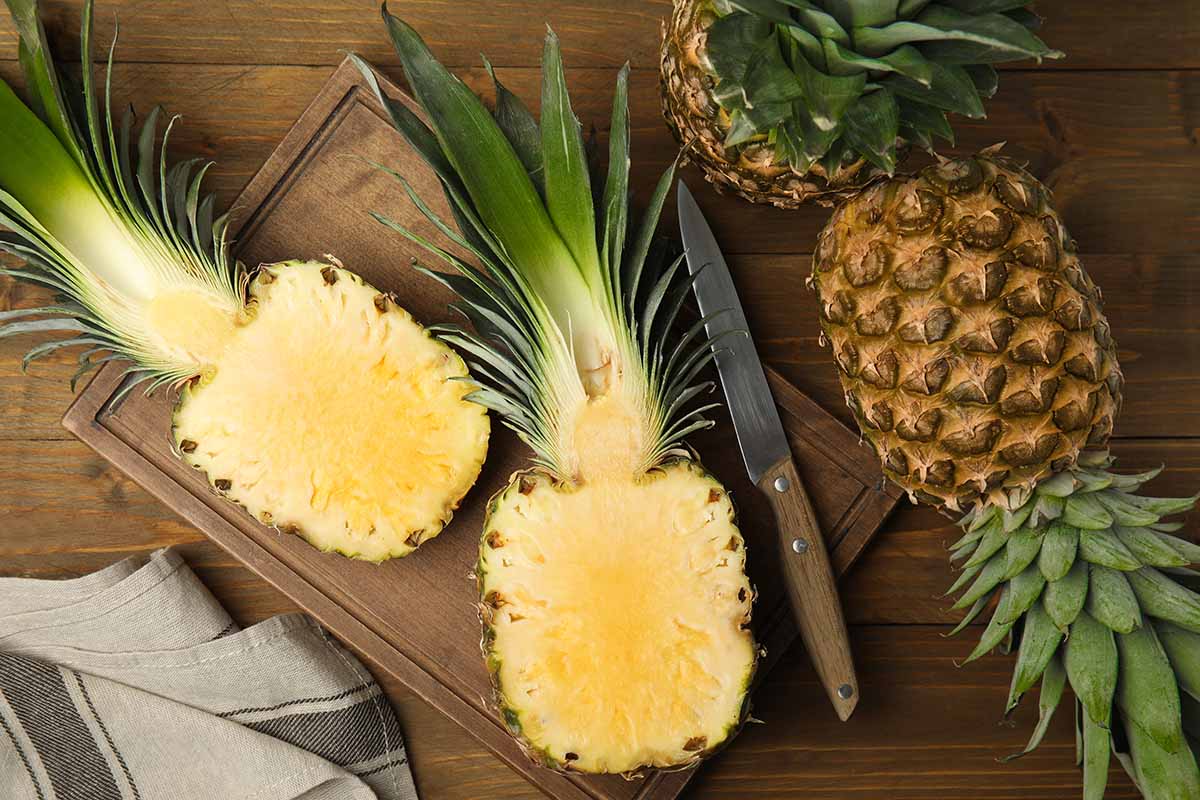
It can be a little intimidating the first time you set out to process a fresh pineapple because of the sheer oddity of the specimen.
It’s pokey, you can’t peel it easily, and there are several steps that you must take to transform this pinecone with a mohawk into a bowl of sweet, tasty wedges.
Check out Foodal’s guide to choosing and serving fresh pineapple to learn the best way to process it.
If you’re still feeling a little unsure about using a knife to prepare it, check out this guide to the best pineapple corers and how to use them, also on our sister site, Foodal.
Fresh spears or chunks will last in the fridge for about a week. Keep them in an airtight container and use them as soon as possible to avoid spoilage.
To freeze the fruit, spread chunks on a cookie sheet covered with parchment paper and pop it into the freezer for about 30 minutes to an hour. Transfer the chunks to a zip-top plastic bag for freezer storage for up to a month.
You can also puree the flesh and freeze it in an ice cube tray if you plan to use it as an ingredient in smoothies, which cuts down on storage space and mess.
This is a great option if you’ve ended up with an overabundance that won’t last long enough to use up.
And don’t forget to save those tops for replanting!
Recipes and Cooking Ideas
There are so many ways to use your harvest.
Pairing pineapple with chicken or pork, like in this sweet and sour pork recipe from Foodal, is a tried-and-true combination that adds sweet yet tart juices to grilled or broiled meats.

Rings arranged on a ham, with or without maraschino cherries, is a classic recipe loved by so many at the holidays.
Rings or slices can be arranged on foil or a grill-safe tray and basted with a blend of melted salted butter and brown sugar. A hint of ginger or cinnamon can be included if desired.
Baste well or drizzle the sauce over the slices and place them on the grill at medium heat until it’s just caramelized.
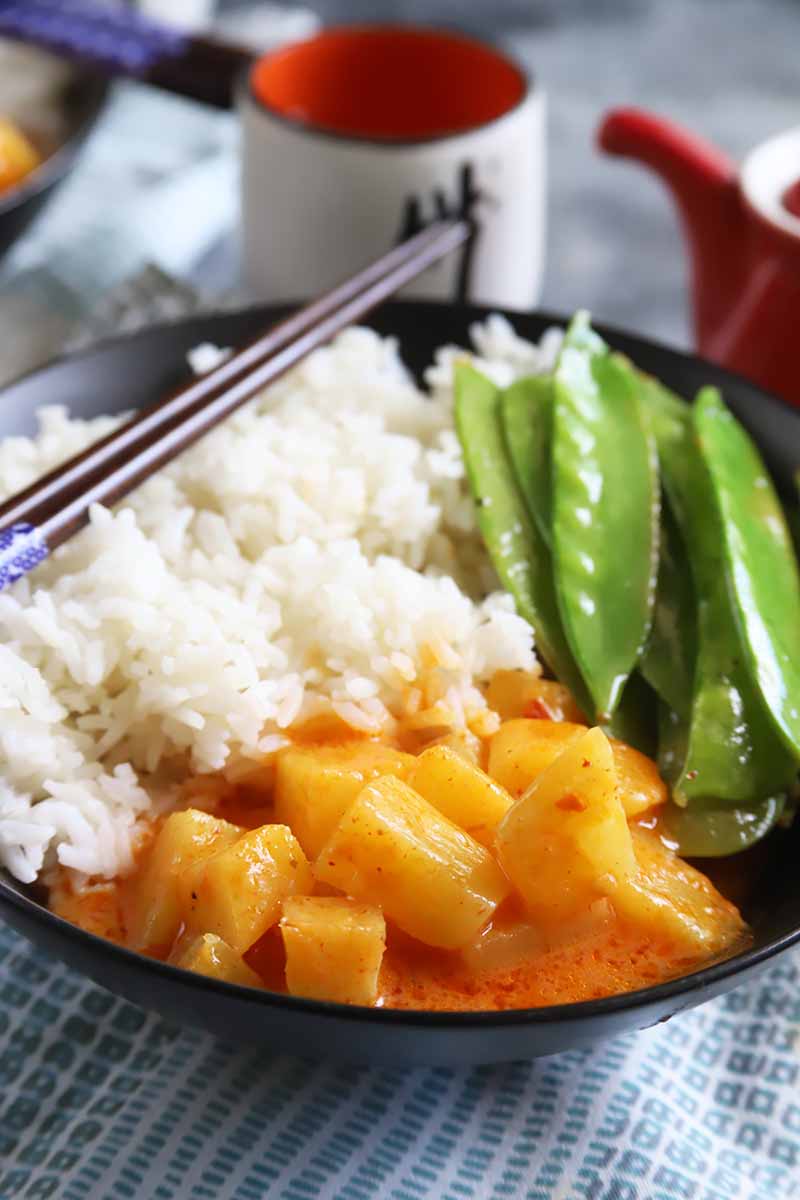
For a meatless alternative, try this pineapple curry from Foodal, which can also be prepared as a vegetarian dish with or without some spicy heat.
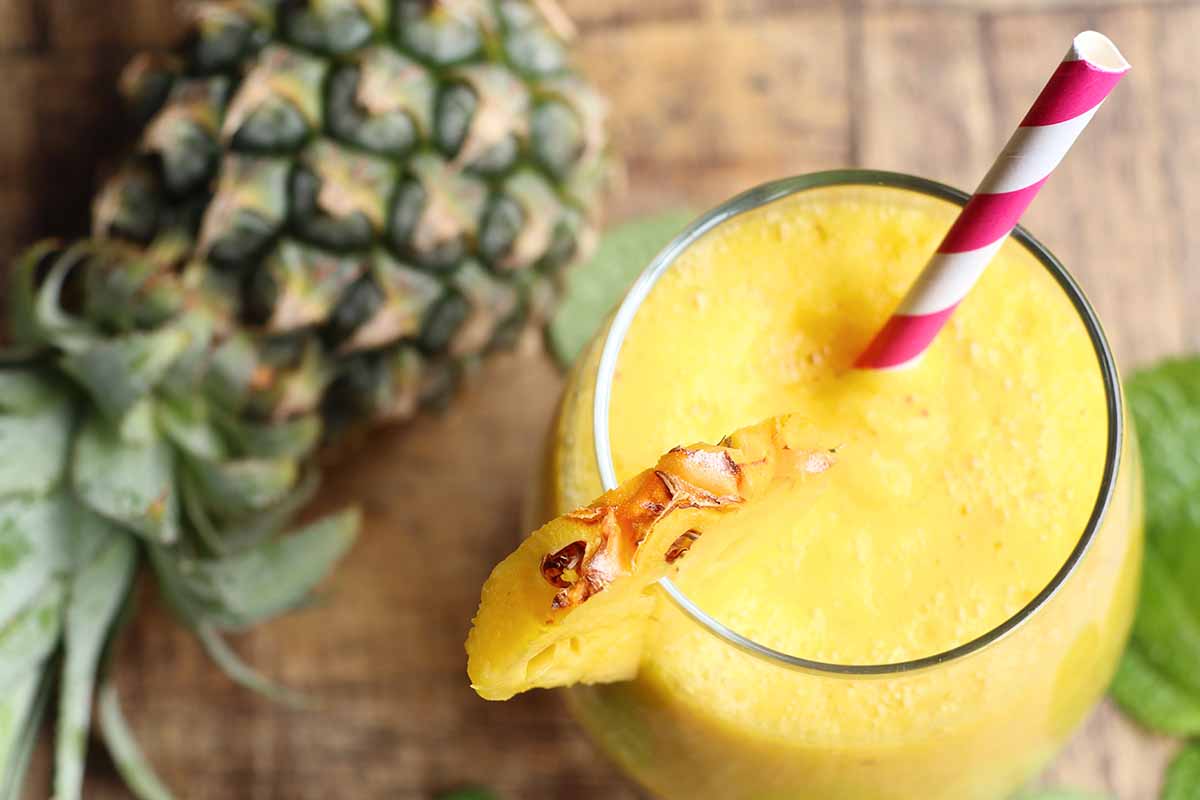
For a seriously refreshing taste of the tropics, try a pineapple coconut smoothie! You can find Foodal’s recipe here.
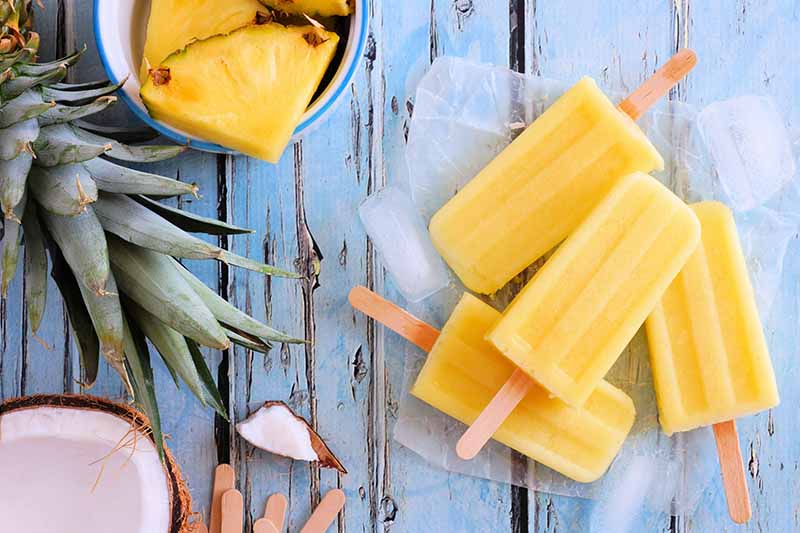
Of course, it’s just as easy to use pureed pineapple to make some simple, frosty popsicles that are perfect for those hot summer days.
The possibilities are endless! Don’t forget to share your favorites with us in the comments below!
Quick Reference Growing Guide
| Plant Type: | Herbaceous perennial | Maintenance | Moderate |
| Native to: | Brazil, Paraguay, West Indies | Water Needs: | Moderate |
| Hardiness (USDA Zone): | 9-11 | Tolerance: | Mild drought |
| Exposure: | Full sun | Soil Type: | Sandy loam |
| Time to Maturity: | 2 years | Soil pH: | 4.5-5.5 |
| Spacing: | 24-36+ inches | Soil Drainage: | Well-draining |
| Planting Depth: | Same depth as existing pot (transplants), depth of root system (offshoots) | Order: | Poales |
| Height: | Up to 6 feet | Family: | Bromeliaceae |
| Spread: | Up to 6 feet | Genus: | Ananas |
| Common Pests and Diseases: | Opossum, mealybugs, monkeys, raccoons, rats, scale, squirrels; Black rot, heart rot, sooty mold, white leaf spot | Species: | Comosus |
Get Familiar with This Strange Fruit
If you have suitable growing conditions to add pineapples directly to your garden or landscape, you could easily start with just one plant for the sheer fun of watching it develop.
It’s more than worth it, especially if you have kids who like learning about life cycles.
Or, if you’re looking for a larger crop, it’s pretty easy to use the suckers and ratoons that these plants readily produce to flesh out an entire field’s worth in just a couple of years.
No matter what your plan is, you’re well prepared to begin with all of your newfound knowledge – but we’re still here for you if you have questions.
We’d also love to hear about your experiences with this distinctive species and see your progress in the comments below!
Craving even more delicious homegrown fruit? Read these guides next: