
For the past few years, cucumbers, squash, and zucchini have wilted in my garden – no matter what.
My best guess is that my soil is infected with a virus, be it phytophthera or some other crippling condition.
Since then, I have planned to build a raised bed for cucurbits, which would give me some fresh soil to try growing them again.
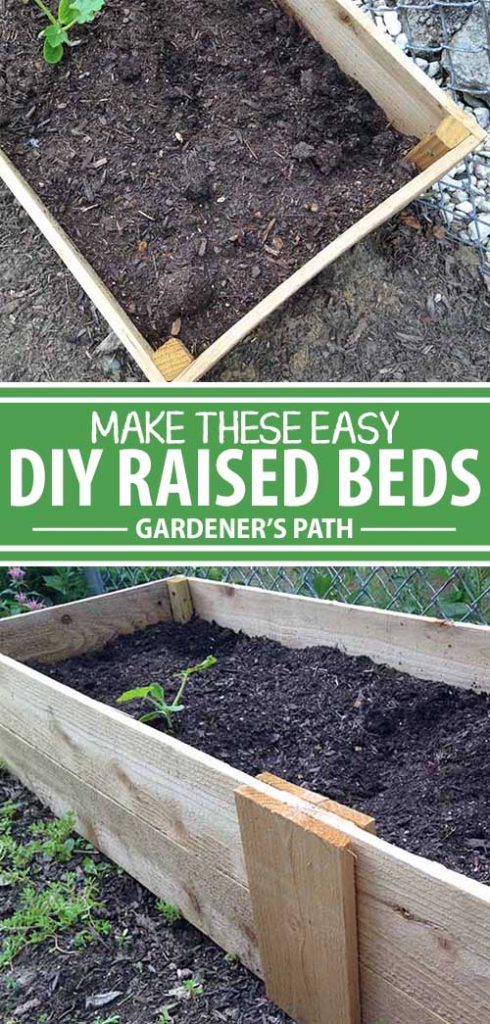
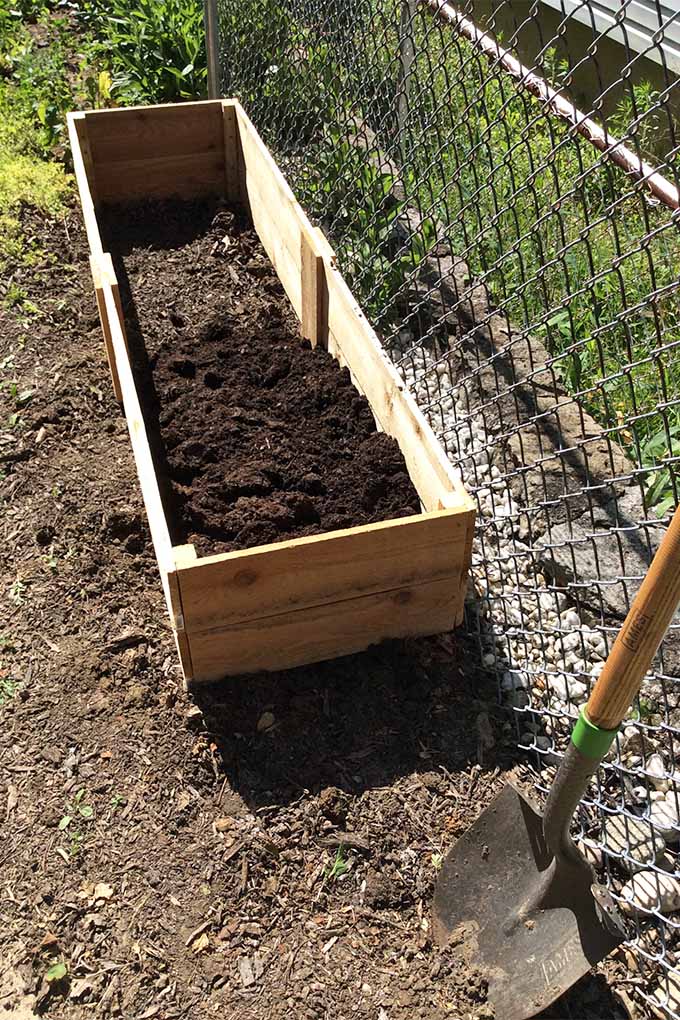
Well, I finally got around to it! I built a raised bed out of dog-eared cedar fence posts and pressure treated 2x2s. It measures 6 feet long by 18 inches wide by 11 inches high.
It’s a little skinny for squash and zucchini plants, but I was desperate to create an area with fresh soil without breaking the bank. So, we’ll see how it goes!
While the size of this DIY bed may be a stretch for large plants, like zucchini and squash, it is beyond perfect for growing root crops, which need loose, loamy soil to reach their full potential.
Place it up against a fence or add a piece of trellis to the back and it’s equally great for climbing crops, like peas, green beans, and cucumbers.
I spent around 20 dollars on lumber and already had exterior screws on hand. And it was less than 35 dollars to fill with soil – but this will vary depending on what type of soil you use and have available.
While I don’t consider a total of 55 dollars a small sum, I do consider it an investment.
Next year, I’ll just have to top off the soil with some compost and possibly more sand for added drainage. So it’s nearly a one-time expense.
Want one (or five) for your garden? Keep reading to learn how to build your own DIY raised beds at home!!
What You’ll Need
Materials
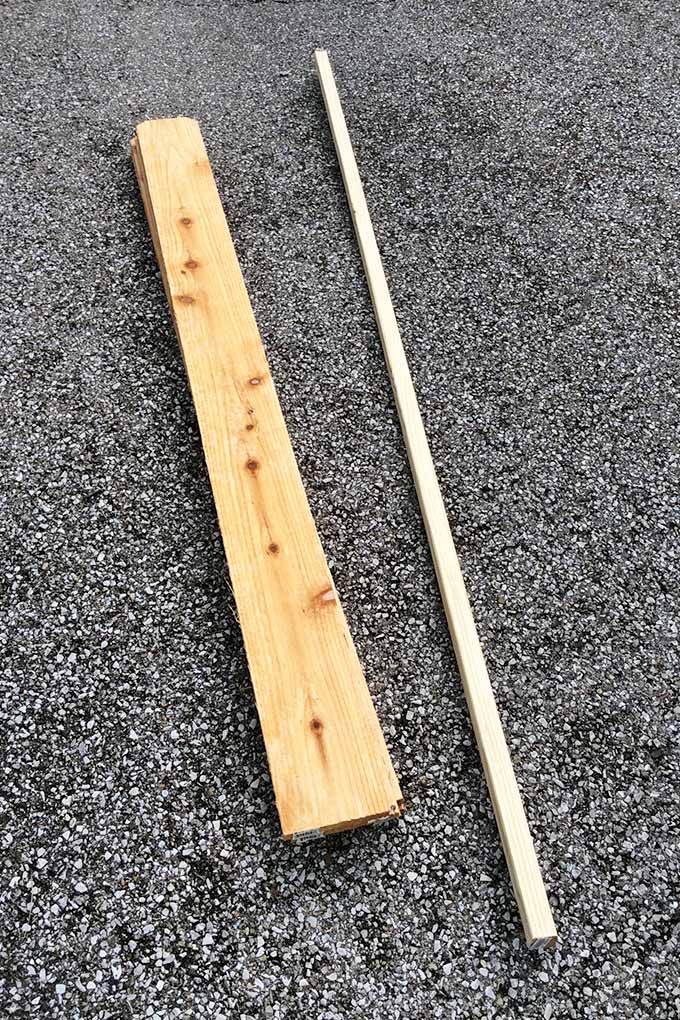
- 6 dog-eared cedar fence posts, 6 feet each
- 1 pressure treated 2×2, no less than 4 feet long
- ¾-inch exterior screws
- 1 ¼-inch exterior screws
Tools
- Circular saw or miter saw
- Pencil
- Speed square
- Drill
- Tape measure
Get to Work
First Things First – Cut Everything to Size
Cedar is expensive – but buying dog-eared fence posts is a way to get it for cheap.
Keep in mind that you’ll have to cut all of the dog-eared ends off the fence posts before beginning assembly of your beds.
To do this, take one fence post and mark a straight line with your speed square just below the dog-eared end. It should measure a little less than 6 feet.
Cut the end off with your circular or miter saw.
Use this picket as a guide for all of the others, so they are the exact same length.
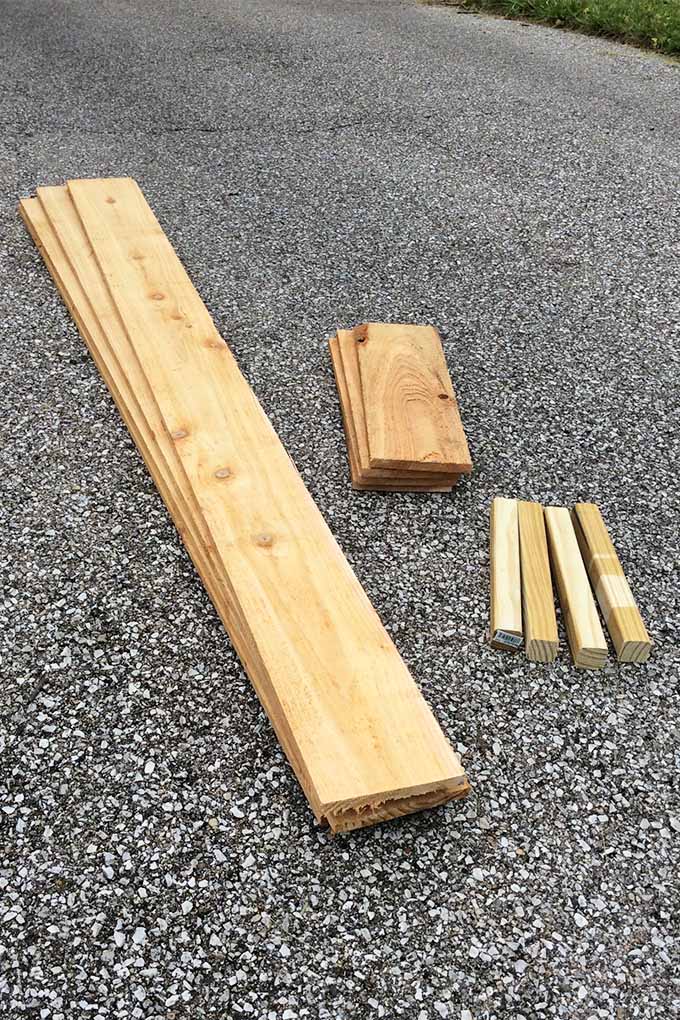
Set four of these pieces aside – they will be used for the long sides of your new bed.
For the short sides, you’ll cut one fence post into four equal sections, around 18 inches each.
They may be a little longer or shorter than 18 inches – it will depend on your particular boards. The important thing is that they are all the same size.
Then you’ll take your final 6-foot fence picket and cut it into four to six sections, each section measuring roughly 11 inches, which is the height of the raised bed.
These pieces will be for stabilizing the long sides, as well as adding a little bit of character.
All you will have left at this point is the 2×2. Cut four sections from the 2×2, each measuring 11 inches. These will become the corners of the structure.
That’s it! Those are all the pre-cut pieces you’ll need.
Assembly
Now it’s time to put it together.
First, assemble the long sides.
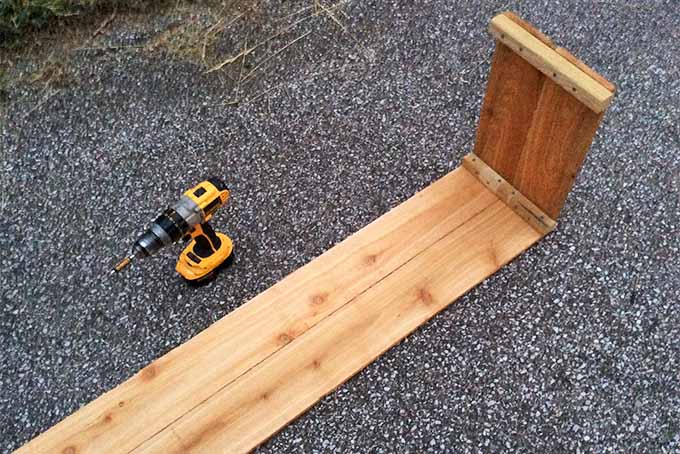
Lay two of the 6-foot fence pickets on the ground, one above the other with the ends flush.
Then, take two of the 2×2 sections you cut and line them up with the ends of the boards.
Pre-drill your holes, then attach the 2x2s to the cedar pickets with 1 ¼-inch exterior screws.
Cedar can split relatively easily, so don’t skip the step of pre-drilling.
Repeat this process with two more 6-foot pickets and two more 2x2s. These will be the long sides of the bed.
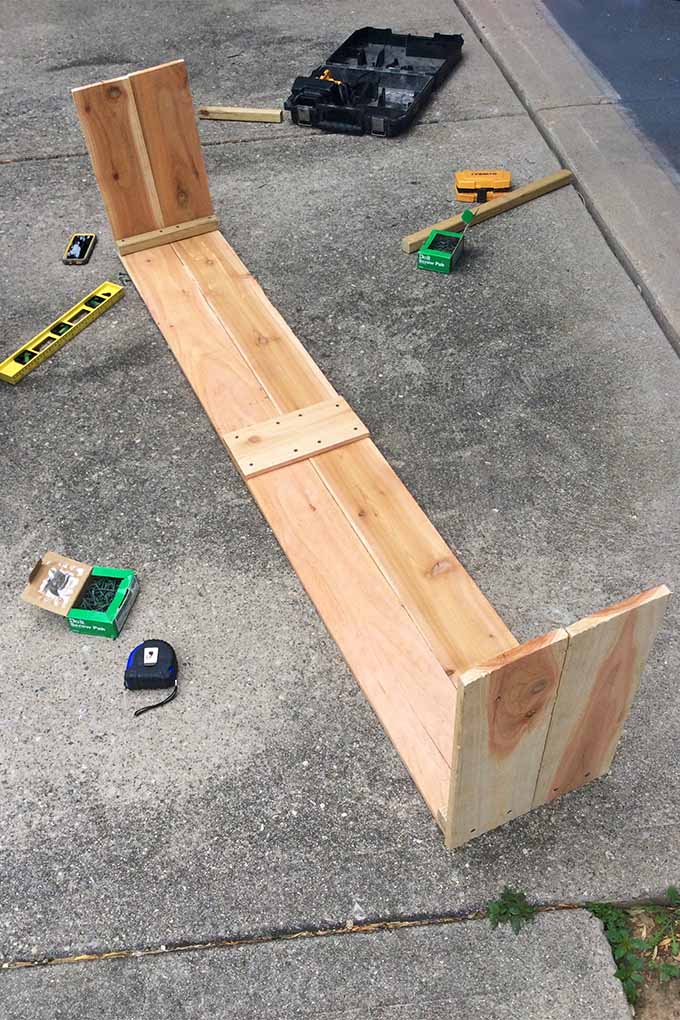
Next, attach the short picket sections – the ones that measure around 18 inches – to the same 2x2s that are now on the long picket sections.
Just a heads up: the screws will show from the outside on the short sides of the bed.
If you don’t want the screws to show, you have a few options:
- Attach the screws from the inside.
- Use a Kreg-jig.
- Sink the screws into the cedar a bit and plug the holes later.
I generally avoid the Kreg-jig, since I have found this option to be more difficult to do with cedar.
At this point, you should have the entire box assembled.
To better secure and stabilize the long sides, use ¾-inch exterior screws to attach the remaining 11-inch sections of cedar to the long sides of the bed.

You can choose to put just one per side or several per side, or sandwich the bed between two of them like I did in the picture above.
If you want to add a little bit of character, try putting these pieces on the exterior of the frame – but attach them from the inside, so the screws aren’t showing.
I’ll be honest though, functionality was my main concern while I was building this.
Take whatever creative liberty you like to make it look a little more finished and charming, if that’s your style.
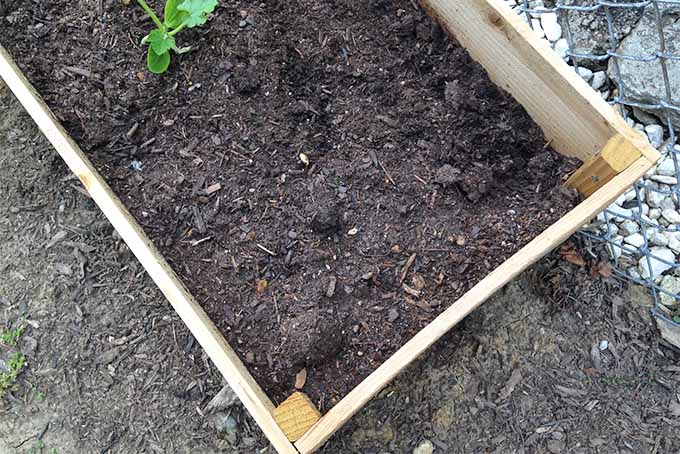
Filling Time
As for filling this beauty with soil, I went ahead and purchased four 3-cubic-foot bags of organic raised garden bed soil.
I also added a 50-pound bag of coarse, multi-purpose sand – the bag actually listed soil amendment as one of the suggested uses.
I gave it a good mix, watered it well, and sowed my seeds.
Not Much to It
That’s all you need to do. Really!
This is just a guide to get you started, so feel free to improvise according to your own whims and needs. You can always use different materials and adjust the size, or make your own embellishments to the basic style.
Do what works for your garden!
If you need something larger, I would recommend using 4×4 cedar or pressure treated posts for the corners instead of the 2x2s.
Also, keep in mind that raised beds dry out faster than planting directly in the ground. So, particularly before seeds germinate and while they’re still seedlings, you’ll want to keep the soil consistently moist.
Have you ever built a raised bed before? Think you’ll give this one a try? If you do, let us know how it goes. We would love to hear your feedback!
If you enjoyed this guide, then these might be helpful:
- What Is a Survival Garden? Tips to Grow Your Own
- Succession Planting: How to Grow Crops for a Continual Harvest
- Bone Meal: Learn How to Use It in Your Garden
Photos by Amber Shidler, © Ask the Experts, LLC. ALL RIGHTS RESERVED. See our TOS for more details.
It’s not recommended to use any chemically treated wood near food crops. I would use a naturally rot resistant wood like cedar or larch.
They are cedar!!
One of the pieces is pressure treated. Use cedar instead.
Dear Neeka,
I believe Michael is referring to the 2″x2″ pressure treated wood used for the inside corners of the box. You could also use redwood 2″x4″ dimensional lumber and rip it into a 2″x2″ or use as is. You may want to use dove wire underneath the box if you have gopher issues as I do. Gravel will work too. I agree with Michael, never use chemically treated wood for food crops. We are what we eat!
Blessings.
Ron.
Fellow gardener
I know this is an old comment…but pressure treated wood is now one of several variations of a copper treatment (AQC and CA).
You’d likely get more copper exposure using an “organic” fungus/mold treatment.
The old stuff, not available in at least 15 years, was a mixture of chromium, copper, and arsenic (CCA).
THAT is where the don’t use pressure treated wood around edible plants stems from.
Simple and to the point for the DIY raised bed. Thank you! Pressure treated pine fence pickets are stored in my garage. Are they suitable for use instead of cedar?
EDIT: Never mind. I see the answer to my question in earlier comments.
I needed this to visualize it…
Hi, I was wondering how long these lasted with the untreated timber? I am hoping to do the same, and would be so grateful for the info! Thanks so much.
Hey David! Honestly, it depends on a bunch of different factors: the type of wood, the source of lumber, the harshness of your elements, et cetera. Depending on which lumber you use and where you’re located, it can last anywhere from two years to two-plus decades. I wish I could give you a more specific number.
In general, slow-grown hardwoods in mild environments will last longer than fast-grown softwoods in harsh conditions.