Phaseolus vulgaris
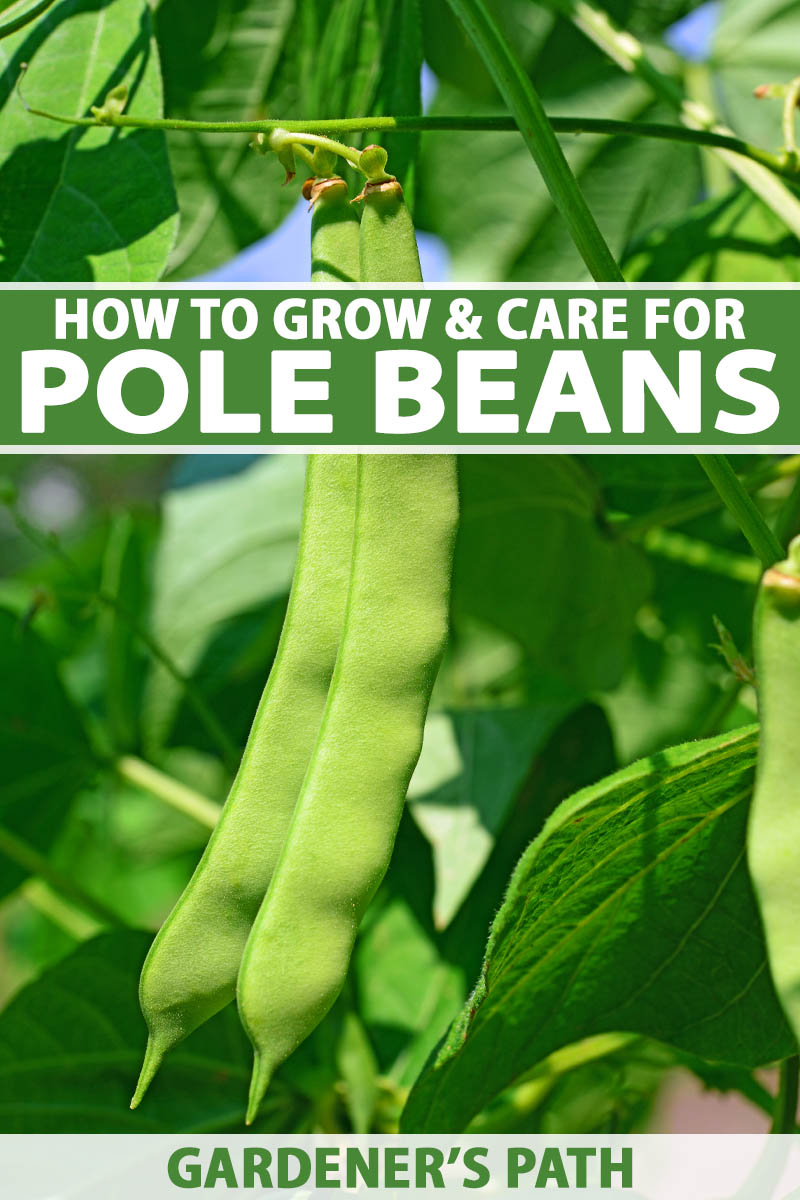
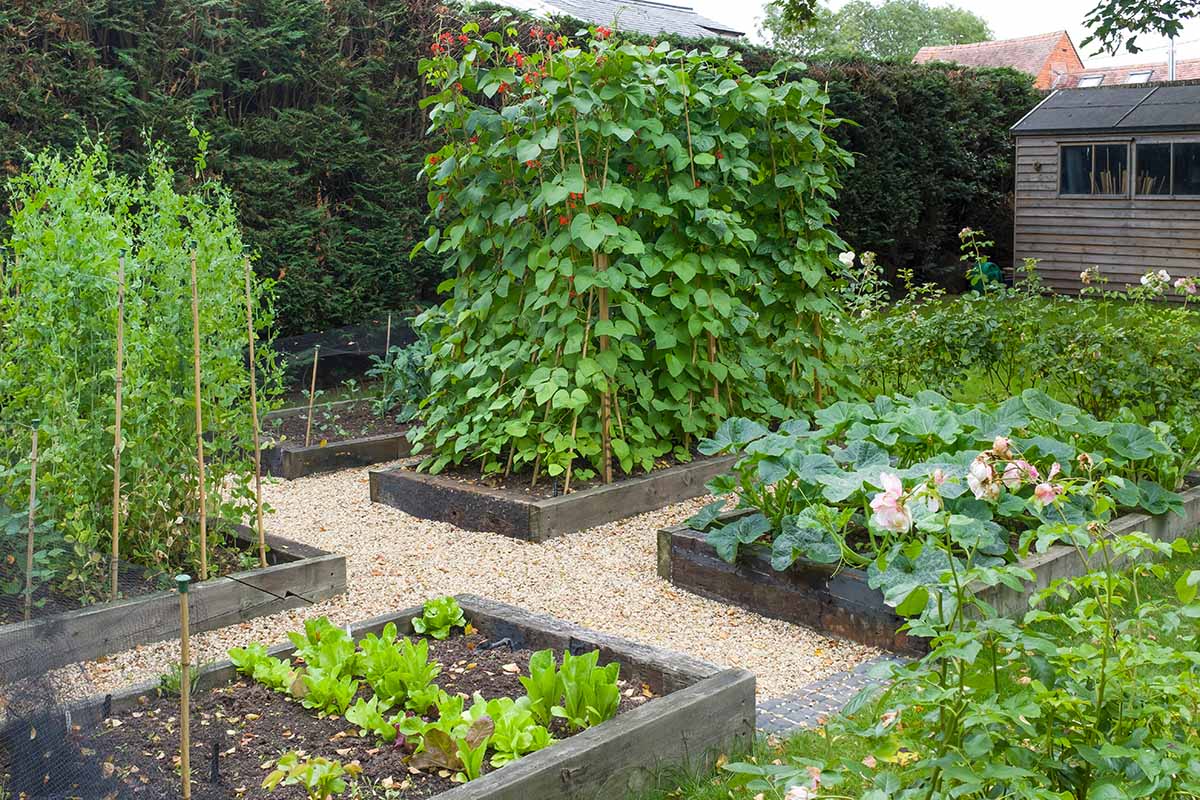
Pole beans provide a delicious and bountiful harvest when planted in the summer vegetable garden.
Grown up trellises or stakes, this vertical crop is fun to sow, easy to pick, and can help maximize valuable garden real estate!
We link to vendors to help you find relevant products. If you buy from one of our links, we may earn a commission.
Whether you’re interested in growing this crop because you’ve heard of some tasty pole cultivars, or you want to extend your garden with trellises or teepees, pole beans add both visual interest and culinary excitement to the summer veggie patch.
So that you get the most out of your crop, we’re going to cover everything you’ll need to know about growing this legume, and we’ll even provide some ideas for how to transform your harvest in the kitchen!
Ready to get the lowdown on planting and growing this lofty legume? Here’s what we’ll cover:
What You’ll Learn
What Are Pole Beans?
Call it a wild guess, but I have a pretty strong suspicion that you know what a bean is.
Perhaps it would be helpful to scrutinize the term “pole bean” before we get started though, so we’re all on the same page?
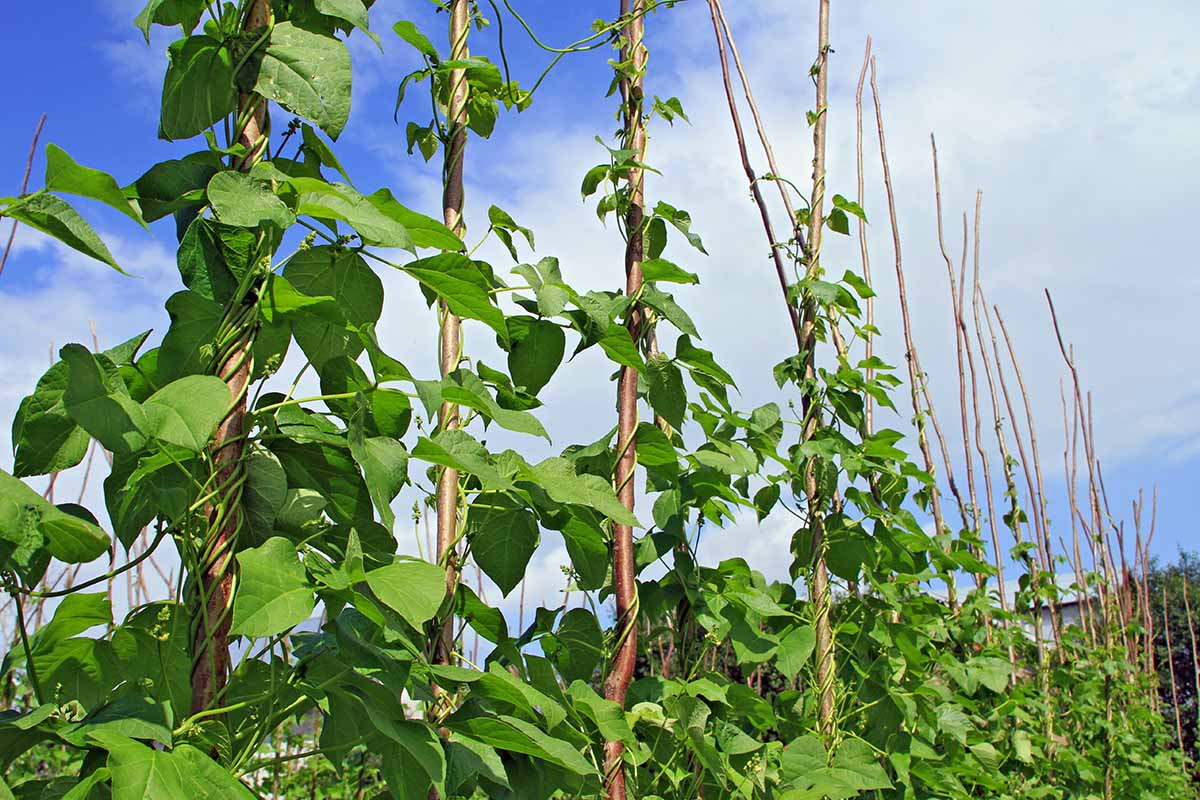
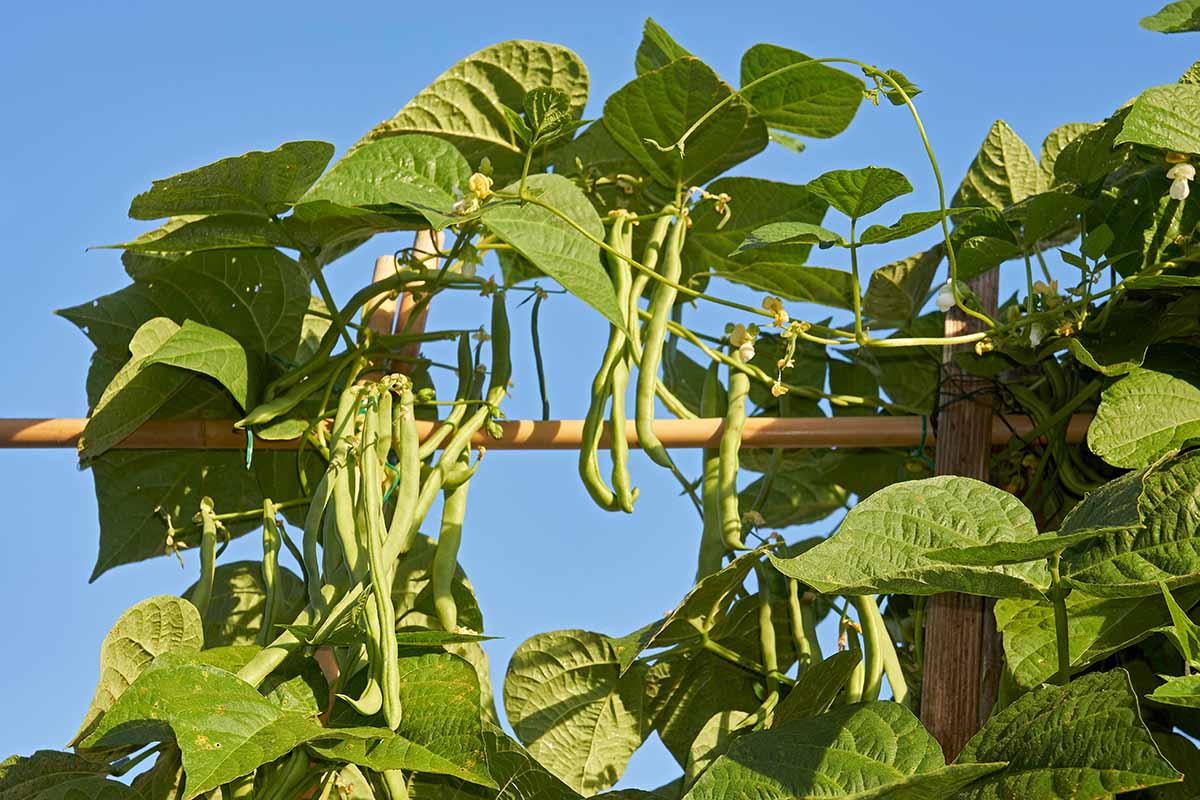
Pole beans are legumes that have a vining growth habit and are trained to climb up trellises, stakes, or some other sort of support to keep their foliage growing skywards instead of creeping across the ground, or smothering the other plants in their path.
While there are actually many different species of legumes that have this type of growth habit, for the purposes of this article, we’re going to focus on just one member of the Fabaceae family.
That’s the common bean, botanically classified as Phaseolus vulgaris.
However, if you’re like me, you have an inquiring mind and want to know which other types of beans might be grown vertically too.
You will also find climbing varieties of beans among limas, cowpeas, mungs, runners, teparies, winged, and yard longs – which are just a few of the many different types of edible beans that can be grown in the garden.
Unlike bush bean varieties, pole bean cultivars have an indeterminate growth habit, just like many tomatoes. That means the plants keep growing and producing pods until something stops them, such as a hard freeze.
Because the plants are vining, they do best and are more easily cared for when grown on supports of some sort, such as poles, stakes, trellises, or even on tall, upright bean companion plants, like corn or sunflowers.
Let’s say you suddenly inherit a veggie patch, aren’t sure what’s what, and want help identifying pole bean varieties of P. vulgaris.
As we’ve established, these plants are vining, and they generally climb to five feet tall or more.
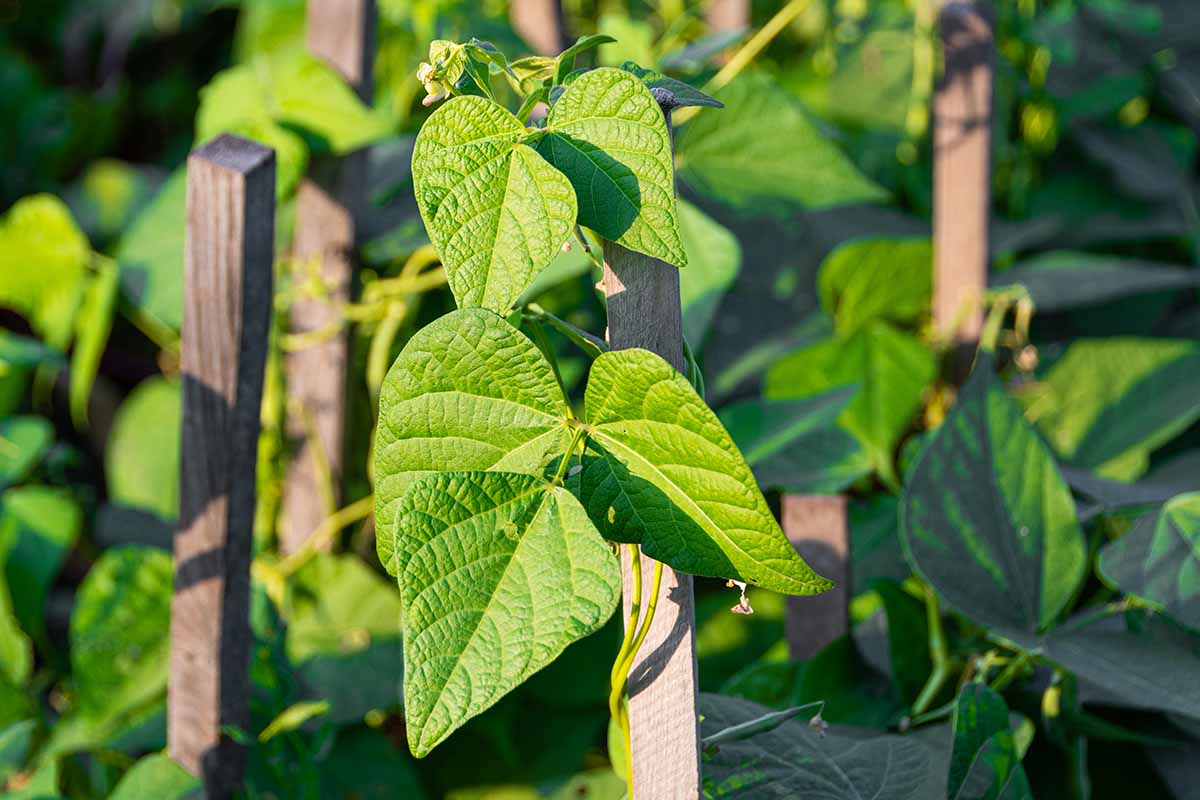
They have divided leaves with three leaflets, and their foliage and stems are usually green, but some have a purplish tinge.
Flowers are white, pink, or purple, giving way to pods that can range in size from three inches to upwards of eight inches long.
Pods are most often green in color, but can also be yellow, pink, or purple. Most pods are solid colored, but some varieties are known for their mottled patterns.
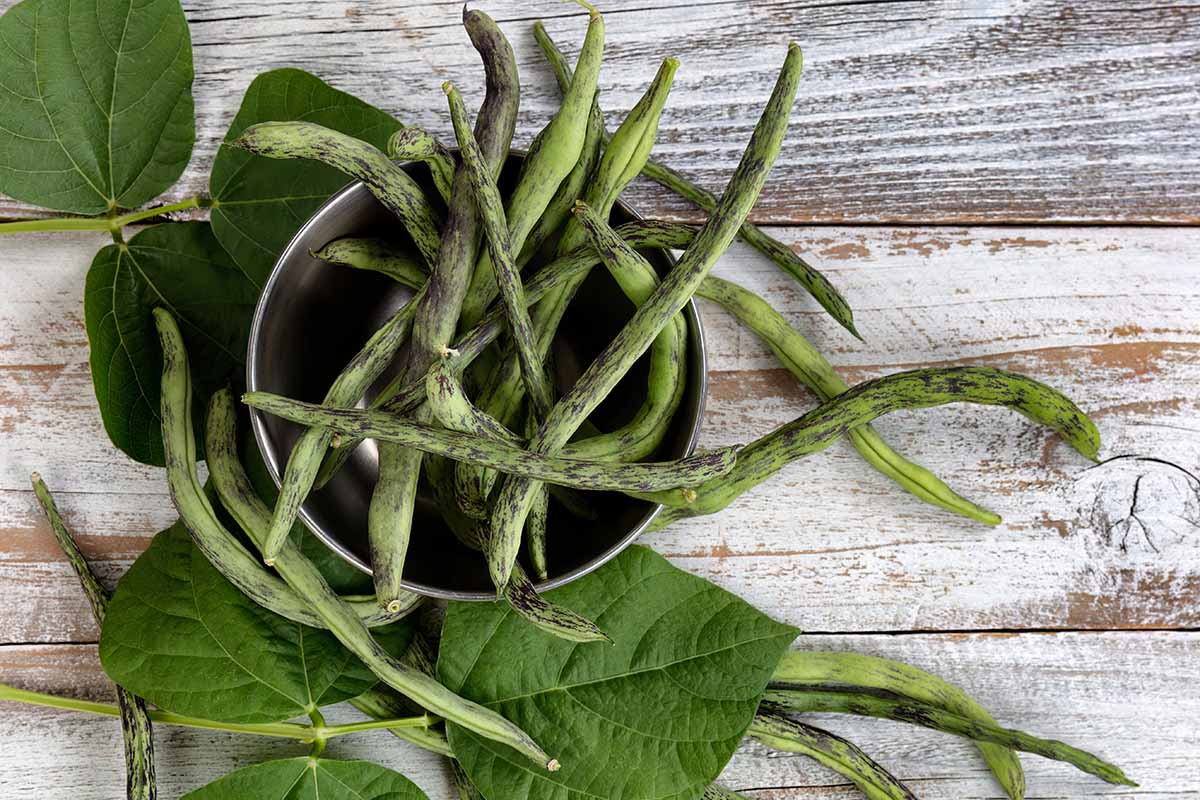
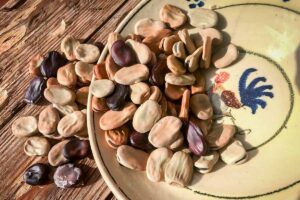
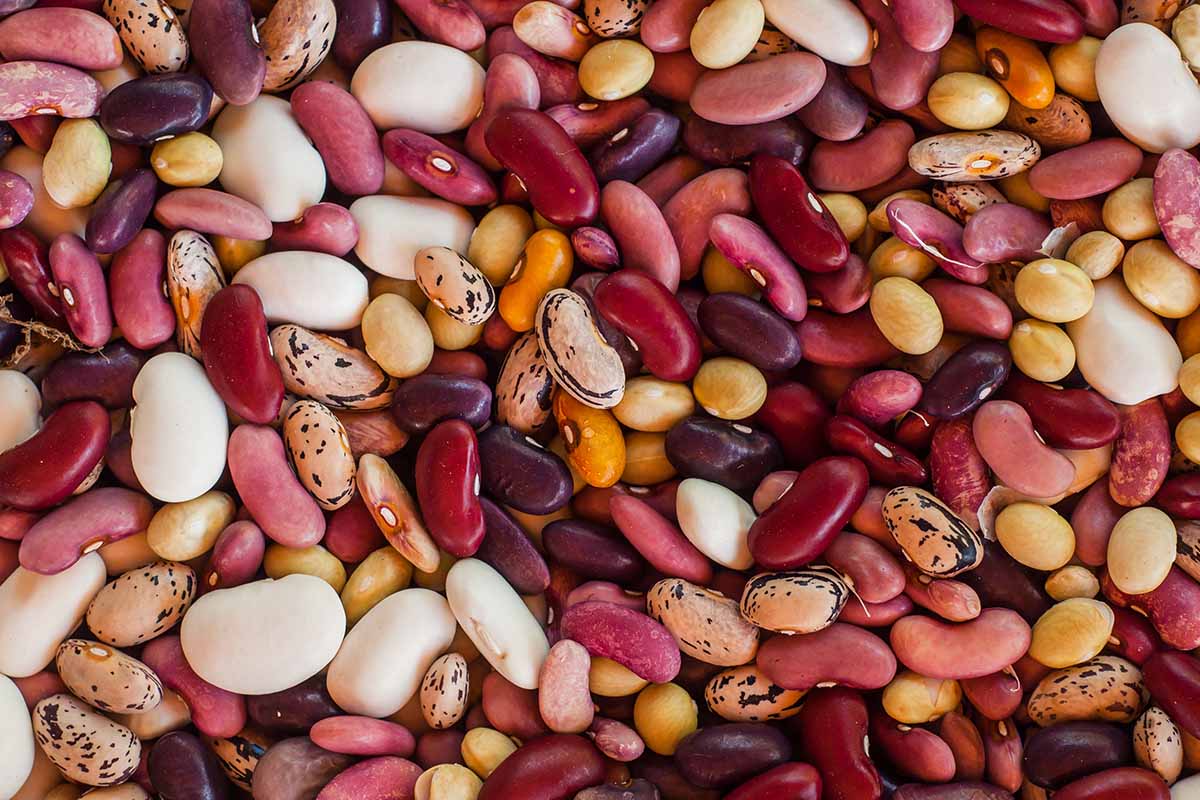
Inside these pods are kidney-shaped seeds which, when allowed to fully mature, can be dried and saved to sow new crops in subsequent years – or cooked up and enjoyed as a hearty kitchen staple.
These seeds can come in a wide range of hues and patterns depending on the variety, one of the things about growing pole beans which makes them so much fun!
Dry bean varieties are especially known for their fabulous patterns and colorations – make sure to check out our article on the best dry bean cultivars to learn more.
Cultivation and History
The pole beans we grow in our gardens these days were domesticated from a wild plant that hails from Latin America.
This plant, P. vulgaris, was first cultivated at least 7,000 years ago, and is native to temperate and subtropical climates.
One of the historical uses of this vining legume was in the companion planting combination known as “The Three Sisters,” composed of pole beans, pumpkins or other types of squash, and corn.
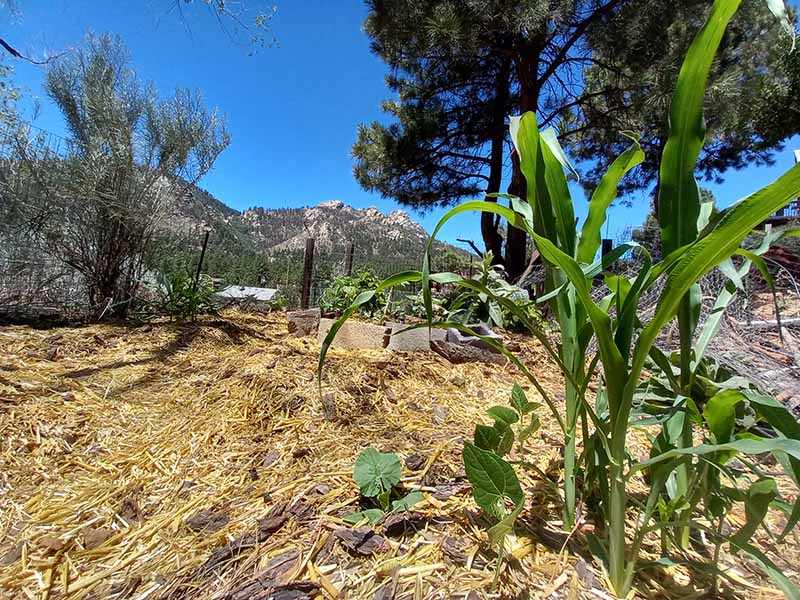
Archeological evidence shows that this combination was first grown together in North America over 950 years ago.
This gardening technique has been practiced by at least 15 different Native American peoples, including the Haudenosaunee, Seneca, and Cherokee.
There are different variations on how these crops are grown together, but one method is that corn is planted first, allowed to get a head start for two to three weeks.
Once the corn is a few inches tall, then the bean seeds are sown around the corn.
After about one more week when the bean seeds emerge, squash seeds are sown at least 12 inches away from the corn and pole beans.
In North America, pole beans are grown in gardens as an annual summer crop since they are susceptible to damage by frost.
These legumes make an excellent choice for a first vegetable garden, a child’s garden, or for those wishing to maximize their space with vertical gardening – in fact, pole cultivars produce two or three times the yield of bush varieties.
When planning the best layout for your garden, just make sure to plant this crop to the north of shorter crops so they don’t shade out the other members of your garden.
You might want to sketch your design out in a gardening journal before you get sowing!
How to Sow
Like beets and carrots, pole beans don’t transplant well, so these are seeds you’ll want to sow directly in the ground rather than starting indoors.
But this is hardly an arduous task!
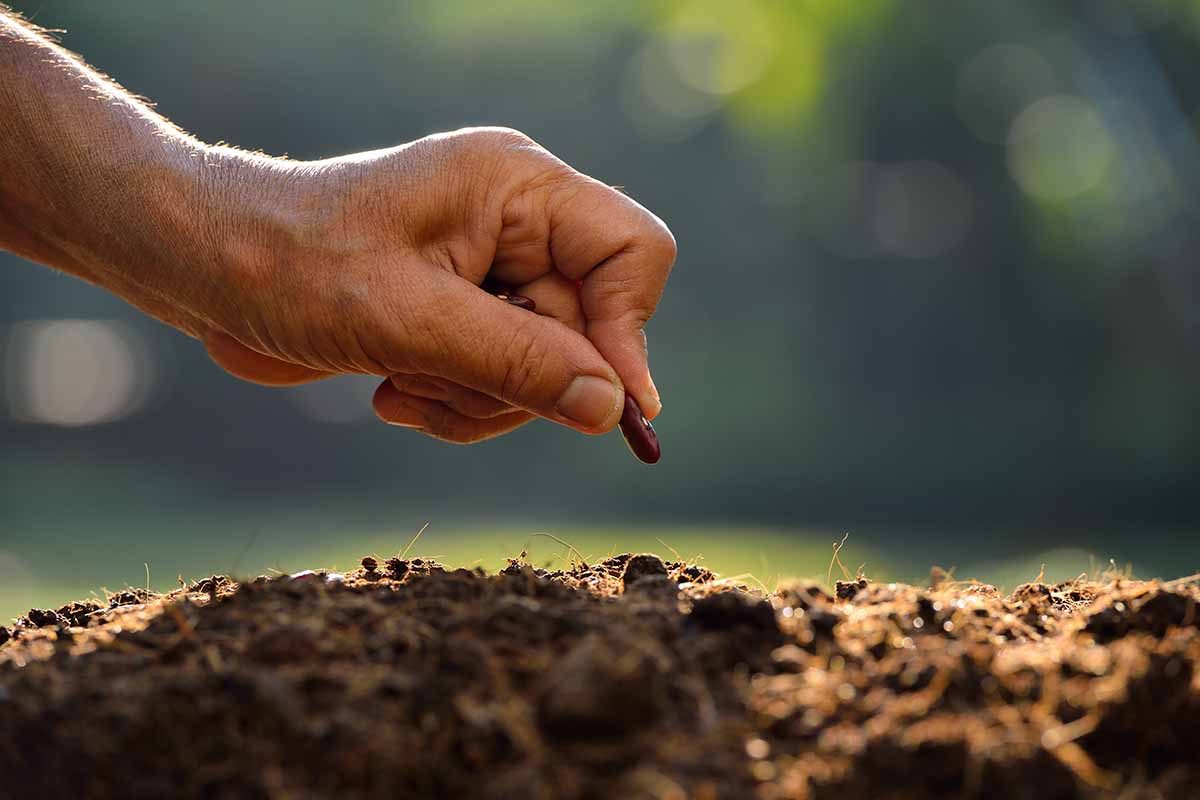
Because of their large size and attractive colorings and patterns, these seeds can be one of the most satisfying garden crops to sow.
Once you have chosen a planting location, prepared your beds, and set up your climbing supports, you’ll want to make sure the timing is right – wait until after your last spring frost to sow.
Also, keep in mind that the seeds of these legumes will germinate best when the soil temperature is between 70 and 80°F, so if you want conditions to be ideal, test the temperature first with a soil thermometer.
Plan to sow seeds two to four inches apart.
If you live in a drier climate you may be able to safely plant them about two inches apart, while those in humid climates should sow seeds with a wider gap of four inches to permit more airflow.
And if you’re using square foot gardening as a guide, you may wish to plant up to nine seeds per square foot.
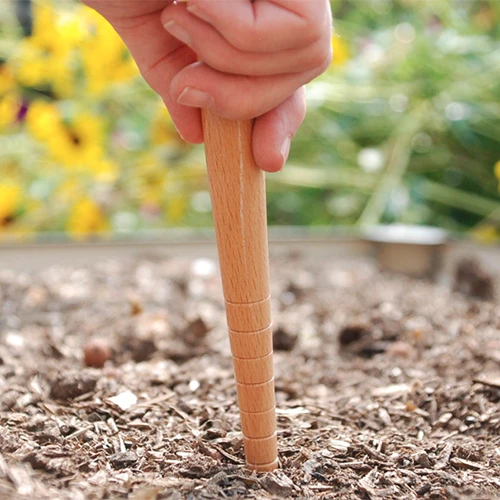
Burgon and Ball Wooden Dibblet
When the time is right and you’re ready to sow, grab your seed packet and a pencil or dibbler for poking holes in the soil – you’ll find a graduated wooden dibblet from Burgon and Ball for purchase via Botanical Interests.
If using a pencil, use the pointy end. I like to poke holes one inch deep in the soil first, then once they are all ready, I drop in the seeds one by one.
Once each hole contains a seed, squish the soil closed over each seed. Then pat down the soil to ensure good contact between the soil and the seeds.
Next, water the seeds in.
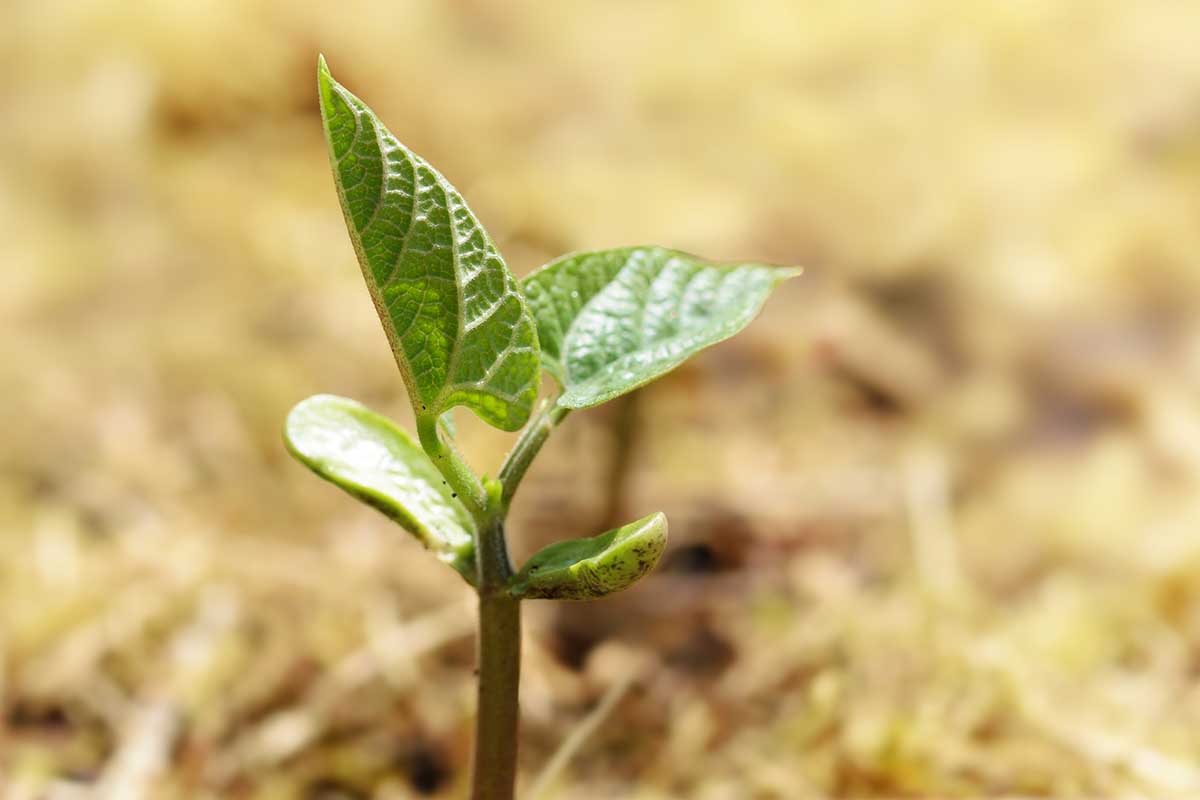
Keep the soil moist until the seedlings come up, which should occur in eight to 15 days.
If you aren’t receiving regular rainfall, you may need to irrigate. While the seeds are germinating, I recommend doing so with a gentle spray from a watering wand.
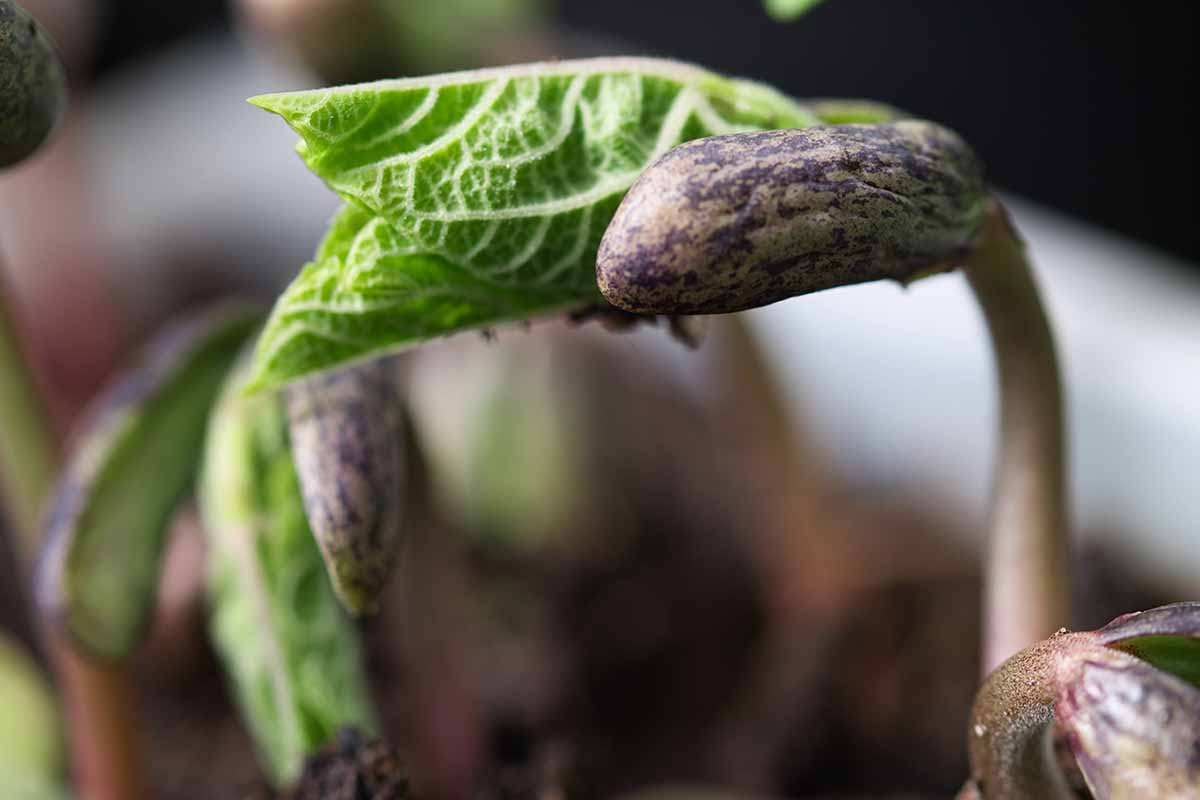
Bean sprouts are large and easy to recognize, and the sight of them is a thrill to new gardeners – as well as those of us who just never get tired of witnessing tiny miracles in the garden!
How to Grow
Now that you know how delightful and easy it is to sow bean seeds, you’ll also want to make sure you know how to care for this crop during the growing season.
Before you sow, select a location that receives full sun, or between six and eight hours of direct sunlight per day.
As for garden soil, it should be well-draining with a loose texture and a pH of 6.0 to 8.0. If you aren’t sure what the pH of your soil is, consider doing a pH test.
Add well-rotted manure or compost to your soil to increase organic matter.
When it comes to water, this crop needs about one inch of water a week. If drought is a problem, or rainfall is scant, you will need to irrigate.
If you aren’t sure how much rainfall you are receiving, a handy rain gauge can help clear up any uncertainty!
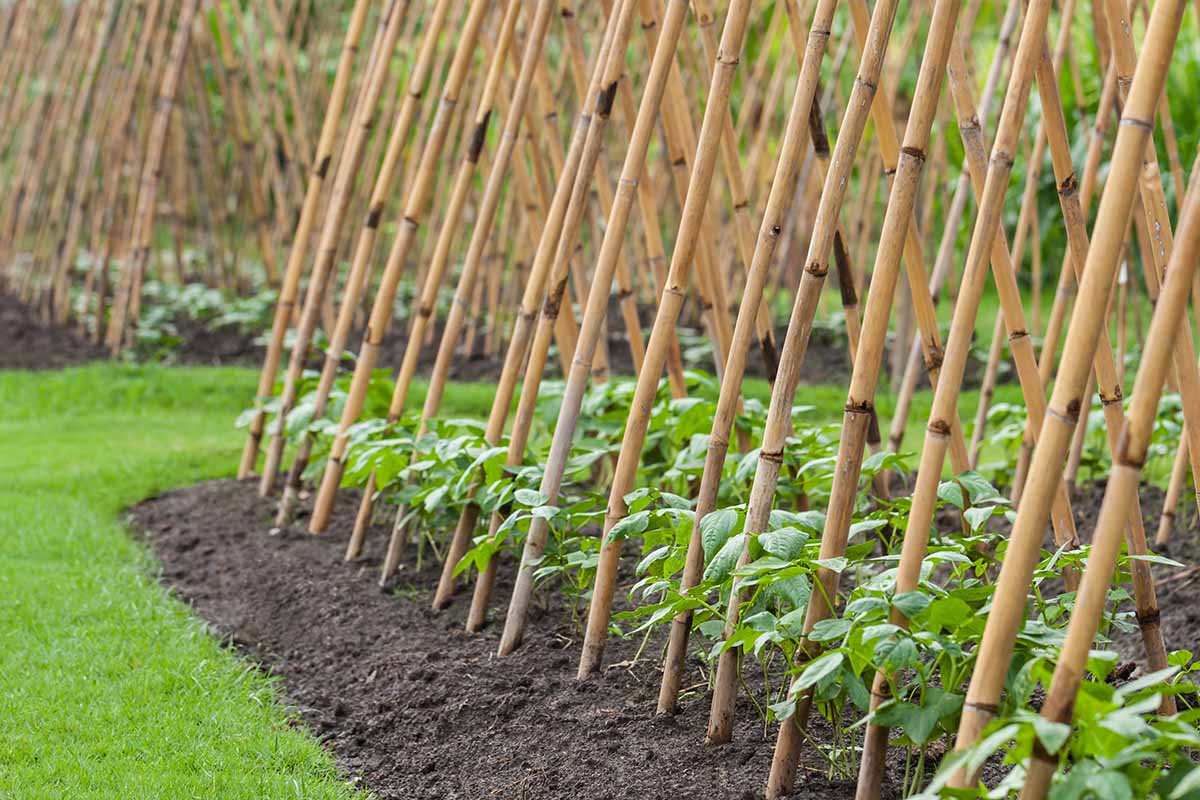
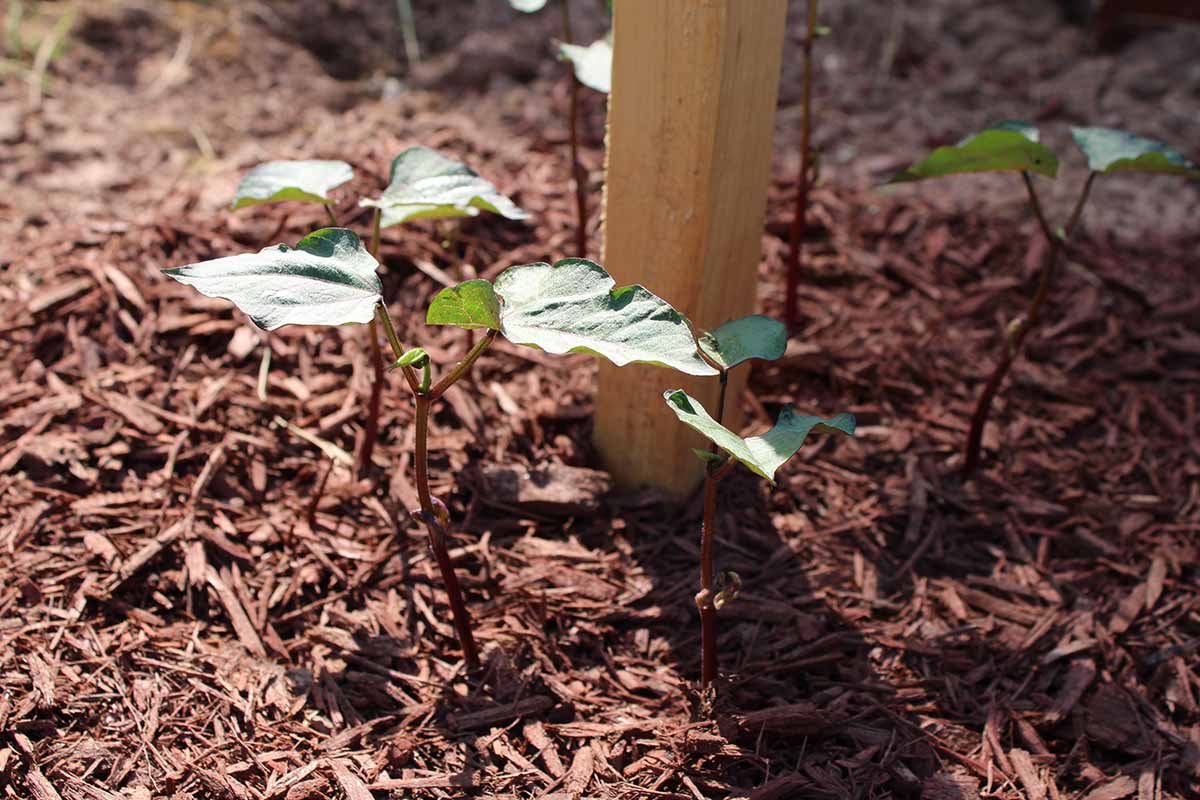
Another important part of growing this crop that I would recommend is to create some sort of support for the pole bean vines before you even sow the seeds.
You can allow the vines to climb up poles or stakes, or you might even construct a trellis or teepee.
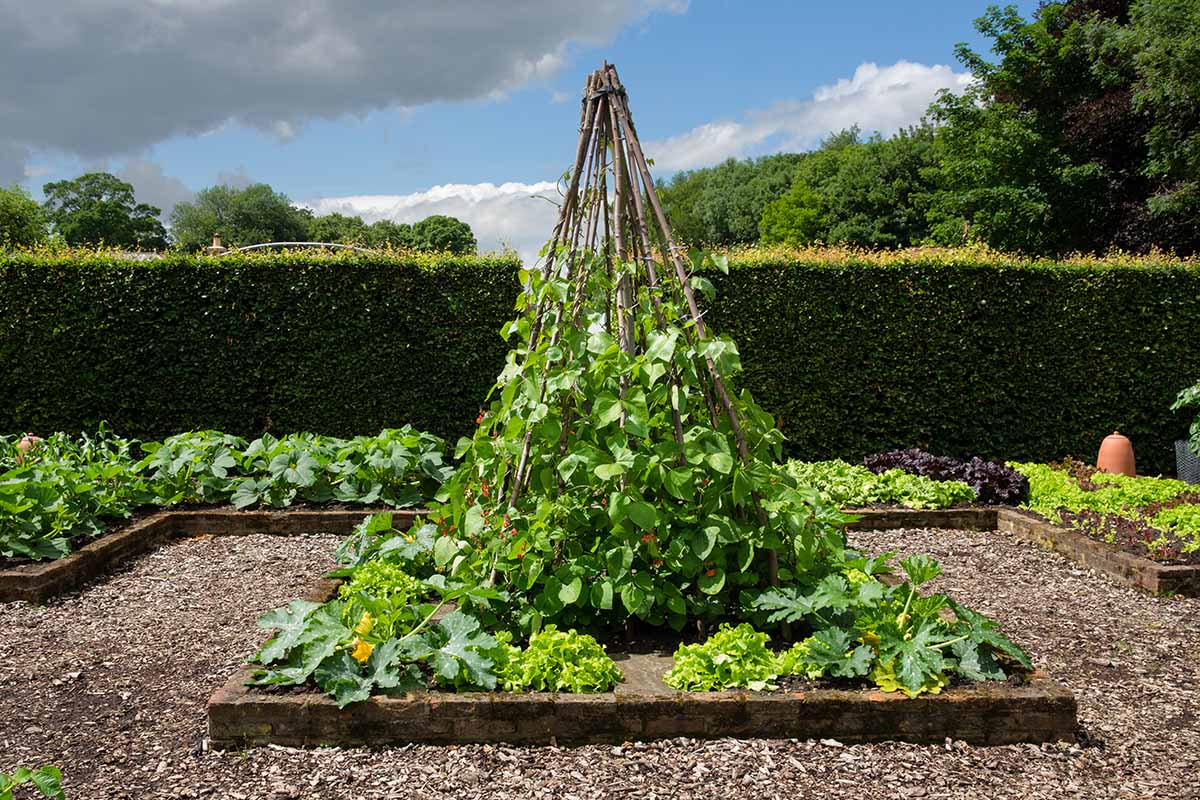
Feel free to get creative and make your own bean supports or trellises.
On my farm, we have a permanent teepee trellis made from juniper branches and twine, as well as a mobile trellis made from hog paneling attached to metal stakes.
In many locations there are stands of invasive bamboo which are considered weeds in need of removing.
Bamboo poles can be harvested from these stands to use for stakes, or to create a trellis or teepee lashed together with twine.
If you want to harvest some local bamboo, just ask the owner of the land first – they’ll probably be thrilled to let you take as much as you can use!
On the other hand, if DIY isn’t really your thing, there are a wide assortment of readymade options available to purchase, at vendors like Gardener’s Supply.
Growing Tips
- Grow in full sun.
- Provide climbing supports.
- Make sure soil is well draining.
- Provide one inch of water per week.
Maintenance
One of the reasons I love growing pole beans – besides the pleasure of sowing such beautiful seeds – is that they are such a low-maintenance crop.
Weeding
Weeding around this crop is important, especially as young plants are getting established.
Weeds can take nutrients and water from establishing plants, and even block light if they are allowed to get out of hand.
If you find yourself frowning at this recommendation, think of it as time you get to spend soaking up some sun or breathing in some fresh air.
But you may also want to read our article on how to spend less time weeding!
Mulching
On that note, one way to spend less time pulling up lamb’s-quarters, pigweed, and bindweed is to mulch around your plants.
The caveat here is not to pile the mulch up too close around the plants – excess moisture around the bases of the vines can provide fungal pathogens a bridge to your crop.
Instead, make sure there’s a mulch-free circle a few inches wide around each plant.
Not sure what to use as mulch? Read our article on mulching for low-maintenance gardening.
Fertilizing
Fertilizing legumes, which are nitrogen fixers, is a little different than what you might do for other garden crops.
In fact, the authors of a growing guide published as part of Cornell University’s garden-based learning program recommend against using nitrogen fertilizers for these legumes.
When it comes to fertilizing this crop, there are two steps and you’re going to want to take both of them – before you even sow your seeds.
First, mix some compost into your planting beds before you even plant your seeds, as discussed above in the How to Grow section of this guide.
The next step is to inoculate your seeds with rhizobium bacteria, which will help your crop in its nitrogen-fixing endeavors.
Just make sure you pick one that is recommended for beans, such as Exceed Legume Inoculant, and apply it according to the manufacturer’s instructions.
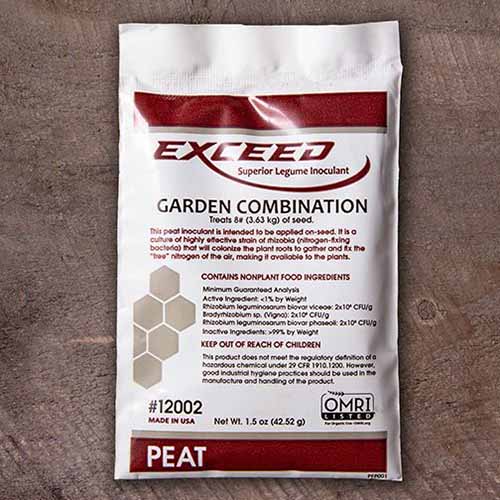
Exceed Legume Inoculant in 1.5 Oz Bag
You can purchase Exceed Legume Inoculant in a one-and-a-half-ounce bag, enough to treat eight pounds of seeds, via High Mowing Organic Seeds.
Learn more about using legume inoculants here.
Pinching
Once all your hard work has helped your plants grow to great heights, now you might want to encourage them to restrain themselves a bit – I’m talking about pinching back the vines.
Pinching pole bean vines back to the top of their poles or trellises will encourage the plants to branch and increase yields.
Get more guidance on pinching pole beans in our article. (coming soon!)
Rotating Crops
Finally, once the growing season is over and you start planning next year’s garden, make sure to rotate your legume crops.
A good rule of thumb is to create a three-year rotation, so you grow pole beans in a bed one year, and non-leguminous crops for the next two years.
Just like you might do when rotating cover crops, rotation helps to prevent disease, pest problems, and soil depletion.
This is another instance where a garden journal is handy – so you can track which crops were planted in which bed or row in which year!
Cultivars to Select
I’ve already told you about one of my favorite parts of growing pole beans – sowing them. Here’s another of my favorites – choosing seed cultivars.
If you don’t yet have seeds of your own to sow, here’s a selection of four of my favorite cultivars for your consideration:
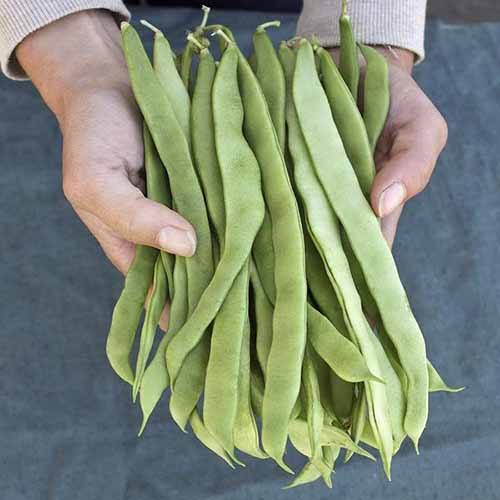
Northeaster
‘Northeaster,’ an open pollinated, early producer with long, flat beans, is a favorite variety in my household. Possibly even the favorite.
Also known as ‘Nor’easter,’ ‘Early Riser,’ and ‘Kwintus,’ this is an excellent, high-yielding selection for gardeners with short growing seasons.
These Romano-style pole beans are green, measure an inch wide, and they’re stringless when picked at seven to eight inches long.
‘Northeaster’ has an excellent, buttery taste and tender texture.
I kid you not, when I first served these to my husband, he looked at me quizzically and asked, “Did you put something on them, like butter?”
It’s not my style to slather food in butter, so the answer was a merry “Nope!” That flavor was just coming from the pole beans themselves.
With medium-green colored pods and white seeds, ‘Northeaster’ has vigorous vines and will need a sturdy trellis.
This variety tolerates cooler weather, and matures in just 56 days.
If pods are picked regularly, plants will enjoy a long growing season and continue producing until the first frost. This is also a great variety to choose for a late summer sowing since it develops quickly.
Ready for some buttery beany goodness that you won’t have to wait all summer for?
You’ll find certified organic ‘Northeaster’ seeds available for purchase in package sizes ranging from one ounce to 40 pounds at High Mowing Organic Seeds.
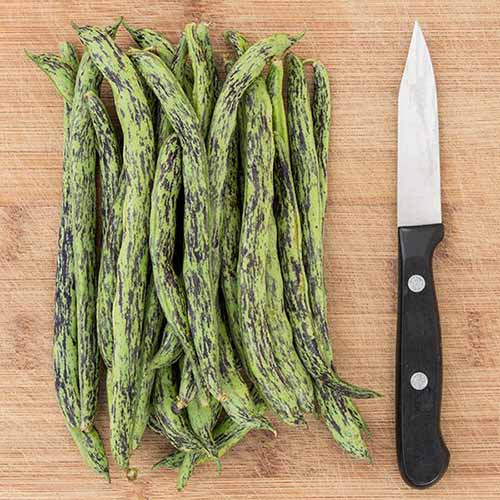
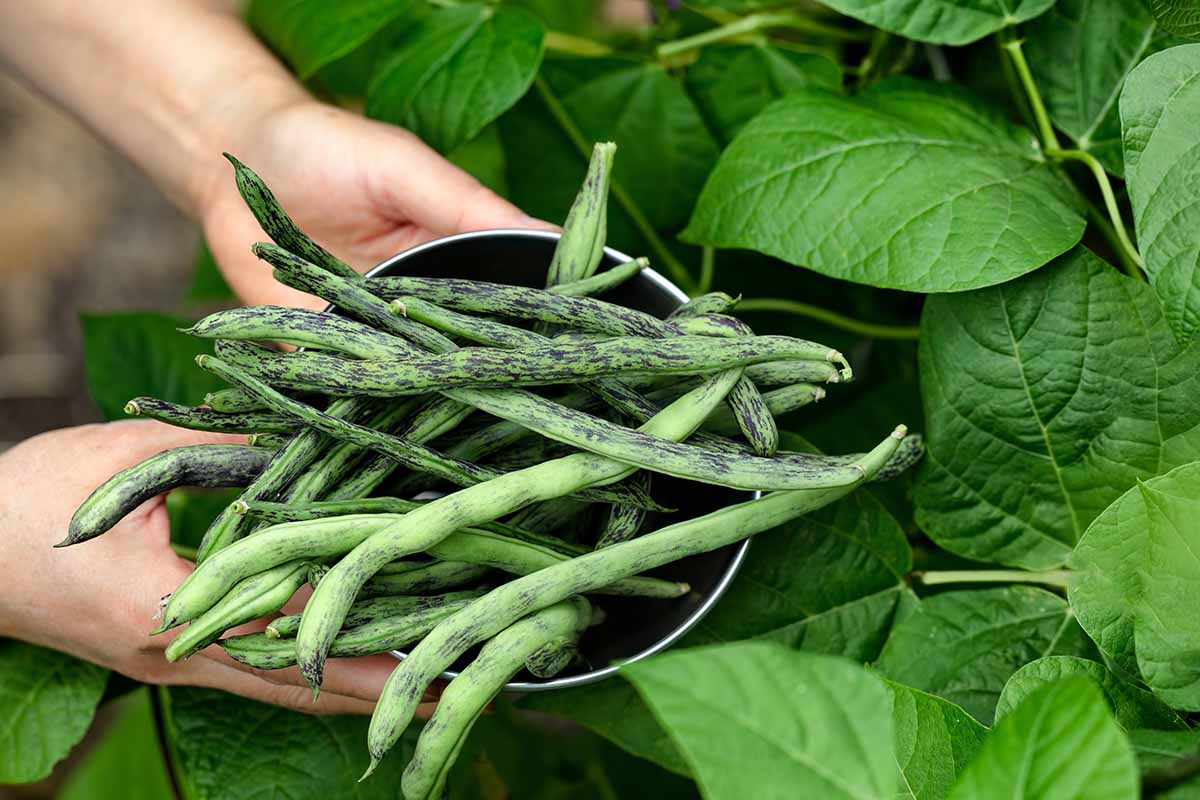
Rattlesnake
Because of its names, this cultivar, also known as ‘Preacher Bean,’ makes me think it might have been around at Appalachian tent revival meetings – though I’ve found no proof of that, it’s just a hunch.
‘Rattlesnake’ is an open-pollinated heirloom that can be enjoyed in multiple ways – for fresh eating, shelling, or drying.
Ten-foot vines produce round pods that are green in color and mottled with purple. They turn solid green when cooked.
For fresh eating, pods are picked at eight inches or less and have a flavorful, strong umami taste with a juicy and tender texture.
This is a great variety for freezing, but if you let them mature fully, you can save the dry seeds. These are light brown, mottled with dark brown.
Tolerant of hot, humid weather and drought, this cultivar is better suited for southern climates than northern ones, and matures in 65 days.
Handling these rattlesnakes may not make you feel as daring as the preachers in the tents, but these are guaranteed not to pack a bite.
You’ll find seeds in an assortment of package sizes from one ounce up to 40 pounds, available for purchase at High Mowing Organic Seeds.
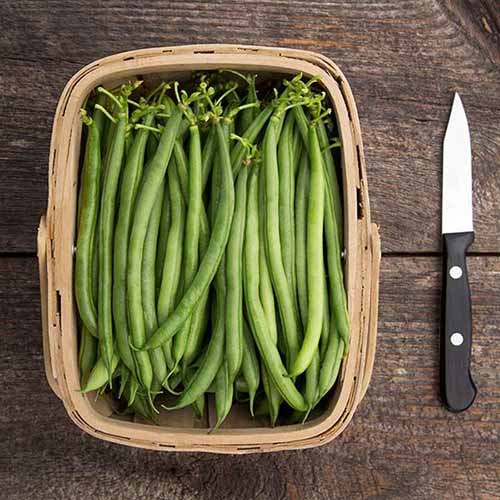
Seychelles
We’ve already encountered a couple of interesting varieties – one with wide flat pods, another with colorful pods. How about something a little more classic now?
‘Seychelles’ is a 2017 All-America Selections winner that has mostly straight, dark green, tender, stringless pods that are picked at four to six inches long.
This open pollinated and high yielding variety produces richly flavored pods in clusters of six, making harvesting easy.
The small seeds of ‘Seychelles’ are white to light green, small, and slow to develop, extending the harvest window.
Pods grow on dark green vines that are vigorous, reaching seven to nine feet long, but nonetheless they grow well in containers.
‘Seychelles’ is an early maturing variety, ready to harvest in 55 to 60 days, and is resistant to anthracnose and bean common mosaic virus.
You can purchase ‘Seychelles’ in an assortment of package sizes ranging from one ounce to 40 pounds at High Mowing Organic Seeds.
Trionfo Violetto
‘Trionfo Violetto’ is an Italian heirloom whose name means “purple triumph.”
This open pollinated variety has slender pods that are burgundy to purple, and remain tender at up to eight inches long.
Pods have a nutty flavor and a juicy, crisp texture, turning from purple to green when they are cooked, and containing tan-colored seeds.
Vines reach six to eight feet long and produce violet blooms, on foliage that has a purple tint as well.
This triumph of a bean cultivar matures in 64 to 75 days.
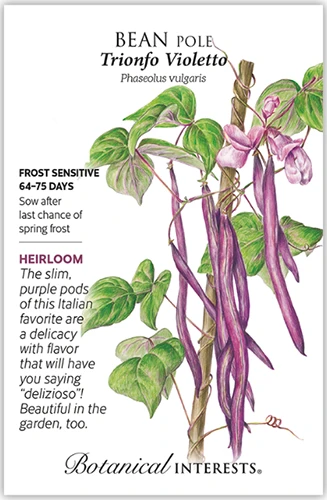
To start your own crop of purple heirloom pole beans, you’ll find ‘Trionfo Violetto’ in packs of 24 seeds available from Botanical Interests.
Want More Options?
Did you really think I was going to tempt you with just four varieties of delicious pole beans?
Of course not!
There are hundreds of delightful, exciting, and enticing pole beans to choose from. Discover even more fabulous types of pole beans here.
Managing Pests and Disease
It’s time now for everyone’s least favorite part of learning how to grow a new kind of tasty vegetable – the part where we warn you about how things might end up going badly for your plantings.
You sow your seeds, watch them come up and… all is not well.
Well, rest assured, it’s quite possible you might not encounter any serious pest or disease problems with your pole bean crop. But let’s talk about them anyway, just in case.
Forewarned is forearmed, after all! (Alas, that does not make us four-armed, which could really come in handy sometimes. But I digress.)
Herbivores
Fresh pole beans are quite a treat, and we humans aren’t the only ones to think so – with some of our four-legged (or perhaps, four-armed?) neighbors enjoying the foliage as well.
Some of the usual suspects when it comes to garden marauders include deer, rabbits, voles, raccoons, skunks, and groundhogs.
If you are observant, you may be able to find animal tracks in your garden to cue you in as to who the guilty party is, which can help you decide your best course of action.
If deer are the problem, use tall fencing around your garden patch. You’ll find tips for creating your own DIY deer fence in our article.
And sinking fencing six inches under the soil will help keep rodents out.
Insects
Insects can also treat your crop as theirs. To be honest, most times there’s enough to share and you won’t even notice a few leaf bites missing here and there.
But in some situations, things can get out of hand and your crop may be at risk of being damaged.
Let’s consider some of the most likely pest problems.
Aphids
Aphids are a common presence in vegetable gardens, and spotting a few on your Phaseolus vines doesn’t necessarily mean your crop is doomed.
However, you may notice the damage they do before you notice the actual bugs – keep an eye out for curling leaves and trails of sticky, shiny honeydew on foliage.
These small insects tend to congregate on the bottom sides of leaves, where they spend their short lives sucking nutrients from foliage.
Their honeydew trails can allow fungal pathogens to gain a foothold, and to make matters worse, these insects can also spread disease as they munch.
If you find a population of aphids in your veggie patch you may be able to remove them with just a hard spray of water from your garden hose.
Also, if you are cultivating a landscape where pollinators and beneficial insects are welcomed, look for aphid enemies hanging out nearby, such as green lacewing larvae and ladybug larvae. These predators will help keep aphid pest populations under control.
You’ll also want to keep an eye out for any aphids that are bloated and a different color than the others – these have been parasitized by aphid predators like wasps, so you’ll want to leave them be!
If you see these signs of pest populations being balanced in your garden, you can refrain from further efforts and let nature sort things out for you.
Any pesticides you spray will likely harm beneficial insects as well as your pest targets, which can throw off the delicate balance in your garden ecosystem.
On the other hand, if you have an extreme aphid problem, you may need to take a more active approach. You can learn more about controlling aphids in our article.
Cutworms
Cutworms are a threat to sprouting seedlings. These pests are caterpillars, not actual worms, which tend to spend their days hiding under the soil and then come out at night to feed.
Unless you accidentally dig one up while preparing your garden beds, your first clue to their presence may be a seedling that looks like it got its head lopped off.
The reason for this strange sight is that these annoying little critters like to chew through tender seedling stems.
If you find any cutworms in your soil while preparing your beds, they make lovely gifts to foraging robins hanging out in your garden during the spring!
You don’t have to go digging all the cutworms up though, or wait for the robins to do the job for you.
There are other steps you can take to protect your seedlings – learn more about controlling cutworms in our article.
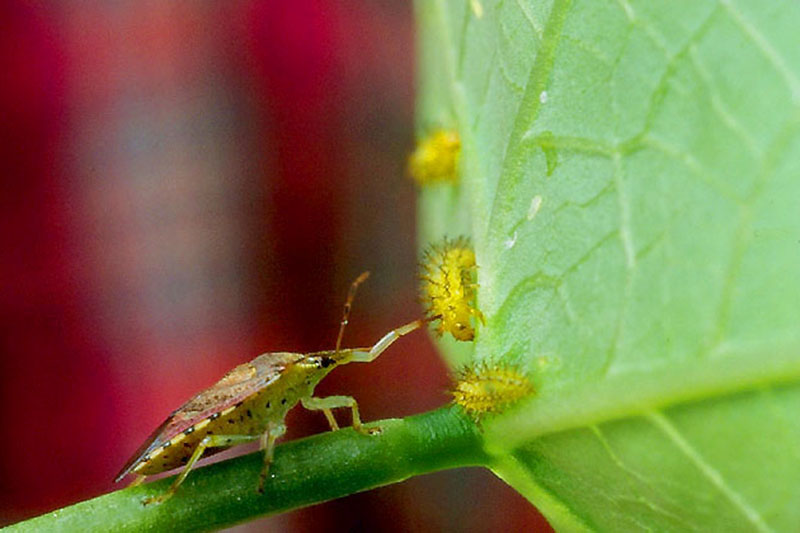
Mexican Bean Beetles
Have you noticed skeletonized foliage on your Phaseolus vines? The Mexican bean beetle might be the culprit.
This friendly-looking insect is actually a gardener’s foe. But you may mistake this garden pest species, Epilachna varivestis, for a harmless ladybug, and for good reason!
Though orangish colored with black spots instead of red, this beetle is actually a type of ladybug – one that feasts on plants.

Mexican bean beetles are more active later in the summer, so it can help if you sow your seeds as early as possible, giving the plants time to get established before these pests are on the prowl.
The larvae usually cause more damage in gardens than the ladybug-esque adults, so look for larvae on the undersides of leaves.
Luckily, it’s easy to tell the beneficial ladybug larvae apart from that of the Mexican bean beetles – while our friendly ladybug larvae look somewhat like tiny dark alligators decorated with bands of bright orange, Mexican bean beetle larvae are yellow and spiky.
Once again, garden pests are also food for friendly beneficials so look for their predators among your veggie patch, such as spined soldier bugs.
If these pests tend to be a problem in your garden, consider avoiding yellow podded varieties, also called “wax beans.” Wax cultivars tend to be more highly preferred by these pests than other varieties.
Learn more about controlling beetles on green bean plants in our article.
Disease
As with pests, when it comes to disease, you may have some fungal or viral “guests” take up residency on your plants without your crop suffering.
Hey, it’s nature, there’s a lot of stuff going on at all times, so don’t expect a garden to be a sterile environment. That would just be sad.
On the other hand, it’s also sad to lose a crop to an undetected plant disease, so here’s what you’ll want to look for:
Anthracnose
Are you noticing reddish-brown spots or streaks on your plants’ stems and foliage? If so, anthracnose may be the problem.
You may also see oval-shaped lesions on foliage, stems, pods, and seeds, and darkening leaf veins – though there are some varieties that have purple leaf veins in healthy conditions, so this isn’t the most conclusive sign.
This plant disease is caused by fungi, specifically Colletotrichum species.
Anthracnose tends to be more of a problem when conditions are cool and moist, so an important step towards prevention is watering plants at the ground level instead of overhead, so foliage doesn’t stay damp.
If your crop is infected with this disease, it’s best to remove infected plants and destroy them – don’t put them into your compost pile.
Wash your hands and gloves after handling infected plants and disinfect any tools.
Prevention is imperative – and crop rotation is an important step towards prevention since these organisms can overwinter in the soil.
Another means of preventing this disease is to choose resistant varieties, such as ‘Fortex’ and ‘Seychelles.’
Bean Common Mosaic Virus (BCMV)
As its name implies, this viral disease causes mosaic-like patterns on foliage. Other symptoms include stunted plants, distorted leaves, and yellow spots.
This virus can be spread by aphids, but often shows up via infected seed, so make sure to obtain seeds from a trustworthy source.
As with anthracnose, the best treatment if this disease shows up in your garden patch is to remove and destroy infected plants.
You can also prevent this problem by planting virus-free seeds and choosing resistant cultivars, such as ‘Blue Lake Pole,’ ‘Helda,’ ‘Kentucky Blue,’ ‘Kentucky Wonder,’ ‘Rattlesnake,’ and ‘Seychelles.’
Powdery Mildew
If you notice a powdery, grayish substance on the foliage of your plants, you may be dealing with powdery mildew.
This fungal disease is extremely prevalent in gardens, with many different types of fungal organisms targeting different plants, such as roses, apples, and cucurbits such as pumpkins.
There are many things you can do to reduce the risk of this disease, such as ensuring adequate airflow between plants, watering at the ground level, and washing your hands and sterilizing tools in between handling different plants.
However, if you are past the stage of prevention and need to move into treatment, you’re in luck. It’s possible to treat powdery mildew with organic and homemade remedies – read our article to learn more.
Harvesting
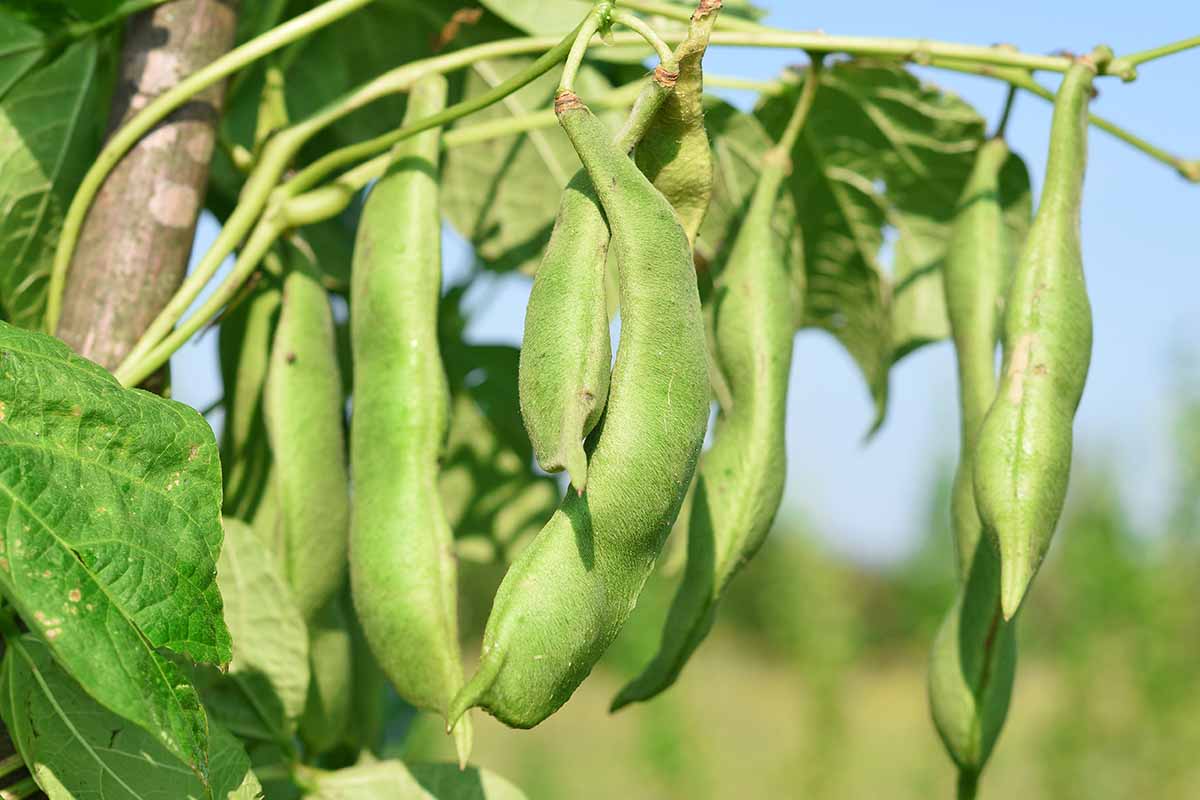
After your hard work sowing, trellising, and maintaining your Phaseolus vines, suddenly you’ll notice flowers blooming, and not long after that, you’ll start seeing adorable little pods forming.
In no time at all, these pods will be ready to pick!
But before you slip on your gardening gloves and pull out your harvesting basket, let’s discuss our options, shall we?
Pole beans can be harvested at three different stages:
At the first stage, fresh pods are picked young to be used as snaps, before the seeds inside the pods begin to bulge.
The length of the pods at this stage depends on the cultivar, with some being picked at four or five inches, while others can be harvested as long as eight inches, or even more.
Pick pods continuously throughout the growing season to keep vines producing.
Read our article for more pointers on harvesting fresh snap beans.
Once the seeds inside the pods have gotten plump, the pods will start to get stringy and fibrous, and they won’t be as pleasant for eating.
This brings us to the second stage, in which the seeds (not yet dry) are removed from the pods before eating, and can be enjoyed fresh or preserved for later use. These are often called “shellies.”
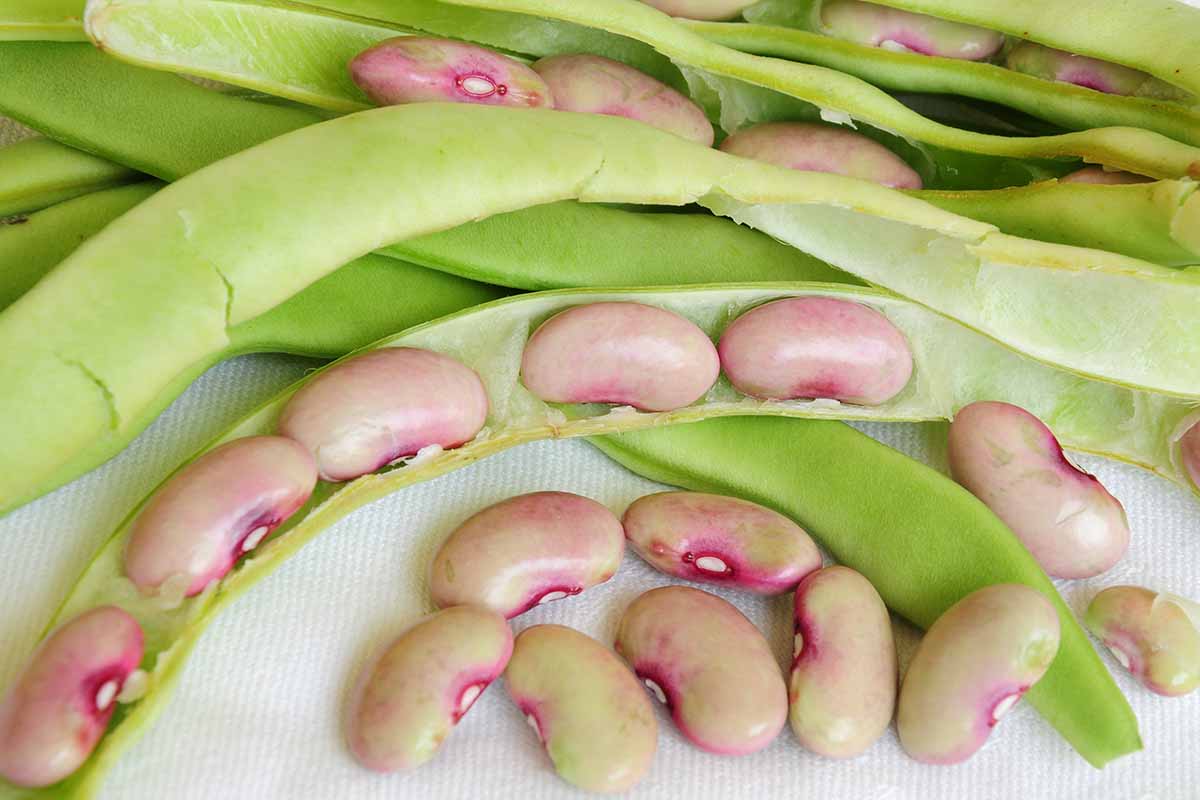
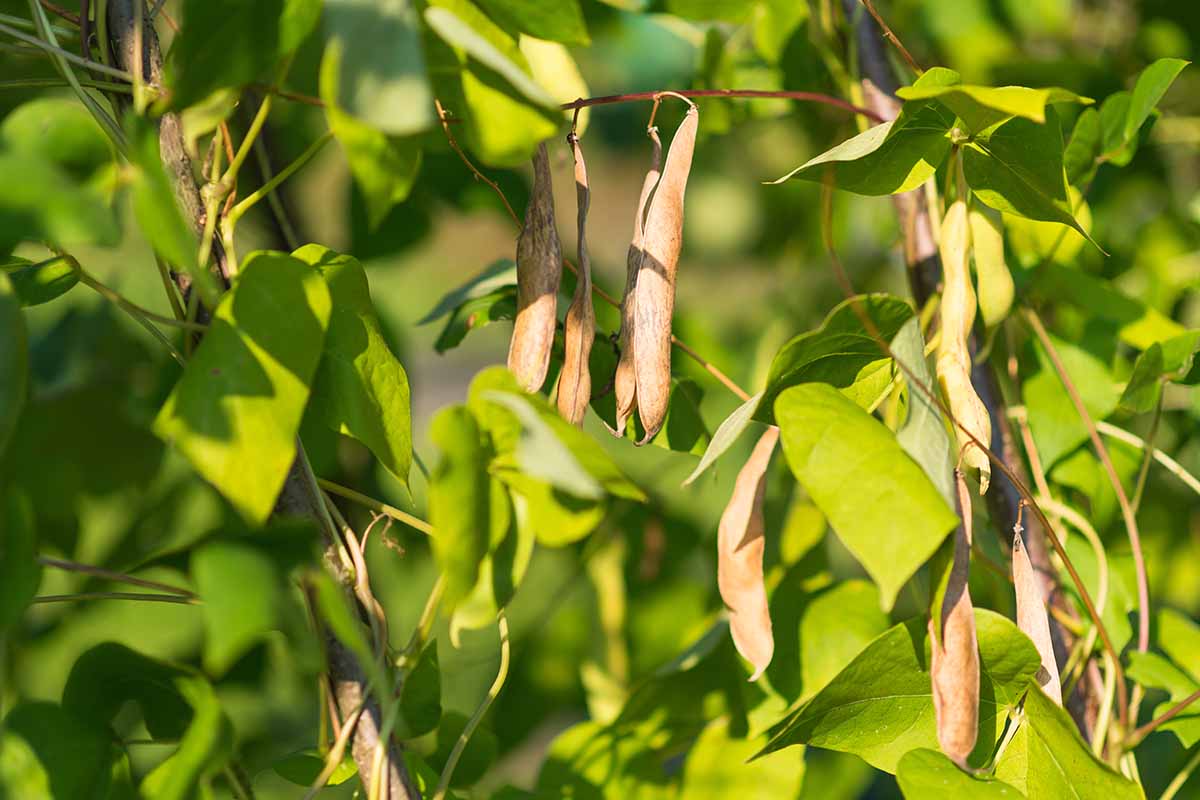
Finally, once the pods dry, we come to the last harvesting stage. The mature seeds inside the dry pods are either dry as well at this stage, or they have started to dry.
To harvest dry pole beans, if possible, collect pods or entire plants when the pods are dry and the seeds rattle inside them.
I say, “if possible” because sometimes weather events might require us to hurry and harvest the dry seeds before all of them are fully dry. But no worries, you can finish them off indoors.
However, do make sure to collect seeds or plants when they aren’t damp – preferably not first thing in the morning when they’re covered with dew, or directly after rainfall.
Some pods will split open during the process, so it can help to hold your bag or basket under the pods as you harvest.
If harvesting entire plants, they can be hung upside down in a dry, dark location to finish drying out.
For those seeds removed from the pods at harvest, spread them out in a single layer in a dry, dark location.
Seeds can be pressed with a fingernail to test for full dryness – any that still have some moisture in them will give, dry ones won’t.
Once the seeds are dry, store them in an airtight container. These can be used dry for cooking or they can be sown to grow future crops.
There you have it, three stages for harvesting pole beans!
Fresh snaps and shellies will keep in the fridge for up to a week, while properly stored dry pole beans will be at their best for one to two years, but they will keep indefinitely.
Preserving
If you aren’t going to eat all of your fresh harvest in the amount of time it’ll keep in the fridge, there are many different ways to preserve fresh pole beans.
Fresh snap pole beans (as well as fresh shelled pole beans) can be frozen, dehydrated, fermented, or canned.
Let’s start with freezing.
If you’d like to freeze a bountiful harvest, first you’ll want to prepare the pods by cleaning, trimming, and cutting them into one- or two-inch pieces.
Writing for the University of Missouri Extension, Barbara Willenberg, Master Gardener and Nutritionist, and Susan Mills-Gray, State Nutrition Specialist, recommend blanching them in boiling water for three minutes, or steam blanching for five minutes.
Blanching slows or stops the action of enzymes in the vegetables and helps preserve flavor, color, and texture in the frozen food.
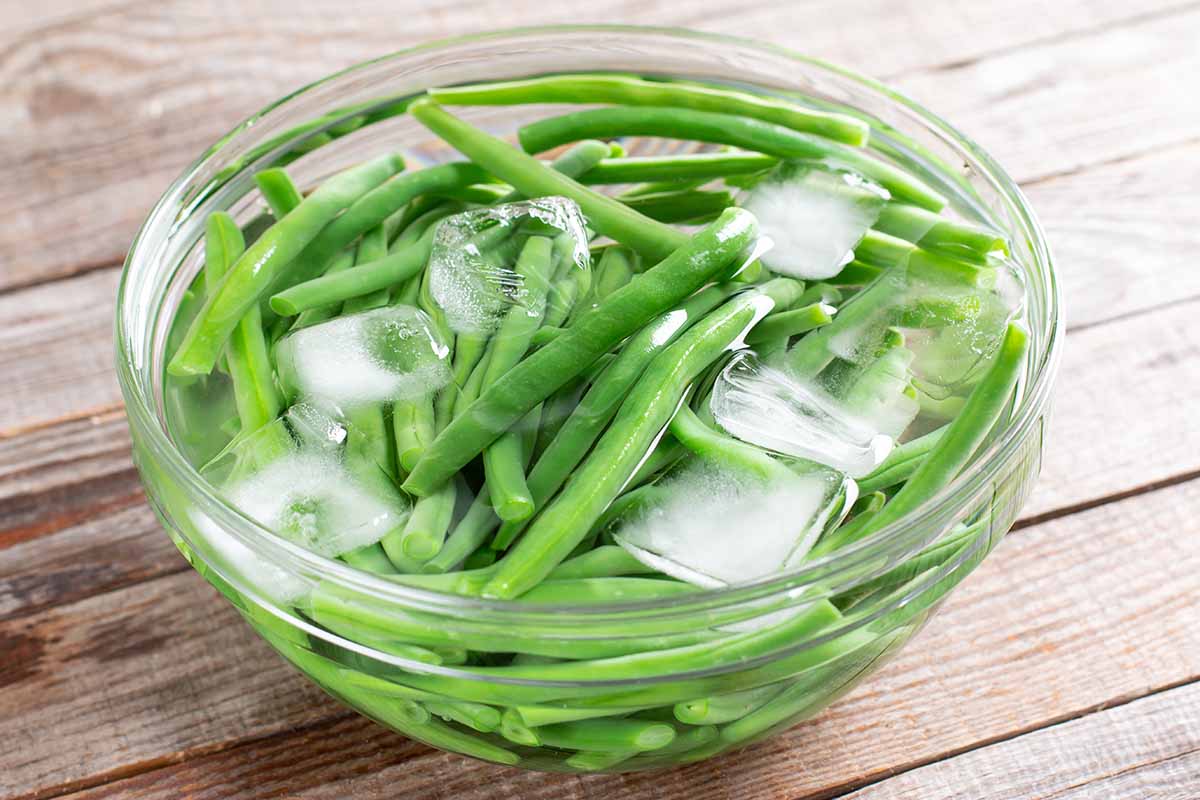
As soon as the blanching time is up, quickly plunge the beans into an ice cold water bath to halt the cooking process.
Drain the cooled pods, then store them in a freezer-safe container.
Make sure to mark the freeze date on the container – these will keep for six to 12 months in the freezer.
You might also try dehydrating the fresh pods. They can be dehydrated plain, or jazz them up with spices, herbs, or salt before drying, to create a savory and crunchy homegrown snack food.
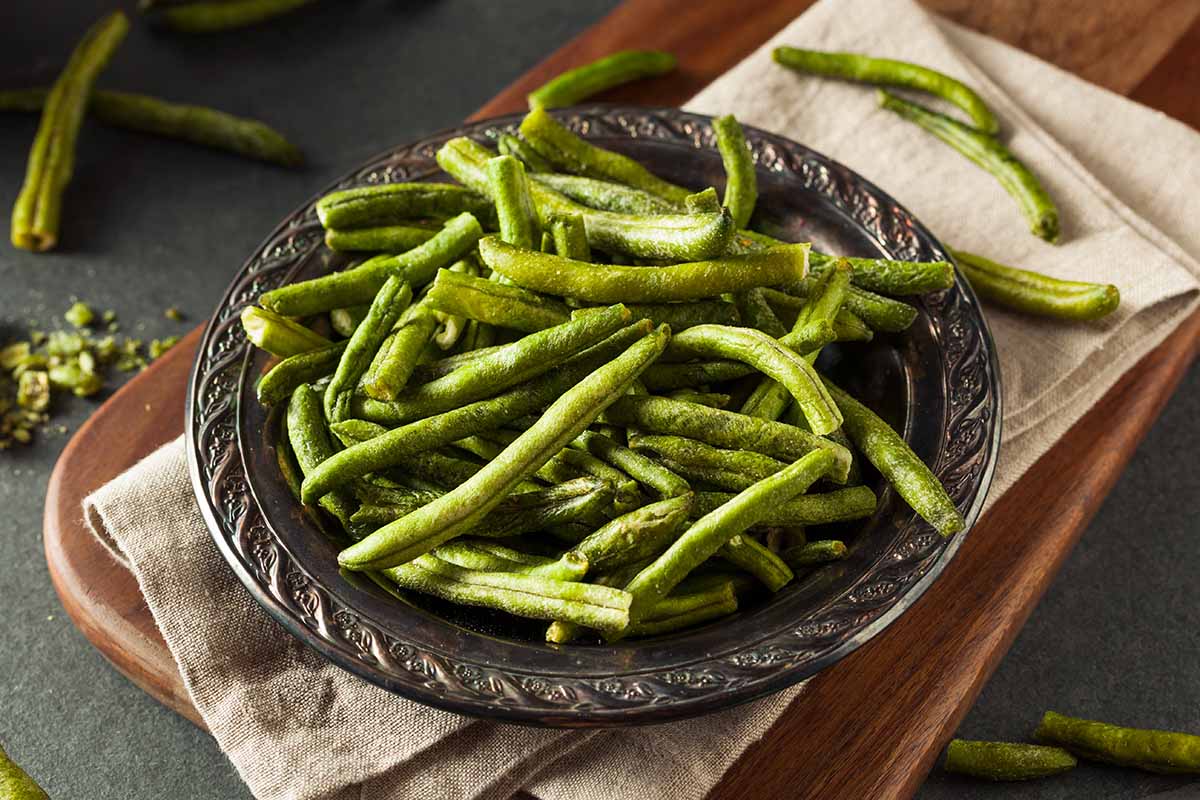
For dehydrating tips, check out our guide to dehydrating fruits and veggies.
For long term storage, you might also decide to can the fruits of your labor.
Canning this crop requires the use of a pressure canner.
Improperly canned green beans impart a risk of botulism, so be sure to use a reliable recipe for canning this crop, and follow it exactly!
You might also avoid the risk altogether and put up pickled green beans instead of plain ones, since the addition of acid negates the botulism risk.
Find more tips on canning at our sister site, Foodal.
The last preservation method you might want to consider is fermentation.
This ancient method of prolonging the life of food is much easier than canning since it harnesses the preserving power of lactic-acid-producing bacteria. It’s like pickling, but without the need for a heat source or vinegar.

To make lacto-fermented pole beans, place trimmed and cleaned beans in a jar, add 1 1/2 tablespoons of salt per quart-size mason jar, fill it with water, and use a pickle weight to keep the ingredients submerged.
There’s no need to make a brine first – the brine will make itself inside the jar!
Place the lid on the jar, but keep it loose in order to allow gasses to escape during the fermentation process.
Speaking of gasses – you’ll also want to place the jar on a plate since the activity of those gasses will cause liquid to spill out.
If water spills out during fermentation, be sure to top off the liquid in the jar to keep the ferment submerged.
Fermentation times will vary depending on how much salt you use and how warm your kitchen is, so do a taste test after a few days. In the meantime, it’s a good idea to stir the surface of the brine once a day to prevent yeasts from growing.
The fermented pole beans should have a tart flavor – when they taste good to you, place the jar in the fridge to slow the fermentation process.
These will keep potentially indefinitely in the fridge as long as you practice good hygiene practices – that means no fingers or used utensils in the jar!
However, the fermented vegetables will lose their crispness over time, so enjoy your lacto-fermented green beans within a few months for best results.
Recipes and Cooking Ideas
Preserving a harvest certainly is fun, but you may just want to devour your crop as soon as it’s picked – so here are a few ideas to get your culinary juices flowing.
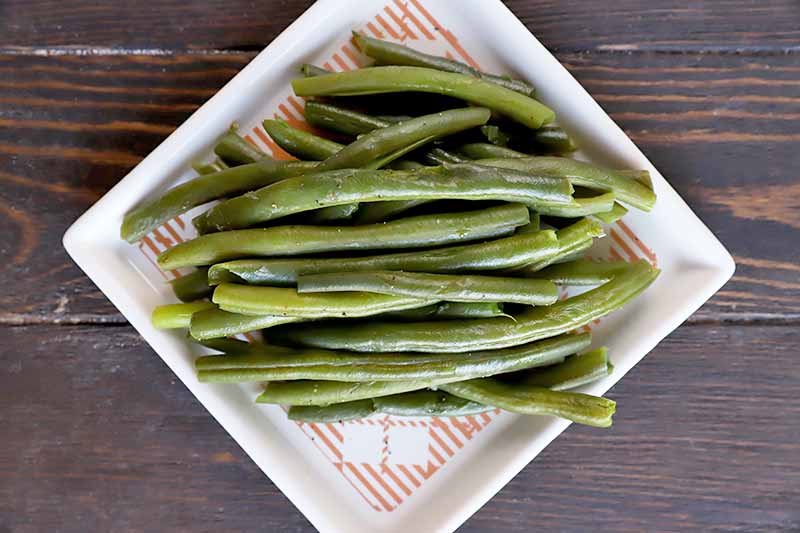
Why not start simple? It’s hard to beat the taste of green beans cooked fresh from the garden – and you may find you enjoy them best au naturel!
For a simple, unadorned preparation, try pressure cooking them. You’ll find tips for pressure cooking green beans on our sister site, Foodal.
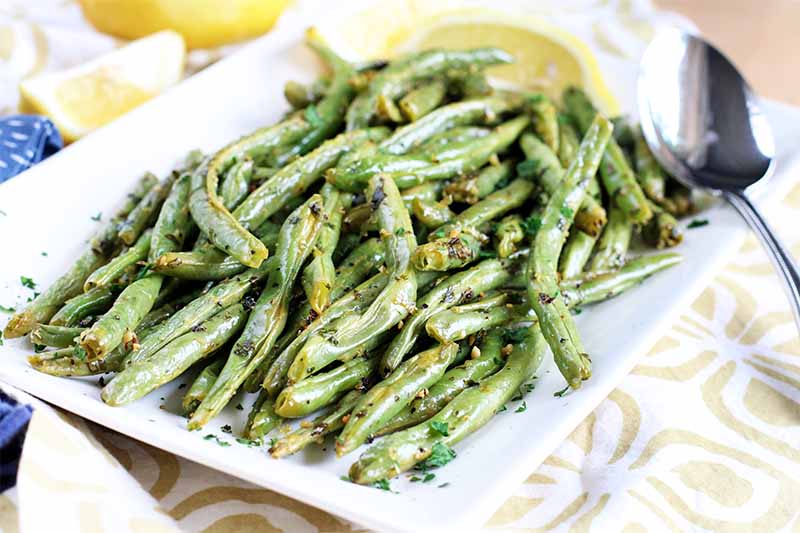
Want to keep things simple but add a bit more flavor? Why not try this recipe for roasted lemon garlic green beans?
It’s the perfect side dish for a Mediterranean themed meal – you’ll find the recipe at Foodal.
On the other hand, if you’re looking for a complete meal idea, why not incorporate your garden bounty into a delicious Sriracha tofu vegetable stir fry? You’ll find this recipe at Foodal too.
Quick Reference Growing Guide
| Plant Type: | Vining, herbaceous annual vegetable | Tolerance: | Heat, drought |
| Native to: | Latin America | Maintenance: | Low |
| Hardiness (USDA Zone): | 3-10 | Soil Type: | Clay or silty loam |
| Season: | Summer | Soil pH: | 6.0-8.0 |
| Exposure: | Full sun | Soil Drainage: | Well-draining |
| Time to Maturity: | 55-90 days, or more depending on cultivar | Companion Planting: | Beets, borage, cabbage, carrots, catnip, cauliflower, chamomile, corn, cucumbers, dill, eggplant, kale, marigolds, nasturtiums, radishes, sage, savory |
| Spacing: | 2-4 inches | Avoid Planting With: | Alliums |
| Planting Depth: | 1 inch (seed) | Order: | Fabales |
| Height: | 5-10 feet, or more | Family: | Fabaceae |
| Spread: | 18 inches | Genus: | Phaseolus |
| Water Needs: | Moderate | Species: | Vulgaris |
| Common Pests: | Alfalfa loopers, aphids, armyworms, cabbage loopers, corn earworms, cutworms, leaf miners, Mexican bean beetles, spider mites, stink bugs | Common Diseases: | Alternaria leaf spot, anthracnose, bacterial blight, bacterial brown spot, bean common mosaic virus, bean rust, black root rot, damping off, fusarium root rot, halo blight, timber rot |
Love for Lofty Legumes
I hope you now feel confident and ready to grow a bountiful crop of pole beans, but that you also have an even deeper appreciation for these wonderful garden veggies!
Is this your first experience growing this legume? Need help troubleshooting your bean grow setup? Want to show off your creative trellis work? Feel free to post comments, questions, and photos in the comments section below.
Looking for more tips on growing plant-based protein? You’ll find plenty of inspiration and guidance right here: