Brassica oleracea var. italica
Are you a broccoli lover? Then it might be time to try growing your own!
This healthy green brassica is a member of the Brassicaceae, or cabbage family, a close relative of brussels sprouts, cauliflower, bok choy, head cabbage, and greens like collards and mustard.
It grows as an annual in USDA Hardiness Zones 2 to 11.
We link to vendors to help you find relevant products. If you buy from one of our links, we may earn a commission.
Also known as a cole crop, this cruciferous vegetable prefers cool weather. It is planted in spring, fall, or both, and may yield one or two main harvests, as well as multiple mini side-shoot harvests per growing season, depending upon the planting times and varieties you choose.
In this article, we discuss everything you need to know to cultivate broccoli in your garden.
Here’s the lineup:
What You’ll Learn
Get out your gardening tools and get ready to grow your own broccoli!
Cultivation and History
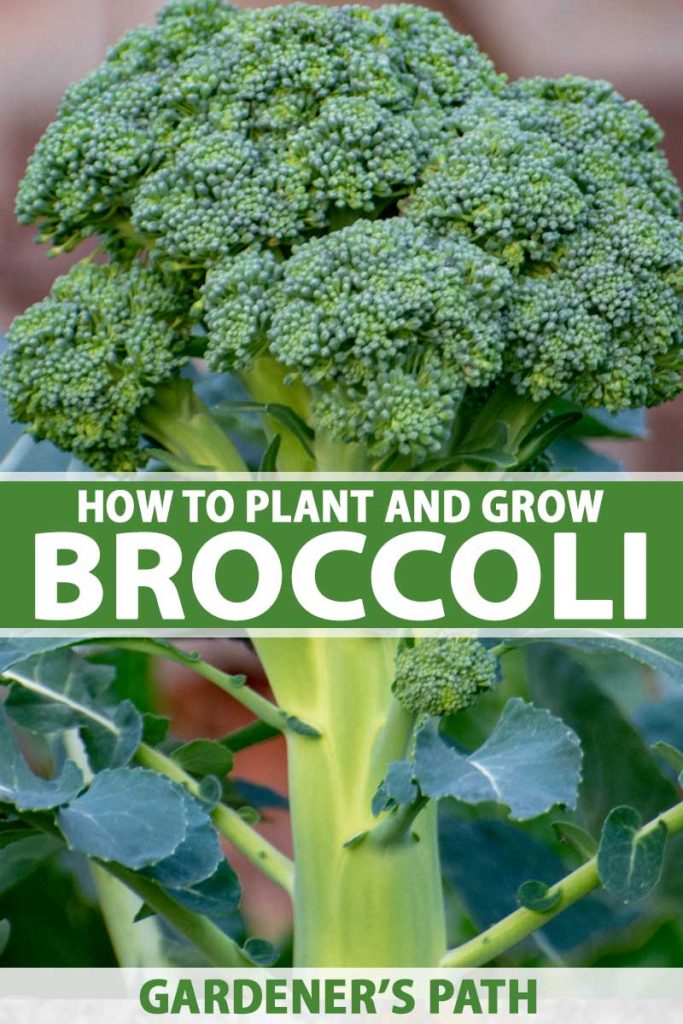
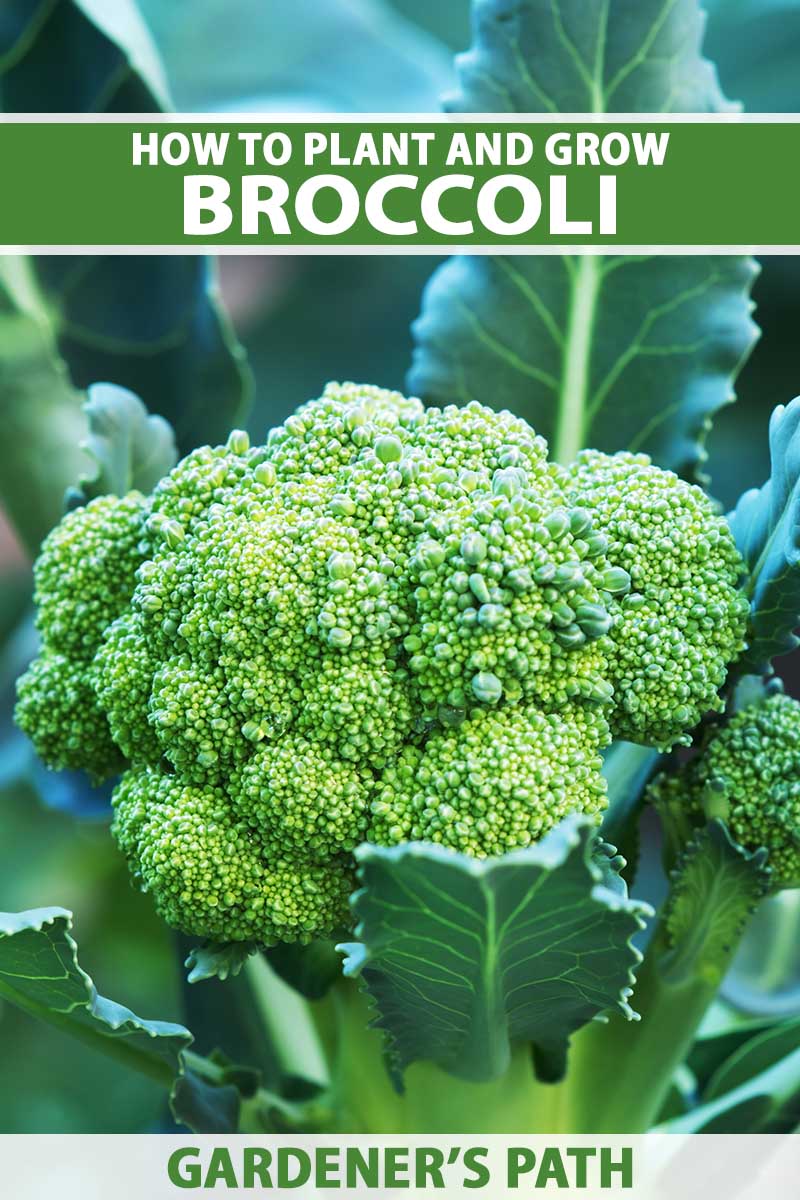
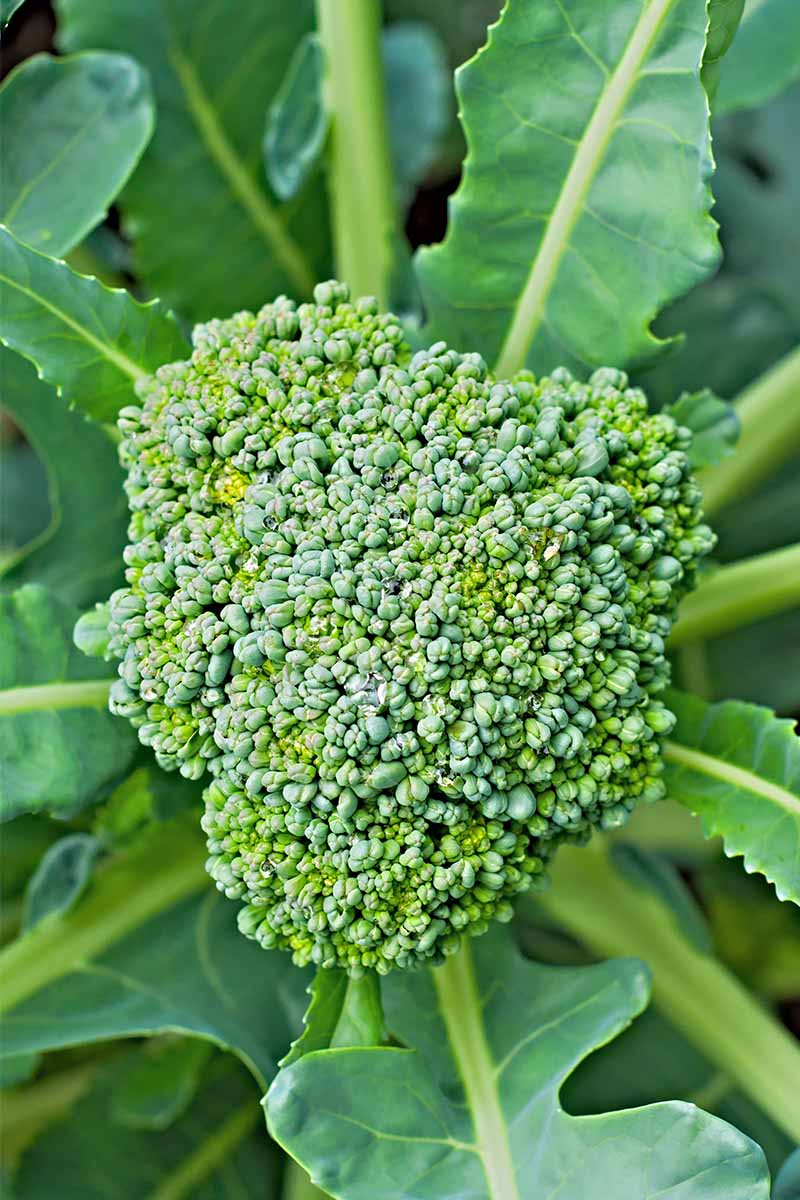
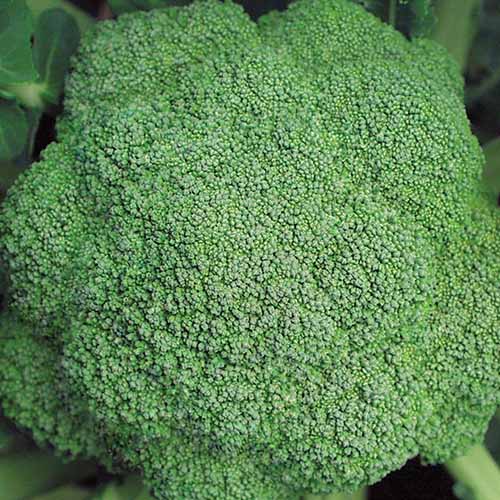
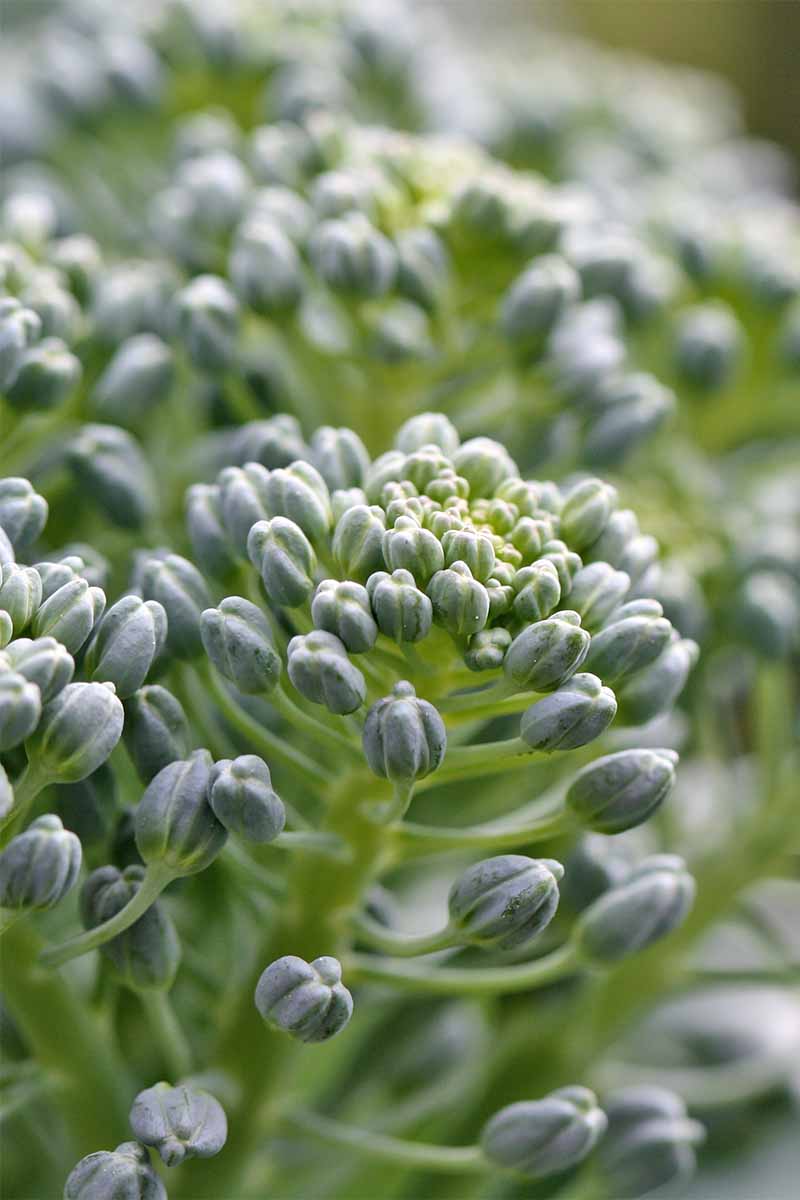
Broccoli is a green vegetable that is grown for its round flower head.
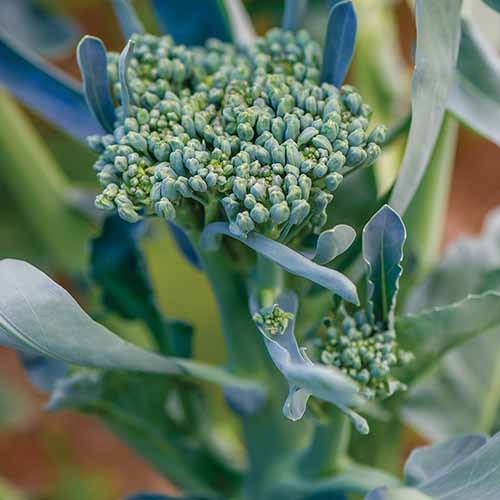
It is harvested and eaten prior to blooming, when the head contains a tight mass of unopened green buds. The tender young leaves and stalks are also edible, both cooked and raw.
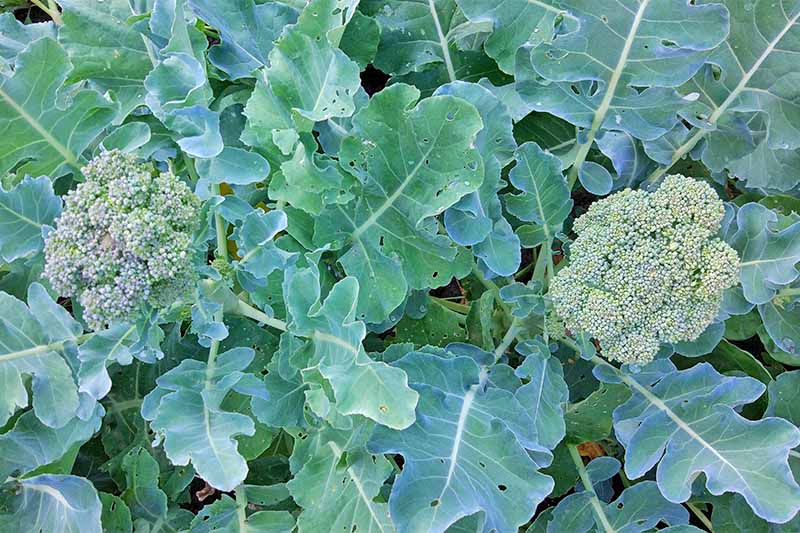
A widely hybridized crop, there are many varieties with mature dimensions ranging from approximately 18 to 24 inches tall, and 12 to 24 inches wide.
A short number of days to maturity and above-average pest and disease resistance are desirable features in spring-planted varieties.
For fall harvests, select plants that are especially frost hardy. Sow seeds in midsummer, and you’ll have veggies that can withstand a light frost or two and keep you supplied through fall.
Many folks have better luck with fall crops because there are generally fewer hot spells and pests in the later months of the year.
Historically, Brassica oleracea var. italica, dates to the ancient Roman Empire. By the Middle Ages, it was cultivated in Asia Minor and Eastern Mediterranean regions, where it made its way into the kitchens of many an Italian cook.
Believed to have been transported by Italian immigrants to the United States in the 1800s, by the 1920s, broccoli was grown commercially in California. After World War II, it gained a strong foothold as a staple food crop.
Today’s cultivars offer qualities like disease resistance, shorter days to maturity, and robust flavors that appeal to the home gardener.
Broccoli Plant Propagation
To propagate plants, you’ll need to start from seed or purchase nursery starts. Let’s explore each method in more detail.
From Seed
Consider your climate zone. Do you have hot summers? The experts at Rodale, in their Ultimate Encyclopedia of Organic Gardening, recommend getting a jump on spring by starting seeds indoors about eight weeks before the last frost date for your region.
Sow seeds half an inch deep in well-draining containers filled three-quarters full of potting mix amended with a 10-10-10 NPK fertilizer, as recommended on the package.
Alternatively, you can use garden soil cut 50-50 with compost or aged manure, to achieve a nutrient-rich, sandy-loam planting medium.
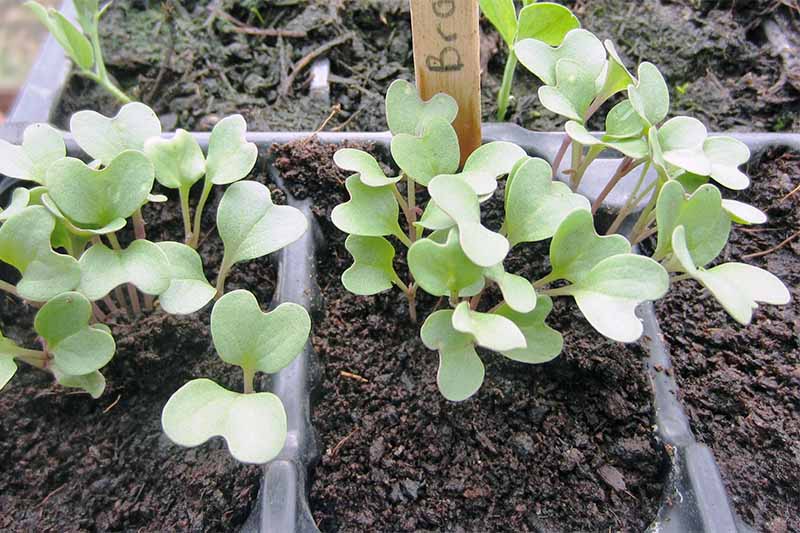
Keep seedlings in a sunny location that is about 60 to 65°F. Maintain even moisture.
About two weeks before the last frost date of spring, when the seedlings are at least six inches tall, harden off, or acclimate them to the outdoors for a few hours each day.
Increase the time by one hour each day for about a week, starting in a sheltered location for the first day or two, and then moving out into the garden.
Adjust your schedule if the weather is especially inclement.
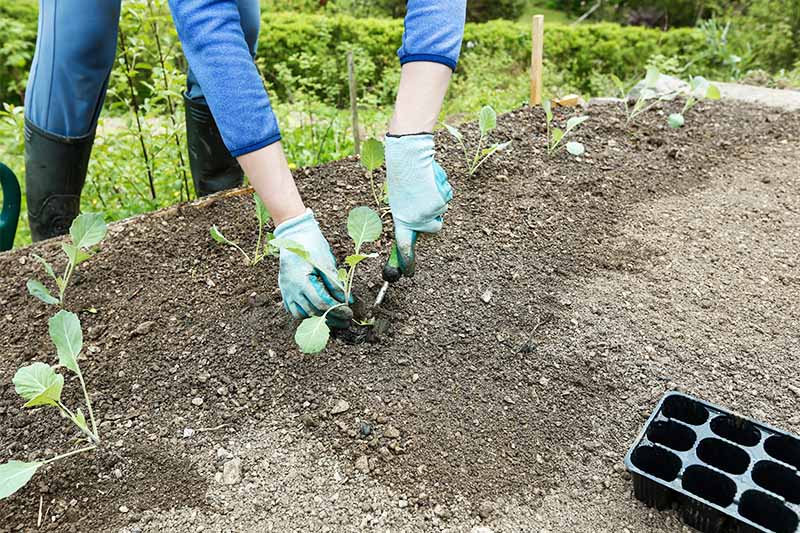
After hardening them off, transplant the seedlings into the garden. Set them a little deeper than they are in the containers in which they sprouted, and provide 12 to 20 inches of space around each seedling.
Water in well, and then provide about an inch per week in the absence of rain.
For a fall crop, sow seeds directly into the garden in late summer or early fall. Sprinkle them every 12 to 20 inches, depending upon the mature dimensions of your selected cultivars.
Maintain even moisture during the germination phase.
Thin them to one seedling per interval when they have two sets of true leaves. Provide one to one and a half inches of water per week in the absence of rain.
Be sure to aim the garden hose or watering can at the soil, and not over the leaves or developing heads, to inhibit fungal development.
Some folks plant multiple times between spring and midsummer, but one’s ability to do this all depends upon how hot your summers get.
You can learn more about how to start broccoli from seed in our guide.
From Seedlings/Transplanting
If you purchase seedlings from a nursery, try to plant them on the day of purchase.
Set them into the ground so that the container potting medium is a little lower than the surface of the garden soil, cover it with soil, tamp it down, and water in well. Maintain an inch of water per week in the absence of rain.
Not sure how much rain you are getting? Try a rain gauge.
How to Grow Broccoli
Select a location with full sun and organically rich soil that drains well. You may improve your soil with the addition of compost.
In addition to fertile ground, broccoli requires moderately acidic to neutral soil to thrive (pH 6.0-7.0). Conducting a soil test will help you to determine the pH and nutritional makeup of the soil.
A little lime can sufficiently raise pH levels if the earth where you wish to plant is overly acidic, whereas amending with peat moss, sulfur-containing products such as gypsum, or mulch can help to lower the pH and decrease alkalinity.

As your plants mature, keep the soil moist, but not soggy, and never let it dry out completely. You may apply a generous layer of mulch to help keep the ground cool and moist as the temperature rise.
In addition, during the maturation phase, you may side-dress with a boost of veggie fertilizer. Place it on the soil around the stems, but without touching them, to add vital nutrients, and aid in moisture retention.
Try Fish Plus Kelp Seaweed Concentrate from Indian River Organics. It’s available on Amazon.
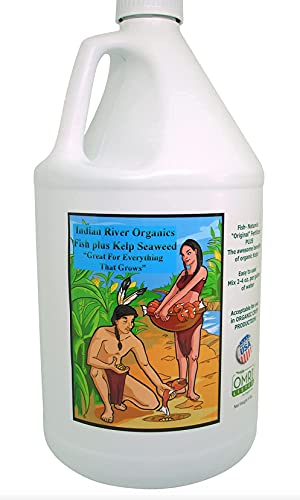
Indian River Organics Fish Plus Kelp Seaweed
Loosen the soil occasionally with your garden cultivator and remove weeds that may harbor pests. Healthy plants are least vulnerable to insect damage and disease, so good drainage and air circulation are important.
The Rodale pros recommend protecting young plants from weather that’s detrimental to head formation. Ideal temperatures are 60 to 75°F during the day, and above 30°F at night.
For protection from the cold, you may want to have a glass cloche on hand. Mature plants can tolerate frost, and heads may even taste sweeter for it. However, young plants may succumb to a freeze.
Floating row covers offer another means of keeping young plants warm during a sudden cold spell.
When it come to companion planting, keep in mind that broccoli is one of many plants that emit allelochemicals that may adversely affect other plants and future plantings on the same garden site.
Excellent companions are beets, celery, chamomile, culinary sage, dill, garlic, hyssop, fennel, marigolds, nasturtiums, onions, oregano, peppermint and other mints, potatoes, rosemary, thyme, and yarrow.
Steer clear of beans, corn, cucumbers, other brassicas, peppers, strawberries, squash, and tomatoes.
Learn more about the best companion plants to grow with broccoli in our guide.
If you like to cultivate vegetables in containers, broccoli is one to try.
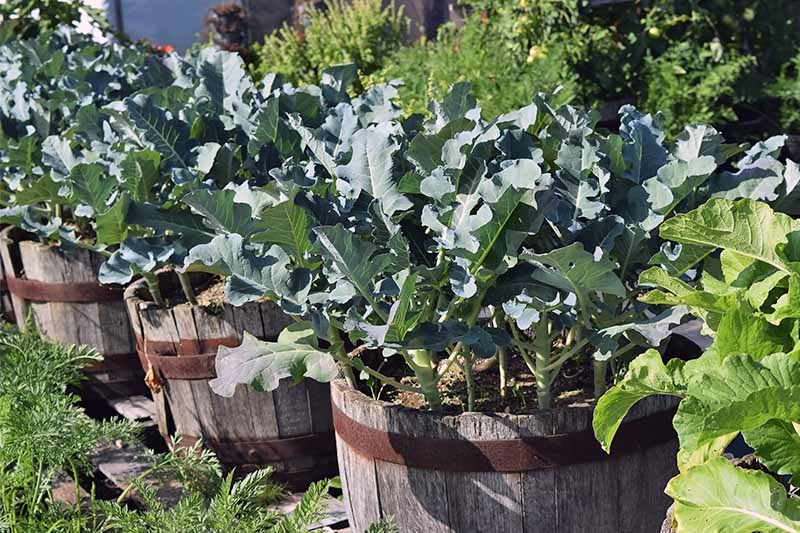
An easy way to make a suitable container is to drill a few drainage holes in a large five-gallon bucket, and fill it with potting medium.
The medium should reach about three inches below the bucket rim, for easy watering without spillover.
Learn how to grow broccoli in containers in our guide.
Growing Tips
Broccoli is a lot easier to grow when you remember to do the following:
- Choose varieties appropriate for your climate by considering the number of days to maturity and suitability for spring and/or midsummer planting.
- Select a full sun location, and possibly one with afternoon shade in the warmest regions.
- Protect young plants from temperature extremes with items like cloches, floating row covers, and mulch.
- Side dress with fertilizer during head formation for a nutrient boost.
Broccoli Cultivars to Select
There are numerous broccoli cultivars from which to choose. As you browse, think about whether you will plant in spring, fall, or both, and note the number of days to maturity for each variety.
Here are two to whet your appetite:
Marathon Hybrid
This type has robust green heads with a uniform dome shape, and a root system that is noteworthy for its strength.
Plants reach 30 to 36 inches tall and 40 to 45 inches wide. Expect to wait 70 to 75 days for these to mature.
This cultivar exhibits some downy mildew resistance and good heat tolerance. It produces side shoots after the main head is harvested, and thrives well as both a spring and fall crop.
It’s an excellent all-purpose veggie for cool salads and savory sides.
Find packets of 100 seeds available from Burpee.
Royal Tenderette Hybrid
This hybrid is known as a cutting or baby variety that consists of individual side-shoot-like florets, rather than a dense head.
An early bloomer perfect for spring, this one matures in 50 to 60 days, at a height of 12 to 18 inches and a width of 24 to 30 inches.
Cut and come again for tasty bites that are great when enjoyed raw out of hand, in a salad, or artfully arranged with other crudite.
You can find ‘Royal Tenderette’ available from Burpee. Choose from a package of 50 seeds or a bundle of six nursery seedlings.
Want More Options?
You’ll find even more cultivars to consider in our article, The 10 Best Broccoli Varieties to Grow at Home.
Managing Pests and Disease
Broccoli is one of the least pest-prone brassicas, especially when cultivated in the cool temperatures of autumn, when pest activity is winding down.
Common pests include:
- Aphids
- Cabbage Loopers
- Cabbage Maggots
- Cabbage Worms
- Cutworms
- Flea Beetles
- Harlequin Bugs
- Mites
- Slugs and Snails
- Thrips
For mites and harlequin bugs, a firm spray with the hose, or application of insecticidal soap, are usually all that’s needed.
An application of food grade diatomaceous earth may be effective as both a preventative and treatment for caterpillars.
In addition to insect pests, hungry herbivores like deer, groundhogs and rabbits may pay a visit to your veggie garden.
Covering your plants with netting or floating row covers is an effective way to deter foraging critters.
In addition, many of the companion plants mentioned earlier have “umbel” or flattened flower heads that attract parasitoid wasps, predators of the pests that feed upon broccoli.
Examples are dill, fennel, and yarrow. Planting them is a form of “biological” pest management, a key element of any integrated pest management program.
You can learn more about broccoli pests in our guide.
There are also diseases you may encounter, such as:
- Black Leg
- Black Rot
- Downy Mildew
- Fusarium Wilt
- White Leaf Spot
If your plants begin to wilt or discolor, they may be the victims of a fungal infection called black leg. It’s sometimes present in the seeds themselves, and we don’t know it until it’s too late.
Per the University of California Statewide Integrated Pest Management Program (UC IPM), infected plants must be destroyed, and crop rotation practices used in the seasons to follow.
Seedlings that show signs of discoloration and disfigurement may be the victims of black rot, a fungal infection that may also be present in the seed itself. Affected seedlings fail to thrive. There is no cure.
Downy mildew coats the foliage with a fuzzy grayish coating. It is caused by a water mold that may respond to fungicide treatment.
White leaf spot is a fungal condition that may be treated with a copper-containing fungicide.
Fusarium wilt is a fungal disease for which there is no cure. It causes growth anomalies, discoloration, wilting, and death.
In addition, broccoli is a relatively heavy feeder. A deficiency of the essential nutrient boron may cause browning and hollowing of stems, and a failure to form buds.
The addition of a boron amendment, such as boric acid, may remedy the deficit.
If your crops are plagued by pests and disease this year, be sure to rotate to a new location next year.
Pest larvae and disease pathogens can winter over in plant debris and soil, ready and waiting to infest and infect the next brassica to come along. Even if a condition doesn’t prove fatal, this practice is a good one.
Learn more about common broccoli diseases in our guide.
Harvesting Broccoli
Figuring out when it’s time to harvest can be difficult for first-time growers, especially when it comes to green vegetables. Without a sudden color shift to indicate that it’s time to pick, what are you supposed to look for?
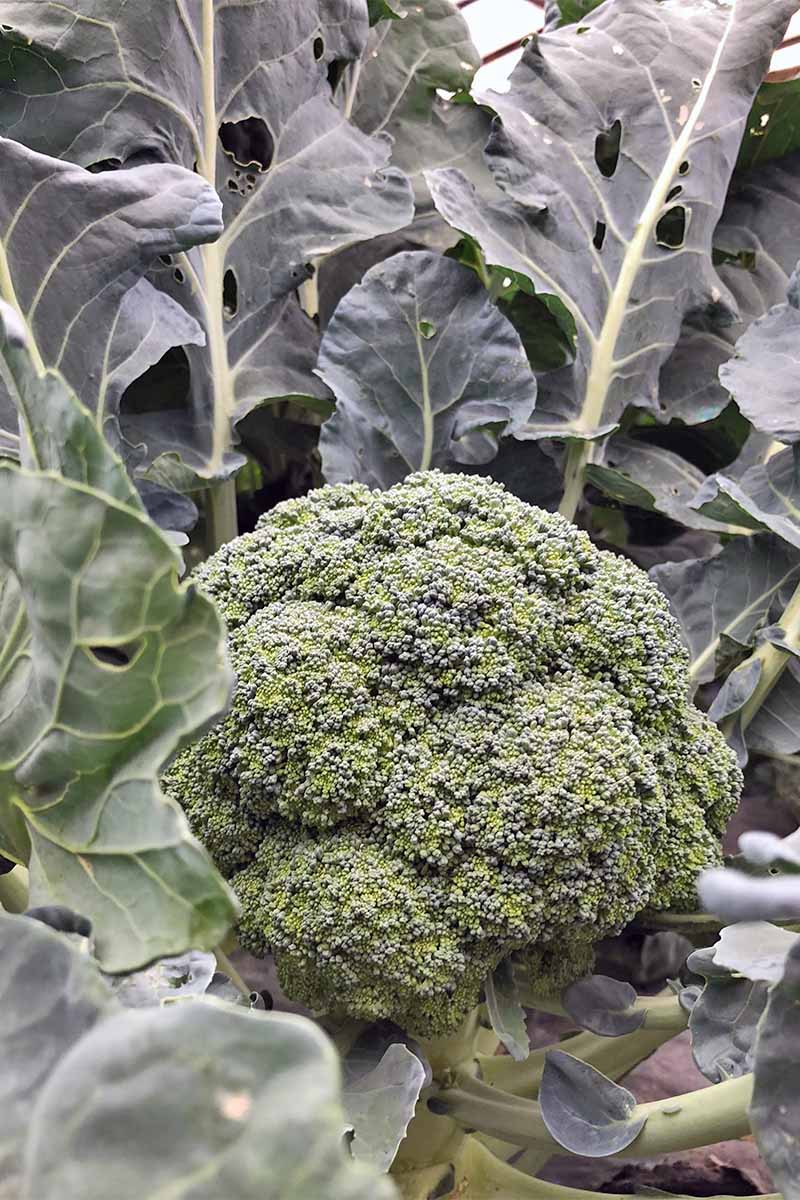
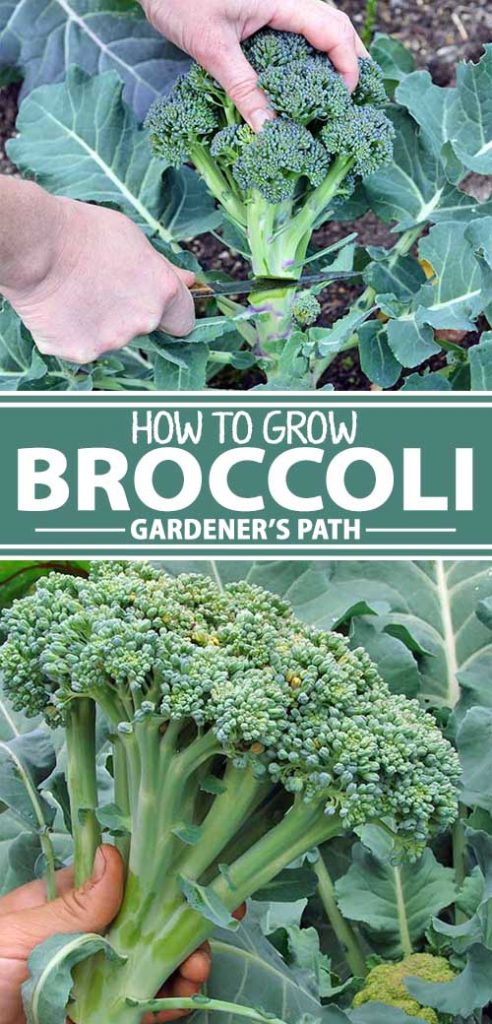
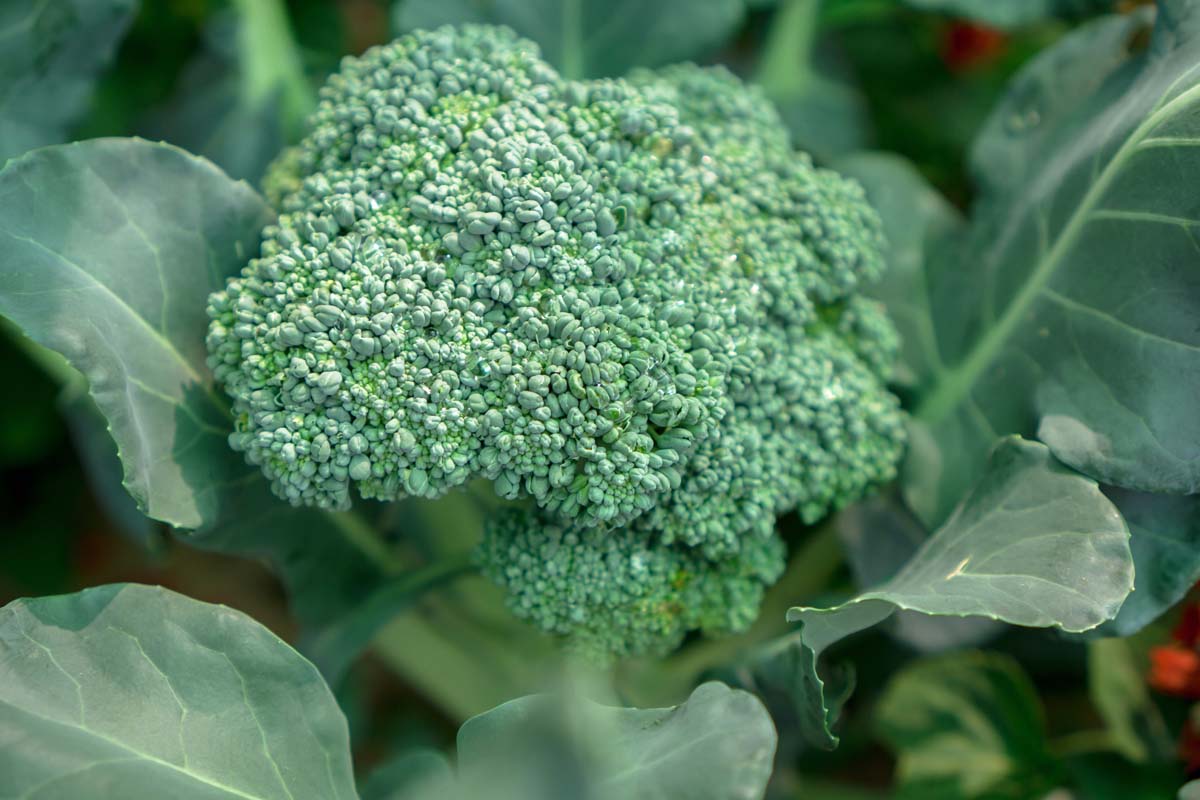
You’ll know that your crops are ready for the first harvest when heads have formed, and they’ve reached a diameter within the range of what’s indicated for the cultivar that you’re growing, usually around four to seven inches across.
Check your seed packets for this information, as well as the average number of days to maturity, a period that varies widely, from 50 to 100 days. This is another helpful guideline to keep in mind.
When florets on the outside edge of the head are large and full, this is another useful indicator that you’re good to go.
But don’t wait too long. When they begin to turn from green to yellow, this is a sign that they’re beginning to flower, and past their peak.
If you notice this change taking place, your crops are still good to eat. In fact, the flowers are edible.
As with all gardening endeavors, this is a learning process. We’re all too often tempted to keep berries on the bush and tomatoes on the vine longer than we should, in the quest for peak harvest perfection.
Pay attention to what your senses are telling you, and keep a gardening journal to compare suggested indicators of maturity with your own recorded experiences.
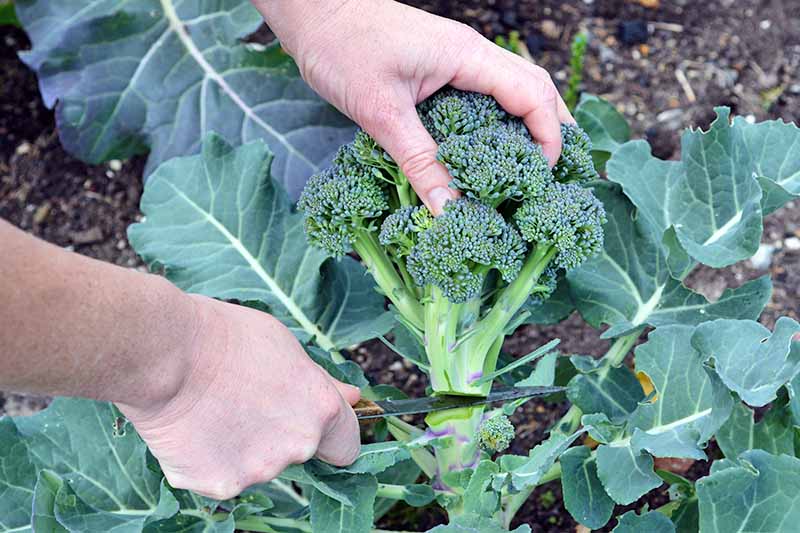
To harvest, use a sharp, clean knife to make a cut about five to six inches below the mature head. Try to do this cleanly, and without pulling, to avoid damaging the roots and remainder of the plant.
After picking, most cultivars will continue to develop smaller side shoots with florets that are also good to harvest. Add a little nitrogen-rich fertilizer to encourage their growth.
These side shoots will be in plentiful supply for as long as you keep cutting them. Once you stop, expect the plant to flower, run to seed, and die. A bout of sudden heat may produce the same results.
Read our complete guide to harvesting broccoli for more tips.
Storage
Broccoli is best consumed the day it’s picked. Wash it right before use.
You can store a harvested head for about a week. Here’s how:
Moisten a large linen dish towel or two to three paper towels.
Wrap the unwashed head in the paper towels. Place it in the low-humidity crisper bin of the refrigerator.
Check for brown or black discoloration, and/or sliminess that may indicate the presence of mold. Don’t consume any affected portions.
You can also freeze broccoli. To do so:
Place washed individual florets in boiling water for about three minutes, a process called blanching.
Plunge the florets into a bowl of cold water for five minutes.
Lay the florets in a single layer on clean linen dish towels or paper towels.
When completely dry, freeze the florets in a single layer on a tray or cookie sheet. When they are frozen, store the florets in zippered plastic bags for up to one year.
And don’t forget that those nutritious stems and leaves are edible as well. You can even feed the leaves to your chickens.
Recipes and Cooking Ideas
Broccoli contains beneficial vitamins and minerals including A, C, folic acid, calcium, and potassium.

Once you’ve exhausted your own repertoire of delicious recipes, you might like to try the following:
For a fresh green side dish, try a simple broccoli salad with asparagus and radishes. You can find the recipe on our sister site, Foodal.
Or how about the melding of sweet potatoes and broccoli with olive oil and a fried egg for a Sunday brunch? Get the recipe now from our sister site, Foodal.
And I know you’re going to fall in foodie love with this cheesy charred broccoli pasta bake,” also from our sister site, Foodal.
Quick Reference Growing Guide
| Plant Type: | Annual vegetable | Maintenance: | Moderate |
| Native to: | Asia Minor, Eastern Mediterranean | Soil Type: | Organically rich |
| Hardiness (USDA Zone): | 2-11 | Soil pH: | 6.0-7.0 |
| Season: | Spring, fall | Soil Drainage: | Well-draining |
| Exposure: | Full sun | Attracts: | Beneficial parasitoid wasps that eat pests |
| Time to Maturity: | 50-100 days | Companion Planting: | Beets, celery, chamomile, culinary sage, dill, garlic, hyssop, fennel, marigolds, nasturtiums, onions, oregano, peppermint and other mints, potatoes, rosemary, thyme, yarrow |
| Spacing: | 12-20 inches | Avoid Planting With: | Beans, corn, cucumbers, other brassicas, peppers, squash, strawberries, tomatoes |
| Planting Depth: | 1/2 inch (seeds), just below grade (transplants) | Order: | Brassicales |
| Height: | 18-24 inches | Family: | Brassicaceae |
| Spread: | 12-24 inches | Genus: | Brassica |
| Water Needs: | Moderate | Species: | Oleracea |
| Tolerance: | Cool temperatures, frost, part shade | Variety: | Italica |
| Common Pests: | Aphids, cabbage loopers, cabbage maggots, cabbage worms, cutworms, flea beetles, harlequin bugs, mites, slugs, snails, thrips | Common Disease: | Black leg, black rot, downy mildew, fusarium wilt, white leaf spot |
Affordable and Abundant
Homegrown broccoli is the best, and I know you’re going to enjoy it. One of my favorite memories is of my father-in-law presenting my mother-in-law with a fresh “bouquet” of the tasty green stuff to prepare for dinner.
Why should you buy broccoli seeds or seedlings this year?
Here are three reasons:
- Seeds are reasonably priced and keep several years in a cool, dry location.
- This is a crop you can sow more than once, for an extended growing season with multiple harvests.
- A serving provides your family with vitamins and minerals including A, C, folic acid, calcium, and potassium in every cost-effective bite.
You’re going to love garden-fresh broccoli!
And if you’re growing heirloom varieties, don’t forget to collect and save some seeds for next year so you don’t need to keep buying new packets.
How does your vegetable garden grow? We’d love to hear all about it in the comments section below.
For further reading about broccoli, we direct you to these additional articles next:


Hello, my name’s Suzie Glew.
Can you eat the leaf of cabbage? I am not sure to eat the cabbage leaf.
I’m growing veg in my garden, I got a greenhouse.
Are you referring to broccoli leaves, Suzie? Yes, they are edible! Good luck with your vegetable garden.
will broccoli die a natural death eventually?
Yes, after harvesting 2-3 times, broccoli plants will usually slow down and eventually stop producing heads. Depending on where they’re grown, they will not typically make it through the winter to produce again the next year.
My broccoli bolted and I’m going to save the seeds. I have researched how to do it. The only thing I’m not sure about is how much water to give them during this process.
Hi Kelly –
After bolting, broccoli begins to set seed. There’s no need to water a bolted plant. After the flowers finish, the seed pods form. Pull up the entire plant and hang it upside down over a paper bag. When the pods are brown and dry, crush them between your fingers over the bag to release the tiny seeds. Separate the seeds from the chaff and store the seeds in an airtight container. Next season, you may soak the seeds overnight before planting, to jump start germination, but it is not required.