
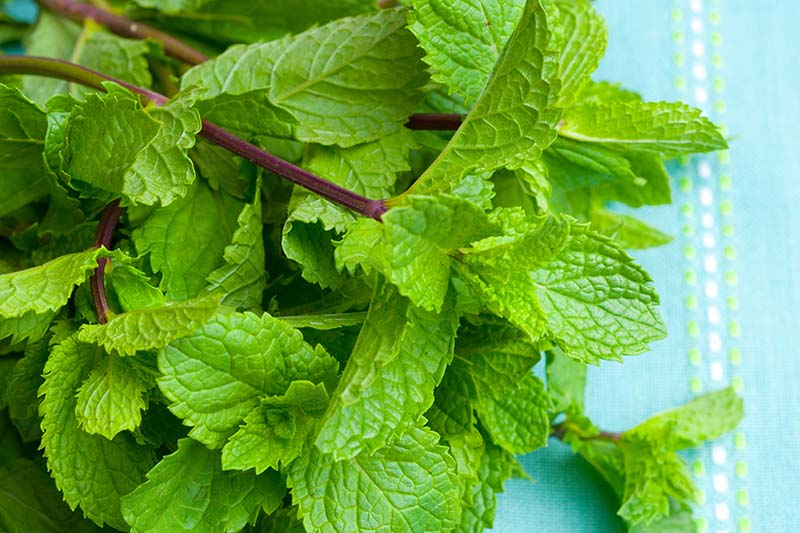
Mentha x piperita
If the very thought of a peppermint patty makes your mouth water (guilty!), or the idea of peppermint tea sends you running to the kettle, there’s no reason why you shouldn’t grow this marvelous herb at home.
Mentha x piperita is a hybrid of watermint (M. aquatica) and spearmint (M. spicata). It’s sometimes called black or candy mint.
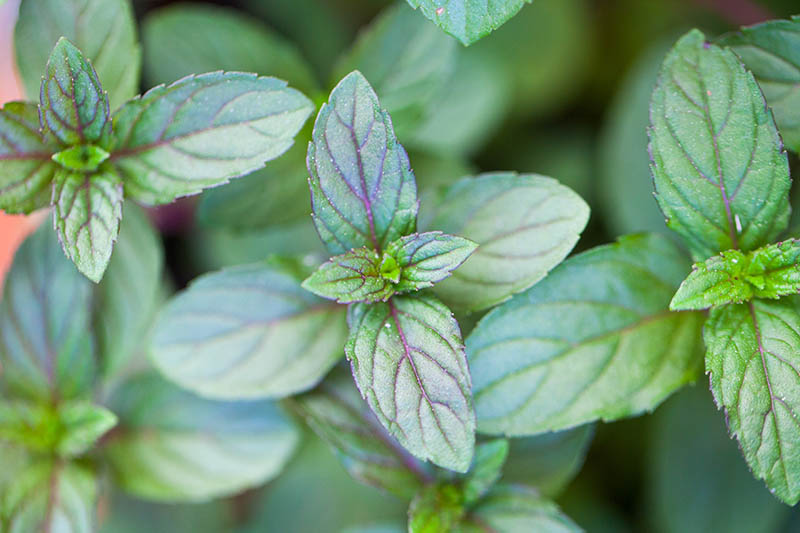
Peppermint has a pungent, peppery bite with a cool aftertaste that sets it apart from other types of mint. It’s a flavor that almost all of us have tried in candies, desserts, or health care products at some point.
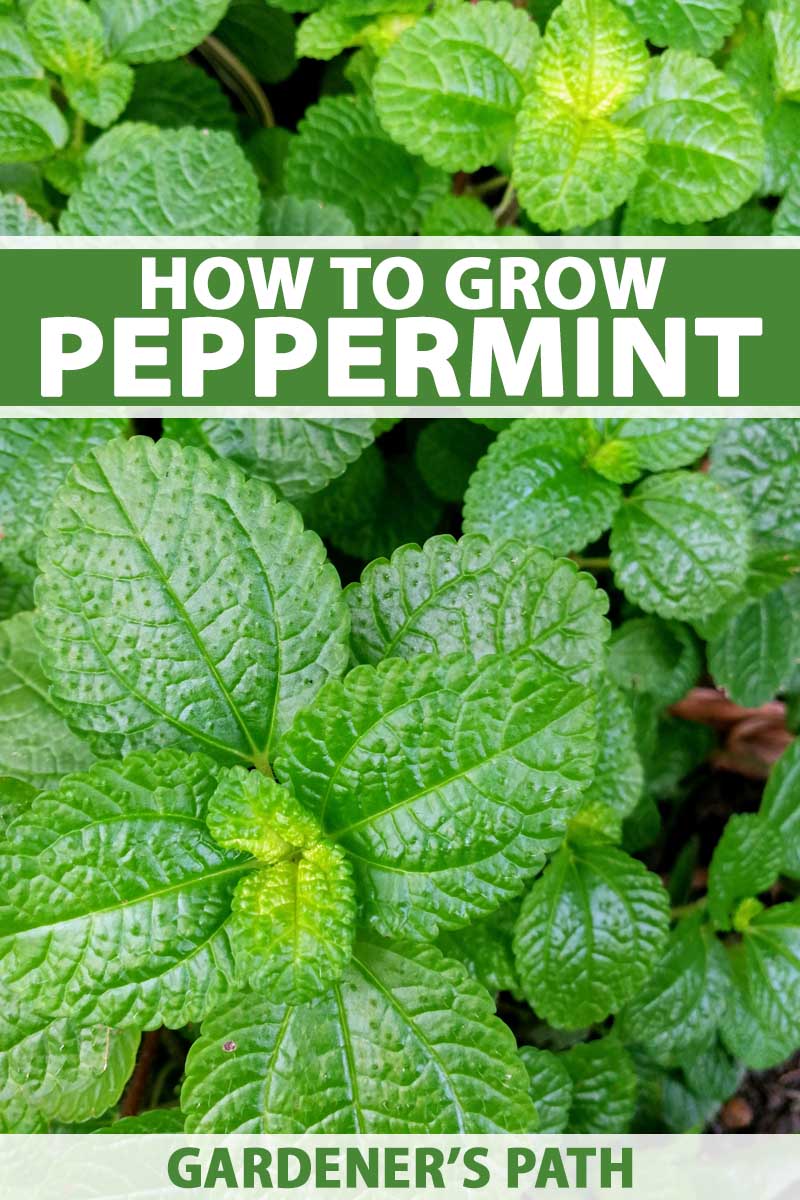
In the garden it’s prolific, attracts pollinators, and is easy to grow.
If there was ever a plant that could make the blackest thumb turn green, it’s mint. Give it enough water and it will happily do its thing.
In USDA Hardiness Zones 3 to 8, it will continue to grow – and spread – year after year.
Ready to add peppermint to your herb garden? Here’s what I’ll cover:
What You’ll Learn
What Is Peppermint?
Peppermint is a natural mint hybrid that grows wild throughout Europe, North America, and Australia.
The name comes from the Latin word Mintha, the Greek name of a nymph who was transformed into a mint plant (it’s a whole story) and piper, meaning pepper.
The “pepper” part of its name is particularly apt since it has a spicy, pungent flavor derived from a unique combination of menthol, menthone, and menthyl acetate, as well as limonene and other terpenoids.
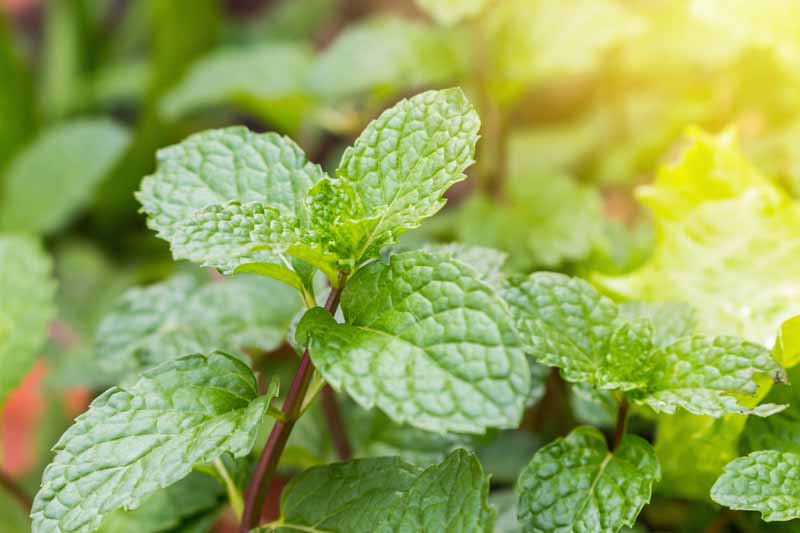
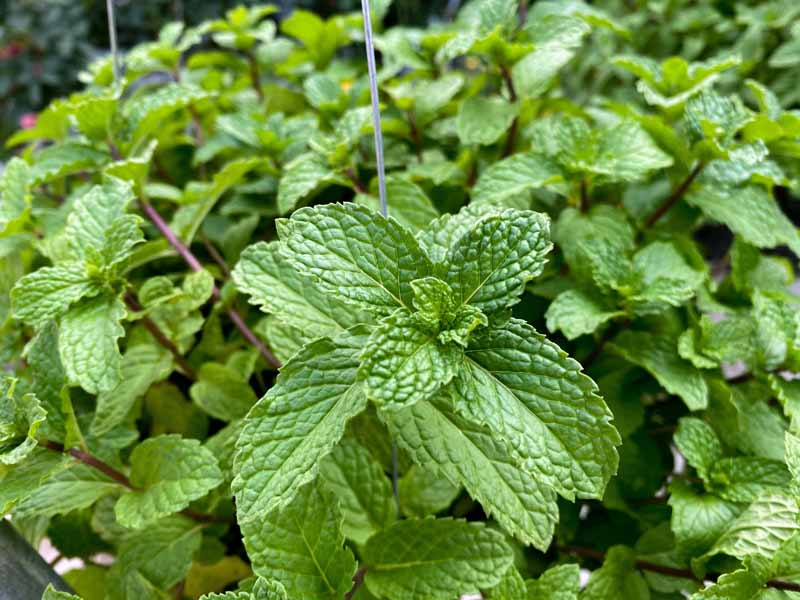
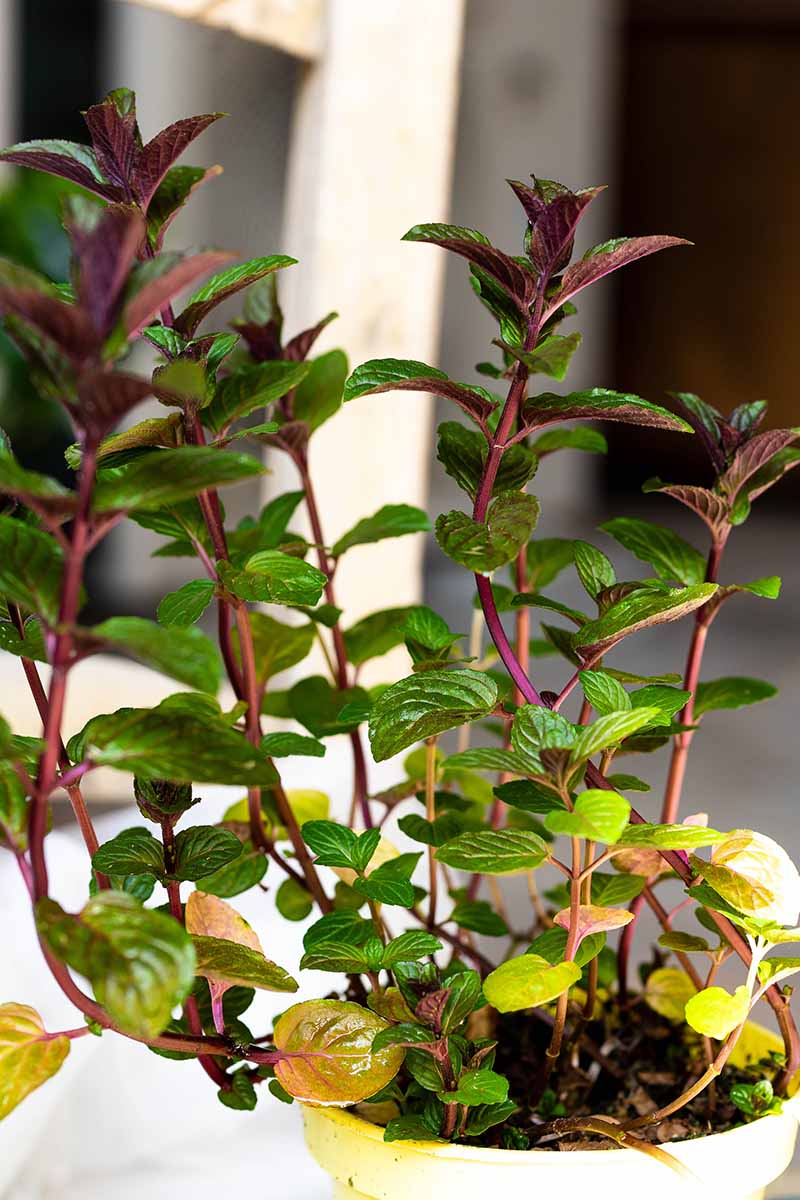
Peppermint plants can grow up to three feet tall and two feet wide at maturity, depending on growing conditions. Most often, plants top out at one to two feet tall.
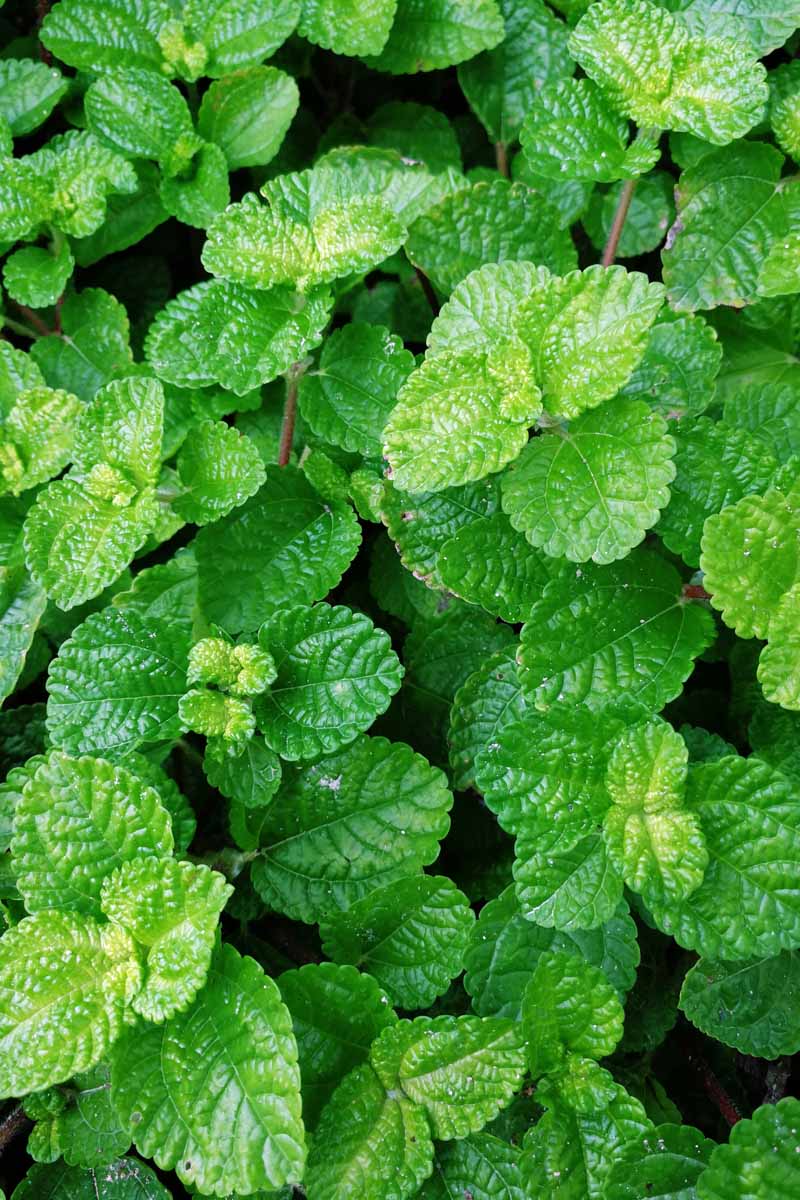
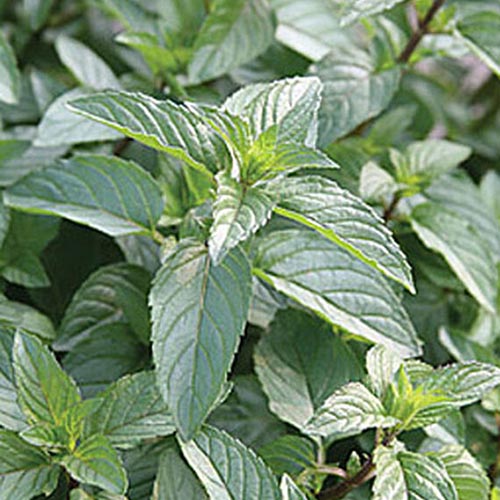
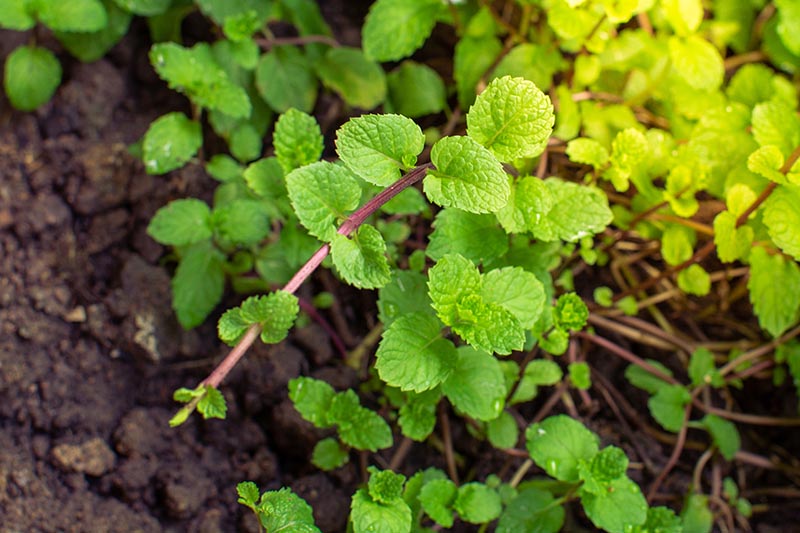
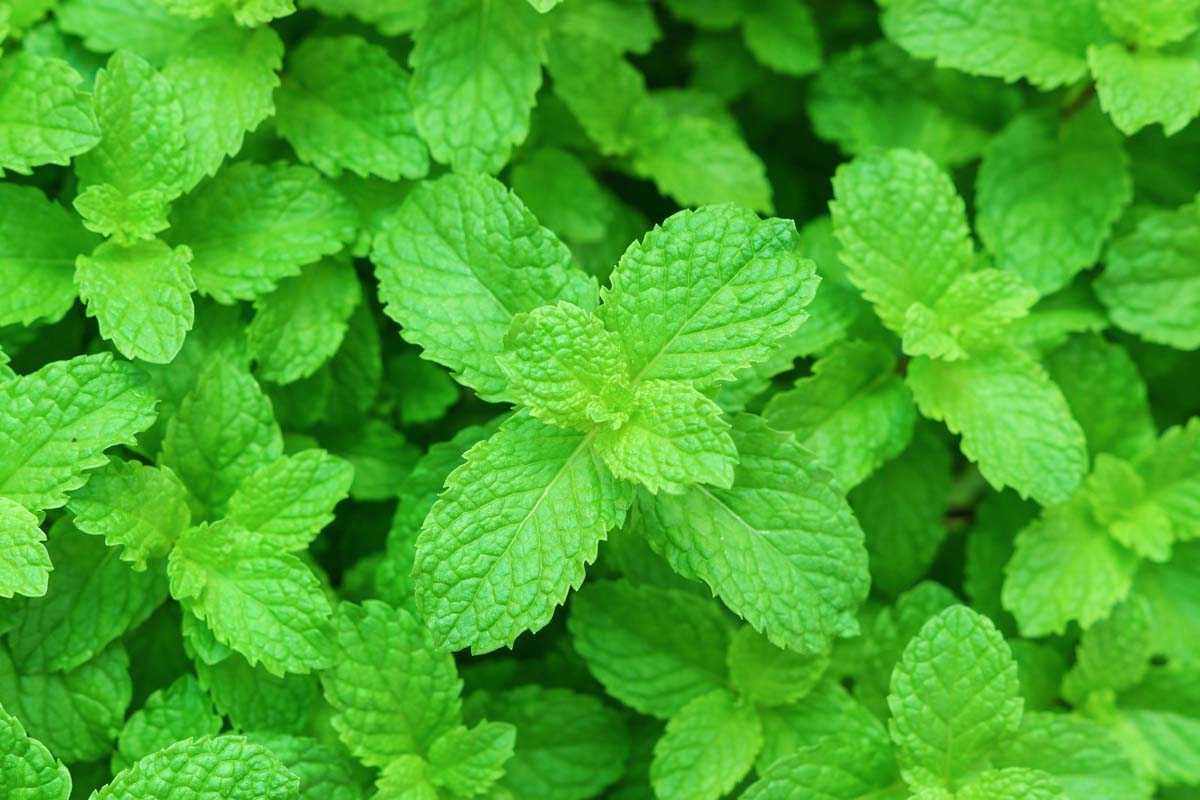
The stems are usually red and smooth, though some cultivars have green, hairy stems. The leaves are broad and oval with toothed margins, and may be hairy.
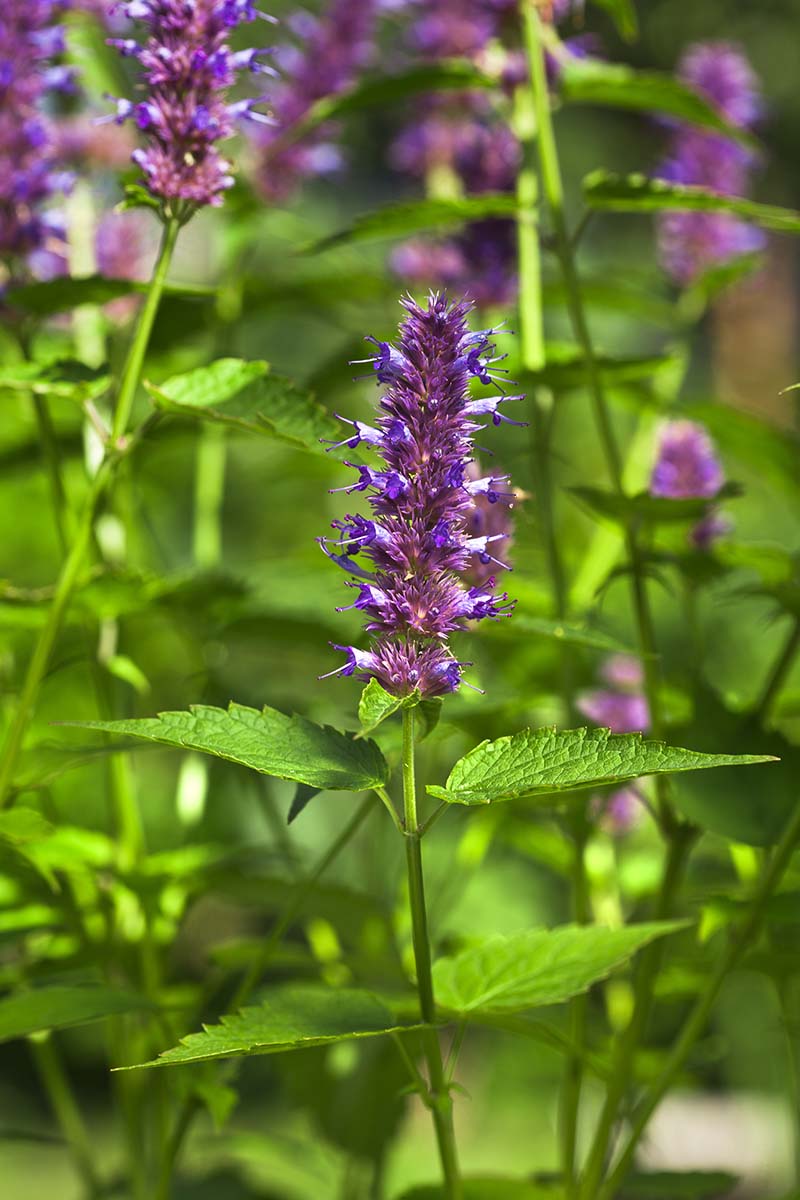
In the summer, the plant produces pretty pink or purple flowers on spikes.
Cultivation and History
Like most mint varieties, the history of peppermint is a little unclear because it can be found growing wild in many parts of the world.
Scientists don’t know exactly where it first came from, but it’s believed to have originated in the Mediterranean region.
In his book “The New Healing Herbs: The Essential Guide to More than 130 of Nature’s Most Potent Herbal Remedies,” available on Amazon, journalist Michael Castleman notes that both peppermint and spearmint were considered to be the same plant until 1696, when English botanist John Ray differentiated the two plants.
For centuries, peppermint has been distilled to extract its essential oil for use in flavorings and herbal remedies. The oil is commonly used to flavor toothpaste, mouthwash, confectionaries, and cosmetics.
The earliest record of its medicinal use comes from the ancient Egyptian text Ebers Papyrus. Whether this refers strictly to peppermint or some other type of mint is unclear.
Today, extracts are used to aid digestion and ease symptoms of irritable bowel syndrome, and when applied to the skin they may help alleviate headaches, itching, and sore muscles.
Peppermint was first cultivated commercially in the US in the 19th century, after English settlers brought stolons with them to Massachusetts in 1812.
However, the fungal infection verticillium wilt devastated these early crops. Early mint farmers were forced to gradually move across the country until the only commercial growing land that wasn’t infected with the fungus was largely in the west.
Peppermint is a an important commercial crop in the US, and is primarily grown in Washington, Oregon, Idaho, Wisconsin, and Indiana.
About 90 percent of the peppermint grown in the US is in the Pacific Northwest, which has the kind of climate it loves: moist, with cool nights and warm days, and more than 14 hours of sunlight during the summer months.
Propagation
You can propagate peppermint from stem cuttings, runners, by division, or layering. You can’t, however, grow it from seed.
You can sometimes find “peppermint” seeds for sale, so what’s up with that? Don’t buy them. M. x piperita is a sterile hybrid that does not produce viable seed.
Any seeds claiming to be peppermint will likely be a type of spearmint that may turn out to have an unpleasant flavor and scent.
It’s pretty easy to get peppermint to reproduce – it doesn’t need much encouragement.
Peppermint is so vigorous that some commercial growers plow up their plants in the fall to chop up the roots and stolons and spread them around. In the spring, new peppermint plants pop up everywhere and mature rapidly.
Stem Cuttings
Rooting stem cuttings is the preferred propagation method for commercial growers because it’s reliable and easy.
Take a four to six-inch cutting from the top of a healthy stem and remove the leaves from the lower half. Dip the cut end into a food-safe powdered rooting hormone, and then place the stem in a glass of water.
Find a bright, airy location, out of direct sunlight, and change the water every two to three days. After about 10-14 days the stems will take root.
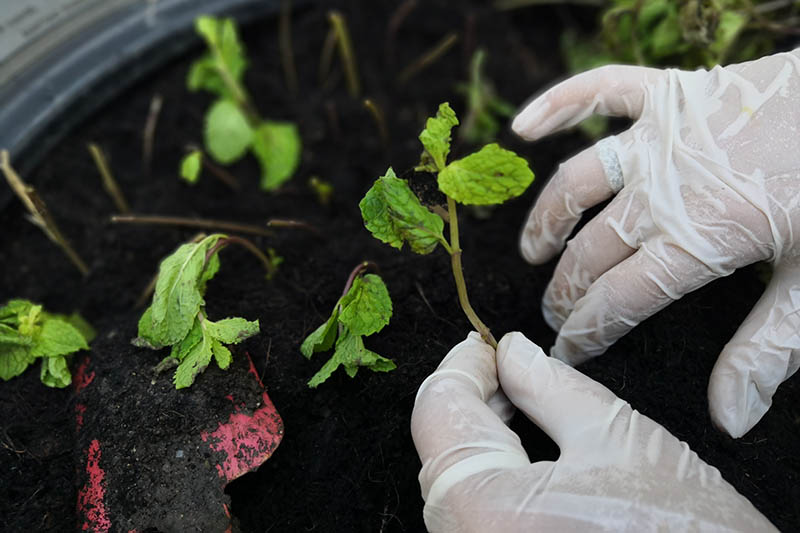
When you see roots starting to develop, plant cuttings in a four to six-inch container in potting soil. Give them a good soak to settle them in place and keep the soil moist but not waterlogged.
In three to four weeks, the rooted cuttings will be ready to move out into the garden. Harden them off over the course of a week or so by placing the pot outside in the sun for a few hours and then bring it back indoors. Each day, put it out for an additional hour until it can be in direct sunlight for seven hours at a time.
Then, plant it in prepared soil at the same depth that it was growing in the pot. Give it a good soak to settle the roots. Space plants 18-24 inches apart.
Runners
Peppermint reproduces vegetatively by sending out runners, aka stolons, in the summer after flowering.
To identify a stolon, look for what appears to be an above-ground root or horizontal stem extending from the parent plant. These may or may not have leaves on them.
Gently pull up a stolon of at least six inches long and clip it away from the parent plant.
If you can find a stolon that has already formed a stem and new leaves (and thus, roots), you can dig it up, leaving a three-inch margin on all sides. Make sure you dig about six inches deep.
Plant in a new location at the same depth as the root ball you dug up.
By Division
Peppermint plants are easy to divide. Doing so regularly can be beneficial for your garden because it helps to limit spread, and keep plants healthy.
You might find yourself giving away plant divisions to anyone who will take them!
The best time to divide plants is in the spring or fall.
To divide your plant, you will need at least six inches of roots. Assuming you’re working with a mature plant that’s about a foot wide, dig up a six-inch-by-six-inch piece of the plant, at least nine inches deep. Fill in the excavated area with soil.
You can always take a larger division – as long as you leave about six inches of root behind, your plant will come back quickly.
Plant the new division in prepared soil at the same depth as the root ball and water in well.
You can learn more about dividing perennials in this guide.
Layering
Peppermint is easy to propagate by stem layering. To do this, take an outside stem and remove the leaves from the center four inches.
Lie it horizontally on the ground, and bury it lightly with soil. If you need to, you can weigh down the end of the stem with a rock or small stone.
The stem will begin to form roots and new shoots within a few weeks. When the new above-ground growth is at least three inches tall, detach the stem from the parent plant and dig it up.
You want to dig about six inches deep in the soil and three inches around the perimeter of the new plant to ensure that you lift enough of the root system.
Put the new plant in your prepared spot at the same depth it was growing previously and water thoroughly.
How to Grow
Peppermint is an incredibly adaptable plant, but ideally it prefers a cool, moist climate with well-draining, loose, organically-rich soil.
You can conduct a soil test through your local extension office to determine the nutrient balance and pH of your soil.
The soil pH should be between 5.5 and 6.0. It will tolerate sandy or clay soil, provided it’s kept sufficiently moist.
Peppermint will thrive in a part shade to full sun location. I’ve even grown it as a groundcover in full shade, but the flavor was noticeably diminished.
Variegated cultivars require protection from the heat of the midday sun, or the white and cream areas of the foliage can become scorched.
This is particularly important if you’re growing in a region with temperatures that go above 85°F.
There’s one thing to keep at the front of your mind when growing peppermint: water.
While the plant can forgive poor soil or inadequate sunlight, dry soil spells disaster. That said, the oil concentration is stronger if you let the soil dry out a little between waterings as harvest time nears.
If you live in a hot or dry area, add a layer of organic mulch like grass clippings, straw, or leaves. This will help the soil to retain moisture.
Always water at the base of plants and not on the foliage to prevent fungal infection. Water in the morning if you can, so that any water that splashes onto the leaves has time to dry out over the course of the day.
After flowering, in mid-June to late July, you’ll start seeing runners. This means the plant is sending out stolons to spread itself around.
These are different from standard stems because they have fewer leaves. They’ll form roots wherever a bud touches soil. That’s when it’s time to be vigilant.
Unless you want a ton of new plants, you’ll need to start trimming, pulling, and restricting its spread. Pull up any suckers and clip stolons off the plant when you see them.
Every few years, you may want to dig up half of the plant and either put it in a new place or use up all the leaves.
That’s why growing mint in a container is such a good idea. Container growing will limit how far it can spread, and prevent it from taking over your garden. A two- or five-gallon container is ideal to accommodate the plant’s mature size.
You can also bury your container in the ground, leaving the top two inches of the pot above ground. In this case, use a five-gallon pot.
Be aware that the soil in containers tends to dry out much more quickly than it does in the garden – so be vigilant with your watering schedule.
Peppermint can also grow indoors in containers with one caveat: it will rapidly outgrow small pots.
A half-gallon container is the minimum size I’d recommend for one plant, and even then, it will become rootbound pretty rapidly, depending on the growing conditions.
If it does become rootbound, you can either divide it, put it out in the garden and start with a new plant, or transplant it into a larger container.
Peppermint doesn’t require much in the way of fertilization.
Beyond working in some well-aged compost at planting time, you can give your plants an annual dressing of compost, or nitrogen rich-fertilizer to increase the foliage a few weeks prior to blooming.
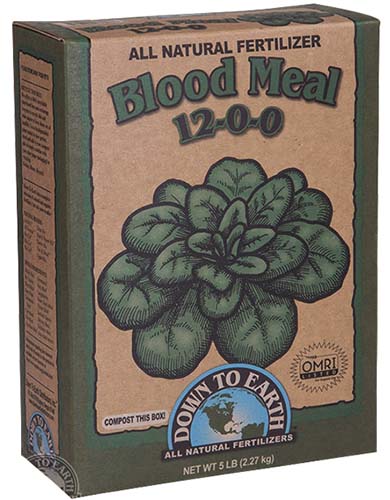
Down to Earth blood meal, available at Arbico Organics, or Neptune’s Harvest fish emulsion, from Terrain, both work well.
Don’t use fish emulsion, blood meal, or manure if you’re growing indoors! The smell can be… unpleasant.
Personally, I prefer to be liberal with the well-aged compost. I work it into the soil at planting time, and side-dress all my mint plants with it a week or two before the blossoms appear.
Growing Tips
- Keep soil moist but not waterlogged
- Plant in full sun to part shade
- Keep plants in check through pruning and dividing
Cultivars to Select
As mentioned, peppermint will not grow from seed. You can find nursery starts at your local garden center or online.
Plants will often be generically labelled as “peppermint,” but in addition, there are a number of cultivars available – though these can often be difficult to find.
Mentha x piperita – Peppermint
You can find a set of three peppermint plants available at Burpee.
Black Mitcham
‘Black Mitcham’ (M. x piperita var. vulgaris) is one of the most common varieties grown by commercial farmers.
It’s sometimes called ‘Mitcham Mint,’ as well as black or English peppermint.
This cultivar has violet-colored leaves and stems. Unfortunately, as with most varieties, it’s susceptible to verticillium wilt.
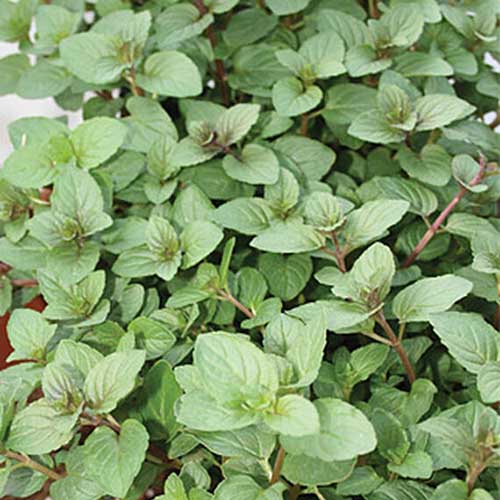
Candymint
‘Candymint,’ also known as ‘Candy Mint’ or ‘Candy Peppermint,’ has a more intense flavor than the standard peppermint.
It has a compact growth habit, topping out at about 16 inches tall, with deep red stems.
Chocolate
M. x piperita ‘Chocolate’ doesn’t smell or taste much like chocolate, but more like a peppermint patty.
If you’re looking for a variety to use in chocolate desserts, this is an ideal choice.
To add this cultivar to your garden, you can find a set of three plants available at Burpee.
Eau de Cologne
‘Eau de Cologne’ (M. x piperita var. citrata), also known as orange or bergamot mint, has an aroma reminiscent of lemon.
It has a slight note of citrus, and is popular for making perfume and cologne. The scent and flavor is a little too pungent to use in cooking.
This cultivar is less susceptible to verticillium wilt.
Lime
‘Lime’ (M. x piperita var. citrata) has crinkly, bronze-green leaves and a pronounced lime scent.
It has a slightly fruity taste, which makes it ideal for use in drinks and cocktails, or as a garnish on summer salads.
Todd’s Mitcham
‘Todd’s Mitcham’ is a commercial cultivar bred in the 1950s to have some disease resistance.
It isn’t as susceptible to verticillium wilt as most other varieties. Otherwise, it’s similar to ‘Black Mitcham,’ described above.
Variegated
Variegated peppermint (M. x piperita ‘Variegata’) is a compact cultivar that grows to just 14 inches tall, with the same peppery flavor and aroma as peppermint.
The leaves are two-toned with a creamy, green variegation. This type should be protected from the afternoon sun.
You can manage this by either planting it in a spot that gets afternoon shade, or growing it in a container so you can move it out of the sun during the hottest part of the day.
This variety is slower growing. Be sure to cut any pure green stems or the plant may gradually become entirely green.
White
‘White’ peppermint (M. x piperita) is another commercial cultivar considered to have a more refined flavor and higher concentration of oils than ‘Black Mitcham.’
For this reason, it commands a higher price. That might make you wonder why every commercial mint farmer isn’t growing this type.
The problem is, it’s even more susceptible to disease and has a slower growth habit than M. x piperita var. vulgaris.
This variety has pure green stems and leaves.
Managing Pests and Disease
One of the things I love about mint besides its flavor and scent is that it’s less bothered by pests and disease than some other plants.
That doesn’t mean you’re off the hook entirely, however. There are a few pests and diseases to keep an eye out for.
Pests
M. x piperita plants are resistant to deer, rabbits, and rodents. Aphids, thrips, and spider mites can sometimes cause minor problems.
Alfalfa and Cabbage Loopers
The alfalfa looper (Autographa californica) and cabbage looper (Trichoplusia ni) are moth larvae that are happy to nibble on the leaves of your mint plants.
They both look like green inch-long caterpillars. You can identify a looper because of the way it arches the middle of the body as it moves, so its back and front legs meet.
This pest feeds on the foliage and you may notice ragged holes on the leaf margins. A large infestation can completely defoliate a plant.
The bioinsecticides Bacillus thuringiensis and spinosad are effective controls if you have a large problem on your hands.
Otherwise, you can just toss out the chewed leaves when you harvest. Most of the time, the damage occurs early in the season and plants repair themselves before harvest time arrives.
Read more about controlling cabbage loopers here.
Armyworms
The Bertha armyworm (Mamestra configurata) is the larvae of a mottled brown moth. It can vary in appearance, with coloring that ranges from pale green to black, and it may have yellow lines along its body.
They start to appear in late June or early July, nibbling on the leaves of your mint plants.
If you don’t have a massive infestation, you can just shake them off your plant. Place a piece of paper under your plants and gently shake the stems.
This will dislodge the larvae. Then, roll up the paper and dispose of them.
If you have a large infestation that’s decimating your crop, you’ll need to turn to pesticides or bioinsecticides.
A bioinsecticide containing the bacteria Burkholderia spp., such as Venerate XC, is generally effective.
Learn more about armyworm identification and control.
Cutworms
A variety of cutworms may also enjoy munching on your peppermint: the mint cutworm (Heliothis phloxiphaga), the spotted cutworm (Xestia c-nigrum), and the variegated cutworm (Peridroma saucia).
Mint cutworms are the largest of the bunch, measuring one to two inches long, with yellow, tan, or green bodies and black spots.
Spotted cutworms are about an inch long and are dark brown or black, with triangular markings on their backs. Variegated cutworms are the same size and are brown or tan with white or yellow irregular markings.
They do the same damage as armyworms, nibbling on leaves, but they don’t tend to cut plants off at the base like some other types of cutworms.
Handpick cutworms if you see them, or you can use an insecticidal soap in the case of a large infestation.
Find more tips on combating cutworm infestations here.
Flea Beetles
Flea beetles are common garden pests that chew holes through plant leaves. The mint flea beetle (Longitarsus waterhousei) loves plants in the Mentha genus.
The larvae feed on the roots and tunnel into the rhizomes, stunting growth and causing plants to wilt.
Flea beetles aren’t usually a problem in established plants.
Learn more about how to manage flea beetles with this guide.
Two-Spotted Spider Mites
The two-spotted spider mite (Tetranychus urticae) is a tiny arachnid that is usually found on the underside of plant leaves.
You’ll often see silky webbing on your plants before you notice these tiny pests. They’re typically translucent; yellow, orange, or light brown; and 0.25-0.5 millimeters long. They have dark spots on the side of their bodies.
Beyond sucking the life out of your plants, they can also spread rust. They are a particular problem in hot, dry, dusty weather.
The first line of attack is to keep your plants well-watered. This creates a less attractive environment for the mites.
Then, if you spot them on your plants, blast them with a strong spray of water from the hose to knock them loose. This can often be enough to control the population.
In the case of a large infestation, you can treat with neem oil, according to the package instructions.
Disease
All types of mint are susceptible to fungal disease, and peppermint is no exception.
As a side note, I will say that in my two decades of growing mint, peppermint and its cultivars tend to have problems with rust and powdery mildew more often than spearmint, so be diligent about prevention.
Mint Leaf Rust
Mint leaf rust is caused by the fungus Puccinia menthae. Keep an eye out for rusty red, orange, or yellow spots on the underside of leaves. Foliage may eventually turn dark and die off.
This fungus thrives in damp, moist conditions. That’s why it’s important to water the soil rather than the foliage of your plants.
You should also try to water in the morning rather than the evening, so leaves have time to dry off in the sun.
Cut away any infected parts of the plant. If the disease continues to spread, pull your peppermint plants and don’t grow anything in the Mentha genus in that area for at least five years.
Powdery Mildew
Any gardener who sticks at it long enough will encounter powdery mildew. There are many types, but the one that bothers Mentha plants is caused by the fungus Erysiphe cichoracearum.
It thrives in dry conditions with warm or hot temperatures.
This disease causes round, powdery lesions on foliage that can look a bit like your plant has been dusted in flour. It may cause stunted growth, but it generally won’t destroy your plants.
Spray your plant with a 50-50 mix of milk and water to help control it.
You can also use a spray made from one tablespoon dish soap and one tablespoon baking soda dissolved in a gallon of water.
Verticillium Wilt
Verticillium wilt, often just called vert, is a disease caused by the fungus Verticillium dahliae. It is perhaps the most serious disease that can affect your peppermint, and has caused enormous losses for commercial growers.
Once the fungus has taken up residence in your soil, it’s very difficult to eliminate. It also attacks potato plants.
Depending on the severity of the infection, plants may not show any signs of disease. Leaves may twist up, curl, and/or turn yellow or bronze.
The lower leaves of the plant may begin to drop off, followed by the rest of the leaves. In the case of a severe infection, the plant will eventually die off.
Stressed plants are more susceptible, so make sure you provide adequate water.
In the case of a bad infection, pull your plants, dispose of them, and don’t plant any type of mint in that location for at least 10 years.
Harvesting
The ideal time to harvest is just as the plants start to bloom. That’s when the oil concentration – and the flavor – are at their peak. You should also harvest early in the day for the strongest flavor.
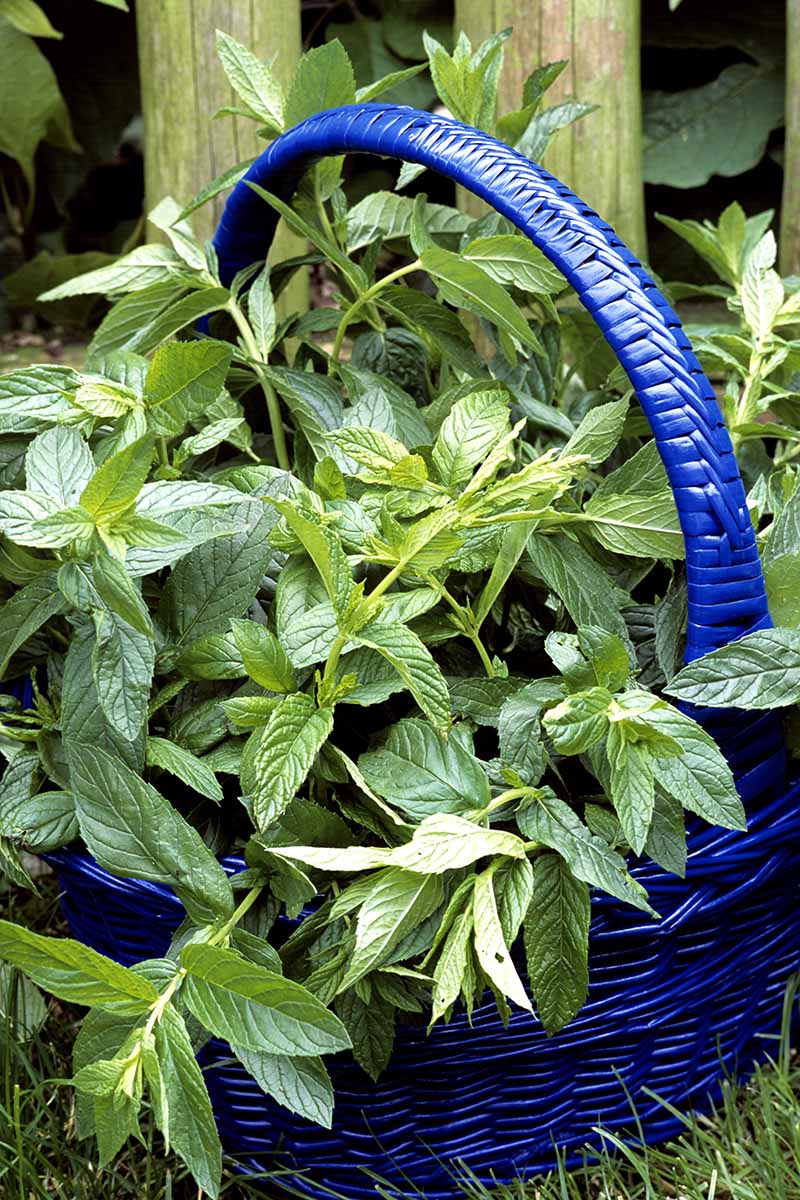
You can either cut stems down to about an inch above the soil, or snip off a few inches from the top.
The stems will grow back and you’ll have more to harvest during the remainder of the growing season. But they may not reach this perfect peak of flavor again until the following year.
If you feel like making some mint tea or need a garnish for your chocolate brownies, feel free to pluck a few leaves or stems as you need them. Your plants will grow back quickly enough.
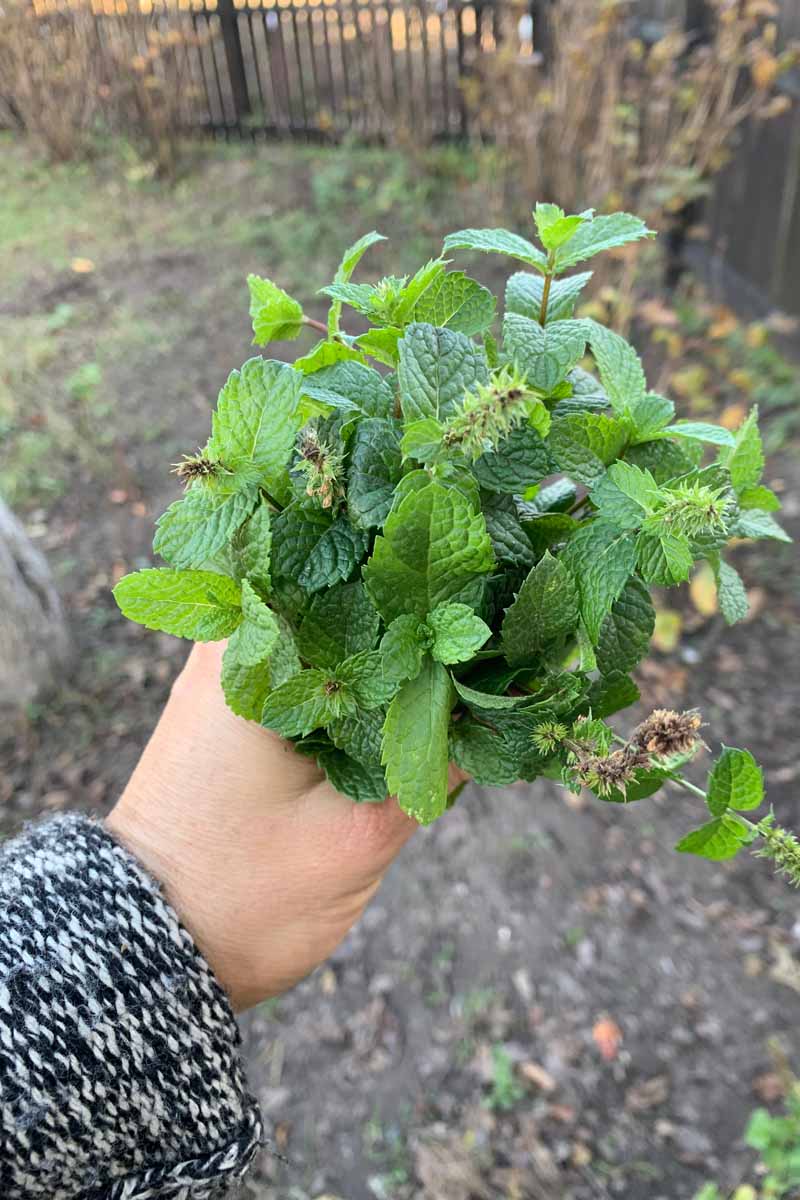
It’s always a good idea to continue to cut back the stems periodically throughout the year. This keeps the plant under control and encourages bushier growth.
At the end of the growing season, you can cut your entire plant down to an inch above the soil. This helps to control its spread and gives you a last-minute batch of tasty herbs for the coming winter.
Preserving
If you plan to use your leaves within the week, you can wrap them in a damp paper towel and store them in a plastic bag in the refrigerator.
You can also stand the stems upright in water as you would a bouquet of flowers, and place in the fridge.
Peppermint leaves dry well. You can bundle them up and hang them in a cool, dry, protected space for several weeks.
You can also lay the leaves out on a cookie sheet and bake them on the lowest setting of your oven until they’re crisp.
I lay the stems out on a screen for a few days in a dry, protected area with good air circulation.
Drying the leaves mellows out the menthol flavor a bit, so you lose some of that pungent, peppery bite.
That can be a good or bad thing depending on how you plan to use them, so keep that in mind.
Read more about drying fresh herbs here.
You can also freeze the leaves. To do this, wash them and place them on a cookie sheet and put them in the freezer.
When they’re frozen, place them in a sealable bag and store them in the freezer for up to six months.
You can also suspend a leaf or two in ice cubes to use in cocktails.
Read more about freezing herbs here.
Recipes and Cooking Ideas
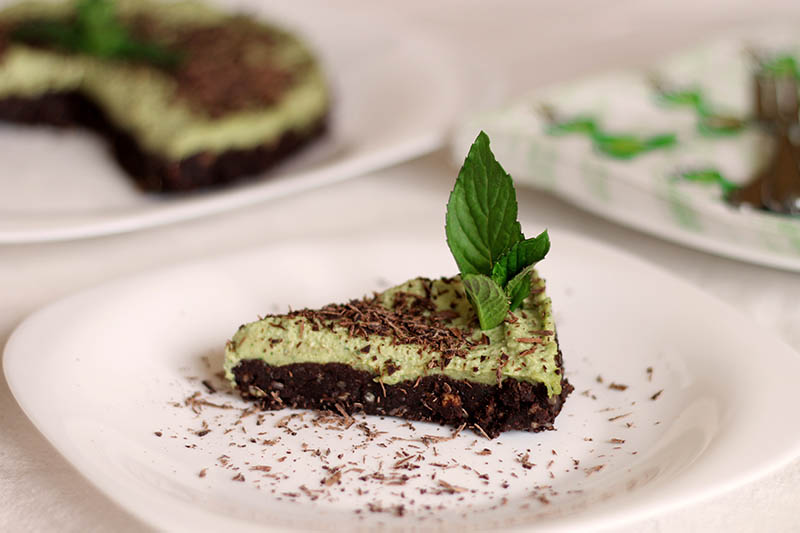
Two words: peppermint chocolate. If you’re looking for a way to team your peppermint up with something sweet, you can’t go wrong with chocolate brownies, cake, cookies, candy, hot chocolate, or ice cream.
Fresh leaves give fresh fruit salads a peppery punch.
Okay, I’ve talked a lot about how great it is in desserts. I can’t even imagine the winter holidays at my house without peppermint bark and ice cream. But the zingy herb is delicious in savory dishes, too.
Dried, chopped, and tossed with some butter, it makes a unique popcorn topping. Fresh or dried peppermint can complement lamb, poultry, or fish dishes.
Chopped fresh and sprinkled on prosciutto pizza, it’s delicious. The trick is to use a small amount, because it has such a bold flavor.

You can also, of course, use it in drinks. Why not try this Dark Mint Dream cocktail from our sister site, Foodal?
Don’t forget to use the leaves to garnish a chocolate eggnog mocha.
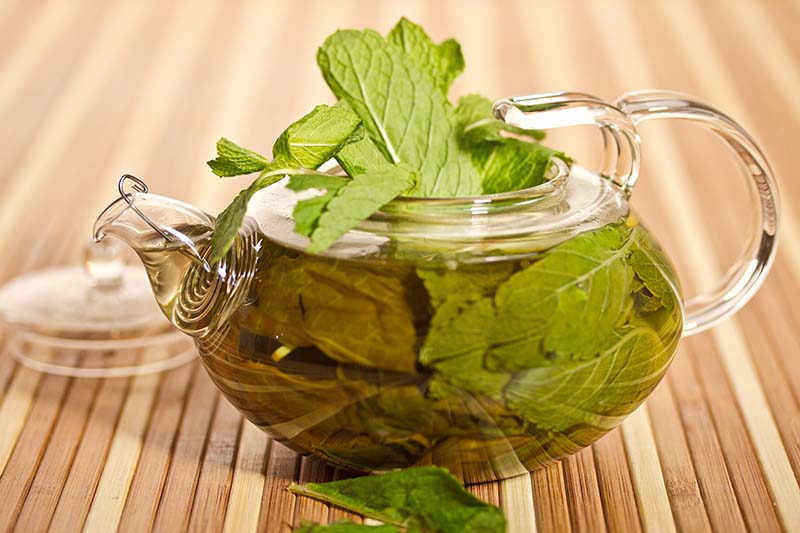
And let’s not forget about mint tea. Add a handful of fresh or dried leaves to a teapot and allow to steep for a few minutes for a refreshing hot drink.
For more cooking inspiration, check out these mint recipes on our sister site, Foodal.
Quick Reference Growing Guide
| Plant Type: | Perennial herb | Tolerance: | Frost |
| Native to: | Mediterranean | Maintenance: | Low |
| Hardiness (USDA Zone): | 3-7 | Soil Type: | Clay, loamy, clay |
| Season: | Spring-fall | Soil pH: | 6.0-7.5 |
| Exposure: | Full sun to part shade | Soil Drainage: | Well-draining |
| Growth Rate: | Fast | Attracts: | Bees, butterflies, and other pollinators |
| Spacing: | 18-24 inches | Companion Planting: | Broccoli, cabbage, carrots, eggplant, lettuce, peas, peppers |
| Planting Depth: | Same depth as root ball | Avoid Planting With: | Potatoes |
| Height: | 1-3 feet | Family: | Lamiaceae |
| Spread: | 2 feet (vigorous) | Genus: | Mentha |
| Water Needs: | High | Species: | x piperita |
| Common Pests: | Alfalfa looper, armyworm, cutworm, cabbage looper, flea beetles, nematodes, two spotted spider mites | Common Disease: | Mint rust, powdery mildew, verticillium wilt |
A Peppery Punch in the Herb Garden
Whether or not you love desserts, peppermint makes a marvelous addition to any herb garden.
Having a patch of the pungent herb is a sensory experience. When the sun warms the leaves I sometimes find myself taking a moment to pause and enjoy the fragrance.
In the summer when the honeybees are buzzing around the plants, I like to soak in the sound of these industrious insects.
The fact that you don’t have to fuss or baby the plants makes it well worth giving this tasty herb a place in your yard.
Are you growing peppermint in your herb garden? What’s your favorite way to use your harvest? Let me know in the comments below!
And for more information about growing members of the mint family in your garden, check out these guides next:


While it is true you cannot collect Peppermint seeds from a Peppermint plant that will grow, Peppermint seeds are still a thing. How else would the hybrid have been created if not by the seeds produced from the cross pollination of 2 varieties of mint…? Isn’t that how cross pollination works? You can cross pollinate, and the resulting seeds will grow a sterile hybrid, right?
That’s an interesting question and thanks for bringing the topic up! It’s true that peppermint came into being after water mint and spearmint cross-pollinated, creating the seeds that grew into peppermint. But if you tried to cross-pollinate those same plants again, the resulting cross would be very unlikely to grow into the peppermint we have today. Instead, you’d end up with a range of diverse new mints. Of course, if you kept at it long enough, you’d probably be able to eventually reproduce peppermint, and then you would have peppermint seeds. So technically, yes, peppermint seeds could exist. When it… Read more »
Do you have to put peppermint inside for winter freezes?
Hi Michael, nope! Peppermint is hardy to USDA Zone 3, which means it can survive down to about -19°F. A freeze won’t even phase it.
My peppermint leaves has black fungi on them I’ve been pulling them out so the rest of my peppermint don’t get infected. Is that the right thing to do?
Hi Denise, that’s certainly one way of tackling the problem. You can also use copper fungicide to spray the plants and kill any fungal pathogens. Arbico Organics carries various sizes of copper fungicide if that’s of interest. If you go that route, spray once every two weeks. Otherwise, keep picking off any symptomatic leaves and be sure to water at the soil level, not on the leaves. You can also thin out the plant a little to improve air circulation.