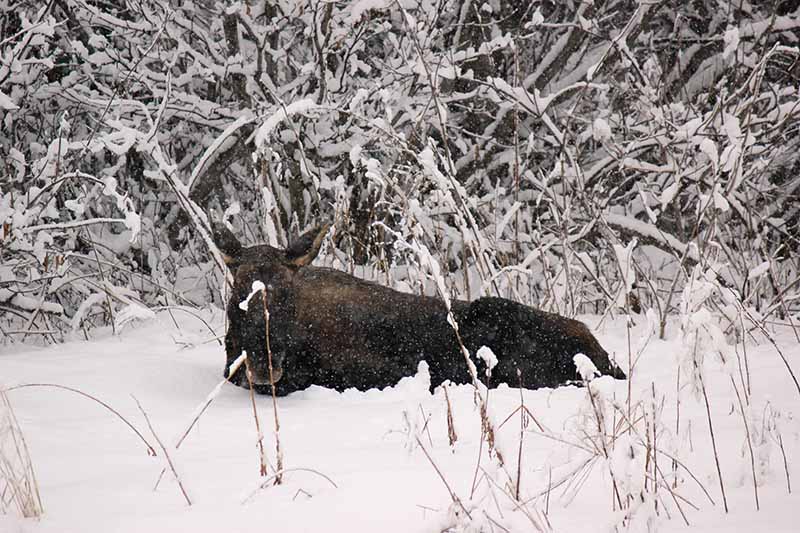
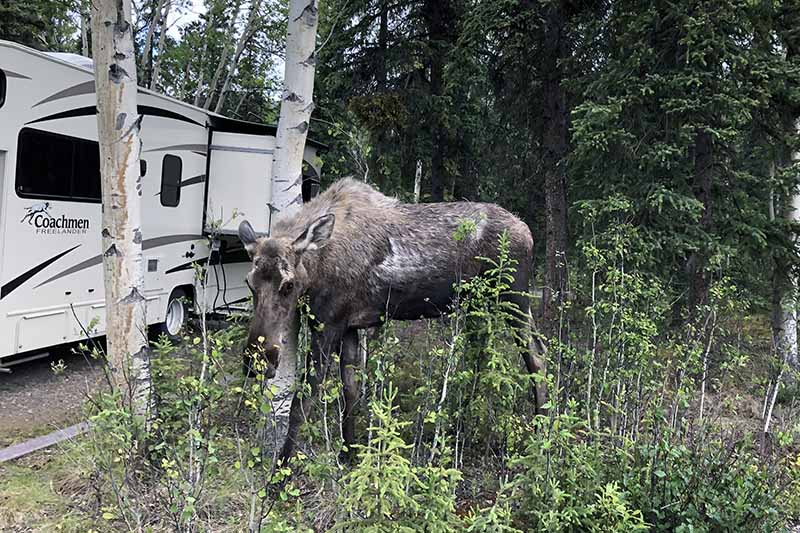
I’ll never forget the morning when I first woke up to the sight of a moose lying down in my backyard.
Well, two moose, actually. Young, fuzzy, and huge.
Having only recently moved into my small Alaskan home, I’d seen moose tracks in my yard plenty of times, but never the giant animals themselves.
After grabbing my young son, I dashed over to the back porch to show him the two adolescent Cervids.
We link to vendors to help you find relevant products. If you buy from one of our links, we may earn a commission.
But then I noticed that my freshly planted willow tree looked strangely sparse, like an eyebrow plucked at random.
With a yelp, I dashed to the front yard to check on my brand-new plum and apple trees.
Every single one of their leaves had been stripped off by large, moosey teeth.

Thankfully we had already harvested the fruit, but I wondered how badly the mauling would affect the trees.
Would they survive the coming winter? Would they still produce apples and plums?
Since that fateful October day, the giant creatures have devoured:
- Cabbage that I planted in a flower bed
- Half the bark on my aspen tree
- My maple tree leaves
- Plum tree branches
- A birch tree
- My sanity
My life as a gardener in Alaska has been defined by moose. Or more specifically, how to keep moose out of my garden and orchard.
My yard has no fence around the perimeter, so it’s even more of a struggle to keep animals out.
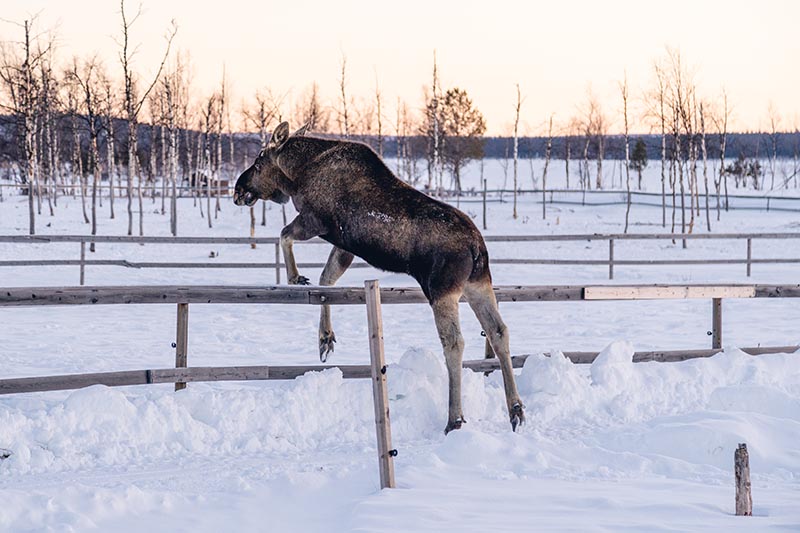
But moose can jump lower fences anyway.
If you live in Alaska, Montana, Idaho, Maine, Wyoming, Wisconsin, or any other area where the great Cervids are out to gobble up your garden, you’re in luck.
I’ve learned a thing or two about deterring the creatures from my plants while still enjoying the sight of them in my yard.
And I’m eager to share what I’ve learned with you.
Here’s what you’ll discover:
What You’ll Learn
Why Do Moose Love My Trees and Plants So Much?
When I first brought home thirteen new trees from the gardening store two years ago, my old-timer Alaskan neighbor chuckled.
“What kind of trees are those?” he said.
I listed them off. Aspen, willow, maple, birch, plum, and apple.
“The moose are gonna love those apple trees.” My neighbor then listed off all the tried-and-not-so-trues of deterring the animals:
Hang a bar of Irish Spring soap in the trees. Drape tinsel all over the branches. Tie dryer sheets, cut into strips, onto the branches.
It all sounded wacky and strange, and my neighbor ended with, “I planted a mountain ash tree a couple years ago and the moose ate it all.”
I could hardly imagine such a thing. And I was confident that my chosen deterrent method would work.
It did and it didn’t, which you’ll learn more about in just a moment.
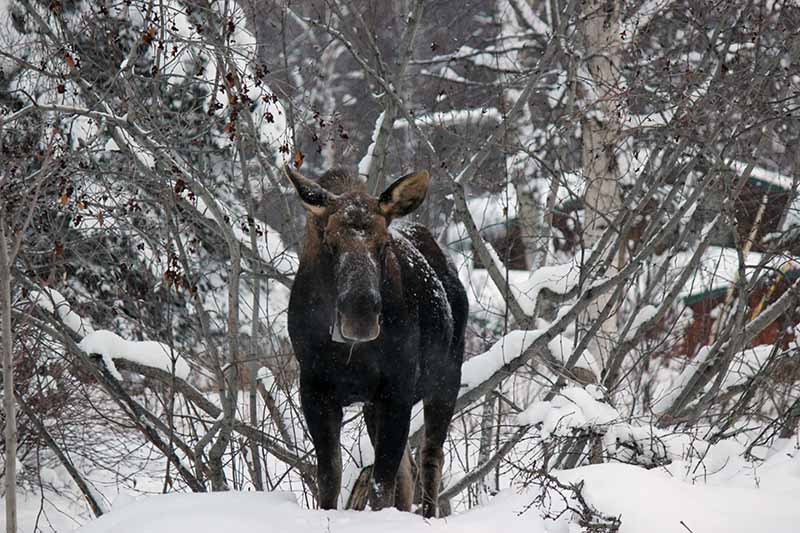
First, a note about these magnificent mammals (Alces alces), which are part of the deer family, Cervidae.
They grow up to six feet tall, from their hooves to their shoulders, and weigh around 1,000 pounds.
The bulls grow impressive antlers that they shed and regrow from scratch each year.

And while you probably don’t want to get in the way of a bull moose and his antlers, it’s even scarier to find yourself out on the trail near a mama moose and her babies.
Females will use their hooves to trample anyone who comes close to those precious fluffy babes.
As long as you respect the animals, though, they’re not ferocious.
Unless you’re a garden or an orchard. Because like deer, moose are herbivores.
But they’re no ordinary herbivores. Due to their tall stature and heavy bodies, these Cervids tend to avoid eating low-lying grasses and instead set their sights on trees.
It makes sense, as the twigs, leaves, bark, and branches are at the perfect height or within easy reach of those long, strong necks.
The etymological foundation of the word “moose,” which is the animal’s common North American name (it’s called an elk in British English, not to be confused with Cervus canadensis) suggests that the creatures love to decimate trees.
In the Algonquian languages – which include the languages spoken by Narragansett, Abenaki, Wampanoag, and additional nations native to northeastern states, parts of the Midwest, and much of Canada – animals are named after their key attributes or customs.
For example, one Algonquian word for fly is “oochaus,” which translates to “animal moving all about.”
So it follows that one of the Algonquian words for the giant Cervids – moosu – translates to “he who strips off.”
If it could talk, my aspen tree would tell you that that’s exactly what a moose did to it this past winter.
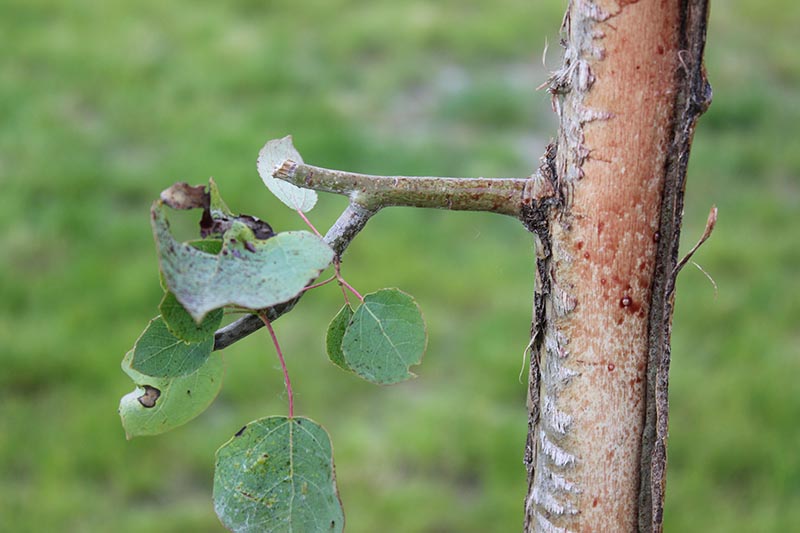
Aspen trees are often found in a moose’s native habitat, and the tender bark is one of their favorite foods.
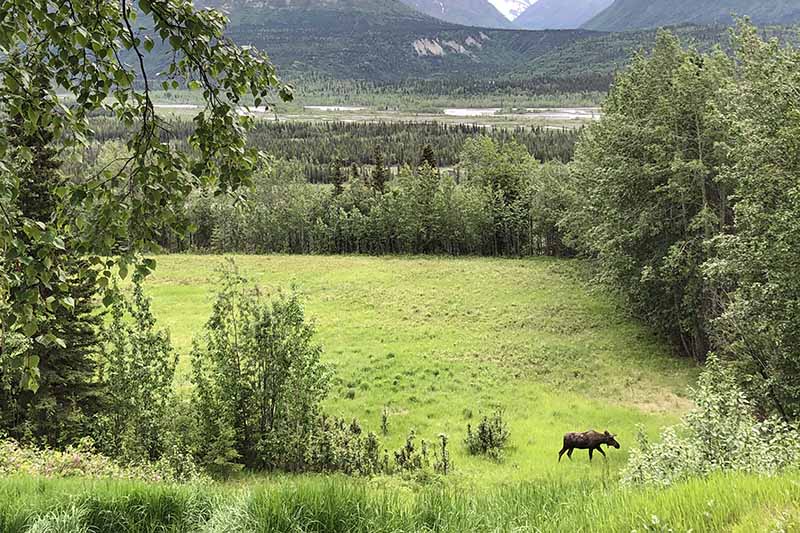
While the animals may visit your garden or orchard in the summer, they’re most likely to seek out nutrition in the fall, winter, and early spring, when food is scarce in the forests and mountains beyond our home gardens.
Still, I had a moose come into the yard last week (at the end of June!) and nuzzle my maple tree leaves. My husband was able to scare it away with a shout.
Shouting at them does not work in the wintertime, by the way. I’ve literally bellowed at the moose to get away from my trees in the winter and they completely ignore me and keep eating.
So there’s never a wrong time to learn about how to keep your plants safe from these critters.
And while they definitely tend to eat trees more than grasses, they won’t hesitate to munch from your vegetable garden, too.
What’s growing in there is a lot tastier than grass, after all.
The Top Methods of Moose Damage Prevention
Now that you know why moose crave the fruits of your labor, it’s time to figure out the best ways to deter them.
Let’s start with the most foolproof method of them all.
Construct a Barrier Fence
Any Alaskan will tell you that the single most effective way to keep the hungry animals away from your trees and garden is to erect a fence around said tree or garden.
I know this because many Alaskans told me the moose would eat my trees if I didn’t do this.
Since I had just spent a lot of cash on the trees, I didn’t feel like dropping even more on fencing materials.
But that same October day when the moose stripped my apple and plum trees of their leaves, I went to the local hardware store, bought supplies for four fences, and built them that very night.
With my husband’s help, it took three hours.
It felt urgent to finish them that night.
This is because moose won’t leave your barren trees alone after the first attack. They’ll simply come back and finish what they started.
Of the thirteen trees I planted when I moved into my current house, four are fruit trees. We constructed fences around each of these after the attack.
And the morning after I built those fences, the moose came back.
They started by nosing the trees in the backyard.
I went out and yelled at them to leave. So they ran toward the front of the house where the little apple and plum orchard is.
I caught a shot of a moose running past my window. It paused and looked back at me.
Then it saw the fences I’d built around the apple trees and it ran in the other direction.
The trees survived the winter and grew leaves and fruits again the following summer, but nearly two years later there are still barren patches on some branches where the bark hasn’t recovered.
I should have built fences when I first planted the trees, but alas, all I can do is hope you learn from my failure.
If you or anyone in your area has ever seen a moose in the neighborhood, go get fence-building supplies now.
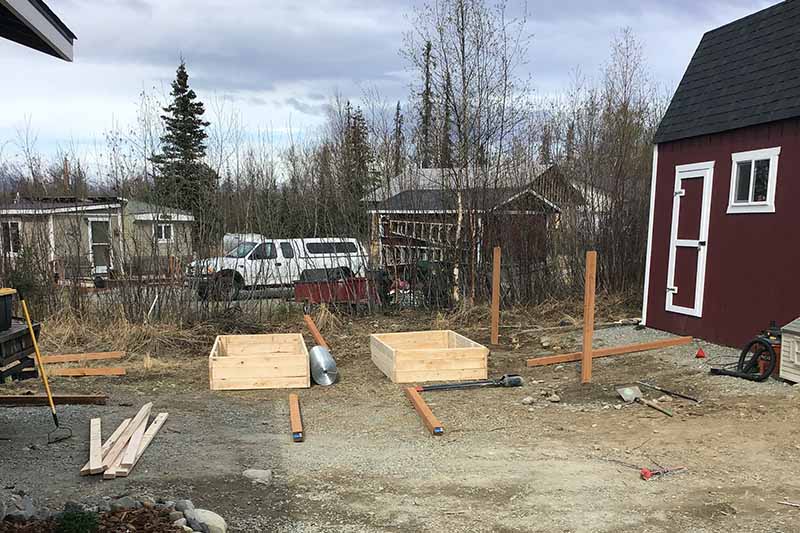
This goes for your garden, too. When my husband built me a new garden this year, he also built a 5.5-foot-tall fence around it to keep the animals out.
Trust me on the fence thing. Your trees and garden will thank you.
Not sure how to get started? Here’s how we built our tree and garden fences.
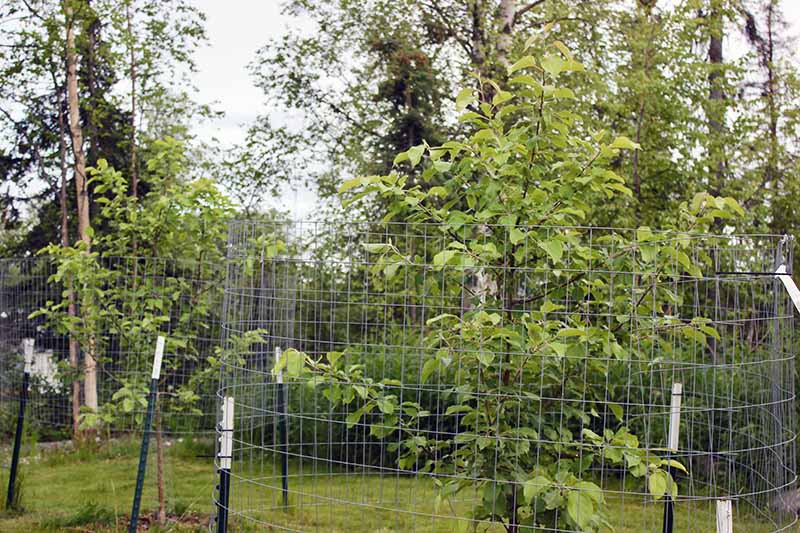
How to Build a Fence Around Your Young Trees
Before we get started, just know that this isn’t an especially elegant or beautiful fence design, but it gets the job done.
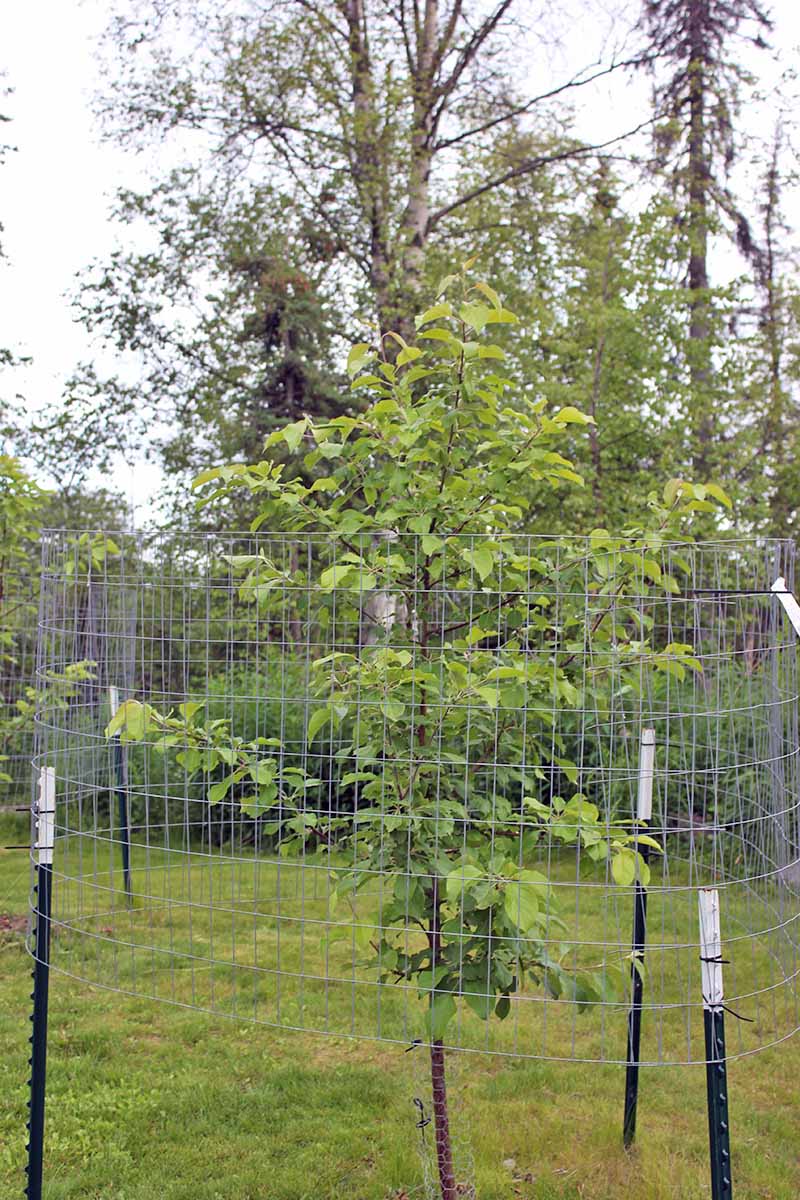
Once your trees are large and fully mature, they’ll be able to withstand moose snacking on them without much of an issue. It’ll be like free pruning for you.
But it takes years for trees to get big enough for that, so until then you’ll have to enjoy the sight of your tree from behind this simple Alaskan mostly-moose-proof fence.
Here’s what we bought before building:
- 4-foot steel welded wire, 100 feet or more as needed
- 5-foot steel fence U-posts, 3 per tree
- Several bags of 100 zip ties
- A mallet, for driving posts into the ground
- Wire-cutting scissors
- A shovel (or post-hole digger)
Step 1 – Mark Out Hole Placement
To avoid the frustration of putting down a fence post that you later realize has wonky placement, mark out where you want the posts to go before you do anything else.
Use rocks to mark a “triangle” of post holes around your tree, about two to three feet apart.
There should be at least two feet between the trunk and the fencing, but not a whole lot more. There shouldn’t be any room for them to land if the moose decides to attempt a jump.
Step 2 – Dig the Post Holes
Now that you’ve marked where you want the holes to go, you can dig post holes with the confidence that you won’t have to re-do them.
With a post-hole digger or a shovel, dig down 12 inches or a little more. Insert the U-post and pack dirt in around it.
Step 3 – Measure the Fencing Material
You could technically get all fancy in this step and whip out a tape measure, but I like to do this part the simple way.
And besides, the erected U-posts pretty much do your measuring work for you, as you’ll see below.
Once all three posts are up, wrap the fencing around the posts and cut the wire, leaving some overlap so that you can attach the zip ties.
Make sure the fencing covers the branches as much as possible. A suitable fence will reach six to eight feet in height.
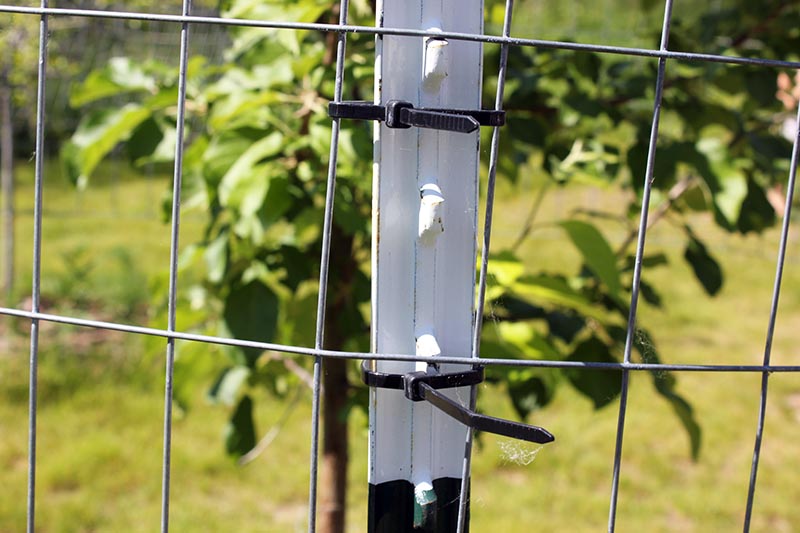
Step 4 – Secure the Fencing to the U-Posts
This last step is the easiest of all. A sweet reward for all the sweat of the first few steps, am I right?
All you have to do is this: zip tie the fencing to the U-posts.
That’s it! While you can technically build a fence around the entire orchard, this can be more expensive and awkward looking.
And besides, moose and deer can jump fences if there’s room inside the fenced area for them to move around in.
As a general rule, a moose-resistant fence should be about six to eight feet tall from where the post meets the ground to where the steel welded wire ends.
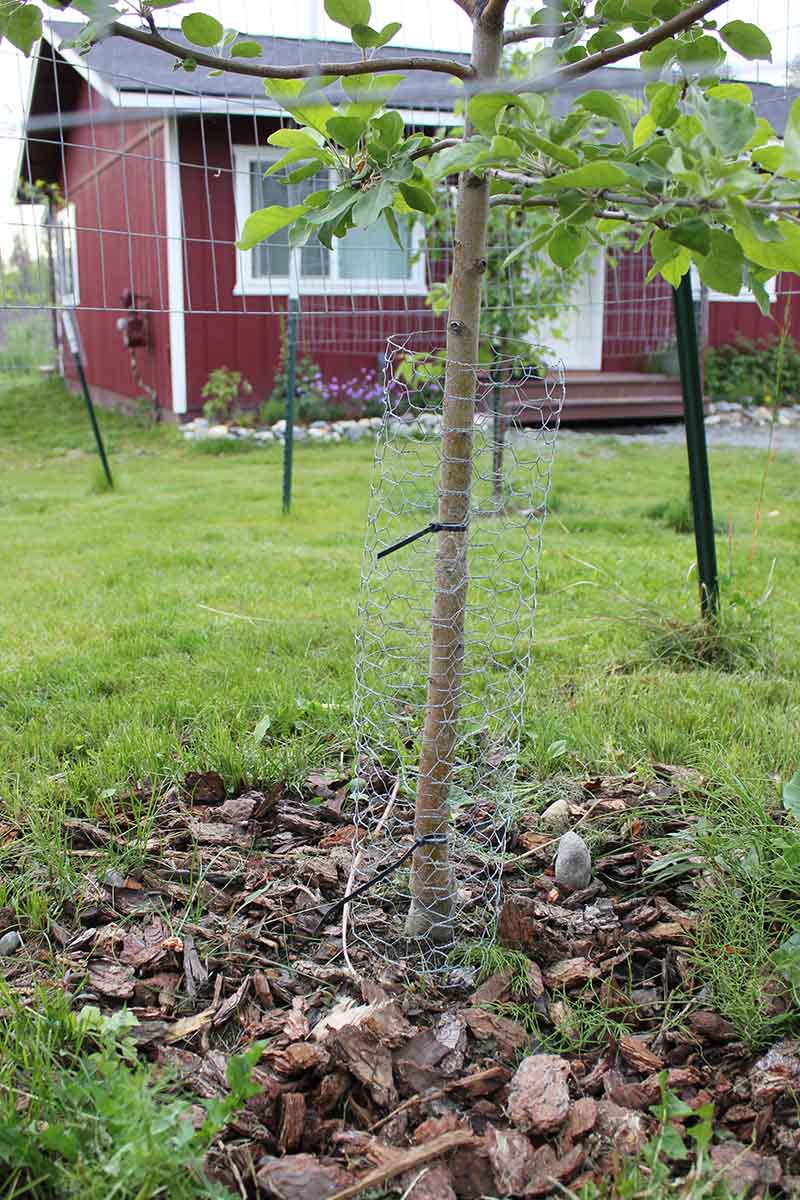
To protect the trunks – because yes, moose can absolutely bend down and strip bark off the lower portion of a tree when they want to – wrap chicken wire loosely around them and tie it off with zip ties.
Just make sure the wire isn’t touching the trunk of your tree.
How to Build a Fence Around Your Garden
First, a caveat: a very determined moose will plow into a fence no matter what, unless it’s a 10-foot concrete wall or something.
But so far, none have bothered to break into my fenced-in garden or orchard.
I’m pretty sure it’s because there are enough wild willows growing all along the edges of my property, and they tend to eat those instead of my apple trees and veggies these days.
This is fine with me. I actually love it when the animals visit. I never get tired of seeing their gorgeous, gangly bodies in my yard.
They were here first, after all, and as long as they don’t eat the crops and trees I planted, I’m happy.
If you need help building a simple fence around the perimeter of your garden, here’s how we built ours.
It’s not perfect, but it does the trick – without breaking the bank.
Before you start building your fence, you’ll need to have a few items in your tool box:
- Tape measure
- Circular saw or table saw (optional)
- Hammer
- Power drill
- Wire cutters
- Spirit level
- Post-hole digger
Then, you’ll need some supplies. This is what was on my shopping list:
- A 50- or 100-foot roll of 5-foot-tall steel welded wire fencing
- Nine 8-foot pressure-treated posts, like these. You may need more or fewer posts, depending on the size of your garden. You can also use U-posts instead of wooden posts, but I’ve found they don’t look as imposing. You’re definitely going for intimidation here.
- Rapid set concrete mix if you want extra-sturdy posts. We did ours without concrete so that we can easily expand the fence next year to add another raised bed.
- Two 5-foot, two 4-foot, and one 5.5-foot (or slightly smaller – you may need to trim to size once you’ve built the gate frame) pieces of 2 x 4 lumber for a simple gate. You can get these pieces cut for you at the hardware store or use a saw to do it yourself.
- Exterior wood screws
- A gate latch, such as this
Now, onto the steps to build the structure!
Step 1 – Estimate or Measure the Perimeter of the Garden
For the math-averse like me, this part isn’t the most exciting. But the good news is that the measurements don’t have to be perfect unless you want them to be!
Measure or eyeball the perimeter of the garden, first marking the four corners with rocks.
Our garden area ended up being roughly 18 feet by 13 feet. You can adjust the amount of fencing and posts to suit the size and shape of your own garden.
If your garden isn’t square or otherwise four-sided, mark out places to put posts about every six feet.
Trust me, this will work. My husband isn’t a huge fan of measuring things carefully before he builds, so our fence posts are about six to seven feet apart, except for the very carefully measured gate.
In between the corners, add rocks every six to seven feet to mark additional places for posts to go. We ended up using nine posts in total.
For the gate area, posts should be set apart as wide as the gate will be – usually around four feet.
Step 2 – Mark the Expected Soil Depth
In preparation for the grunt work of digging post holes, you’ll need to know just how far down you have to dig.
So mark each post about two feet up from the base. You’ll want to bury the posts about two to three feet deep, so this will help you to visualize that.
Our garden area wasn’t completely level, so some of the posts were closer to three feet deep, while others were sunk two feet down.
Step 3 – Dig the Post Holes
Ah, the fun part. I remember the sweaty work of digging post holes for my mom’s garden as a youngster.
Did I love it? No. But did I absolutely adore spending time in the fenced garden afterward?
Yes. And it felt even sweeter to linger there, knowing I had helped with the hard work of digging post holes!
If you have especially hard soil, you may want to hire or purchase a post hole auger, such as this, to make light work of it.
In this step, that’s exactly what you do.
One at a time, dig each post hole where you marked the rock.
Digging at least two feet down for each post is going to be a lot of work.
But just think of all the moose that won’t be eating your strawberries, cabbage, kale, carrots, tomatoes, and other goodies from your berry patch and vegetable garden!
Step 4 – Level the Posts
Before you make any permanent decisions, such as cementing posts into the holes, you’ll first have to make sure the holes are at the right depth to allow each post to be level with each other.
To check if the posts are level, lay a piece of scrap wood or one of your uncut 2x4s over two of the posts. Place the level on top.
Adjust the depth of each post until the piece of wood is level, and then move on to the next hole.
Repeat for each post.
Step 5 – Pour the Concrete
For whatever reason, my dad adores mixing concrete. When I mixed and poured it for a mailbox I put up a few years ago, I discovered I did not share that passion.
But if you do, you’re in luck! This step is all about concrete.
Mix the concrete according to package instructions and pour it into the holes, firming in the bottom of the post. Allow to set before progressing to the next step.
If you’re skipping the concrete like we did, simply refill the holes with tightly packed dirt.
Step 6 – Mark the Posts for Fence Staples
When you’re in the thick of wrapping fencing around the posts, you’ll want to know where in the heck you’re supposed to pound the first staples in.
So mark the bottom of the posts up six inches from where they’re buried.
This is where you’ll nail the fence staples to each post, allowing for a small gap at the bottom of the fence.
Step 7 – Wrap the Fencing Around the Posts
This part is thrilling, actually. My husband and I completed it within an hour because we were so excited to see the fruits of our – okay, mostly his – labor.
Get out your roll of fencing, fence staples, and hammer.

Starting to the right of the gate area, unroll the fencing. Hammer a staple into each post at the bottom, middle, and top. Make sure to pull the fencing tight between each post.
This step is easiest to accomplish with two people: one to hold and unroll the fencing, the other to hammer in the staples.
Once you finish this step, you’re almost done! Cut any excess fencing with your wire cutters.
Step 8 – Create the Gate
For this step, you’ll need a circular or table saw. Or, you can take the wood into the Home Depot or your local hardware store, where they can cut the pieces for you.
To make a five-foot-tall gate, cut the 2x4s into five pieces: two four-foot pieces, two five-foot pieces, and one 5.5-foot piece.
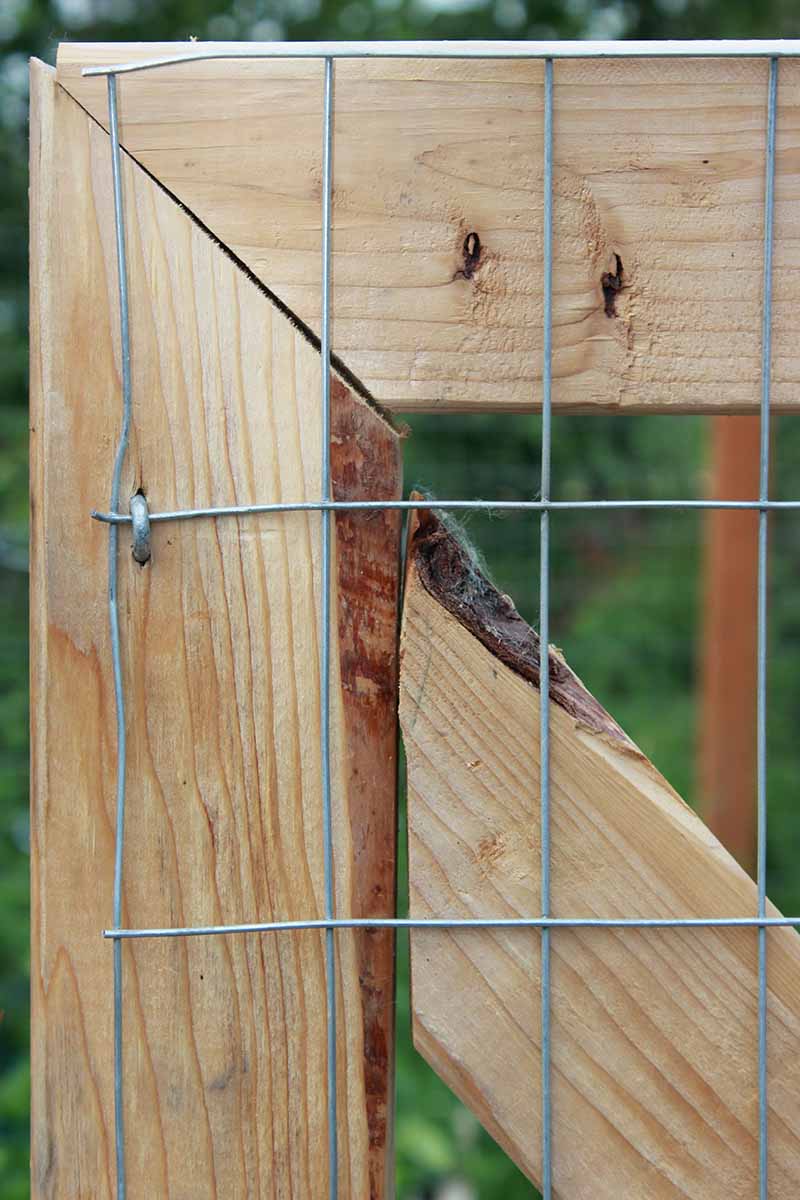
The ends should be cut at a 45° angle so that they can be screwed together.
Use a power drill to make pilot holes, then screw the two five-foot pieces and the two four-foot pieces into a door shape, to make a rectangular frame with two longer sides and two shorter sides.

Insert the final 5.5-foot piece diagonally across the frame and screw it in. This serves to keep the wire frame from bending too much.
Next, cut a five-by-four-foot section of wire fencing. Staple it to the wood frame, spacing the staples six to eight inches apart to make it secure. Trim off any excess fencing with wire cutters.
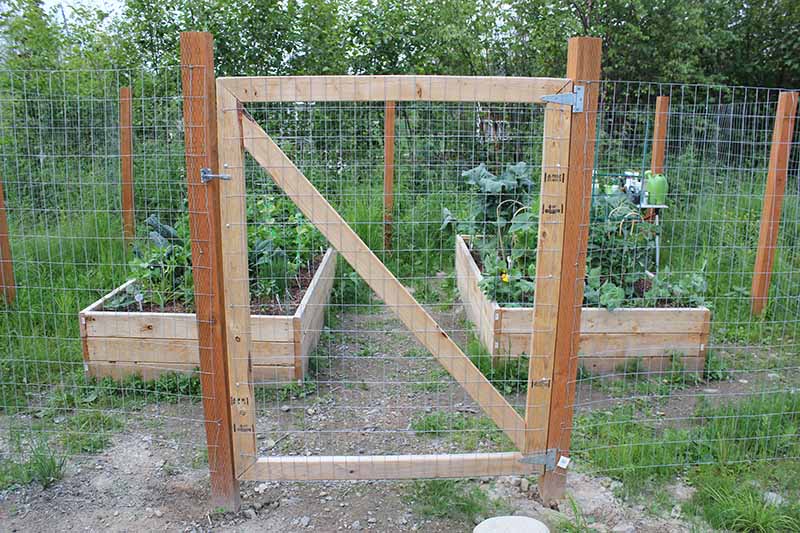
Mark the fence one inch down from the top and one inch up from the bottom. This is where you’ll put the hinges.
Affix the hinges to the gate and then to the garden post. Using screws and your power drill, attach the gate latch.
And that’s all!
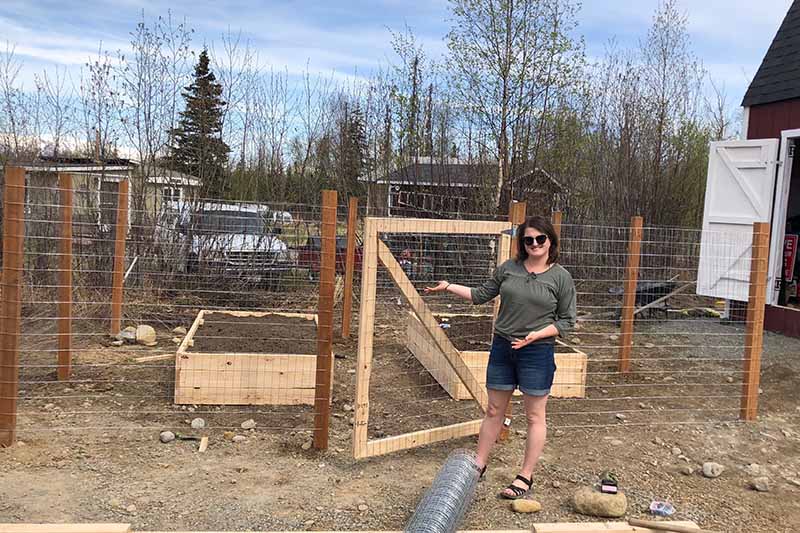
I know it’s a hefty amount of work. It took my husband about a day to do it with our three-year-old “helping.”
So if you don’t have a three-year-old, you’ll probably be a lot quicker.
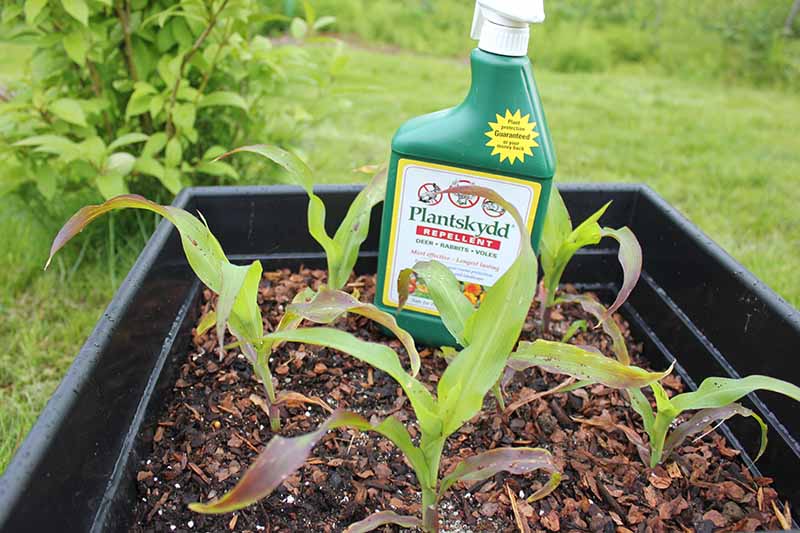
If you don’t have the resources and time to build fences around your trees and garden, the next best option is Plantskydd, which you’ll learn about below.
Use Moose Repellent Spray
I actually still use animal repellent in addition to my fences. An extra layer of protection never hurt anybody, right?
Plantskydd is a deer, moose, elk, vole, rabbit, chipmunk, and squirrel repellent spray, available in ready-to-spray or powdered form.
It’s made from dried cow or pig blood (aka blood meal), and it works by emitting a bloody scent that makes herbivores think there’s a hungry carnivore around.

Plantskydd Ready-to-Spray Moose Repellent
This is what I use in my orchard and garden. I spray the perimeter of the fenced garden, as well as the fenced trees.
It’s also the only moose protection I use on my unfenced backyard trees.
While I have had mixed results with Plantskydd, many Alaskan gardeners swear by it. I think the blame for any failures I’ve experienced while using it rests squarely on me.
The best thing about this product is that it’s safe to spray on fruit and vegetable plants, shrubs, and trees. Once it dries, it’s safe for kids and dogs. Plus, it’s rain-fast after three hours and doesn’t harm bees, birds, or butterflies.
For maximum effectiveness, you have to spray all parts of the plant, including new growth, every two to four weeks.
Before the Cervids ate my apple tree leaves, I’d sprayed them with Plantskydd at the beginning of the summer.
I followed the spraying instructions for two or three months, but by the time fall rolled around, I’d stopped spraying regularly.
And that’s when A. alces came.
The apples and plums have now grown taller than the six-foot fences, so I spray the overhanging leaves with Plantskydd to help keep the animals away.
I also spray before wintertime hits.
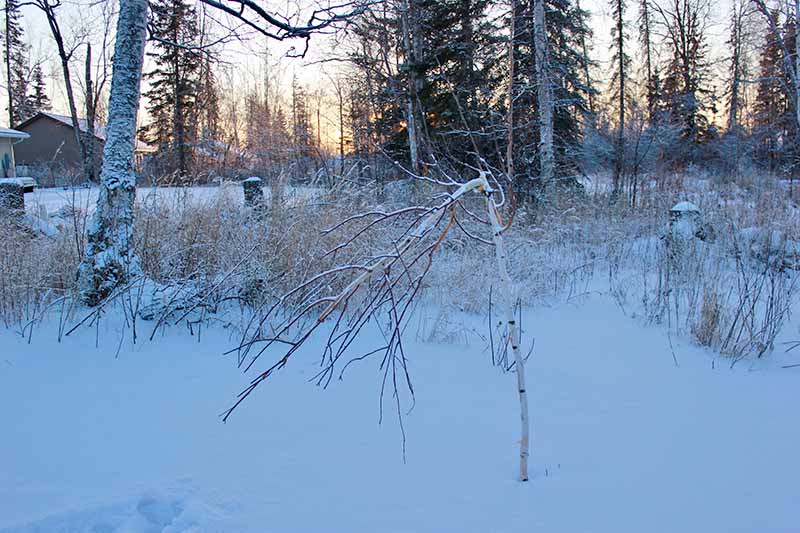
Tree World, the manufacturer of Plantskydd, recommends applying the spray every three months during the dormant season, but I didn’t follow that piece of advice either and my birch tree got chomped in half.
So the single most important thing to do if you use Plantskydd is this: follow the directions!
Set alarms or reminders on your phone to spray your garden every two weeks during the summer, and every two to three months during the dormant season, if you have one.
If you keep a schedule in your gardening journal, note this task there as well.
Also, Plantskydd doesn’t work like bear spray, where all you have to do is point and spray and the offending creature will (hopefully) go away.
One day when an A. alces came to eat my little willow tree (a cultivated one), I went out to my yard with bear spray – which can actually work to repel a charging moose – and Plantskydd.
I sprayed the tree with Plantskydd and then went back inside.
Two seconds later, the moose began to eat the Plantskydd-soaked willow tree.
To be fair, the instructions say to allow 24 hours for the product to dry on the tree. Also, you should apply it before the animals begin their browse.
Not during.
There is, however, a caveat to using Plantskydd: since it’s composed of blood meal, it’s a high-nitrogen fertilizer, too.

Alaska gardener and Anchorage Daily News gardening columnist Jeff Lowenfels recommends spraying Plantskydd around the fruits and veggies instead of on them so they don’t go wild with leaves and have a hard time bearing fruit.
I often spray the perimeter of my yard with the stuff, as well around the outside of my garden fence, apple tree fence, lower beds, and any container that’s not inside my fenced garden.
Like the popcorn I’m growing in a container far away from the sweet corn in the garden so that they don’t cross-pollinate.
Plantskydd smells a little bit like morning breath to me, but it’s a whole lot worse-smelling for herbivores.
It also leaves little brown spots on leaves and flowers, which isn’t the best, but it’s better than the plants getting eaten.
You can buy Plantskydd in powder form, which is what I originally did. But mixing it is a messy, slightly complicated process and that kept me from using the spray as often as I should.
The benefit of getting the powder is that it doesn’t expire as quickly as pre-mixed spray.
Plantskydd Powdered Moose Repellent
You can find the powder on Amazon.
Or you can buy the pre-mixed spray I mentioned earlier that lasts about three months, available on Amazon or from Walmart.
Methods That Don’t Work (Or Only Sometimes Work)
The best way to keep moose away is to erect fences around your garden and trees, and then consistently spray them with Plantskydd.
Each of these two approaches works just fine on its own, but by doubling them up, you increase the chance that the animals will be too spooked to touch your plants.
If you want to try a homespun method that some Alaskan gardeners say works okay in the summer – but not the winter, when the lack of vegetation in the mountains drives the Cervids to eat nearly anything – try the dryer sheet method.
All you need to do is cut dryer sheets into strips and tie them to the outer branches of your trees.
These strips will flutter in a light breeze, and with any luck, this will cause moose to back off.
If it’s not breezy, the moose might take a bite of a leaf and also inadvertently eat the dryer sheet. He might hate it enough to stay away.
Or he might not. I know I described this technique as “tried-and-not-so-true” above, and it’s certainly not as effective as the other options that I’ve outlined here!
Another method some people suggest is getting a watchdog to scare moose away.
But if you value your pup as a member of your family, this method won’t appeal to you. The giant Cervids can easily injure or even kill a dog.
I know, because my dog once decided to flirt with two young moose in my backyard, and they charged her several times.
It was absolutely terrifying.
She was quick enough to avoid getting trampled, but still. The sight and sound of a dog does not deter moose at all.
Another method that might work is mixing cayenne pepper with Vaseline and rubbing it on the leaves of your plants.
The idea is that moose will take a spicy bite and hopefully decide not to return.
But you may also get a spicy surprise if you don’t thoroughly wash your veggies before eating. And this method requires the moose to eat your plants before hopefully being deterred.
Plantskydd and fences, on the other hand, discourage them from ever taking that first bite.
The Joys of Living in Moose Country
Most of us who live among moose know that we’ll probably see some damage to our gardens at some point, but by using effective deterrent methods consistently throughout the year, we can reduce the chances greatly.
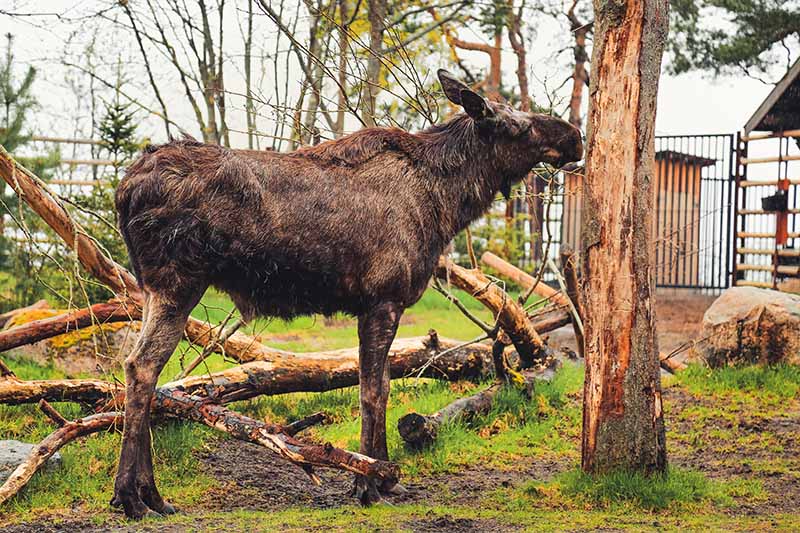
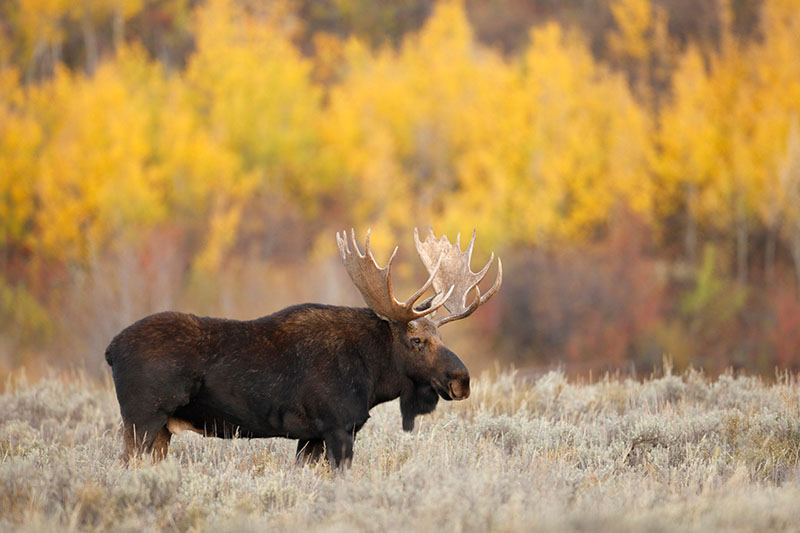
That allows us to simply enjoy watching the animals eat wild vegetation, like this male moose I saw a few weeks ago at my favorite rhubarb pie joint in Alaska, near the Matanuska Glacier.
Isn’t he a beauty?
Learning how to garden among moose is essential to living in the creatures’ original homeland.
Have you ever seen one in your yard or garden? If so, I’d love for you to share in the comments below. I’m always up for a good moose tale.
And don’t forget to check out these articles on protecting your garden from wildlife for more tips:
Photos by Laura Melchor © Ask the Experts, LLC. ALL RIGHTS RESERVED. See our TOS for more details. Product photos via Plantskydd and Walmart. Uncredited photos: Shutterstock.
Great article! And I thought the deer in our East Coast area were bad, guess it could always be worse. Hadn’t heard of Plantskydd before. Thanks for the tip!
Thank you, Paulette! Plantskydd should definitely help with deer. 🙂
Excellent article! I live in south central Alberta. Mostly farmland, but in a small acreage/woodland that borders a small city. It doesn’t seem at all like a place where moose would thrive, but it is. Four of them did a walk through our property (4 acres) again this morning. They are pruning the willow and aspen. When we bought our home, it had a 4 ft chain link fence enclosing about 1/2 acre of land. The deer kept jumping the fence, but oddly enough, the moose didn’t. We eventually had the fence rebuilt and raised to 6 feet. The deer… Read more »
Ah, I hope your willow and aspen are large enough to withstand the free pruning! I have two red maples that do okay after a moose-pruning, but my aspens are so tiny that they suffer. Plus, the moose love to strip the bark off those ones.
Thank you for reading, Margy!
Thanks for this post! Great information, I figured a fence would be required, which I will now do for the (replacement) apple tree and the other trees I have planned for this season. We have several resident moose on our land and have seen them often since we bought in north-central Alberta, however I only just started planting fruit bearing trees/bushes in the past two years. So far the only thing the darn moose hasn’t taken a sample of are the lilac bushes (she ate my apple tree down to a stump over the winter). I hadn’t heard of the… Read more »
Lilacs are nice moose deterrents! I’ve been considering planting them all around my apple trees for that very reason. I’m sorry the moose have destroyed so much. It’s truly frustrating! This winter they trimmed the tops of my apple trees for me (they’ve gotten used to the fences) but didn’t do any real damage, thankfully. In the back yard, I don’t have any fences and just use Plantskydd. It works pretty well — unless I forget to apply it. And then the moose come and I can toss bean bags in the snow near them, yell at them, and they… Read more »