Orchidaceae
Orchids may seem mysterious and rare, like the precious jewels of the plant world. But you probably encounter them – at least in their seed form – on a regular basis.
It’s quite possible you have some in your pantry or freezer. Maybe you even ate some in your yogurt with breakfast this morning.
We link to vendors to help you find relevant products. If you buy from one of our links, we may earn a commission.
I’m talking about the culinary star of the orchid world – vanilla.
So, even if you don’t have an actual orchid plant in your kitchen, if you have pure vanilla extract in your pantry, then you have a preparation made from the seeds of one member of the orchid family.
And if you’re a fan of the type of vanilla ice cream that has the little black specks in it, then you have seen, and eaten, actual orchid seeds.
Each of those little black specks is a seed. And V. planifolia is not the only orchid with minuscule seeds. Some orchid pods, of a size that you could easily hold in your hand, can contain millions of teeny tiny seeds.
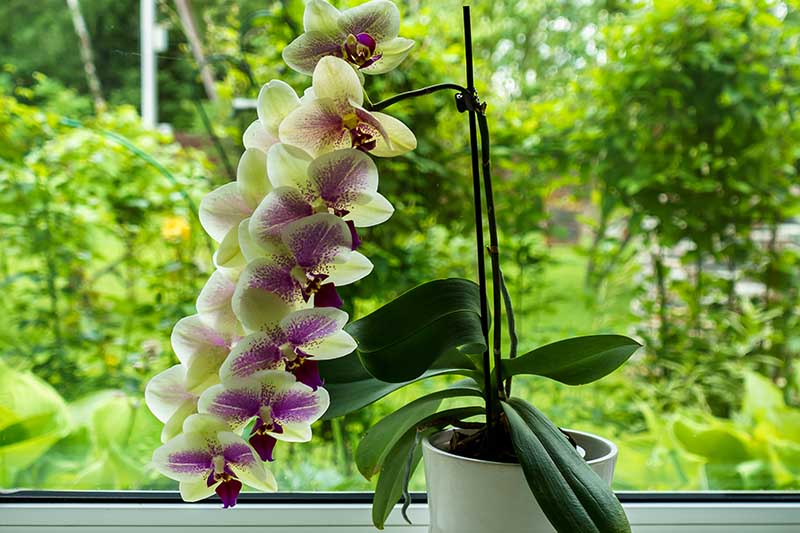
And just as vanilla brings luscious flavor to many different desserts, as houseplants, orchids bring their alluring beauty into our homes.
Growing these plants at home may be intimidating, but it doesn’t have to be difficult.
In fact, most orchids that struggle to survive fail to thrive as the result of too much attention rather than too little.
Knowledge of the right kind of extra care, on the other hand, will turn you into an orchid-growing pro. And that’s what I’m going to provide here.
If you’re ready to try your hand at growing one of these beauties as a houseplant, you’ll need to understand what caring for them entails so they can grow and flourish for as long as possible.
Ready for a crash course in growing and caring for orchids? Here’s what I’ll cover:
What You’ll Learn
What Are Orchids?
Since most of us may think of these houseplants as tropical species, it may be surprising to discover that there are native orchids to be found in most locations around the world, ranging from above the Arctic circle down to southern Patagonia.
Although this article focuses on types that can be grown as houseplants, there are even hardy orchids that can be grown outdoors in your flower garden.
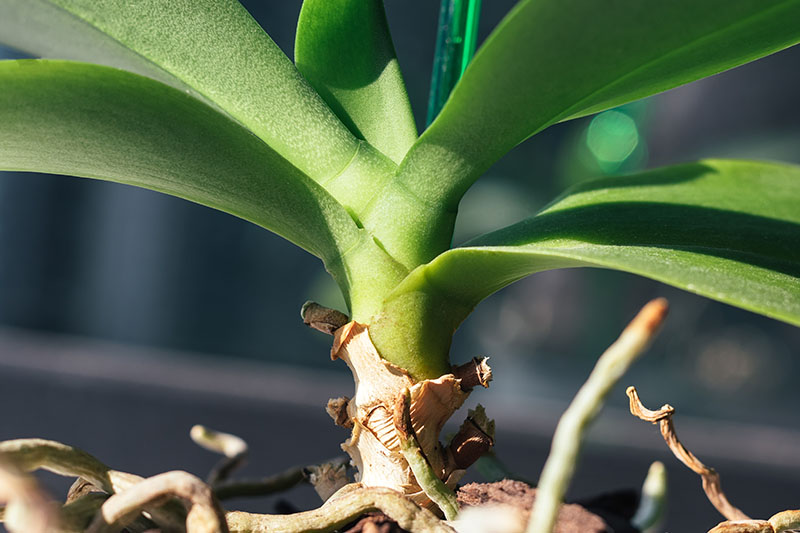
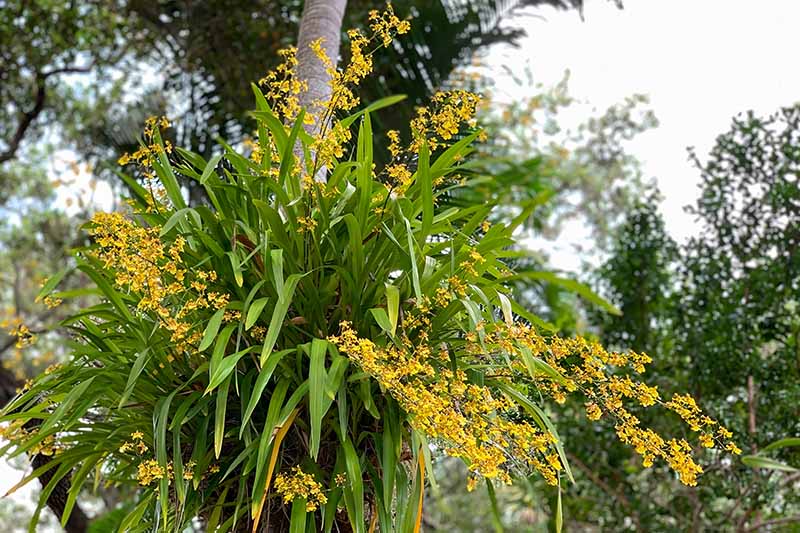
Orchids are perennials. They often grow on trees, just like bromeliads or air plants do, and they can have one of two growth habits: monopodial or sympodial.
Monopodial means “one foot,” and refers to plants that grow upwards from a single center.
Sympodial types, on the other hand, have many feet, growing in a more clumping fashion.
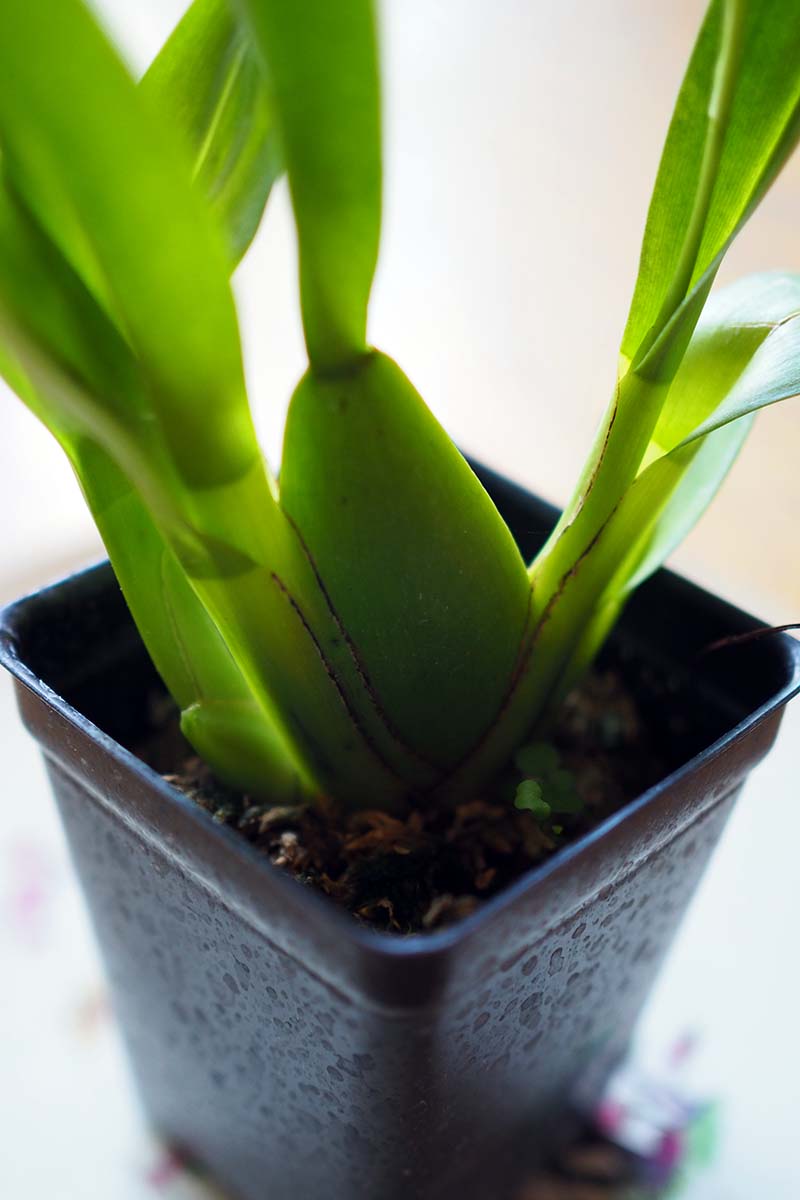
Some sympodial types have pseudobulbs, a swollen stem base that is used to store water and nutrients for the plant in times of drought.
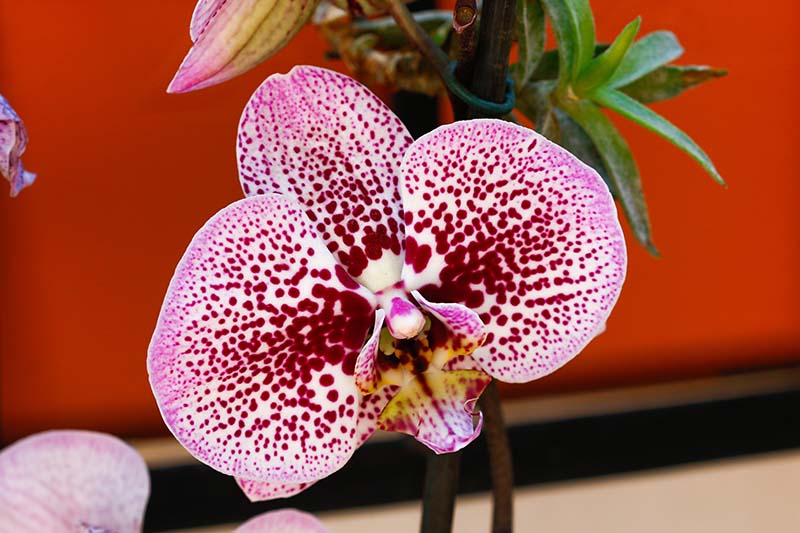
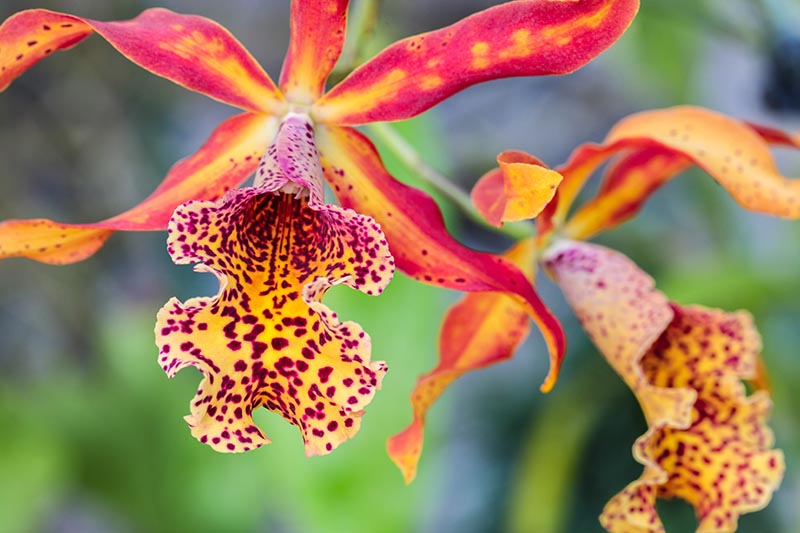
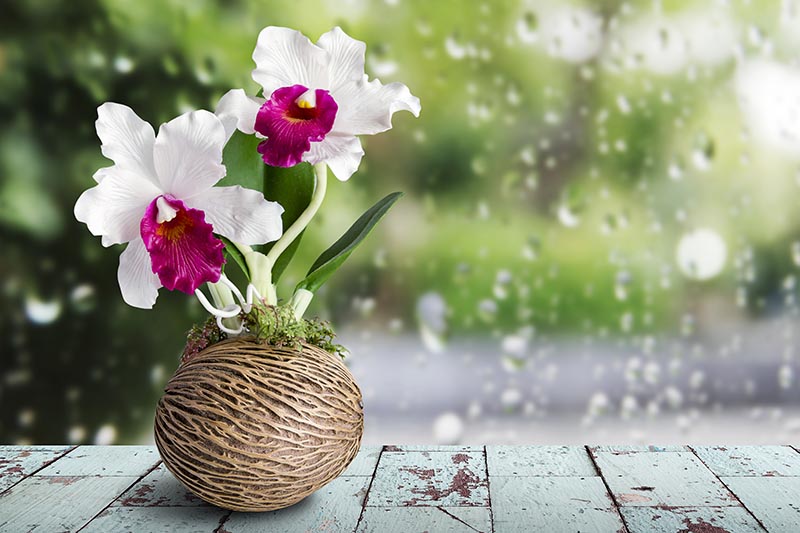
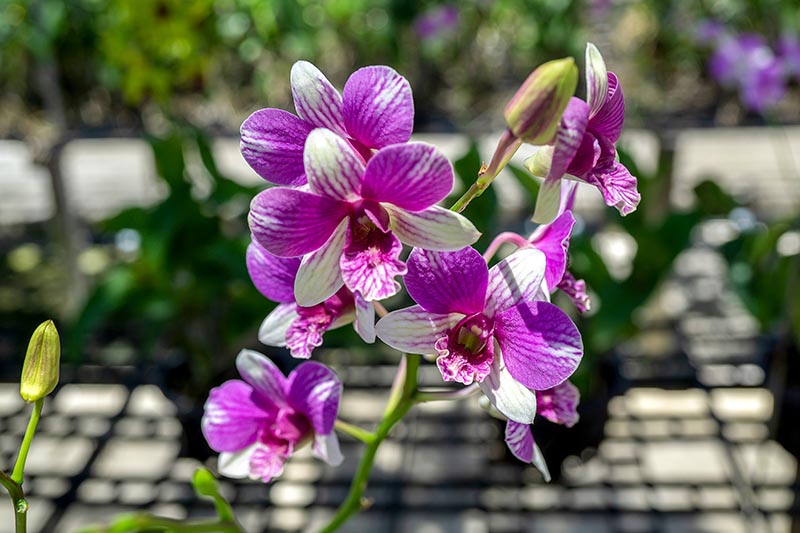
Orchids are grown for their spectacularly striking flowers, which can last for a day or less, or up to several months, depending on the species or cultivar.
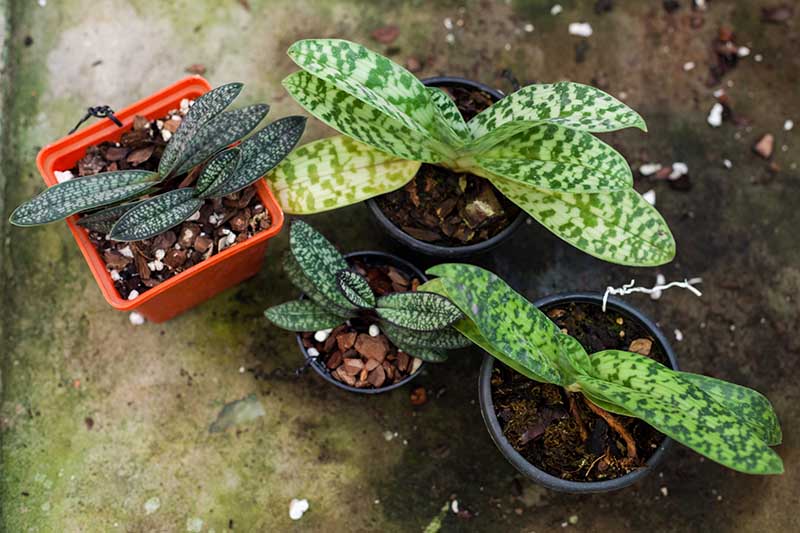
Some species exhibit beautiful patterns on their foliage as well, such as certain types of paphiopedilums and jewel orchids.
Dedicated orchidophiles are willing to keep these otherwise mild-mannered plants around when they are not in bloom because, when the flowers do appear, it feels as if the heavens have parted and a choir of angels has appeared.
Some plants may only produce a single flower at a time, some may produce several, and others may produce a whole mass of blooms.
The number of flowers your plant will produce at one time depends on the species or cultivar. The age of the plant can also influence the number of flowers it produces.
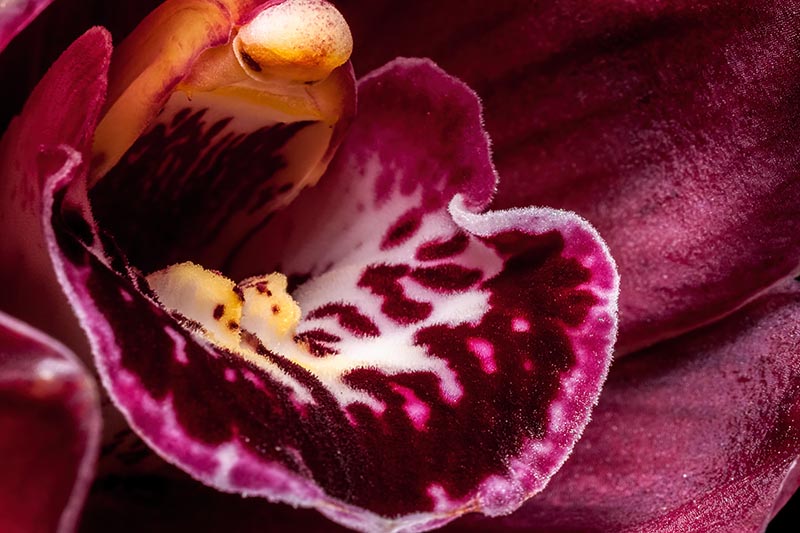
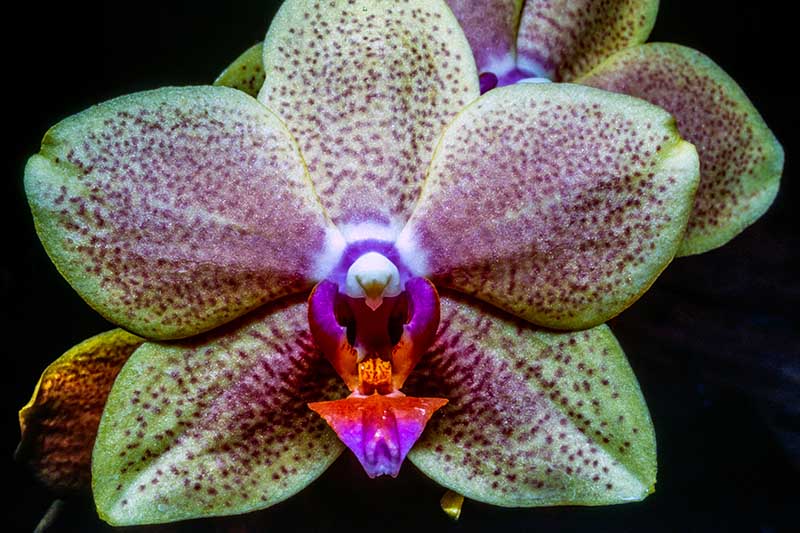
These showy flowers have a modified bottom petal called a lip or labellum that attracts pollinators, increasing the plant’s chances of reproduction. It’s all about sex, baby.
They are also highly attractive to us humans, with their stunning array of colors, patterns, and sometimes intoxicating fragrances.
We may find them intriguing for another reason, too – they have a certain type of symmetry that is particularly appealing.
It’s not that other flowers aren’t symmetrical, but many of them are symmetrical in a less compelling way.
Take sunflowers, zinnias, or cosmos, for example. Each of these lovely flowers is symmetrical all the way around – if you look at the flower head-on, there is no obvious top or bottom.
Orchids, on the other hand, have bilateral symmetry, meaning there are two halves that are mirror images of each other – just like a human face – where we recognize a top, a bottom, and a midline.
Some orchid flowers even look like small faces.
Many of these flowers imitate the pollinators they are trying to attract.
One such example is the bee orchid, Ophrys apifera, which resembles a bee, not only to our eyes, but also to the compound eyes of male bees who try to mate with it.
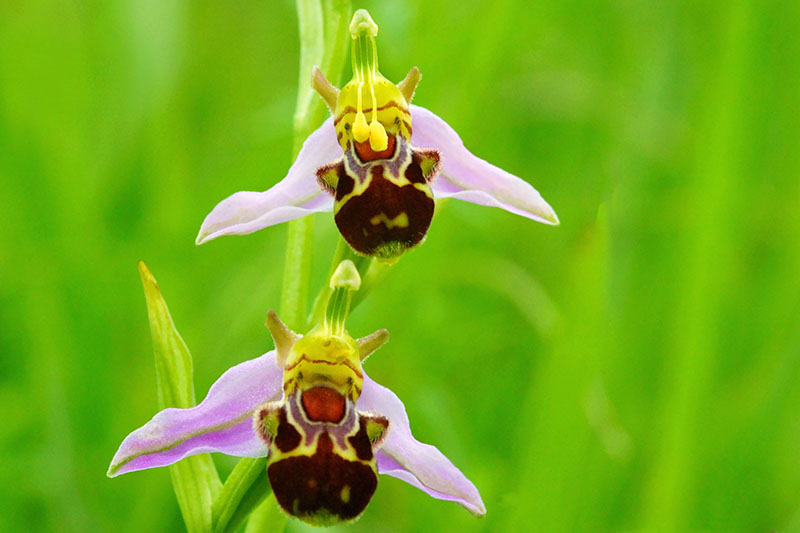
This mimicry results in some very intriguing flower shapes and patterns – which is perhaps why some individuals collect these flowers as if they were works of art.
Cultivation and History
Although you’d probably never guess it by looking at them, these flowers are distantly related to asparagus.
Both the orchid and asparagus families are taxonomically classified in the Asparagales order.
The name “orchid” doesn’t refer to a single species or even a specific genus. Orchids make up a very large taxonomic family of flowering plants called Orchidaceae, which includes around 30,000 different species.
To put things in perspective, that means there are more than four times as many orchid species as there are species of mammals.
Another perhaps more relatable example of a taxonomic family is that of the felines – Felidae – which includes both house cats and cheetahs.
That means writing this article, “Orchids 101,” is kind of like writing an article entitled “How to Care for Your Feline,” and expecting it to cover the care of both house cats and cheetahs.
Yes, there are some basic similarities between the two, but there are definitely important differences you’re not going to want to overlook!
And there are only 37 species of feline, compared with the tens of thousands of orchids out there.
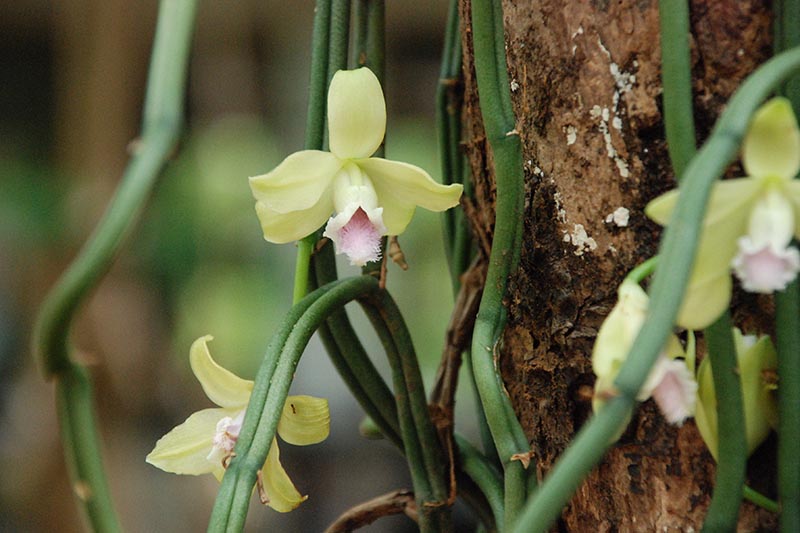
In the orchid world, perhaps the very popular phalaenopsis is most like the house cat, happy to live its life sitting in your windowsill, while Vanilla planifolia, one of the sources of the delicious vanilla bean, is more of a cheetah, requiring greenhouse conditions to thrive and potentially growing more than a hundred feet long.
I offer this comparison to highlight how important it is for you to find out what type of orchid you have, so you can provide it with the very best care.
You wouldn’t expect your pet cheetah to sit quietly on your windowsill, would you?
If you thought these were primarily tropical plants, it may surprise you to know that in the wild, orchids grow on every continent except Antarctica.
Some species even grow on the southern tip of Greenland!
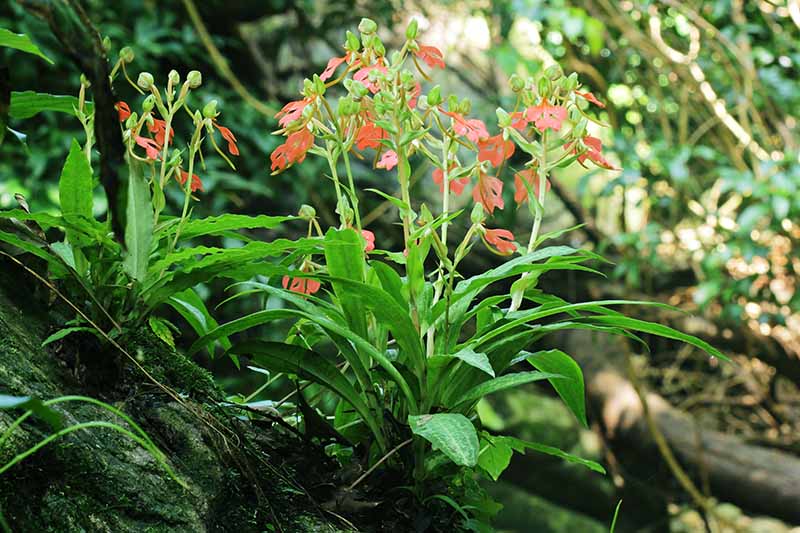
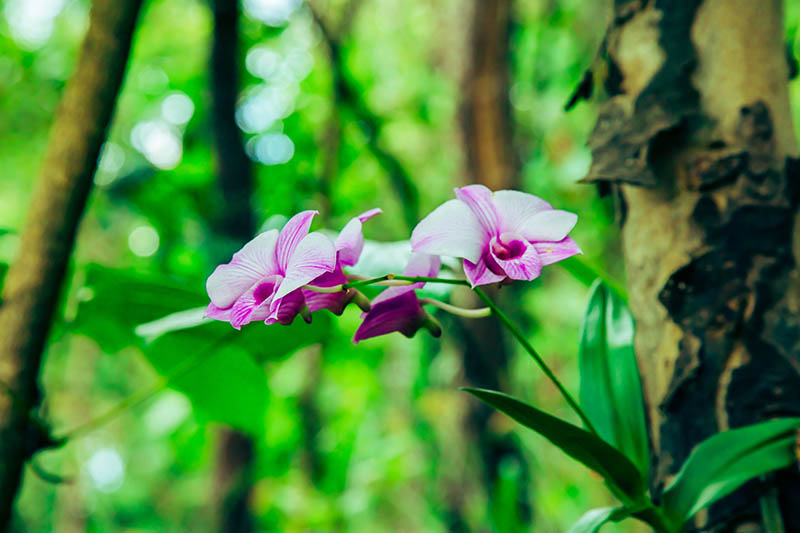
In pretty much every climate inhabited by humans, these striking flowers are there too, growing in the crevices of trees, on rocks, or in leaf litter on the forest floor.
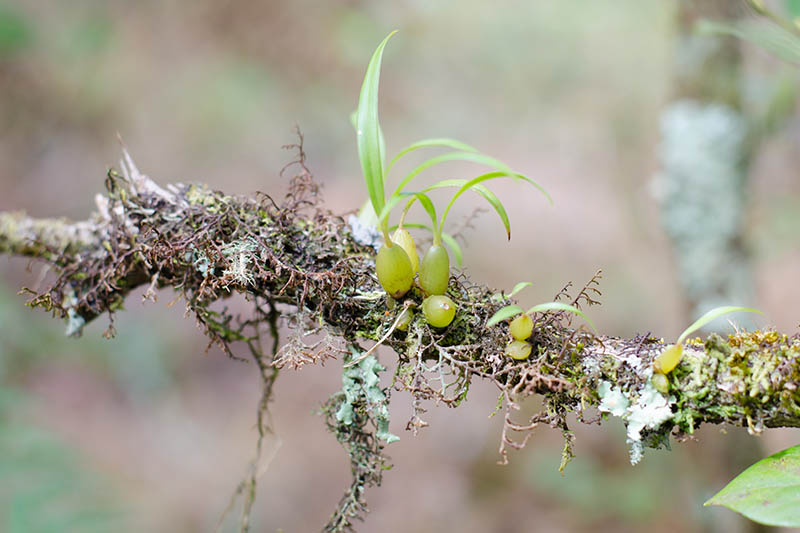
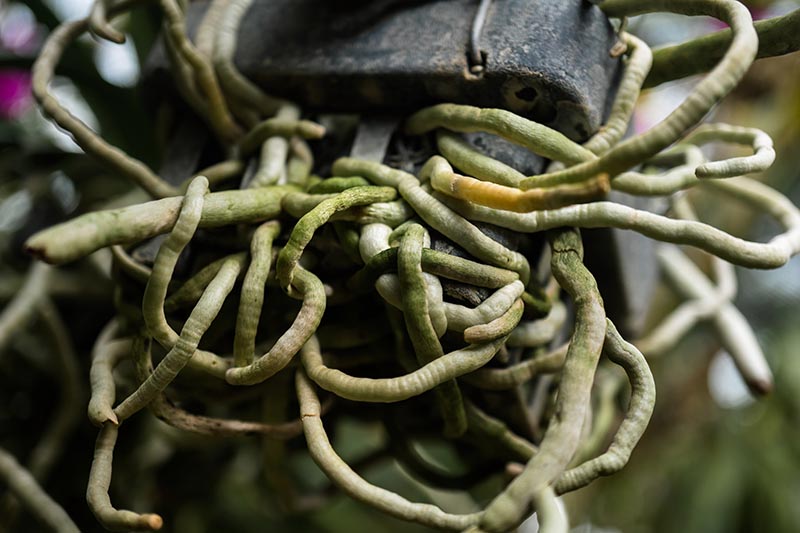
And this is one of the most important takeaways from this article – the vast majority of these plants don’t grow from soil, but have aerial roots that cling to their growing surface.
However, lest you think of these plants as freeloaders, even though they may grow on trees, they are not parasites.
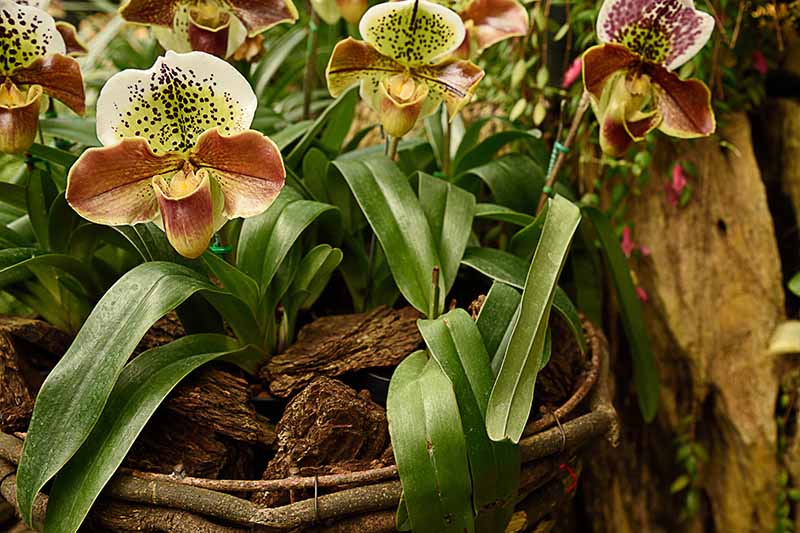
Orchids can be categorized into four different types, depending on what type of surface they grow on in their native habitats:
- Epiphytes – grow on trees, as do many bromeliads.
- Lithophytes – grow on rocks.
- Semiterrestrials – grow in decomposing material on the ground.
- Terrestrials – a very small number of species grow in soil.
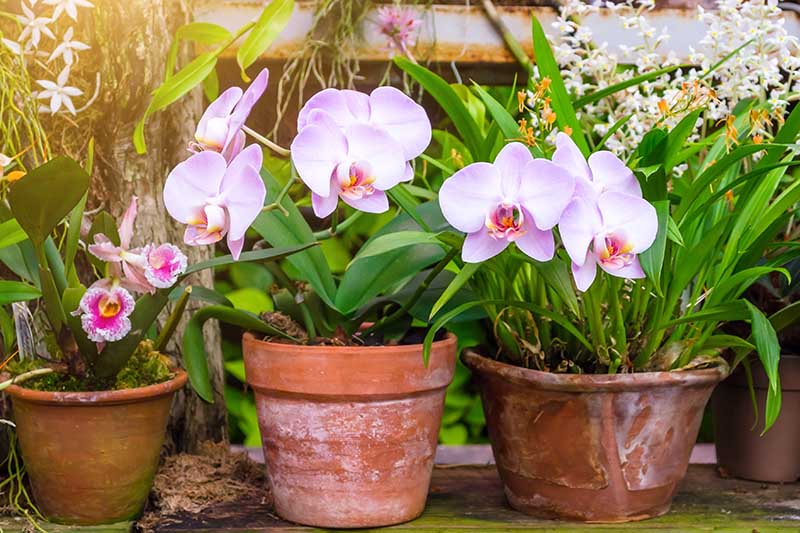
These different natural habitats result in a range of distinct requirements we should be aware of when we bring one of these plants into our homes.
Some, such as cymbidiums, are used to bright light and cool temperatures, while others, such as phalaenopsis, prefer dimmer light and a warmer environment.
Humans have admired these flowers since at least the time of Confucius, who wrote about his veneration for them. And there were orchid field guides being written in China as far back as the 1200s.
In the West, there are no records of anyone growing these flowers in their homes until the 1700s.
By the 1800s, they became popular among well-to-do Europeans, who sent explorers out to find rare specimens in distant lands and bring them back home in special protective cases.
Much like tulip mania of the 1600s, this was the beginning of “orchidelirium.”
Unfortunately, these manic collectors assumed the plants all came from hot and steamy jungles, and sought to provide them with only the sultriest growing conditions in their homes.
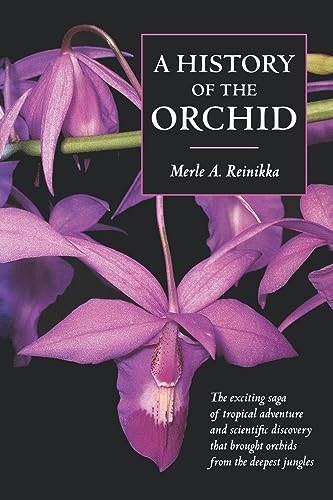
In his book “A History of the Orchid,” available on Amazon, author Merle A. Reinikka explains that these imports were often housed in “stoves” heated by coal fires intended to keep them as hot as possible.
The species that tolerated these hot, dry conditions were a very small minority, and most plants perished with this treatment.
On the other side of the Atlantic, the wild orchids of south Florida were almost wiped out during this time, when collectors removed them from the wild to grow them as potted houseplants.
If you asked the orchids for their point of view, they might claim that orchidelirium never ended.
Unfortunately, the practice of searching out and removing rare species from the wild still happens today to satisfy overzealous collectors, as you may know if you read Susan Orlean’s book “The Orchid Thief” or saw the film it inspired, Adaptation, about one poacher’s search for the elusive and endangered ghost orchid.
Unscrupulous traffickers illegally harvest rare specimens from the wild, putting these plants at risk of extinction.
According to Rachel Bale, an editor at National Geographic, “some orchids have been shown to be at risk of extinction if as little as 5 percent of the population is harvested.”
To avoid contributing to the disappearance of these magnificent plants in the wild, always make sure to choose plants from a reputable source.
The American Orchid Society recommends only purchasing cultivars propagated from seed or tissue (via cloning), to discourage illegal harvesting.
Luckily, there are plenty of ways for those of us who become obsessed with these plants to scratch that itch without resorting to the purchase of specimens harvested illegally.
While not all species are available for folks like us to have as houseplants, that doesn’t mean our choices are severely limited.
There are over 900 different genera in the orchid family, and many of them hybridize easily between different species or even different genera, providing breeders with many possibilities for creating attractive hybrids.
To date, horticulturalists have produced over 100,000 cultivated varieties, and that number keeps growing.
While some species are also used for medicinal purposes, apart from the culinary star vanilla, most are grown as colorful houseplants or as specimens in collections, making our lives sweeter through their highly symmetrical good looks.
Propagation
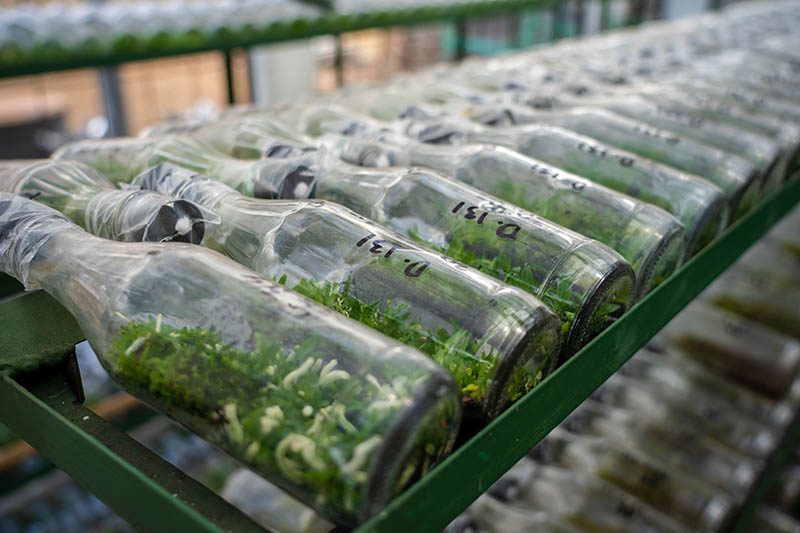
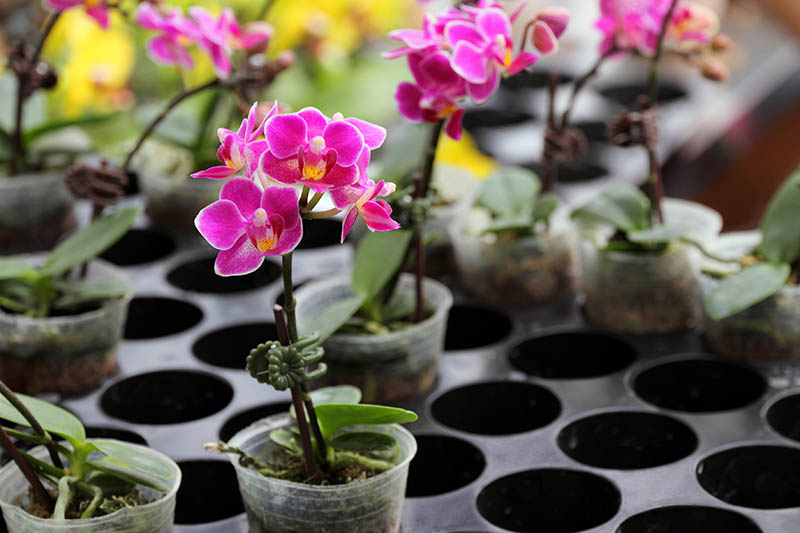
If you buy an orchid from a big box store or grocery store, it’s very likely that it was grown from tissue culture.
If so, your plant is known as a mericlone, a clone created by growing out a tissue sample from a plant.

While this propagation technique works for commercial growers, allowing them to provide affordable orchids to more people, it’s more of a lab experiment than a home gardening project.
And so is growing these flowers from seeds.
That’s because they have extremely small seeds that don’t come with the same built-in resiliency as, say, a squash seed.
In the wild, orchid seeds rely on partnerships with beneficial fungi in order to germinate and grow.
This is why you often see orchid plants for sale – but orchid seeds, not so much.
Still, growing these houseplants from seed is possible to do at home if you’re willing to invest in all the necessary equipment, including flasks, grow lights, agar, and nutrient mix.
In addition to seed sowing and tissue culture, they may be propagated by methods more practical to the average home gardener (although not all methods apply to all types of orchids):
- Division
- Back bulbs
- Stem cuttings
- Plantlets (keikeis)
- Aerial roots
While growing orchids from seed may produce flowers with features unlike the parent plant, these other methods will result in clones, so there will be no surprises as to what type of flower your plant will produce.
Want to get into the details of these different propagation methods? Make sure to check out our complete guide to orchid propagation.
How to Grow
If you’ve been reading along closely so far, you may have started to get the message that with so many different types, there isn’t one absolute set of best growing conditions to cover them all.
Even within the same genus, different species may have differing requirements in terms of temperature, frequency of watering, amount of daylight, and humidity.
So if you start off your orchid growing adventure with a properly identified cultivar, it will be easier to find out what conditions are best for it, to provide exactly what it needs.
However, you may not know exactly what kind of orchid you have if it was purchased from a grocery store. (Though, if that’s the case, it’s most likely a Phalaenopsis.)
Plus, since these plants hybridize easily, even between different genera, and many of these intergeneric hybrids are available commercially, identification is even less straightforward.
In the following care recommendations, I will offer general guidance as well as some specifics.
Choosing Your Plant
Before you start caring for an orchid of your own, you’ll need to know what to look for to ensure you bring home a healthy plant.
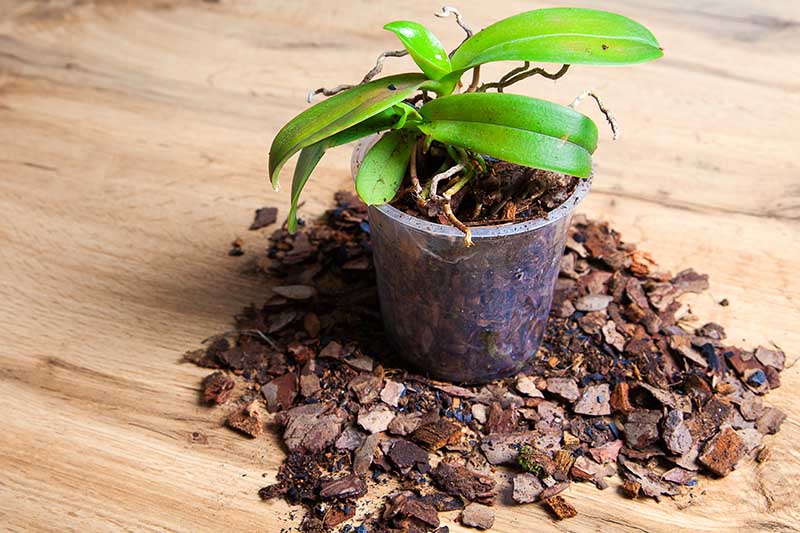
If the plant is potted in a transparent plastic pot, this is great, because it will allow you to inspect not only the top portions of the orchid, but its roots as well – an important indicator of health.
Here’s what to look for when you choose your orchid:
- Leaves should be a medium or light green color, not dark green.
- Leaves should be plump, not wrinkled or leathery.
- There shouldn’t be any spots or discoloration of the leaves.
- The roots should be snug in the pot – they shouldn’t have too much extra room.
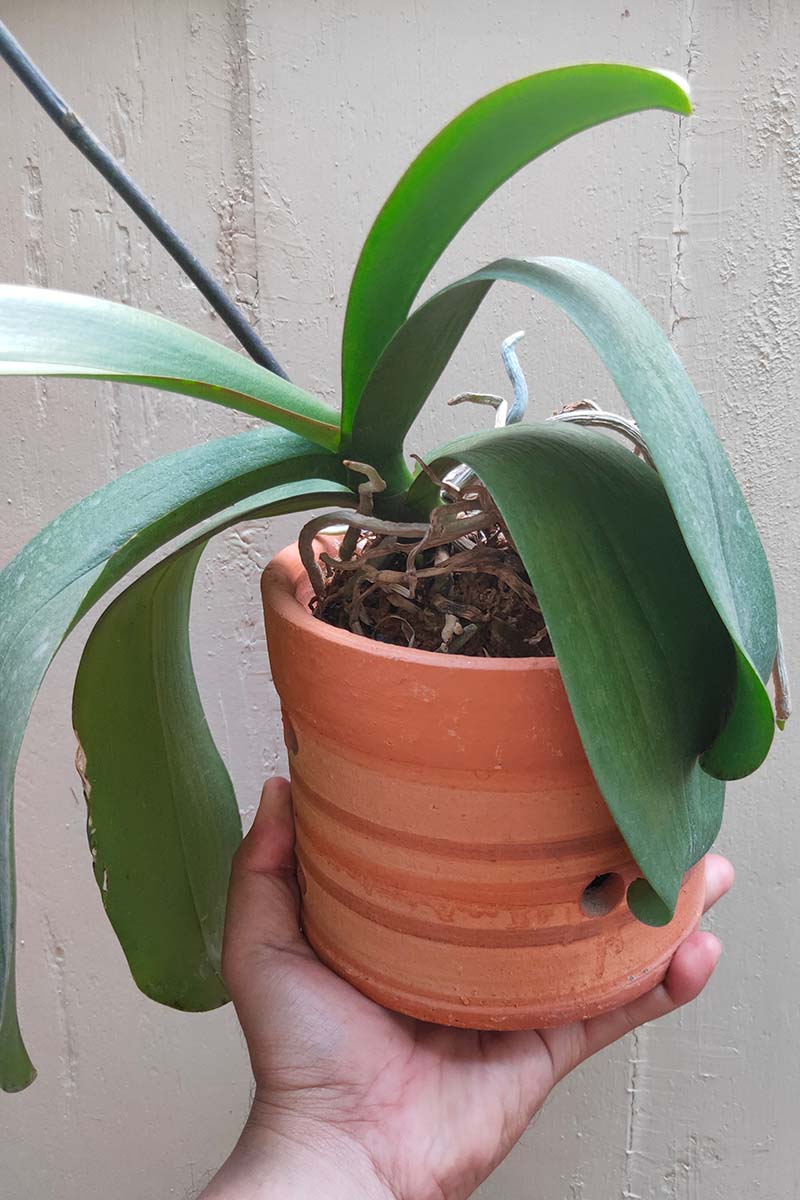
- If visible, the roots should look plump, not shriveled or mushy.
- Roots should be green or grayish-green, and aerial roots should be white and firm.
- If the plant is in bloom, flowers should be unblemished.
- The entire plant should be free from signs of pests or disease.
- Look for signs of new growth, which may indicate a healthy specimen.
- The pot the plant is in should have adequate drainage holes.
Another good idea is to smell the growing medium. If it smells funky, the roots are probably rotting. If that’s the case, pass on this plant and look for a healthier one.
Welcoming Your Plant Home
Whether you bring your plant home from a store or garden nursery, or order it online, you’ll want to give it a friendly welcome when it arrives.
If you purchased it online, gently unwrap the packaging around your plant. It should have been packed in a way that protects the plant even if the package was turned upside down or thrown around during transit.
You may wish to place it in a spot in your house where it won’t be exposed to high temperatures or bright light at first. Instead, choose a location with medium, indirect light.
Let it recover for a few days before placing it in its permanent growing spot to give it a gradual transition back to normal life.
Poke your finger into your plant’s pot – if the growing medium feels dry, go ahead and water it. Otherwise, wait for two or three days to water, or until it is acclimated to its new home.
If you have purchased your new plant from a grocery or big box store, it’s a good idea to go ahead and repot it after giving it a few days in its new location.
To reduce the need for regular watering, plants sold in these establishments are often potted in a growing medium that will keep the roots moist – usually too moist.
Repot your plant in an appropriate growing medium to start it off on the right foot. Check out the instructions for repotting below.
Temperature
In general, orchids do best when daytime temperatures are maintained in a sweet spot of about 70 to 80°F.
In addition, most also prefer temperatures at least 10 to 15 degrees cooler at night – and for many varieties this is not only preferred but necessary in order to promote flowering.
Beyond that sweet spot, the minimum temperature that most types will tolerate is 50°F, and the maximum recommended temperature is usually 95°F.
Temperatures outside of this range won’t necessarily kill your plants, but they will stress them, making them more susceptible to problems with insects and disease, and less likely to flower.
There is more wiggle room on the warmer end of the spectrum and less on the cold end – do be aware that the majority of orchids kept as houseplants are frost-sensitive and shouldn’t be subjected to very cold temperatures.
These plants are often classified in terms of their temperature preferences.
Some are considered cool growers, some warm growers, and some are in between – these are known as intermediate growers. This information won’t necessarily be noted on the plant label.
Cool Growers
Cool growers prefer average daytime temperatures of 60 to 75°F while nighttime temperatures should be in the 50 to 65°F range.
These include standard Cymbidium, Odontoglossum, Miltoniopsis, and many Paphiopedilum species.
Intermediate Growers
Intermediate growers prefer average daytime temperatures of 65 to 80°F and nighttime temps of 55 to 70°F.
These include Cattleya, Miltonia, and Dendrobium species.
Warm Growers
Warm growers require average daytime temperatures of 70 to 90°F, and nighttime temperatures should be around 60 to 75°F.
These include Phalaenopsis and most types of Vanda, as well as Paphiopedilum species with mottled or strap-shaped leaves.
It’s safe to assume that your plant will prefer the cooler end of the temperature range during the winter, and the higher end during the summer months.
Day/Night Differential
Orchids aren’t alone in their preference for cooler nighttime temperatures. This is called a “day/night differential” or DIF, and other houseplants such as Christmas cactus and poinsettia prefer this, too.
To provide your plant with a cooler temperature at night:
- When possible, locate it on or near a windowsill since windows cool off at night.
- In winter, place it away from forced air vents or radiators.
- Turn your thermostat down at night.
Light
As for light requirements, this is what you need to know: give your orchids bright, indirect light. This is a good rule of thumb if you aren’t sure what type you have.
Of course, if you do know what type you have, there is actually a more nuanced range of light preferences among the different species and cultivars.
This is good news for fans of these flowers, opening up more possibilities for growing them in different parts of our homes – some cultivars can be placed in higher light areas near southern windows, and some can live happily in lower light areas, such as near eastern windows, with options in between as well.
In fact, choosing your variety depending on how much light is available in your home is an excellent idea. These are general indications for most orchid genera, but always double check care guides for your particular species or cultivar.
Higher Light Species
Higher light species include many varieties from the Cattleya, Cymbidium, Ascocenda, Phragmipedium, Brassia, Vanda, and Dendrobium genera.
These can be placed close to south-facing windows that have some shading from trees or a sheer curtain.
Dendrobiums can tolerate some direct light in the morning, but avoid giving them direct light in the middle of the day – or place them a foot or so away from the window.
Medium Light Species
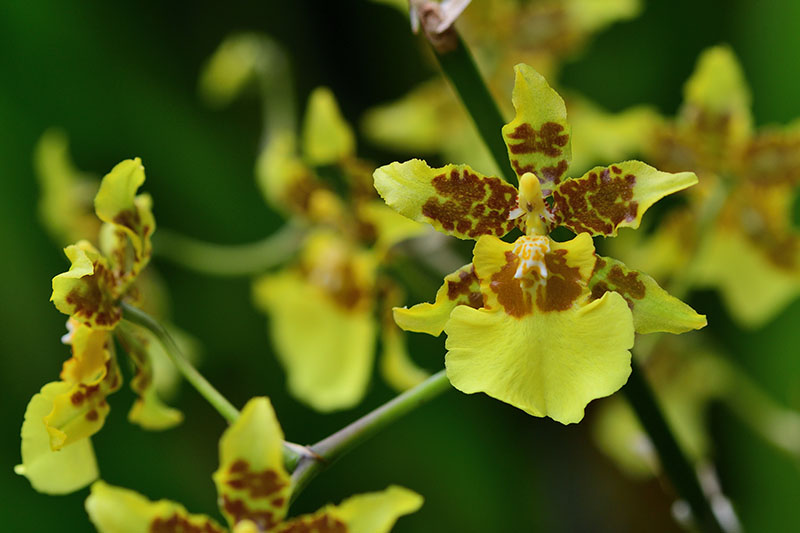
Medium light species include Oncidium, Miltonia, and mini Cattleya species.
These can be placed a bit further away from a southern window, or on a windowsill but with more shading either from trees or blinds.
Medium light types may also do well near west-facing windows, as long as the area doesn’t heat up too much on hot summer days.
Lower Light Species
Lower light species include varieties of Paphiopedilum, Phalaenopsis, and jewel orchids. These should be placed near eastern windows to receive morning light – with some exceptions.
If you live in a climate that is frequently overcast such as that of the Pacific Northwest, you may need to situate lower light species on a south-facing windowsill.
On the other hand, in my very sunny northern Utah climate I have been able to grow lower light species, and even get them to flower, in a bright window on the north side of my house – where they were exposed to bright, indirect light.
Everyone’s home is different, so you’ll have to adapt these general guidelines to your situation and your selected types of plants.
Troubleshooting Lighting
How do you know if these houseplants are getting enough light?
If their leaves are dark green, although they look beautiful this way, this is actually a sign that they aren’t getting enough light. Generally, leaves should be medium to lime green in color.
Insufficient light can also prevent flowering, so if a year goes by and your plant hasn’t bloomed, you can try using a grow light to help your plant, or move it to a sunnier window.
On the other hand, if your plant’s leaves start to develop any red tones, this can be a sign that it is exposed to too much light.
In this case it should be provided with a bit more shade, moved further from the window, or placed in a window that gets less sun during the day.
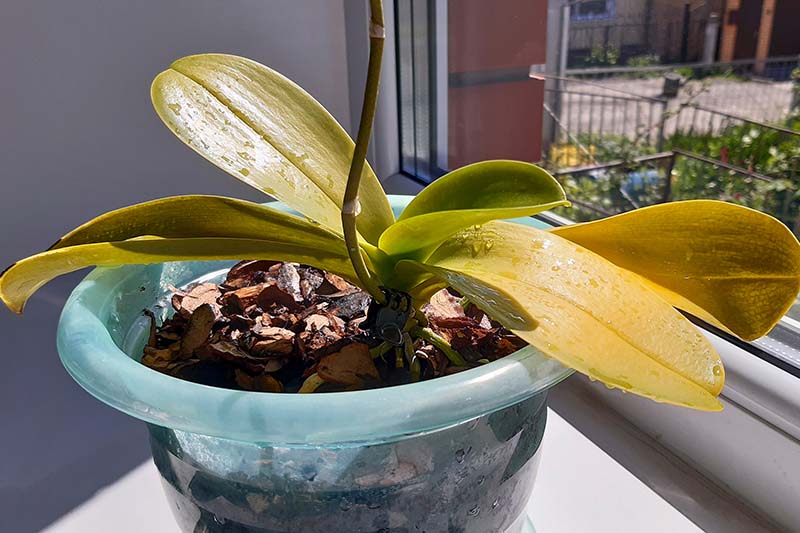
Leaves that turn yellow can also be a sign of too much light.
Soil
This is perhaps the most important part of growing these plants – do not plant your orchid in potting soil. Repeat after me: Do not plant your orchid in potting soil.
Potting soil will keep the roots of the plant too wet and will not allow them exposure to the air they require.
With very few exceptions, these flowers grow – in slightly acidic conditions – in the crevices of trees, on rocks, or in shallow, nutrient-poor organic matter on the forest floor.
To replicate these natural growing conditions, it’s important to choose a high-quality, specialized orchid growing medium – and that is not potting soil.
Now that we have established that you won’t use regular potting soil to pot your orchids, you’ll want to choose a more suitable growing medium.
Here are some of the different materials that can be used:
- Bark
- Shredded tree fern
- Charcoal
- Peat moss
- Sphagnum moss
- Coarse coconut husks
- Fine coconut coir
- Perlite
- Lava rocks
- Expanded clay pellets
- Gravel
Your growing medium can be comprised of just one of the above materials or it can be made up of a mixture of two or more of them.
You can learn more about the finer points of choosing or creating your own orchid growing medium in our guide (coming soon!).
Alternatively, you may want to start with a general purpose premixed orchid growing medium.

4 Quart All Purpose Orchid Value Mix In Resealable Bag
I recommend rePotme’s All Purpose Orchid Value Mix. It contains coconut husk chips as well as small sponge rock, also known as perlite.
You can find it for purchase in a four-quart bag from rePotme via Amazon.
Water
After selecting a growing medium, watering is probably the second most important aspect of caring for these houseplants.
It’s important to water them with the right frequency. If you water too often, their roots can rot, which will prevent them from taking up the water they need, eventually causing them to die from dehydration.
On the other hand, if you don’t water them enough, they can also die from dehydration.
Since different cultivars have different water requirements, you will need to get to know your plant and determine how often it needs to be watered.
You can start by watering your orchid once a week and then fine tune this once you see how quickly it is drying out.
Your watering frequency will depend on:
- The species or cultivar
- The type of growing medium
- The temperature
- How well developed the root system is
- The age of your plant
- The type of pot
- How snug the roots are in their pot
Pick your plant up and get to know how heavy it feels after watering. Keep picking it up every day for a week or ten days.
When the pot feels light, it’s probably time to water. If it feels exceptionally light, you have probably waited too long, and should provide water sooner in the future.
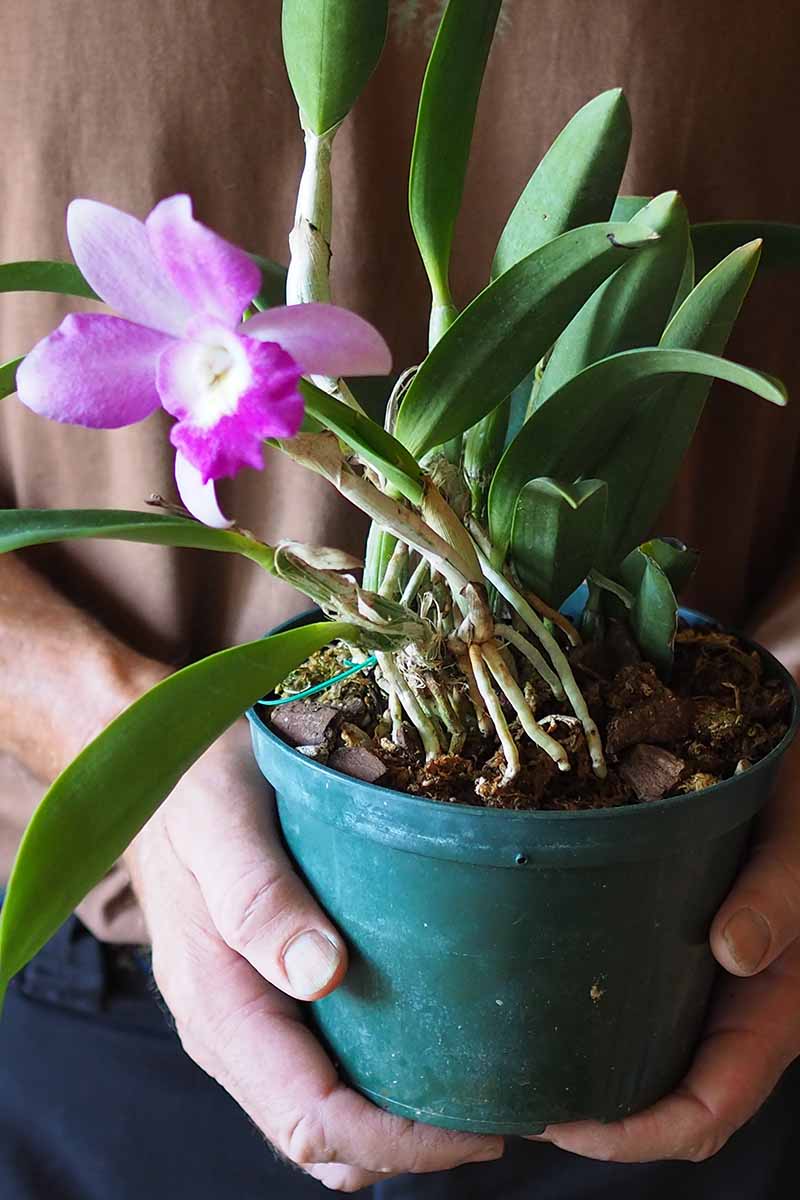
As a general rule, if you think your plant can wait another day or two before you water it – meaning it still feels a little heavy when it’s picked up – then you should probably wait.
However you’ll have to adjust these recommendations to your species or cultivar.
Some prefer to stay evenly moist all the time, such as paphiopedilums, and may need to be watered twice a week.
Others, such as cattleyas, like to dry out between waterings and may only need to be watered every two weeks.
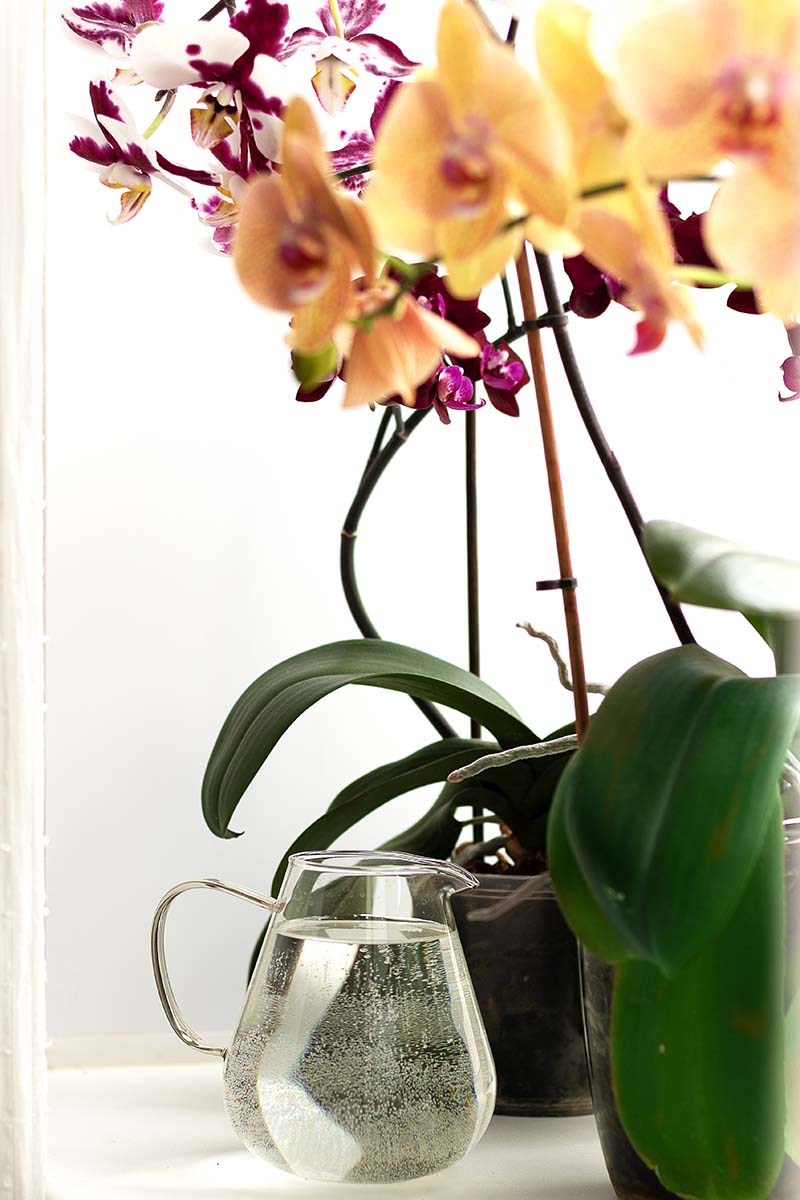
Water your orchids in the morning so they have ample time to dry before nightfall, and use tepid, good quality water.
The gold standard is water that has been filtered through reverse osmosis. You can also use clean, fresh rainwater.
If you have public water, you may want to filter it since municipal tap water can contain any number of unknown chemical residues, in addition to chlorine.
If your plant is in a decorative cachepot as well as its plastic growers pot, remove the decorative pot before watering.
I like to place my orchids in a bowl one by one, and pour about a cup or so of tepid water over the potting medium and roots, let it drain through the pot, and then repeat a few more times until it feels like the pot is heavy.
I let the pot drain thoroughly before returning the plant to its saucer, to make sure the pot isn’t sitting in water.
Make sure you don’t pour water over the foliage of the plant, as this can lead to rot and give a foothold to fungi and bacteria. Clean your plant’s leaves off with a damp rag when you water instead.
Learn more about orchid watering requirements here.
Fertilizer
The rule of thumb for fertilizing these plants is to fertilize “weakly, weekly.”
After watering each week, feed with a diluted fertilizer.
Judy White at the American Orchid Society recommends using a 20-10-20 (NPK) liquid fertilizer diluted at quarter strength during regular growth, and a 10-30-20 (NPK) formula in autumn to encourage blooming.
Once a month, skip the fertilizer and give the roots a good rinse when you water instead, to flush fertilizer salts from the roots and growing medium.
To flush fertilizer salts away, place the plant in your sink or bathtub without a saucer underneath, and water the plant with fresh water amounting to at least three times the volume of the pot, allowing the liquid to drain away.
On the other hand, if you have a terrestrial species, you may want to skip fertilizing altogether.
In the “Kew Gardener’s Guide to Growing Orchids,” available at Amazon, author Philip Seaton recommends not feeding terrestrials at all since they grow in conditions that would be naturally low in nutrients in their native habitats.
Kew Gardener’s Guide to Growing Orchids
Personally, I like to make my fertilizing regimen a bit more natural, so I use a tea made from earthworm castings for a gentle, slow-release fertilizer which has the added bonus of beneficial microbes.
If you don’t have your own supply of worm compost on hand, you can buy it in handy tea bags called TeaDrops.
You simply steep the bag in lukewarm water for four to 24 hours and then water your plant with this concoction.
TeaDrops Orchid and Air Plant Formula
You’ll find TeaDrops Orchid and Air Plant Formula from Earthworm Technologies available via Amazon.
Get more tips on fertilizing orchids here.
Humidity
Most orchids do well in an environment with humidity levels between 40 and 70 percent.
As always, you’ll want to check the specific recommendations for your particular species or cultivar, which may be higher or lower than this range.
If you’re not sure what the humidity levels are in your home and you want to take your orchid growing seriously, you can use a gauge to monitor humidity levels.
I use the Goabroa digital humidity gauge, available on Amazon.

Goabroa Digital Humidity Gauge Monitor
In winter when the air is dry, or for those of us who live in an arid climate year-round, there are a few ways you can increase humidity for these plants:
- Use a humidifier to help humidify the air in your home.
- Group them together with other houseplants.
- Grow them inside a terrarium.
- Place them on a humidity tray.
A humidity tray is simply a waterproof tray lined with a layer of pebbles or gravel and filled with water.
The tray should be big enough to allow water to evaporate under the entire width of your plant.
Place plants on saucers before placing on the humidity tray to reduce any chance of letting their pots sit in water.

Brussel’s Bonsai Humidity Tray
This humidity tray from Brussel’s Bonsai is 13 inches long, made of black plastic, and it comes with pebbles to fill it up. It’s available on Amazon.
You can also find humidity trays that don’t require pebbles.
Some have a grid that fits snugly into the tray instead – you pour water into it, and it evaporates throughout the day, humidifying the air around your houseplants.
How much humidity is too much?
According to Greg Griffis and Peter Zale, PhD, at Longwood Gardens, if you see mist hanging in the air, it means the air is oversaturated and you should reduce your efforts to increase humidity.
And if you’re wondering if you should mist the leaves of your plant with a spray bottle, know that this is not the best method to provide your orchids with the humidity they need.
Misting can give you a false sense of security – if you are relying solely on misting to provide your plant with humidity, especially in a dry climate like mine, a once-a-day mist isn’t going to help much.
But the main problem with misting is that a wet orchid will be more likely to succumb to bacterial or fungal disease.
Water could drip down the leaves and pool in the crown of your plant, leading to crown rot.
In nature, many Phalaenopsis species grow from trees hanging down or sideways to prevent water from pooling in their crowns.
Since we are growing them upright, we have to make sure we keep the crowns water-free.
Instead of misting, stick to the recommendations listed above for increasing humidity.
Air Movement
Going hand in hand with humidity, these plants also need good air movement. This is particularly important in more humid climates and seasons, or when growing in greenhouses.
Air movement will help provide these plants with carbon dioxide, as well as reducing the risk of fungal or bacterial disease.
The more humid your environment, the more air movement is needed. And the inverse is also true – in drier climates or weather, aim for less air movement.
An overhead fan, or an oscillating floor fan directed away from the plants, will generally provide enough air movement.
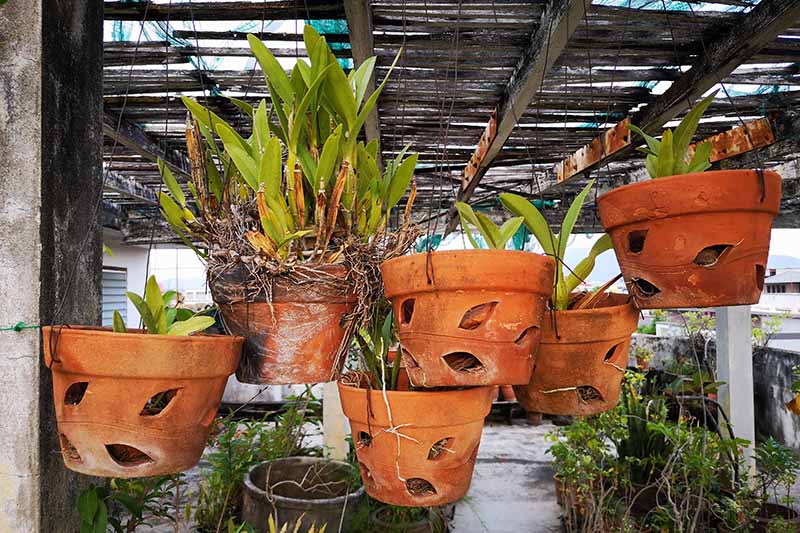
In the wild, many species grow with their roots exposed to the air, so air circulation is important not only for the foliage of these plants but also for their roots.
Using a special pot with side slits can help get air to the roots, and these provide better drainage as well.
You can learn more about the special containers used for growing these plants in our article about how to choose a pot for your orchid.
Growing Tips
- Don’t grow orchids in regular potting soil, instead use a specially formulated growing medium.
- Water approximately once a week.
- Provide bright, indirect light.
Maintenance
Maintenance includes keeping up with watering and fertilizing as discussed above, in addition to cleaning your plant’s leaves, coaxing flowers from your plant, and repotting regularly.
Clean Your Plant’s Leaves
Clean your plant’s leaves off with a moist rag on a regular basis to remove dust. Scheduling this maintenance for your weekly watering time is a good idea.
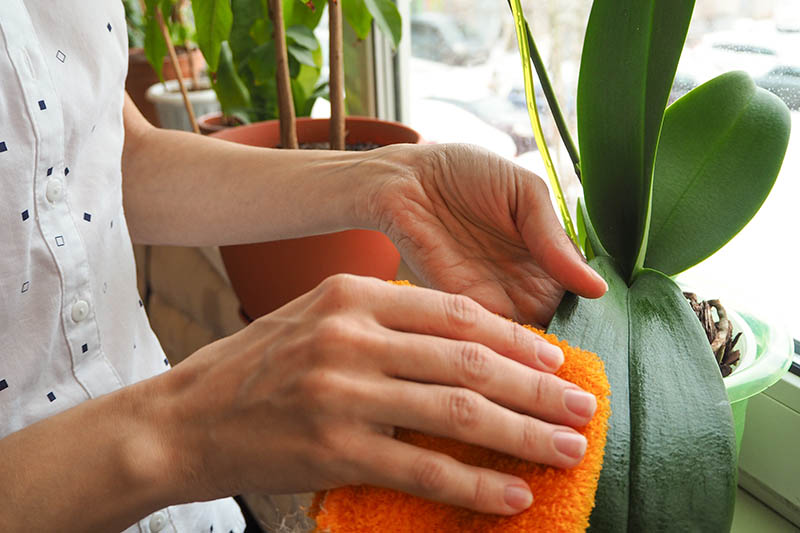
Cleaning your plant’s foliage regularly will help ward off insect pests and keep leaves healthy.
Make sure your rag is moist but not soaking wet – remember, you don’t want water pooling in the crown of your plant.
Encouraging Blooming
If you follow the care instructions described above, your plant should be more than willing to honor your home with its gorgeous flowers – and that’s the whole reason you bought it in the first place, right?
Providing your plant with adequate light, fertilizing it gently, and giving it the day/night temperature differential that it requires are your main responsibilities in encouraging your plant to bloom.
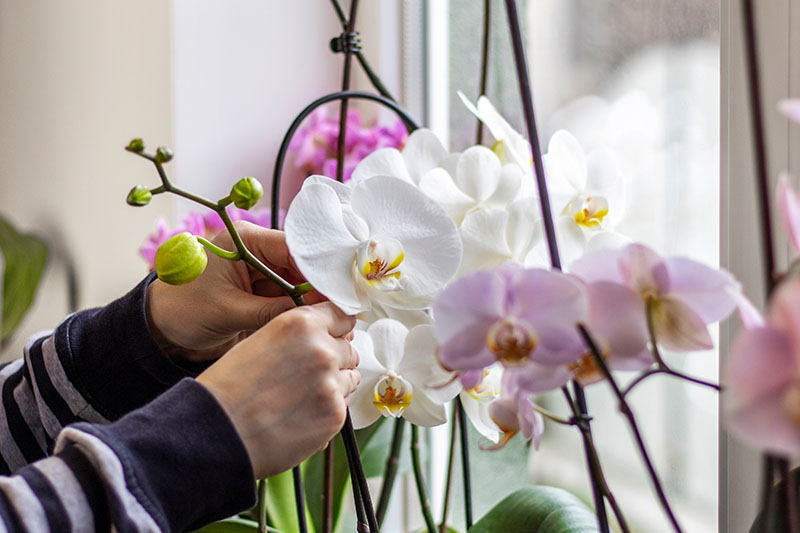
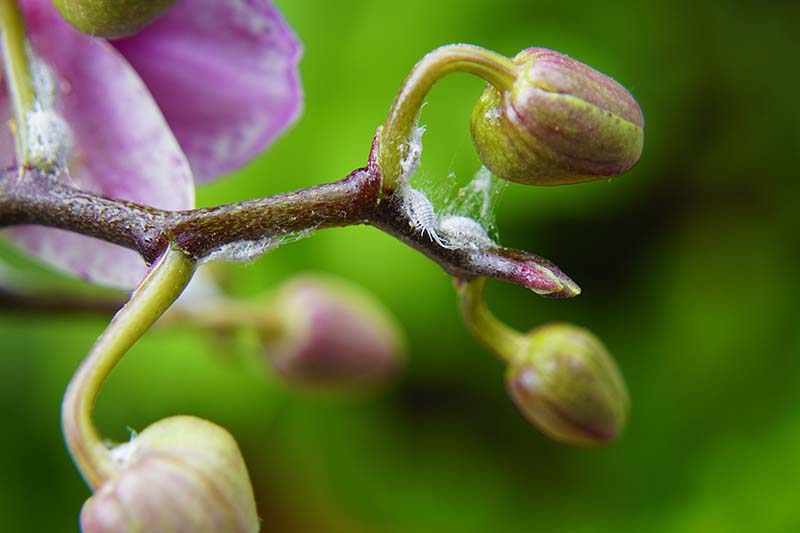
If it blooms from a long spike, as with phalaenopsis, you may need to stake it for support.
It’s a good idea to do this before the flower buds open up, to ensure that the extra weight of the flowers is supported. Gently insert a stake into your growing medium and attach the spike to it with a twist tie.
A specimen purchased with a flower spike will likely already be staked.
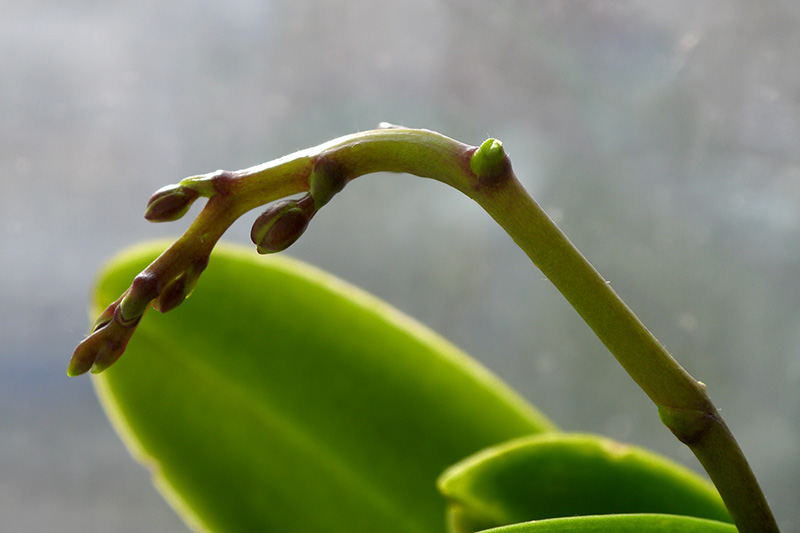
While many sources recommend trimming spikes on spent flowers, old spikes will sometimes rebloom year after year.
So while you get to know your new plant, you may want to leave the flower spike intact to see if your plant will bloom from old spikes.
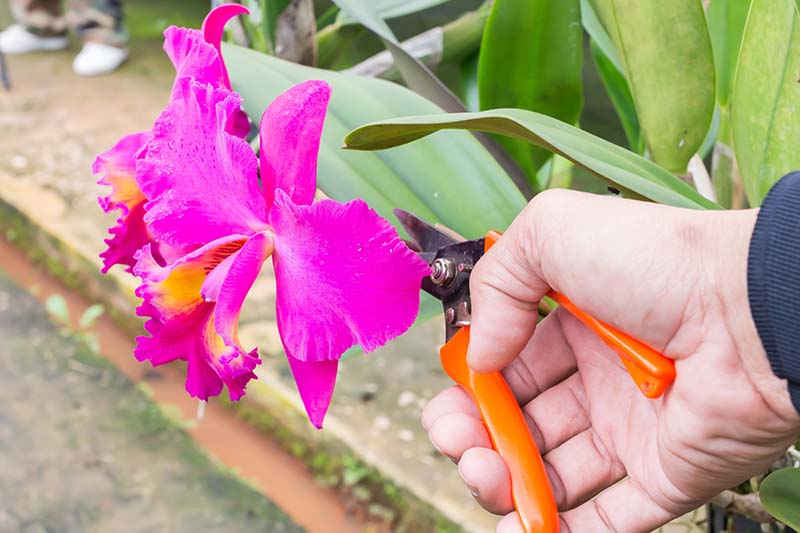
Spikes that turn brown or yellow won’t rebloom and can be pruned. If you decide to trim your plant’s spent flower spike, make sure to use sterilized pruners or scissors.
For phalaenopsis, trim the spike about an inch from the soil. For other genera, be sure to consult specific care information for your genus before pruning.
Read more about encouraging orchids to bloom here.
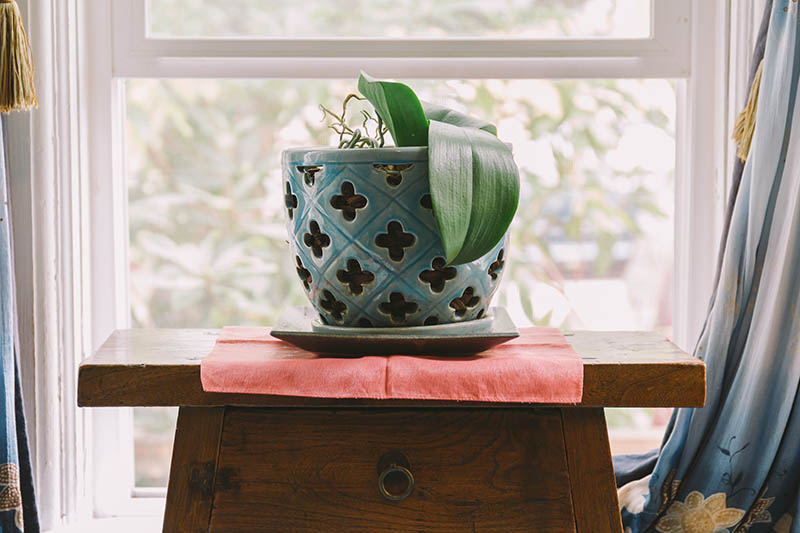
Repotting
Forget everything you know about houseplants when it comes to repotting your orchids.
Orchids are not repotted to move them to a larger pot in most cases, but instead, to provide them with fresh growing medium.
Old growing medium can become compacted over time as it starts to break down, making it harder for your plant’s roots to get the air they need.
That’s why, even if your orchid doesn’t look like it needs to be repotted based on its size, you should still repot it on a regular schedule.
Repot your orchid every one to two years, in a pot that is only big enough to contain the plant’s roots. This may be the exact same pot, filled with new growing medium.
Or if your plant’s roots are growing a lot, move it to a pot that is one size bigger, but no more.
The period after your flowers have faded and when there is new root growth is a good time to repot.
You may also want to repot when you bring a new plant home to ensure it is growing in an appropriate potting medium, as described above.
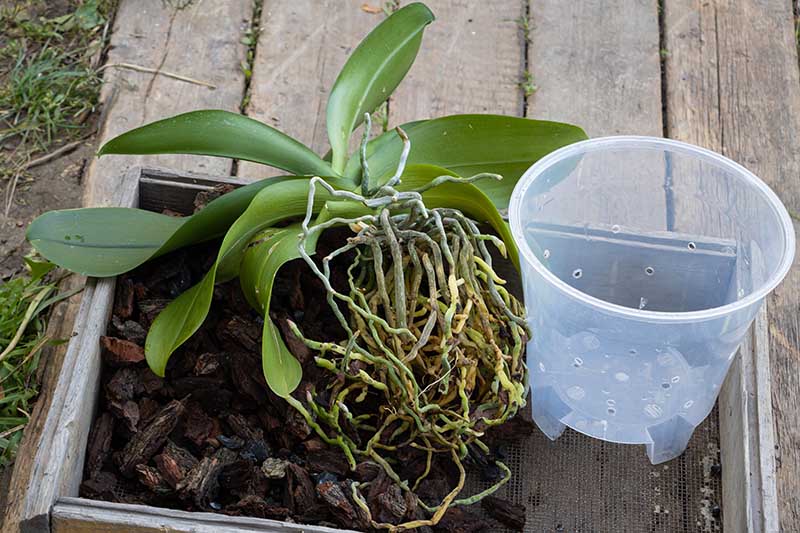
To repot, remove the plant from its pot and gently loosen the roots to remove the old potting medium.
This may feel a bit counterintuitive if you are used to being careful not to overhandle plant roots while repotting houseplants or transplanting garden veggies.
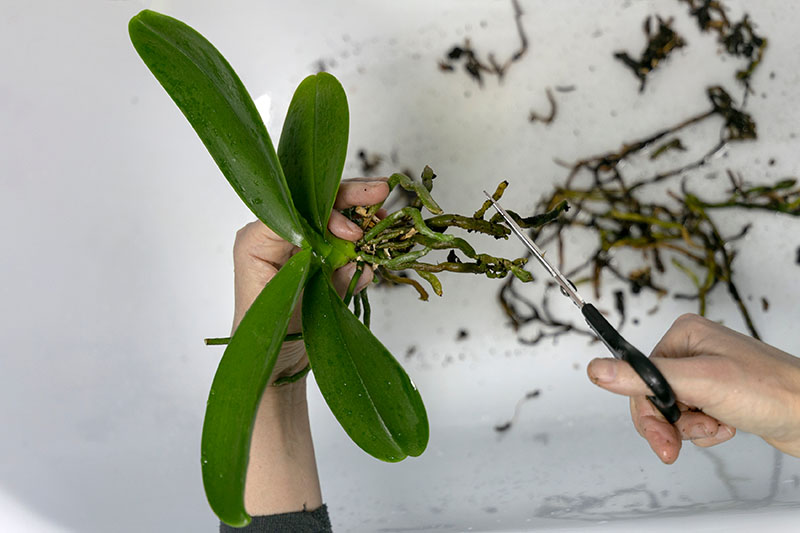
Trim unhealthy roots if needed, place roots into the new (or same) pot, and fill with fresh growing medium.
Some growers like to water right away, and others prefer to wait two or three days before watering. If you trimmed any rotten roots from your plant, wait a few days before watering.
Make a note of the date you repotted on your calendar, and then go ahead and schedule your plant’s next repotting appointment.
You might also place a sticker with your repotting date on the plant’s pot, or add a note in your gardening journal.
For a full step-by-step guide to repotting your orchid, check out our full guide.
Cultivars to Select
Are you ready to try out one of these colorful houseplants?
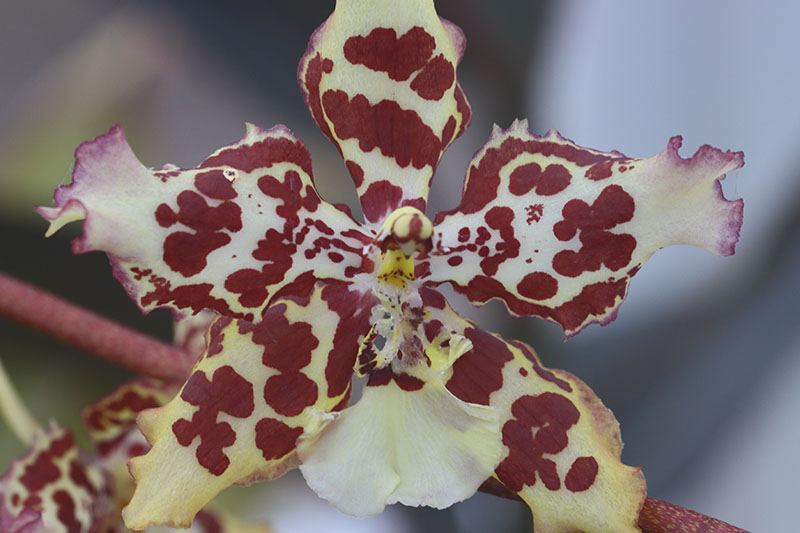
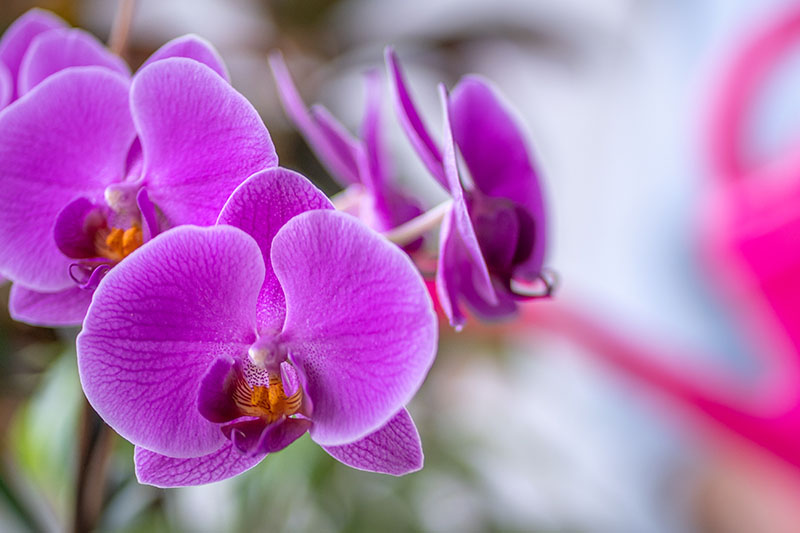
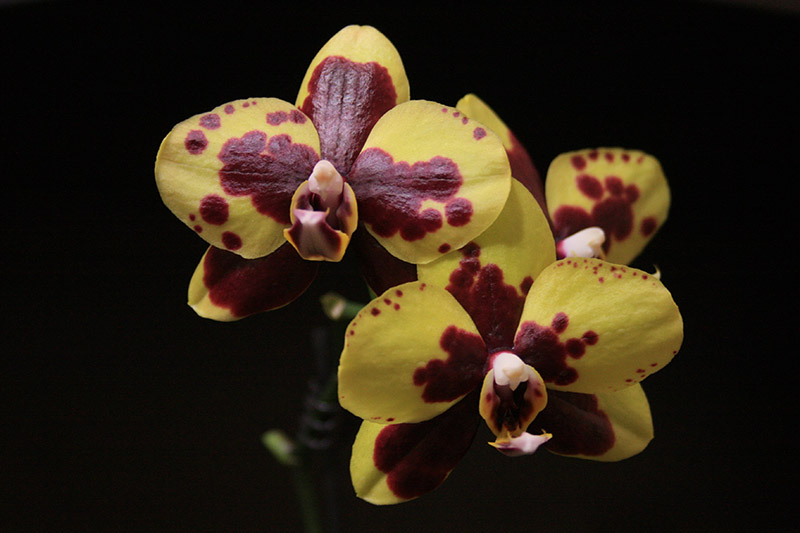
Orchid flowers come in a huge array of hues, including whites, purples, pinks, reds, oranges, yellows – even browns and greens – as well as striped, spotted, or harlequin patterns.
But before you choose a color, make sure you select a variety or species that will adapt well to the conditions you have available for it.
Also, when buying live plants, make sure to pick one that is “blooming size” if you’re impatient for flowers – or use this growing opportunity to cultivate your patience at the same time that you cultivate your orchid!
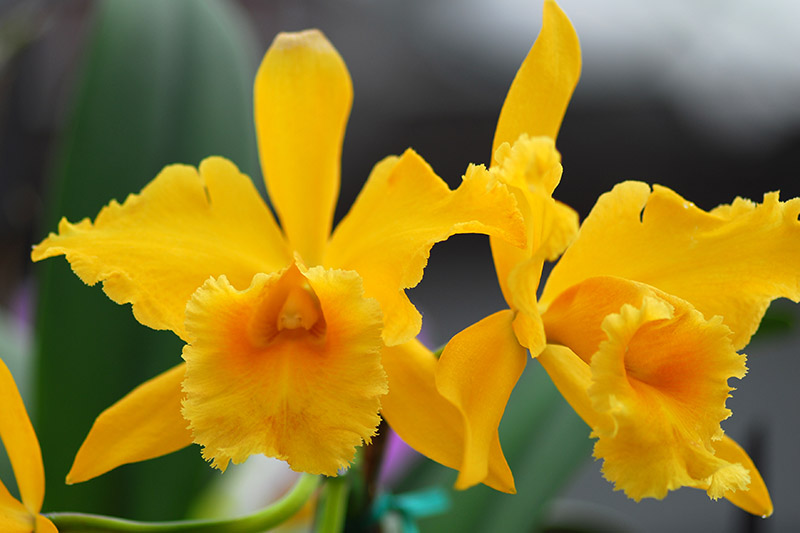
Cattleya
Cattleyas are known as corsage orchids due to their widespread use in the cut flower industry, beautifying prom goers and wedding ceremonies for decades. They are epiphytic or lithophytic and are native to the Americas.
These cultivars are considered easy to grow at home. They bloom in late winter or early spring and their blossoms can last for a month.
Cattleya flowers are large and showy, available in shades of white, yellow, orange, red, pink, purple, and green. Many of them are fragrant.
In order to produce flowers, cattleyas need nighttime temperatures that are 15-20 degrees cooler than daytime temps.
Cattleyas have a sympodial growth habit, producing pseudobulbs that help the plant store water.
They can be large, growing up to two feet tall, but there are some mini cattleyas that will fit nicely on your windowsill.
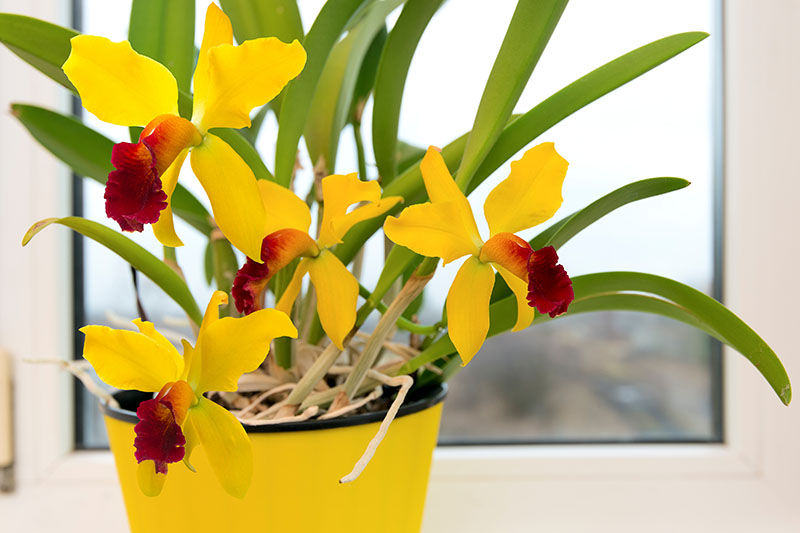
Cattleyas prefer daytime temperatures of 70 to 85°F and nighttime temps of 55 to 60°F. Humidity levels of 50 percent or higher are best.
The potting medium should have large particles to allow the roots to dry easily. Mature plants should be allowed to dry out between waterings.
Cattleyas prefer higher light – place them near a south-facing window where they are exposed to bright, indirect light.
Read more about caring for cattleya orchids here.
Hsinying Mini Beauty
‘Hsinying Mini Beauty’ is an intergeneric hybrid with cattleya and rhyncholaelia ancestry.
It is considered a mini cattleya. This hybrid produces bright tricolored flowers that are magenta, white, and yellow.
As a mini cattleya, this variety does well with medium light.
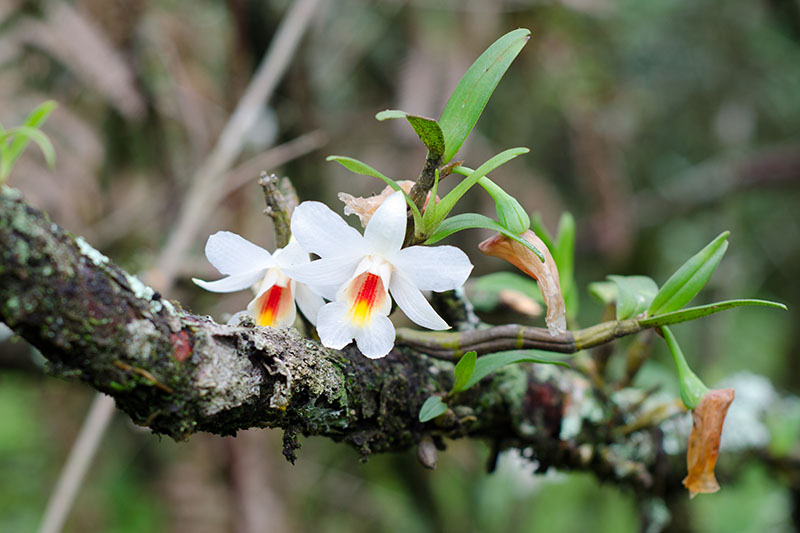
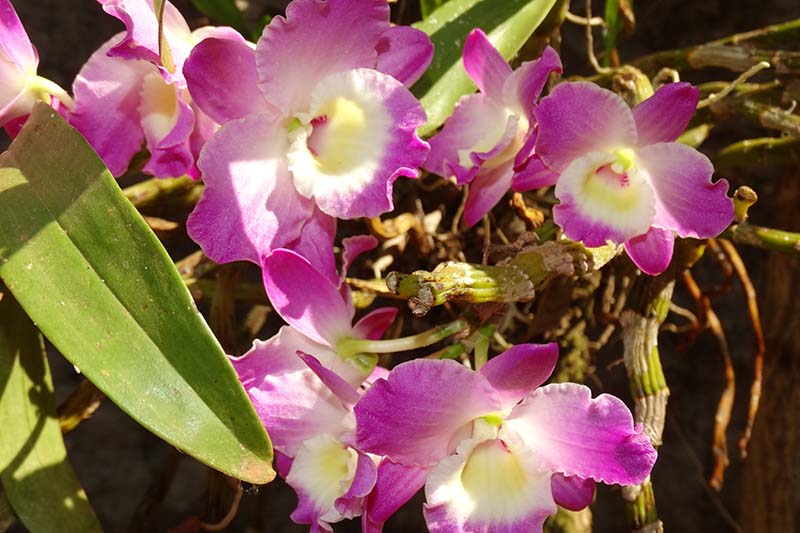
Dendrobium
Sometimes called “spray orchids,” Dendrobium is a genus that includes over 1,800 different species. These are native to Asia and Oceania. Most of the species in this genus grow on trees or rocks.
The flowers come in shades of purple, pink, white, yellow, orange, brown, and green, with the lip usually being a different color from the petals and sepals.
Dendrobiums are sympodial and usually have pseudobulbs. The pseudobulbs are upright and in some species are thin and cane-like.
The leaves of dendrobiums tend to be longer than they are wide and can be oblong, linear, or cylindrical. Dendrobiums can grow up to four feet tall and four feet wide.
Some are deciduous, others are evergreen – and both types may require a dormant period in order to flower.
Dendrobiums do best with bright, indirect light and can be placed in a slightly shaded southern window.
They are warm growers, preferring daytime temperatures in the 80 to 90°F range and nights between 60 and 65°F.
Mature dendrobiums should be allowed to dry out between waterings. When repotting, keep in mind that they like to be in a tight pot. Dendrobiums have tall upright growth and can benefit from staking.
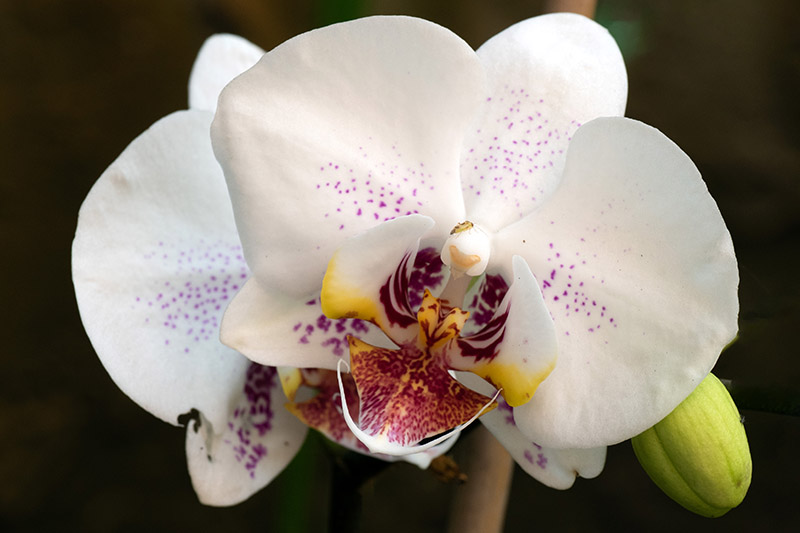
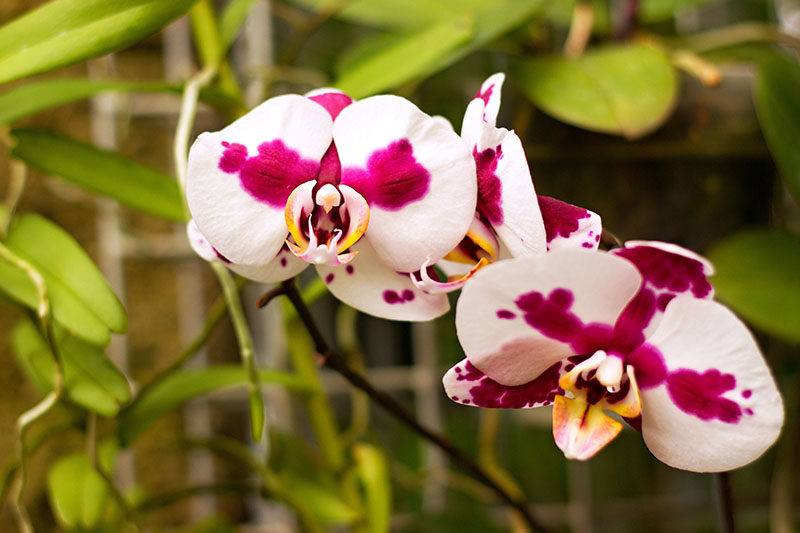
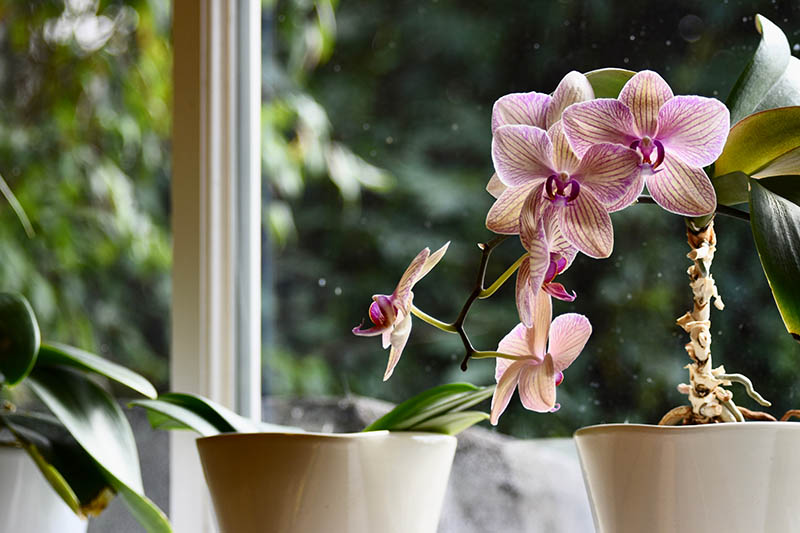
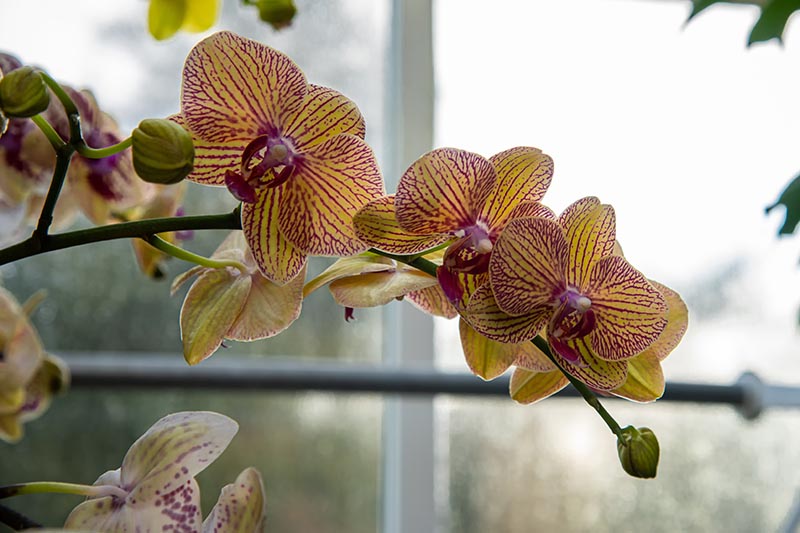
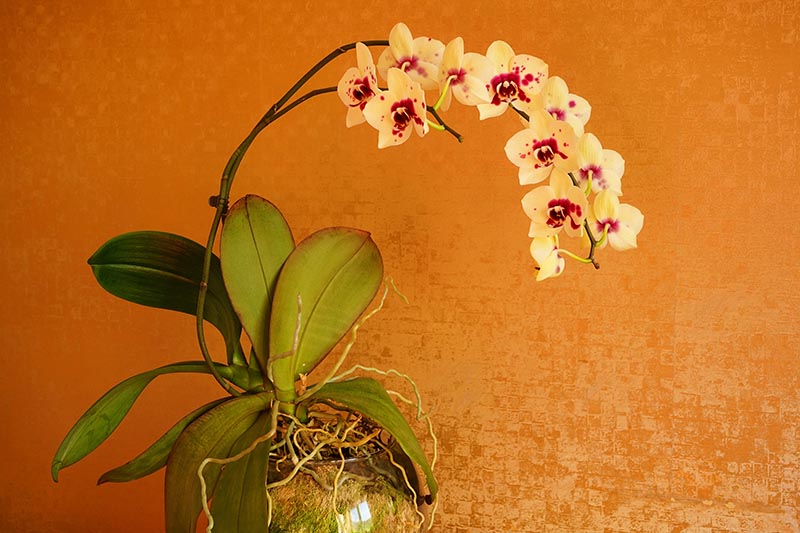
Phalaenopsis
Phalaenopsis is a genus that includes about 70 different species.
“Phals” as they are commonly called, are generally considered the easiest orchids to grow at home. Also called “moth orchids,” they are native to tropical Asia and Australia.
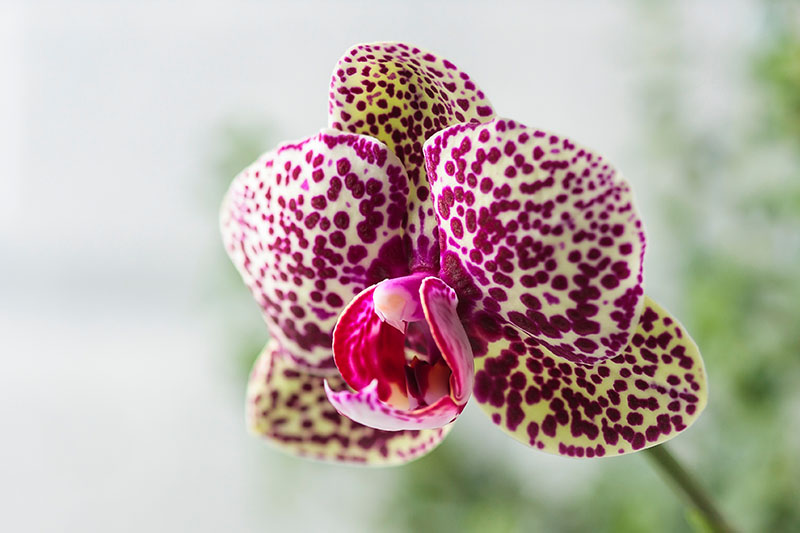
Phals bloom in winter from a flower spike with multiple blooms. Flower colors can be shades of white, yellow, pink, red, or salmon, and flowers sometimes have striped, harlequin, or spotted patterns.
Flowers on phals can be very long lasting – between three to five months. They need several weeks of temperatures between 55 and 60°F to encourage flowering.
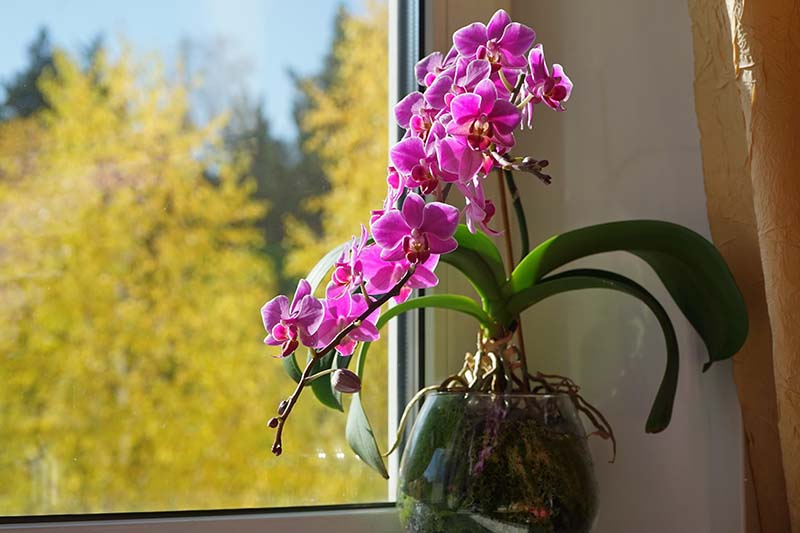
Phals have a monopodial growth habit, fleshy alternate leaves, and can grow up to three feet tall.
They do well in low or medium light, and can be placed on east-facing window sills or near a shady southern window. They are warm growers, tolerating daytime temperatures of up to 90°F.
Phals are considered great starter orchids because of their easygoing natures, adapting well to average indoor conditions.
You can find a set of two Phalaenopsis – one with purple flowers and the other with yellow blooms – grown in gravel from Athena’s Plants via Amazon.
Learn more about how to grow and care for Phalaenopsis orchids in our guide.
Want More Options?
Be sure to sure to check out our follow-on guide, “23 Types of Orchids to Grow as Houseplants.”
Managing Pests and Disease
Luckily, these plants aren’t highly prone to either pests or diseases, but when one of these appears, you’ll want to act fast to save your plant.
Insects
Insects may be more of a problem when growing these plants in a greenhouse or when they spend summers outdoors.
However, some insects can hitch a ride from the nursery where they were grown, so you’ll want to inspect new plants before you buy them or as soon as they arrive home.
Be on the lookout for aphids, scale, mealybugs, and spider mites, all of which will set up camp on your plant and suck out nutrients, interfering with the orchid’s ability to feed itself through photosynthesis.
Washing the leaves on a regular basis will help prevent an infestation.
If infestations occur that are not manageable through leaf washing, neem oil can be used to kill pests without posing a health risk to your family or pets.
When using neem oil, follow the manufacturer’s recommendations for applying the product.
And keep in mind that neem oil shouldn’t be applied on very hot days, when plants are in full sun, or to cultivars with very thin leaves.

Monterey Neem Oil is an OMRI-listed product that is recommended for treating aphids, mites, scale, and mealybugs, among other pests.
You can find it in a 32-ounce spray bottle or as a concentrate in a pint-size container at Arbico Organics.
To learn more about keeping your plants insect free, check out our guide to common orchid pests.
Disease
With orchids, disease isn’t generally spread by insects in our homes or greenhouses – instead, we are the main culprits, unwittingly transmitting disease with unsanitized hands or tools.
So disease prevention comes down to good hygiene practices – wash your hands between handling different plants, and sanitize your tools.
Sometimes infected plants show no signs of illness, so use good hygiene between handling different plants even if they seem healthy.
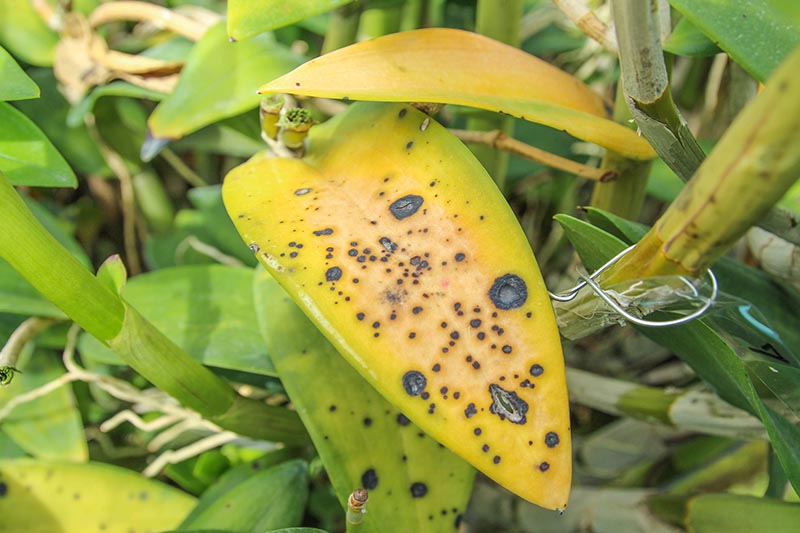
The two most common viruses to look out for are Cymbidium mosaic virus and Odontoglossum ringspot virus. There is no cure for either of these viruses, so prevention is imperative.
Learn more about these and other orchid diseases in our article. (coming soon!)
Quick Reference Growing Guide
| Plant Type: | Flowering perennials | Flower Color: | White, pink, purple, red, yellow, orange, green, brown |
| Native to: | North America, South America, Africa, Europe, Asia, Oceania | Maintenance: | Moderate |
| Exposure: | Bright indirect sun | Uses: | Ornamental, houseplant, cut flower |
| Water Needs: | Moderate | Order: | Asparagales |
| Soil Type: | Well draining soilless medium (orchid growing medium) | Family: | Orchidaceae |
| Soil pH: | 5.0-6.5 | Subfamilies: | Apostasiodideae, Cypripedioideae, Epidendroideae, Orchidoideae, Vanilloideae |
| Soil Drainage: | Very well-draining | Genera: | Cattleya, Cymbidium, Dendrobium, Oncidium, Phalaenopsis, Vanda |
| Common Pests: | Aphids, fungus gnats, mealybugs, orchid blossom midges, scale, spider mites, thrips, whiteflies | Common Diseases: | Black rot, botrytis, cucumber mosaic virus, Cymbidium mosaic virus, Odontoglossum ringspot virus, orchid fleck virus, Phyllosticta leaf-spot, potyviruses, tospoviruses |
Take Care ‘Chids
Congratulations – you have successfully completed Orchids 101!
You now know all the essentials for taking good care of your orchid houseplant: provide it with a special growing medium instead of potting soil, go easy on the watering, only repot one size up at most, and give it indirect light instead of full blazing sunlight.
And, unless you skipped to the end, you also know that there are many, many different types of orchids, and you should always adapt your care to your species or cultivar’s particular requirements.
Are you thinking of bringing home one of these beauties for the first time? Or perhaps your previous attempts to grow them didn’t turn out so well, but you’re ready to try again.
Tell me your orchid growing story in the comments section below, I’d love to hear it!
If adding a green companion or two to your home puts a thrill in your heart, you might want to check out some of our other guides to growing houseplants next:

Thank you. Informative.
Mamun,
Thanks for letting us know you enjoyed the article!
Thank you for all the information. We have had this Orchid for a few years and this is our first bloom. We think it’s a Florida Orchid but we aren’t sure. Can you identify it? Also, can we cut the additional spikes to get them to grow and would that be at the top or from the bottom, or do we just give them more time? I guess I’m wondering why the pics I see show the leaves so low, while ours have grown very high up the spike before producing. Such a beautiful flower though. Worth the time spent… Read more »
Hi Heather, Thanks for posting your questions here and sharing your photo. I agree, orchids are definitely worth the wait in between blooms! I believe that your orchid is a dendrobium, probably a den-phal type. There are many different types of orchids, and different types of dendrobiums, so your plant may not look like other species you are seeing photos of. However, if you look up “den phal orchids” you should see photos of orchids that look very much like yours. They are called “den phals” because they are dendrobiums with flowers that look like those of phalaenopsis. As for… Read more »
Beautiful presentation
Hi Miriam,
Thanks for your kind comment!
I am just getting started with orchids & wanted to get educated a bit before I purchase. This is one of the best articles that I have ever read on anything- informative with correctly evaluated information, clearly written & friendly too!
Thank you!
Hi Suzanne,
Thanks so much for your very kind comment- you made my week! I’m so glad you found this article helpful and wish you the best of luck with your first orchid growing experience!
I emptied a pot of the soil/medium and found lots of bulb-like things with white stems coming out of them. Are these roots or branches. Don’t know whether to plant them with white stems going down or going up. Can’t find anything about this anywhere. HELP!
Hi Ruth,
Could you please share a photo so that we can try to advise you? Just click on the paperclip icon in the bottom right corner of the comment box. Also, you might want to check our article on repotting orchids. Thanks!