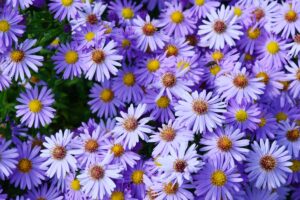


Phalaenopsis spp.
When I started out with houseplants, I was intimidated by orchids.
They seem so delicate and strange – how on earth do you keep them alive, let alone help them to thrive?
Years later, friends now bring me their orchids to help them recover and rebloom.
One of the easiest species to grow at home is Phalaenopsis. You see them everywhere, even grocery stores carry them.

We link to vendors to help you find relevant products. If you buy from one of our links, we may earn a commission.
Also known as moth orchids because the flowers resemble dozens of moths flitting around the leaves.
In our Orchids 101 guide, we give you an overview of the fascinating world of plants in the Orchidaceae family.
Whether you were gifted a moth orchid and aren’t sure how to make it happy, or you’re an experienced grower looking for some help, this guide covers it all.
Here’s what we’ll chat about, coming right up:
What You’ll Learn
Phalaenopsis comes from the Greek “phala” for moth and “opsis” meaning appearance.
Some species growing in the wild truly look like a cluster of moths flitting around near a tree, so these are well-named.
There are multiple subgenera within the Phalaenopsis genus, and this genus includes some of the most popular cultivated orchids.
The subgenera you may come across are Phalaenopsis, Parishianae, Aphyllae, Proboscidioides, and Braceana. The first two contain the vast majority of species that you’ll find in commercial cultivation.
Quick Look
Common name(s): Moth orchid, Phalaenopsis
Plant type: Flowering evergreen epiphyte
Hardiness (USDA Zone): 10-12 (outdoors)
Native to: Tropical Asia
Bloom time / season: Spring, summer, fall
Exposure: Bright indirect light
Soil type: Loose bark, well-draining
Soil pH: 5.5-6.0, slightly acidic
Time to maturity: Up to 7 years
Mature size: Up to 3 feet tall by 1 foot wide
Best uses: Houseplant
Taxonomy
Order: Asparagales
Family: Orchidaceae
Subfamily: Epidendroideae
Genus: Phalaenopsis
Species: Amabilis, amboinensis, aphrodite, mannii, schilleriana
These plants may be found throughout tropical Asia, as far west as India and Nepal, and as far east as Papua New Guinea.
They grow in the wild as far south as tropical Australia and north to Taiwan. And they grow at every elevation, from sea level to thousands of feet up.
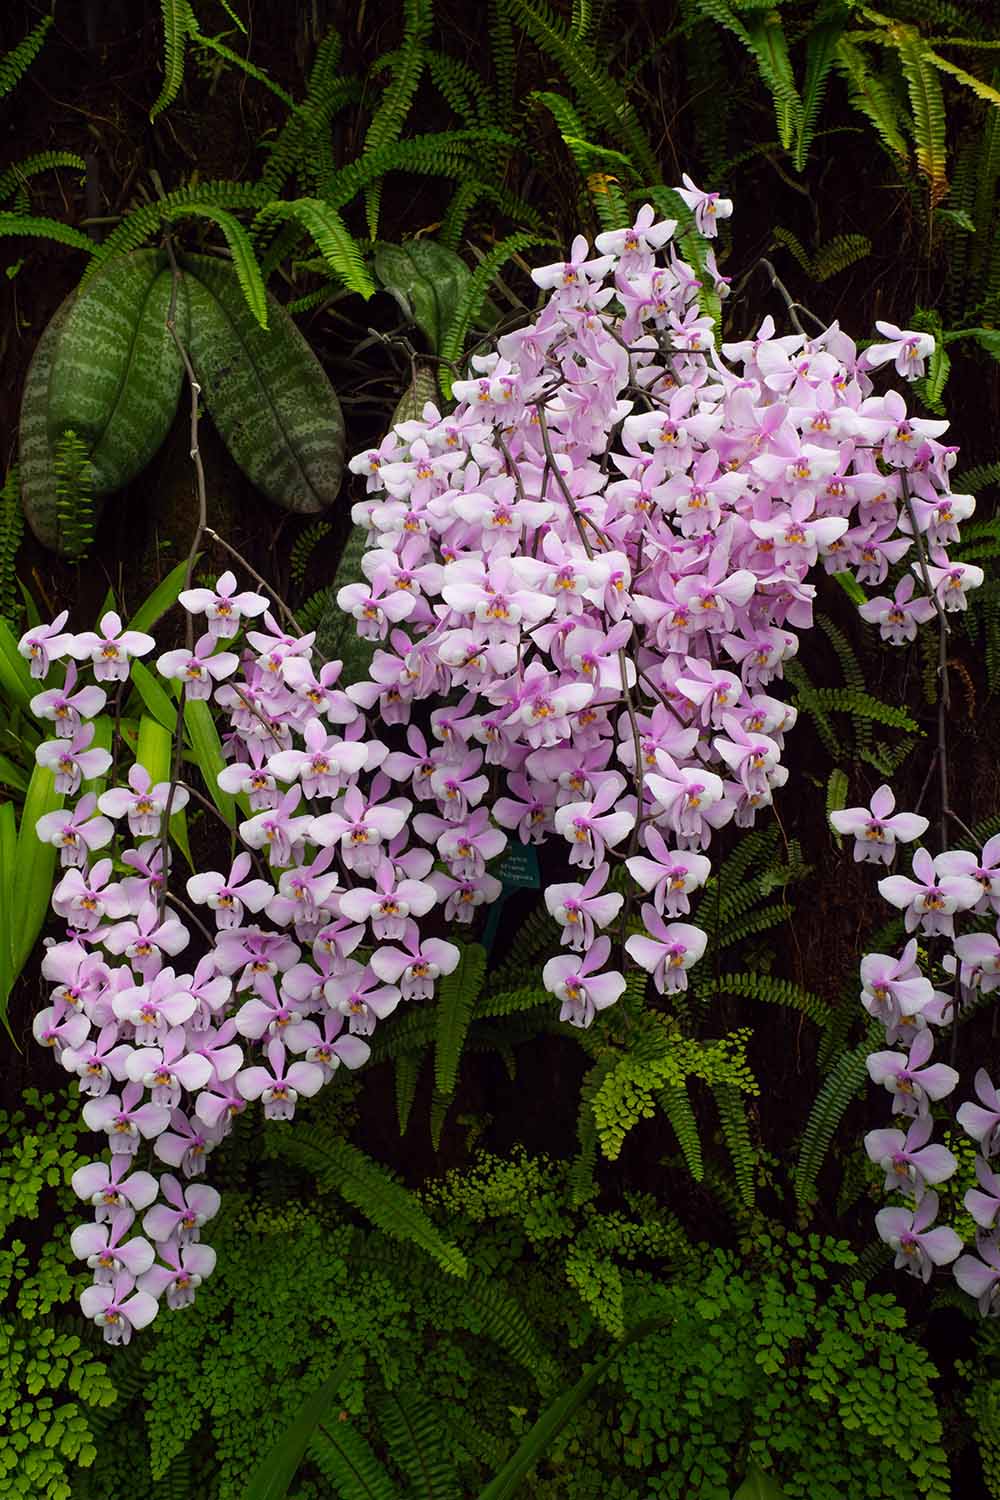
Almost all moth orchids are epiphytes, which means they grow on the branches and trunks of trees.

They pull nutrients and water from the air as well as the debris that has collected on the phorophyte – or host plant – that it is growing on.
Some are lithophytes, which are plants that grow on rocks.
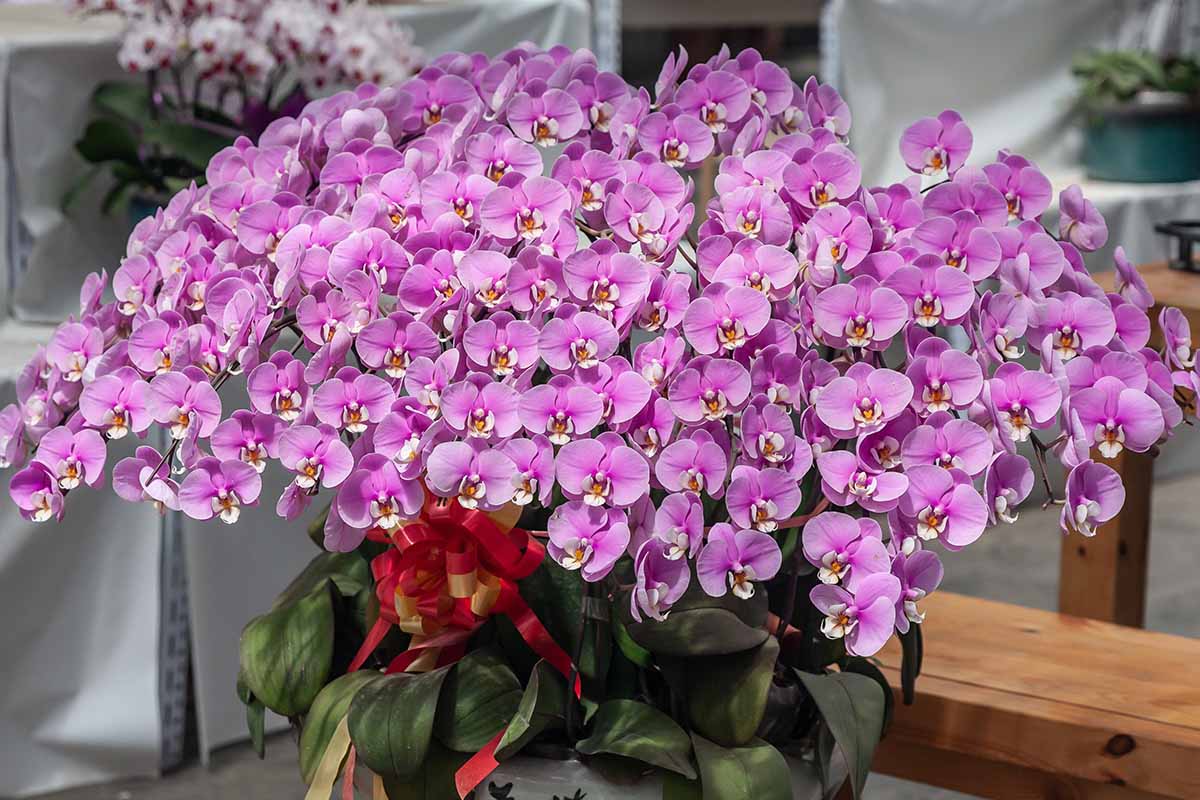
All have succulent leaves that emerge from a central point, and exhibit long-lasting flowers.
They bloom on flower stalks and most typically start blooming in late summer through winter or early spring. All of the flowers open at once.
How to Grow
Orchids aren’t like your average houseplant, they need specific conditions to thrive.
Let’s take a look.
Potting Medium
You can’t use standard potting soil – it’s too dense. Well, you can use it, but you’ll make your life much more difficult than it needs to be!
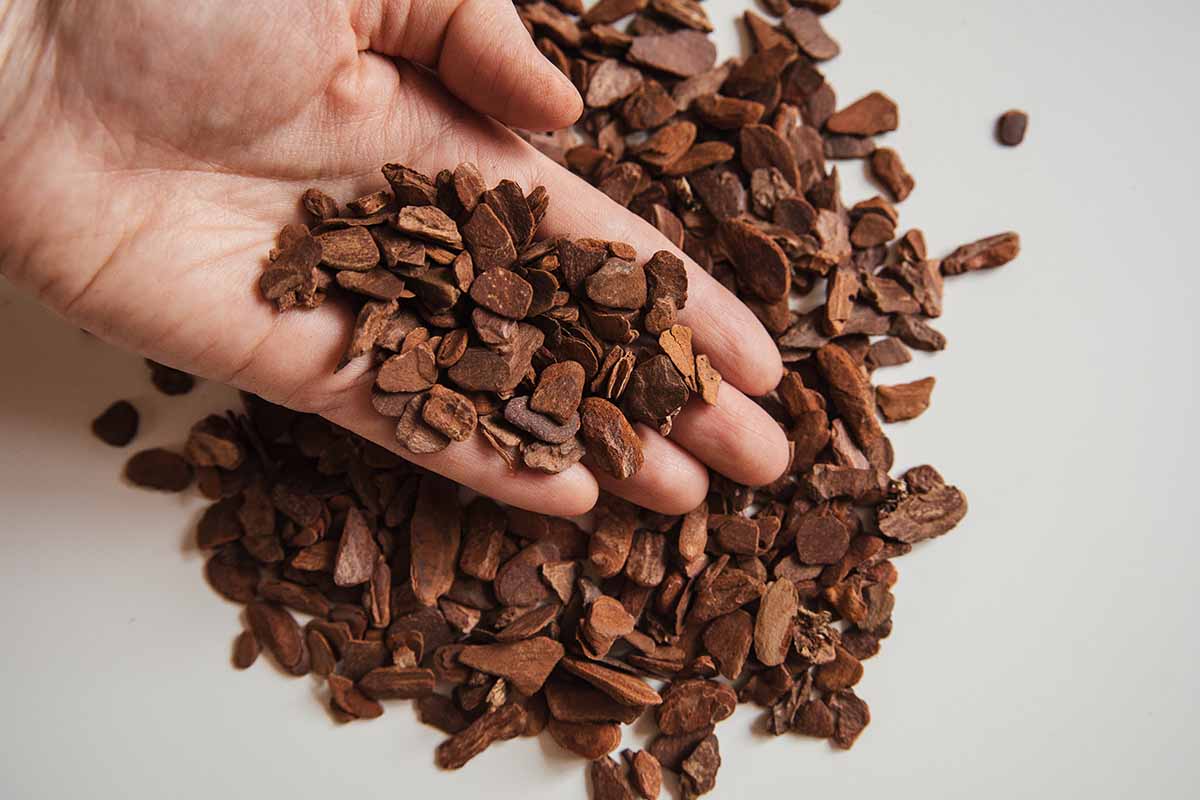
Chopped fir bark is the best medium. The pieces should be around a quarter-inch to an eighth of an inch in size.
To that, you can add a little perlite and charcoal if you desire, but it’s not necessary. Perlite retains water and improves drainage, and charcoal absorbs excess water.
You can also buy pre-made products that contain a similar mix to what I’ve described above.
These mixes are formulated with the proper pH for Phalaenopsis, somewhere between 5.5 and 6.0.

I love Sun Bulb’s mix, which contains charcoal, sponge rock, and fir bark. It is available from Amazon in four-quart bags.
Containers
You will need to make sure you have an appropriate container to house your Phalaenopsis.
Plastic containers made specifically for orchids are available, with extra holes or slats cut into the bottom as well as up the sides.
Regular houseplant pots are not suitable.
Water
Watering is arguably the biggest challenge with orchids as it’s so easy to overwater.
That’s why many come in plastic pots filled with bark and with lots of drainage holes.

Some people recommend watering with ice cubes once a week to ensure you’re giving the right amount of water. I do not recommend this method as it can damage the roots.
You want to add water when the substrate is almost entirely dry.
Be sure to only water at the soil level and not on the leaves. Standing water on the leaves can cause crown rot.
You could also opt for bottom watering. If you live in a humid area, you’ll need to water far less often than gardeners in dry climates.
Light
These plants like bright but not direct light, except for a little in the morning.
Pick a north- or east-facing window, or a west- or south-facing window with a sheer curtain over it.
Err on the side of providing too little light rather than too much. Phalaenopsis won’t thrive in bright direct light and the healthiest ones growing in the wild tend to be in shadier spots.
Temperature
When it comes to temperature, aim for a warm environment during the day, with 80°F being ideal.
It can be about 15 degrees cooler at night, but that’s not necessary. They can survive brief periods with temperatures dipping down into the mid 30s, but try to avoid that.
Give your phal really good air circulation, and don’t put it in a closed spot.
Fertilizing
Feeding your Phalaenopsis requires understanding what part of the growing phase your plants are in.
You must feed to encourage new blossoms and you should support them during their long flowering phase.
The problem is that most people buy these plants while they’re blooming. Commercial growers encourage them to bloom outside their normal phase to encourage sales.
For that reason, I find it’s best to lay off the fertilizer for at least a month.
It won’t hurt to underfeed for a short period, but overfeeding can lead to some problems that can be a challenge to remediate.
After the first month, feed plants monthly with a diluted or extremely mild fertilizer when in bloom.
Increase applications to feed every two weeks when the plant isn’t blooming.
Dr. Earth’s Pump & Grow fertilizer is an excellent option.

Dr. Earth Pump & Grow Fertilizer
It’s mild enough for regular use and balanced to give your plants the nutrients they need. Bring home a 16-ounce bottle from Arbico Organics.
Find more tips on how to feed your plants here.
Species and Cultivars
Many times, these plants will just be listed as generic moth or Phalaenopsis orchids at grocery stores, big box stores, and nurseries.
There are many, many hybrids and there are always new ones popping up. Some of the more common hybrids are bred by Mituo.
Their Diamond series features flowers with some pretty striking patterns and colors.
Amabilis
The beautiful moon orchid, as this species is often called, is one of the varieties most commonly found in stores.
P. amabilis flowers are typically white or nearly white.

Each blossom can be up to four inches across and there can be dozens on a single plant. Each of these lasts for weeks, and the plant continually sends out new flowers all summer long.
The plants themselves can grow over three feet tall indoors with proper care.
Amboinensis
This species is less common, but it’s highly sought-after on the market.
In their native habitat, P. amboinensis plants are endangered, but there are lots of lovely hybrids out there if you’re willing to do the work of finding them.

Most feature flowers with some combination of yellow, red, brown, or white petals. They’re also highly fragrant with a strong floral scent.
Plants can reach about a foot tall and each one can support multiple flowering stems at a time.
Aphrodite
This species has small white flowers, but there are some hybrids that feature pink splotches or ones with entirely pink petals.

Easily mistaken for P. amabilis, P. aphrodite flowers are about an inch smaller and pinkish-red at the base of the central petal. The plants are smaller overall, too.
Mannii
This species likes to do its best impression of a swarm of bees, with petite yellow and brown blossoms on plants that stay under a foot tall.

If you’re looking for a miniature specimen, see if you can find P. mannii ‘Black.’
It has tiny, bright yellow and brown flowers with dark black spots. They really look like bumblebees hovering around the tiny, six-inch-tall plant.
Schilleriana
Along with P. amabilis, this species represents some of the most popular flowers on the market.

P. schilleriana is super tolerant, doesn’t mind low light or some direct morning sun, and won’t collapse in a heap if you aren’t the best at watering.
The plants can be covered in dozens of small flowers in colors like white, pink, and lilac. They can grow up to three feet tall.
Maintenance
Orchids aren’t the most attractive plants when the flowers fade.
Snipping off that flower stalk can go a long way toward improving the appearance and it encourages reblooming.
Take a clean pair of scissors and snip the flower stalk as close to the base as you can.

You should repot once every year or two, but you don’t necessarily need to increase the pot size.
This job should be done in the early summer after the blossoms have faded.
One of the biggest challenges of orchid growing is to take a plant that has stopped blooming and encourage it to bloom again.
Provide about 15 degrees of difference in temperature from day to night. Temporarily aim to provide slightly cooler conditions than the usual.
It should be around 55°F at night and 70°F max during the day until you see the flower spike start growing again.
Then move it back to a location with warmer temperatures closer to 80°F during the day and 15°F cooler at night.
White and pink-flowered types in particular need cooler temperatures to bloom again.
If your plant stopped blooming and you moved it to a cooler spot in the summer, you should start to see new flower spikes forming by about January in most regions.
Our guide to encouraging orchids to rebloom has more tips.
Propagation
Propagating orchids is a tricky process that is generally best left to the professionals. However, if you’re game to give it a try, there are two methods.
From Seed
If you have more than one Phalaenopsis, you can use a paintbrush to take the pollen from one flower’s column and place it on another flower’s stigma.
In about nine months or so, a seed pod will form.

Many orchid breeders will send the pod to a special lab to undergo a process known as flasking.
This entails germinating the tiny seeds in a flask filled with a gelling agent and symbiotic mycorrhizal fungi.
You can try germinating your seeds at home, but it’s extraordinarily difficult with a low rate of success.
You can learn all about this process in our orchid seed propagation guide.
From Divisions
As Phalaenopsis plants grow, they become taller and put out lots of aerial roots.
These form near the base of the plant but above the potting medium. When your plant has lots of these aerial roots, you can divide it to create new plants.
Grab a sturdy, clean pair of clippers and fill a fresh pot with your chosen medium.
Cut the stem above the soil but below as many of the aerial roots as you can. Pot the top in the new container with the aerial roots buried in the medium.
You can treat the top cutting as you would any orchid, but the bottom part of the parent that remains needs special care.
Put it in a spot with bright, indirect light and water lightly. You want to keep the medium moist but it shouldn’t be wet.
You should see a bunch of new plantlets pop up after a month or two of care.
Detach these plantlets with some roots attached to each one, and pot them separately.
Keep watering and treating the bottom half as you normally would and it will regrow eventually.
You need to be careful not to overwater, though, because the plant will require less moisture than before.
Transplanting
Mostly when you buy an orchid at the store it will come in a plastic container with lots of drainage holes.
If that’s the case, you can just keep it in there until it’s time to upgrade to a larger pot. If you don’t like the look of the pot, feel free to place it inside a decorative one.

Sometimes, you can find plugs or plants in solid grower’s pots with potting soil and maybe a few drainage holes in the bottom.
If that’s the case, you’re going to want to repot your orchid ASAP.
Remove the plant from its container and brush away as much of the media as you can from the roots.
Place it in a new container and fill in around the roots with the orchid bark mix.
Since they’re epiphytes, you can also grow them on the surface of a wood substrate wrapped in moss to create a really special display.
Pests and Disease
For the most part, if you water and feed your moth orchid appropriately, you probably won’t encounter too many problems.
If issues do occur, quick action is key.
Pests
Since we typically grow these indoors as houseplants, orchids may be attacked by some of the common critters that chomp on all houseplants.
Aphids
There are dozens of aphid species that might feed on your orchids, but green peach (Myzus persicae) and cotton aphids (Aphis gossypii) are a few of the most common.
You can easily spray them off your orchid with a blast of water. Do this once a week for a few weeks and the problem should be handled.
If the water method doesn’t work, we have a guide to help you eliminate aphids.
Mealybugs
Mealybugs are oval-shaped and white, cream, yellow, or pale pink. They use their sucking mouthparts to feed on the sap from the stems and leaves.
If you see them, act right away. They can rapidly become a severe problem, and they can hide in the nooks and crannies of the bark in pots.
These pests can cause a plant to rapidly lose flowers, turn yellow, and die.
Quickly isolate the infested specimen and grab some rubbing alcohol and cotton swabs. Dab some alcohol on each bug.
Our guide to managing mealybug infestations has more tips.
Need more help in identifying pests that are attacking your moth orchids? We have a guide for that.
Disease
Phalaenopsis generally shows good resistance to disease.
If you keep them healthy with proper care, you probably won’t run into either of these ailments, but that doesn’t mean you shouldn’t be aware of potential issues.
Black Rot
If you start seeing black spots on the leaves of your plant, you should suspect black rot.
It’s caused by two different species of oomycetes or water molds, Pythium ultimum and Phytophthora cactorum.
This problem pops up when plants are overwatered or grown in overly humid conditions.
On the bright side, Phalaenopsis orchids are less susceptible to this disease than some from other genera.
Treat your plant with a Bordeaux mixture of one part copper sulfate, one part lime, and 10 parts water, and cut out any heavily infected parts with a clean knife.
Root Rot
Before you see leaf spot or black rot, you’ll likely see root rot. It’s the most common disease to impact orchids.
Technically, it’s not usually pathogenic, but it can be. It’s caused by chronic overwatering that drowns the roots.
The leaves will droop and turn pale, and eventually collapse. Meanwhile, the roots turn black and mushy.
Your best option to try to save the plant is to remove it from the pot and take it out of the growing substrate.
Let it dry out, wipe down the container to sanitize it, and repot in fresh substrate. Be sure to ensure good drainage, and avoid overwatering.
Learn more about root rot here.
There’s Nothing Like Fantastic Phalaenopsis Orchids
They’re truly elegant plants, orchids. But they’re not like other houseplants. They need special treatment to grow and look their best.
But when they do, they’re true showstoppers.
Is this your first time growing an orchid? Have you run into any trouble? Did this guide help you sort things out? Let us know all about your adventures so far in the comments.
Want to learn more about growing orchids? Have a read of these guides next: