
Daucus carota sativus ‘Nantes’
Carrots that you grow yourself are crunchy, flavorful, and best of all, fresh! But the ‘Nantes’ variety is a good reminder that they’re not all the same.
This type of Daucus carota is distinguished by its skin, which does not require peeling, only a good scrub before eating or cooking.
And its six- to seven-inch cylindrical roots will “hold” longer in the ground than other varieties without becoming fibrous.

We link to vendors to help you find relevant products. If you buy from one of our links, we may earn a commission.
They also have a less noticeable, thinner core than some other types, so they tend to be extra sweet and have almost entirely tender, crisp flesh. This is another reason they’re a favorite with reluctant vegetable eaters.
If you’re considering growing this root crop this season or next, let’s determine whether ‘Nantes’ might be the good choice versus other favorites like ‘Chantenay,’ ‘Imperator,’ or ‘Danvers.’
I’ll delve into its traits and growing requirements, and explain how to get top yields.
Here’s what I’ll cover:
What You’ll Learn
The Nantes carrot is as French as the city of Nantes, where it was developed by the Vilmorin-Andrieux seed company in the 1850s.
Since those days, the original has been tapped as one of the parent crops to create a number of other cultivars, and all of them are now considered “Nantes-style” varieties.
Quick Look
Common name(s): Nantes carrots
Plant type: Biennial root vegetable
Hardiness (USDA Zone): 3-10
Native to: Eurasia
Bloom time / season: Spring and fall
Exposure: Full sun
Soil type: Sandy, loamy, well draining
Soil pH: 6.0-6.8, slightly acidic
Time to maturity: 65-70 days (spring); 70-75 days (fall)
Spacing: 6 seeds per inch when planting, 2 inches after thinning
Planting depth: 1/4 inch (seeds)
Mature size: 1-2 inches wide x 8-12 inches high
Water Needs: Medium
Taxonomy
Order: Apiales
Family: Apiaceae
Genus: Daucus
Species: Carota sativus
Cultivars: Nantes. Bolero, Half-Long, Mini Core, Scarlet Nantes, Touchon
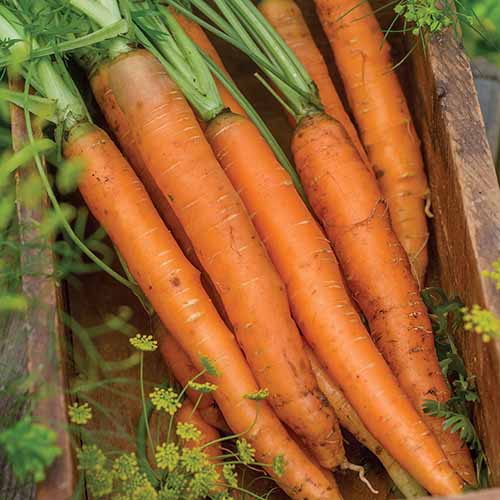
A hallmark of the variety is its cylindrical, slightly tapered roots. They’re tender, not fibrous, and typically grow six to seven inches long at maturity, though the ‘Bolero’ cultivar can reach eight inches.
The flesh is bright orange-red with almost no core at all. They mature in the relatively short time frame of 65 to 75 days, which explains their nickname, “Early Coreless.”
Not requiring peeling saves a step in the kitchen. And it allows these carrots to retain all the vitamin C and niacin that are most concentrated in the peel, and right below it.
You’ll also get to eat just a bit more of the beta carotene that humans convert to vitamin A, which is equally dispersed throughout the skin and flesh.
Of course, the extra-tender flesh means ‘Nantes’ doesn’t contain as much dietary fiber as some other varieties you might choose to grow.

‘Nantes’ is also a great baby carrot option, since it is already sweet if harvested before it reaches maturity.
There are other traits this variety shares with all types of carrots, from the short and stumpy to the pointed and purple.
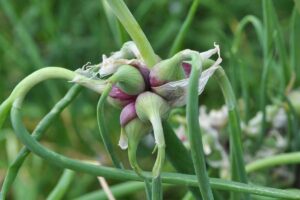
All cultivars of D. carota sativus originated in Central Asia, and all types are biennials, which means they don’t bloom until their second year.
Of course, us gardeners typically like to pull up the roots and enjoy them for fresh eating and in our favorite dishes long before that second season arrives. But you could also opt to save some of your own heirloom carrot seeds for replanting, if you wish.
Speaking of which, this seems like a good time to dive into the sowing and growing info you’ll need before planting this crop. Here you go!
How to Sow
All carrots grown in the garden have a few non-negotiable demands, and ‘Nantes’ is no exception.
They require a spot that receives at least six hours of sun daily, along with sandy or well-draining loamy soil that’s rich in organic matter.
The depth of the soil is key. The plants won’t produce healthy, mature roots to harvest unless the dirt is deep enough to cultivate to about 10 inches.

To prevent deformed carrots, make sure to pick any stones and clumps out of the soil before planting.
If your soil is too rocky or heavy for that, you might want to consider planting in a raised bed that you fill with a more appropriate growing medium, with room for the roots to extend six or seven inches deep.
Some gardeners are able to provide deep enough soil by setting the raised bed on top of a spot in the yard that can be cultivated below the planter to a depth of at least a couple of inches.
If you go for this option, remember not to line the bed with any material that roots can’t break through, like heavy plastic or weed mat.
You can also grow this variety in a container, as mentioned above, but you usually can’t plant more than a few in a 12-inch diameter pot, and it would still need to be 10 inches deep.
Once you start using pots that are larger than that and fill them with soil, they tend to be too heavy to maneuver easily, and carrots planted in containers will require watering every couple of days during the growing season.
To be able to use lighter, more portable pots, I would grow a much shorter variety in containers, like ‘Altas’ or ‘Parisian,’ but it’s your choice!

Another key step in prepping is testing your soil if planting in-ground, and working to achieve the preferred pH and nutritional makeup. If you can, start this process the season before you want to plant.
For the best yields and the sweetest flesh, strive for a soil pH of 6.0 to 6.8, which is a bit on the acidic side.
These root vegetables grow best when daytime temperatures are around 75ºF, and nighttime temperatures are around 55ºF.
Plan to plant them on a timeline where they can mature, or at least do most of their growing, within the ideal temperature range.
Those of us who are growing vegetables in areas with extra-hot summers must plan to pause sowing beyond early spring, and then resume again in late summer and early fall for a harvest about 75 days later.
Start sowing a couple of weeks to a month before your average last frost date in the spring, but not during a hard freeze. Make successive plantings every two or three weeks as your climate allows.
Remember, carrots can grow well in chilly temperatures, but they do grow a bit more slowly when the weather cools down. Allow an extra week or two for ‘Nantes’ to reach maturity in the fall, especially if you live in an area where hard frosts strike early.
Germination can be erratic, and it takes 10 to 21 days before you will know how many of your seeds sprouted. That’s a long time to wait, only to discover that you may need to start more!

Instead, plant plenty and plan to thin your seedlings if too many germinate. Six seeds per inch works for me.
Space rows eight inches apart. Also leave yourself a walkway if you’re planting a large patch in the ground, but don’t worry about doing this if you are sowing in a raised bed that offers access from all sides.
Cover the seeds lightly with a seed starting medium or vermiculite mixed with loam. If you’re planting in early spring or fall, when the temperatures are cooler, cover the seeds with a quarter to half-inch of the medium.
When the temperatures are warmer, increase the depth to about three-quarters of an inch.
Water the seeds in lightly with a spray bottle or a fine mist from the garden hose. And then vow to keep the top two inches of that soil moist but not soggy until germination occurs.
How to Grow
Even though vegetables like cucumbers or tomatoes have a much higher water content, carrots still need plenty of water to produce a good yield.
Keeping them moist starts when you plant the seeds. At that point, you’re worrying only about the top couple of inches of the soil, but as they get longer, they’ll need the moisture to reach as far down as the tips of the roots.

If your carrots haven’t received at least one inch of rainwater in a given week during the warm months, provide supplemental water yourself.
Be careful to water at the soil line, not from overhead, to avoid waterborne pathogens. You can determine how much precipitation you’re getting with a rain gauge.
Another important duty is keeping the seedlings thinned properly so they have space to grow and ample air circulation.
Once the seedlings are two inches tall, pull or snip the weakest-looking seedlings to leave about two inches of space between the healthier ones.
Thin again when the seedlings are about half their mature height, usually between four and six inches tall.

At this point, you may want to eat the young carrots you uproot. Though they may not be a deep orange or particularly sizable just yet, they should be plenty sweet.
Do what you can to keep weeds out of this area of the garden patch, too. These root vegetables will be more robust and sweeter when they don’t have to compete for water or nutrients.
For more ways to grow the best carrot crop in your vegetable garden, read our guide.
Varieties to Select
Here’s a friendly reminder to begin, in terms of sourcing: You may come across transplants for sale, but in general, carrots have substantial taproots that react poorly to transplanting.

Instead, start your own from seed, or at the very least, find seedlings that are not yet two inches tall. Ideally, these should be planted in biodegradable cells that can go straight into the ground, such as peat pots.
Here’s a short list of places to buy the best ‘Nantes’ seeds. Keep in mind that although ‘Nantes’ is a cultivar, many modern-day varieties have sprung from ‘Nantes’ parentage.
Bolero
An improved hybrid Nantes type, ‘Bolero’ is resistant to powdery mildew. The roots are seven to eight inches at full-size, and reach maturity 75 days after sowing.
‘Bolero’ seeds are available in 500-seed packets from Papaw’s Garden Supply via Amazon.
Nantes Half-Long
Slim and cylindrical, this cultivar still grows the same length as varieties with similar names, about six to seven inches, but is a bit blunter at the end and less tapered.
These mature 70 days after sowing.
‘Nantes Half-Long’ seeds are available from Burpee in conventionally-grown 1,000 and 3,000-seed packages, organic packets of 3,000 seeds, and in 22.5-foot-long seed tape.
Nantes Mini Core
Note that it’s the core that’s extra small on this variety, not the carrots. They are six or seven inches long and ready to harvest about 70 days from sowing.

‘Nantes Mini Core’ seeds are available in various packet sizes from True Leaf Market.
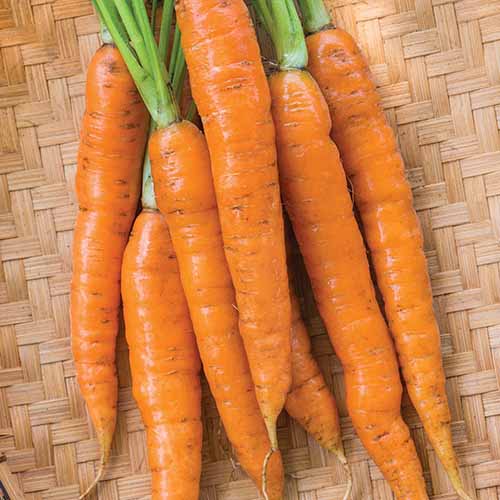
Scarlet Nantes
Sweet and deep orange, ‘Scarlet Nantes’ carrots grow between six and seven inches long, maturing in 65 to 75 days.

Find seeds for ‘Scarlet Nantes’ in various-size packets available from Eden Brothers.
Touchon
A Nantes-type heirloom praised for its lack of hard fibers, this cultivar reaches about six inches long and an inch across. It matures in just 65 days.
‘Touchon’ is available in 3,500-seed packets from Burpee.
Managing Pests and Disease
We’ll discuss pests first:
Pests
So predictable they’re even named after their target, carrot rust flies are the primary insect pest that might destroy your lovely orange root vegetables.
The adults lay eggs where the crowns emerge from the soil, setting up their larvae to hatch and consume the roots below the surface.
This scourge affects the looks of your crop, and renders it inedible.
Other underground larval pests that may burrow into the roots include carrot weevils, and wireworms.

Want to avoid all three of these pests with one method? Consider placing a floating row cover over the sprouts just as they germinate. It will let water in, but keep the adult insects from landing on the base of the plants to lay their eggs.
There’s another tactic old-timers swear by for dealing with wireworms. It seems they’re so attracted to carrots that veteran home gardeners often plant whole or chunked carrots in strategic spots in a plot they intend to plant with seeds.

If you do this, be sure to place a stake or stick in the ground as well, to note the location of these “traps.”
Leave them in place for a week or two, and then dig them up and dispose of them, wireworms and all. This may not take care of all the potential culprits, but it will definitely put a dent in the population ahead of planting in that soil.
Some insect pests do assault carrots from above the ground, too. A few of these include aster leafhoppers, flea beetles, and grasshoppers.
Find more information on controlling carrot pests here.
Disease
While a few Nantes-type cultivars have been bred to resist certain diseases, like ‘Bolero’ which is resistant to downy mildew, there are still a bunch that can infiltrate your crop.
Alternaria leaf blight, usually caused by the fungus Alternaria dauci, may start with smaller spots on the leaf edges that grow into larger brown water-spots. Unchecked, this leaf blight might turn the carrot fronds brown or make the entire plant look scorched.
Root-knot nematodes (Meloidogyne spp.) can cause forked roots, while the oomycetes Pythium violae and P. sulcatum can cause cavity spots, which leave some pretty ugly blotches.

Another disease to watch for is aster yellows, caused by phytoplasmas which are similar to bacteria, and often spread by leafhoppers in search of food. You can learn more about its characteristics and the available controls in our guide.
Also anticipate possible bacterial soft rot, cercospora leaf blight, downy mildew, or powdery mildew whenever you grow carrots.
Stay ahead of all these issues by making good interplanting choices, and sowing seeds in a new area of the garden or a clean container filled with fresh soil each year.
Never plant ‘Nantes’ in the same place two years in a row, and you’ll be able to avoid many of the insects that overwinter in the soil, or disease pathogens that don’t dissipate from the dirt for a season or two.
And finally, make sure you only pick a type of carrot that will grow well in your available soil and growing conditions. Vegetables that grow steadily and are robust show better disease resistance.
Find tips on identifying and controlling carrot diseases here.
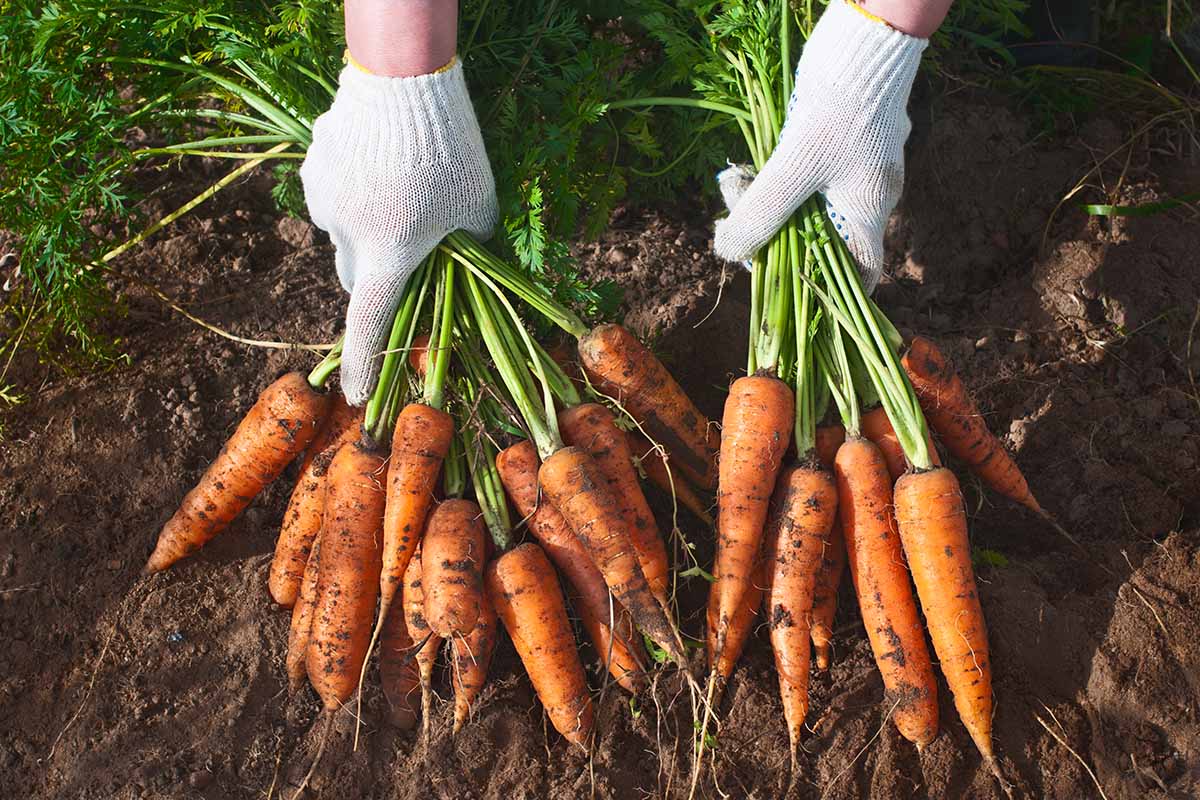
Harvesting
To pull ‘Nantes’ carrots in their prime, make a note in your gardening journal and mark your calendar on a date a week or so ahead of when they will mature, which is typically 65 to 70 days depending on the variety.

Usually, you’ll be able to see that they’re getting thick enough to pull just by looking at the area where the crowns peek out of the soil.
But if the tops are resting beneath the dirt and you can’t spy them readily, you may need to pull a sample every few days until they reach the size you’d like.
If you plan to harvest them as baby carrots, take these steps about three weeks before the typical number of days to maturity has passed for the cultivar you’re growing.
You’ll probably have to do more sampling until you determine which size of baby carrot is the ideal color, size, and sweetness for you. Be sure to note the number of days when this is achieved in your gardening journal for future reference.
Also bear in mind that carrots harvested in autumn tend to mature more slowly, so even the babies won’t be ready as quickly with cool-weather plantings.

Remember, this type of carrot is fine-grained, with very few fibers in its flesh, so it is more susceptible to breaking as you pull. It’s a good idea to harvest after a decent rain, or pre-moisten the soil to make the task easier.
Pull them out by gripping their tops for leverage. You may need to gently loosen the soil near the crowns using a garden claw or trowel until you can work the roots free.
‘Nantes’ is a type that will resist getting pithy for a few extra weeks if you wait a bit past peak maturity to pull the roots. And the flesh tastes even more sweet after a touch of frost hits.
If you’ve timed your harvest for fall, feel free to leave the mature roots in the ground and pull a couple as needed right up until you’re anticipating a hard freeze.
Storage
Don’t pause after pulling. Brush any dirt that came up with the roots back into the garden, and remove their tops right away to prevent shriveling.
Twist the stalks off with your hands, or use a paring knife or scissors to trim them to a half inch above the crown of each root.
If you’re not going to immediately put them in a salad or stew, brush off any loose dirt and store them in a plastic bag in the bottom of a fridge set to 32 to 40°F with 95 percent relative humidity.
They’ll last for three or four weeks, which should give you plenty of time to eat them fresh or enjoy them in one of the recipes shared below. Keep reading to discover a few of our favorite suggestions!
Be sure to wash your stored veggies well after storing, before eating or cooking them.
Preserving
With their “no peeling required” skins, this type of carrot is ideal for fresh eating. But that doesn’t mean you shouldn’t also grow some extras to preserve.

Our guide to growing carrots provides the details for dehydrating or freezing your harvest, along with a recipe for quick pickles.
‘Nantes’ Are What’s Up, Doc
When you succeed with your first crop of ‘Nantes,’ or any other homegrown carrot, you’ll understand why vegetable gardeners are willing to battle insects and wildlife, and endure a long growing season, to enjoy this crop.
Tasty, nutritious, and great for storage, ‘Nantes’ is worth the extra TLC required.

Is it already one of your favorites? Or do you have another that’s struck your fancy? The comments section below is a great place to share your selections, comments, and questions.
And to learn more growing tips and gain insight on which variety might be best for your garden, read these carrot guides next: