
Once you have become a seasoned veggie gardener, the next logical step is to preserve seeds from your own crops for future plantings – and future food.
Seed saving can save you money, and it is a fun way to geek out, gardener style.
With carrots in particular, the return on your investment is astonishing.
Each individual plant can produce over 1,000 flowers, so for each carrot that you allow to go to seed now, you could potentially grow a thousand in the future.

We link to vendors to help you find relevant products. If you buy from one of our links, we may earn a commission.
Looking at things that way, it’s pretty easy to do the math and realize that saving seeds is worth the bit of extra effort this gardening project requires.
In order to get the highest quality harvest from your future garden, you’ll need to follow several important steps now with your existing crop.
Since these root vegetables are biennials, saving their seeds is a two-year process. And in order to successfully grow carrots that are true to type, you’ll need to get started in year one.
Before we begin, here’s an overview of what I’ll cover:
What You’ll Learn
Start with Open-Pollination
For most backyard gardeners, the easiest way to ensure that you get a seed crop which grows true to type is to plant a single variety – for reasons we’ll get to in the next section.
But don’t pick just any cultivar. Make sure you choose one that is open-pollinated rather than a hybrid.

Why?
Hybrid cultivars are the result of cross-pollination between two distinct parent plants.
When plant breeders create a hybrid vegetable, each parent plant is chosen for various desirable properties – for example, long orange roots from one parent, and super sweet flavor from the other.
The first generation produced from the F1 hybrid will have these selected properties – but if you let those carrots mature, the seeds they produce are not guaranteed to produce true to type, or replicate and maintain the characteristics of the parent plant.
Seeds from hybrids may produce plants with desirable traits – or they may have undesirable ones. With hybrids, the seed may also fail to be viable at all.

So choose an open-pollinated variety to start with, to make sure you know exactly what to expect when you plant your saved seeds.
If you need some ideas, you’ll find a selection of open-pollinated cultivars in our article on the 13 best varieties of these root vegetables.
Isolate Your Variety
Saving seeds is about growing food, of course, but it’s also about preserving the genes from the specific varieties that you like – so that you can ensure more predictable results.
In the interest of producing plants with the characteristics you are expecting, you will want to isolate your selected plants from other varieties.
Here’s why:
These plants are pollinated when pollen from other cultivars is floating in the air, or – the most likely scenario – via insects that stop at flower after flower, feeding on the nectar and moving pollen around.

If there are other carrot varieties growing within a certain radius, the pollen from these could potentially fertilize your flowers, resulting in unexpected and possibly unwanted characteristics when those seeds are planted.
For the home gardener, the easiest way to isolate your carrots and keep your next generation predictable is with distance.
Professional growers sometimes use seed isolation cages, but the use of these means the grower has to then hand pollinate flowers or do a controlled introduction of pollinating insects – neither of which is a simple process.
Many commercial growers rely on isolation through distancing, by creating zones dedicated to growing certain cultivars over a large area of land, rather than using isolation cages.
So when using distance to isolate, just how far away from other varieties do you need to keep your crop?
J.E. Ells and D. Whiting at the Colorado State University Extension recommend isolating carrots at a radius of 1/4 of a mile.

However, the radius required to successfully isolate carrots will vary depending on obstacles such as buildings and vegetation, as well as your local climate – how humid your weather is, and how windy.
In humid locations like Virginia, a one mile radius is recommended, while in more arid regions like parts of the southwest, where hot dry winds can damage airborne pollen and discourage insect mobility, 1/4 of a mile may be overkill.
Because of these variables, I recommend that you start with a 1/4 mile radius, and try a small batch in your location to see if your saved seeds are producing true.
You may need to coordinate with your closest neighboring gardeners on this project.
They may be more than willing to help you out for a year and grow the same cultivar as you – especially if you offer to share your seeds.
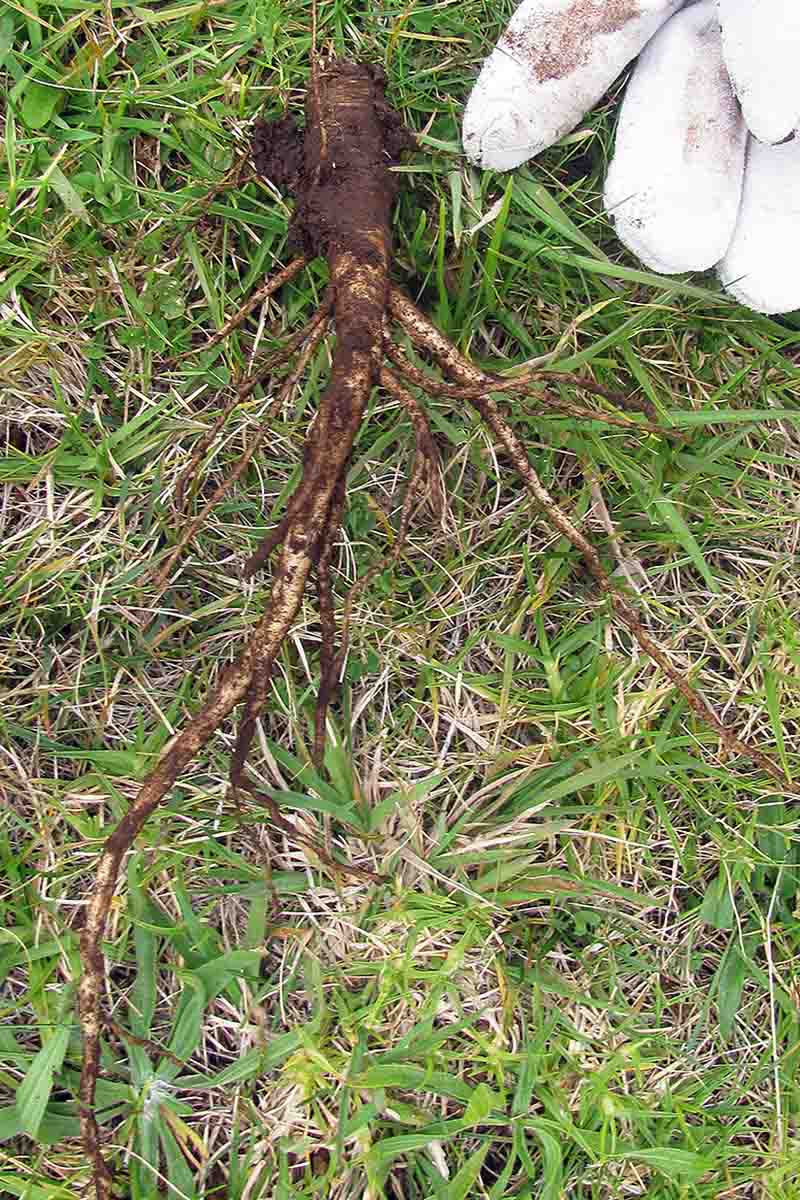
You’ll also need to make sure your plants are isolated from Queen Anne’s lace or “wild carrot” (Daucus carota), which is the same species as the domestic carrot and can easily cross-pollinate it.

Just as with other carrot cultivars, the presence of Queen Anne’s lace can introduce some unwanted genetics into your seed crop – resulting in unreliable flavors and colors in your future harvests.
Queen Anne’s Lace is considered an invasive weed and can grow in disturbed areas, pasture, and hay fields.
When on the lookout for this weed, it can be hard to differentiate from carrot foliage.
But underground the difference is obvious – Queen Anne’s lace has a long slim taproot and fibrous, woody secondary roots.
If you have Queen Anne’s lace on your property, according to J. Colquhoun and co-authors at Oregon State University, the best means of control is mechanical – either by plowing it under the soil and replacing with a different crop, or mowing it down.
If this isolation business sounds like a giant headache, the good news is, your carrots only need to be isolated from other cultivars and their wild relative, Queen Anne’s lace, when your crop is flowering – in its second year of growth.
So you can grow multiple varieties in the first year, harvest the ones you intend to eat, and leave a selection of your chosen cultivar in the ground to produce seed in year two.
And by the way, you’ll want to plan on saving at least 5 plants to harvest seed from, for reasons I’ll explain in the harvesting section below.
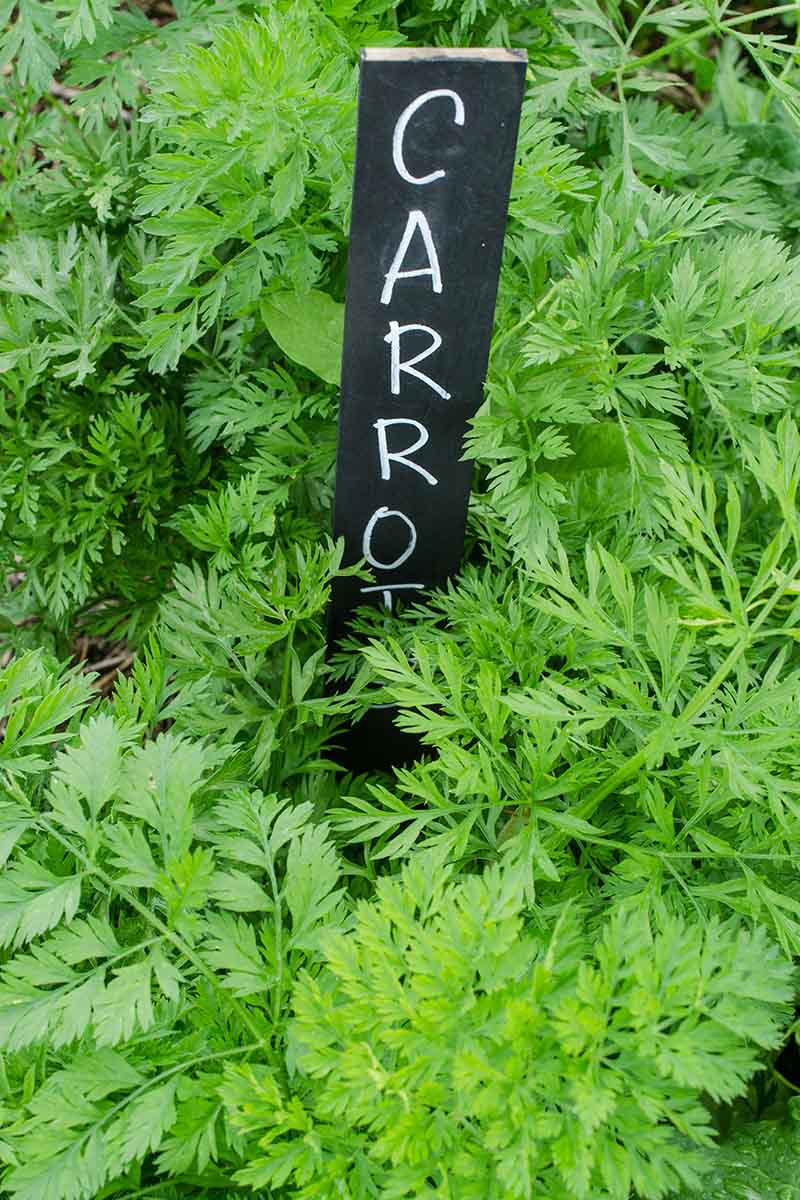
Mark Your Planting
Whether you grow more than one variety in the first year or not, you’ll want to make sure you mark your crop in some way.
This will provide a visual reminder that at least some of these plants should be left in the ground and not harvested as this year’s food.
I recommend doing this in year one, at the time when you first plant your root veggies.
And, by the way, If you need a primer on proper practices, check out our guide to growing carrots in your garden.
There are many ways you can mark your plantings, such as making a detailed map of your garden in your garden journal, or by using physical plant markers.
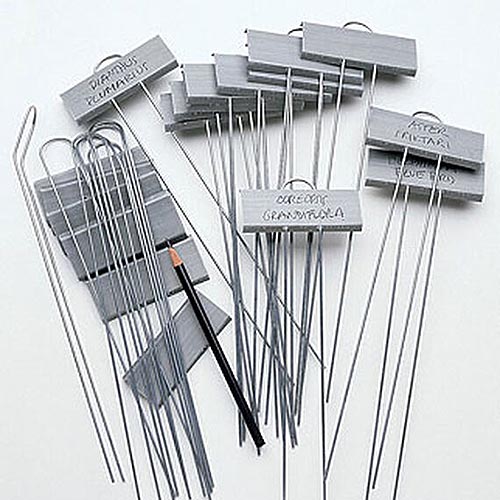
I like these reusable zinc plant markers – not only will they do the job of keeping track of your crops, they will give your garden a lovely cachet.
You can find packs of 25 reusable zinc plant markers at Burpee.
Vernalize
Like kale, carrots are biennial plants, which means they require two growing seasons to complete their reproductive cycle.
What happens in between these two growing seasons to tell the plant to go ahead and get busy reproducing?
Cold, that’s what. This cold period is also known as vernalization.

Vernalization triggers flowering in biennial plants. Your biennial crop needs to experience cold temperatures in order to mature and begin its reproductive cycle.
You can overwinter your crop in your garden if your area experiences at least 10-12 weeks of temperatures that are consistently below 59°F.
If your ground freezes solid in winter, like mine does, you can still leave your carrots in the garden during this time, as long as they are well mulched.
I’m able to successfully overwinter this root crop in Zone 5a where the lows can get down to -20°F.

You can learn more about this technique in our article on overwintering carrots.
If your location is either too warm or too cold for overwintering in the garden, your roots can be harvested before the first hard frost and vernalized in storage – such as in a fridge, root cellar, or cool basement.
Carrots kept for seed saving rather than eating may be harvested and stored in the same way as your edible crop would be for long term storage:
- Dig them up
- Trim off the greens, leaving an inch or so of stem
- Brush off extra soil with your hands but do not wash them
For more details, just follow the steps outlined in our guide to harvesting carrots.

When selecting plants to use for seed saving, look for healthy ones – and remove any plants that have bolted in their first growing season or that have unhealthy looking foliage.
If you are tempted to try planting store bought carrots to grow seeds, consider that it is unlikely that you will know what variety you are starting out with.
And since most commercially available carrots are hybrids, the next generation is unlikely to be the same as the root you started with.
Vernalized carrot roots that have been stored for seed production should be replanted in the garden – in spring – at the same time that you would sow carrot seeds.
Just make sure to replant only healthy looking roots. Some carrot roots may not survive their winter storage, so if any of them show signs of rot, feed those to your compost.
Winter-stored roots should be planted at the same depth as they would have previously been growing – with the tops of the roots bulging slightly from the ground.

Whether you are working with an overwintered or winter-stored crop, make sure to allow 3 feet of space between each plant – these vegetables will need extra room in their second year of growth.
If you need to thin your bed to allow plants this extra room to grow, make sure to remove carrots gently, without disturbing the plants you intend to leave in the ground.
Despite their sturdy appearance, carrot roots are very sensitive to disturbance.
Let Your Crop Grow
Finally, the easy part. Now that your carrots are in their second year of growth, it’s time to watch the leafy growth and flowers that will eventually produce seeds take shape.
Once the warm days of spring arrive, you will notice fresh growth sprouting from the tops of your carrots, and the flower stalk will develop in 4-6 weeks.

Keep your crop watered as you would normally, and keep your eye out for pests or disease. Remove any infected plants immediately.
If you’ve never let your carrot crop flower before, you might be surprised at how these flowers look very much like those of their umbellifer relatives, dill, and caraway.

The green umbels will soon start to blossom into an umbrella-shaped cluster covered with tiny blooms, during which time they will attract droves of beneficial pollinators.

Later in the summer, you will see these beautiful umbels dry out and turn brown – and this is the time to harvest your seeds.
How to Harvest
When you choose which umbels to harvest, collect them from several different plants.
Seed Savers Exchange recommends harvesting from at least 5 plants, but preferably 20 – to make sure you obtain enough seed that’s viable, and to ensure genetic diversity and resilience.
And try to pick the healthiest looking plants in order to preserve the strongest sets of genes – don’t bother saving seeds from any diseased or insect infested plants.
Clip off the dry umbels with pruners and place them in brown paper bags. Do not pack them in too tightly as they need good ventilation to prevent mold from growing.
Place the bags in a dry spot in your home to allow the umbels to finish drying out.
Alternatively, you can spread the umbels out to dry in a single layer on a screen or other flat surface where they will have good ventilation.
You will know they are thoroughly dry when the plant material is brittle instead of pliable.

Once your flower umbels are dried out, it’s time to remove the seeds.
Separating the seeds from the umbel will allow you to store them in a smaller container, as well as removing chaff which takes up unnecessary space and could potentially harbor mold or diseases.
When harvesting a small batch of umbels – the amount common for a backyard gardener – you don’t need any special equipment for this process.
I do this with just a few items from my kitchen.

First, you want to remove the seeds from the umbel.
Get a bowl or plate, place one of the umbels over it, and rub them between your fingers to loosen the seeds from the flower head.
Generally, good quality seed will not have any problems being handled this way. If it disintegrates when rubbed, it is likely not viable anyway.

Rubbing the umbel in this way will produce a pile of spiky carrot seeds mixed with larger debris – or chaff.
Pick out the larger pieces of chaff until you are left with just the spiky carrot seeds.
Typically seeds are separated from chaff by winnowing, as many plant seeds are heavier than chaff. This is not the case with carrot seeds, which are quite light.
Professional growers use screens to let carrot seeds fall through and filter out the larger debris, but for most home gardeners this is not a necessary tool.

After removing large pieces of chaff, then use your fingers to rub the spikes off the seeds.
These spikes are the plant’s way of ensuring its seeds are dispersed.
Much like the spiky hooks on burs, the spikes on these seeds can easily get caught on animal fur, and transported to a new location where a new plant can grow.

Removing these spikes is not absolutely necessary for growing new crops, but it will make for more compact storage.
Once the seeds are clean, I like to place them in a sieve and rub them against the mesh to continue removing any remaining spikes, and filter out the smaller pieces of dust-like debris, so that it doesn’t go into my seed packets.

Continue picking larger pieces of debris out of the sieve and gently shake the sieve to remove small particles of dust.
By this point, you should have some fairly clean carrot seed that’s ready to go into storage for planting next season.
How to Store
Next, you’ll want to store your clean and dry carrot seeds. While you can store them in any sort of container, I prefer to store mine in small paper envelopes.
While airtight containers like jars have the advantage of keeping out mice, they take up more room and are more prone to mold problems if the seed isn’t completely dry.

Whatever type of container you use, make sure to label it with the plant type, cultivar name, and the harvest year so that you don’t end up with packets of unidentified mystery seed down the road.
I usually make my own little storage envelopes out of junk mail envelopes that I would have otherwise thrown away.
But if you want to take your gardening hobby up a notch, you can store your seeds in more professional looking envelopes, such as these small blank kraft storage envelopes that are available from Amazon.
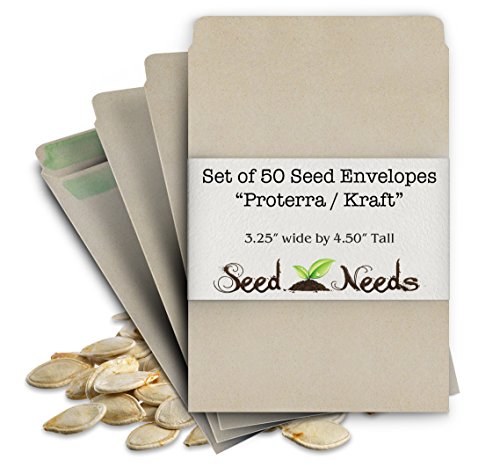
Set of 50 Proterra Seed Envelopes via Amazon
Once your carrot seeds are packed into their envelopes, store them in a cool, dark, dry place.
If you live in a humid climate, you can place some silica packets next to your seed envelopes or inside the jars to help keep humidity down.
You can count on these being viable for about three years, on average.
If you have too many to use yourself within that period of time, I recommend sharing them with other gardener friends.
Or use your extras for fun indoor experiments, such as growing these root veggies indoors.
Food for the Future
Saving carrot seeds is not so hard after all, from the first planting of your store bought seeds to the final harvesting of your seed crop.

And if you take these extra steps to ensure a healthy, predictable crop, your plants will give back to you a thousandfold.
Are you ready to save some carrot seeds? If not, what’s holding you back? We’d love to hear from you in the comments below!
To learn more about growing carrots at home, check out these guides next:

Hi, I’m just curious, when you replant the carrot to get it to turn to seed, are you able to eat the carrot after or does it rot?
Hi Tanya,
That’s a good question!
A carrot that goes to seed (whether intentionally or not) shouldn’t rot – instead the root will become tough and fibrous – definitely inedible.
This is because the plant is taking the sugars it has stored in its root and using them toward reproduction instead!
Loved reading this, thank you! I’m from Texas but live in Uganda and it is quite warm year round. I have some lovely red carrots (from Baker Creek) that I’d really like to save seed from. I can Google some more, but thought I’d ask here- Any ideas on how to “cool” dry store some carrots, when homes are without AC? 🙁
Hi Liz! Glad you enjoyed the article – and I love interesting questions like yours! Is there any refrigeration available to you at all? If you have access to a fridge, you could store them in there. I was also going to say that you could try storing them in a pit deeper in the ground (sometimes this is called a “silo” not to be confused with a grain silo), but if it’s pretty warm year round, I don’t think your ground will be cool enough. Although officially carrots need a vernalization period to produce seed, I think it would… Read more »
My carrots have produced lots of seeds, but it is their first year. Are they viable? I live in Utah county, Utah and it has been a really hot summer. I would love to save them, but stye are just in my garden planted in a big box with beets. I have one beet that has created seeds as well. I don’t know if they will be viable either????
Hi neighbor! Both seeds from your carrots and beets will be viable. However – when you save seeds from plants that bolt from heat, you are saving plant genes that are prone to bolting – meaning you will likely get a crop of seeds next year too instead of a crop of edible roots. If you want to make sure that you have carrots and beets that you can eat year after, it would be better to save seeds from plants that DON’T bolt from heat in their first year. However, it doesn’t hurt to try saving some and seeing… Read more »
This is absolutely a wonderful article. Thank you. My friend and I found one carrot flower blossom in her garden and shared the seeds. We’ll see if they were hybrids or not. They weren’t quite brown when we picked them 🙁 This is my first seed saving year, as I was worried when everything sold out in the pandemic. I’m really enjoying this hobby. I was born in utah, but now live in southern idaho. I’m excited to read more of your work! I will look for you on instagram. I am @momma_quail on there.
Hi Rebecca, thanks so much for your kind words! I’m glad you have the seed saving bug – it’s hard to shake once you get it. ????I’m not really active on instagram, but who knows, maybe one day! Let us know how your saved carrot seeds do next year – and keep warm over the winter!
We have just ‘set out’ some of our wonderful red carrots to save the seeds, in pots, in the front room by the picture window and baseboard heater. One of them has already started a seed stalk! Our small farm is in central Labrador and red carrots are well liked.
Thanks for the great tutorial!
JP
Hi JP,
I’m glad you appreciated the article! Thanks for giving us a lovely view into your farm life in Labrador. Best of luck with your carrot seed crop!
Happy gardening!
If my carrots are flowering now, I can’t harvest these seeds? I still need to overwinter them? Thank you for clarifying for me; I’m confused ????
Hi Nikki, Let me try to clear things up for you. Yes, you can save your seeds if they are flowering now. But there’s a reason why you might not want to save those particular seeds. I’ll explain with an example from my own garden. I planted a crop of carrots this year. Some of the plants (from the same pack of seeds) bolted this summer, and some didn’t. When I say they bolted, that means the heat triggered them to flower, even though they should have waited until next year to flower, since they are biennials. So if I… Read more »
Thank you for this extremely helpful article. I’ve never saved carrot seeds and you answered all the questions I hadn’t even thought of asking. I never considered that they would cross pollinate with Queen Anne’s Lace! (We have a lot of it around here.)
Hi Suzanna,
Thanks for your comment – you made my day! Best of luck with your carrot seed harvest, and future plantings.
Hi there, I have just started to experiment with seed saving. I started with Petunias and super bells as I was curious about never seeing their seeds for sale but rather just their starts in stores. I found success right away and then noticed one of my carrots bolted so I looked into saving their seed. I am just experimenting but it is now just about October and the umbels don’t appear to have browned enough to cut. I don’t really know about zones etc and no one can answer definitively for me but I live in the Columbia region… Read more »
Hi Wendy, There’s no need to collect the seeds before it gets cold. The seeds will resist the cold just fine, and carrots are considered cool weather crops, so they actually tend to do better in spring and fall than in summer. I often get volunteer carrots coming up in my garden from seeds that have fallen the previous fall and have survived winter temperatures as low as -15°F (about -26°C). (They probably hold up to even lower temps – that just tends to be as low as it gets in my climate.) You definitely want to let the seeds… Read more »
Love this article! I have Tendersweet carrots that flowered this year. I plant my carrots in the same box each year because we have amended the soil with a lot of sand. Since it was hot this summer in Southeast Idaho I don’t know if one bolted or was a carrot that didn’t get fully harvested from last year. We sometimes have the end break off when pulling them. My question is; the only way to see if the seeds will have a tendency to bolt is to plant them, correct?
Hi Tam,
Thanks for your comment – I’m glad you found the article helpful!
In answer to your question, yes, you’re correct. Since you aren’t sure whether the carrot that flowered and produced seed was in its 1st year or its 2nd year, it seems to me like it is still worth saving some seeds and planting a new crop. You might just want to plant a backup variety as well, so that you are sure you get some carrots to eat, and not just flowers – though, the pollinators will love you for the carrot flowers!!!
Hope this helps!
Hi. Am musa from south africa. I just wantt to know how many seeds can I get from each flower from carrot?
Hi Musa!
That’s a great question.
I’ve never taken time to count them myself, but I have read that one carrot flowerhead can produce over 1000 seeds. When you take into account that each plant can produce many flower heads, that’s thousands of seeds per plant.
Hope this helps!