Allium fistulosum and other Allium species
When you love growing vegetables and crave a hint of onion flavor in savory dishes, scallions can deliver what you want 50 to 70 days from sowing.
Even if you opt to devote part of the veggie patch to grow slower-paced bulb-forming storage onions as well, scallions, or bunching onions, can deliver consistent onion flavor over the course of months in spring and early summer, and again in autumn.
We link to vendors to help you find relevant products. If you buy from one of our links, we may earn a commission.
Before I continue describing all the good traits of scallion plants, let’s quickly clarify a few terms.
In many regions of the country, any immature onion harvested while the top is still green may be referred to by the name “bunching onion,” “green onion,” “spring onion,” or sometimes, “scallion.”
Many growers and home gardeners plant regular bulbing onions, or varieties of A. cepa, thickly, and then harvest them young, before the bulbs are fully developed.
If they aren’t picked at the immature stage, those onions can continue growing until you harvest them as storage onions.
While these are delicious and handy to have around, for our purposes, we’ll be talking about growing and caring mainly for A. fistulosum.
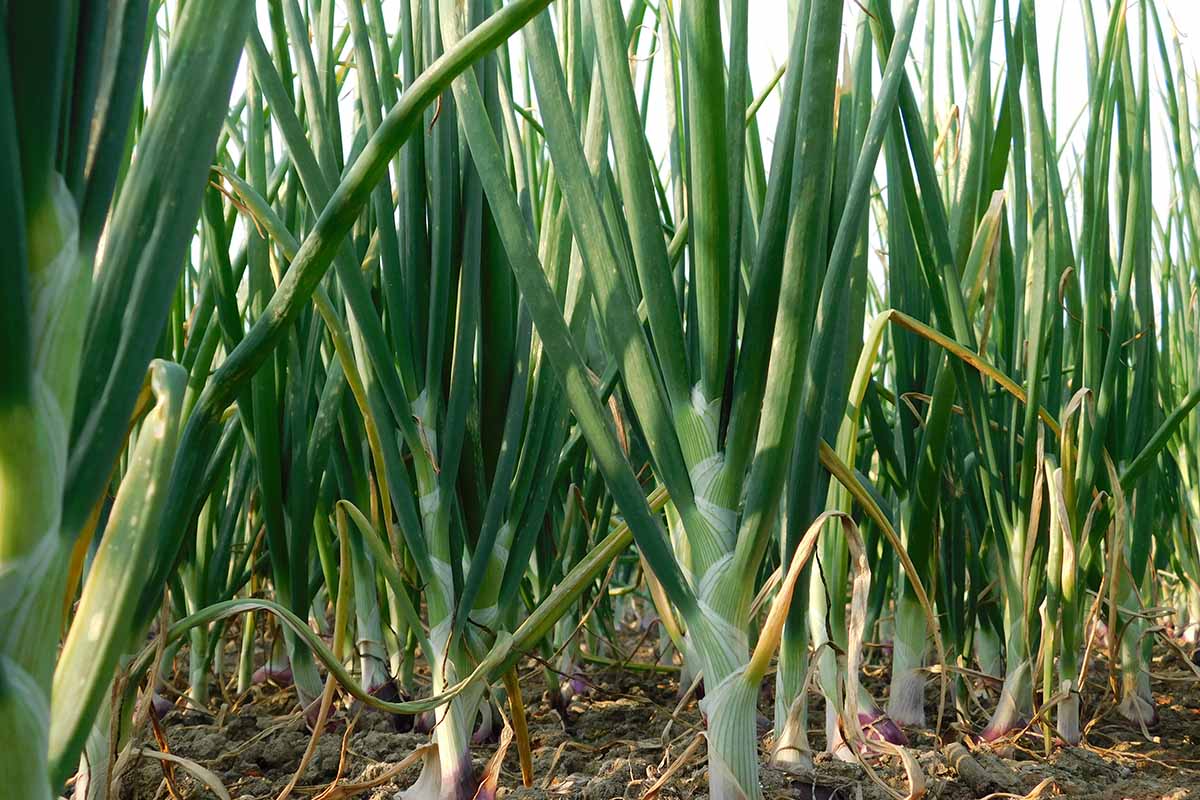
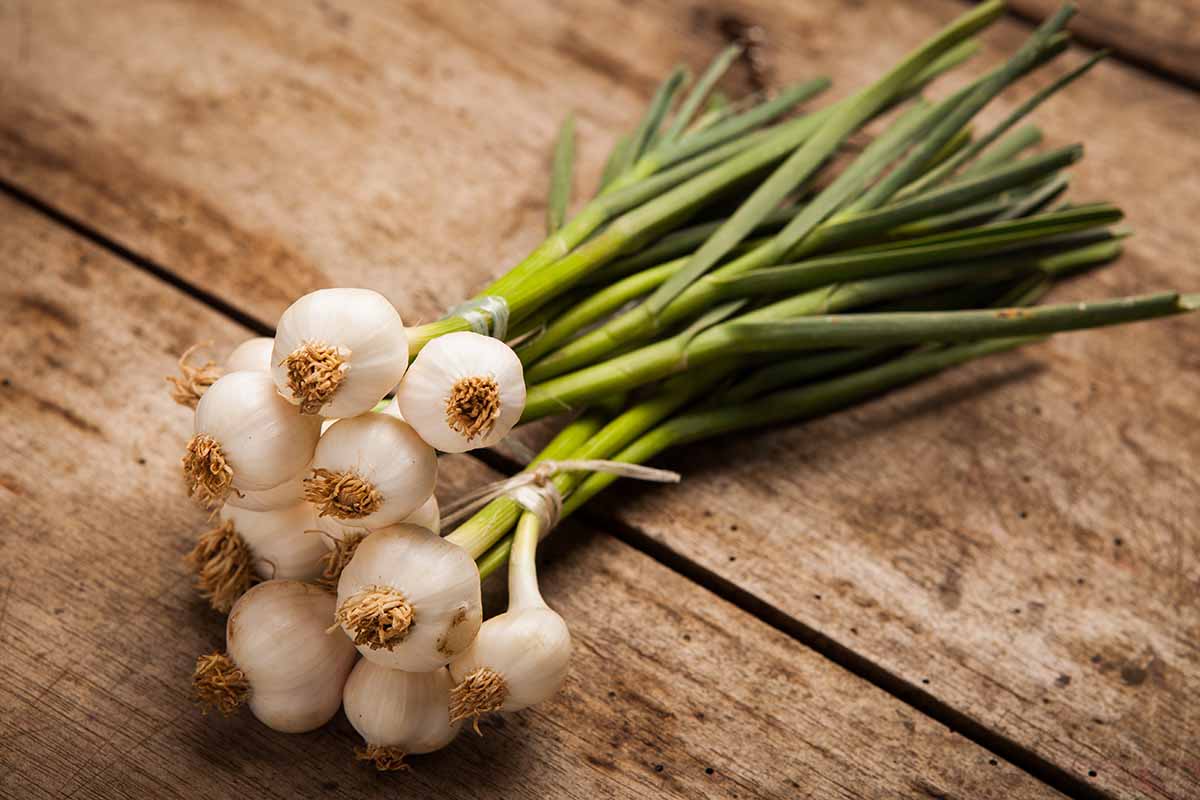
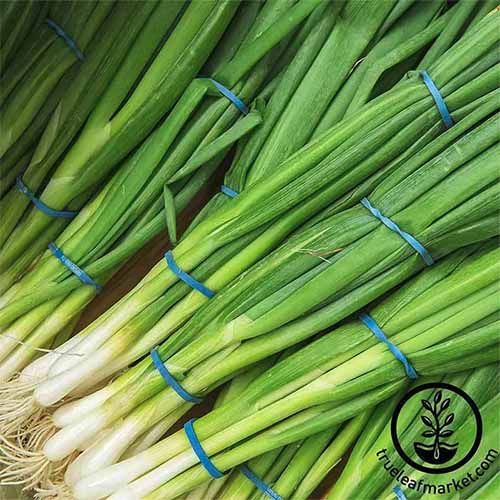
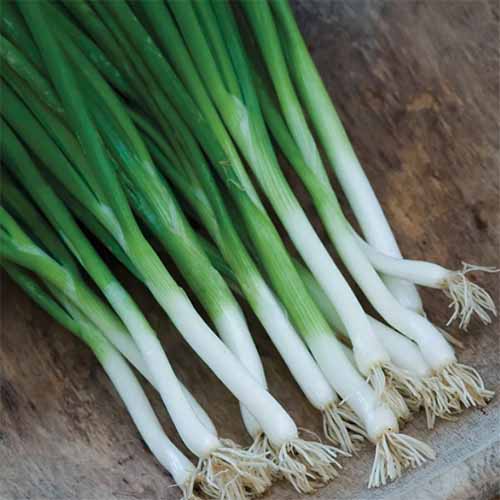
This onion species forms cylindrical stalks with hollow, green tops – hence the name fistulosum, which means “hollow.” Native to China, this species is now cultivated globally.
The bottom portions are white, and the green tops taste a bit like chives.
There are a few additional distinctions that make these scallions quite appealing.
First of all, they grow quickly, producing a harvest in a matter of months, compared to the 14 to 20 weeks – or sometimes more – required to harvest full-size bulbing onions.
Next, while a couple cultivars bulge slightly at the bottom, A. fistulosum plants don’t form bulbs.
The types that do form bulbs are dependent on day-length to initiate bulbing, and gardeners in certain areas must select only the “long day,” “short day,” or “day neutral” types that will grow best in their area.
Gardeners in any latitude, or with any day length, can grow A. fistulosum as annuals.
And here’s the really cool part:
Also known as “bunching” onions, these alliums can overwinter in USDA Hardiness Zones 4 to 9, so gardeners in these regions can grow them as perennials.
They don’t just survive, they spread, or bunch, with each clump continuing to form new scallions you can either divide to form new plants, or pull up and eat.
Those tough, easy-care alliums will keep spreading until you pull them out of the ground.
Between the speed with which they grow and the scallion’s fuss-free nature, even beginners can produce a harvest easily.
Whether you’re a veteran gardener or a newbie, this is a worthy crop, and I’d like to tell you more about growing it. Here’s what I’ll cover:
What You’ll Learn
What Are Scallions?
Native to China, where they have been cultivated since at least 200 BCE, scallions are the mildest edible allium you can grow in your garden.
They are also known commonly as Welsh onions – though they’re not from Wales! – as well as green, bunching, or Japanese bunching onions. Some sources claim that the “Welsh” moniker refers simply to plants originally derived from non-native sources.
Some term them “spring onions,” but it would be more accurate to reserve this term for a type of A. cepa, a bulbing onion that is harvested in the spring while it is green and uncured – and hasn’t had a chance to form a fully mature bulb yet.
Learn more about planting and caring for spring onions in our guide.
Just because the names are so similar, some cooks and gardeners also confuse scallions with shallots, which have a different flavor profile and are harvested as mild-flavored bulbs.
Some think baby leeks are scallions, because they’re also upright alliums with white on the bottoms and green up top.
Once you’re in the habit of growing these versatile, undemanding onions, though, you’ll probably never mistake them for another plant again. If you’re ready, let’s go ahead and get started!
Propagation
You can readily grow new scallions by seeding them directly, starting seeds indoors and then transplanting them out, or by division.
Here are the basics:
Direct Sowing
This is my preferred method, both because it’s inexpensive to skip all the extra indoor planting materials, and because I can control how much I plant with successive sowing based on how many scallions we’re actually consuming at the house.
I can also sow a few bunching onion seeds into wee spaces in the garden, like on the edge of the raised bed where I grow kale.
If they grow, great! If they don’t do well, at least I haven’t put 10 weeks into starting transplants.
Ahead of sowing in the garden or a container, apply a balanced fertilizer. Scallions will do okay in poor soil, but they’ll produce healthy stalks, and do it more quickly, in nutrient-rich dirt.
To direct seed, as soon as the soil can be worked in the spring or in late summer for a fall crop, sow seeds about half an inch apart in rows that are a foot apart.
Cover with a quarter to half an inch of fine soil, vermiculite, or sand. Firm the soil gently with the palm of your hand and water in using a spray bottle or the gentle spray on your garden hose nozzle.
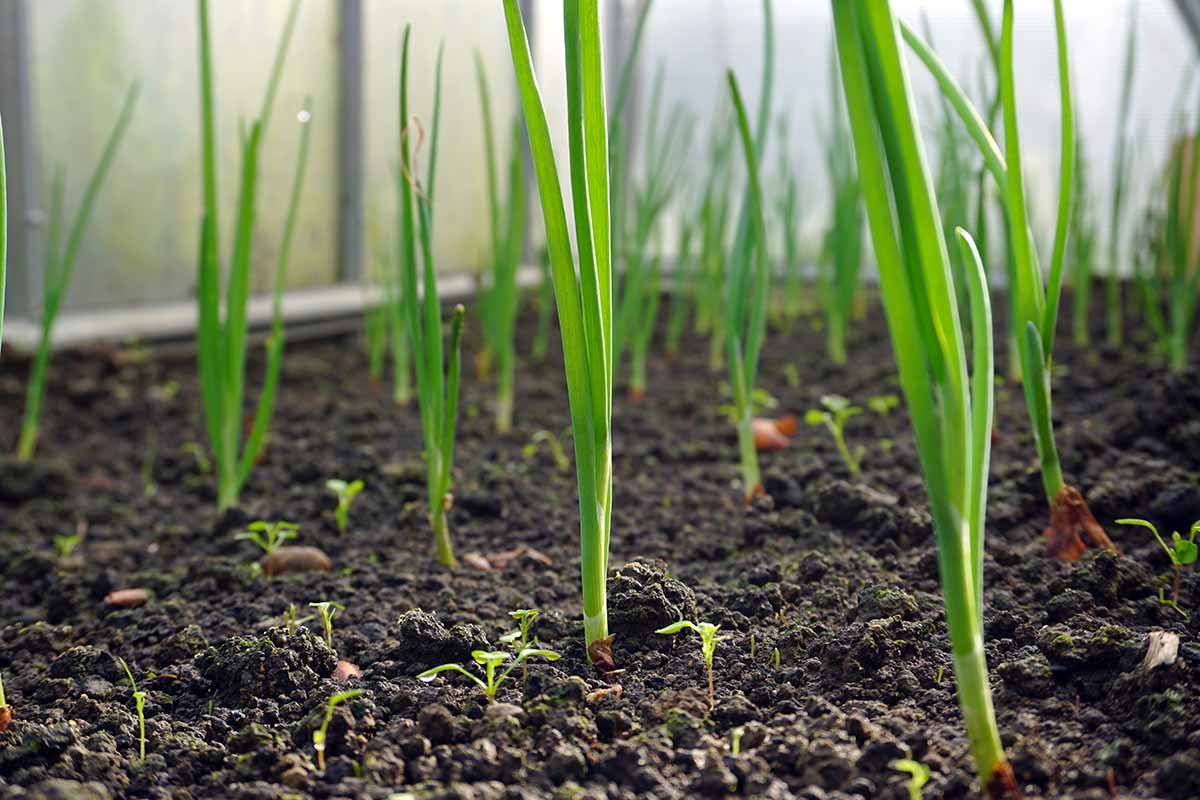
Keep the soil evenly moist until the seeds germinate, which generally takes about seven to 14 days.
Start Seeds Indoors
If you want to get a jump on the harvest and have a sunny windowsill or an appropriate grow light, starting seeds indoors and then transplanting clumps of the sprouts to the garden can work.
Full disclosure: It takes consistent care over the course of eight to 10 weeks, to keep tiny scallion plants alive indoors.
Determine the last frost date for your area, and schedule your seed-starting endeavor about eight weeks before then.
Fill enough individual one- or two-inch cells, or an entire flat tray or plug tray, with pre-moistened all-purpose potting soil or seed-starting mix.
The cells or flat should have drainage holes. Place the containers on a sturdy tray or container that’s at least half an inch deep to catch the excess water.
Sow a group of four or five seeds per cell, or scatter in groups of two or three across the surface of the tray, spaced a couple of inches apart in each direction.
Press the seeds into the growing medium with your fingers, and water the top with a fine spray.
Keep the growing medium moist until the seeds germinate. As soon as they’ve sprouted, place them on a sunny windowsill (but not in direct sunlight) where they’ll receive four or five hours of bright light per day. Keep them moist.
Transplanting
Once they’re big enough that you can spy roots through the drainage holes, transplant the small clusters into larger cells filled with growing medium.
When the transplants have grown to fill out those containers and have reached three or four inches tall, spend a few days acclimating them to their new destination.
Begin by placing them outdoors in a protected area for a couple of hours, and add an hour or two of exposure each day for the next couple of days.
You want the seedlings to get used to the new levels of sunlight and the temperature outdoors gradually, so they don’t experience transplant shock.
Then transplant each clump to your garden or a container that’s at least eight inches deep and that can hold a couple of quarts of soil, spacing them four or five inches from each other.
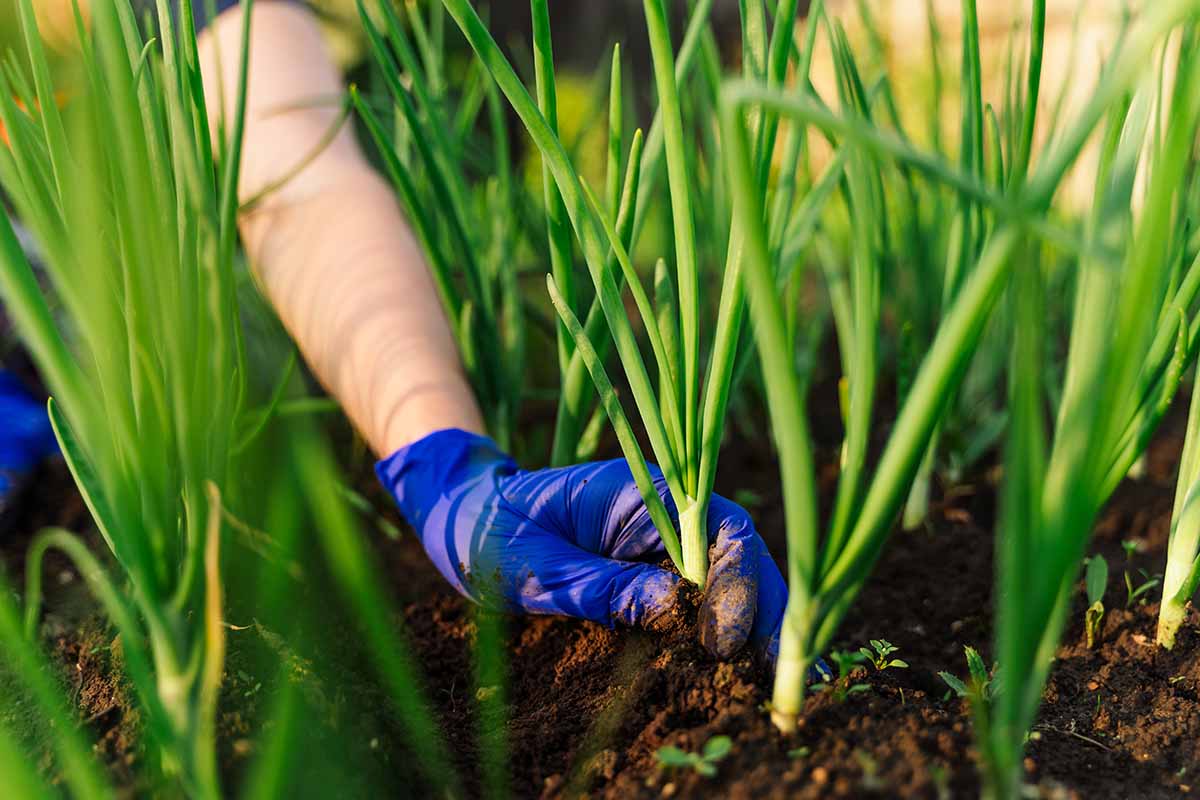
From Divisions
Growing scallions from divisions is a nifty way to get free starts. You have the best odds of succeeding when you do this in spring, when the plant begins a new growth cycle, but it’s feasible at any time of year.
If you’re fortunate enough to know someone with scallions that have already “bunched,” dig up a big clump (with permission!), being careful to get the roots out without breaking them.
Then use a sharp knife or a hori hori to cut a section of two or three root ends away from the others, with the green tops still attached.
Plant each at least six inches away from another clump or other garden plants, with the white portion positioned below the soil.
Backfill with well-draining soil you’ve amended with plenty of compost or other organic matter, and also add some of that fresh, nutritious dirt when you replant the remnants of the parent plant.
How to Grow
Scallions will do okay in poor soil or part shade.
But for a bountiful, tasty crop, why not pull out all the stops?
These alliums will tolerate less-than-ideal sunlight, but they’re far more likely to thrive in areas of the garden that receive full sun.
They will tolerate lean soil that doesn’t have many nutrients, or compacted or overly sandy soil that pools water or drains too quickly. But they’ll grow more quickly in well-draining soil you’ve amended with composted manure or other rich organic matter.
It’s also a good idea to go ahead and test the soil to make sure you’re offering the ideal slightly acidic to neutral pH of 6.0 to 7.0. If you purchase prepackaged vegetable garden soil mixes, you’ll notice that their pH is already in this range.
Those pH levels make it easier for scallions to access key nutrients from the soil, including nitrogen, phosphorus, and potassium (NPK). Your plants will be far more likely to resist disease and even pests when they’re receiving ample nutrition.
Apply a balanced fertilizer ahead of sowing or transplanting, too.
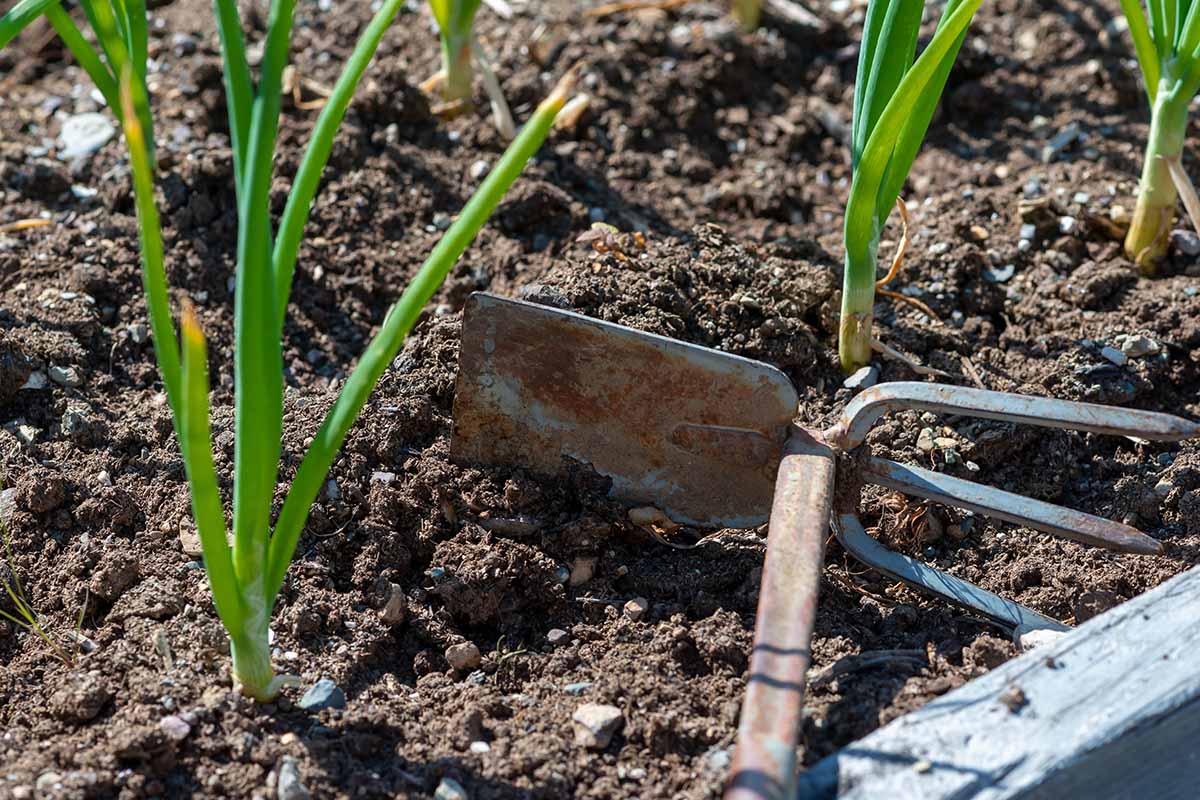
You may opt to grow scallions in soil that’s merely “good enough,” without amending it to add nutrition or drainage. But you’ll still want to loosen it to a depth of at least eight inches.
This allium’s roots are shallow, but the white parts will form beneath the soil. If the dirt has been cultivated properly, they can grow downwards without difficulty.
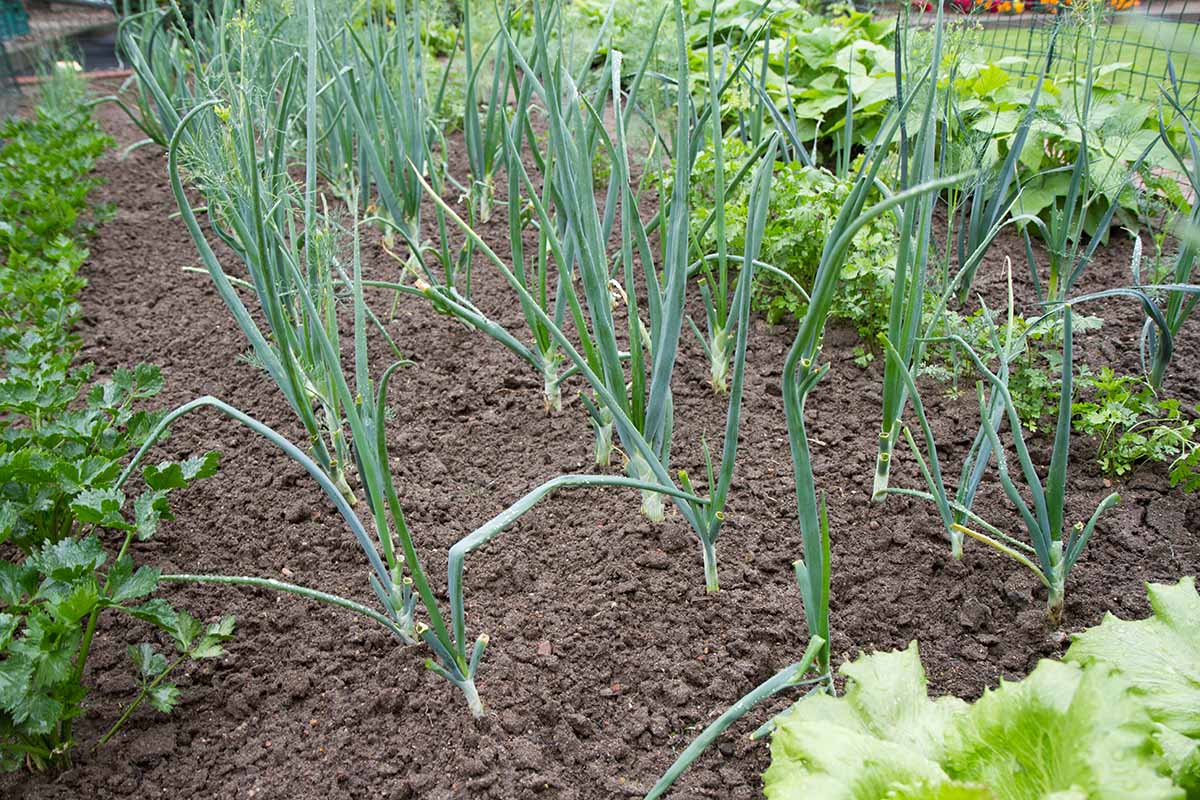
Once the green tops have attained a height of a couple of inches, you’ll also need to thin them if they’re not already spaced two inches apart.
Scallions don’t need a lot of space, but they do need some air circulation to help keep the tops dry, which will fend off moisture-related diseases.
If you provide ample distance between plants, they’ll also have room to spread. And hey, you can eat any of the seedlings you must thin, so it’s all good!
Speaking of good eating, plan to plant more of the seeds every couple of weeks until the end of early spring in your area to encourage a prolonged, staggered harvest.
Depending on their maturity rate and whether they’re winter-hardy in your area, you may want to sow or transplant another crop in late summer for an autumn harvest You can learn more about succession planting in our guide.
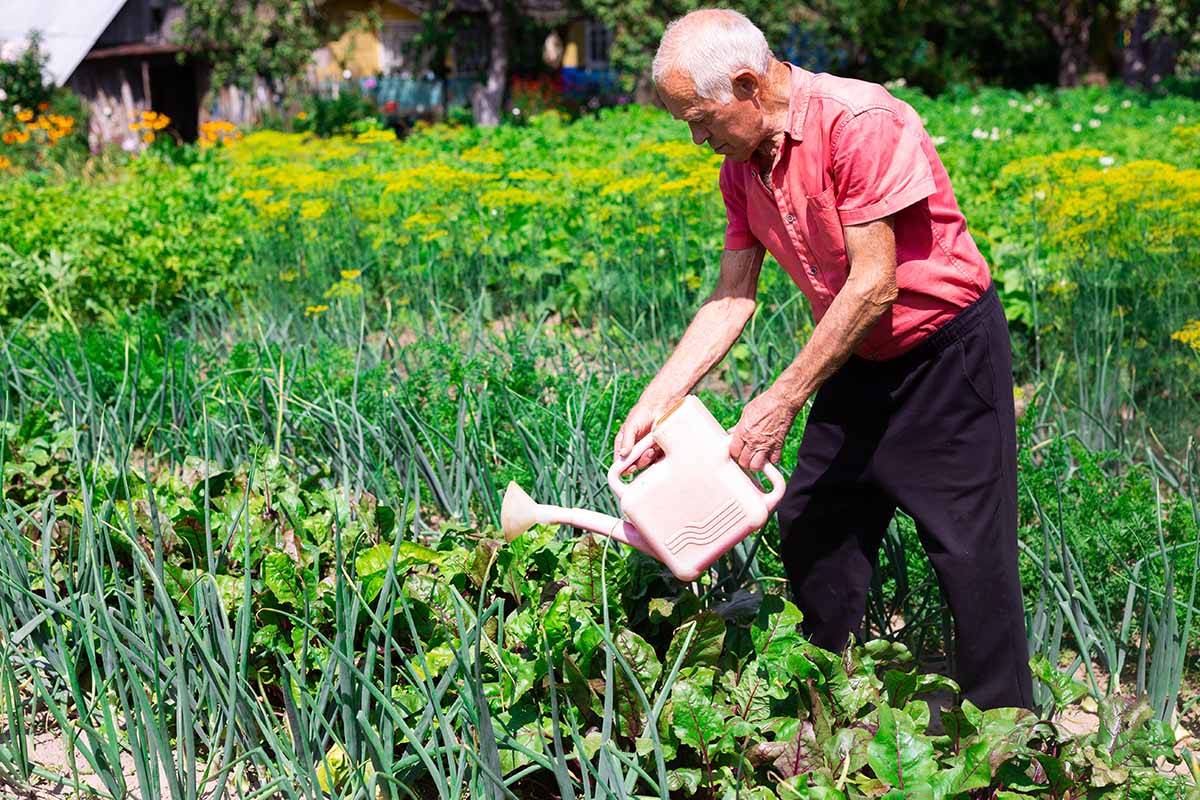
The main gardening chore once scallions are established is watering. The taste and texture of the harvest will suffer if the plants don’t get enough water – at least an inch of supplemental water per week when it doesn’t rain, or doesn’t rain enough.
Ideally, you’ll be able to water the plants at the soil line, using the hose or a watering can, or investing in a drip irrigation system.
Also be sure to keep up with weeding. Don’t let the weeds grow so big they compete with the alliums for water, sunlight, or nutrients.
Apply a thick layer of straw, pine, or plastic mulch once the plants are a couple of inches tall. Mulch will help the onions retain moisture while it suppresses weeds. Keep an eye out for any weeds that infiltrate the ground cover, and get rid of them pronto.
Before you know it, harvest time will be approaching.
If you opt to grow scallions as an annual crop, picking them all as soon as they’re ready, you’ll be in for lots of good eating!
But you can also thin the plants to sit about six inches apart, and leave a few to bunch and continue growing as perennials in appropriate zones.
You can also share offsets with friends so they too can propagate delicious scallions, or start more of your own plants by division. And then the whole awesome oniony cycle begins again.
Keep reading to glean some maintenance tips for these garden and menu MVPs, and learn more about three cultivars you might want to grow.
Growing Tips
- Plant in well-draining soil with a pH of 6.0-7.0.
- Weed often so the plants don’t have to compete for water or nutrients.
- To discourage disease, try to keep the tops dry by watering at the soil line, not from overhead.
Maintenance
One other task is strictly a matter of preference. If you’d like a higher percentage of white flesh to develop at the bottom, along with taller green tops, you can mound dirt around the plants where the white part meets the soil line.
Over the course of the 50 to 70 days it takes these alliums to reach their mature size, “hill” the soil around their base every couple of weeks, piling the soil higher with each successive hoeing session.
This process is called “blanching,” and you can start when the seedlings are about four inches tall.
Your efforts will cause more white plant tissue to develop on the portion of the stalk that’s covered with soil. The blanching process also encourages the green tops to grow taller, so it’s a win-win.
There are a few more maintenance chores for those who live in Zones 4 to 9 and choose to grow their scallions as perennials.
You’ll want to clean up any dead or dry debris from the plants ahead of freezing weather, to discourage insect pests from overwintering.
You may also want to apply a new layer of mulch in between the plants, to help retain warmth and moisture.
Depending on how cold it gets, you may see the green tops die back over the winter. Be sure to clip them and dispose of them after the weather warms up in spring.
And remember, spring is the best time to divide those clumps to share or transplant in your own garden. Once you’ve got a healthy bunch established, you’ll want to tap the benefits of their spreading habit.
Cultivars to Select
Don’t forget to ask around and see if any friends have bunching onions growing that have formed clusters. Those are a cheap source of divisions to propagate.
You can also buy seeds from nurseries and online vendors. Here are three popular varieties to consider:
Evergreen
This tasty allium lives up to its name. It is a disease-resistant, cold-hardy perennial that forms clusters you can break apart to propagate by division if you don’t opt to harvest all the scallions as an annual crop.
It produces 12- to 14-inch stalks that are springtime green at the top and white at the bottom. They mature 65 days from sowing and will hold in the ground for 120 days.
‘Evergreen’ is available in various packet sizes and in bulk organic seed from True Leaf Market.
Parade
Don’t let this ‘Parade’ pass you by! This cultivar forms upright, firm, pencil-thin scallions that are easy to envision “marching” in a row along your raised bed or a border.
They are best harvested when they are between 10 and 12 inches tall, and mature about 60 days from sowing.
‘Parade’ is available in 1,500-seed packets from Burpee.
Tokyo Long White
Long, slender white roots with tall, tubular, medium-green tops are the hallmarks of this Asian scallion.
It’s generally regarded as not being as cold hardy as other scallions, so plan to grow this variety as an annual, or perhaps bring containers indoors for the winter.
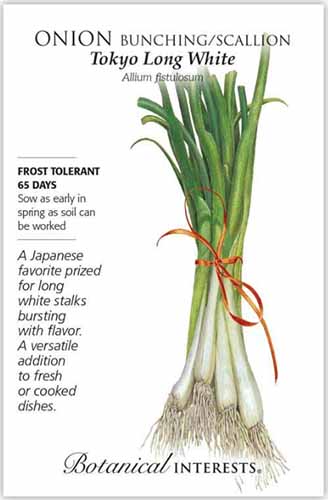
This cultivar matures 65 days from sowing, and is at its mildest and most flavorful when harvested at 10 to 12 inches, though the plants will reach 16 to 18 inches tall.
‘Tokyo Long White’ is available in 475-seed packets from Botanical Interests.
Managing Pests and Disease
As members of the allium family, scallions are sometimes employed to deter pests. Old-timers plant them near carrots to deter carrot flies, for example.
But sometimes bunching onions are on the receiving end of the pest and disease equation.
Pests
Rabbits will steer clear of scallions, and other mammals also tend to leave them alone. There are a few insect pests to be aware of though. Here are a few of the most destructive:
Allium Leaf Miners
The name is a clear tip-off: Scallions are particularly susceptible to allium leaf miners.
The larvae that hatch from eggs laid on the leaves wreak havoc, munching plant tissue all the way to the roots, and creating wounds that can draw fungi or bacteria that will rot onions posthaste.
Because we gardeners have to co-exist with these common pests, it’s important to prevent them from infesting your crop. One solution is growing scallions beneath row covers, so the flies can’t lay their eggs.
Learn more solutions and detection methods in our guide to allium leaf miners.
Onion Nematodes
While many types of nematodes are beneficial, a couple of different types of these colorless, transparent, non-segmented worms can adversely affect scallions.
Adult females of the root-lesion nematodes (Pratylenchus spp.), for example, lay their eggs in soil or within the roots of the allium host plant.
Eggs, juveniles, and adults can all overwinter in the soil or roots. When spring arrives, they hatch and invade the roots – or they’re already living there and they grow bigger to wreak more havoc.
In their early stages, root-lesion nematodes do the most damage to the roots, but they may move along to penetrate and consume plant tissue as they cycle through juvenile and then adult life stages.
The damage renders the roots ineffective at nutrient and water uptake, which reduces the quality of the edible portions and also makes the whole scallion more susceptible to damage from other pests.
The lesions these nematodes create can also leave an opening for other harmful soil microorganisms to infect the roots.
Root-knot nematodes (Meloidogyne hapla) can also cause your scallion patch to grow unevenly, or produce stunted green or yellowing tops.
You can learn more about identifying and controlling harmful nematodes in our guide.
In general, the best strategy for preventing onion nematode damage is to rotate all the alliums you grow with other types of crops from season to season.
That way, harmful nematodes can’t overwinter and then emerge from the soil in time to infect spring-planted onions.
Also make sure to clear any debris from infected crops as soon as you spot them, and put them out with the trash instead of composting.
And keep in mind that these tiny bugs can’t get far on their own. They rely on people or rainstorms to distribute them via runoff, contaminated garden tools, or in soil from infested gardens.
Pulling plants at the end of the season instead of growing them as perennials may help to prevent a reinfestation.
Thrips
You may spot the thrips themselves – tiny, tan-colored flying bugs with black eyes and striped abdomens.
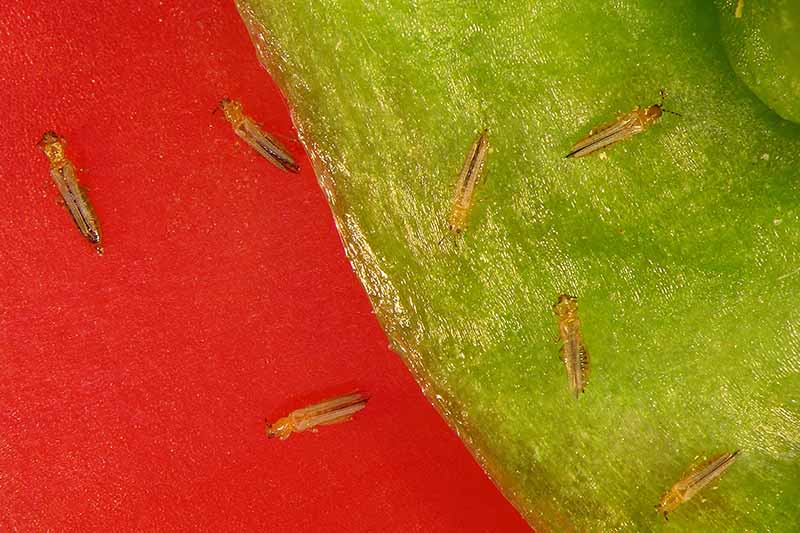
If you don’t see them, you may be able to detect their presence by noting the blotches they leave on the green tops of scallions, eventually deforming the foliage.
If you note their presence, you can treat your crop with an organic pesticide that’s safe for use on edibles, like neem oil.
Check out our guide to learn more about detecting and dealing with thrips.
Diseases
I’m going to lead with the good news here: Most diseases that might affect scallions can be prevented, or at least minimized, with sound garden practices.
It’s important to plant the alliums so they’ll benefit from ample air circulation, for example.
This encourages healthy growth, so they’re able to withstand most diseases, and also keeps the leaves from staying damp for too long and succumbing to numerous waterborne ailments.
Other tactics that help to prevent disease include rotating vegetable crops, avoiding overfertilizing, and cleaning up all plant debris in a timely fashion, particularly infected roots or foliage.
Unfortunately this is another point against potentially growing a perennial crop, but they still make wonderful additions to the annual garden.
The short list of diseases most likely to afflict scallions includes damping off, downy mildew, leaf blight, neck rot, rust, and white rot.
Harvesting
If you’re an established home garden forager, feel free to break off a bit of the greenery at any point for a burst of oniony flavor as you stroll and snack.
And fret not, the severed tops will grow back, so you’ll be able to enjoy them continually.
You can also eat any scallions that you thin to provide the rest of the plants with optimal spacing.
The immature ones I winnow are often consumed on the spot, but you may have more self-restraint.
Once the green tops are at least an inch tall, you can snip or pull them and use them in place of chives to flavor all manner of dishes from pasta salad to eggs or baked potatoes.
Harvest full-grown green onions when they’re about 10 to 12 inches tall. This usually takes about 50 to 65 days from sowing seeds, depending on the cultivar, or a little longer if you’re growing in poor soil or the plants aren’t getting ample water.
Be sure to mark your gardening journal with the projected harvest date so you’ll be ready.
If you let the plants grow much taller, the green parts will start becoming tough, while the roots develop a more pronounced, slightly bitter flavor.
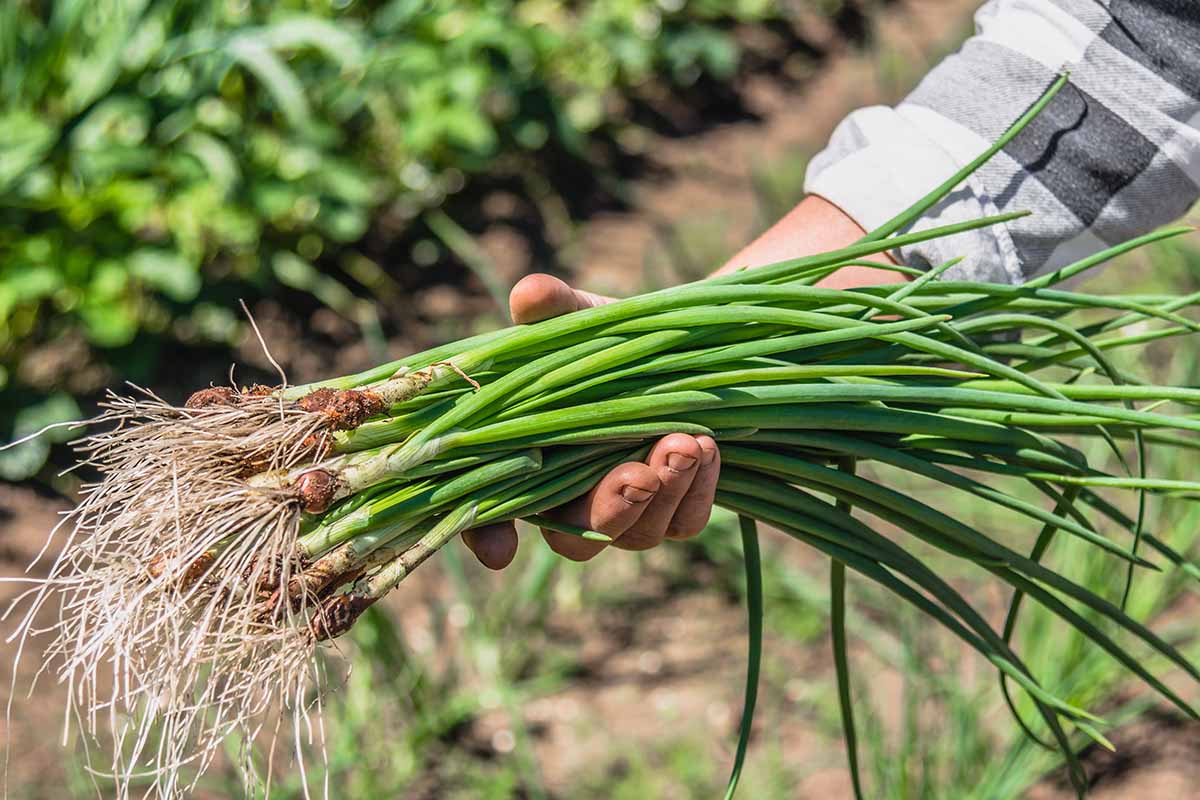
If they’re growing in a garden plot or raised bed, loosen the soil beneath the onions with a gardening fork before gently pulling them out with your hands. In smaller containers, you can use a garden claw for this purpose.
Should you be planning to harvest the entire bunch at once from a pot or planter, you may want to just gently turn the container on its side and pull the whole mass out with your hands. You can separate the harvest from the soil after it’s free of its pot.
Get more tips on when and how to harvest scallions here.
Storage
Post-pulling, shake any loose dirt from the stalks. At this point, it’s optional to wash the onions or cut the roots, but I usually do both while I’m still outside to keep the kitchen a little tidier.
To minimize the moisture that can hasten rotting, you may want to just wipe the stalks with a damp, clean dish cloth and dry them ahead of storing, or wipe them gently with a dry cloth.
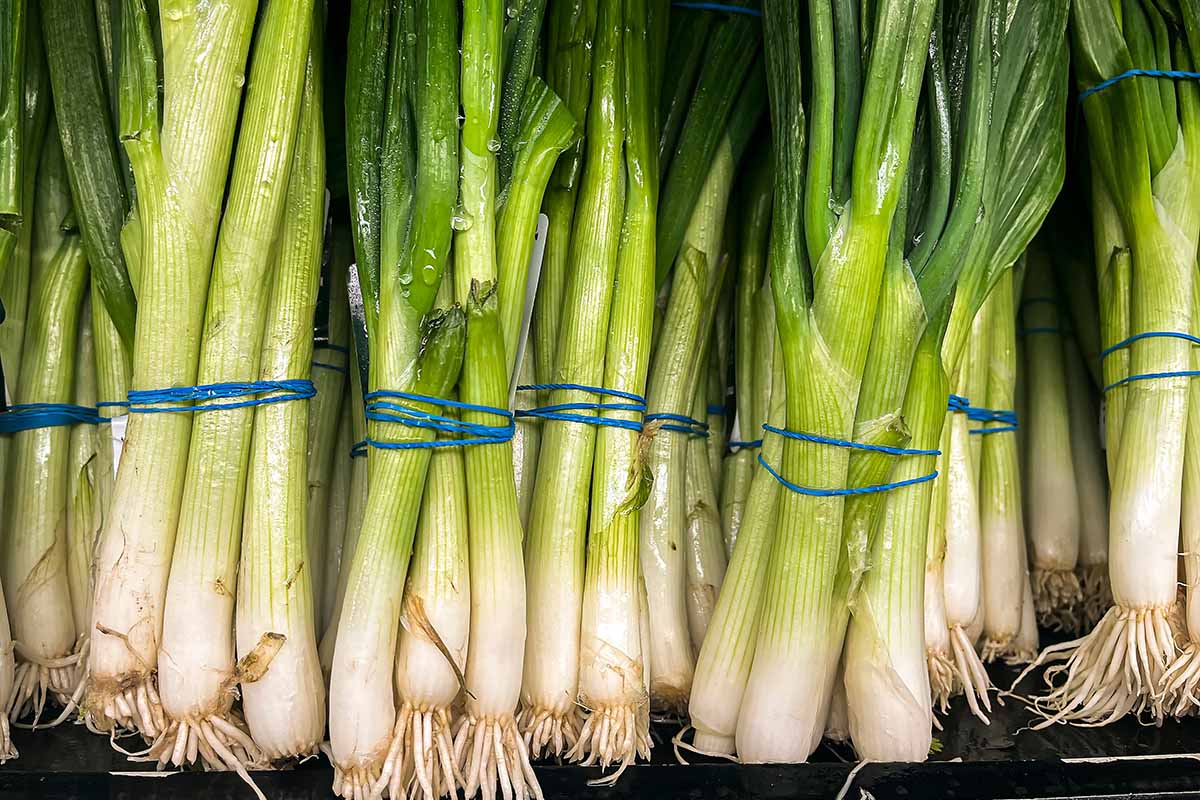
You can pop scallions into a zipper bag and store them in the veggie crisper, and they’ll stay fresh for about a week.
To retain maximum freshness and flavor, treat them like you would a bunch of fresh herbs.
Another option is to trim off the roots, then fill a drinking glass or mason jar with a couple of inches of water, and insert the green onions, root side down.
Upend an open plastic sandwich bag over the top of the greens, letting it drape down to the glass rim so some air will circulate around the stalks.
The onions will stay firm and the green tops won’t wilt or die for about seven to 14 days.
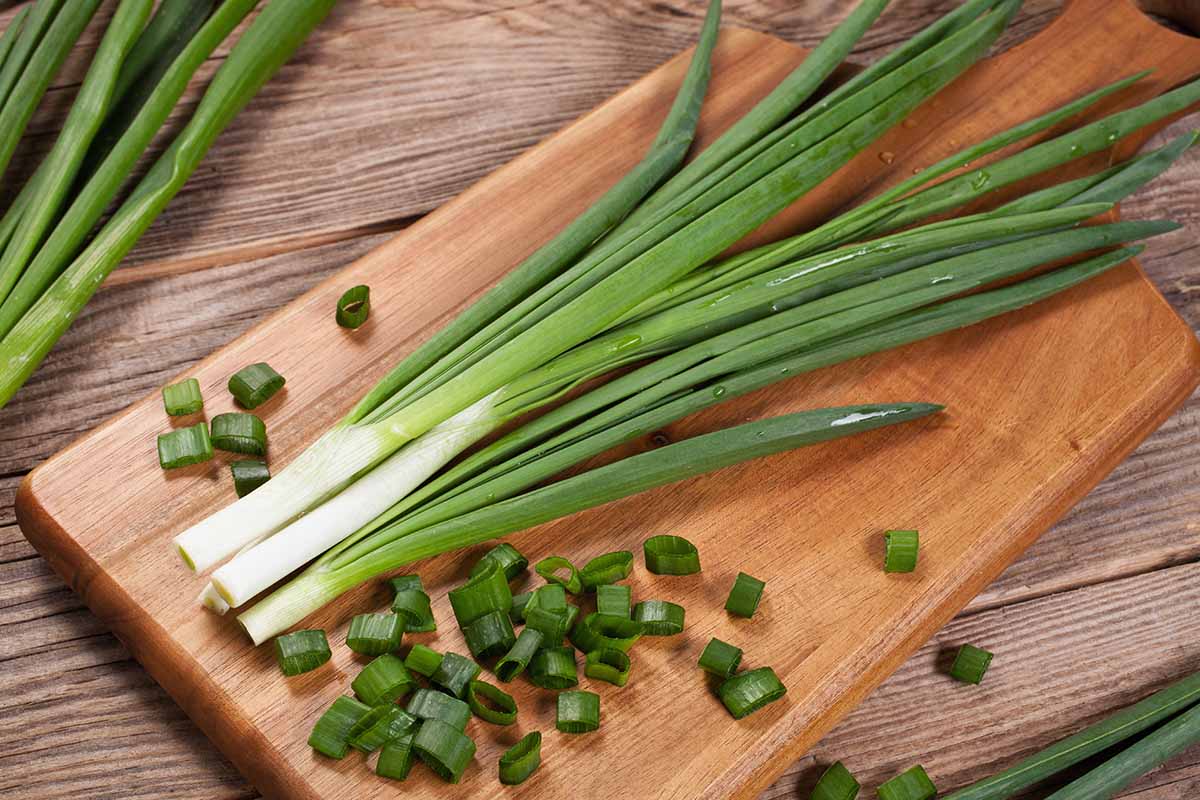
You can also wash and chop the green and white sections separately for storage. Just make sure they’re completely dry before storing them in an airtight container in the fridge.
While the tops and sliced white portions will taste great in a salad mix, don’t store them in with your leafy greens.
They can get slimy, or the oniony flavor may become more pronounced and overwhelm the rest of the mixture by the time you get around to preparing a salad.
Instead, store prepped scallions separately, and mix with other salad ingredients immediately before tossing and serving.
Preserving
I appreciate how easy it is to preserve either the green or white parts of these non-bulbing onions, either together or separately, and I’m sure you will too.
Freezing is the simplest. You don’t have to blanch them first, just wash them, spread them on a clean tea towel to dry, and chop them. Lay them in a single layer on a plate or tray, and then pop them in the freezer.
When they’re completely frozen, remove them from the tray with a spatula and funnel them into freezer-safe containers or bags. This approach keeps the individual pieces separated, instead of freezing into a clump.
Of course, these won’t have a crisp texture upon defrosting, so they’ll only be fit for tossing into stews or soups, not fresh dishes.
You can also dehydrate scallions using a dehydrator or the lowest heat setting on your oven. I like to mix dehydrated green onion tops with other dried herbs and vegetables to keep on hand for making wintertime vegetable soup.
Learn the basic method for dehydrating scallions and other vegetables in our detailed guide.
Recipes and Cooking Ideas
I could sit right here and comfortably rattle off 50 ways to serve scallions either fresh or cooked – they’re that versatile.
And since they’re relatively quick-growing and don’t take up much garden space, it’s entirely possible to grow enough so you can eat at least a couple every day during harvest season.
One of the simplest ways to prepare chopped A. fistulosum is also one of the most satisfying.
Heat a cup of miso broth with a sprinkling of ginger and a few drops of dark sesame oil, and scatter a couple tablespoons of the chopped green and white parts on top right before serving.
Sip the concoction from a coffee cup as a warm beverage on a chilly spring day, or serve it in small bowls for a light, appetite-stirring first course ahead of your meal.
Scallions can be used to add a dash of mild onion flavor to scads of savory dishes.Try roasting half a cup of one-inch sections of the white part with two cups of cubed red potatoes.
You could stir the chopped greens into scrambled eggs in place of chives, or add sliced scallions to fresh or cooked salsa in place of bulb onions. This will taste a bit more vegetal than the versions you may be used to, but I think you’ll come to like the fresh, light flavor profile.
There are also dozens of recipes where the lighter onion flavor of these alliums works better than the bulbs.
I prefer them to the bigger onions to top nachos or stuff into pitas with lunch meat or tuna salad, for example. On the nacho front, over the years, I’ve actually increased the proportion of scallion to where there tends to be a bit more of it than lettuce!
Don’t say I didn’t warn you: They’re habit-forming!
They also complement the flavors and textures of many types of soup, especially as a fresh, green garnish for traditional ham and bean soup in early fall, or stirred into Crock-Pot potato soup at any time of year in the last half hour of cooking.
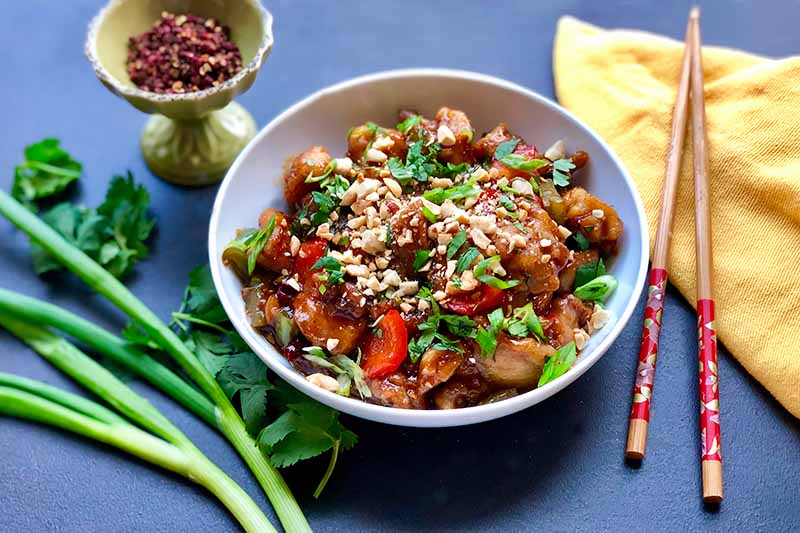
Our sister site, Foodal, offers numerous recipes that have these upright, non-bulbing onions as a key ingredient, like this quick and easy Kung Pao chicken.
The green tops make a crispy, mild topping for Foodal’s nacho pizza, too.
You can also find a handy guide to preparing and storing scallions on Foodal.
Quick Reference Growing Guide
| Plant Type: | Perennial vegetable | Tolerance: | Part shade, poor soil |
| Native to: | China | Maintenance: | Low |
| Season: | Spring-fall | Soil Type: | Fertile soil rich in organic matter |
| Exposure: | Full sun | Soil pH: | 6.0-7.0 |
| Time to Maturity: | 50-70 days | Soil Drainage: | Well-draining |
| Spacing: | Standard 2-3 inches (seed), 6-8 inches seedling clusters) | Companion Planting: | Beets, carrots, kale, lettuce, mustard, parsnips, spinach, turnips |
| Planting Depth: | 1/4 inch (seed), crown even with soil line (transplants) | Avoid Planting With: | Other alliums, asparagus, beans, peas |
| Height: | 10-24 inches | Family: | Amaryllidaceae |
| Spread: | 2-3 inches | Genus: | Allium |
| Water Needs: | Moderate | Species: | Chinense, fistulosum |
| Common Pests: | Allium leaf miners, armyworms, cutworms, onion maggots, root lesion nematodes, slugs, thrip | Common Diseases: | Damping off, downy mildew, leaf blight, neck rot, rust, white rot |
Plant Scallions Early and Often
When you’re trying to grow more of your own food and also get into the habit of cooking at home, scallions are invaluable.
Planting and maintaining these veggies is straightforward, and it’s the kind of crop even beginners can succeed with, yet the rewards are ongoing and substantial.
Homegrown scallions are simple to prepare when you want to add a bit of oniony goodness to dozens of dips, salads, or other dishes.
When you’re in a hurry or feel like grazing, they’re ready to enjoy as a straight-from-the-garden snack, or to pluck and store for meal prep.
Already a fan? Please share your allium experience, tips, and questions in the comments section below.
And if this material was a value-add for you, check out these other onion guides next: