

Whether you mostly eat takeout and warm up frozen dinners or are a dedicated home chef, the harvest season for homegrown scallions is a gleeful time.
They’re so handy for chopping to scatter over a frozen dinner entree or even canned soup, or to toss in with taco toppings or a green salad.
Or you can use them as the base for homemade scallion pancakes, yummy pestos and stir-fries, or elaborate, sophisticated soups.

Before they reach the kitchen counter, though, you’ll need to harvest them. There’s a bit of a knack to the process, but nothing tough!
Mostly, you’ll need to time the harvest for peak flavor, and then use the best methods for picking scallions at various stages, including harvesting the edible blooms.
I’ll share a few unique traits that distinguish them from immature bulbing onions at harvest time, and tell you how and when to pick or pull these standouts.
Here’s what to expect:
What You’ll Learn
Unique Scallion Traits
There’s often a bit of confusion when vegetable gardeners refer to scallions.
Many folks call any onion that’s harvested green in the springtime a “scallion.”
But because we’re talking about harvesting, we’re going to distinguish between true scallions, Allium fistulosum, and other onions that are referred to by the same common name but have a different growth habit.
Scallions don’t form bulbs as they grow to full size, and are also known as “bunching” or Welsh onions.
And while you can grow them as annuals and harvest them that spring, the plants are perennials. They’ll spread and come back year after year if you don’t pull up the whole plant at harvest time.
In contrast, spring onions are A. cepa varieties harvested at an immature stage. To add to the confusion, many folks also refer to spring onions as scallions. But these varieties will form fat bulbs if left to mature, which often takes 100 or more days.
Some A. cepa varieties are picked while they are immature for immediate use, while others are dried and cured for storage.
Scallions, on the other hand, don’t last long in storage, maybe a few days in the fridge. And they mature more quickly than storage onions, usually within 50 to 70 days of sowing, depending on the variety.
Now that we’re all clear on which type of allium we’re dealing with, let’s get to the good part: Harvesting these onions at their peak of flavor.
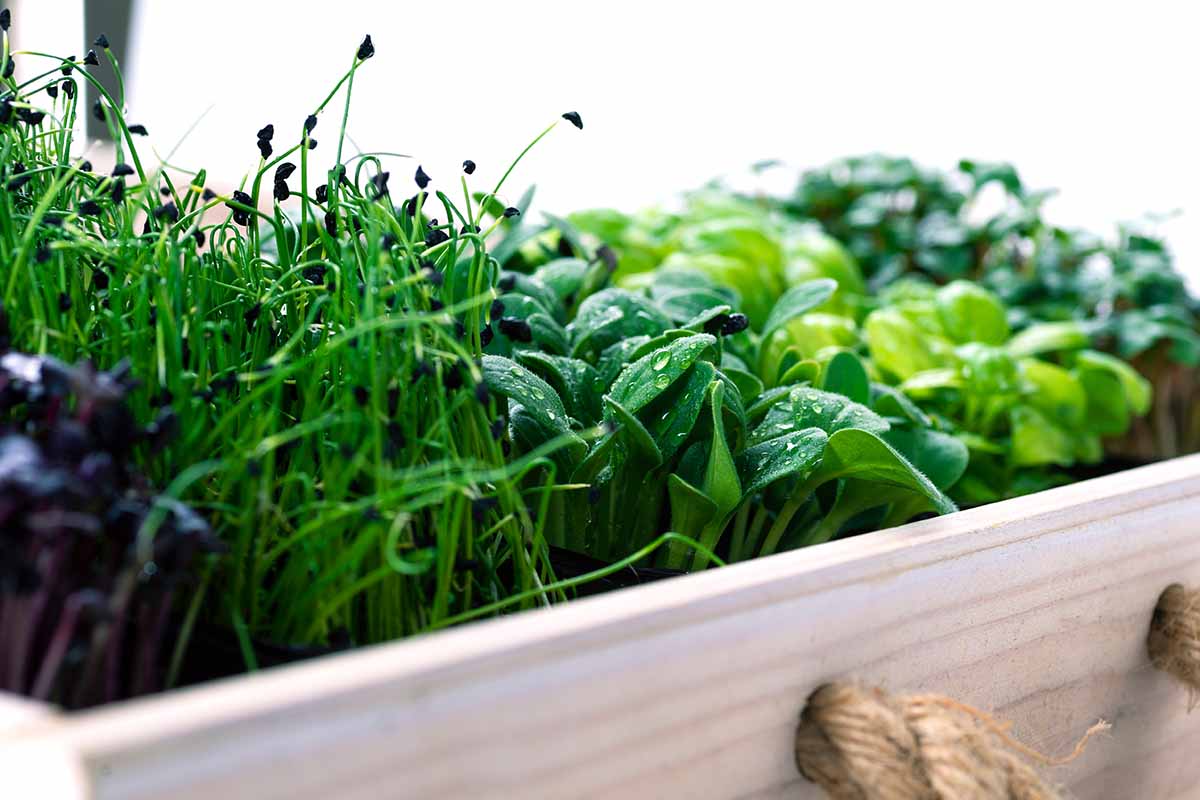
Pick as Microgreens
Scallions are popular to grow as microgreens, sown thickly on the surface of a growing medium, and harvested when they’re just two or three inches tall.
They’ll take about 15 to 22 days to get tall enough to pick. Because the green stalks grow from the base up, you can snip some and they’ll regrow, providing a second and sometimes a third harvest.
You can learn more about growing microgreens indoors in our guide.
Make sure to use sanitized scissors to snip the microgreens about half an inch from the soil line.
If you’re not planning to regrow a second harvest you can also gently pull individual microgreens by hand, and snip the roots off once they’re out of the soil.
Clip Greens to Use Like Chives
You can treat yourself to a bit of onion flavor before the scallion plants are fully mature by clipping a couple of the green stalks growing above the ground.
Wait until they’re at least four or five inches tall, and then cut only one or two from each clump, leaving the bottom inch of the stalks in place.
You can use these in place of chives in hot dishes, herb butter, and salads.
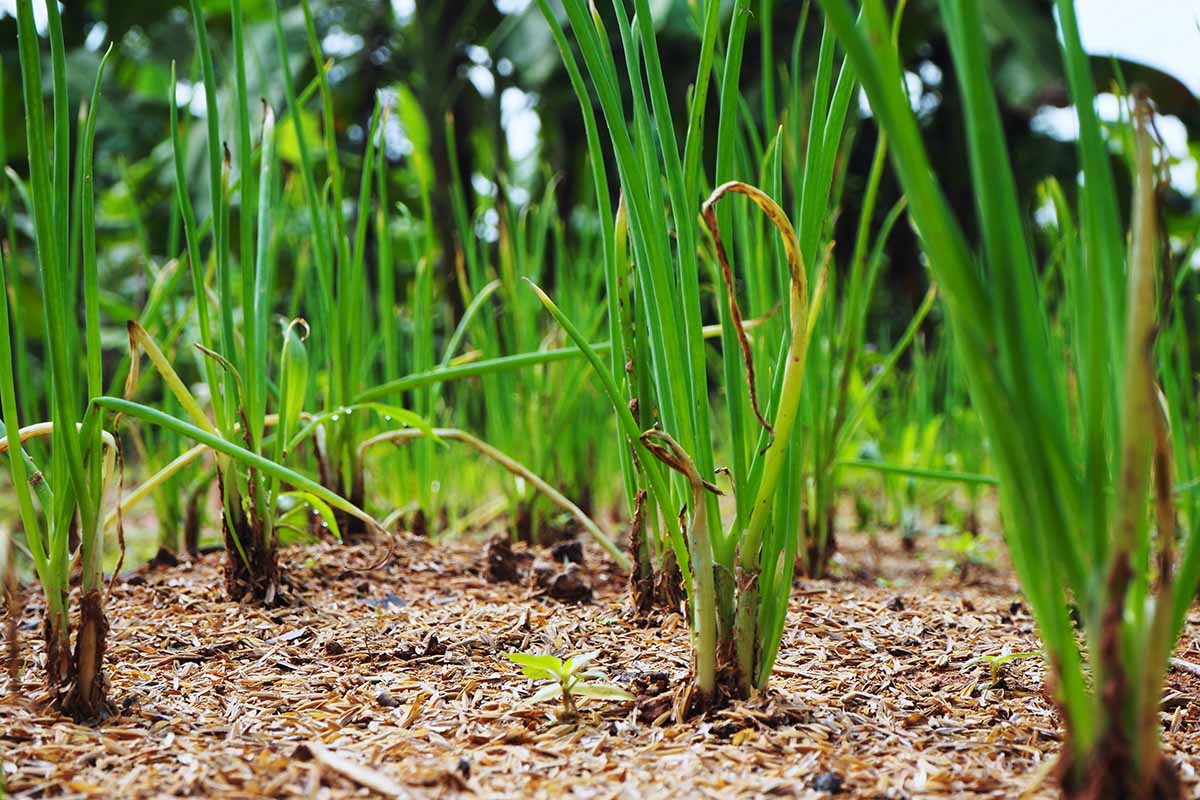
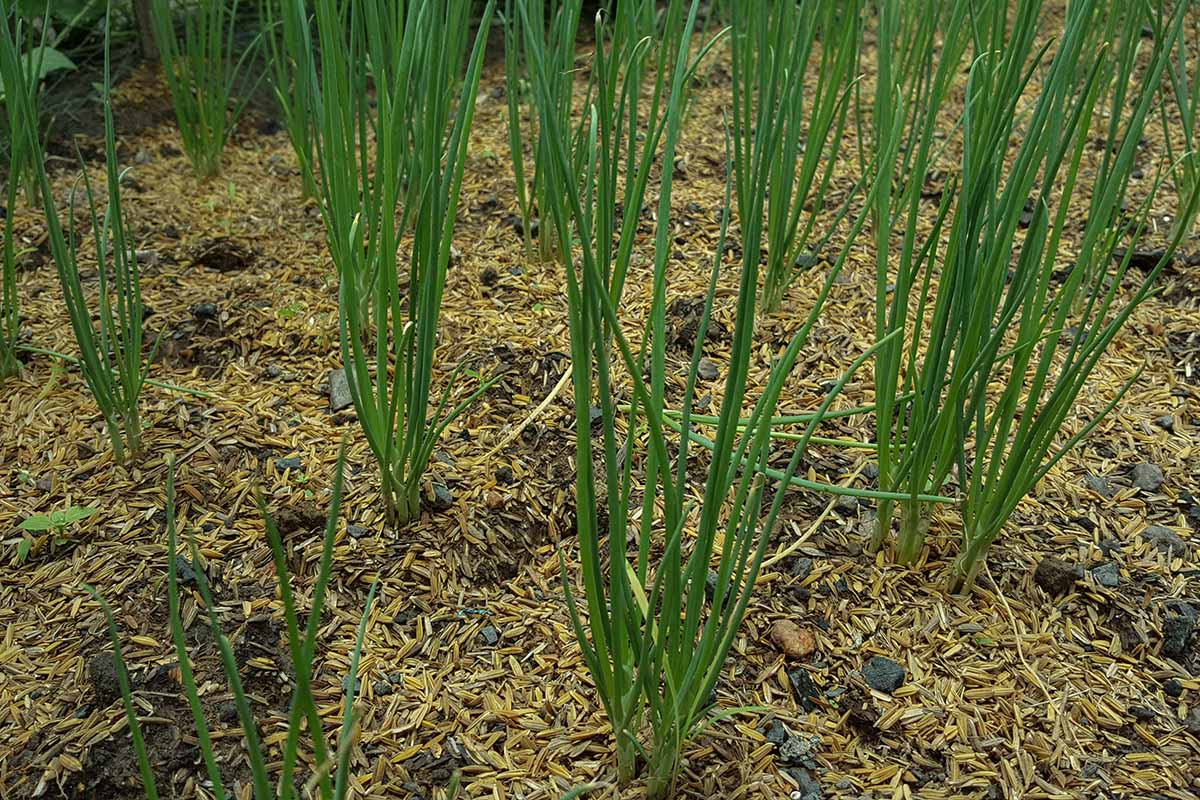
Pull Bunching Onions
During the growing season, if you want the white parts of the stalks to be longer, be sure to hill a couple of inches of soil around the green stalks to “blanch” the portions growing beneath the surface.
Once the green tops are about six inches tall, mound two inches of soil around the base of the stalks a couple of times before harvest, once every two or three weeks.
I don’t bother with blanching because I enjoy cooking with both the white and green portions of scallions, but if you prefer the white part of the stalks, it’s a good idea.
You’ll know the scallions are ready to pick at full size when the stalks are between a quarter and half an inch wide and the green tops are 10 to 12 inches tall.
Use size as your guide, and also refer to your seed packet to determine how many growing days your variety needs to reach maturity.
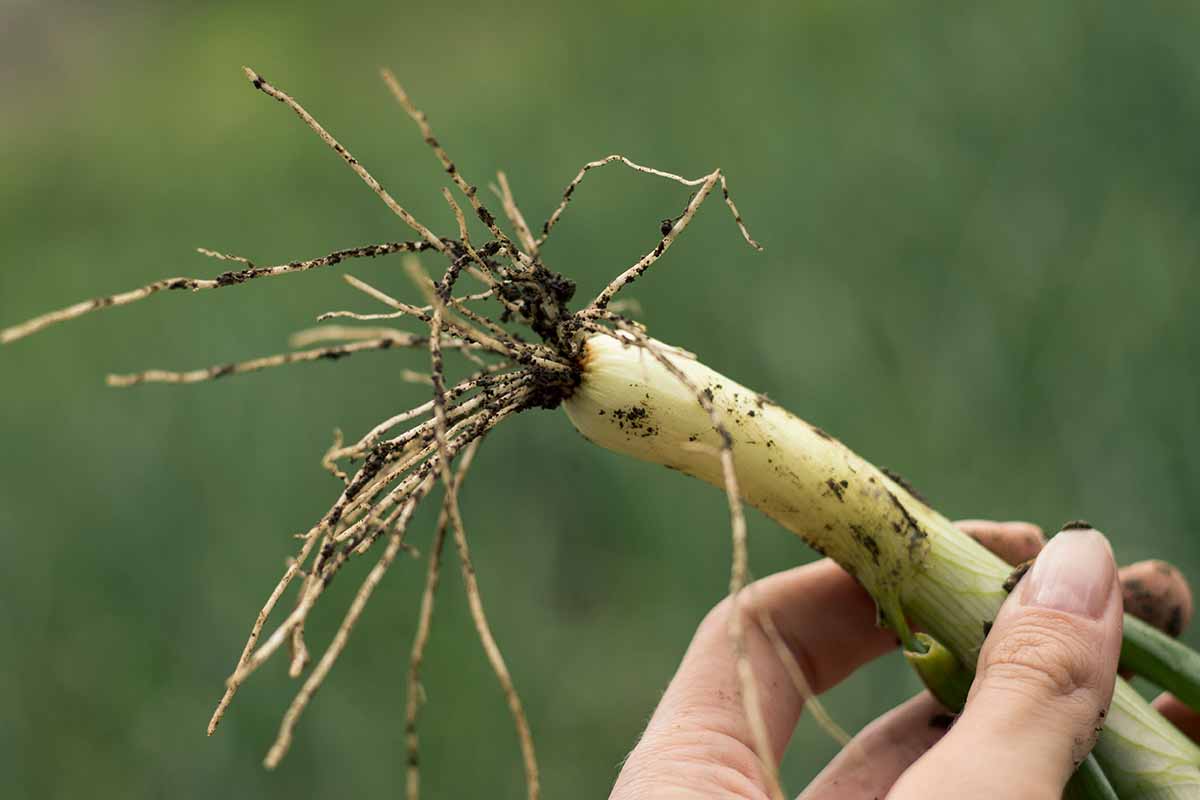
Start by pulling a sample stalk. The white portion should be at least two inches long. If it’s not, wait a bit longer to pull the rest of your harvest.
Try to pull scallions the day after it has rained, so the soil will give easily and their flesh will be hydrated and firm.
In the absence of rain, try to give the plants about an inch of supplemental water the day before harvesting.
When you just intend to pull a few at a time, use a claw or small trowel to loosen the soil, and then gently tug the ones you want using both hands.
Backfill the holes left behind, and give the clump a thorough watering so it will stay productive.
If you’re growing bunching onions as an annual, single-harvest crop, dig up the whole clump using a gardening fork. Remove it from the ground and separate the individual green onions, gently knocking off loose soil.
Replace the dirt that came out of the ground with your harvest, and make sure you remove any debris.
Plant remains left in your vegetable patch soil from season to season can encourage disease and also give insect pests a place to overwinter.
For tips on post-harvest storage, preserving, and cooking, see our guide to growing scallions for more information.
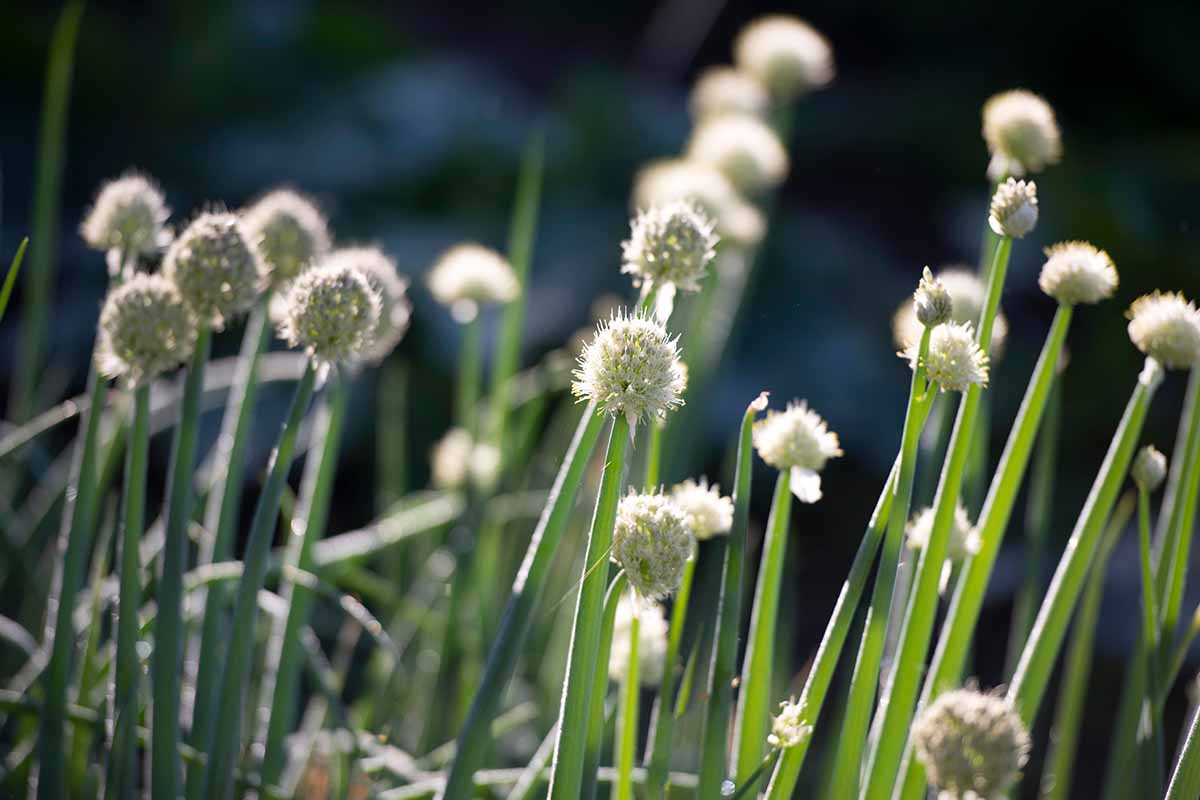
Harvest Scallion Blossoms
These plants form buds on the tops of their stalks and then flower. When your plants start to bud, you’ll have a couple of decisions to make.
Having young blooms won’t alter the flavor of the white or green stalks. But as the flowers age and start to form seed pods, this causes the plant to be less vigorous since it concentrates its energies on producing seeds, not the pungent, flavorful stalks.
When you want to save the seeds, of course, that’s a good tradeoff. For directions on saving allium seeds, see our guide to growing garlic chives.
But if you’re more interested in the scallion stalk harvest, be sure to clip the buds as they form.
I prefer to leave a couple of scallions to flower, because the pollinators are drawn to them, and because I enjoy eating the blooms.
They are dry and mild, with a faint onion taste. They’re delicate, so they don’t stand up to cooking.
But you can snip the petals to add to spring mix or float on soups, or use the entire flower heads as garnishes or to infuse oils or vinegar.
Picking the blooms is pretty simple. Just use clean scissors to clip them from the top of the stem.
Rinse them gently with cool water and let them air dry on a clean dish towel before using them in fresh recipes or as garnishes.
Don’t pick the spent flowers to eat after the seed pods form, though. The black seeds inside are too hard to chew, and at that point, the stalks below aren’t as tasty, either.
Plant Once, Harvest for Years
I won’t fault you if you don’t want to fool with growing these onions as perennials. Some gardeners need their space for a different crop later in the season.
What’s nice is the flexibility you have with the A. fistulosum harvest. You can pull all the mature green onions at once, or leave clumps to continue growing.

Are you growing scallions? Let us know in the comments section below and share your harvest tips!
And for more information about growing onions in your garden, have a read of these guide next:

Newby here. Never grew anything. I’ve planted a few items in a raised bed to gain experience. The bed is about 10 miles away from my apartment. It’s a teaching project on the college campus. I replanted store-bought scallions on the advice of my garden mentor. Now I’m confronted with two-foot-tall scallions that barely resemble scallions. Any suggestions as to how to use them would be appreciated.
Hi Maurice, sounds like a nice set up! If you mean that the scallions have become too large, don’t worry, you can still use them. Just think of them as tough scallions. They aren’t fantastic raw unless you chop them up very fine. But they are great cooked in some oil and then used in soups, omelets, etc.