
Cauliflower may not seem like the perfect plant for a container garden. But think again.
Thanks to its compact shape and shallow roots, it’s ideal if you’re looking for a way to add some nutritious food to your veggie garden, even if you don’t have an in-ground plot of land.
Let’s be honest: cauliflower (Brassica oleracea var. botyris) isn’t the easiest plant in the world to raise successfully.
It’s what I would classify as a fussy veggie. It wants things to be just right.
We link to vendors to help you find relevant products. If you buy from one of our links, we may earn a commission.
But when you raise yours in a container, it’s that much easier to control all of the growing conditions.
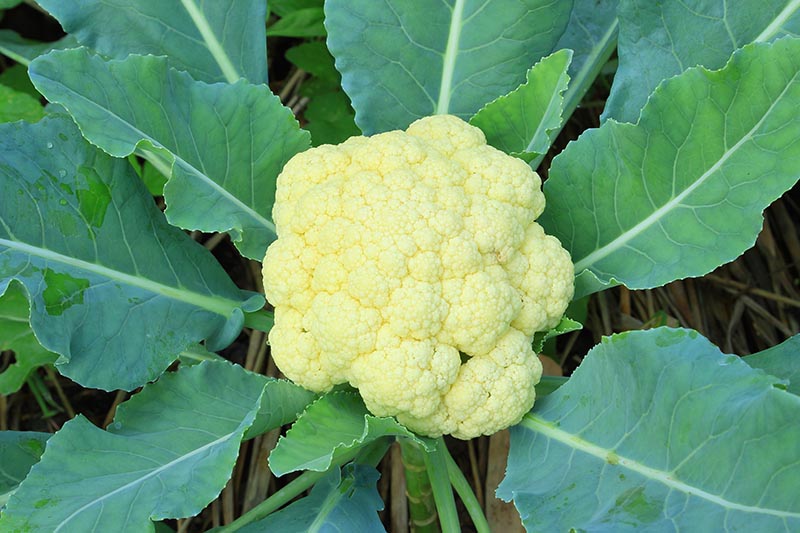
Which means you’ll have a better chance of harvesting those lovely white (or purple, orange, or green) heads.
Plus, cauliflower grown in pots is easier to access, which means blanching and harvesting are simpler.
In case you’re brand new to the world of growing this cruciferous vegetable, you might want to check out our full growing guide for all their basic requirements.
Here’s what I’ll cover in this guide, which is specifically aimed at growing your cauliflower in a container:
What You’ll Learn
Ready to dig in? Then let’s get started.
Choosing a Container
Cauliflower has shallow roots. That means you don’t need a super deep container, just one that’s wide enough to accommodate the mature dimensions of the plant and provide it with enough soil to draw moisture and nutrition from.
You will need a pot with a minimum depth of eight inches and a width of 18 inches to grow one plant.
If you want to grow several, you’ll need to increase the width accordingly, allowing 18-24 inches between plants, or purchase multiple pots.
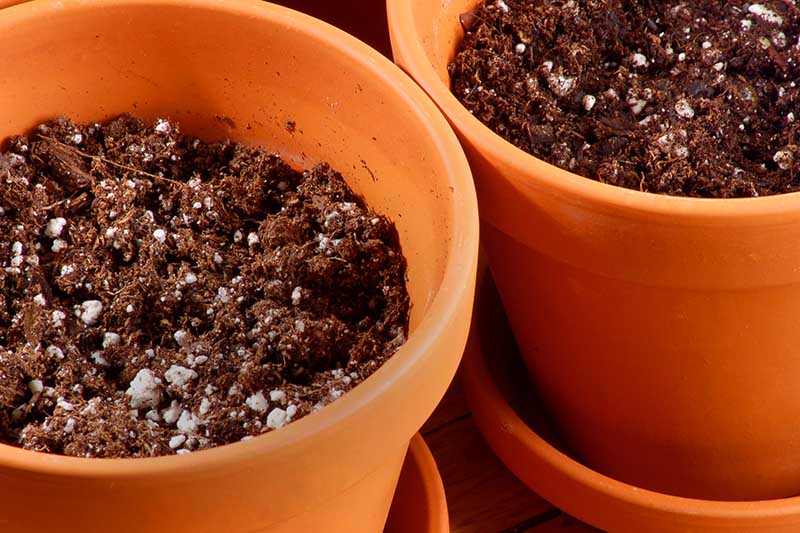
You can use terra cotta pots, but you will need to be extremely diligent at watching the moisture level in the soil if you choose this option, since terra cotta tends to dry out quickly.
Cement or stone pots tend to retain water better. But you might want to put them on wheels so you can move the plant around as needed without straining your back – they’re heavy.
I like to plant mine in a plastic or metal container because these retain water well, but they’re also light enough that you can move them around easily when you need to. Since this plant is sensitive to heat, this is particularly handy.
Learn more about the pros and cons of different container materials in this guide.
Make sure whatever type of pot you pick has at least one 1/2-inch drainage hole for every square foot of surface area at the base of the vessel.
If you aren’t using a new container, it’s always a wise idea to wipe pot down with a 1:10 mix of bleach to water in order to sanitize it. That way, you won’t be sad when your seedlings suddenly look decidedly unwell thanks to some hidden pathogen.
If you struggle with keeping up with your watering schedule, you may want to select one with a self-watering system to make things easier.
Varieties to Select
While you can plant any variety of cauliflower in a container, here are a few recommended options to check out:
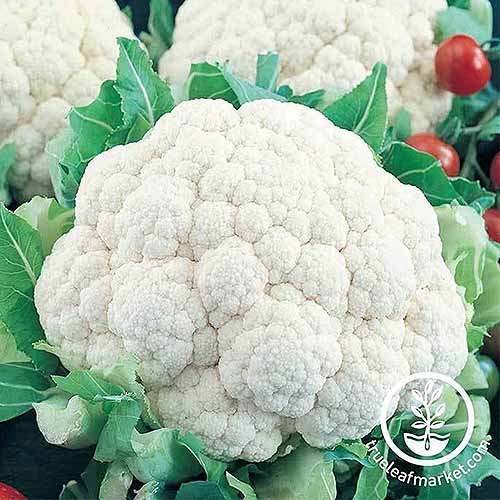
Early White
This hybrid variety is ideal if you are impatient to harvest your homegrown crop, because it matures quickly, in about two months.
Each head is about seven inches in diameter and has a lovely white color with a rich, buttery flavor. This variety has large leaves which makes blanching easy, and exhibits good heat tolerance.
Burpee carries ‘Early White’ seeds.
Cheddar
No, it won’t taste like cheese, but this orange hybrid cultivar certainly adds some color to a veggie platter!

Ready for harvest in 70 to 75 days, uniform smooth heads should not be blanched if you want them to develop that alluring color.
As an added bonus, orange cultivars like this one contain more vitamin A than their white counterparts.
Seeds are available from True Leaf Market.
Depurple
If you want something that will add a little color to your container garden, ‘Depurple’ produces seven-inch heads in an intense shade of violet.
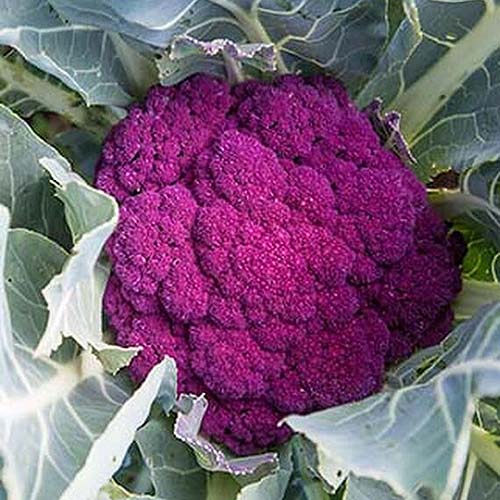
You don’t need to blanch them in the garden (more on that process a little later – and no, I’m not referring to the process of tossing the florets in boiling water to par-cook them after harvest!) and they take about three months to mature.
‘Depurple’ is rich in healthy anthocyanins, the antioxidants that give it the rich purple color. Check out our guide to learn more about the health benefits of purple produce.
Get your hands on this hybrid stunner with seeds or starts, available from Burpee.
Flame Star
If you want to grow cauliflower but you live in a warmer area, consider planting ‘Flame Star.’
This hybrid cultivar can handle warmer temperatures, which is useful as you tend to get a slight increase in heat if you’re growing your crop in containers set on a cement surface.

Plus, the seven-inch orange heads are pretty stunning.
The plants are medium-sized, reaching about 12 inches tall and wide, and heads are ready to harvest in about 60 days.
Want to try this one out? Head to Burpee for seeds or six-packs of seedlings.
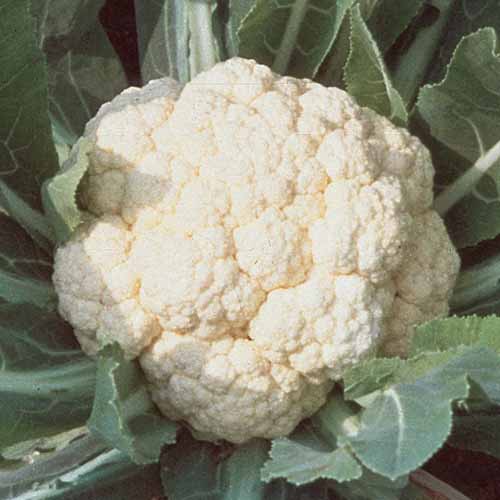
Snowball Improved
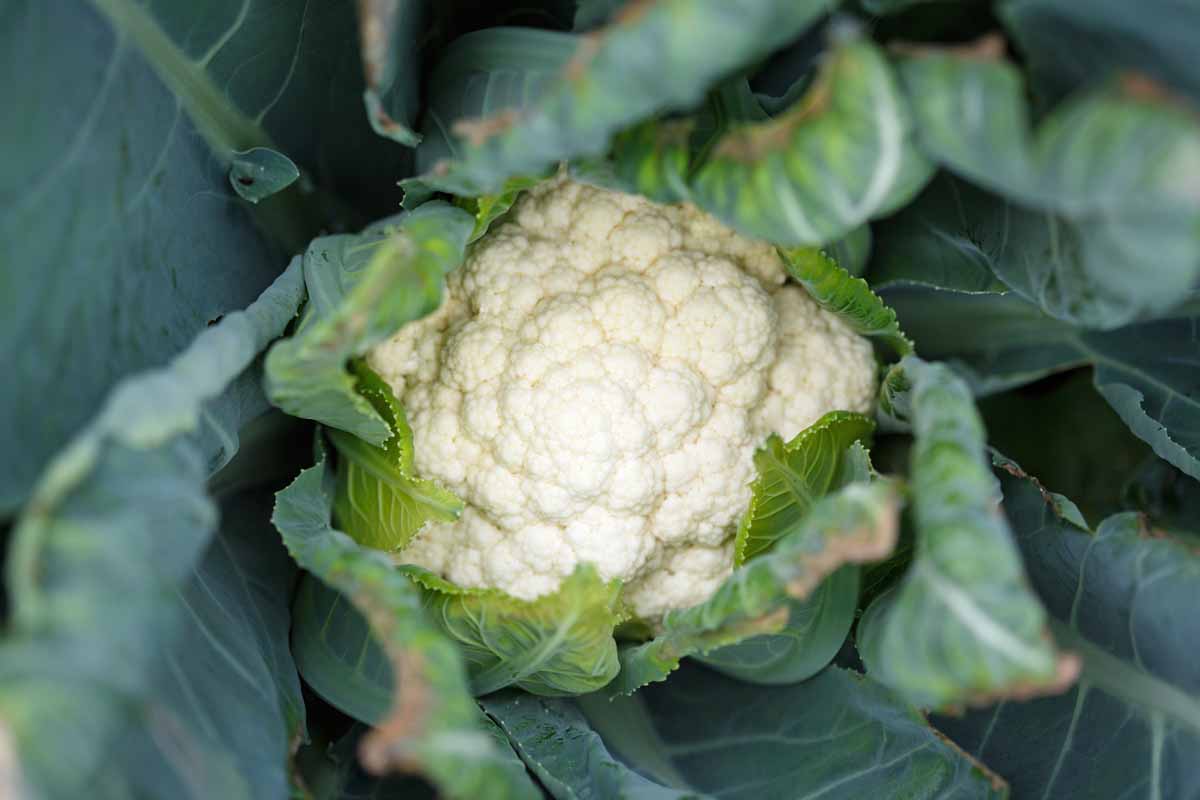
‘Snowball Improved’ is a self-blanching heirloom variety, which means the leaves curl up on their own to protect the developing heads from the sun.
You don’t need to pull them up and secure them like you may with other varieties, and the result is pure white heads that range from six to eight inches across.
This is an early type that’s ready to harvest in just 55 to 65 days.
Seeds are available from True Leaf Market.
Read more about the best cauliflower cultivars for home gardeners in this roundup.
How to Plant
Pick a spot in full sun to partial shade to start your plants, but plan on moving them around if the weather turns, or as the trees begin to leaf out in spring or lose their leaves in fall.
Ideally, this veggie prefers six hours or more of sun a day, but a little shade throughout the hottest part of the day is always welcome.
You can grow cauliflower any time when you have around 60 days or so, depending on how long the variety you chose takes to mature, in the forecast with average daily high temperatures below 75°F, and nighttime temperatures above freezing.
Fortunately for this plant, a light frost isn’t the end of the world. It’s a cool-season crop, and though it won’t tolerate heat, a touch of frost shouldn’t hurt it.
One advantage of planting cauliflower in a pot is that you don’t have to worry about rotating your crops like you do each year in the garden.
Use fresh all-purpose potting soil like Burpee’s Premium Growing Mix (find it on Amazon) and you won’t have to worry about your plant being infected with some nefarious pathogen from the soil (more on that later).
To get started, you can either plant seeds straight into your chosen vessel, or if you have a short spring or fall season, you can start them indoors.
If you go the latter route, start seeds four to six weeks before the last frost in the spring, or eight to 10 weeks before the first expected frost in the fall, making any necessary adjustments depending on the maturation rate of the variety you’re planting.
The goal is to make sure the plant can reach maturity before the summer heat or winter frosts hit.
Heads that are wrapped in leaves for blanching will probably withstand a light frost, but persistent winter weather will either cause the plant to bolt, or will turn the head mushy and inedible.
Sowing Seeds
Fill your selected container with potting soil and sow seeds 1/2 inch deep. Space the seeds about two to three inches apart.
Water the soil thoroughly, using a soaker hose so that you don’t disturb the seeds. Keep the soil moist but not waterlogged. Seeds should germinate in about 10-14 days.
Ensure that the seedlings get at least eight hours of sunlight per day as they mature.
Thin to 18-24 inches apart (if you’re growing more than one in a pot) or remove all but the strongest seedling from each pot when they develop two true leaves.
Starting Indoors
If you decide to start your seeds indoors because you have a short growing season, you have two options.
You can start them in the pot that you plan to grow them in or in seed trays.
Opt for the second route if your chosen pots are too large or unwieldy to move easily. Starting seeds in trays or small pots also enables you to control the soil temperature with a heat mat.
To do this, fill a seed starting tray or cells with a seed starting mix. Sow one seed per cell or space them two to three inches apart in a tray, 1/4 to 1/2 an inch deep.
Place your seed starting tray on a heat mat set to 70°F if you’re starting them during chilly weather, to aid germination.
Water thoroughly, using a spray bottle so you don’t disturb the seeds. Keep the soil moist but not wet.
Your seeds should germinate in about 10 days.
After germination, the seedlings should get plenty of sunlight or artificial lighting from a grow light, for at least eight hours per day.
When the seedlings form two sets of true leaves, you can transplant them to their permanent container and move them outside.
Regardless of whether you’re transplanting seeds started in cells or moving a pot that you started indoors, it’s a good idea to harden them off for a week before moving them outside permanently.
Hardening off involves placing the plants outdoors in indirect sunlight for an hour and then bringing them inside again. Add an hour each day over the course of a week until they’ve adjusted to the outdoor conditions and can stay there full time.
Transplanting
To transplant seedlings to their permanent container home, prepare your container as described above, then dig a hole the same depth and twice as wide as the cell of the seed starting tray or nursery start.
Gently remove the seedling, taking care not to disturb the delicate roots, place it into the hole and backfill with potting soil.

Miracle-Gro All Purpose Plant Food
Apply an all-purpose fertilizer such as Miracle-Gro All Purpose Plant Food, available at Amazon.
Mix 1/2 teaspoon of the granules to one gallon of water.
You want to be careful to select a fertilizer that won’t burn your cauliflower’s tender roots, and this one is a good option.
If you started them outdoors, seedlings should be fertilized for the first time when they have developed at least two sets of true leaves.
Container Care
Here’s the biggest challenge that you’ll encounter:
Cauliflower plants absolutely must have consistent moisture.
If they don’t, the heads won’t form properly and all that hard work will be wasted.
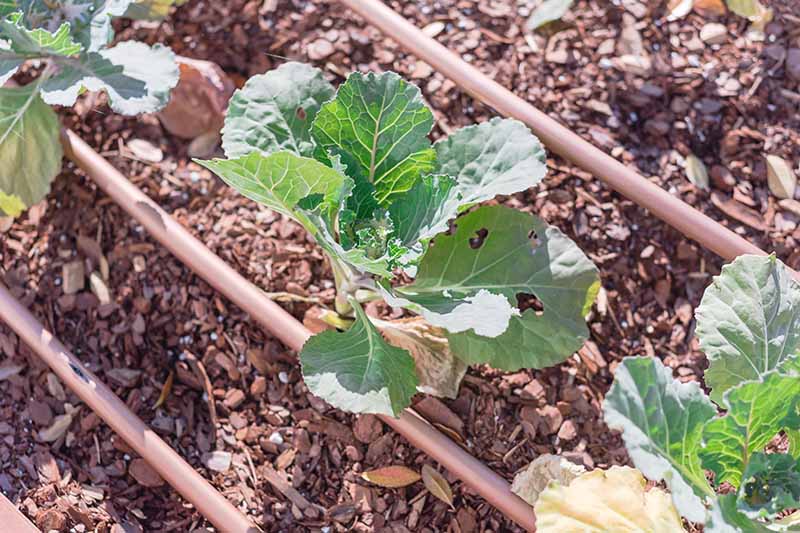
Containers are notorious for drying out more rapidly than soil in the ground. If you aren’t particularly adept at providing consistent water, consider investing in a drip irrigation system.
When you pot a plant in a new container, it’s a good idea to fill it up and water it until the water runs out of the drainage holes.
Then, check the plant in 12 hours or so and see if the soil feels dry or wet by sticking your finger in a few inches deep.
If it feels wet and your finger comes out muddy, it retains water well and you should give your plant less next time.
If it feels dry, plan to give your plant a longer soak in the future, or water more often.
This is a good way to determine how long your particular pot holds water, for future reference.
Of course, you’ll have to adjust as the weather warms up or when rain falls, but this gives you a good starting point.
Check the soil moisture regularly. It should feel moist, like a well wrung-out sponge, as far as you can stick your finger in. If the soil ever feels dry, give the plant a good soaking.
Additionally, you can place a one-inch layer of straw on the top of the soil around your plant to help retain moisture.
Cauliflower needs full sun, but be prepared to move your pots if the days start to heat up beyond 75°F or so in the spring, or if you have an unexpected warm spell in the fall. If that happens, put them in a shaded location for the duration of the afternoon heat.
Every two weeks, apply the same fertilizer that you used when setting your transplants in the soil. If you’re using MiracleGro All-Purpose food, apply it at a ratio of one tablespoon of granules to every gallon of water.
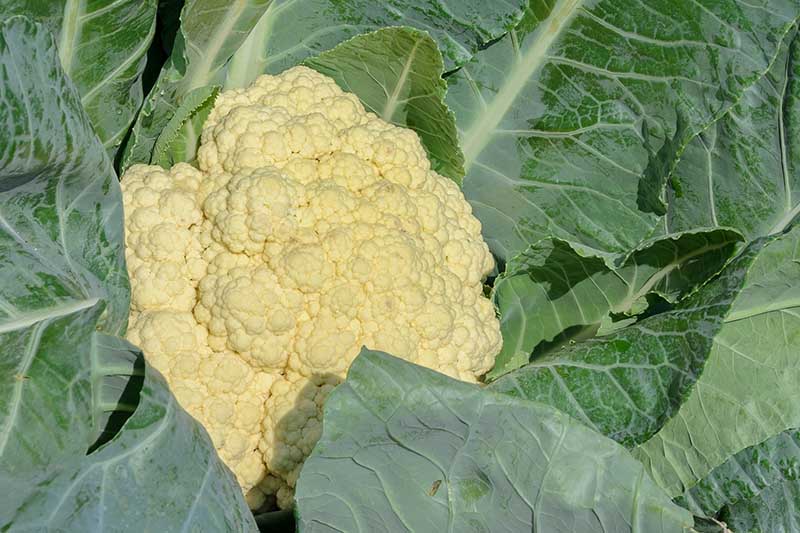
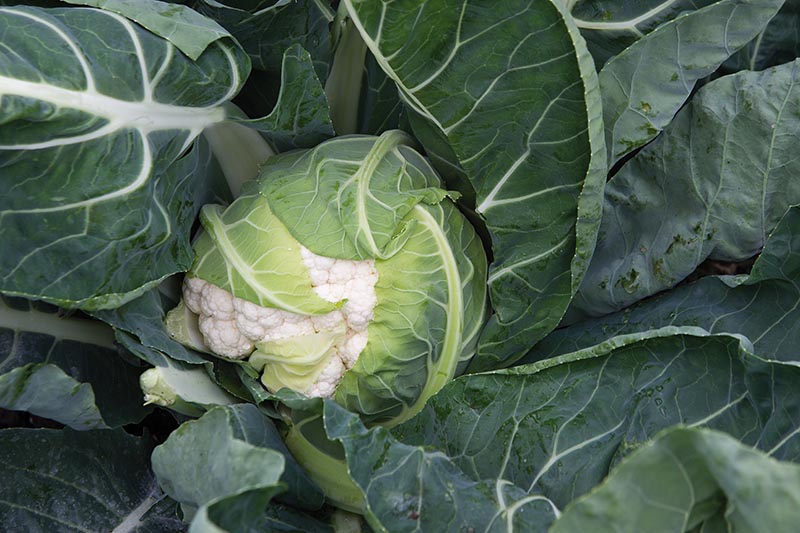
Blanching
Unless you have selected a self-blanching type, you’ll need to blanch each cauliflower head as it forms. This is the process of shielding the developing head from excess sunlight, to maintain the creamy-white color and prevent them from turning bitter.
When the head is a little larger than a golf ball, you should pull some of the leaves up and secure them loosely around the head with some twine or a rubber band.
The head should be entirely covered by the leaves, but be sure to leave a few open and exposed to the sunlight.
Read more about blanching cauliflower here.
Troubleshooting Tips
Cauliflower is prone to various pests and diseases, just like all of its cruciferous cousins.
The good news is that, so long as you’re using fresh potting soil, you shouldn’t have to worry about some of the common soil-borne diseases, like clubroot.
Another bit of good news is that crop rotation and cleaning the garden beds regularly so there isn’t any plant debris lying around are key steps to preventing many cauliflower diseases – but since you’re planting in a container, you’ve already nailed these two!
Here’s what you need to watch for:
Aphids
Aphids attack many plants, including cauliflower.
They’ll suck on the leaves and infest the heads, causing small brown spots or yellowing leaves. They can also cause stunted growth. That’s a lot of damage for such a tiny critter.
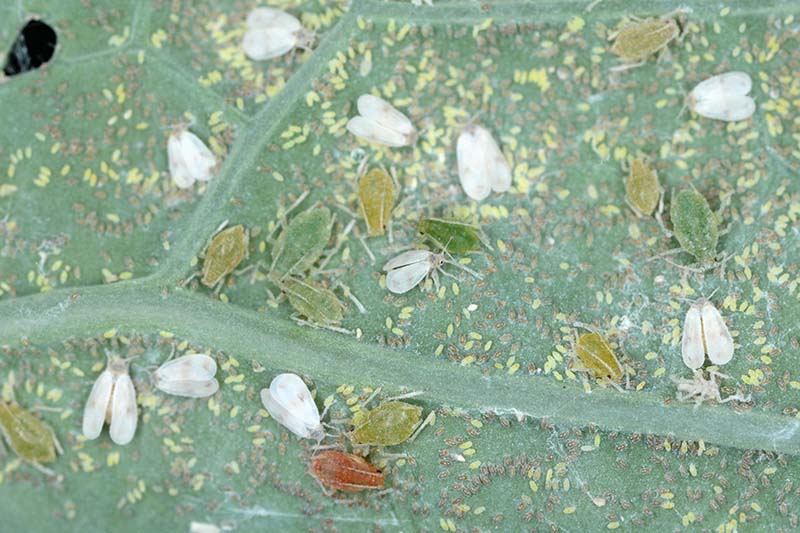
The bugs themselves can be hard to spot since they’re just an 1/8 of an inch long. Depending on the type, they can be pink, white, gray, green, black, or tan.
They’re usually active during periods of warm weather, with temperatures ranging from 65 to 80°F.
You’ll often spot these bugs on the underside of leaves, or you may see the sticky residue that they leave behind, known as honeydew.
Learn more about dealing with aphids here.
Bolting
While growing cauliflower in a pot has its advantages, one of the drawbacks is that the plants can be more prone to bolting.
That’s when the plant shifts into survival mode by producing flower stalks and seeds.
For you, that means no lovely cauliflower head to eat.
Bolting is typically caused by an overabundance of heat, too little water, or, less often, a hard freeze. The bad news is that containers tend to heat up faster than the ground soil, as I mentioned above.
On top of that, if you place your pot on cement, tarmac, or dark wood, it’s going to get hotter even faster.
Keep a close eye on your container and touch the outside now and then to see if it feels hot. If so, you might want to move it to some shade.
You can also insert a soil thermometer into the soil, and keep an eye on it during periods of particularly warm or cool weather.
Cabbage Loopers and Worms
All brassicas may be attacked by cabbage loopers (Trichoplusia ni). Sometimes described as inchworms, these green caterpillars crawl along plants, chewing holes in the leaves.
These annoying pests can have several generations per year and are most active when air temperatures are between 70 and 86°F.
Once they get going, they can completely defoliate a plant within a few days. Don’t ignore it if you see ragged pieces missing from your plants’ leaves, or if you notice that entire leaves have vanished.
Check your plants daily for pests and pull them off when you see them. Drown them in soapy water or crush them.
Potted plant covers or a cloche, treatment with Bacillus thuringiensis, or releasing predatory trichogramma wasps are all effective means of control.
Cabbage white butterflies (Pieris rapae) – known as cabbage worms in their larval form – are pretty little white butterflies with a black dot on their wings that will be more than happy to lay their eggs on your plants in the spring.
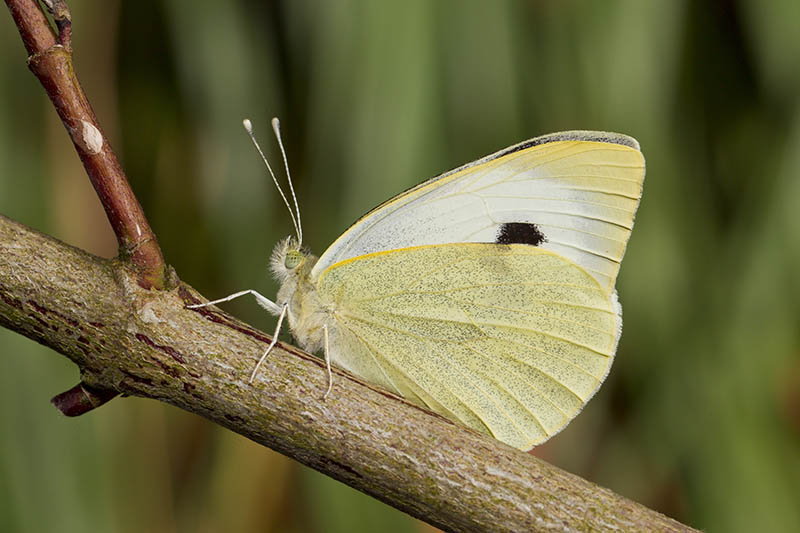
Within a week, these eggs hatch out into larvae that are intensely voracious eaters, chewing ragged holes in the leaves. They’re about an inch long, hairy, and green with a faint orange stripe.
They’re one of the most invasive pests of vegetable crops in the world, in fact, and if there are enough of them, they can quickly destroy an entire plant.
The worms will also bore into the developing heads, or can even prevent head formation before it starts.
Even worse? There can be four generations each year. If you are growing a variety that is slower to mature, you might think the attack is over, only to have to fight a second round!
Once again, treatment with Bacillus thuringiensis and using a cloche to cover your plant are your best defense.
Flea Beetles
Flea beetles, from the family Chrysomelidae, are tiny black or brown bugs that got their name because they hop around like the bugs that prefer to suck on your pets.
These will nibble little shotholes into your plants instead.
Floating row covers will also keep this bug at bay.
Read more about combating a flea beetle infestation here.
Damping Off
Damping off is caused by Pythium spp. water molds, as well as various species of Fusarium and Rhizoctonia fungi, all of which may live in the soil.
Damping off can kill seedlings before they even have a chance to get started.
Seedlings that do grow will have thin stems near the soil line and water-soaked lesions that can cause them to collapse. They’ll fail to thrive, and may eventually die.
If you start with fresh potting soil, you’re halfway toward preventing this disease. In addition, be sure to clean your tools with a 1:10 water and bleach mixture before and after use.
Remember, clean your potting container too, particularly if you plan to reuse an old one.
Read more about damping off here.
Downy Mildew
Downy mildew is caused by the water mold Hyaloperonospora parasitica. Cool temperatures and moist conditions are favorable for the spread of this disease.
Usually, you’ll see small yellow spots form on the leaves of your plants, followed by a gray mold that can cause leaves to die. This can reduce the vigor of your poor plant as well.
As a first line of defense, always be sure to irrigate at the base of the plants and avoid wetting the foliage.
You can also spray plants with a 50:50 mixture of milk and water preventatively every few days.
Growing Cauliflower in Containers Is a Rewarding Adventure
Growing your own cauliflower can be a challenge, but by planting your crop in containers, you make it easier to control their growing environment.
Keep your plants happy and healthy and you have a good chance of finding a beautiful head waiting for you under the leaves at harvest time.
Just remember: water, water, water. If you keep the soil moist but not waterlogged, you’ve already won half the battle.
Have you grown cauliflower in containers and do you have any tips to share? Let us know in the comments below!
And for more information about growing cauliflower, check out these guides next:

Inspirational. How about cauliflower gardening in a wet warm tropical climate?
Cauliflower is a difficult plant to grow and a warm climate makes it even harder, but if you’re up for a challenge! Temps over 85°F are pretty much a no-go. But there are a few culltivars that handle heat better than others, including ‘Attribute,’ ‘Flame Star,’ ‘Veronica Romanesco,’ which is a hybrid.