

Monstera spp.
There are houseplants that have gained massive popularity despite being challenging to grow.
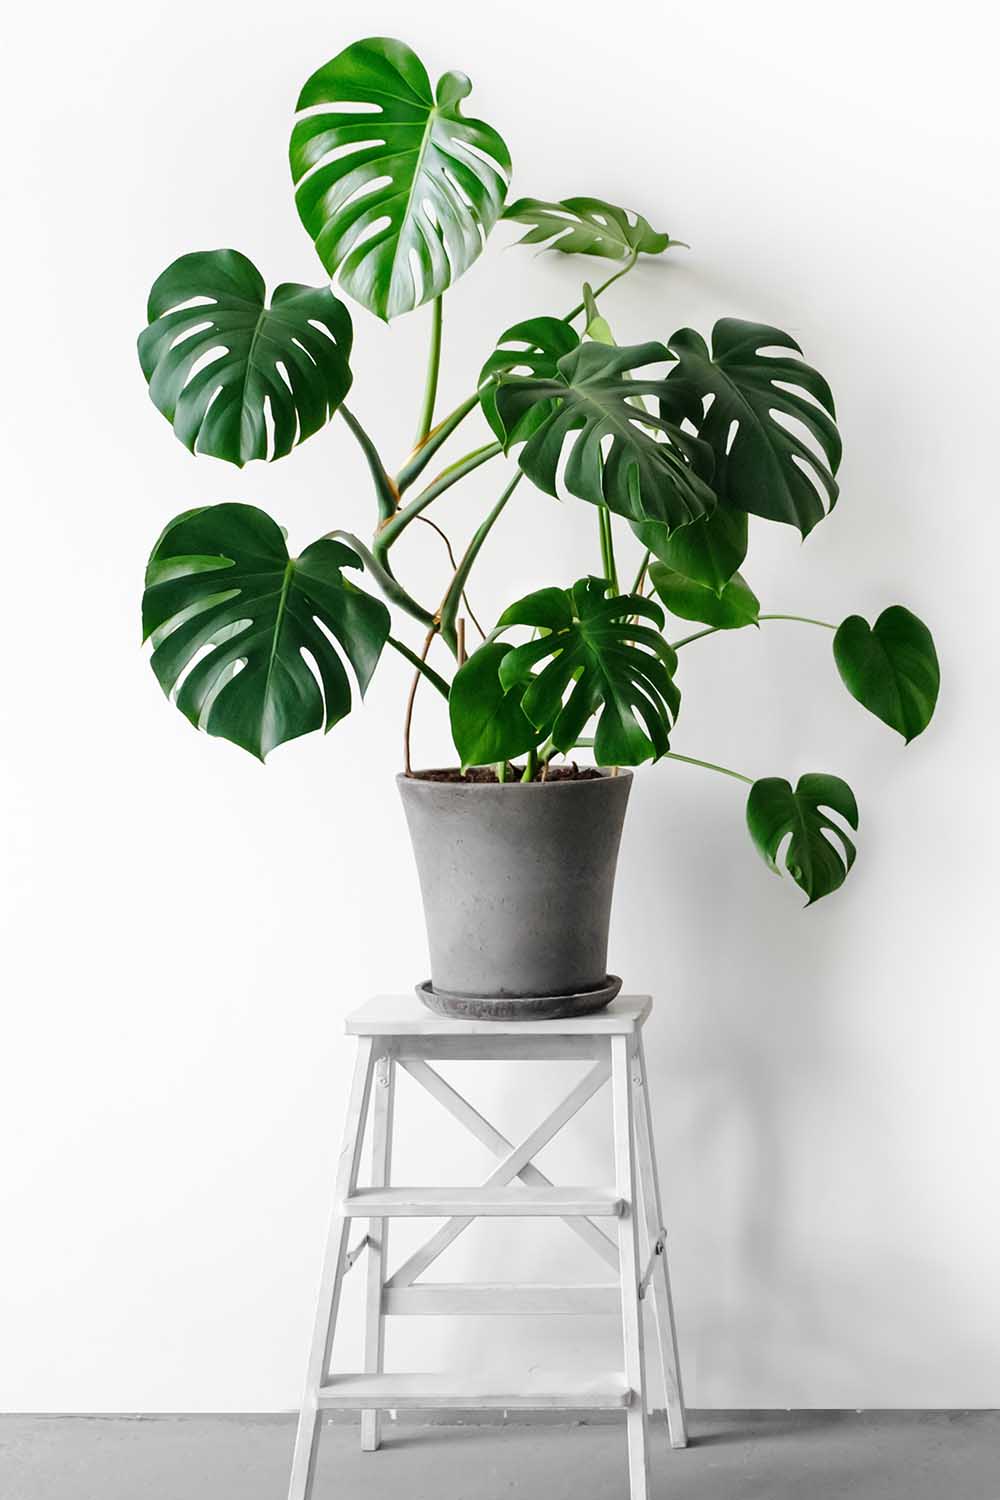
But the Swiss cheese plant combines striking appearance with low-maintenance care requirements.
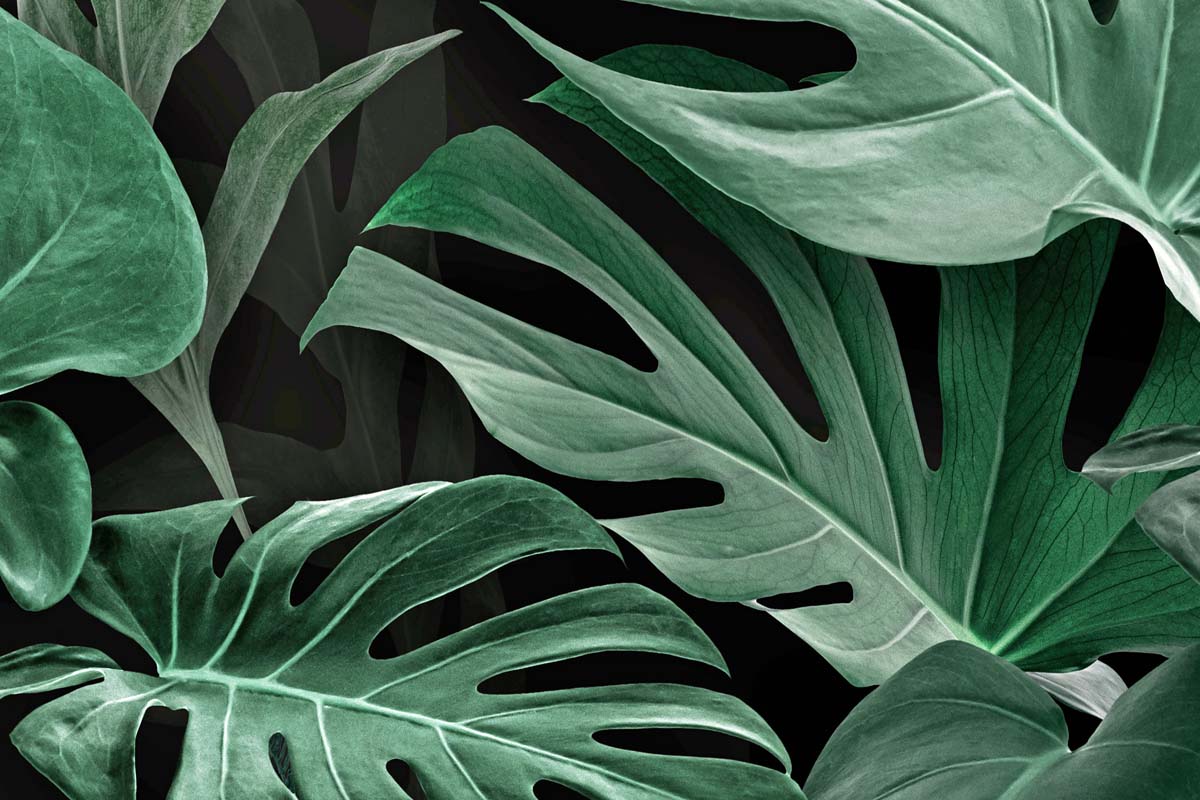
The distinctive fenestrated leaves make a bold statement and unlike more temperamental species, this plant tolerates variations in light, humidity, and watering without dramatic leaf drop.
We link to vendors to help you find relevant products. If you buy from one of our links, we may earn a commission.
Add to that the fact that you can make dozens of little baby monsteras with very little effort, and it’s clear to see why this beauty has popped up in stylish spaces practically everywhere.
This guide covers everything you need to know to successfully grow and care for Swiss cheese plants.
Here’s what we’ll cover:
What You’ll Learn
The scientific name of this popular houseplant is Monstera deliciosa. Huh? Delicious monster?
Basically, yes.
Deliciosa refers to the edible fruit (which rarely appears on those grown indoors), while Monstera is probably a reference to the massive leaves, each one can potentially grow three feet long.
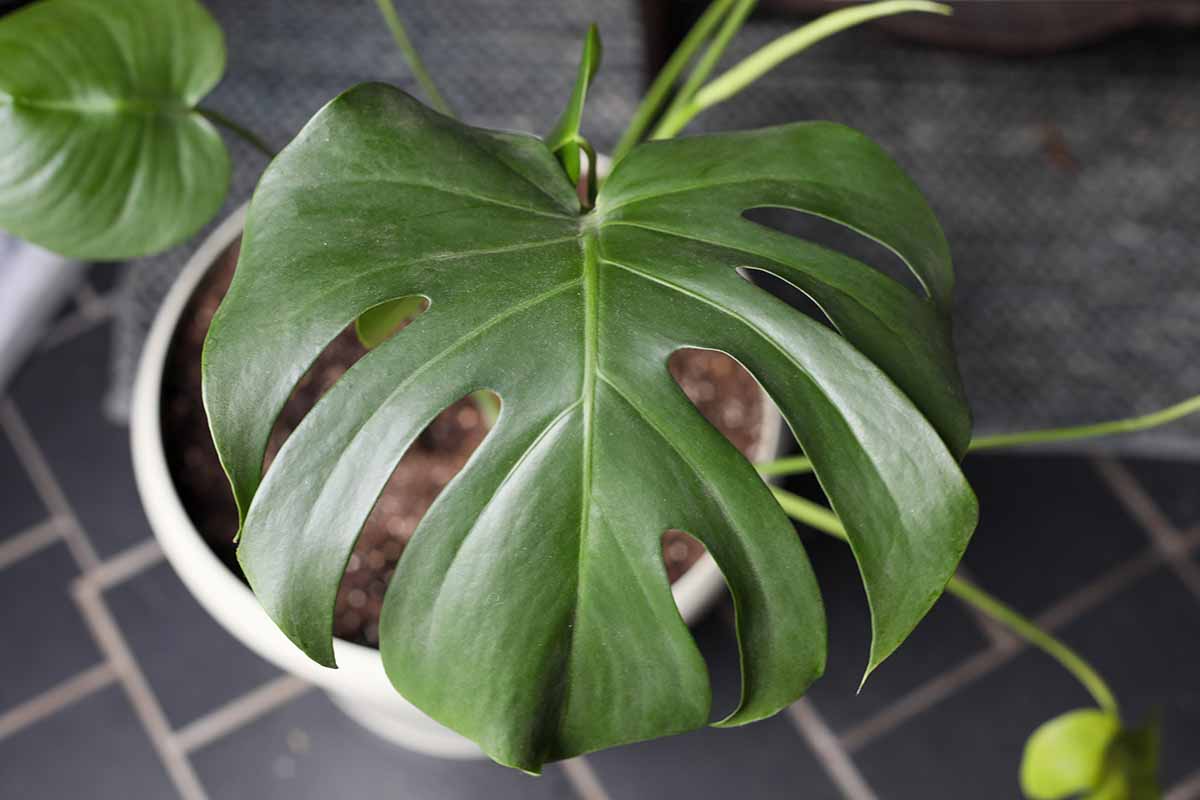
So why “Swiss cheese plant”? That’s because of the holes that form in the leaves. The technical term for this growth is fenestration.
The Latin word “fenestrare” means an opening for light, so you can see where this term comes from. Architects use this term, too, to describe openings in the envelope of a building.
Quick Look
Common name(s): Swiss cheese plant, split-leaf philodendron, Mexican breadfruit plant
Plant type: Evergreen semi-epiphyte
Hardiness (USDA Zone): 10-12 (outdoors)
Native to: Southern North America
Exposure: Bright, indirect sunlight
Soil type: Loose, loamy potting soil, well-draining
Soil pH: 5.5-7.0, slightly acidic to neutral
Time to maturity: 3 years
Mature size: Up to 8 feet tall by 6 feet wide
Best uses: Houseplant
Taxonomy
Order: Alismatales
Family: Araceae
Genus: Monstera
Species: Adansonii, deliciosa, pinnatipartita
Fenestrated leaves develop so wind can move more easily through the large leaves or so that light can filter through them like windows, as the name for this phenomenon implies.
Other plants have fenestration so that water can fall through the holes to reach the roots.

Monsteras grow beneath trees. They are semi-epiphytic, sending out both ground and aerial roots as they vine up taller plants.
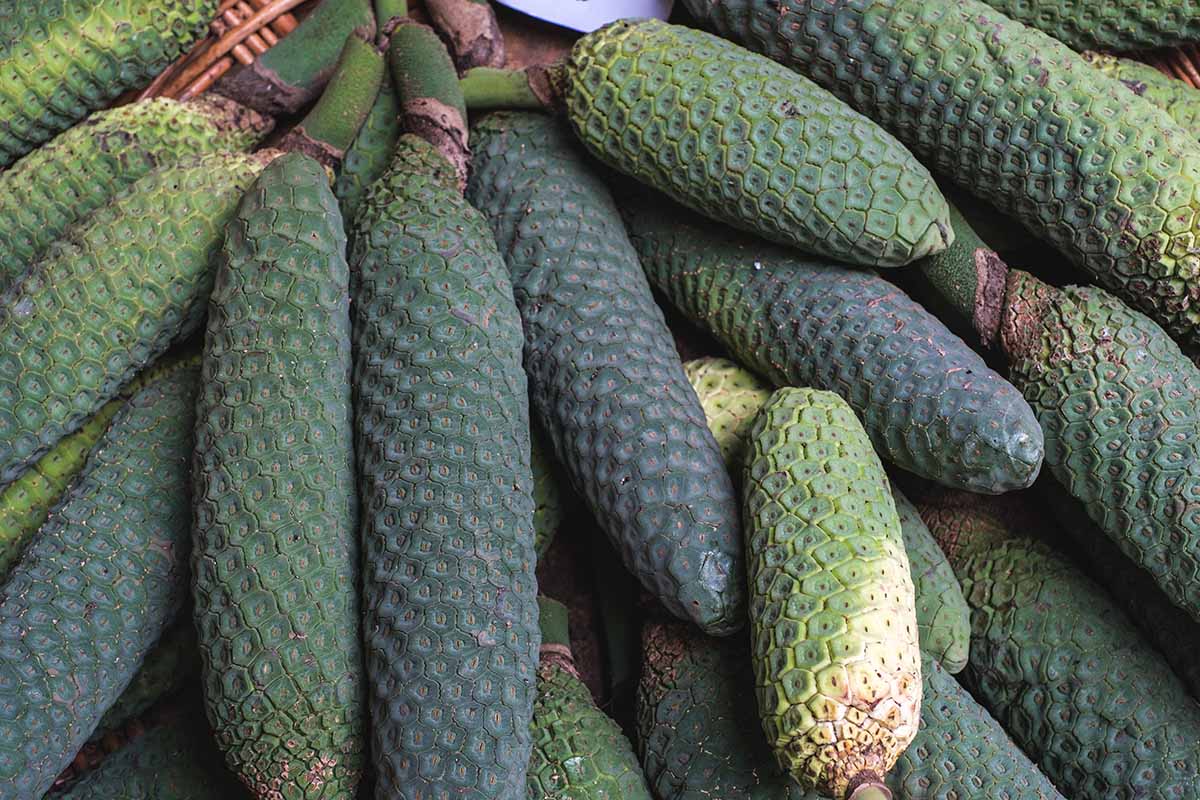
In Victorian England, the plant was cultivated in hothouses for its fruit, which tastes a bit like what you’d get if a banana and a pineapple made a delicious baby.
The fruit, known as Mexican breadfruit, is one of the reasons that gardeners were interested in cultivating this species originally, though it’s much more popular as a houseplant these days.
Native to tropical areas of the North American continent from Mexico to Panama, it’s hardy in USDA Zones 10 to 12, and does well indoors if given a good amount of indirect light.
Monstera has been introduced to some tropical areas around the world, and has even started to become invasive in some places.
Notably, though they prefer a good amount of light, monsteras are distinct from many other plants because they exhibit negative phototropism.
This means that particularly when they are young, they grow away from the light rather than towards it.
In the wild, they can grow to be really, really big – we’re talking up to 70 feet tall.
But don’t worry, in your house they’ll probably top out at about eight feet tall and six feet wide, assuming you give them something to climb.
How to Grow
You have to love a plant that doesn’t make a lot of demands on your time. Swiss cheese plants are like that. They’re cool if you want to just leave them be for a while.
The soil doesn’t need to be constantly moist. Just water when the top inch or two dries out.
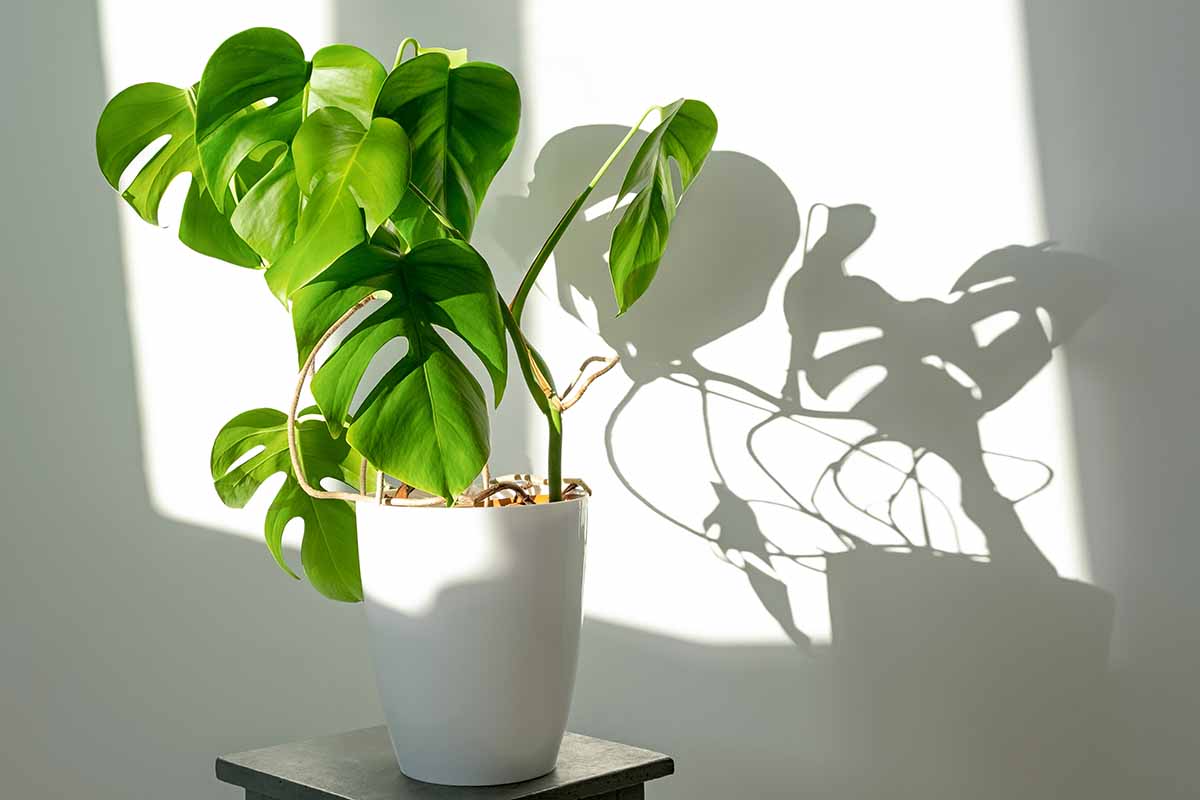
Swiss cheese plants do fine in a bit of shade, though they’re happiest in bright, indirect light.
Alternatively, you can place them somewhere that they will receive direct sunlight for a few hours a day.
If you move your plant from low light to brighter conditions, do so gradually.
Note that variegated varieties are prone to sunscald in direct sunlight, so these should be kept in indirect light.

You can increase the humidity near the plant by grouping it with other plants or using a humidifier. These plants prefer humidity above 40 percent.
But don’t stress over it, though – other plants might drop leaves or turn brown if they are too dry, but unless your air is seriously dry, your monstera will be fine.
So long as you keep your house at an average temperature somewhere between 60 and 80°F, your monstera will be happy.
Watch out if temperatures drop below 50°F as this can damage the plant.
Encourage Fenestration
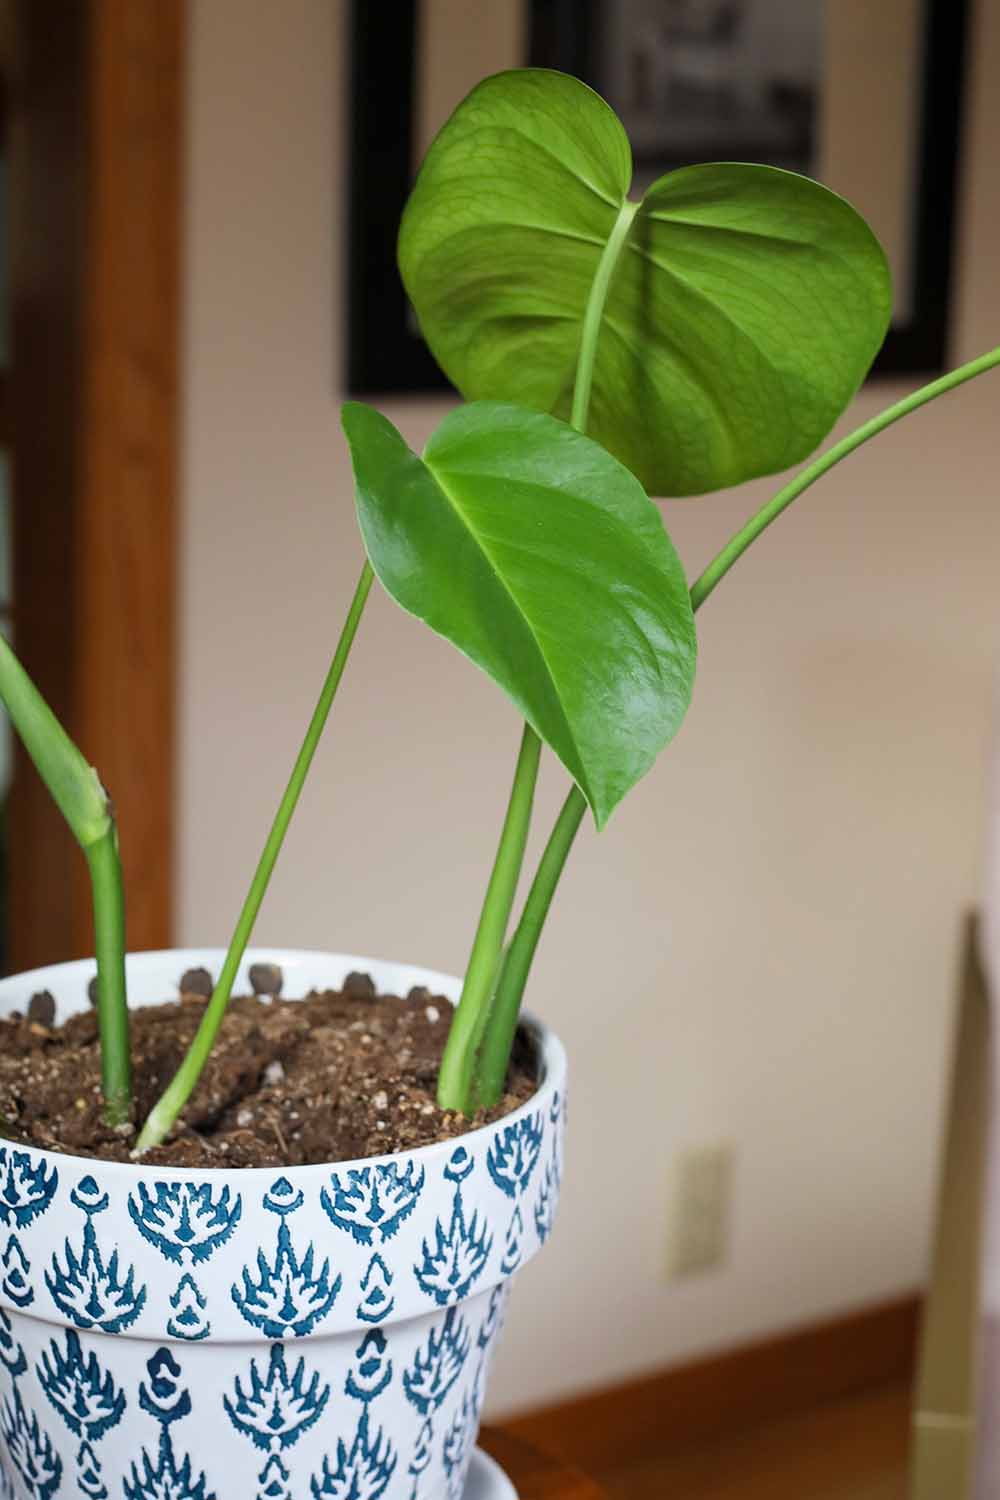
If you love the heavily fenestrated leaves of the Swiss cheese plant, there are ways to encourage them.
A young plant won’t typically fenestrate for the first few years. However, I can tell you from firsthand experience that a cutting can start fenestration within just a few months.
To encourage your plant to form deep slits and holes, give it plenty of sunlight and the right amount of water.
If you don’t provide enough light and water, the plant won’t have the right conditions to develop the leaves you’re looking for.
Unless you trim away any solid leaves that you see, there will always be certain ones that don’t fenestrate.
Species and Cultivars
You can find these popular plants at most garden centers and nurseries that carry a good selection of houseplants.
If you are ready to welcome a Swiss cheese plant into your home, you can find specimens in two- and seven-gallon containers available at Fast Growing Trees.
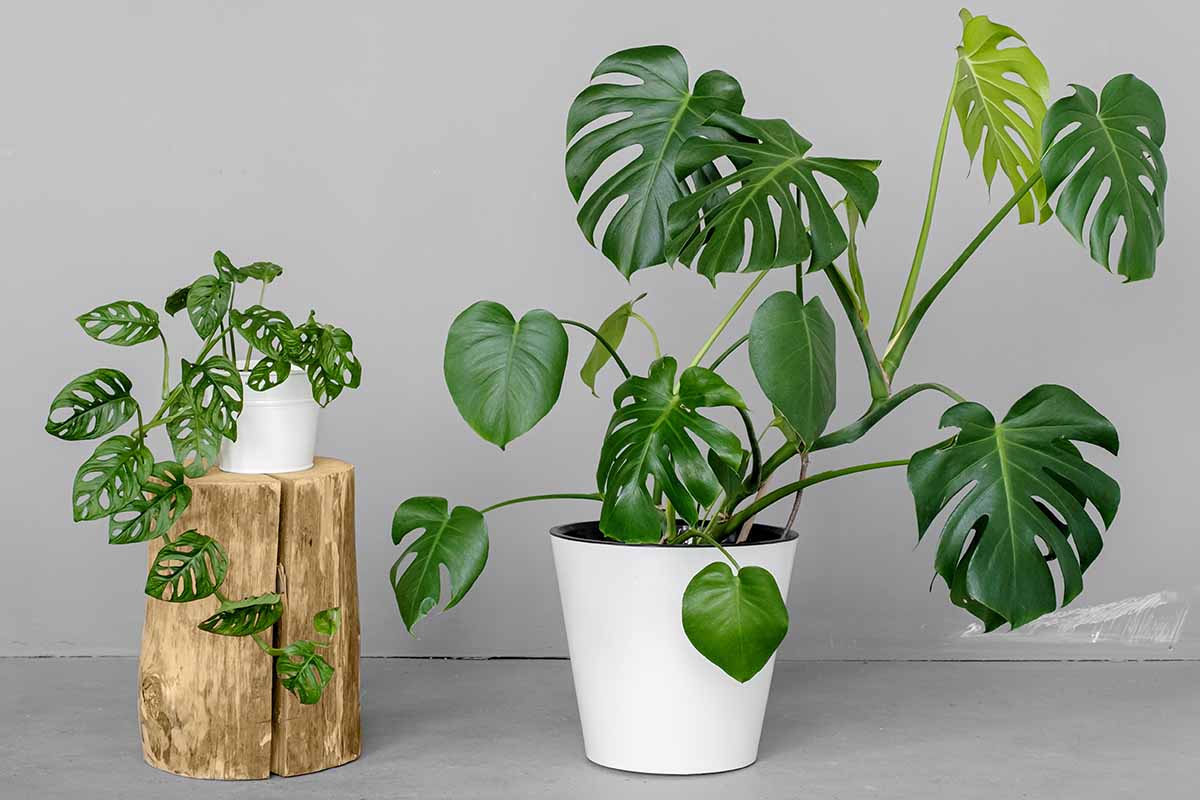
There are several additional monstera species that are popular houseplants, of which M. adansonii is probably the most common.
This one is often labeled as a Swiss cheese plant as well, but you can tell that it is a different species by its smaller leaves with holes that are more narrow.
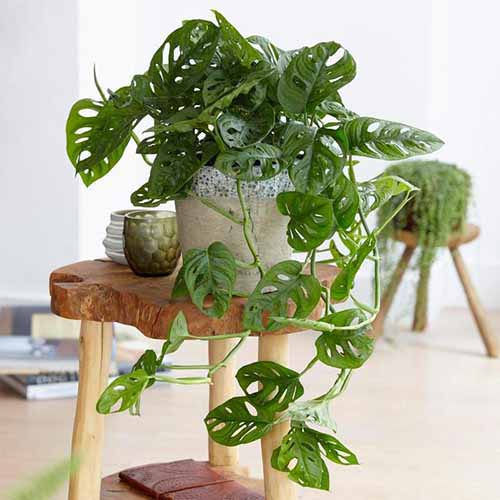
If this pretty alternative appeals to you, Fast Growing Trees carries it in three-gallon containers.
Less often, you’ll see M. pinnatipartita, which has large leaves with heavy fenestration that extends from the edges of the leaves to the midrib, giving them an almost fern-like appearance.
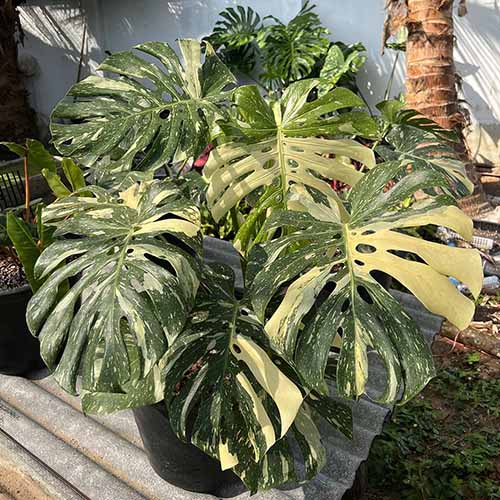
Of the species M. deliciosa, there is a cultivar with variegated leaves, and that is the coveted ‘Variegata.’
Picture the Swiss cheese plant’s massive, fenestrated leaves and add patches of marbling in light green, creamy yellow, and off-white.

Some leaves might even have one side that is creamy white, or they might be entirely that color. It’s extremely striking.
There are a couple of other variegated cultivars out there as well, including ‘Albo Variegata,’ which has chunky near-white patches and pure-white leaves.
Often referred to simply as ‘Albo,’ it’s fussy and needs carefully maintained conditions.
‘Thai Constellation’ has white speckles rather than patches. It’s more challenging to care for than a solid monstera, but not as finicky as ‘Albo.’
You can find ‘Thai Constellation’ in six-inch pots available from Fast Growing Trees.
Maintenance
Your most difficult job when it comes to maintaining Swiss cheese plants is repotting, when necessary.
You need a container with good drainage, and once your plant starts sending out tons of aerial roots and touching the edges of the current pot, it’s time to go up a size.
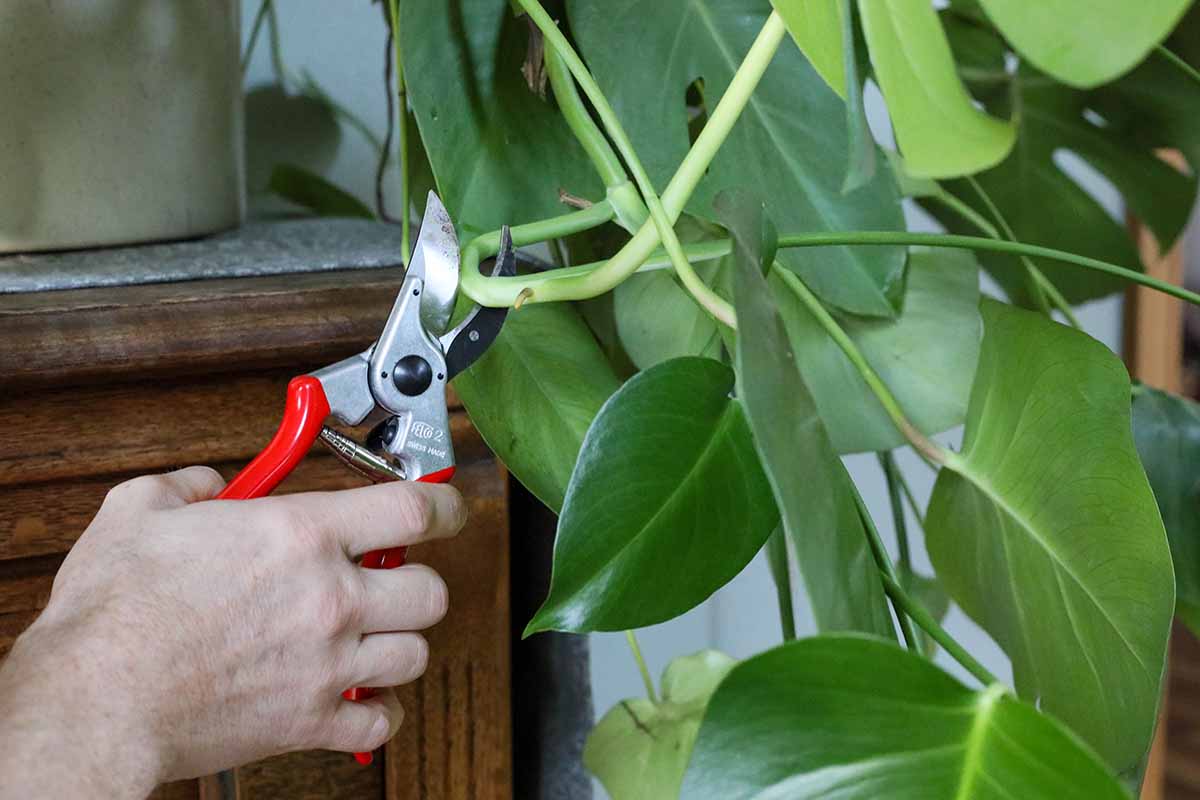
You can constrict a monstera to encourage it to stay smaller. It will send out lots of aerial roots, but it will be perfectly fine. Just prune away some of the foliage to help constrain its growth.
When you repot, remove the existing plant from its container.
Then, prepare a new container with a bit of soil in the bottom so the crown will be sitting at the same level it was before.
Knock away as much of the old soil as you can, and put the root ball in the new pot. Fill in around the roots with fresh potting soil.
Be sure to wipe the leaves with a moist cloth now and then to remove any dust.

Finally, if you are growing variegated ‘Albo,’ be sure to remove any leaves that appear without variegation.
The white coloring that this variety is known for occurs thanks to a genetic mutation, whereas the unique coloration of ‘Thai Constellation’ variegated plants grown from tissue culture is more stable.
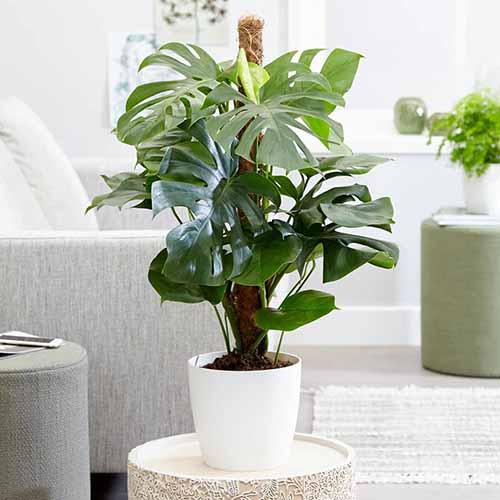
Climbing
As your plant ages, you might want to give it something to climb. This is especially true if you decide to contain your plant rather than repotting it.
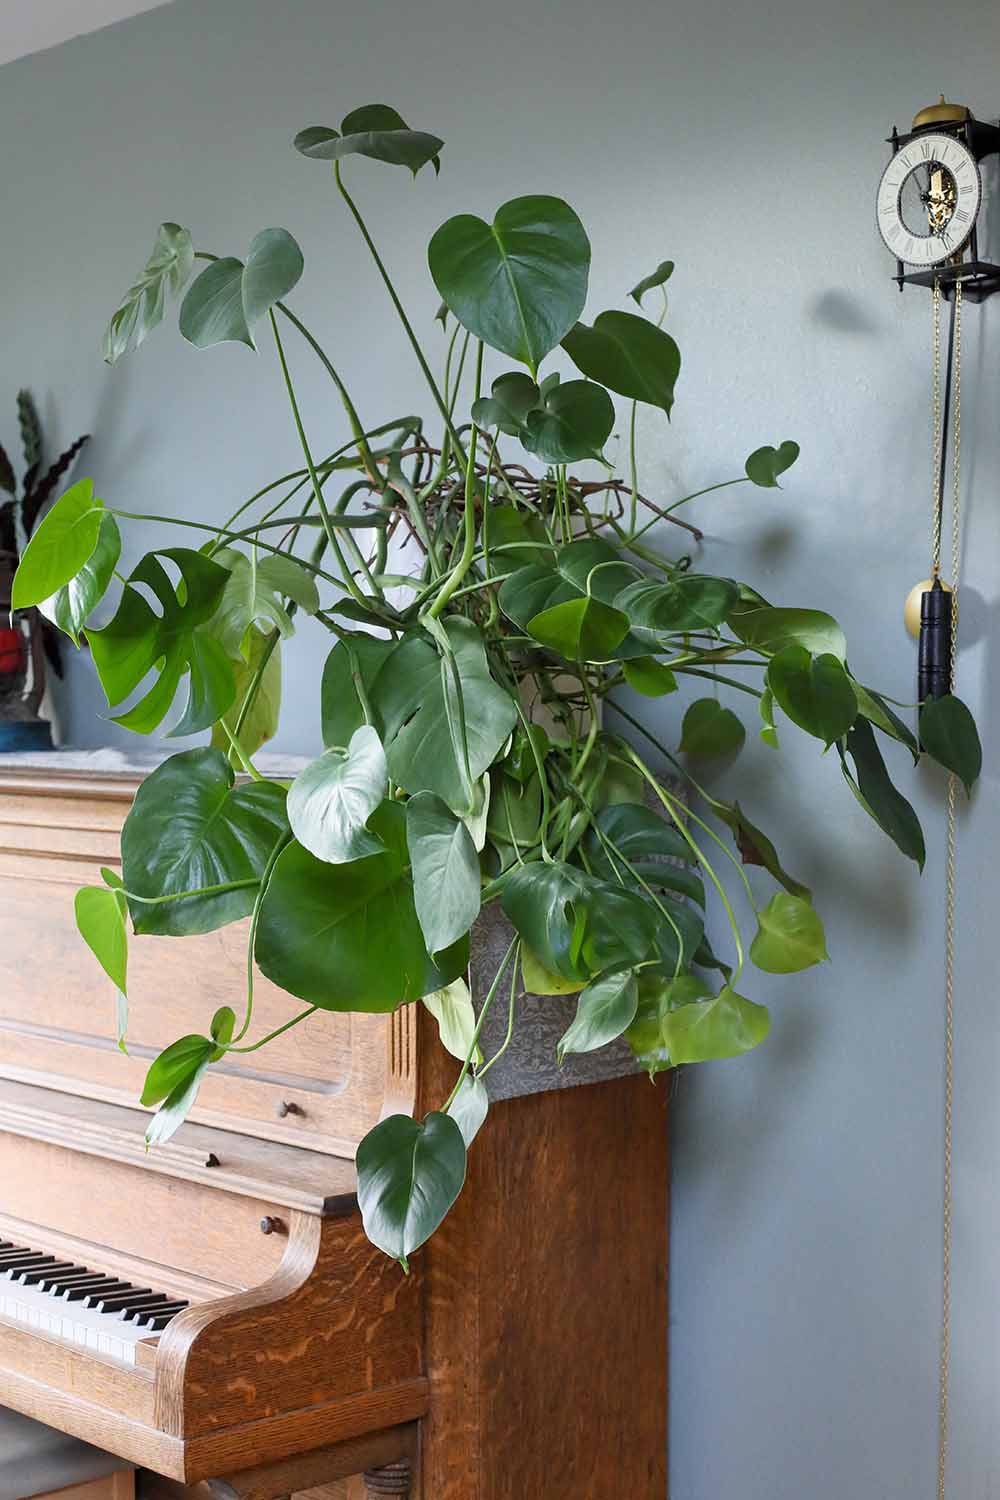
After a plant matures, it can become quite floppy. But that’s not necessarily bad, if you want to create a hanging or trailing look over a shelf.
A pole covered in moss or coconut coir is ideal, though you can also use a trellis.
A mossy pole also serves to recreate the environment that this plant evolved to survive in.
To encourage your Swiss cheese plant to climb, loosely tie the main stem to the pole or trellis.
You don’t need to affix it firmly, just encourage the stem to grow upright near the pole. Then, as aerial roots emerge, either wrap them around the pole or loosely fasten them with twine.
Propagation
Swiss cheese plants are one of the easiest species to propagate that I have ever come across.
If you want to feel like a real plant parenting professional, this is an excellent option to start with.
Find more propagation tips here.
From Seed
It is possible to grow Swiss cheese plants from seed, but you absolutely must find a reliable source.
Better yet, find someone with fresh fruits, slice them open, and pry out the fresh seeds.
When it’s time to sow the seeds, fill a four-inch or larger container with a seed starting medium. Insert a single seed into the mix half an inch deep.
Moisten the soil and keep it moist, like a well wrung-out sponge. Place the container in a spot with lots of bright, indirect light.
In two to three weeks, a little green stem should poke out of the soil. This will eventually unfurl into a leaf. Then you can transplant your new seedling, as described below.
From Cuttings
This is the easiest plant I have ever propagated from cuttings. It’s so easy that I figured out how to do it accidentally.
I like to snip a few of the leaves from my Swiss cheese plant to put in a vase and display on my dining table.
The first time I did this, when I went to replace them with some new ones, I noticed that the existing leaves had grown long roots.
I figured, why not try planting them in some soil to see if they would grow? And sure enough, within a few weeks, I had a thriving plant.
If you want, you can use my lazy method, or you can go the more technically appropriate route. This involves cutting a leaf with a node attached and planting it in soil.
The node is the bit where the stalk (petiole) meets the stem of the parent. If you see multiple leaves emerging from one spot, that’s a node.
Take a cutting a few inches below the node.
Insert the cutting into a soilless seed-starting medium. Keep the medium moist but not wet, and in indirect sunlight.
Eventually, you should see new leaves starting to develop at the base of the plant. This can take a few weeks.
When this happens, it’s time to transplant the seedling into a permanent pot.
Transplanting
If you buy a plant, you can leave it in the container it came in, assuming it has drainage holes, a quality potting medium, and isn’t pot-bound, or you can transplant it into a new container.
Fill the bottom of the container with a handful of all-purpose potting soil. There should be enough at the base that the plant will sit at the same height that it was before.
Squeeze the sides of the plastic container that the plant came in and gently tug the root ball out by the stem. Gently loosen the roots and knock away some of the soil.
Place it in the prepared container and fill it in with potting soil. Give it a good soak.
Pests and Disease
Monsteras are sturdy. They aren’t delicate and in need of pampering to stay healthy (okay, except for the rare ‘Albo’ cultivar).
Pests
In my experience, pests are the problem on houseplants more often than diseases. You should become familiar with the following insects, because they’re extremely common.
Having no natural predators indoors, these insects can reproduce rapidly.
Aphids
Where there are plants, there are aphids. Unless you have a very young Swiss cheese plant, it’s unlikely that these pests will cause much trouble.
Signs of an infestation include yellowing and drooping leaves. Examine your Swiss cheese plant and look for tiny pear-shaped insects that may or may not have wings.
To control them, place the plant in a shower or tub, and spray the foliage and stems with water to knock the bugs loose. You might have to do this once a week for a few weeks.
If that’s not working, break out the neem oil or insecticidal soap. You’ll need to spray your plant with it once every week or two, as long as the pests are present.
Scale
The most common species on indoor plants is brown scale (Coccus hesperidum).
These are flat, brown, and they cluster on the stems, sometimes venturing onto the leaf surfaces.
When they infest a plant, you’ll see leaf yellowing and stunted growth. New foliage will be slow to emerge. It won’t fenestrate, and it won’t grow as large as it should.
If you are the patient sort, this is a fairly easy problem to remedy. You can remove them with cotton swabs dipped in rubbing alcohol.
In the case of large infestations, prune away the worst affected leaves and spray with insecticidal soap.
Learn more about scale in our guide.
Spider Mites
Red spider mites (Tetranychus urticae) are itty-bitty, so it’s unlikely that you’ll know they’re there until you spot fine webbing on your Swiss cheese plant.
If you water your plant well and keep the area humid, visits by these pests aren’t common.
You can rinse them off, as you would do with aphids. If none of that works, break out the insecticidal soap.
Learn more about spider mites here.
Disease
Diseases aren’t at all common but you can’t rule out the possibility of infection entirely. Be prepared to deal with the following, just in case:
Anthracnose
Caused by fungal species in the Colletotrichum genus, this disease causes the leaves to start to yellow on the margins before turning entirely yellow and dying.
You might also see yellow coloring or lesions on the stems.
Use a copper spray designed for use on indoor plants. Apply it according to the manufacturer’s directions, spraying once a week or every 10 days.
If the problem still won’t go away, a product containing Bacillus subtilis can be extremely effective. CEASE is perhaps the most well-known of these.
Apply the beneficial bacteria twice a week by spraying the leaves and stems thoroughly.
You can find CEASE available at Arbico Organics.
Bacterial Leaf Spot
Bacterial leaf spot is caused by a wide range of bacterial species, but these are usually in the Pseudomonas or Xanthomonas genera.
It typically appears as small brown leaf spots. These spots generally appear in small clusters at the center of the leaf.
Sadly, there isn’t an effective treatment available. But if you are diligent about pruning away any symptomatic leaves, you can generally eliminate it.
Root or Stem Rot
Rotting roots or stems can be caused by two problems: overwatering and pathogens.
Overwatering drowns the roots, depriving them of oxygen, and essentially smothering the plant to death.
Fungi and oomycetes in the Pythium, Rhizoctonia, or Fusarium genera can infect the roots can cause them to rot.

You’ll start to see dark spots on the margins of the leaves. These spots grow larger until the entire exterior of the leaf is a sad brown and yellow color.
After that, the leaves die, and the entire plant can even die if a case of rot is severe.
First, trim away any impacted leaves. Remove your plant from its pot. Brush or wash away as much soil from the roots as you can.
Then, spray the roots with a product containing Bacillus subtilis. As I mentioned above, CEASE is a good option.
Switch to a sanitized container with better drainage if you need to. Repot your plant with fresh soil.
Spray the foliage with the same product you used on the roots, once every other week for two months.
Going forward, water less often than you were watering before. Check the soil with your finger or use a moisture meter.
Swiss Cheese Plants Make Growing Look Easy
For such dramatic statement plants, Swiss cheese plants sure don’t need much fuss.
With minimal care, they’ll reward you with big, glossy, fenestrated leaves that command attention in any room.
Are you growing monstera? Let us know in the comments section below!
If you want to add some more houseplant buddies to your plant menagerie, read these articles next:


Mine is so overgrown can I sell a plant to florist
These plants grow large quickly and they’re easy to propagate, so what are we to do with all the extra growth? Some florists will buy them and you’re certainly welcome to talk to your local nurseries. You might have better luck listing yours on a local classified site like Facebook or similar.