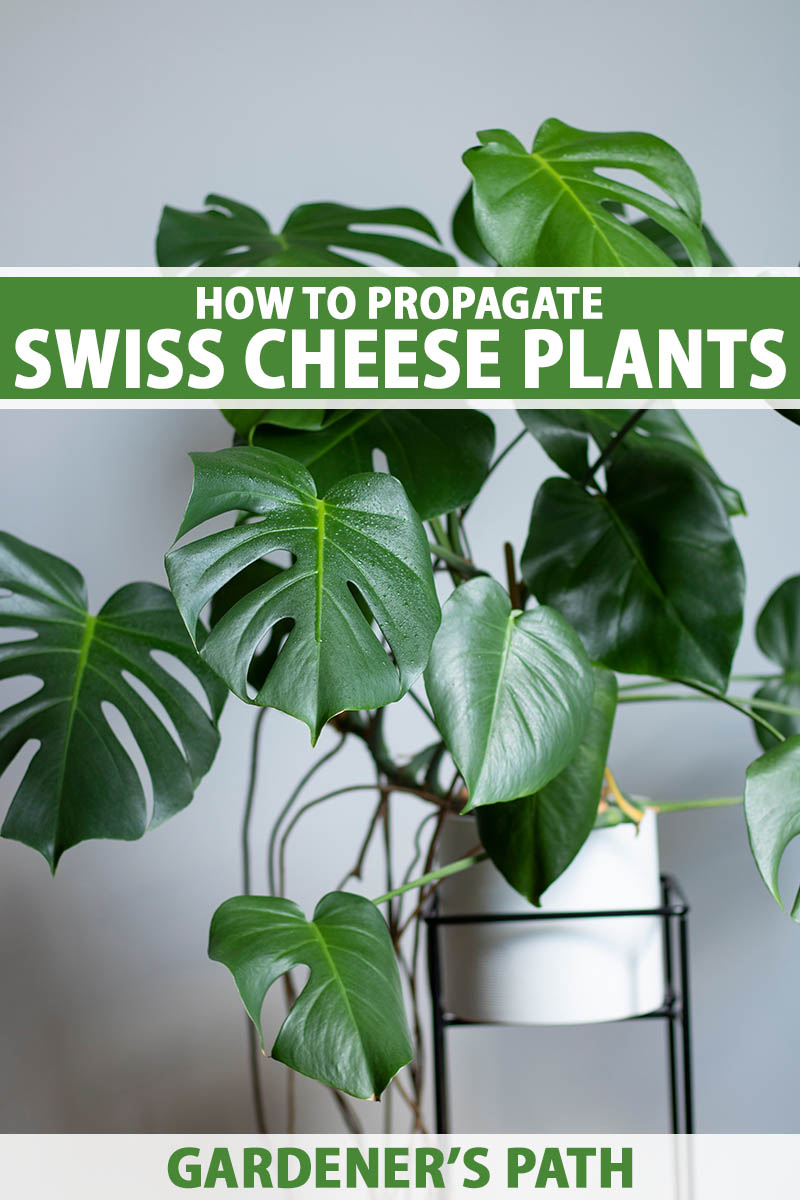
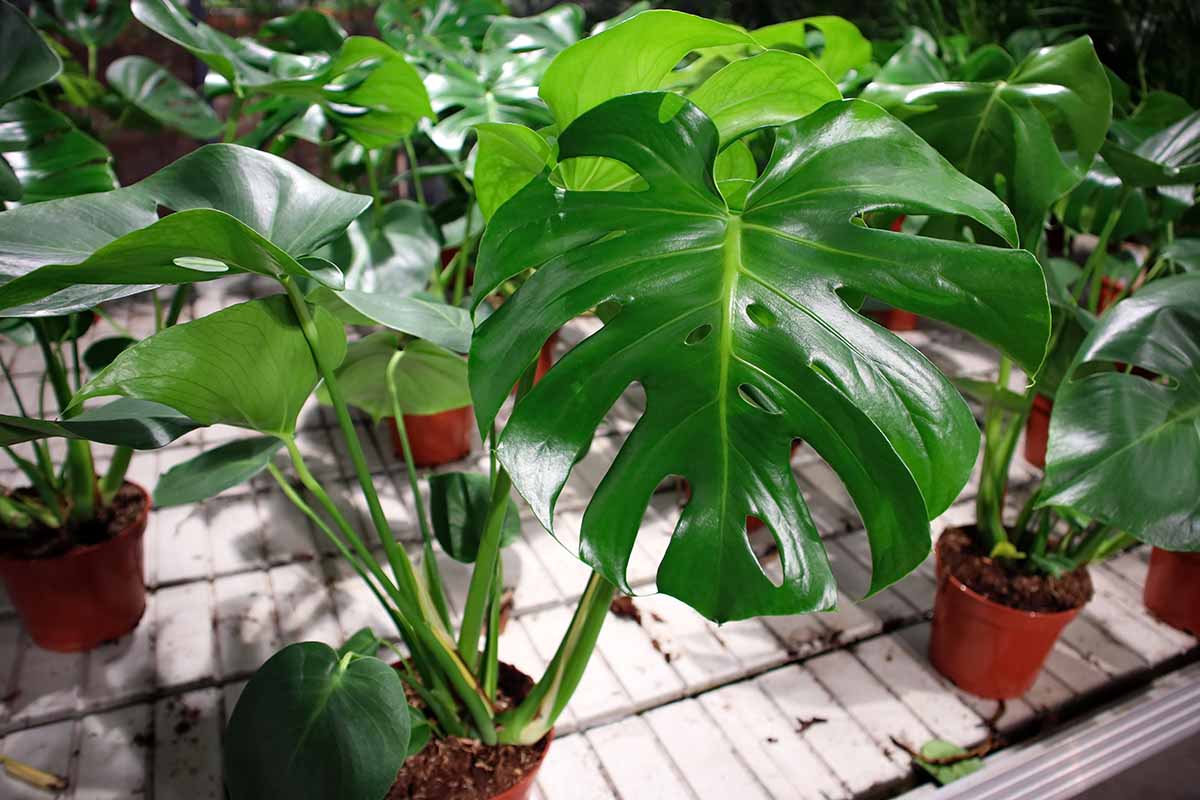
Monstera deliciosa is, hands down, my favorite plant to propagate.
When someone asks me how I do it, I usually provide a simple answer: put a cutting in some water. The end.
We link to vendors to help you find relevant products. If you buy from one of our links, we may earn a commission.
Now obviously, there is a bit more to it. But these are so incredibly easy to propagate that it really isn’t much more difficult than that.
Case in point: the first time I propagated my Swiss cheese plant in water was entirely accidental.
I had taken some cuttings from my unruly, overgrown plant and put them in a vase for a display for my book club that was about to meet at my house. I planned to toss them out when the shindig was over, but they looked good and I decided to see how long they would last in their vase.
I finally went to throw them out a few weeks later but they were still as perky as ever. When I looked inside the vase, I saw lots and lots of roots.
I thought to myself, no harm in planting them, right? What’s the worst that could happen, given that I didn’t intend to make any new plants anyway? Since then, I have mastered the art of propagating monsteras – in multiple different ways.
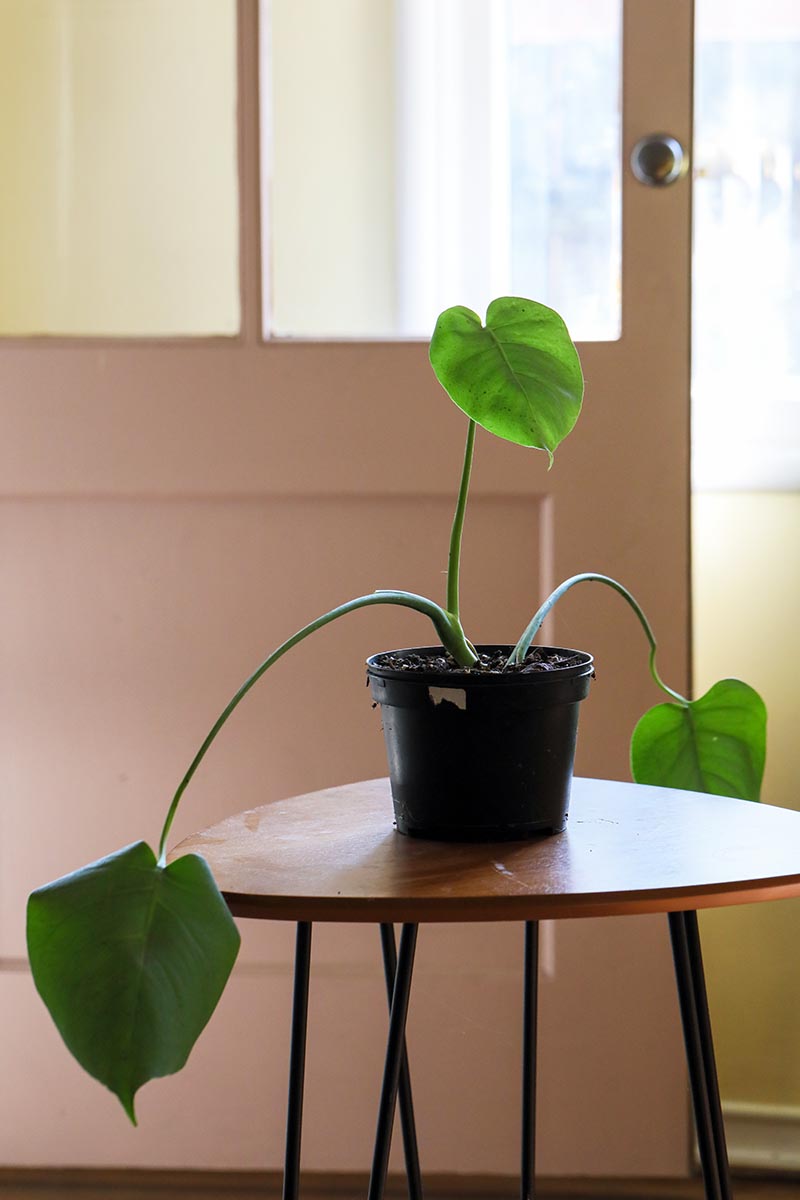
Fast forward a few years and my house is an absolute Swiss cheese plant jungle. I give rooted cuttings away as gifts. I’m in danger of having to put a “free to a good home” sign on my porch.
If you want to feel like a Master Gardener or you just want to start a few more plants to decorate your home, propagating monsteras will make you feel like you have the greenest thumb on this earth.
What You’ll Learn
For all of these methods, the best potting mixture is going to be something that allows a lot of air to reach the roots.
Remember, Swiss cheese plants are epiphytes. That means they grow in the air on the trunks and branches of trees in their natural habitat. Their roots are used to receiving a lot of airflow.
We want to recreate that situation by creating a potting mixture that is light and airy. A mixture that is 50 percent potting soil, 25 percent orchid bark, and 25 percent perlite is about right.
I reduce the quantity of perlite and add in some rice hulls and worm castings, but that’s just my preference. Feel free to give this a try, if you like!
A chunky mix like this will reduce the likelihood of root rot, which is a common issue with monstera plants, especially variegated types.
I like to start with FoxFarm Ocean Forest Potting Soil. It’s the perfect texture and has the right pH for most houseplants.
It’s also great for using as a base to make a medium for monstera by adding some perlite and orchid bark.
FoxFarm Ocean Forest Potting Soil
Grab a 12-quart bag at Amazon.
All of the propagation methods described here are best done in the spring in the Northern Hemisphere, when the light is bright and the days are long.
They will work any time of year provided you can give your plants the light they need, but monsteras are dormant during the winter and they won’t grow much, if at all.
One last thing before we dig in:
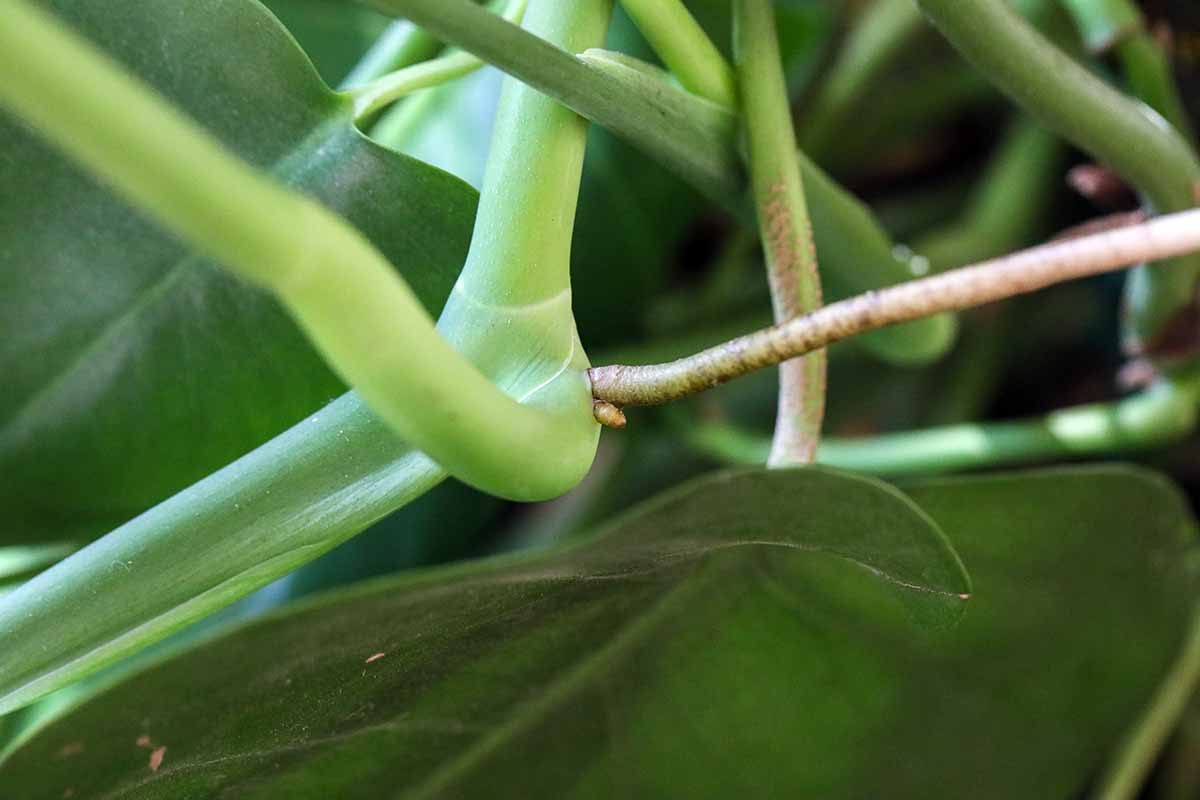
To clarify our terms, each monstera plant has a root ball with a stem emerging from the soil.
From there you have internodes, which are the parts of the stem in between nodes. Nodes are where the leaves emerge from.
Leaves are attached to the stem by petioles. Monsteras can have long stems with multiple nodes along their length.
Rooting Cuttings in Water
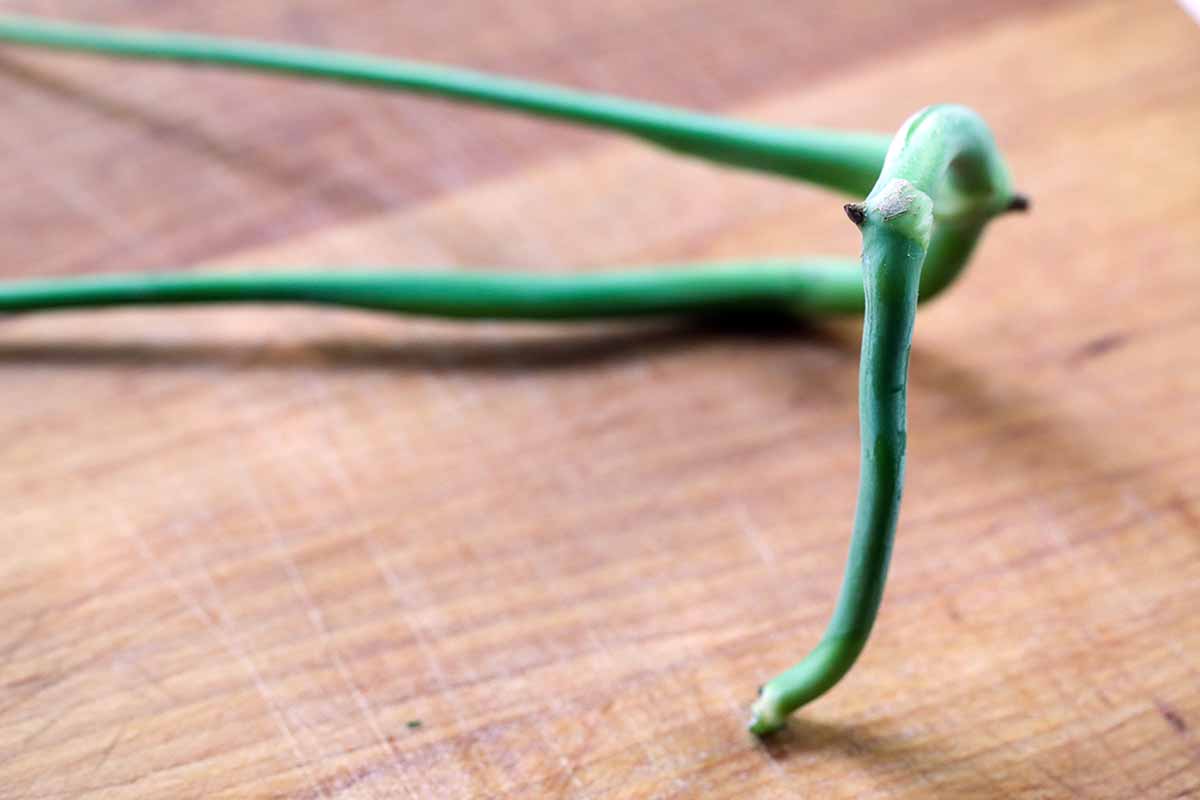
First, get a node! That’s the only thing you absolutely must keep in mind when propagating cuttings. If you cut off a leaf with no node attached, it won’t grow any roots.
So look for that node. It’s a little bump on the stem of the plant, usually near where a leaf starts, but not on the leaf itself.
As long as you have a node, you can make new plants. That’s one of the things that makes monsteras so easy to reproduce.
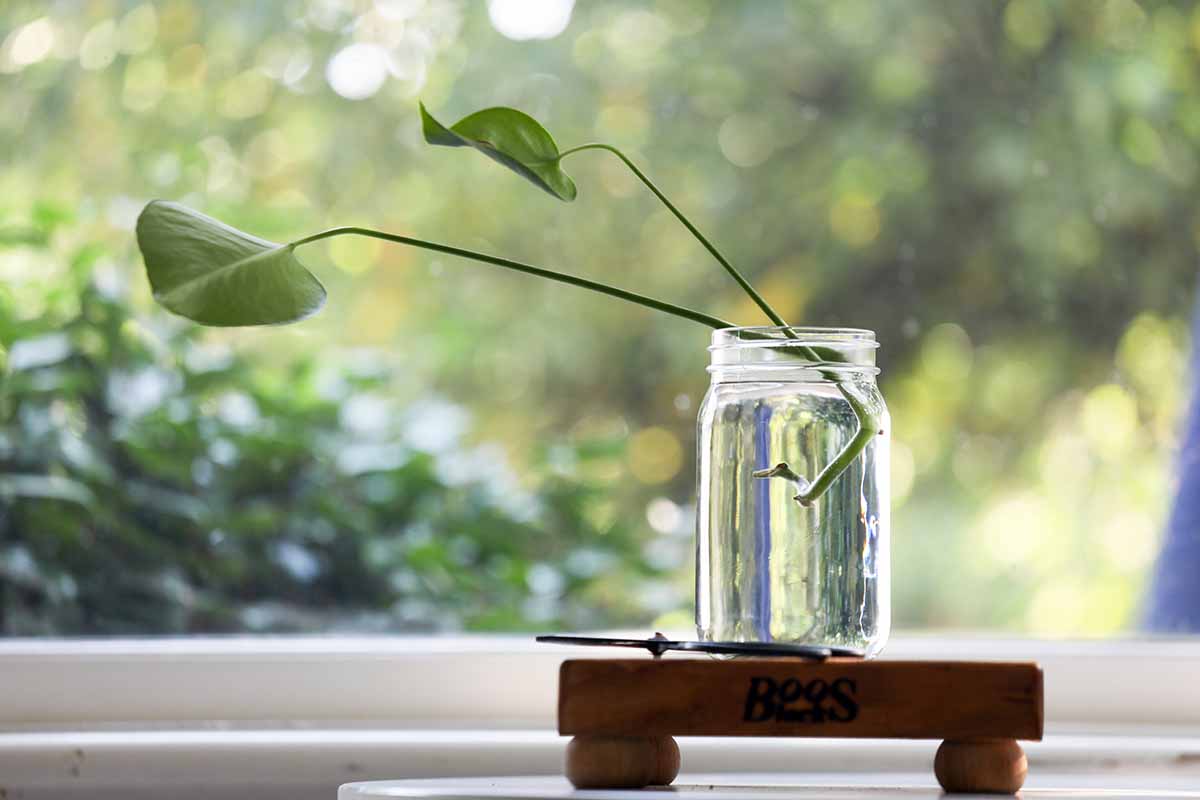
When rooting a cutting in water, you also need a leaf. Choose a stem to remove with at least one node and a leaf attached.
The length of the cutting doesn’t matter, though I’ve found that stems that are at least as thick as a pencil seem to root best and grow faster.
- Cut the stem about half an inch below the node.
- Place the cutting into a glass of water. You only need a few inches of depth, but make sure the leaf itself is kept dry.
- Set the cutting where it will receive dappled or bright, indirect sunlight. Change the water every few days.
Within a week or two, you should see roots beginning to emerge. After a few more weeks, those roots should be substantial enough to plant your cutting.
You’re looking for several roots that are a few inches long.
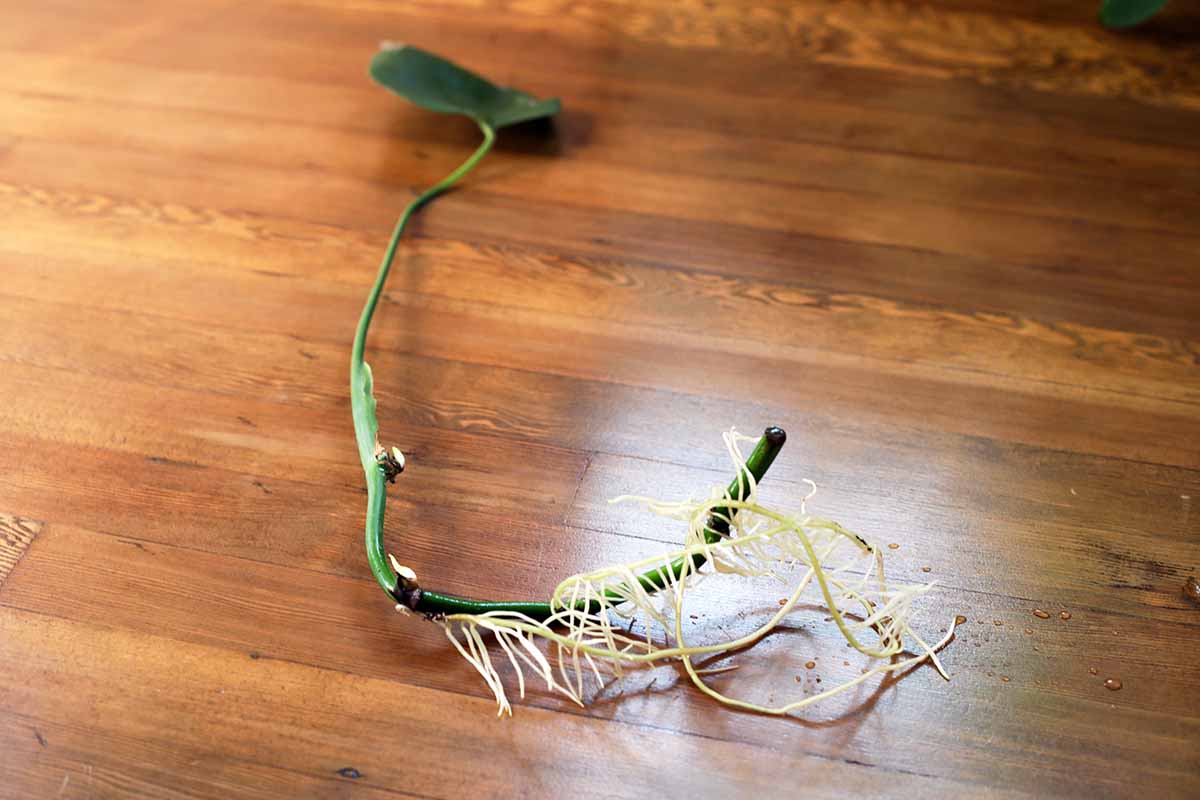
Fill a small container with the soil mix we discussed above. Make a hole in the center, and plant to cover the roots.
Swiss cheese plants do better in a container that is on the smaller side rather than one that is too large and prone to holding too much moisture, so I typically choose one that’s about three to four inches in diameter. Water well.
Beyond that, you can care for your newly propagated plant, as well as any created using the other methods described here, by following the best care practices described in our guide to growing Swiss cheese plants.
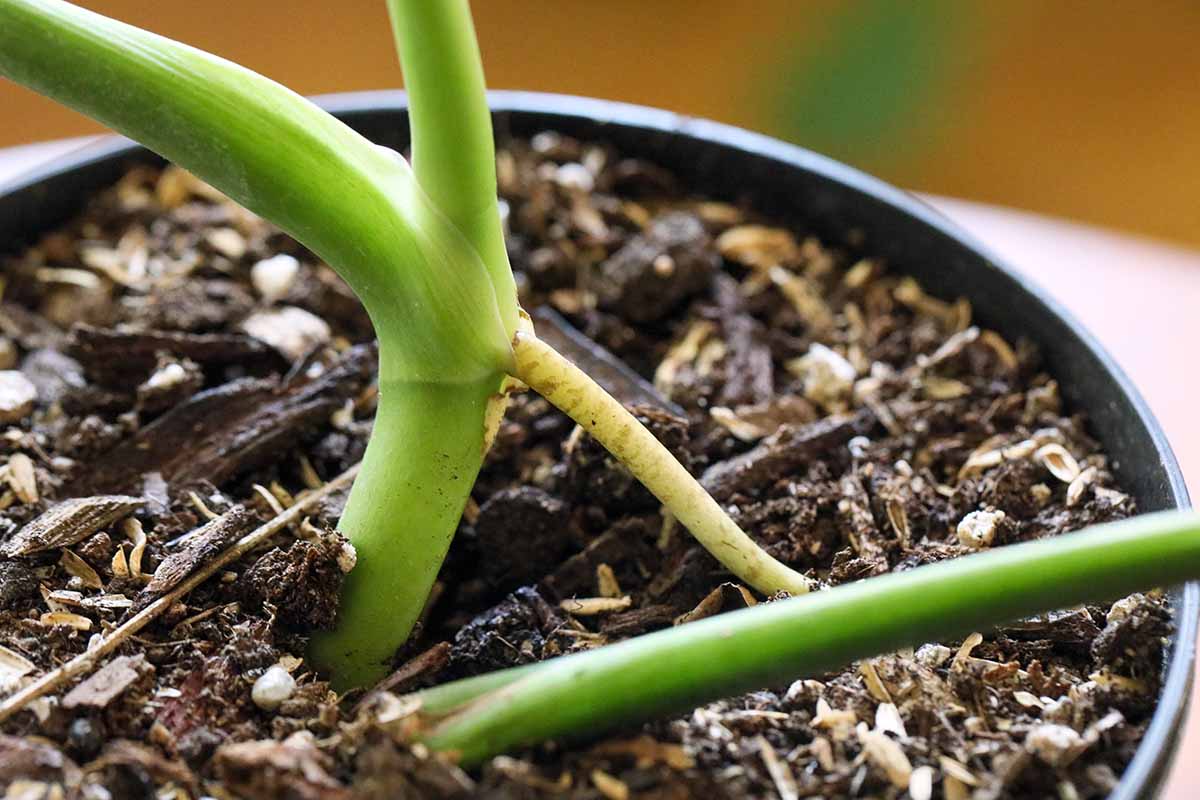
Rooting Cuttings in Soil
There’s some debate about whether it’s better to propagate cuttings in water or to start immediately with soil.
When it comes to Swiss cheese plants, I don’t think one method is better than the other. They both work well and I’ve never run into trouble with either.
- To start, fill a three- or four-inch container with the potting mix we discussed above. A lot of gardeners like to use clear plastic orchid pots to propagate cuttings.
These have excellent drainage, and you can see how the roots are growing and whether they’re developing rot.

If that sounds useful for your endeavors, you can pick up a three-pack of four-inch slotted clear orchid pots from rePotme at Amazon.
- Then, take your cutting as described above for rooting cuttings in water. You’re looking for a stem that has a node and leaf attached, and that is at least the diameter of a pencil.
- Make your cut at least half an inch below the node. Place it in the soil so it’s deep enough that the cutting will stay upright on its own.
- Water the soil well and place the pot in an area with bright indirect light.
Keep the soil moist. It will take up to a month for a good number of roots to form.
You may be able to see some of the roots growing in the soil if you used a clear container, and you can give the cutting a gentle tug to see if it resists. If it does, you’ll know it has developed roots.
When it’s rooted, leave it in place or transplant to a new pot of the same size or just one size up if you wish. Don’t go any larger than that at first.
Division
These monsters are nothing if not prolific and you’ll likely find that your once-petite new addition to your home jungle has become a big, healthy friend in no time flat.
You can divide your plant to keep it under control or to create new additions to keep or give away.
The day before you begin your plant surgery, water it well.
Gently pull the plant out of its container and lay it on a tarp, a table covered with newspaper, or the ground.
Knock away as much soil as you can and look for a spot where the roots seem to divide naturally. You might need to tease the roots apart to find a good spot.
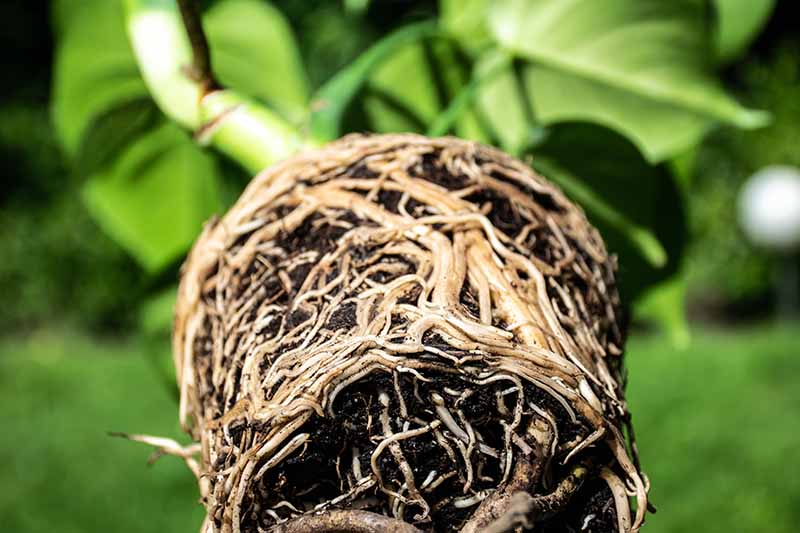
Once you have it, take a clean knife or scissors and cut the two sections apart.
You’ll likely have to keep teasing and pulling for a bit to work them apart because these plants really like to get all twisted up.
Did everything come apart as it should?
Great, now you can put both sections back into your potting mixture, transplanted to the same depth in separate, smaller pots.
The container shouldn’t be much larger than the root ball. Add more potting mix both to the original container and the new one as needed. Water well.
Air Layering
You know those roots that sometimes form on the parts of the plant that are above the soil line? These are aerial roots and they develop on every Swiss cheese plant over time.
Some gardeners try to offer these roots moisture with little cups or pots of their own, but that’s not necessary.
Other people cut them off, and the rest of us just ignore them. The fact that these plants develop aerial roots is extremely handy for layering, though!
Air layering is a convenient mode of propagation because you don’t need to have a separate container taking up room in your home until you’re ready to send your new little plantling off on its way.
You just need some twine, twist ties, or string, plastic wrap or a plastic bag, a knife or scissors, sphagnum moss, and some water.
Look for a large leaf with a node nearby. Again, the node is a little bump, usually found near where a leaf petiole emerges from the stem.
- Slice a small notch about an eighth of an inch deep into the internode (the area right above the node) using your clean knife or scissors. Make your cut perpendicular to the stem.
- Add water to a big handful of moss so it’s moist but not wet. Wring it out really well and place it on a sheet of plastic wrap measuring about a foot square, or inside a clear gallon-size plastic bag.
- Wrap the moss around the node and the cut you made, with the plastic holding it in place on the outside.
- You should have an elongated ball that is about an inch thick on all sides around the stem. Seal the top and bottom with string, twine, or twist ties, going all the way around the stem.
The bottom part closer to the pot should be tied fairly tight to keep water from leaking out, but not so tight that it cuts into the plant.
The top should be a bit loose so there is some airflow to the moss and less likelihood of mold formation.
Spray the moss whenever it starts to dry out. You want it to stay moist.
- After a few weeks, roots should start forming. Depending on how thick your moss layer is, you might not see any roots for a month or two. Once you do, it’s time to cut the new plant away and put it in its own container.
- Cut the rooted section off below the base of the plastic covering and then remove the plastic and moss.
- Transplant your new plant into a small container filled with the above-described potting mixture, covering the roots.
Remember, opt for something smaller rather than a larger container to prevent waterlogging. Water well.
Sowing Seeds
No guide to monstera propagation would be complete without the option to start new plants from seed, but keep in mind that you probably won’t be able to grow your own seeds.
Plants have to produce fruits if you want to be able to collect the seed, and this is extremely rare in plants grown indoors.
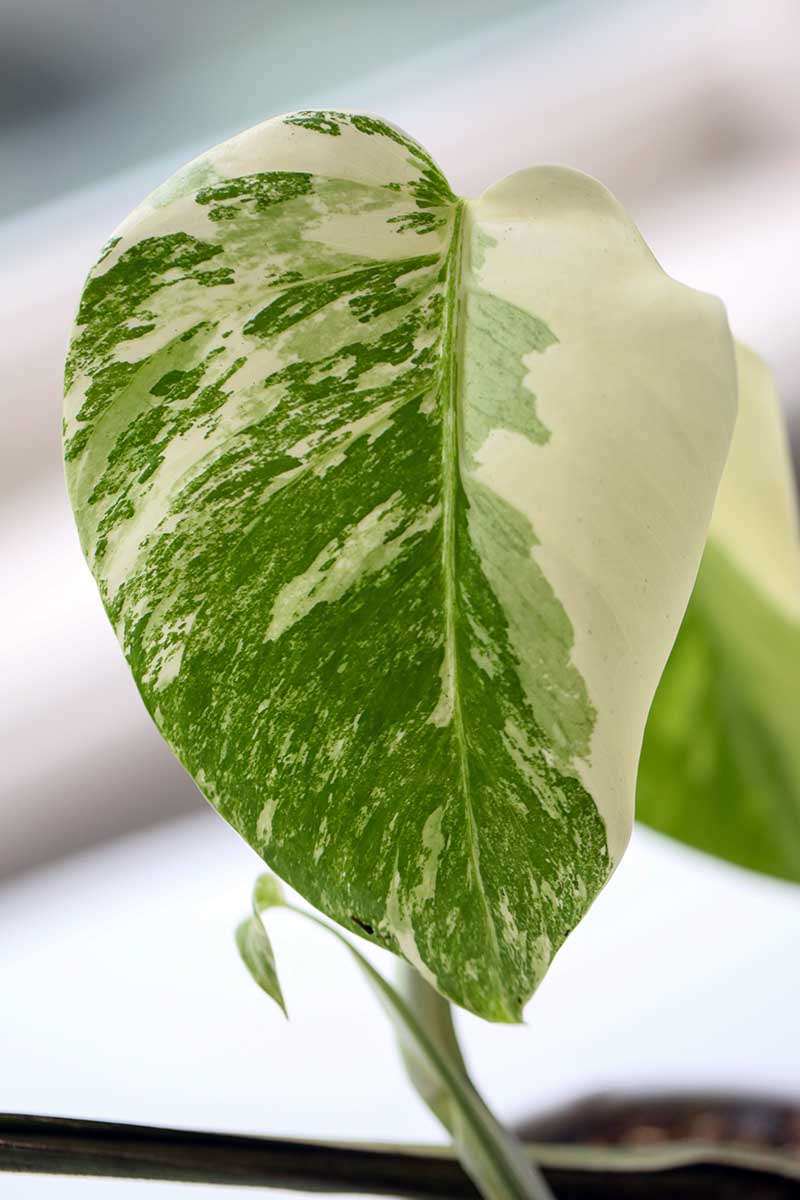
Variegated plants can’t be grown from seed. This is a genetic mutation that won’t be passed along through sexual reproduction.
But variegated plans may be cloned using the other propagation methods described above.
If you purchase seeds online, make absolutely sure that you’re buying fresh seeds since they tend to rot or lose viability quickly.
- Grab four paper towels and moisten them. Lay two of the paper towels down on top of each other to create a double layer in an area with good air circulation and bright but indirect light.
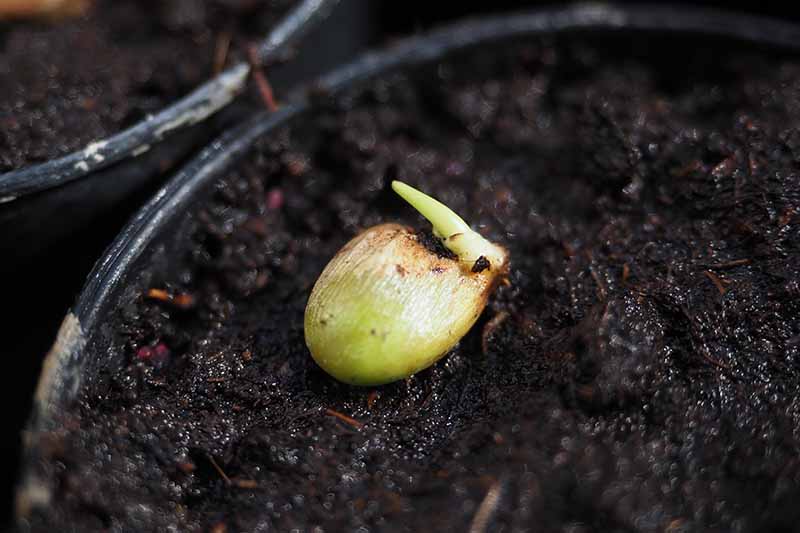
- Lay the seeds in a single layer on the stacked moist paper towels, and cover with two more moist paper towels layered on top.
- Spray the paper towels with water whenever they start to dry out. After a few days, the seeds should sprout. Now you can plant them.
- Plop a single seed in the center of a three-inch pot filled with our homemade potting mixture, sown about half an inch deep. Water well so the medium is moist but not sopping wet.
- If you live somewhere dry, tent some plastic over the container or place it in a gallon-size clear plastic bag. This helps to increase humidity and retain moisture in the soil.
Keep the soil moist. If you’re using a plastic humidity cover, open it once a day for a few hours to increase airflow, and discourage fungi and mold growth.
Remove the plastic permanently once the plant is a few inches tall.
Make More and More Monsteras
Growing houseplants can sometimes be frustrating. There are days when it seems like nothing you do is working.
A Schefflera seed refuses to germinate, a philodendron cutting dies, or aphids move in and start smothering your favorite Alocasia.
Propagating Swiss cheese plants offers a nice break from the many challenging tasks that are part of being a plant parent.
It’s like coasting downhill after pedaling furiously uphill for 45 minutes. Suddenly everything is smooth sailing, regardless of which method you choose.
Speaking of, which method (or methods!) of propagation are you going with? What are you planning to do with all of your new plants? Share with us in the comments.
If you’re hoping to reproduce some of your other houseplants and you felt this guide set you on the right path, you might find some of these guides useful: