
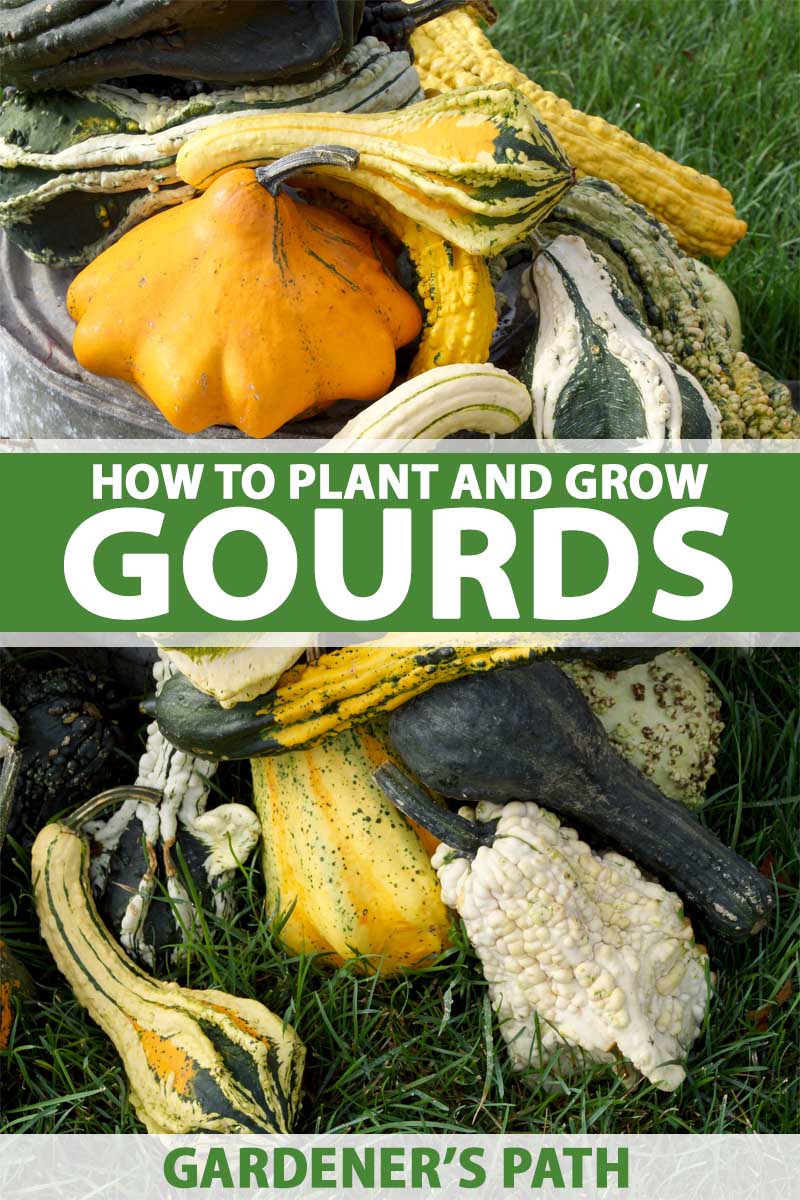
Most gardeners have had a go at growing zucchini (known as courgettes or marrows, where I’m from) or pumpkins at one point or another. But for some reason, I’ve found that far fewer people have tried their hand at growing ornamental gourds.
And there’s really no good reason for this! Gourds also come from the Cucurbitaceae family, so if you can grow one species, you should be able to grow them all.
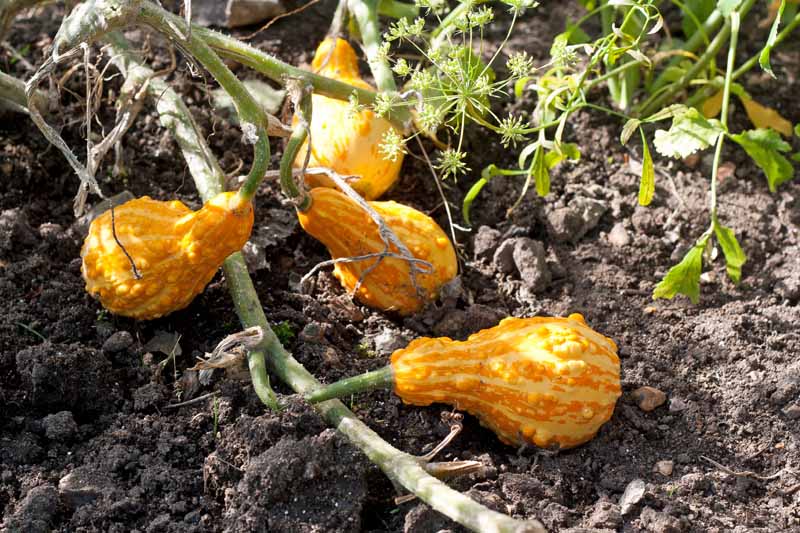
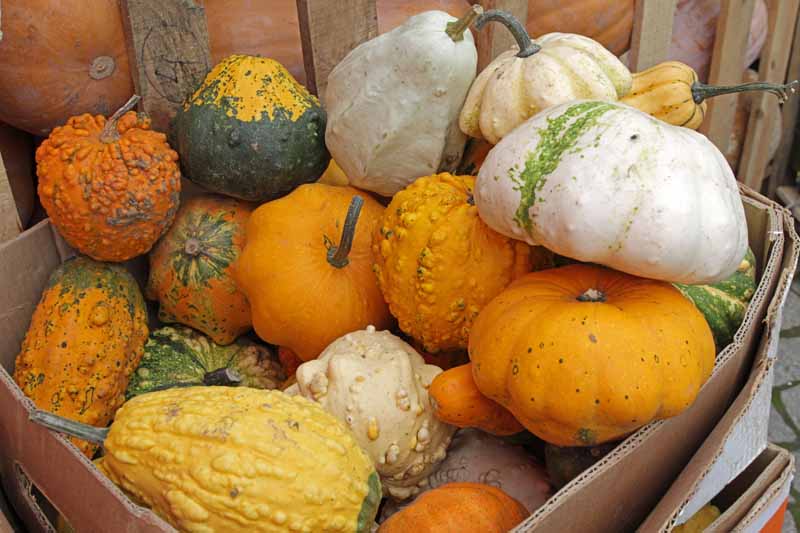
These vegetables (and yes, they are veggies) are beautiful in their own unique lumpy-bumpy way, and nothing says fall like a beautiful bumper crop in the garden.
We link to vendors to help you find relevant products. If you buy from one of our links, we may earn a commission.
In fact, they are so beautiful that many gardeners grow them purely as a decorative crop, just to spice up their plots in the fall, and add a touch of color to autumn holiday table settings and arrangements.
What’s more, they store easily in a cellar or cold room throughout the winter months, providing delicious and nutritious gourd-ness for your family all winter long.
And the fun doesn’t stop there! Certain varieties can also be dried and used for making a whole host of creative crafts, from musical instruments to birdhouses, providing fun for the whole family.
Here’s what to come in this article:
What You’ll Learn
Read on to find out everything you need to know about growing gorgeous gourds!
Cultivation and History
Gourds are the fruits of certain flowering plant species in the family Cucurbitaceae, notably of the Cucurbita and Lagenaria genera. They grow best in USDA Hardiness Zones 3-10.
L. siceraria, or the bottle gourd, is thought to originate from southern Africa, and it seems from the DNA record that two distinct subspecies were developed in Africa and Asia. It is thought to have been cultivated as early as 13,000 BC.
American gourds are thought to have come from the Asian subspecies, and it is likely that this was among the first cultivated species in America.
Broadly speaking, there are two main groups of gourds – hard-shell (Lagenaria spp.) and ornamental (Cucurbita spp.). There is also one other genus, Luffa, the sponge gourd.
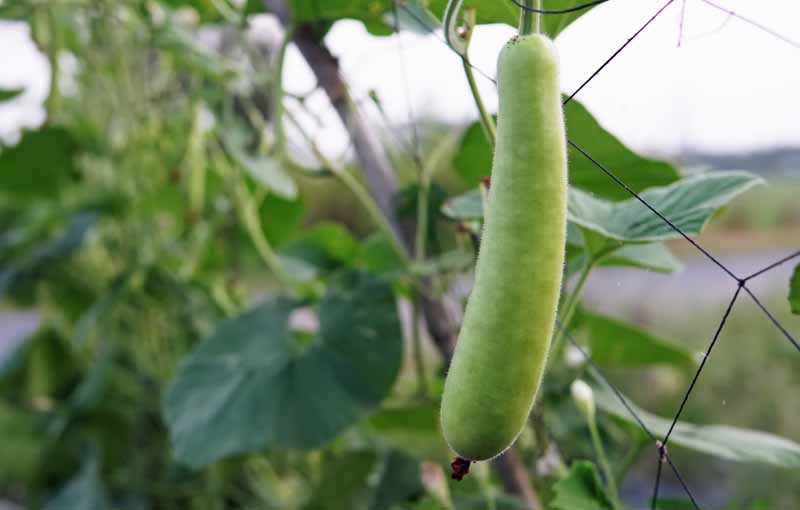
Hard-shell gourds include the speckled swan, bottle, dipper, penguin, and powderhorn varieties, of which the bottle gourd is the most commonly cultivated. These produce beautiful white flowers on long vines and either green or mottled fruits, which come in a whole host of shapes and sizes.

These are the kind that are typically dried after harvest, at which point they turn a soft tan color. They are edible when immature.
Once dried, they can be kept indefinitely and have been used for centuries for a range of creative crafts, from making musical instruments such as maracas, to more practical uses such as fashioning bottles, bowls, and even birdhouses. In fact, the genus name Lagenaria comes from the Latin word for bottle or flask.

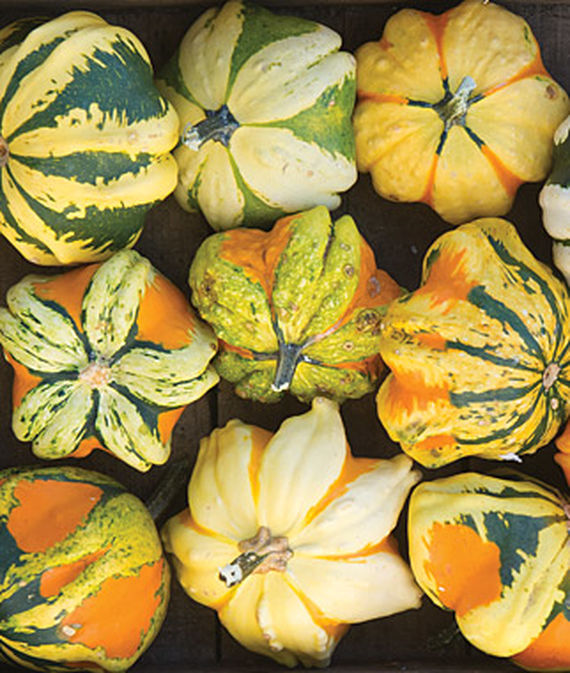
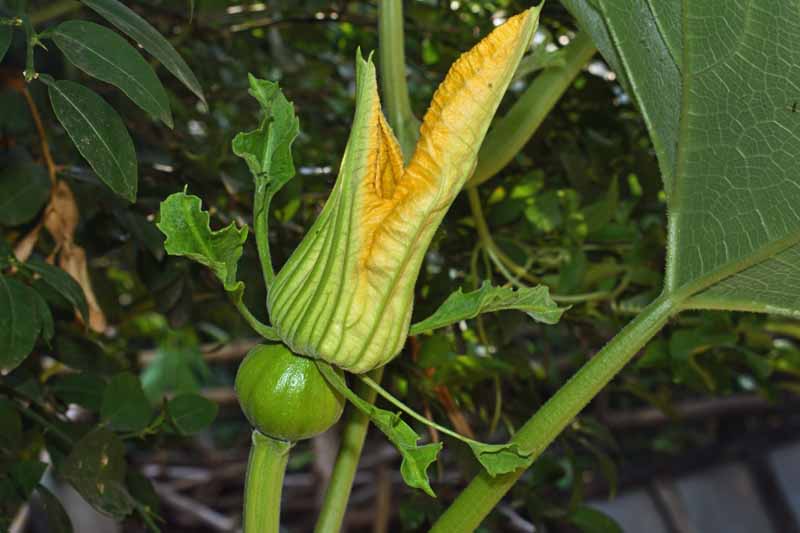
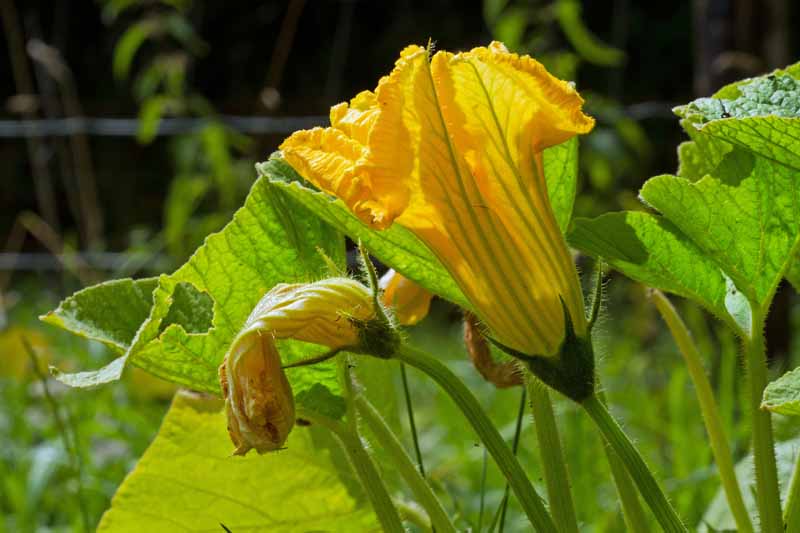
Cucurbita, on the other hand, is a genus of herbaceous vines in the gourd family which includes five species, all known for their edible fruit. They may go by the common names squash, pumpkin, or gourd depending on the species, variety, and location where they are cultivated. They are closely related to other types of pumpkins, winter squash, and summer squash, producing golden yellow blooms much like their close cousins.
The pollinated blooms mature into a range of colourful fruits, producing visually stunning yellow, gold, green, orange, and white vegetables.
Gourds found in the Cucubita genus are generally cultivars of two different species: C. pepo and C. maxima.
Propagation
Ready to grow your own? You have a few different options to get started.
From Seed
Far and away the easiest option to grow gourds is to directly sow the seeds in the ground.
To sow them outside, it’s important to wait until after the last average frost date in your area, and plant once the weather starts to warm up.
Gourds are typically grown in hills of earth to ensure that adequate nutrients are available for these heavy feeders. Hills also help to maximize airflow and minimize ambient humidity, both of which help to prevent the spread of disease.
The best way to accomplish this is to dig a hole approximately one foot deep, and refill it with a mixture of either aged manure or compost combined with the soil, then finish it off with a mound on top.
Don’t be shy about adding compost, as these plants need a generous helping of nutrients to keep them happy.
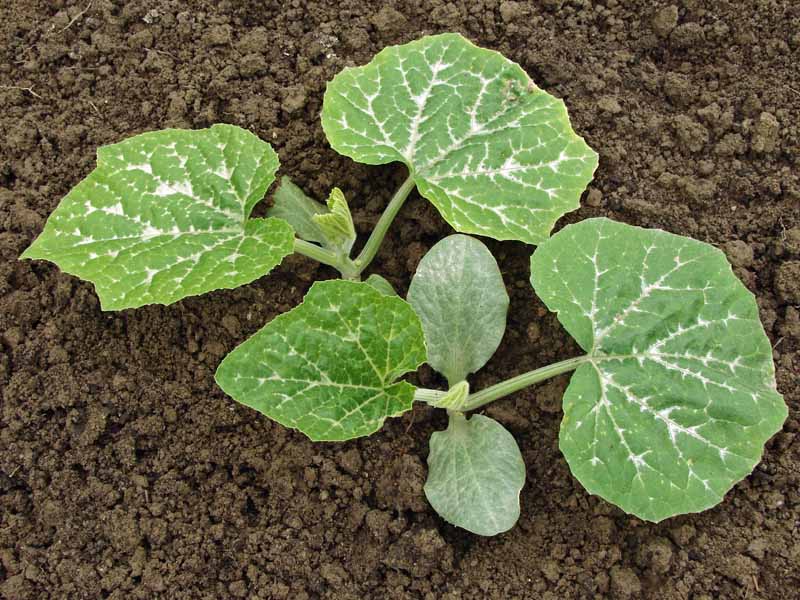
Seeds should be sown one to two inches deep in groups of four seeds each, spaced in mounds at least five feet apart in rows spaced eight feet apart. Seedlings should then be thinned to two or three per hill after true leaves emerge.
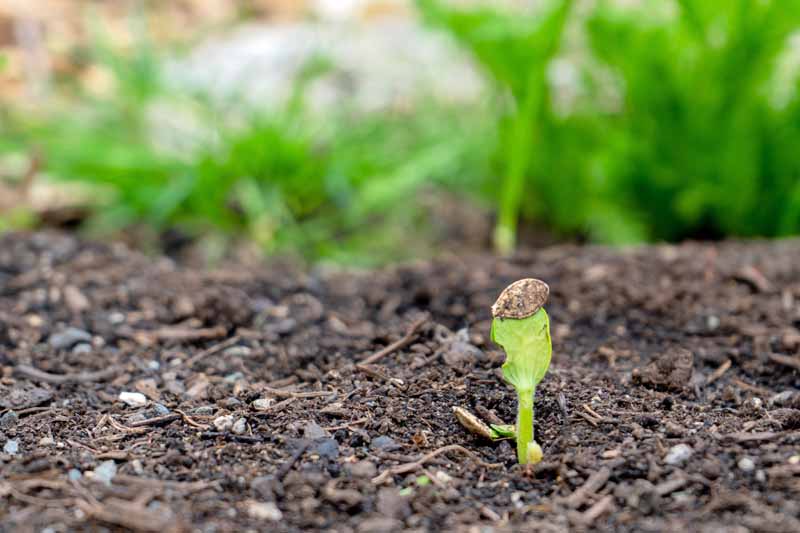
A top tip when sowing these seeds is to plant them with the edge facing down. Planted this way, water will run down the sides of the seeds, thus reducing any risk of rotting. If you’re choosing to sow your seeds directly, be sure to keep reading for more details on the best planting conditions.
You can also opt to start your seeds early to make sure they get off to a flying start. This can be particularly useful in regions with a short growing season, but there is a disadvantage here – gourds have very delicate roots that may be damaged easily during transplanting.
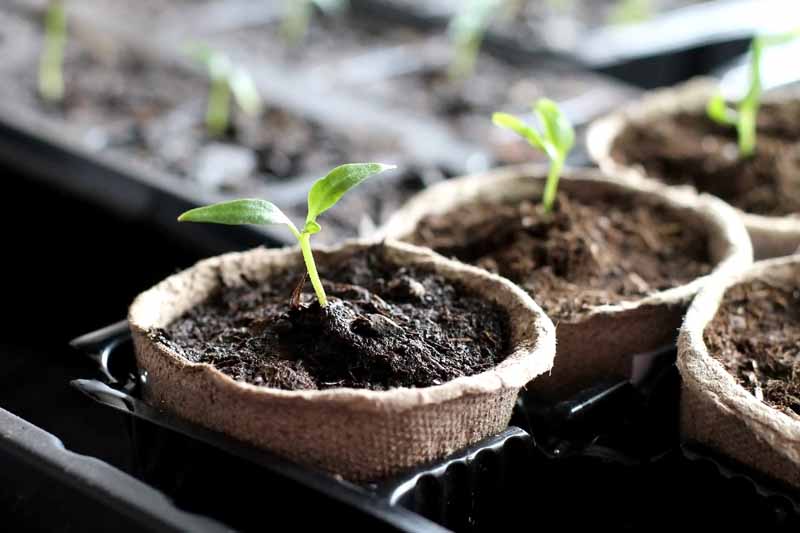
A good way to avoid this is to grow them in peat pots, or another biodegradable alternative. When the time comes to transplant them, you can plant the entire pot with the gourd seedling inside. The roots will have no problem working their way through the peat pot, or you can carefully remove the bottom before transplanting to help them along.
To start seeds indoors, sow them in early to mid-April, either in a heated greenhouse or a seed propagator, set at 60-65°F (15-18°C) for best results. This will get help your gourds grow vigorously and become well established by the time you’re ready to plant them out.
You can expect seeds sown in this way to germinate within one to two weeks.
If you don’t have the option of sowing in heated conditions, but you still want to start your seeds early, transplanting outdoors can be delayed until early May in many growing zones. Keep in mind that plants planted out late will be more about quality over quantity – in essence, they might not be quite as bountiful as those sown earlier on, although they will still produce good fruit with proper care.
Most gourds that grow to maturity are pollinated during this time. Sown this way, germination will also take longer, about 10 to 21 days.
Seeds should be sown edge down at approximately the same depth as the size of the seed, as described above.
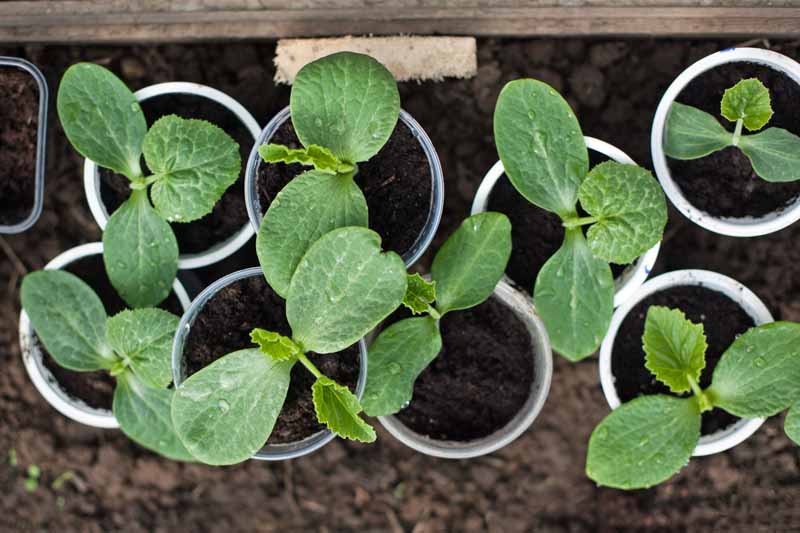
Sow each seed into an individual 3½-inch pot half filled with a soilless multi-purpose compost mix, which can then be topped up with extra compost as needed to provide more stability and encourage root growth as the seedling grows.
Once the seeds are sown, water well with a fine spray.
Gourds want to put out deep stem roots, so as soon as your baby plants are well established but before they become root bound, be sure to transfer them into a larger container about 5 inches (13 centimeters) deep.
Transplanting
Seedlings should be planted out when they have developed four true leaves. To prepare them for the big move, be sure to harden them off for one to two weeks before transplanting, providing gradual exposure to gentle winds, sunlight, and colder temperatures outdoors.
Plant each seedling one to two inches (2.5-5 centimeters) deep, so the bottom two leaves are sitting just above the soil surface.
If you have chosen to trellis your plants, they can be spaced 18-24 inches (45-60 centimeters) apart. See below for more details about how to do this.
To help your baby plants out, it’s best to secure each one to a bamboo cane or some other form of support. This helps to prevent them developing kinks in their stems, which can slow the plants’ growth – or worse, cause them to collapse and die.
Be sure to give your plants a light watering just after planting, and then once every two to three days for the first week.
How to Grow
Don’t have much of a green thumb? That’s not going to be a problem when it comes to these plants!
Regardless of how green fingered (or not) you happen to be, these plants are extremely easygoing and easy growing, which means just about everyone is capable of giving them a go!
Gourds are sun-loving vegetables, and they thrive in sunny spots with good drainage.
One thing to know about these plants that I cannot emphasize enough is that they are hungry, rapidly gobbling up nutrients in the soil. They must be planted in rich soil that has had plenty of organic matter added to it.
This means it’s a good idea to add a generous amount of compost or aged manure when planting. Adding a few handfuls of organic fertilizer before setting out your seedlings would not go amiss either.
However, if you do decide to give your gourds a helping hand, be sure to avoid using a high nitrogen fertilizer, as this will cause the leaves to bush out but it will stunt the fruit’s growth.
Growing Tips
Although you can grow these vegetables on the ground, the vines will sprawl and stretch in every direction, and take up a lot of space. If you’ve got a lot of space to spare, make sure to plant them at least three to four feet (90-120 centimeters) apart.
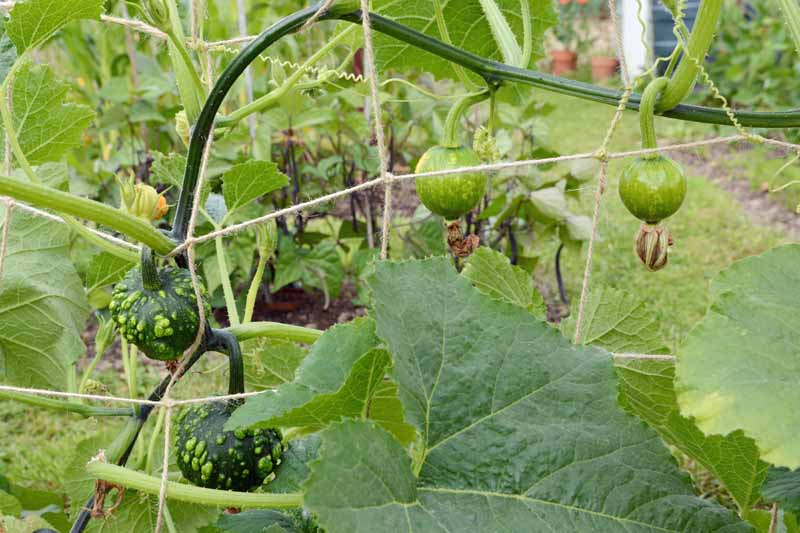
Another easy and space-saving way to grow gourds is to trellis them, training their stems to grow up wires or over a framework. This is great for space saving, protecting your gourds from insects and rot, and keeping them clean.
Trellising also ensures that your gourds will grow into an evenly round shape, rather than becoming flat on one side as they will if they are grown on the ground.
Gourds are natural climbers, and they don’t require any training. The main consideration for trellising that you will need to keep in mind is weight.
For heavier varieties that grow to a large size at maturity, two sturdy posts with an upper and lower wire and garden twine woven in between will be enough to support them. For smaller types, a wire cage (much like a larger version of a tomato cage) will suffice.
You could also choose to place them near a sturdy structure that they can – and inevitably will! – climb, such as a fence.
Cultivars to Select
Now for the fun part! Which types will you choose to add to your garden beds? Let’s take a look at some enticing options with ornamental appeal.
Daisy
This option is comprised of a classic mix of cultivars often found in Halloween, fall harvest, and Thanksgiving displays.
It includes colorful gourds in shades of orange, white, yellow, and green and produces loads of small fruit measuring about two by three inches.
Turks Turban
‘Turk’s Turban’ is another classic that’s popular during the fall for ornamental use, but it is also edible with a satisfying flavor like other types of squash that you might enjoy.
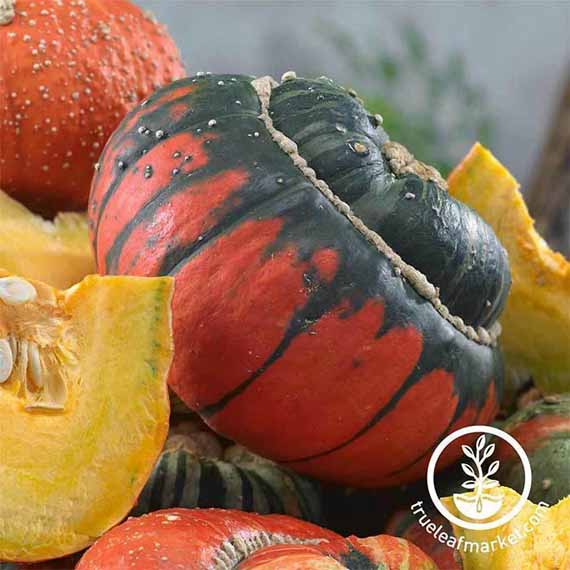
This large, brighly colored variety has flattened round fruit with purple, orange, white, and green banding. The fruit measures eight to ten inches across and four to five inches in height.
You can find seed at True Leaf Market.
Or learn more about growing ‘Turk’s Turban’ here.
Birdhouse
The ‘Birdhouse’ gourd is the most well-known variety available for making birdhouses, martin houses, and for other uses in crafting. This one is an absolute must on any recommended cultivar list.
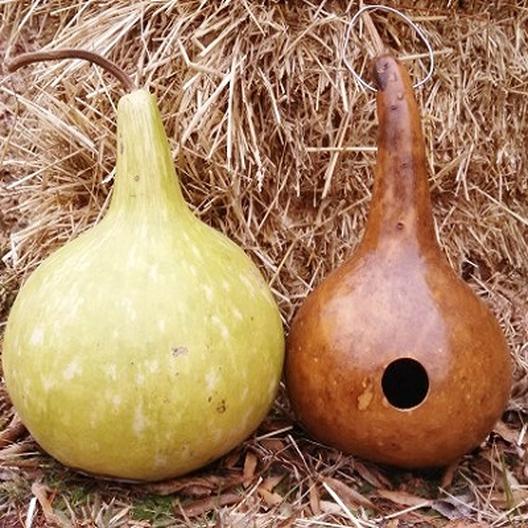
Allow the fruit to mature as much as possible on the vine before harvesting and drying. You can read more about growing these gourds here.
Maintenance
These plants are often said to thrive on neglect, meaning they are very low maintenance plants.
As previously mentioned, it is not advisable to give your plants too much extra fertilizer, as this can be detrimental to their development.
The main thing that is recommended in terms of upkeep is to cut the vines back once they reach 10 feet in length. This encourages the growth of side stems, where the female blossoms (which produce fruit) will grow, ensuring a bumper crop.
Gourds also produce male blossoms, which grow on the main stem, but these do not produce fruit. Cutting back the main stem therefore discourages the growth of these male blossoms.
Conversely, if you are aiming to produce a specific number of fruits per plant, or to encourage fewer more robust gourds to grow, you can pinch or cut any remaining blooms and gourds from the vines once you have reached your desired number.
The best way to do this is by clipping them near the vine and discarding them. This will force the plant to put all its energy into the remaining vines and fruits. Just be sure to be very careful when you do this, to avoid damaging the plant.
Gourds are not especially greedy for water, although young plants especially will benefit from a light watering about once a week whilst they’re getting established.
Provide about an inch of water per week, being sure to water at the base of the plant and never on the leaves. This should be more than sufficient, unless you happen to have an unusually dry spell. If the weather is hot and dry, provide supplemental irrigation.
Managing Pests and Disease
Although fairly hardy, gourds can be attacked by various pests and disease pathogens. Since almost all fruit-producting vines with the name “gourd” belong to the Cucurbitaceae family, they all can be afflicted by many of the same insects and diseases that affect edible squash and pumpkins.
Pests
Pests that you may notice on your plants include:
- Aphids (various species)
- Cucumber beetles (various species)
- Cutworms
- Pickleworms
- Spider mites (various species)
- Squash bugs
- Squash vine borers
- Whiteflies
The main thing to remember here is all plants in the curcubit family require pollinators to be able to produce their fruit.
This means any pesticides should be used very sparingly (or preferably not at all) to avoid interfering with pollinators.
Biological controls should be used first as part of an Intergrated Pest Management (IPM) program.
Insectidial soaps and oils, as well as oragnic pyrethrums, are the safestest organic insecticides to use around beneficial insects and other garden organisms.
Other organic control measures may include applying biopesticides like Bacillus thuringiensis (Bt) and spinosad.
One of the most destructive pests of gourds is the cucumber beetle.
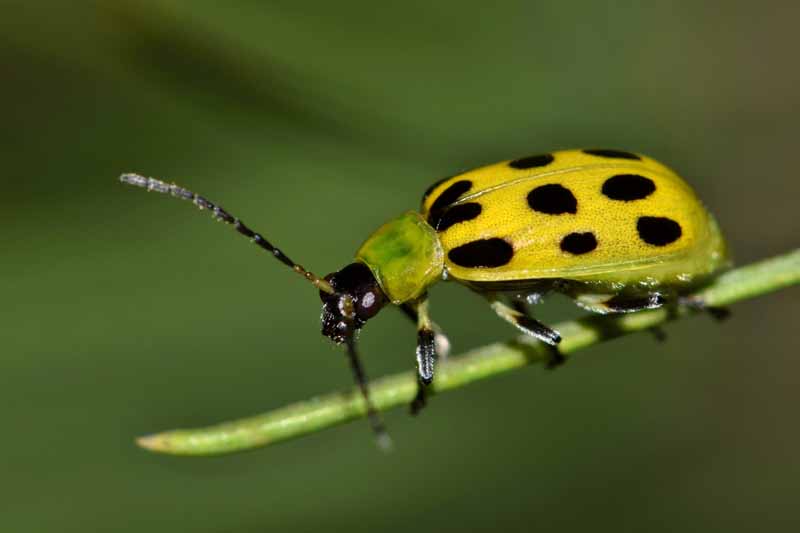
You’ll know if your plants are under attack if you start to see small holes in the foliage and wilting yellow leaves, fruit growth is stunted, and fruits begin to turn yellow.
To avoid heartbreak and loss to the cucumber beetle, try covering your plants with row covers to prevent this bothersome insect from jumping from plant to plant.
Applying wood ash to the base of your plants is also an effective deterrent, as they really dislike the high concentration of nitrogen. Another great deterrent is diatomaceous earth, which you can sprinkle at the base of your plants every couple of weeks.
Diatomaceous earth is also great at deterring another troublesome beetle, the squash bug, which will make holes in your plants.
Disease
An unfortunate knock-on effect of the cucumber beetle (and other sucking insects) is that it often brings with it bacterial wilt disease, transmitted the beetle as it goes along, munching from plant to plant.
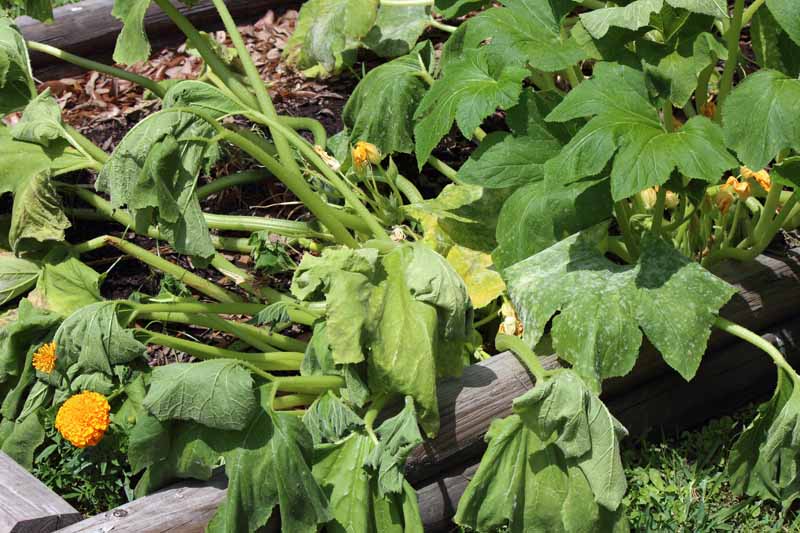
There’s no real cure for wilt, although one top tip for prevention is to rotate your crops. Do not to plant gourds or other cucurbits in the same spot two years in a row, to minimize the risk of this disease.
Other diseases that may affect gourds include:
Fungal
- Alternaria leaf spot
- Anthracnose
- Bacterial wilt
- Cercospora leaf spot
- Downy mildew
- Gummy stem blight
- Fusarium wilt
- Powdery mildew
Viral
- Cucumber mosaic virus (CMV)
- Watermelon mosaic virus (WMV)
Physiological
- Blossom-end rot
Various organic treatments are available, including spraying with copper sulfate or applying biofungicides such as Bacillus amyloliquefaciens, Bacillus subtilis, Trichoderma harzianum, or Streptomyces lydicus.
Harvesting
Patience is the name of the game with these plants. Generally speaking, it’s nearly impossible to leave a gourd on the vine too long, but removing them too early will often cause them to shrivel and rot.
Instead, try to resist the temptation of picking your garden goodies too early. Check your seed packet or cultivar description for the average number of days to maturity, and make a note in your garden journal or on your calendar.
Leave them on the vine until the stems and tendrils begin to turn brown. This will typically be around 100-180 days after planting.
A good indication that they are ready for picking is that your gourds will feel light, which means the water inside is evaporating and the pulp is drying out.
Storage
One of the best things about these fruits is how well they store, making them perfect for decoration throughout the harvest season.
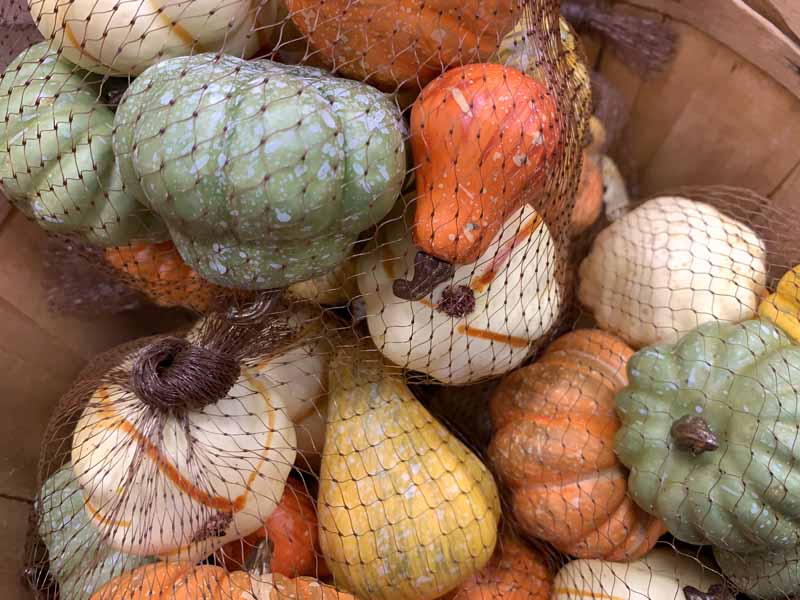
Provided you have a well ventilated, dry space– such as an attic, garage, or barn that is generally between 55 and 61°F – these vegetables can be stored for the long term. They will take one to six months to dry completely.
If you are planning to use your gourds as instruments or for other crafts, you can tell if they are fully dry and good to go when you can hear the dry seeds rattling around inside when you give them a shake.
Get Going with Growing Gourds
Oh my gourd-ness! If you ask me, it’s safe to say there’s gourd reason to get going with growing this gorgeous fall crop.
Have you had any experience with different varieties of ornamental gourds in the garden? Let me know what your favorite thing about this beautiful ornamental vegetable is in the comments section below!
Got squash on the brain? Keep reading, starting with these informative articles:


So I bought dried gourds that had been painted like carrots and some like radishes. I’m looking for seed. What would be the name of these two? TIA.
Can you post a picture?
How far apart should one plant different squash and gourd plants so they do not cross pollinate?
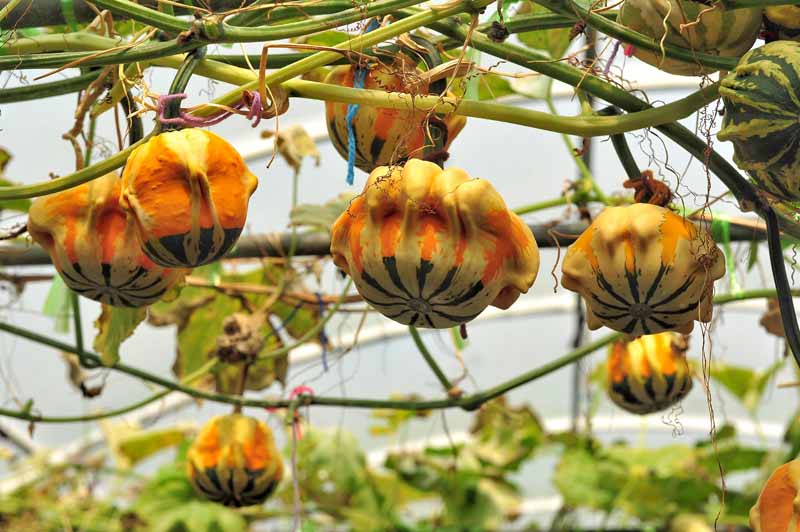
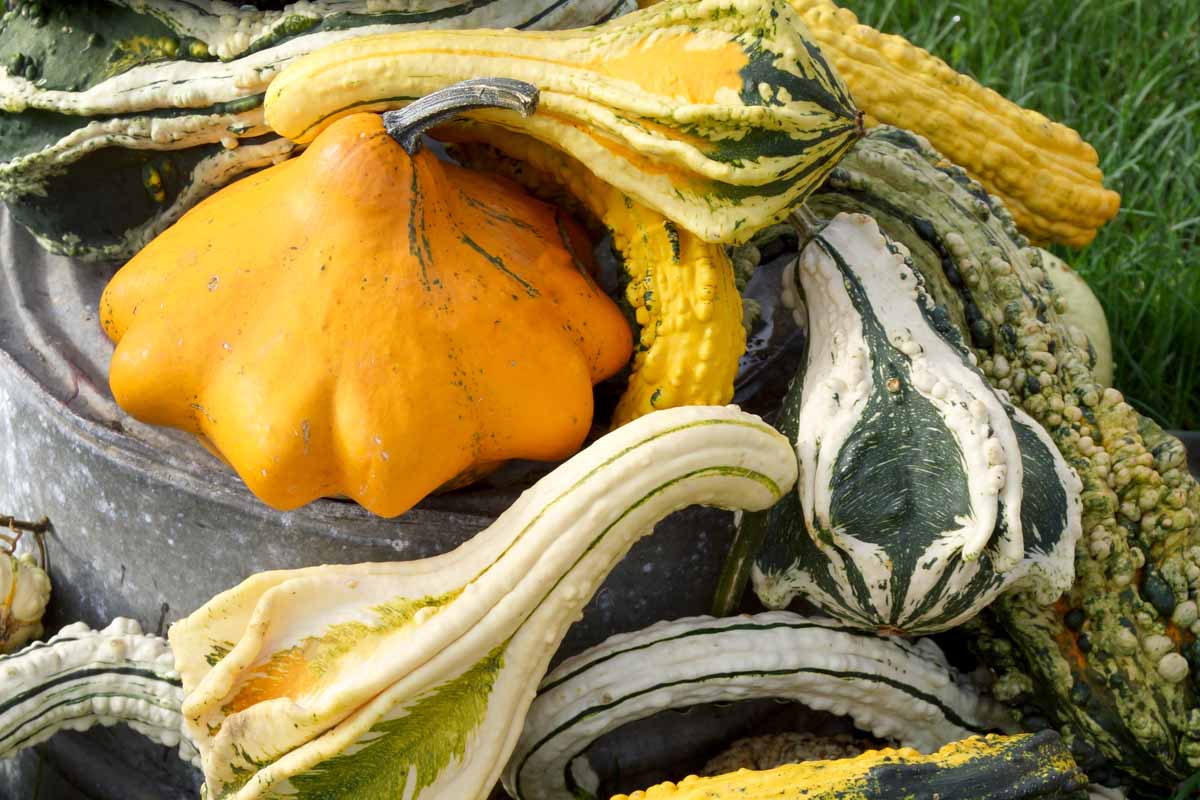
in the bottom photo, on the top right half, is a ribbed yellow gourd with a green bottom.
What is the name of that one & is it ever edible??
Thank You in advance for Your time & consideration.
Hi Becky,
If you’re referring to the bottom photo in the article, I think I know what type of gourd you’re talking about. They’re called ‘Autumn Wings’ gourds. I don’t know whether the taste would be good or not, but these have very hard rinds, which is what makes them hold up well as decorations. There wouldn’t be much in the way of edible material inside them. Some gourds are edible – luffas, for instance, but others wouldn’t be worth the effort to try to eat them.
Hope this helps!
pic of gourd?? edible? name??
IMG_20230706_182144332_HDR_1.jpg
Hi Becky, your photo didn’t upload, please could you try again? If you click the paperclip icon on the bottom right of the comments box it will allow you to attach a picture. Thanks!