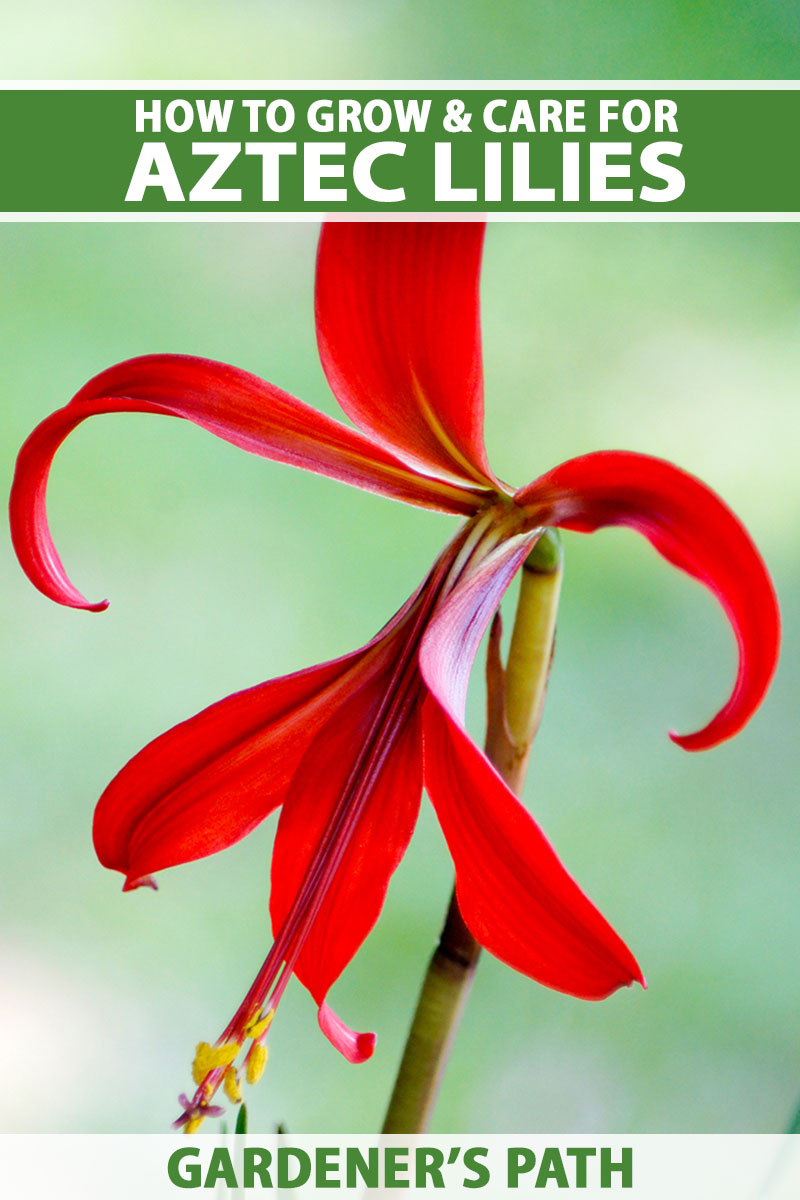
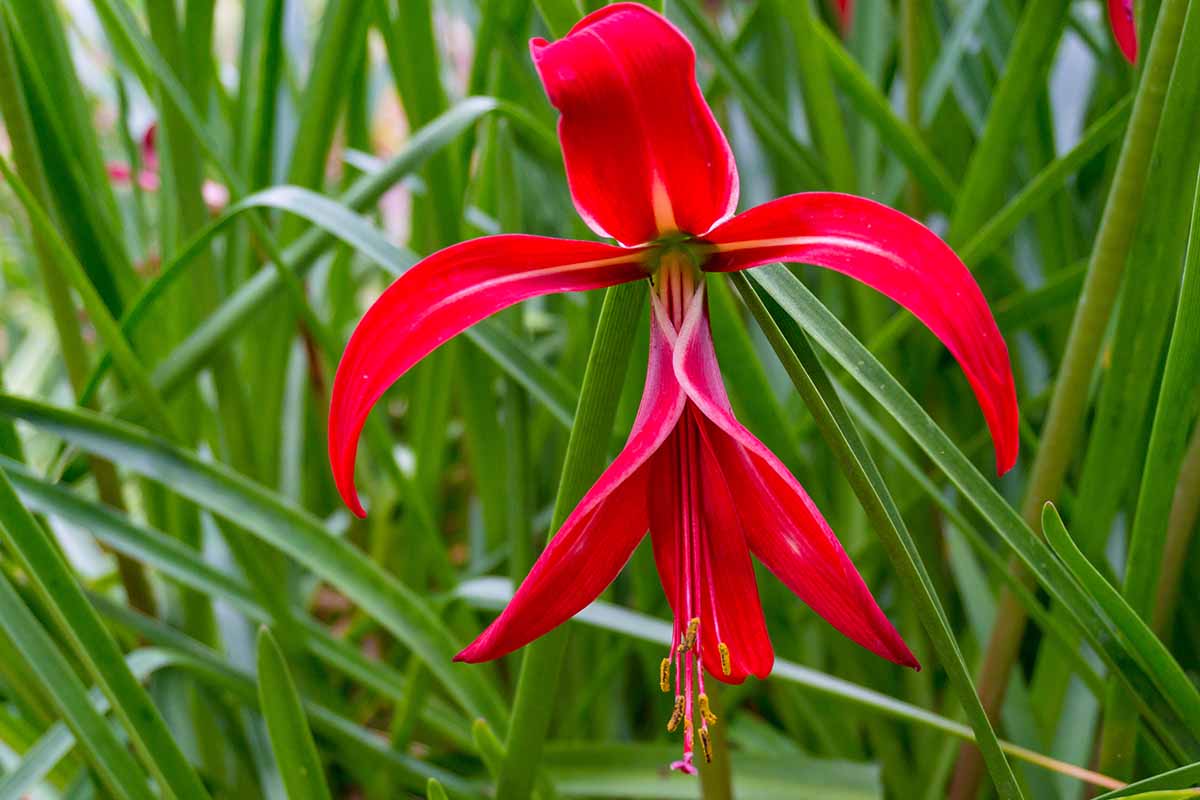
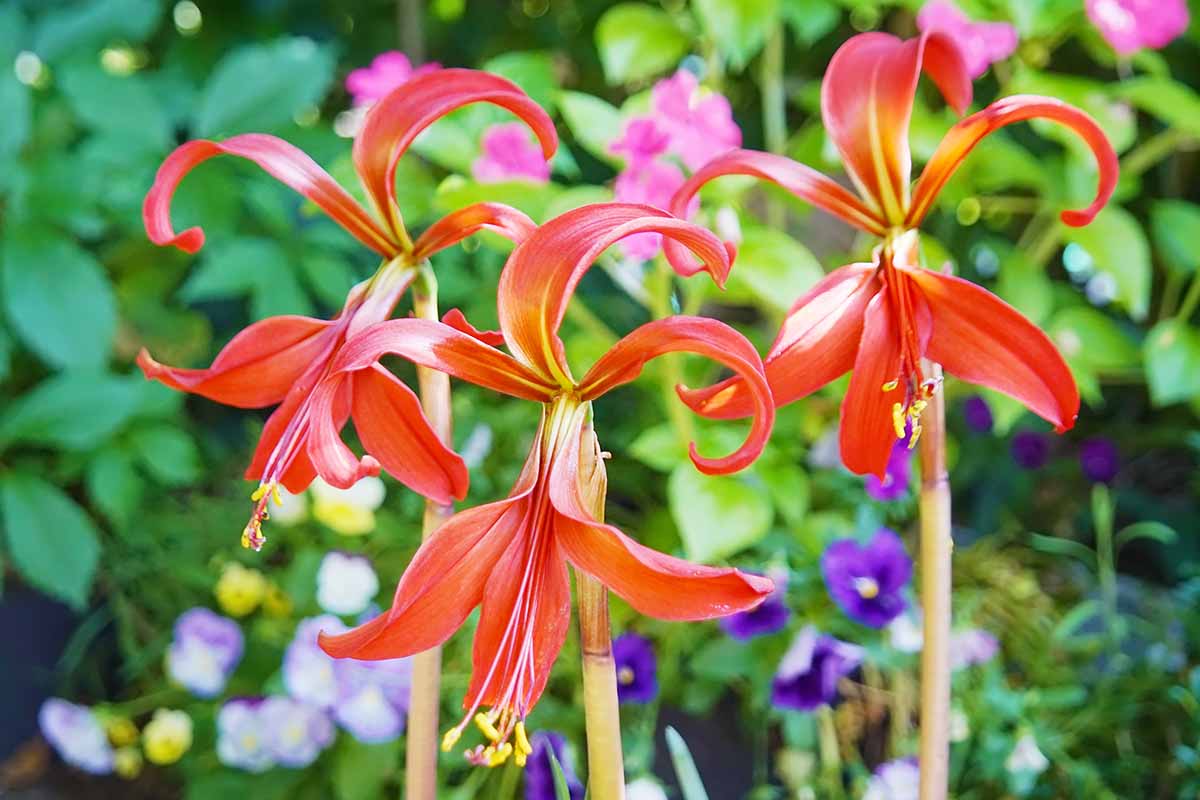
Sprekelia formosissima
Bursting with blood-red blooms as fiercely beautiful as the culture that it’s named after, the Aztec lily is the perfect flowering bulb for a warm, sunny landscape.
If you are in USDA Hardiness Zones 8 to 11 and you’re racking your brain for a new flower to add to your garden, you should give Sprekelia formosissima a go!
Along with boosting your property’s aesthetic, Aztec lilies attract beneficial pollinators, which is always a plus.
We link to vendors to help you find relevant products. If you buy from one of our links, we may earn a commission.
Tolerant of heat and salty soils, Aztec lilies aren’t too tricky to grow and care for, once you have ’em figured out. For some help with that, our guide has you covered.
Read on to learn the important aspects of S. formosissima cultivation, from propagation to pest management. It’ll be a helpful resource for your journey of discovery.
Here’s what I’ll cover:
What You’ll Learn
What Are Aztec Lilies?
Aztec lilies – aka Sprekelia formosissima or Jacobean lilies – are herbaceous, bulbous perennials from the Amaryllidaceae family, which also includes plants like amaryllis (Hippeastrum), onions, daffodils, and ornamental alliums.
In spite of their common name, Aztec lilies are not true lilies.
Aztec lilies originate from Mexico and Guatemala, where they grow wild on exposed outcrops and rocky slopes. As a result, they’ve evolved to flourish in heat, full sun, and rocky to sandy soils.
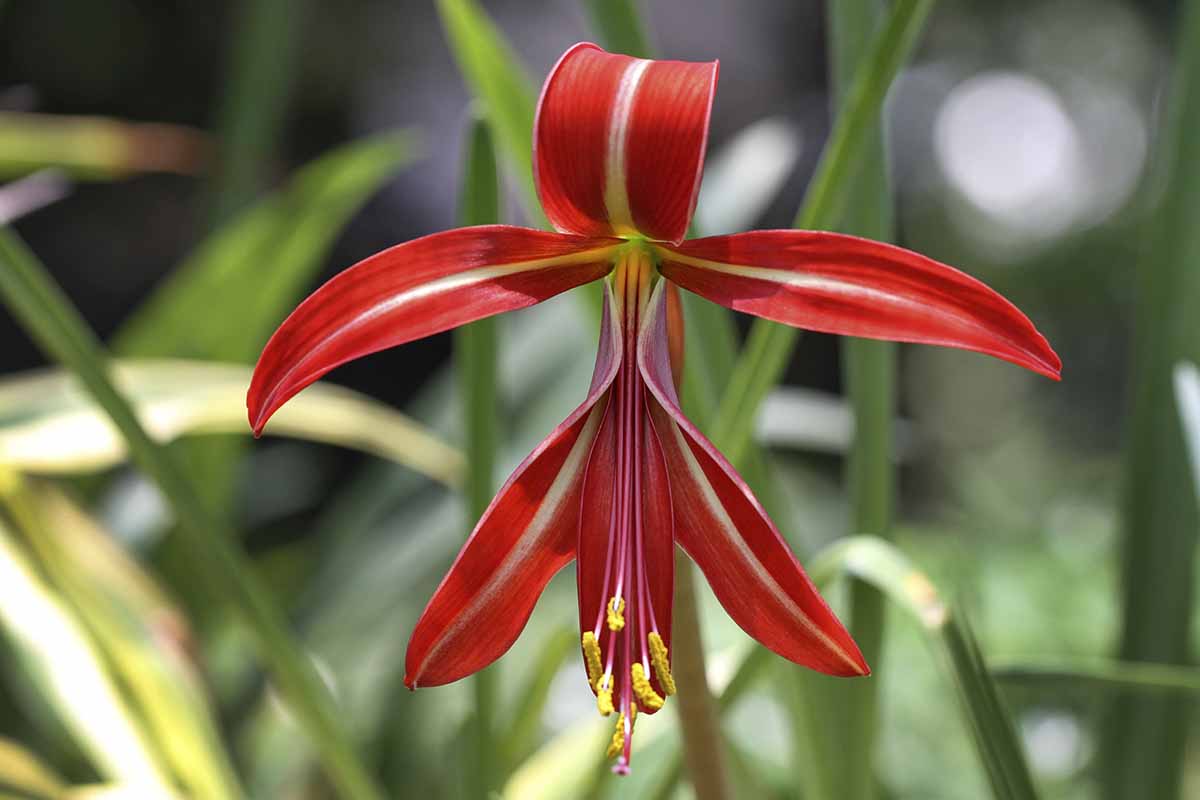
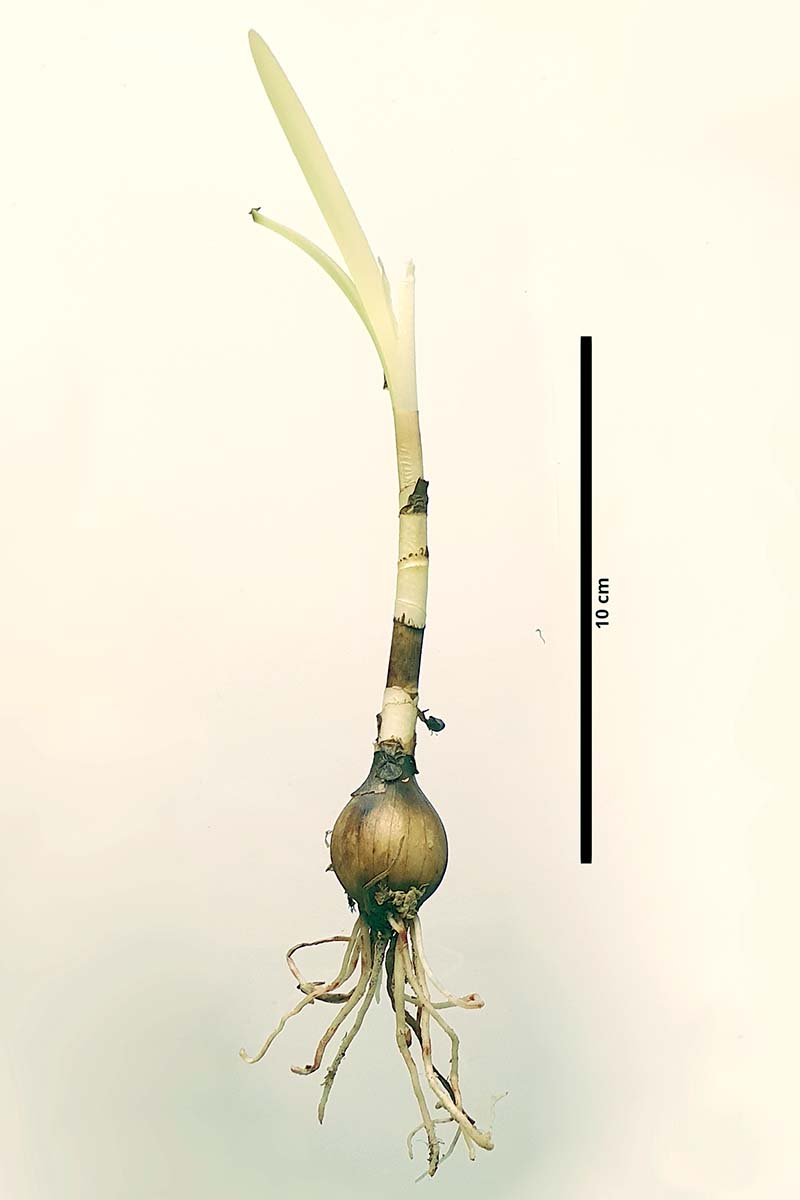
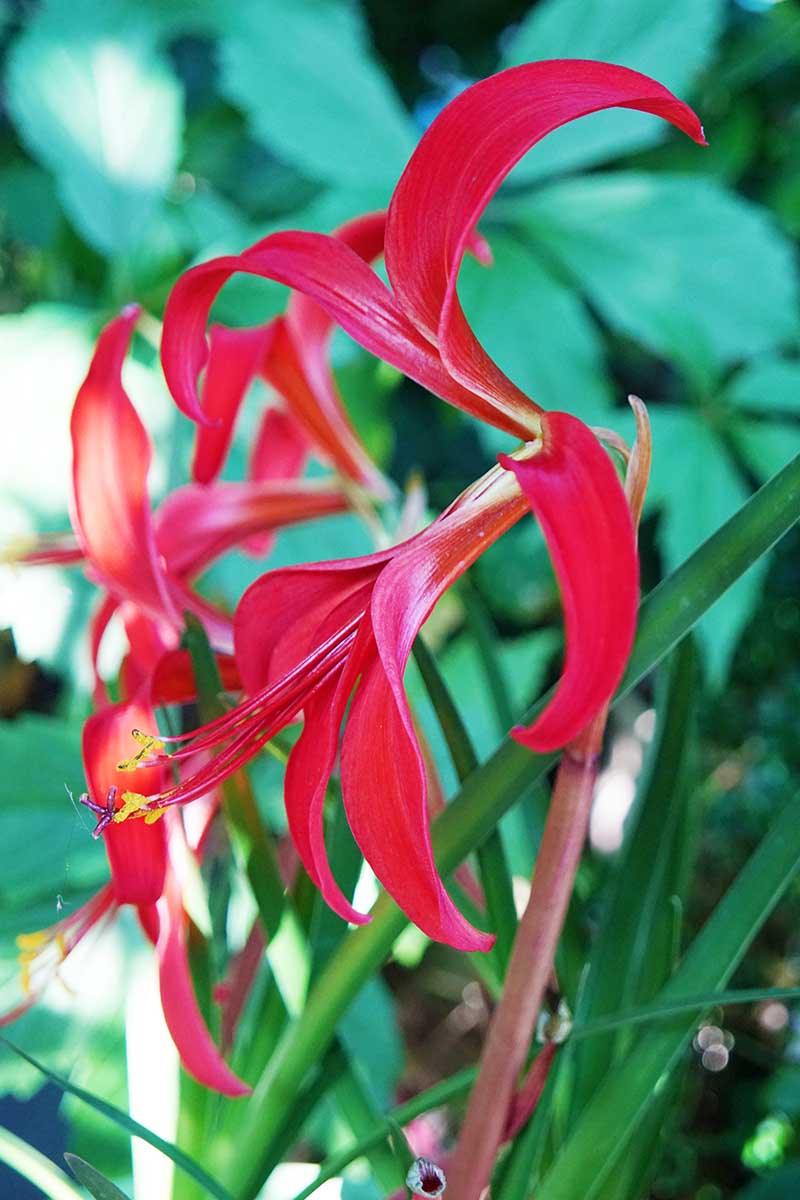
From the underground bulbs grow three to six skinny green leaves, each with a central crease and maximum length of 15 inches.
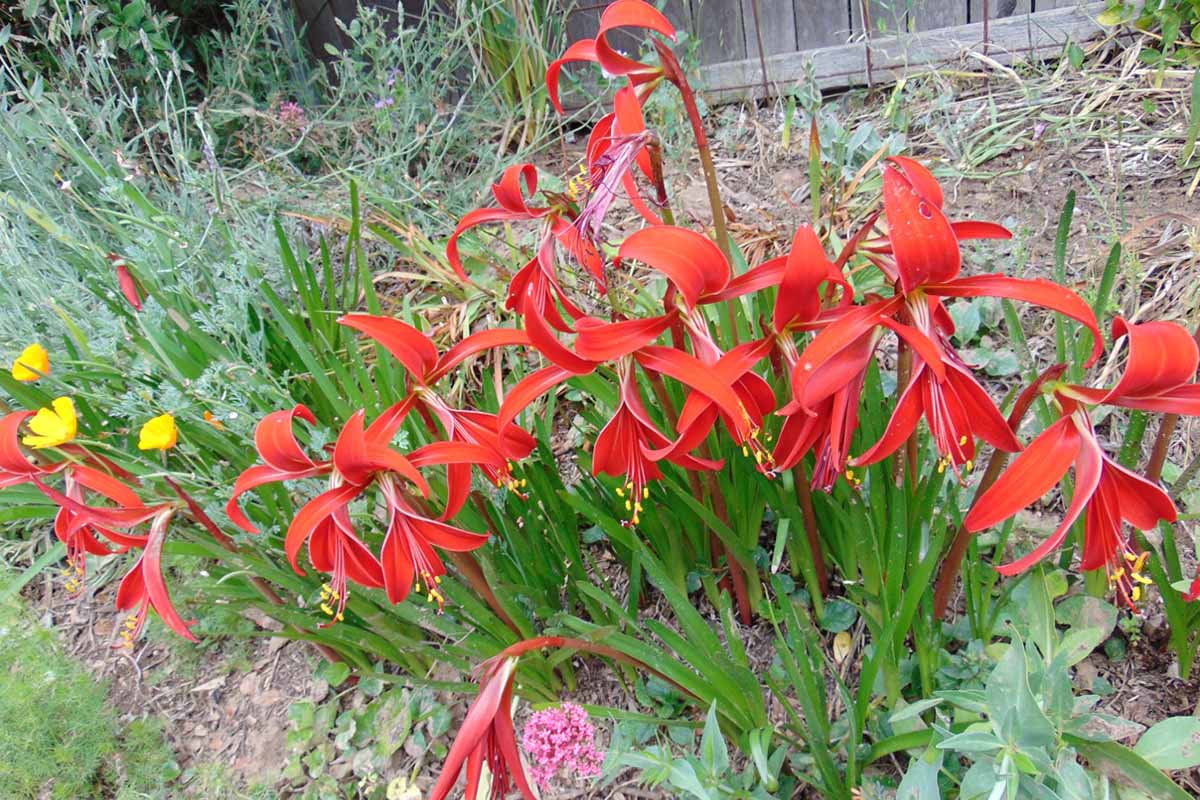
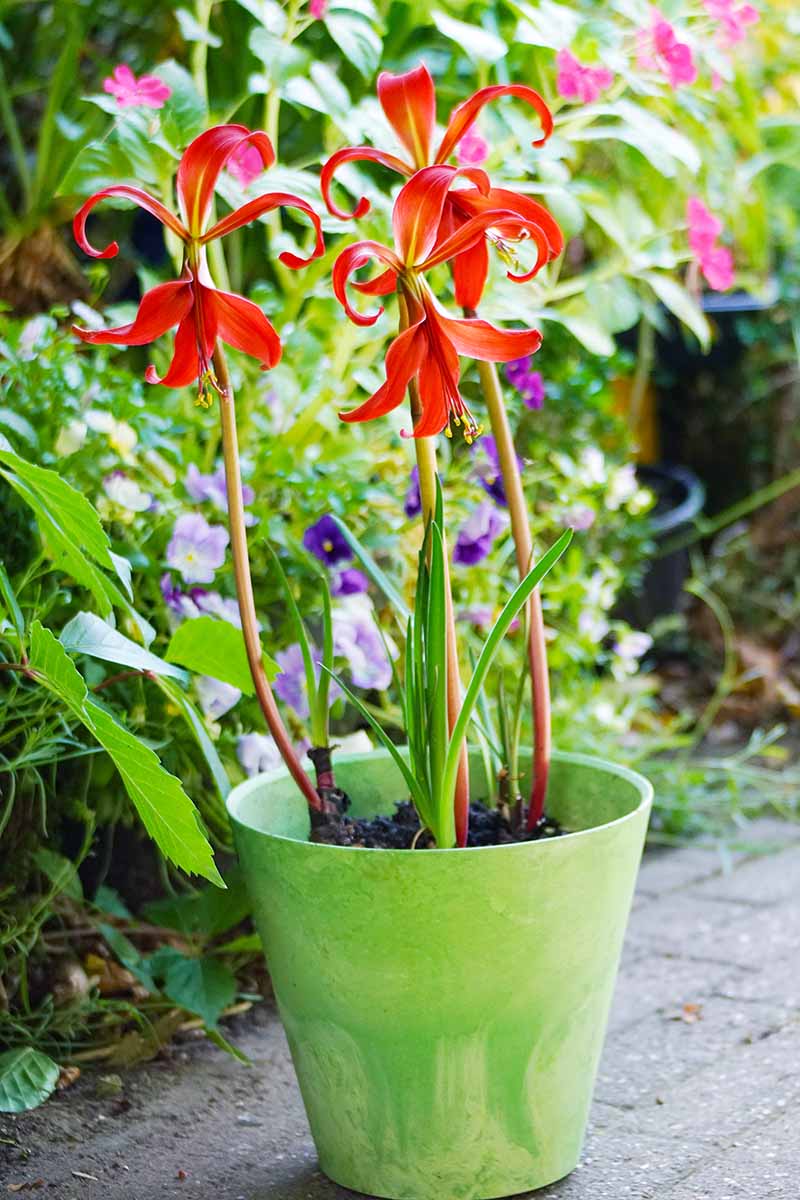
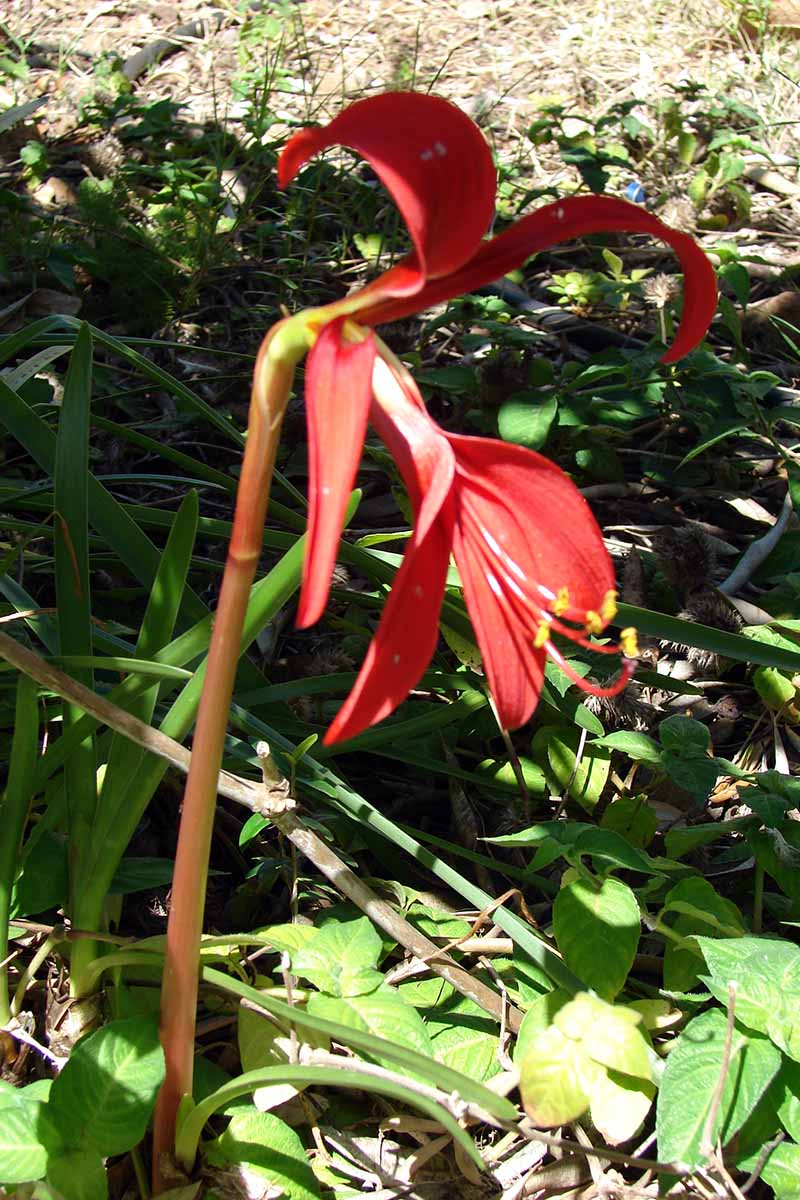
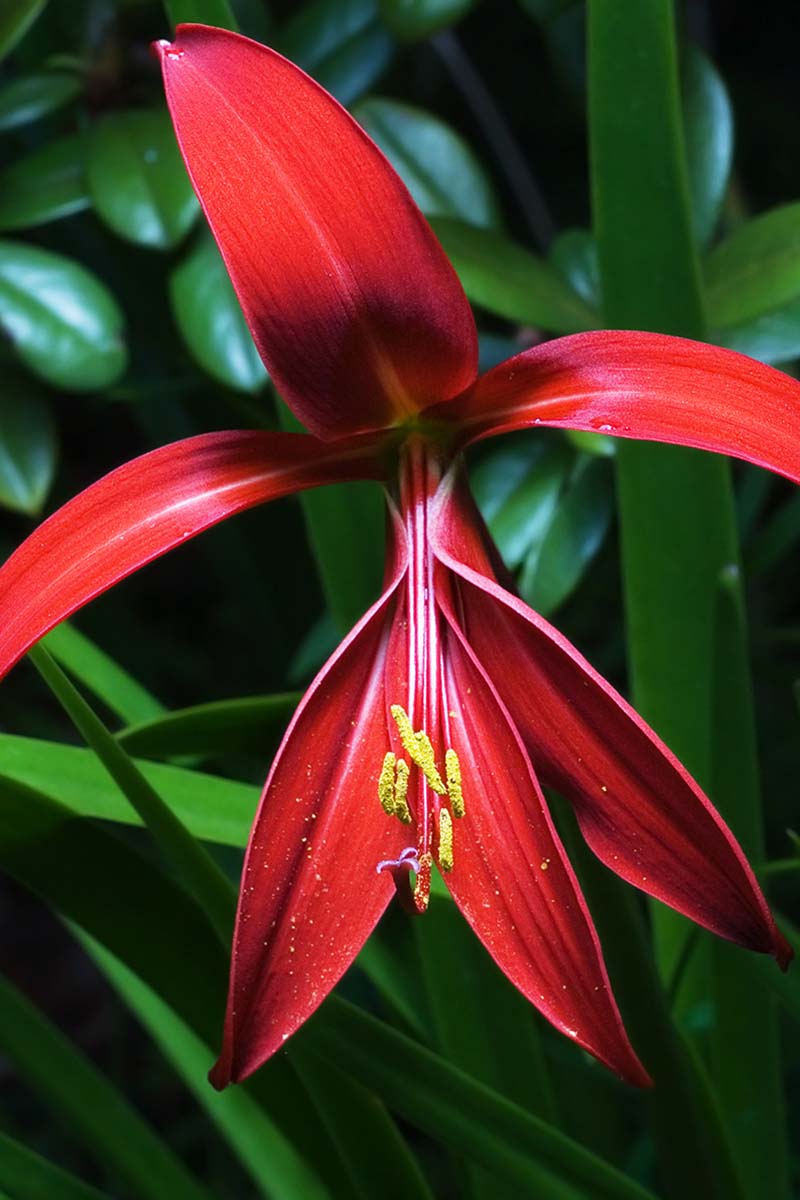
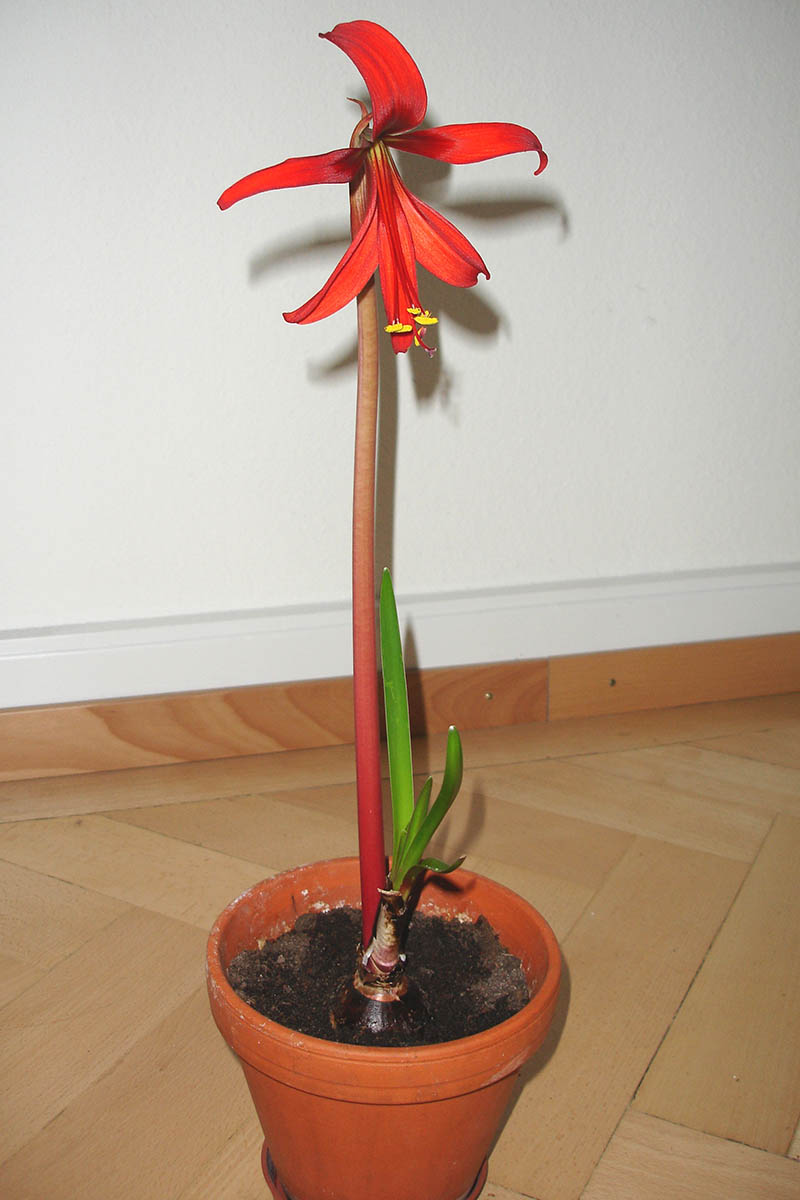
Mounted on stiff stalks up to a foot in height are six-inch crimson to scarlet red flowers, each with six curved petals and yellow-tipped stamens. On occasion, the petals may be pink, have white to light green midribs, or even have white edges.
Blooming anytime in spring to summer – although they typically don’t bloom every year – each flower is open for only a few days before it fades.
Each bulb can produce more than one flower, but usually in sequence, rather than simultaneously.
While open, the flowers attract pollinating hummingbirds and butterflies, which, when pollinated, lead to three-capsuled pods that contain black seeds.
Nearly evergreen in USDA Zones 8 to 11, these plants grow about eight to 12 inches tall and wide. They can also form larger clumps by spreading laterally through bulb offsets, but this is generally a slow process.
These plants can be left in-ground for the winter when they’re grown in Zones 8 to 11. In cooler zones, the bulbs will need to be lifted and stored somewhere warmer during the cold months before they can be planted again in spring.
Speaking of expansion, Aztec lilies found their way into Western horticulture by way of Spanish explorers and colonists.
The Spanish brought S. formosissima back to Europe, where it was introduced to the legendary Carl Linnaeus sometime in the early 17th century, during the Jacobean era of British history – hence the common name, Jacobean lily.
Linnaeus actually identified the plant as Amaryllis formosissima, which it went by until its reclassification into the Sprekelia genus, created in 1821 by William Herbert to honor the German gardener Johann Heinrich von Spreckelsen.
Nowadays, Aztec lilies are a pretty planting option whether they’re grown out in the landscape or inside the home. They do especially well in southern gardens, where it’s nice and warm.
Aztec Lily Propagation
Trying to grow some Aztec lilies of your own? These plants can be propagated from seed, via bulb offsets, or by planting out purchased bulbs. Let’s take a look at each method.
From Seed
Growing Aztec lilies from seed definitely comes with caveats.
For one, you need more than one plant for pollination to occur, since Aztec lilies aren’t self-fertile. So if all you have is a single specimen, then seed production won’t happen.
Additionally, it takes three to seven years for seeds to grow into bloom-producing, mature adult bulbs. So if time is of the essence, then seed propagation isn’t for you.
But if you have multiple Aztec lilies and aren’t deterred by a long wait, let’s begin!
Step one: acquire seeds. They can be purchased, obtained from a friend, or collected from your own Aztec lilies.
If you collect seeds yourself, wait until the seed pods become tan and crispy before using a sharp, sterile blade to remove them from the plant, cut them open, and harvest the seeds within.
You can also tie gauzy organza bags around the seed pods – they’ll catch the seeds when they naturally drop from the seed pods, all while allowing for ventilation to reduce disease risk.
Once a seed pod appears, the seeds should be ripe after about four to six weeks.
Once you have seeds, sow each one into an individual three-inch container filled with a 50:50 mix of perlite and coconut coir. Sow each seed as deep as it is wide – about a half-inch deep. Lay each seed flat on its side.
Moisten the media and expose the containers to bright, indirect light indoors. Keep the media moist as you wait for the seeds to germinate, which should take a couple of weeks.
To ensure that the bulbs will be developed enough to withstand outdoor conditions, keep growing your seedlings indoors in a bright, indirectly lit location for at least two years prior to transplanting.
Keep the growing media moist all the while, and repot them when there is less than an inch or two of space between the developing bulb and the side of the container.
Via Bulb Offsets
Aztec lily bulbs grow offsets, which eventually produce new shoots and roots.
As more offsets are produced, the flowers, leaves, and stems on the parent bulb don’t grow as large, and the specimen can become cramped in its growing site, whether outdoors in the garden or in a pot.
Separating offsets from the mother bulb alleviates these issues, and even yields more plants.
However, the drawback of this is that they don’t like being disturbed and may not flower for a while after division. But hey, at least you’ll eventually have more Aztec lilies!

To divide, wait for the foliage to die back in fall before lifting the plant from its growing site or removing it from the container.
Brush off the soil from the bulb and roots so you can see what you’re working with, then snap or pull away the offsets by hand.
Plant each offset two inches deep in its own six-inch container of well-draining, yet moisture-retaining media.
Water the media, place the containers in bright, indirect light, and care for the offsets like you would seedlings until the bulb is large enough to transplant.
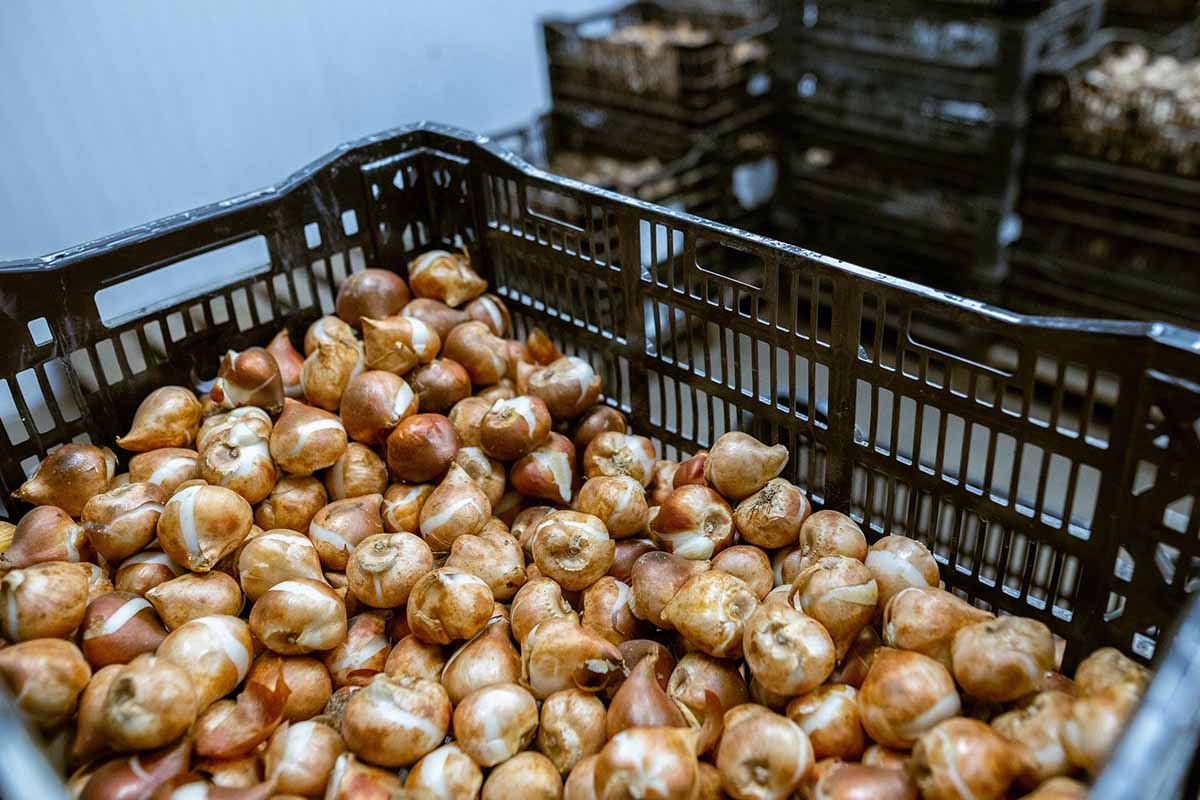
Via Bulbs
If you’re in Zones 8 to 11, you’ll need to plant your bulbs in fall at least six – preferably eight – weeks before the first frost. For plants grown as annuals in colder zones, plant the bulbs in spring after the final frost date.
For growing Aztec lilies in-ground, prepare patches of deep, rich, and well-draining sandy loam soil with a pH of 7.0 to 7.8 in a full sun location. You might wish to conduct a soil test to check if any amendments are needed.
If you’re working with clayey, acidic, and/or barren soil, you’ll have to amend it with some coarsely textured grit, limestone, and/or humus, respectively.
Plant each bulb four inches deep, basal plate down, and space them eight to 12 inches apart. Water them in well.
If you want to grow your Aztec lilies in containers, prepare a six-inch-wide, eight-inch-deep container with drainage holes for each bulb.
You can also put multiple bulbs in containers larger than that, as long as they’re spaced at least four inches apart – this’ll allow the shoots to help each other stay upright.
Fill your chosen containers with a well-draining, yet moisture-retaining medium, such as a 50:50 mix of perlite and coconut coir. Plant the bottoms of the bulbs four inches deep, cover them with media, then water in well.
Bulbs for containerized houseplants can be planted whenever you’d like.
How to Grow Aztec Lilies
Now that you’ve got bulbs in the ground or in your containers and Aztec lilies a-growin’, let’s learn how to best care for them!
Climate and Exposure Needs
Just a reminder: Aztec lilies need to be grown in USDA Hardiness Zones 8 to 11 to ensure their year-round survival outdoors.
S. formosissima houseplants shouldn’t need thermostat alterations. If the temperature is comfortable for you, then it’s comfortable for them!
Light-wise, full sun exposure is ideal, although partial sun is also acceptable in especially warm climates.
Aztec lilies grown as houseplants should receive as much light as possible – spots near south- or east-facing windows are perfect.
Soil Needs
The ideal soil for S. formosissima is well-draining, fertile, and neutral to slightly alkaline. Provide an organically rich, sandy loam with a pH of 7.0 to 7.8, and you’re golden.
Every year in spring, work a one- to two-inch layer of compost or well-rotted manure into your planting beds, being careful to not disturb the bulbs.
Water and Fertilizer Needs
Aztec lilies love even moisture during the growing season, so be sure to water the plants deeply whenever the top inch or two of soil feels dry. During winter dormancy, stop watering entirely.
For both houseplants and outdoor specimens, monthly applications of a balanced fertilizer will help to maximize blooms. And just like with watering, cease fertilization during winter dormancy.

Indoor plants would do well with Bonide’s 10-10-10 liquid plant food, available via Walmart.
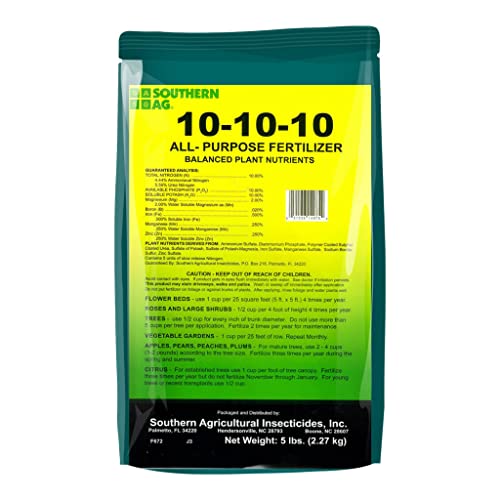
Southern Ag Granular Fertilizer
For outdoor specimens, try this granular 10-10-10 fertilizer from Southern Ag, available at Amazon.
Growing Tips
- Full sun is optimal, but partial shade works in very hot climates.
- A neutral to slightly alkaline soil pH is optimal.
- During the growing season, water whenever the top inch or two of soil feels dry.
Pruning and Maintenance
As the plant prepares to go dormant in fall, its foliage will die back – be sure to trim this off after it has turned brown and withered.
During the growing season, remove any leaves that appear damaged or diseased. You can also snip away flowers as they fade, if you’re not trying to harvest the seeds.

After about three to four years, your Aztec lily will likely start to outgrow its container or planting site. You’ll need to repot container-grown specimens and dig up and divide outdoor-grown clumps.
In-ground bulbs in USDA Zones 8 to 11 can remain buried for the winter. Cover the soil with a couple of inches of mulch, and they’ll be well-insulated during temperature dips.
Bulbs growing in climates colder than Zone 8 will need to be lifted once the foliage dies back in fall, before the first frost.
Lift the bulbs by sticking a spade, trowel, or gardening fork into the ground adjacent to the bulbs, then pushing the handle down to unearth the bulb and surrounding soil.
Dispose of any damaged, mushy, discolored, or otherwise unhealthy-looking bulbs.
Clean the healthy lifted bulbs, cut off any remaining stem tissue an inch above each bulb, and trim off any roots.
Place them on a newspaper-lined tray in a dark, well-ventilated place with ambient temperatures of 60 to 70°F to cure. Keep them there for one to three weeks until they’ve dried out.
Place the cured bulbs in paper or mesh baggies, then store them in a dark, dry place at 40 to 50°F until it’s time to plant them again the following spring.
Where to Buy
As a not-too-common bulb, the Aztec lily may be a bit harder to find than, say, a tulip or daffodil.
To start, I’d recommend that you browse plant shops, online vendors, and catalogs that specialize in ornamental flowering bulbs.
If you don’t find any leads there, you can always look for sellers that specialize in southern plants, as S. formosissima is a southern gardening favorite.
Plant swaps and horticultural shows are fine places to look, too. And don’t forget to ask your gardening friends for spare bulbs, offsets, or seeds!
You may come across ‘Oriental Red,’ a robust cultivar that blooms prolifically during the growing season.
Managing Pests and Disease
For the most part, you won’t have to worry about many pests and diseases. But there are definitely some you should be aware of.
And don’t forget – the best form of preventative plant health care is cultivating your specimens properly.
Pests
Let’s go over a couple of annoying pests that can damage your plants: mealybugs, and slugs and snails.
Mealybugs
Covered with a white and mealy wax, mealybugs are small, segmented bugs that tend to congregate in crevices, on leaf undersides, and at other inconspicuous, hard-to-spot locations on the plant.
Feeding with piercing-sucking mouthparts, these pests extract fluids from plant tissues, which can cause chlorosis, stunted growth, dieback, and even plant death.
They also produce honeydew as they feed, which can attract ants and lead to the formation of black sooty mold.
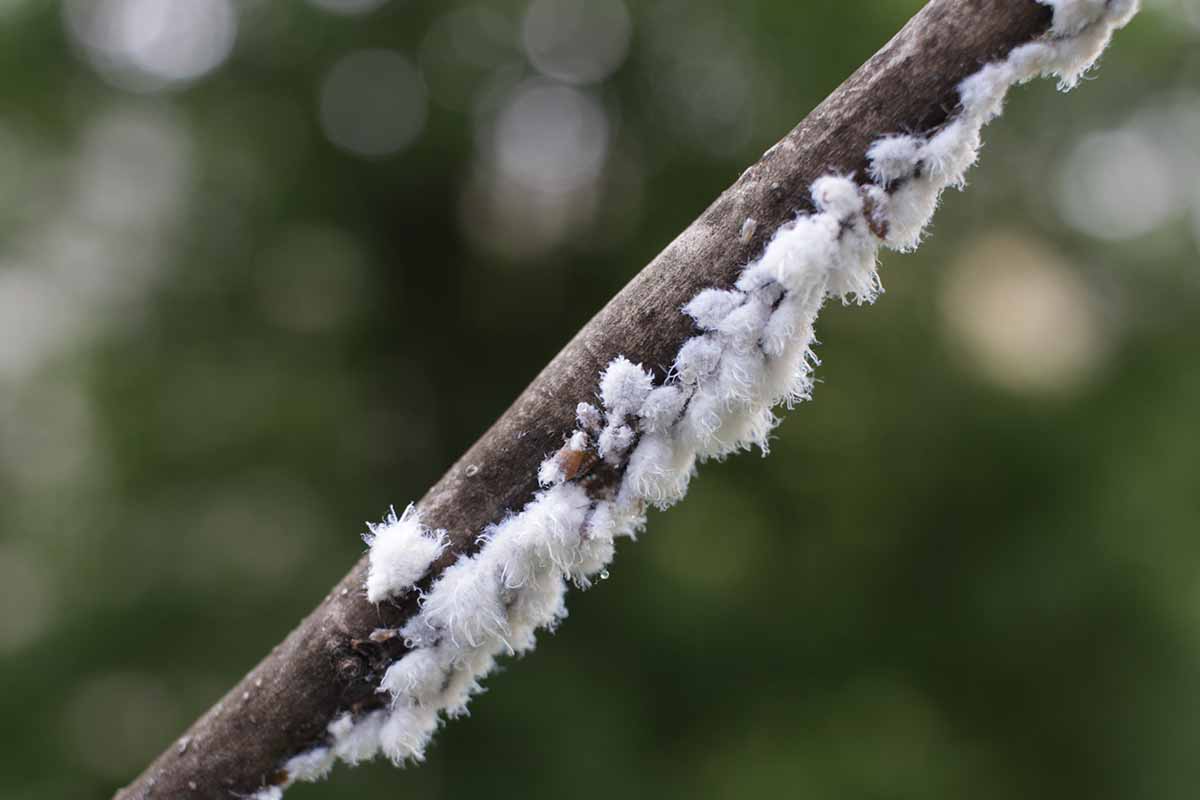
Strong sprays of water can knock mealybugs off of plants, while sprays of horticultural oil can kill them.
Out in the landscape, natural enemies like parasitic wasps and ladybugs help keep mealybug populations down.
Infestations on houseplants are easily treated with dabs of a 70:30 solution of isopropyl alcohol and water, respectively.
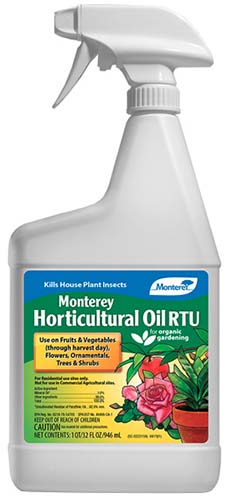
Monterey sells read-to-spray and concentrated forms of horticultural oil at Arbico Organics.
You can learn more about how to manage mealybugs here.
Slugs and Snails
Shelless or shelled, it matters not… both slugs and snails can be a real pain.
Moving around on a muscular, oozing “foot,” these mollusks use their rasping tongues to take irregularly-shaped, yet smooth-edged feeding holes out of plant tissues, which really saps a plant’s health. Plus, they leave nasty slime trails in their wake.
If your plants have a slug or snail problem, you can go out at night with a flashlight to pick them off plants by hand and dispose of them.
It also helps to weed your garden, clean up plant detritus, and eliminate other spots where slugs and snails can hide during the day.
Alternatively, these plastic beer traps from Gardener’s Supply Company can do slug- and snail-catching for you.
Learn more about dealing with slugs and snails in our guide.
Disease
Pathogens easily hitch a ride in contaminated soils and on unsanitized garden tools, so make sure to frequently sterilize your gardening tools and use pathogen-free soils.
Narcissus Leaf Scorch
Caused by the fungus Didymella curtisii, narcissus leaf scorch results in reddish-brown scorching and spotting on the leaves. As the disease progresses, the foliage turns yellow and brown before dying.
These symptoms also occur in flowers and on flower stalks, which is no bueno.
Surviving between bulb scales and in old leaf debris, the fungus spreads via fruiting bodies, especially in wet and humid conditions.
Infected leaves and flowers should be removed ASAP, while severely infected specimens should be dug up and pitched.
To prevent this disease from the get-go, dispose of leaf detritus before it accumulates, and always store bulbs at proper temperatures.
Root Rot
Whether caused by pathogens or purely an abiotic issue, root rot begins when plants sit in oversaturated soils.
When roots are deprived of oxygen for too long, they essentially suffocate, become necrotic, and die. As a result, the bulb doesn’t receive the nourishment it needs and rots, and the shoots above the soil line wilt and die back.
To prevent root rot, not overwatering is essential… and to alleviate root rot, you must stop overwatering, ASAP.
To help out a severely root-rotted plant, dig it up and remove any necrotic roots. If more than half of the roots and/or more than half of the bulb is rotted, then the specimen is probably toast.
Best Uses for Aztec Lilies
A fiery-hot beauty like the Aztec lily has many aesthetic applications.
It dazzles anywhere a pretty flower is needed, but it’s especially awesome as an in-ground floral display, a border planting, a container specimen, and an addition to rock or alpine gardens.
And although it’ll go through a brief dormancy period, it’s also a stunner as an indoor houseplant.
Quick Reference Growing Guide
| Plant Type: | Herbaceous perennial bulb | Flower/Foliage Color: | Red, pink/green |
| Native to: | Guatemala, Mexico | Maintenance: | Moderate |
| Hardiness (USDA Zone): | 8-11 | Tolerance: | Deer, heat, partial shade (hot climates), salt (moderate) |
| Bloom Time/Season: | Spring-summer | Soil Type: | Rich, sandy loam |
| Exposure: | Full sun | Soil pH: | 7.0-7.8 |
| Time to Maturity: | 3-7 years (from seed) | Soil Drainage: | Well-draining |
| Spacing: | 8-12 inches (outdoors), 4 inches (containers) | Attracts: | Butterflies, hummingbirds |
| Planting Depth: | 2-4 inches | Uses: | Alpine garden, containers, greenhouse planting, houseplant, rock garden |
| Height: | 8-12 inches | Order: | Asparagales |
| Spread: | 8-12 inches | Family: | Amaryllidaceae |
| Water Needs: | Moderate | Genus: | Sprekelia |
| Common Pests and Diseases: | Mealybugs, slugs and snails; narcissus leaf scorch, root rot | Species: | Formosissima |
Don’t Be Silly… Grow Some Aztec Lily!
If you have the opportunity to grow S. formosissima, you definitely should. Carpe diem, as the go-getting Romans were fond of saying!
With some Aztec lilies in the garden, your landscape will look absolutely stunning! Same thing goes for your home, if you go the indoor container route.
Are you growing Aztec lilies? Still have questions, or perhaps tidbits of your own to share? Head on down to the comments section below!
And for more information about growing flowers from the Amaryllidaceae family, try these guides on for size next: