Pisum sativum var. macrocarpon
Remember the old adage, “Haste makes waste?” Sugar snap peas contradict these wise words from Founding Father Benjamin Franklin.
These garden vegetables, Pisum sativum var. macrocarpon, do grow in a hurry, usually producing a bounty of edible pods 50 to 70 days from sowing, depending on the variety.
But rather than frivolously wasting vast resources in their haste to produce, these garden legumes give back at every stage of the growing season.
We link to vendors to help you find relevant products. If you buy from one of our links, we may earn a commission.
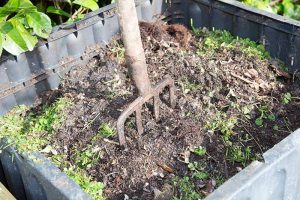
The plants fix nitrogen in the soil, they can provide a source of green manure, and the microgreens, shoots, and blooms are all edible.
These peas can succeed in average soil if it’s well-draining, and they don’t need thinning, pruning, or fertilizing. In all, these speedy producers are one of the most sustainable and easy to care for vegetables you can grow in the garden.
Just as important, they’re delicious! When grown in cool weather using a few key strategies, these edible pod peas are crunchy and sweet.
I’ll be sharing those growing tips here. If you’re ready to get started, let’s take a look at these topics:
What You’ll Learn
What Are Sugar Snap Peas?
A member of the legume family, snap peas are often called sugar snap peas, and they are one of the sweetest, crispiest green vegetables you can grow in the garden.
They are super new compared to most garden vegetable favorites.
While evidence of peas has appeared in archeological digs dating back to 6,000 BCE, this particular type was introduced by breeder Calvin Lamborn much more recently, in 1979.
He’d hoped to create a straighter, more commercially viable snow pea by cross-breeding certain types with traditional English peas, but instead came away with a plant that produced juicy, round, edible pods best eaten fresh.
Like all peas, sugar snaps are best grown in the chill of spring or early fall and will not produce a decent harvest once temperatures exceed about 65°F.
That’s one of their few limitations, though. I think you’ll find that these tasty pods are well worth the space in your garden, and they may even convince the vegetable haters at the house to snack on “rabbit food.”
Want to give it a try? These tips will help you succeed in growing this variety of P. sativum!
Snap Pea Propagation
Do you have a particularly short snap pea growing season?
If you’re in a situation where the weather moves so quickly from light freezes to temperatures above 65°F that you don’t have the requisite 50 to 75 days to sow and harvest these legumes, you may want to start seeds indoors in biodegradable containers you can plant out after you harden off the seedlings.
At transplant time, you simply plop the pots into the ground with the plants positioned at the same level they were in the pots, so the container soil is level with the surrounding earth.
Alternatively, you can plant the seeds in a large container and move it outside when the weather becomes cooperative. Learn more about growing peas in containers in our guide.
In areas where gardeners do have an ample growing season, I heartily recommend sowing the seeds outdoors. You can do so about three weeks ahead of your average last frost date.
They’ll survive a light freeze readily, though it may make them germinate more slowly.
If you are growing in a bed where you’ve never grown legumes before, or haven’t grown them for four or five years, it’s a good idea to inoculate them so they’ll be able to fix nitrogen in the soil more readily.
When purchasing inoculant, it’s important to buy one that’s formulated for peas – not specifically for alfalfa or some other type of legume.
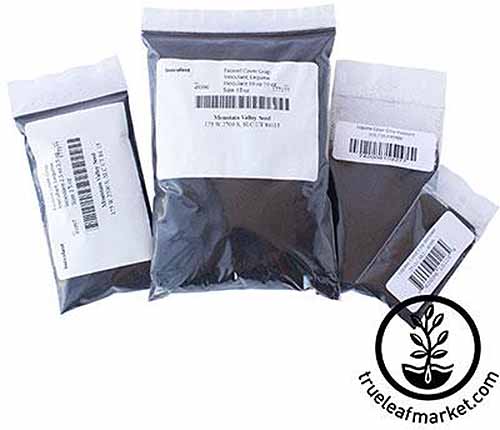
One desirable option is the Cover Crop Inoculant for Pea, Vetch, Bean, and Lentils sold by True Leaf Market. It’s available in containers ranging from a quarter-ounce to five pounds.
Sowing is simple. Some folks soak the seeds the night before, but I have been skipping that step for several years now, and my peas still seem to germinate just as quickly.
Sow the seeds about an inch deep and three inches apart if you’re growing a vining type, or five inches apart if you’ve selected a shorter, shrubby variety that will reach 18 to 30 inches tall.
Tamp the soil firmly. In my raised beds, these seeds tend to plump up and move to the surface after spring rain, so I usually step on the soil covering my sown seeds to anchor them firmly.
Water them in thoroughly and keep them moist but not soggy until they germinate.
That’s it! If you get a late freeze and they never sprout, or germination rates are low for some other reason, sow more seeds and they’ll quickly catch up.
How to Grow Sugar Snap Peas
Most of the work of growing snap peas occurs before you sow the first seed.
You’ll want to prepare an optimal garden site, one with full sun, well-draining soil worked down to at least six inches, and a soil pH of 5.5 to 7.0.

While these legumes will grow in average soil, if they will be maturing in the rainy spring season, this means you need to protect them from standing water that can lead to root rot.
It’s critical to provide a weed-free bed as well. You don’t want your sprouts, which have shallow roots, competing with weeds for water or nutrition – especially fast-growing weeds that got a head start.
Space the seeds for vining plants about three inches apart and the bush varieties five inches apart. This will give the plants enough air circulation to be able to avoid many of the maladies caused by too much humidity.
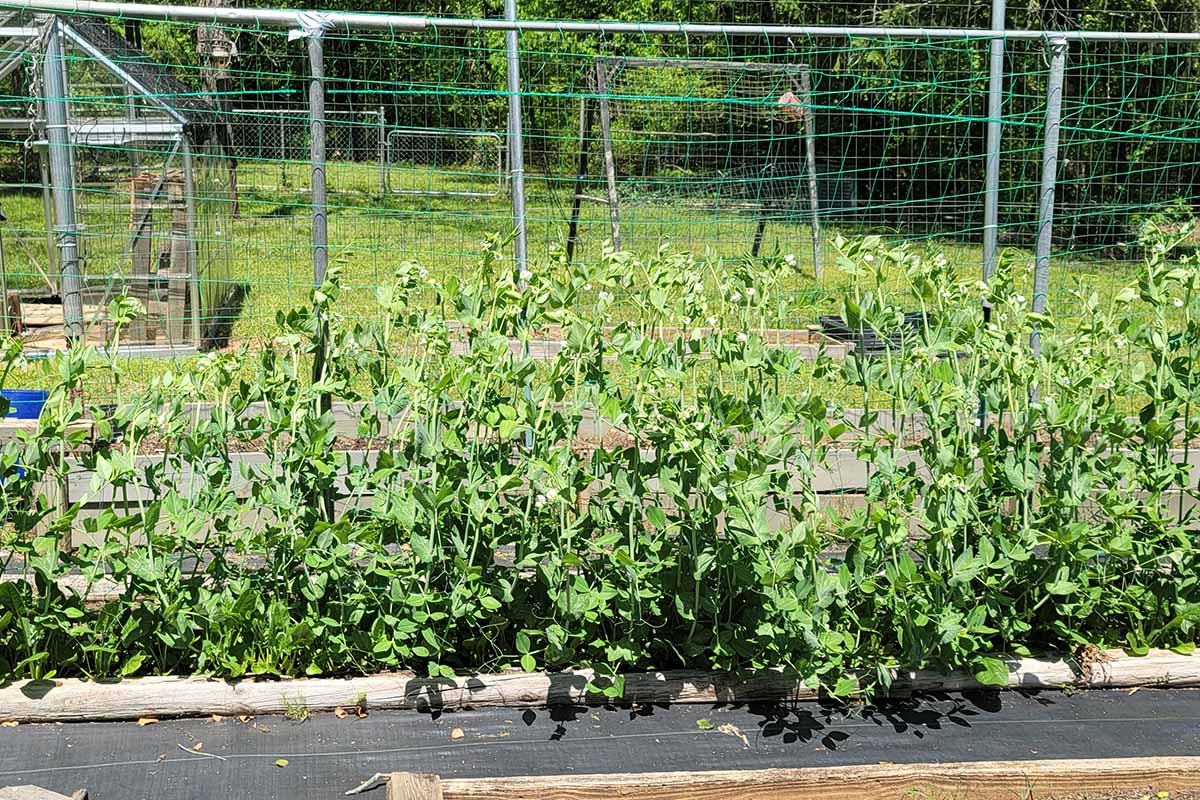
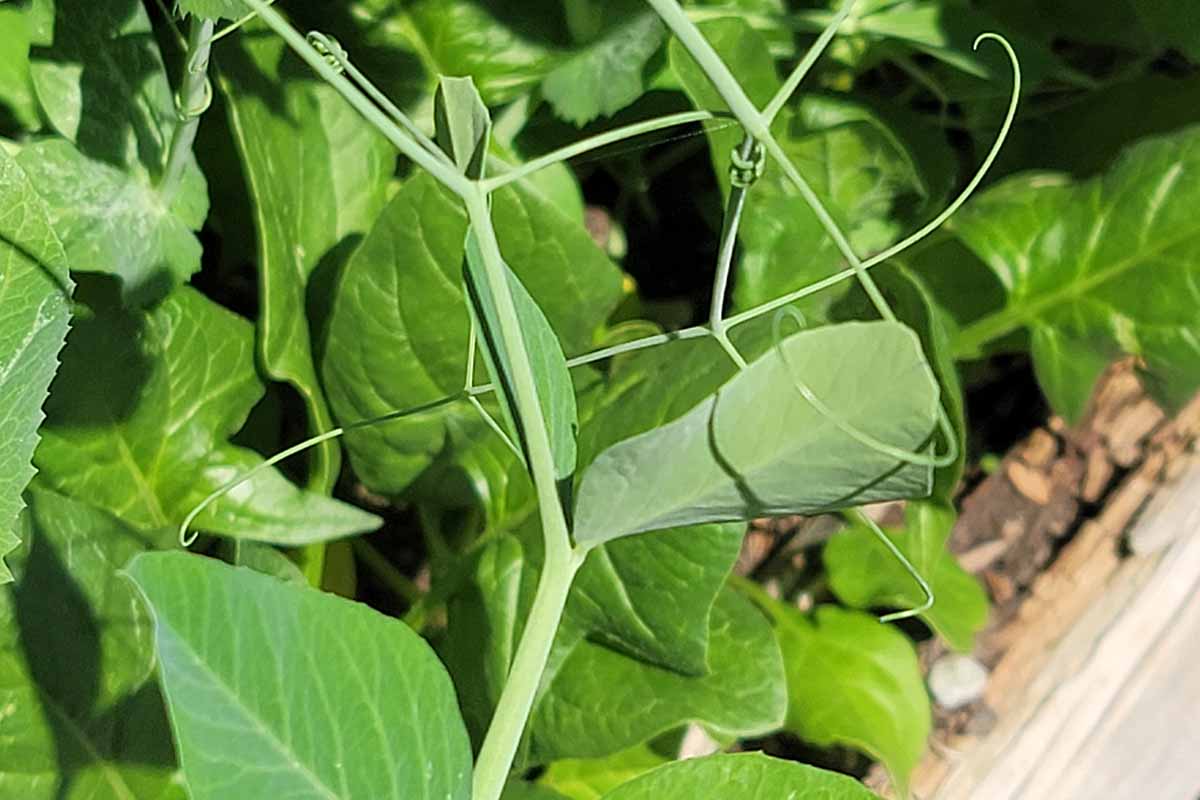
If you’ve selected a vining variety that will grow more than three feet tall, make sure to install supports as soon as the seeds sprout.
Pea netting is usually sufficient, or a couple of bamboo stakes tethered with biodegradable sisal twine to form a V above the plants.
Once the seeds have germinated or you’ve transplanted your starts, the necessary work is minimal for the rest of the season.
When the plants are a few inches tall, place a two-inch layer of pine straw, grass clippings, or shredded newspaper around them to help maintain moisture and suppress weeds.
Make sure the soil is kept moist but not soggy, providing supplemental water at the soil surface when rain doesn’t provide about an inch per week.
Never touch the peas when the vines are wet, as this may encourage the spread of pathogens.
As for fertilizing, pruning, or thinning, well – you won’t need to do any of that!
But you will need to watch out for a few pests, like rabbits, deer, and aphids.
And certain diseases can present a problem, with the top threats coming from powdery mildew and bacterial wilt in most areas.
You can learn ways to troubleshoot and prevent these issues in our guide to growing snow peas.
Growing Tips
- Grow in full sun.
- Pull and destroy all weeds ahead of planting.
- Sow in well-draining soil.
- For vining varieties, place netting, tomato cages, or other light supports when you sow.
- Space seeds five inches apart at planting time and don’t thin them later.
- Apply two inches of grass clippings, straw, or shredded newspaper when plants are six inches tall.
Snap Pea Cultivars to Select
You may luck into finding snap pea starts at a local nursery, but remember these legumes have shallow roots and do not always survive transplanting.
Only buy transplants that are six inches tall max and that come in biodegradable pots you can slip into their new location without disturbing the roots.
When you purchase seeds, pay attention to the mature height and number of days to maturity listed on the seed packet for each variety.
You’ll want a sugar snap pea type that will have time to mature before weather that’s too warm arrives in your area, and you’ll also require a variety you can grow in the space you have available, be that a trellised swath of garden patch or a far more modest container that can only hold four or five compact plants.
Happily, there are many different types available when you’re growing snap peas from seed. Here are a few of my favorites:
Sugar Ann
A 1984 All-American Selections winner, ‘Sugar Ann’ is a popular option for containers and small-space gardening.
One of the fastest to mature at an expected 52 days, ‘Sugar Ann’ snap peas are compact, two-foot bushes that produce pods measuring two and a half to three inches in length.
‘Sugar Ann’ seeds are available in 200-seed packets from High Mowing Organics.
Sugar Daddy
Bred by the same Calvin Lamborn who first introduced snap peas in the ‘70s, ‘Sugar Daddy’ yields slender, sword-shaped, three-inch pods ready for harvest 62 to 75 days from sowing.
Of special note: The pods are stringless, so they’re less work for the chef in the family.
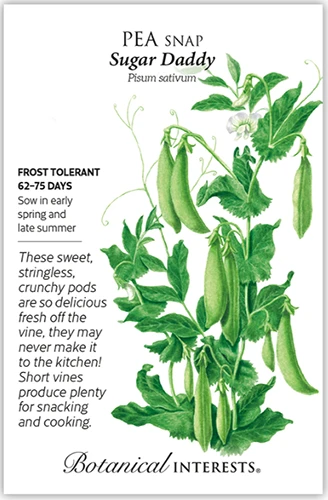
The plants top out at about 30 inches tall, so they may not need support. They’re also resistant to powdery mildew and bean leaf roll virus, making them much simpler to keep healthy than some older varieties.
‘Sugar Daddy’ seeds are available from Botanical Interests in 60- and 160-seed packets.
Learn more about growing ‘Sugar Daddy’ peas here.
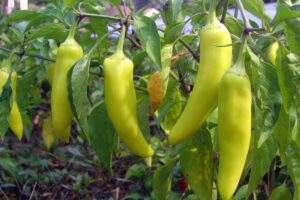
Sugar Snap
Prefer vertical gardening? This cultivar requires pea netting or other supports.
Its vines can attain six to eight feet in height, but the aerial approach saves space on the ground and preserves your back, since most of the harvest will be at waist level or higher.
‘Sugar Snap’ is a better option for gardeners with a longer chilly period in spring than for those growing in a short season, since it takes 70 days from sowing to yield.
Find 300-seed packets of ‘Sugar Snap’ seed available at Burpee.
Sugar Sprint
Not quite as fast as ‘Sugar Ann,’ but close, ‘Sugar Sprint’ produces three-inch, bright green pods starting 58 days after sowing.
This variety works well if you don’t want to mess with supports since it grows to just two feet tall.
If you grapple with powdery mildew in your garden, ‘Sugar Sprint’ is a resistant cultivar.
It’s also a good choice for southern gardeners like myself since it keeps producing for at least a couple of weeks once temperatures start to exceed 65°F, as long as they don’t go higher than about 75°F.
‘Sugar Sprint’ seeds are available in various packet sizes and bulk packages weighing up to five pounds at True Leaf Market.
Harvest and Storage
The many edible stages of peas require different harvest tactics.
If you’re growing the sprouts to eat as microgreens or use as garnishes, you can clip them at the soil level about 10 days from sowing. Of course, at that point, they won’t grow back to mature fully.
If needed, wash them in plain water and let them air dry, or spin them in a salad spinner. They’re ready to consume out of hand, in salads or sandwiches, or even as a smoothie ingredient.
You can also keep them in a plastic bag or airtight container in the fridge for a couple of days before you eat them.
I always try to eat them fresh from the garden, though – it’s so disappointing to have fresh produce ready in a matter of days and accidentally let it get mushy when you store it too long.
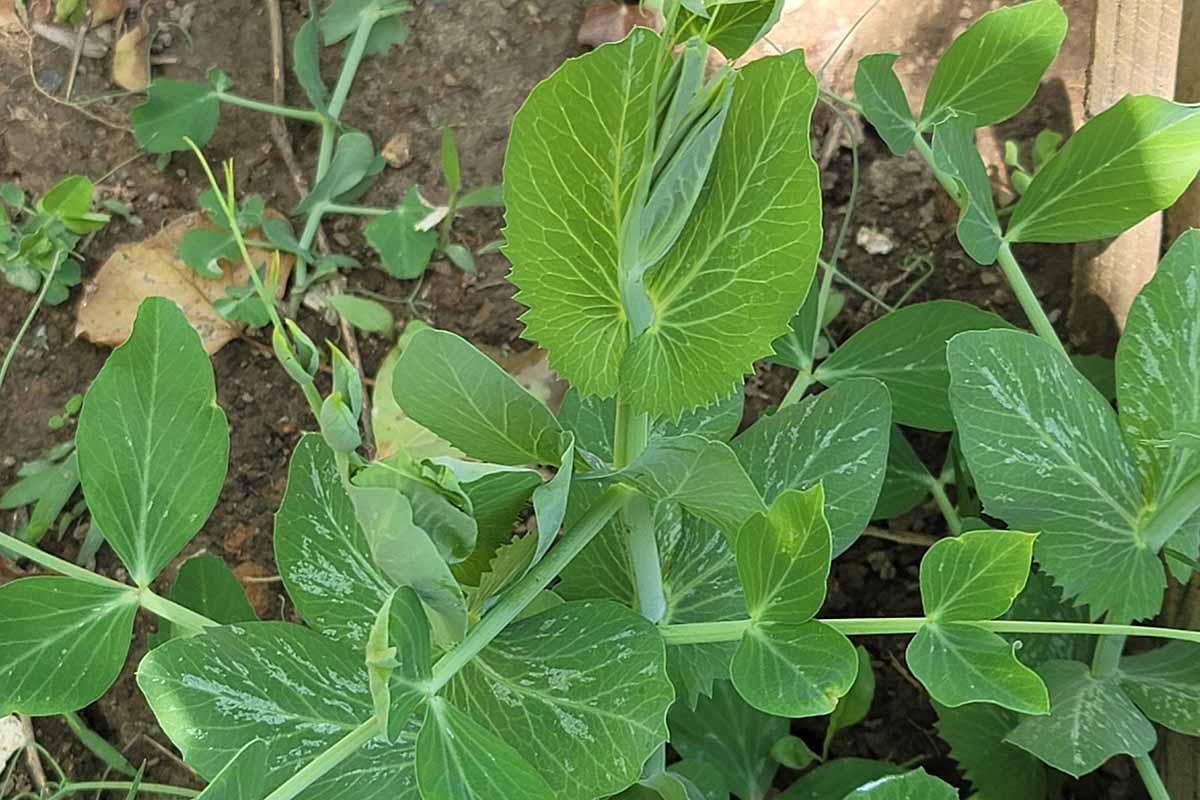
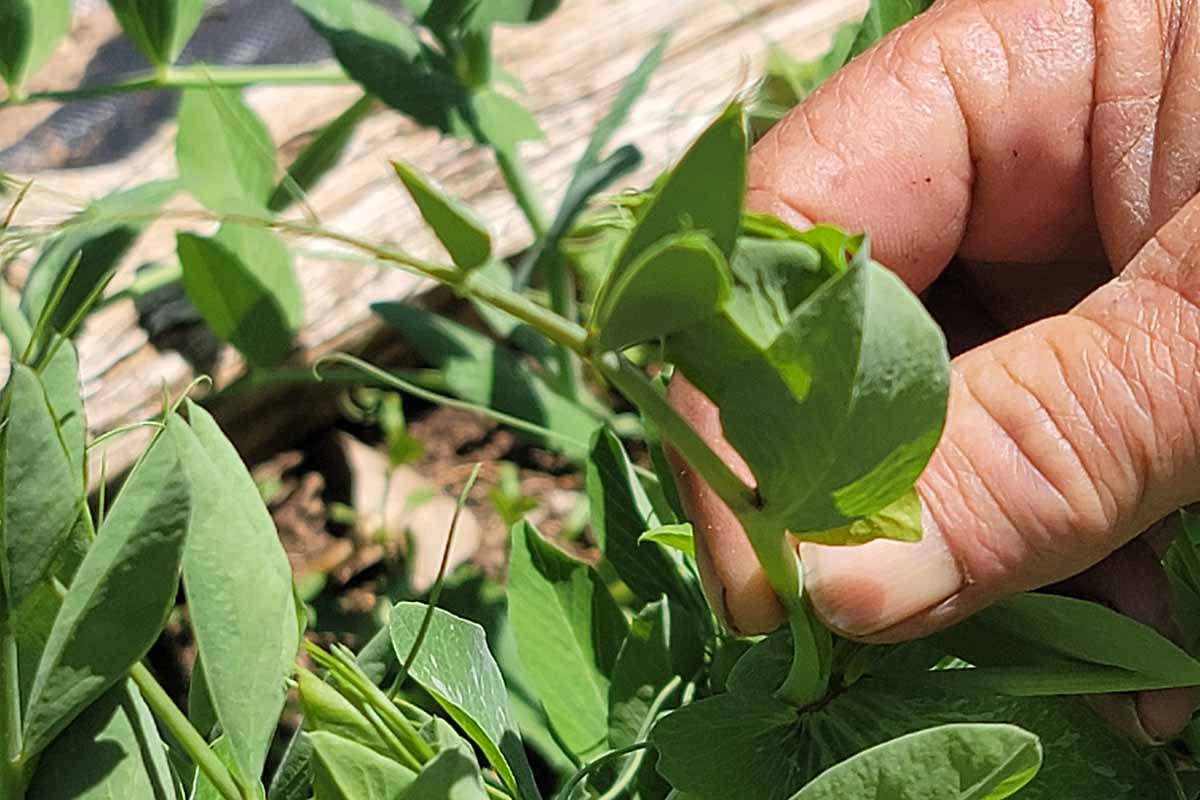
Harvesting pea shoots is simple. Once the plants are about six inches tall, pinch the top three or four inches of stem with your fingers, or use clean, sterile scissors to clip them.
Pick the tip at a leaf node so that the plant will grow back. Usually, you’ll be able to harvest these shoots a couple of times before the plant gets too big and the leaves are too tough to eat.
I like to eat the shoots on forays in the springtime garden, but you can also store them in an open plastic bag in the fridge for a couple of days before eating.
When you’ve grown the blooms without chemicals, you can pinch or clip them to use immediately for garnishes or as a salad ingredient. Keep in mind that any harvested bloom means one less pod to harvest.
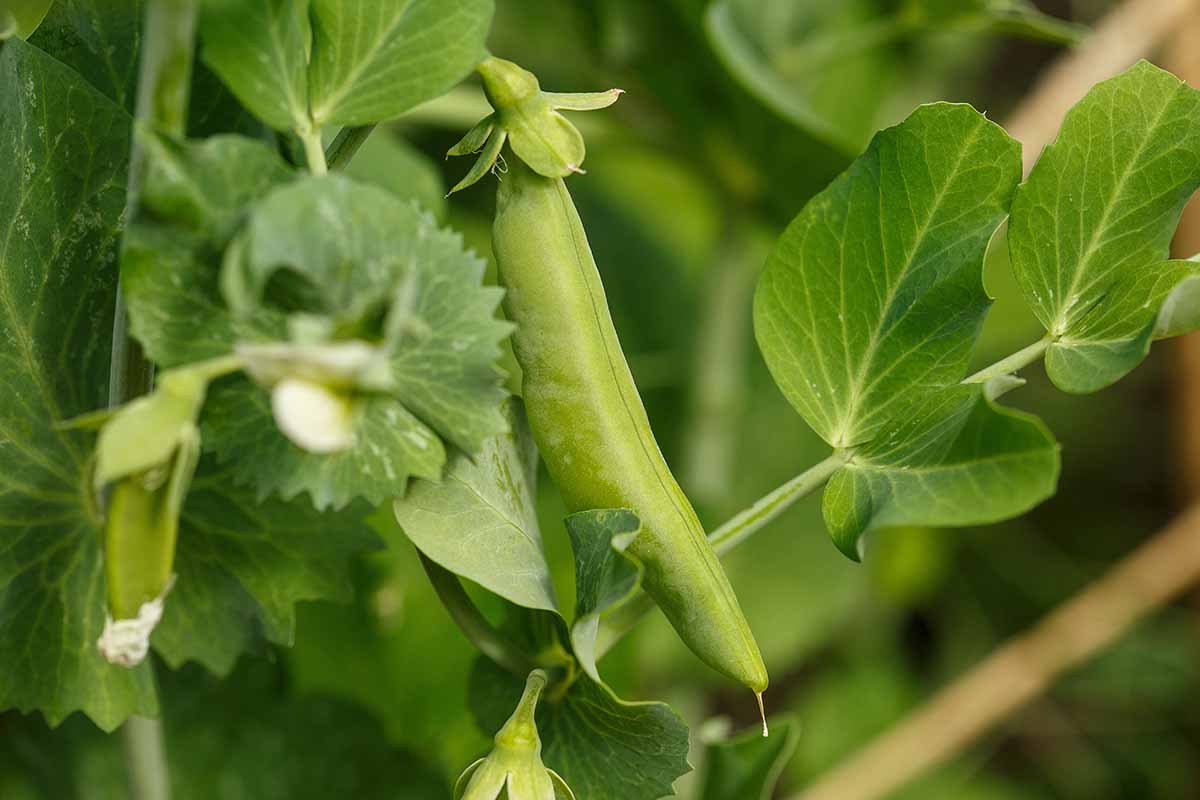
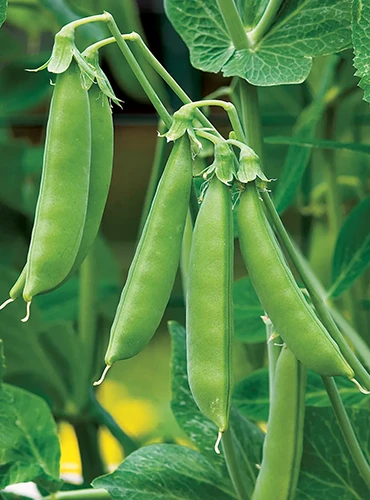
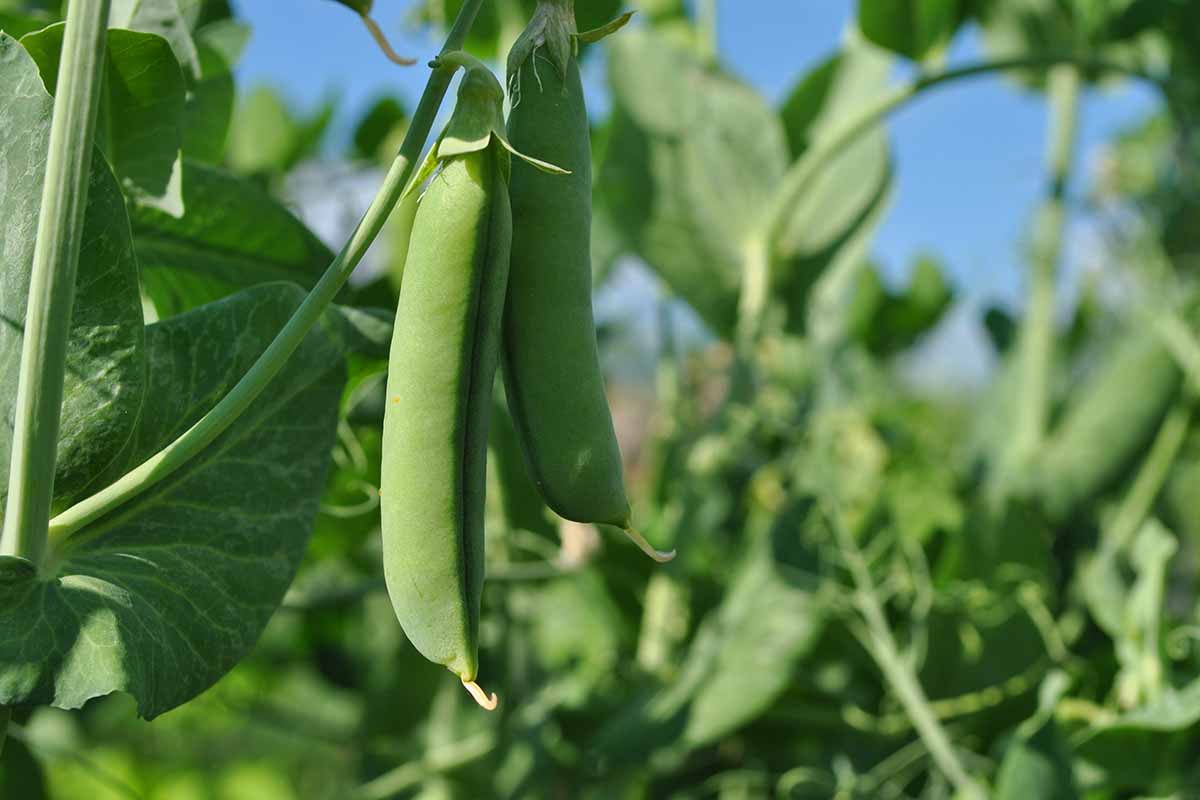
You should have fun experimenting in your future, once the pea pods are ready to harvest.
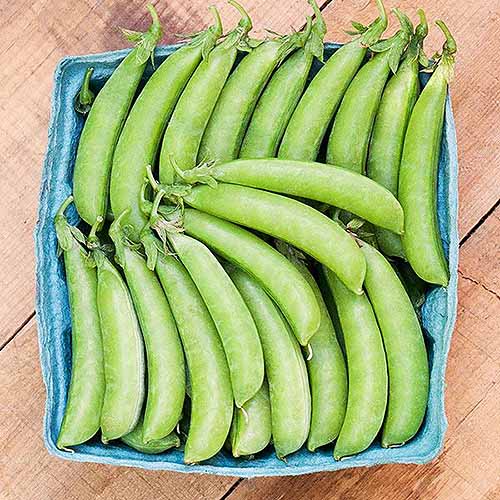
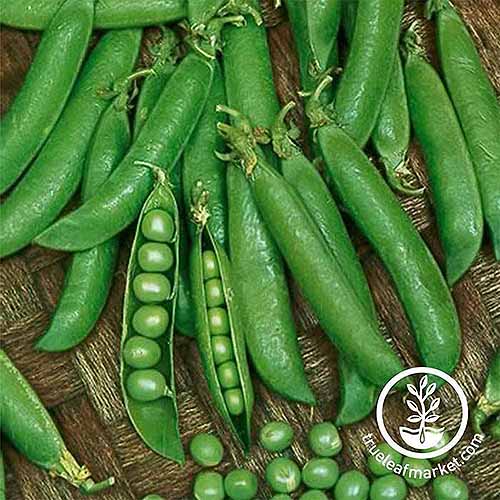
You’ll want to pick them before the seeds inside are fully formed, while the flesh of the pod is thick and crisp.
If they go past their prime, they’ll quickly get fibrous, and the seeds inside will turn from sweet and tender to bland and chalky.
It’s a good idea to sample the pods at different stages of ripeness to see which flavor and texture you prefer.
Mark the probable number of days to maturity in your gardening journal or set a reminder on your digital calendar or cell phone. Ordinarily, the pods will develop and be ready to pick five to seven days after the plants bloom.
Since pea plants have such shallow roots and are easy to pull up if you’re not careful, I recommend using scissors to snip the pods from the stems instead of twisting them off with your hands.
Wash the pods immediately before using them. If you must pick them a few days before consuming, store them in the vegetable crisper and use them within three days.
When you leave them on the counter at room temperature, both the sweet taste and the nutritional value dissipate starting a few hours after picking.
And remember, keep those pods picked! That’s the best way to assure the plants will keep producing, right up until too-warm or too-cold weather halts the harvest.
No Pea Pods?
A lack of pods could indicate issues such as insufficient water, limited sunlight, poor soil conditions, or plant disease. Refer to our troubleshooting guide for tips on diagnosing and addressing these problems.
Preserving
It is possible to blanch and freeze snap peas. Only blanch them for a minute, though – any more and they’ll overcook.
And keep in mind that frozen snap peas aren’t particularly versatile since they can’t be added to long-cooking soups or stews without getting mushy.
They’re tasty added in the last minute of cooking a stir-fry, though, and you can add them to those sorts of dishes without thawing them first.
Thawing is necessary ahead of adding frozen snap peas to pasta salad, though they may be too limp for those types of recipes. And they’ll definitely be the wrong texture for a green salad.
If you end up with a bumper harvest and long to preserve part of it, consider making lacto-fermented pickles. It’s possible with these crunchy peas, while water bath canning will render them limp and bland.
Find a handy guide to lacto-fermented dill pickle basics at our sister site, Foodal.
Recipes and Cooking Ideas
I’ll admit, I’ll go for the fresh, crunchy pods over a cooked version every time. It’s far too easy to overcook sugar snap peas, which makes them limp and leaves them tasting a bit grassy.
I love to eat them with my favorite dips or hummus, or add them to a green salad.
You can steam them lightly for a side dish if you like.
It’s also good form to “par steam” the pods ahead of adding them to a pasta salad like this recipe from our sister site Foodal for vegetable couscous with citrus dressing.
Add them at the same time when you stir the vinaigrette into the couscous. This will leave them crisp but allow them to absorb more of the dressing.
To achieve that optimal balance between tenderized and mushy, steam them in a single layer for about a minute in a basket suspended over a pan of boiling water.
Then plunge them into ice water to stop the cooking and retain their brilliant green hue, drain them thoroughly, and let them dry further on a tea towel.
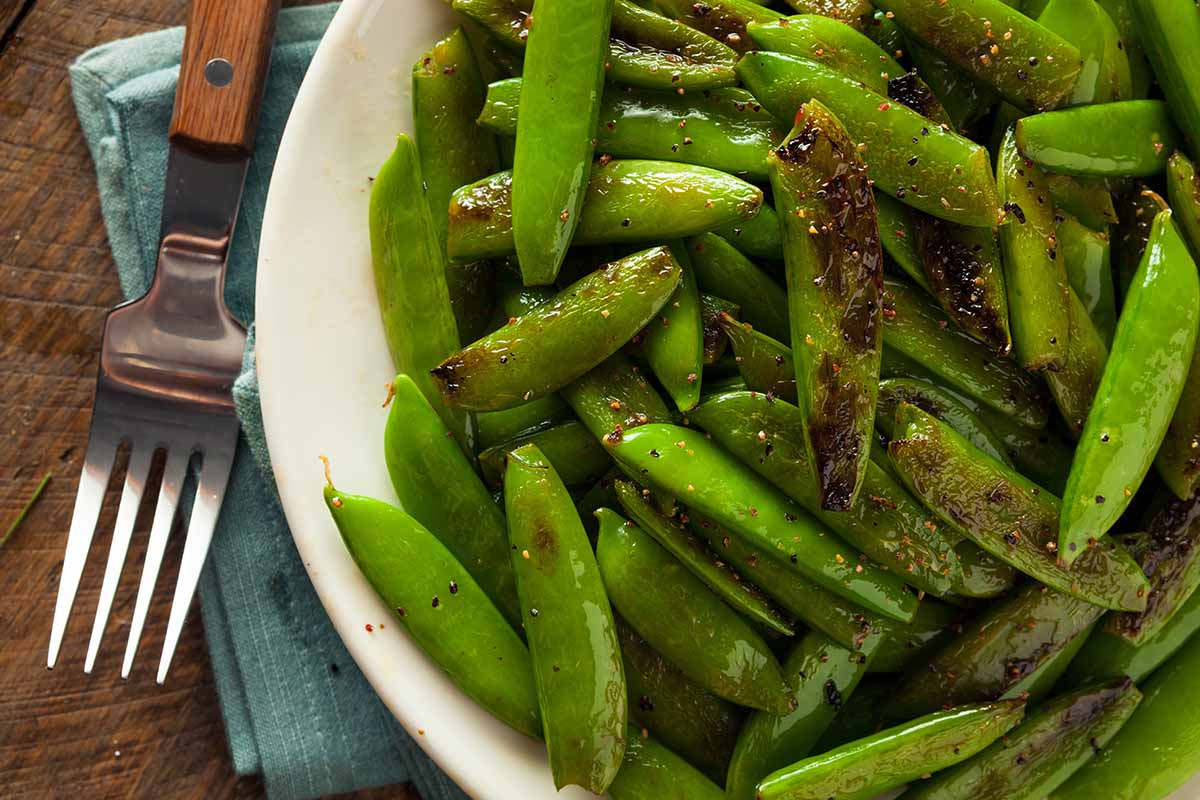
It’s also possible to roast sugar snap peas for a quick side dish, emphasizing quickness.
Toss a couple of cups with a tablespoon or two of olive oil and seasonings like black pepper and garlic powder, and then place them in a single layer on a baking sheet.
Roast in a 450°F oven or air fryer for 10 minutes, or until the pods are lightly browned but not overly wrinkled.
Learn more about cooking with snap peas in our guide to edible pod peas.
Quick Reference Growing Guide
| Plant Type: | Annual legume | Tolerance: | Light frost, some shade |
| Native To: | Asia, Africa | Maintenance: | Moderate |
| Hardiness (USDA Zone): | 3-10 | Soil Type: | Average amended with organic matter |
| Season: | Spring to early summer; early fall | Soil pH: | 5.5-7.0 |
| Exposure: | Full sun | Soil Drainage: | Well-draining |
| Time to Maturity: | 50-75 days, depending on variety | Attracts: | Butterflies, other flying pollinators |
| Spacing: | 4-5 inches (plants), 1-2 feet (rows) | Companion Planting: | Beans, beets, carrots, cucumbers, eggplant, lettuce, peppers, radishes, spinach, turnips |
| Planting Depth: | 1/2-1 inch (seeds), even with soil surface (transplants) | Avoid Planting With: | Garlic, onions, other alliums |
| Height: | 18 inches-8 feet, depending on variety | Order: | Fabales |
| Spread: | 3-4 inches | Family: | Fabaceae |
| Growth Rate: | Fast | Genus: | Pisum |
| Water Needs: | Moderate | Species: | Sativum |
| Common Pests and Diseases: | Aphids, armyworms, birds, cutworms, deer, rabbits, weevils; bacterial blight, bean leaf roll virus, damping off, pea enation virus, powdery mildew, root rot, verticillium wilt | Variety: | Macrocarpon |
A Snap-Pea Start for the Spring Vegetable Patch
There’s something to be said for a vegetable that produces heavy yields of crisp, edible pods in spring before the summer vegetables have even gotten large enough to transplant.
I think the right phrase is, “Bravo!”
Do you agree? If you’re already a fan of the fabulous snap pea, it would be swell if you’d share your experiences and growing tips in the comments section below.
Feel free to pose questions there, too. We’ll get back to you pronto.
And if you considered this coverage valuable, check out these pea guides next for more varieties to consider, and more tips:
Very informative, I learned a lot!