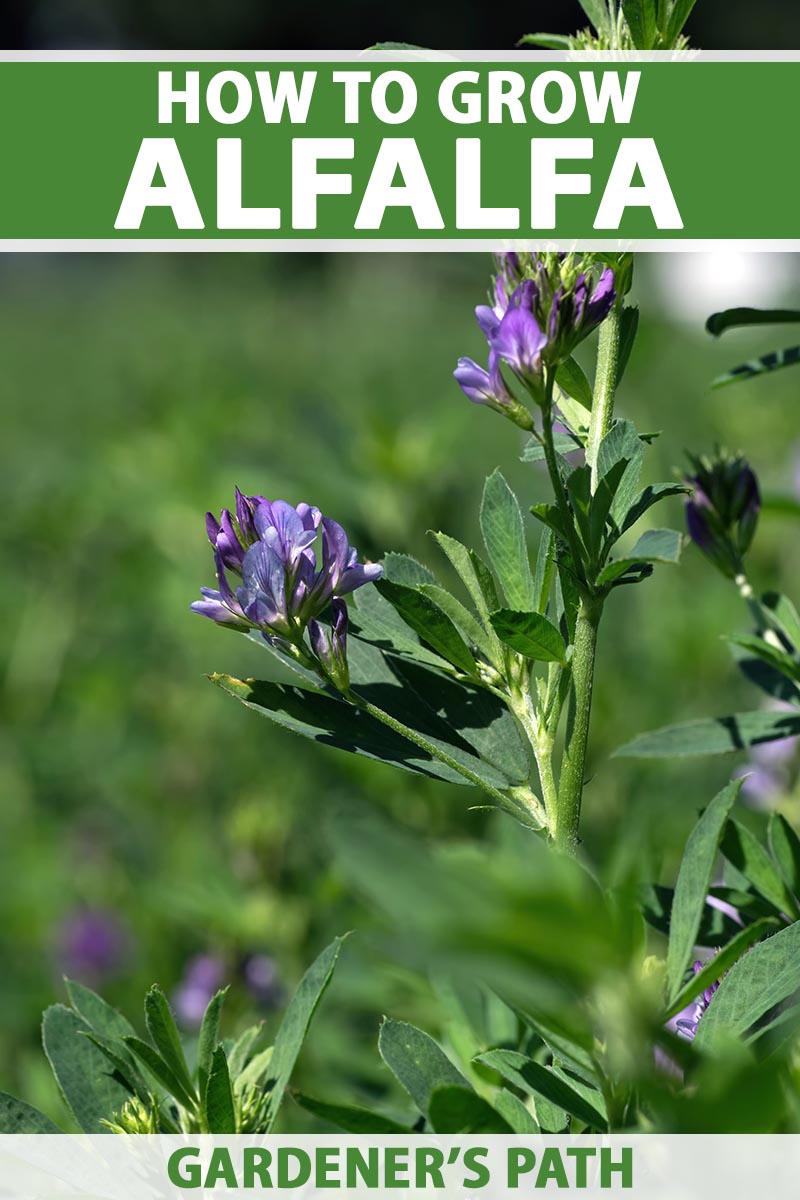
Medicago sativa
If you mainly associate alfalfa with pellets for rabbits and guinea pigs, you’re in for a wonderful home gardening surprise.
Along with being a food crop for livestock and pets, this plant shines as an easy-care, affordable cover crop, especially when planted in the fall.
It will improve the soil, suppress weeds, and control erosion from winter rains. Grown as an annual or perennial, it’s also a good source of mulch, and a prime addition to the compost pile.
We link to vendors to help you find relevant products. If you buy from one of our links, we may earn a commission.
I’d like to help you start growing this helpful legume in a way that assists you with your own garden needs, while steering clear of rookie mistakes made all too easily when you grow alfalfa for the first time.
Here’s what I’ll cover:
What You’ll Learn
What Is Alfalfa?
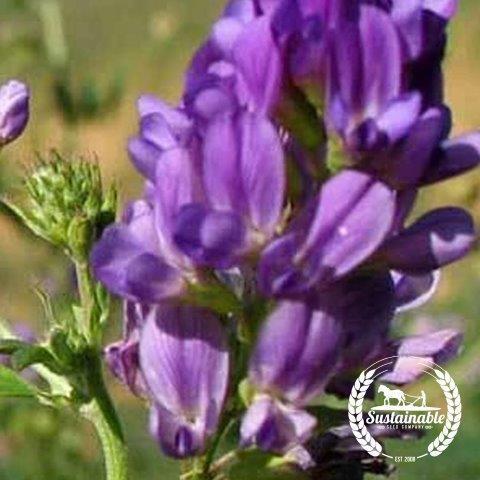
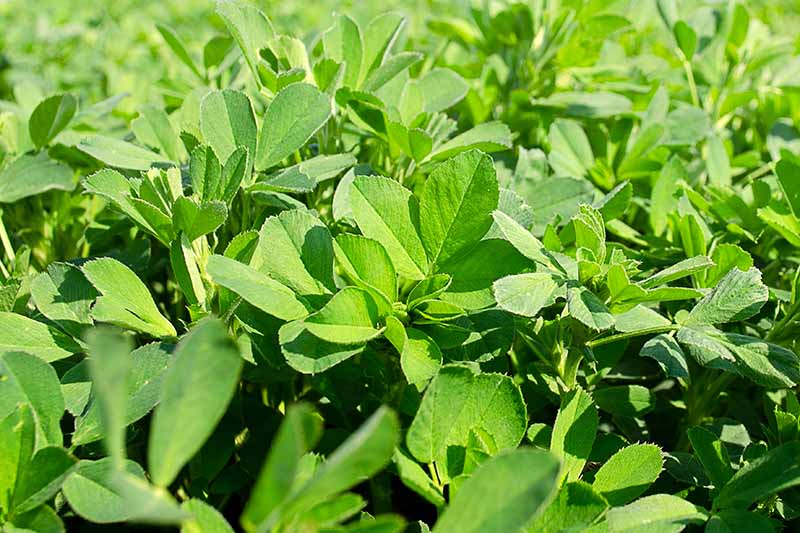
Medicago sativa is an heirloom legume also known as “lucerne.”
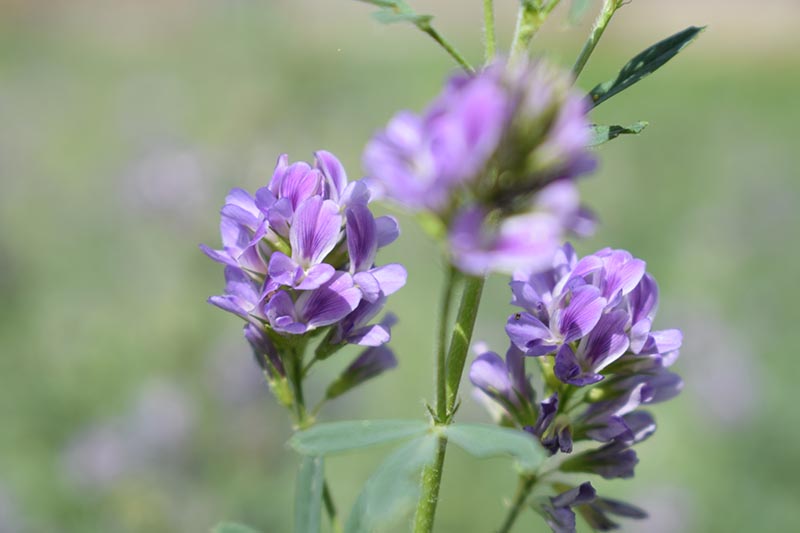
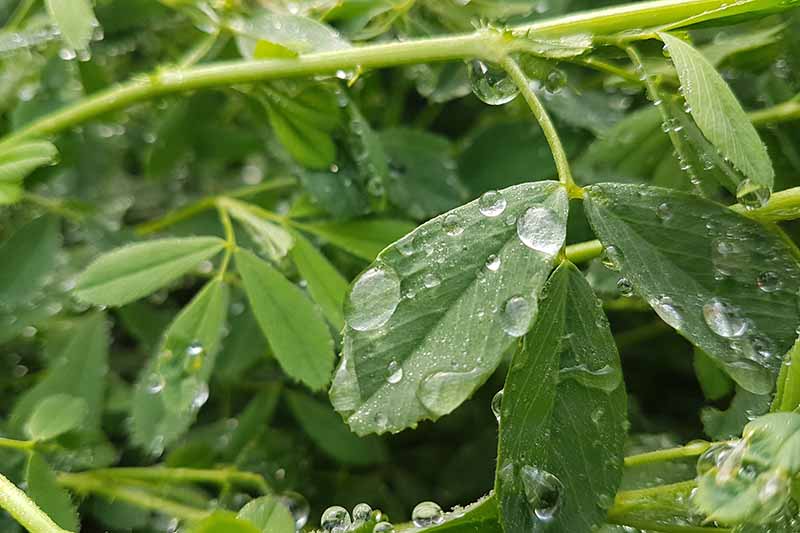
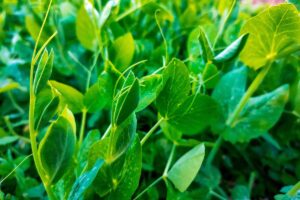
It is pretty, producing little bunches of small, brilliant blue flowers on the upper portions of its side stems.
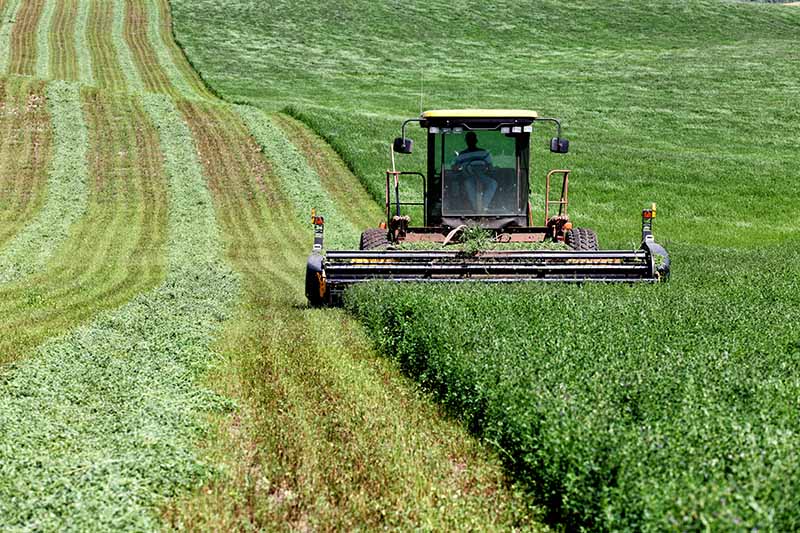
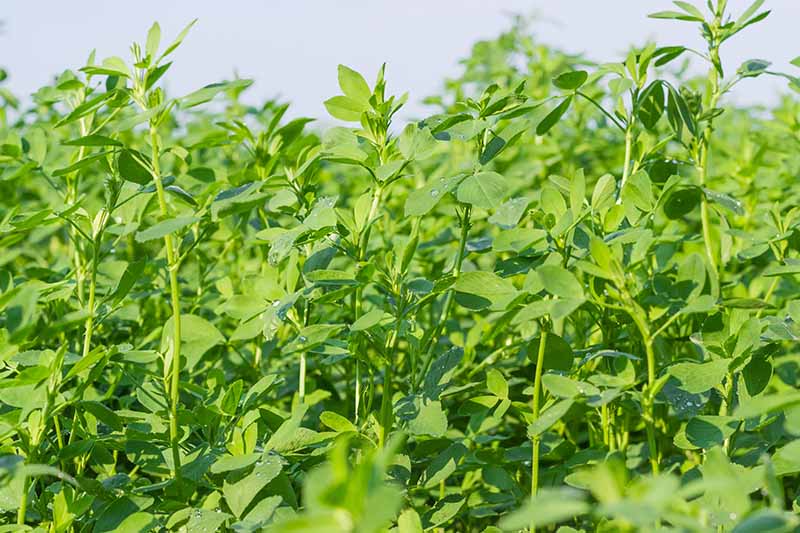
Strictly speaking, it is a perennial. Farmers grow stands that perpetuate for many years, and they cut successive crops to dry and bale to feed farm animals, much like wheat.
For the home gardener, it’s simplest to grow it as an annual cover crop or “green manure,” and till it under at the end of the season to enrich depleted soil.
These plants have taproots that can grow down six feet or more. Once it’s established, each plant develops a “crown” where it emerges out of the soil.
The crowns form bud shoots, which allow gardeners to harvest all but the bottom two inches of the plants and have them send up new stalks from the axillary buds.
If you live in an area where untreated mulch for vegetable gardens is hard to come by, you may also want to devote an area of your garden or yard to growing some to harvest as mulch, or to add to compost.
You can do that most easily by sowing and cutting a “stand” of alfalfa each fall, treating it as an annual.
It’s more involved, but also possible to plant alfalfa as a perennial source of mulch and compost, or to cut some for those purposes and then work the rest into the soil.
A Note of Caution:
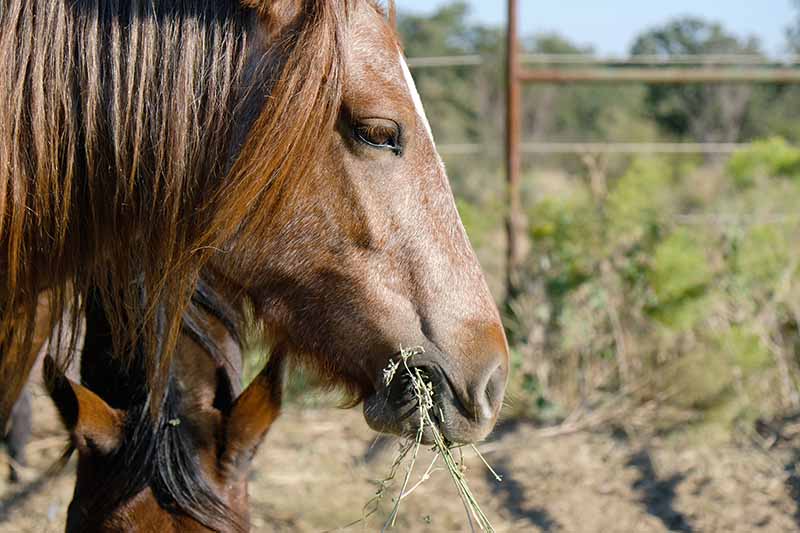
If you intend to grow a crop to feed animals, keep in mind that ruminants that graze on fresh alfalfa might experience bloat. At the same time, alfalfa contains saponins that limit how much you can feed to swine or poultry.
Even dried feed bears watching since it may get moldy, especially in humidity or if you don’t allow it to dry completely after harvest. Horses in particular may experience respiratory issues or gastrointestinal difficulty if they eat moldy fodder.
Finally, even though most dogs aren’t going to consume bitter foliage and stalks straight from the garden, if you have a “try anything” pup, bear in mind that fresh alfalfa’s saponins might cause gastric distress in dogs. And in large amounts, the coumarin it contains can be toxic.
Home gardeners with livestock and ample space could also grow perennial alfalfa as animal feed for horses and larger livestock, or smaller herbivores like rabbits or guinea pigs.
It’s not completely out of the question to grow it for sheep or horses, or for other homestead animals to graze on, too.
But animals can only graze it for four days in a row, max. And then the crowns will need 30 or 40 days to produce stems and leaves suitable for grazing again.
These timeframes mean you’d need a piece of land that could sustain eight contained plots of this forage crop for ample grazing rotation. If you don’t have that, you’re better off harvesting the stalks for dry feed.
Managed properly, alfalfa may return for four or more seasons, and some homesteaders and truck farmers have kept one stand going for a decade or more.
Keep in mind, though, growing this nitrogen-rich legume year-round means contending with aggressive, competitive weeds in the spring and early summer, and maintaining a dedicated space you won’t be able to use for other veggie crops.
Wondering why I haven’t mentioned growing a stand of alfalfa to eat yourself or cook for the family? Well, the plants grown outdoors are not at all tasty. They may be bursting with nutrients and nitrogen, but they’re as bitter as can be.
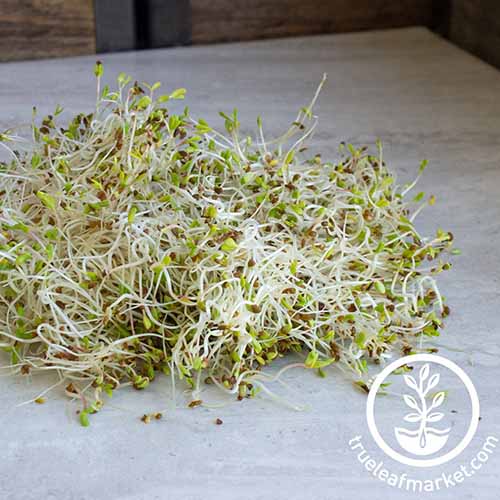
Eating the sprouts or microgreens, though, is a different story.
They’re nutty with just a little bite, and easy to start indoors with minimal equipment. We cover this process, along with harvest and recipe tips, in a separate guide.
Cultivation and History
Not many centuries after humans turned to farming from strictly being hunter-gatherers, alfalfa emerged as a foraging crop for livestock.
Originating in Asia, the first written record of alfalfa is a mention in a Chinese tome from 2939 BC.
It’s thought that the ancient Greeks started cultivating it to use as an herbal medicine and as a food source for livestock around 500 BC. It was domesticated almost all over the globe by the year 1 AD.
Today, it’s grown as fodder and forage for many types of domestic livestock and food animals, from cows and horses to hamsters.
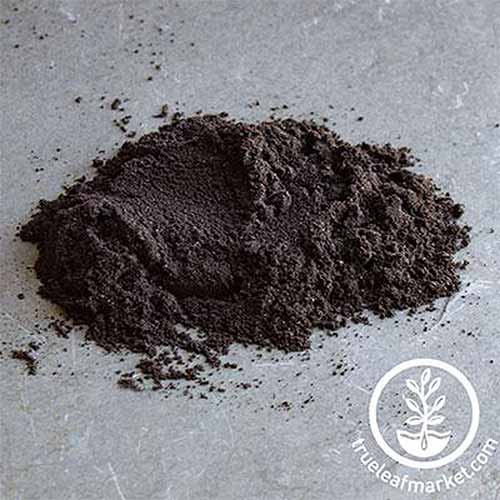
With its beneficial components including calcium, iron, magnesium, and phosphorus, alfalfa meal is also a popular fertilizer, particularly for roses.
These days, organic farmers and home gardeners alike plant stands of alfalfa as “green manure.”
It fixes nitrogen into the soil like other legumes, and growers till the beneficial leaves, stems, and blooms into depleted soil, or use them dried as mulch or a compost component.
Now that you know how M. sativa has improved our lives over the years, let me tell you how to start reaping its rewards in your own garden patch, beginning with ways to propagate alfalfa.
Propagation
Whether you’re planting a single raised bed or a whole field, the basics of starting an alfalfa crop as a home gardener are quite similar.
Here are two ways to propagate your own stand of this soil-enhancing legume:
From Seed
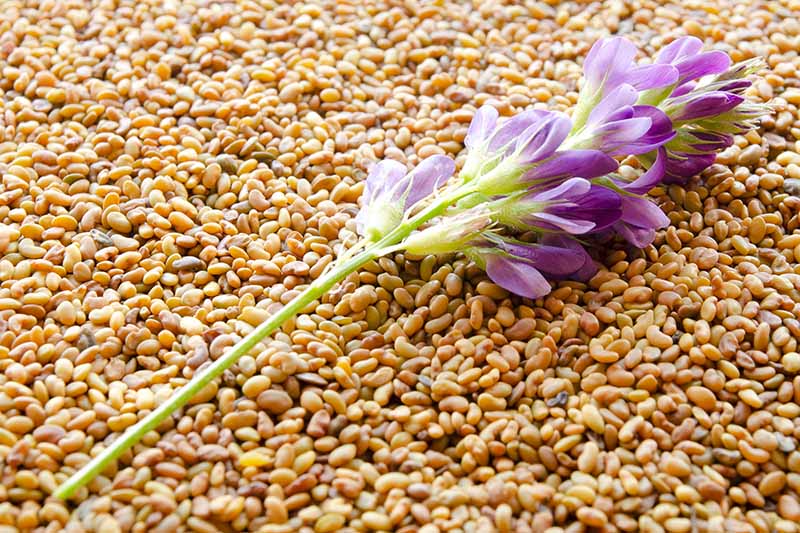
Sowing from seed is the main way to propagate alfalfa as a cover crop or source of mulch.
One of the huge advantages of growing this legume in a home garden is its ability to fix nitrogen in the soil.
Make sure to buy seeds already inoculated with rhizobium bacteria, since that will help them to start fixing nitrogen in the soil immediately.
If you’re trying to use seeds sold for sprouting, which are not inoculated, you should inoculate the seed yourself before planting.
But do this only if you haven’t planted M. sativa or another legume in the space in the past couple of years.
And make sure to purchase a product that specifies that it works on alfalfa. Soy beans, common garden beans, and vetch, for example, require a different inoculant.
Cover crop inoculant for clover and alfalfa is available in quarter-ounce packets and other sizes up to five pounds from True Leaf Market.
To choose a place to plant, first consider where the extra nitrogen and biomass these plants deliver will be most helpful to your soil.
If you’re planning to till them under, choose a spot that needs more amended organic material or perhaps aeration.
This might be a new garden site with poor or heavy soil, or somewhere you’ve recently grown a heavy feeder, like squash or corn.
Note that alfalfa taproots can drill down more than 10 feet, and the roots close to the surface can spread 20 feet or more.
The plants will grow most quickly in well-draining soil, but the taproots can also break up rocky soil, so feel free to pick an area with compacted earth.
They’re picky about pH, though, so use a soil test to make sure the pH is at least 6.0, and preferably between 6.5 and 7.0.
Timing is important. If you plant in spring, weeds can take over quickly.
You can sow any time after the last frost in spring, but I strongly recommend planting in the fall if you’re going for an annual cover crop, or one-time cutting for mulch or compost.
Planted that late in the growing season, the sprouts don’t have to compete with spring weeds, including those annual grasses that will quickly choke out anything growing nearby.
Alfalfa can sprout in cool weather, so take advantage of that trait and plant it after the summer weeds have gone dormant.
Autumn planting also allows this cover crop to tap into moisture provided by winter rains.
The stalks bloom and are ready to cut or till within 60 to 70 days.
It’s ideal to time composting or turning the crop under for green manure so it can be done in late fall, so the plant matter will have time to decompose and enrich the soil before you plant in the spring.
To prepare the bed for sowing, eliminate any weeds, and do it decisively. Once you’ve got close-growing M. sativa plants established, it’s tough to pull up competitors without harming the desirable seedlings.

Also, avoid planting this cover crop anywhere near beds or lawns that are regularly treated with pesticides, or that have been treated with herbicides in the past year or two.
Pollinators depend on this blooming legume, and traces of herbicides can prohibit the seeds from germinating or the plants from growing to maturity.
Plus, residual herbicides can keep the next crop of vegetable seeds you plant in the amended soil from germinating as well.
Rake the top layer of soil into an even layer, so the seeds will stay planted at a uniform depth. If the dirt has clumps, divots, or mounds, seeds can wash away or fail to make contact with moist soil as is required in order to germinate.
If you like this idea, you can plant in rows spaced 12 to 18 inches apart and give yourself a walkway in between.
Most old-timers dispense with that notion for homegrown cover crops or mulch, though, since you will typically harvest or till the whole plot at one go, and can grow more plants without a path in the middle.
Sow seeds a half an inch deep, two at a time, spaced two or three inches apart.
Gently tamp down the soil with your gloved hand or the back of a hoe, so it comes in contact with the seeds, which is necessary for germination.
If you’re planning to grow these legumes to harvest and dry as hay or mulch, start the seeds four to six inches apart, and later thin the seedlings to six inches apart.
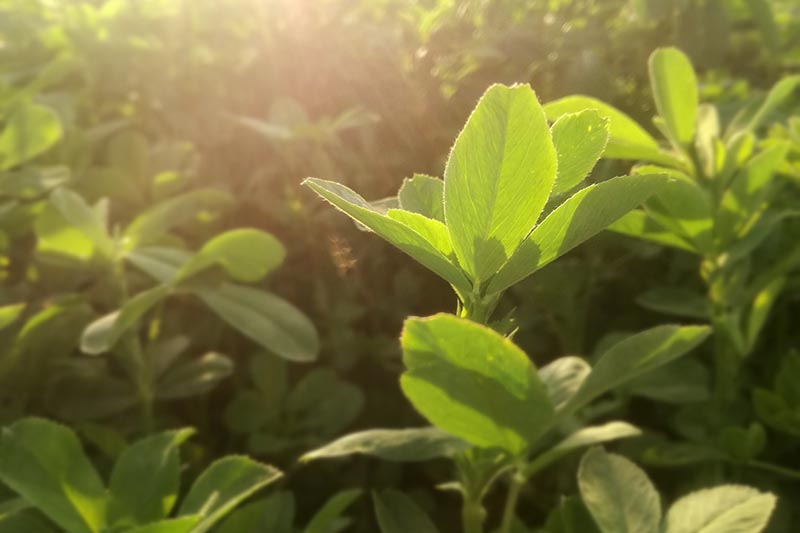
That spacing will allow enough air circulation for the plant to form more of the trifoliate leaves that animals love to eat.
When you’re just growing green manure, the closer spacing of two or three inches between plants is desirable. Planting close together makes it harder for weeds to become established.
That’s it for sowing seeds! Just make sure you give the sprouts a nice drink of water when you spot them breaking through the soil.
From Cuttings
If you only need a small patch for a cover crop, or you’ve already got a healthy stand and want to expand it by a few feet or a few yards, you might want to consider propagating starts from cuttings.
One advantage of this approach is being able to add to a perennial stand in the spring or summer without very young seedlings having to compete with the weeds that are present in those months, which can easily overcome new sprouts.
But if you’re covering more than a modest garden patch, seeds are the way to go.
Of course, you’ll need established plants (or to know someone who has them) to propagate alfalfa from cuttings.
And you should start cuttings early enough to be able to plant them out at least a week before the first hard freeze.
Start rooting your cuttings a month or six weeks before the average first frost in your area if you’re planning to transplant in autumn.
For the strongest transplants, select cuttings only from healthy stalks that have reached at least six inches tall. Cut them two inches from the soil so the crowns and axillary buds will produce new growth.
Strip the leaves from the bottom section of the cuttings, leaving the top three leaves. Then let the cuttings rest, cut end down, in a glass of water overnight.
Meanwhile, fill a shallow container that has drainage holes at the bottom with pre-moistened potting soil.
The next day, stick the ends of the stripped stalks an inch and a half deep into the soil, spacing each cutting a couple of inches apart.
Set the container near a source of strong, filtered light, but not in direct sunlight.
Keep the soil moist but not soggy, always being careful to water at the soil line, not from overhead, to discourage fungal diseases.
In about 30 to 45 days, the stems should produce new sets of leaves.
That’s when you can harden off the rooted cuttings by exposing them to increasing amounts of sunlight and outdoor temperatures over the course of a few days.
Then transplant them out to the garden, spacing them a couple of inches apart and covering the roots with soil, then firming it with your hands.
Water them in and they should be good to go.
How to Grow
You’ll probably get a couple of months of downtime while the seedlings green up and prepare to bloom. But there are a few chores to keep up with:
Weeding
Keep the beds free of weeds until the plants are at least four or five inches tall. When they’re shorter, it’s easy for weeds like summer grasses to take over.

But once the plants reach five or six inches tall, they’ve filled out a bit and have more established roots, so they’re much less vulnerable to competition from weeds. And if you try to pull weeds at that point, you run the risk of uprooting the alfalfa, too.
Weeding is an especially important task, both before planting and during the early growth stages.
You don’t want to till unwanted weeds and their seeds into the soil at season’s end. Remember, herbicides are out of the question for use on foliage you’ll work into the soil or use in compost or animal feed.
Watering
Also note whether they’re getting enough water. Yes, these legumes are drought-resistant, but they’ll grow more steadily with ample water.
Provide supplementary irrigation when it’s dry or hot, ideally ahead of predicted dry weather.
On weeks when it hasn’t rained, use the garden hose or a watering can to soak the plants with an inch of water at the soil line. Don’t water from overhead, or you’ll encourage mildew and fungal infections.
The typical finger in the soil test doesn’t work well because they tend to be growing all over the garden. It’s better just to give them an inch of water in any week when it doesn’t rain.
If you are not sure how much preciptiation you receive, try a rain gauge.
A little too much won’t hurt them if you’re not a good estimator of moisture levels.
The plants are dormant most of the winter, so you can typically skip supplemental water in the cold months if you’re growing alfalfa as a perennial.
Extra Steps for Animal Feed
If you’re planning to grow a perennial crop to dry for fodder, make sure to thin the seedlings to stand six inches apart once they’re around six inches tall.
That gives the plants a little more room to grow the leaves that bulk up the volume of the harvested feed. It’s also easier to harvest continually throughout the growing season with a little more space between plants.
It’s possible to get numerous cuts in areas with warm climates, but typically the yield is three cuts per summer.
Make sure to keep the plants well watered too, to promote fast growth of high-quality fodder for multiple cuttings.
I’ll also remind you that any time you don’t till a stand of alfalfa into the soil as soon as it’s ready, you should plan to reseed a bit in the spring to fill out the stand and discourage weeds.
To make sure the spring regrowth is healthy, you should also conduct a soil test at fall’s end to make sure the soil is still in the proper pH range.
Growing Tips
- Plant in full sun.
- Sow seeds any time after the last frost in spring, and a month before the first frost in autumn.
- Never grow alfalfa in a spot where herbicides have been applied in the past 18 months.
- Water seedlings as soon as they germinate.
Where to Find Seeds
All set to grow your own alfalfa?
If you’re planning to plant M. sativa as a cover crop, it’s a good idea to check with your local ag extension agent to find out if there are any particular pests or diseases that threaten the green manure in your growing area.
If so, they may be able to recommend a variety that grows well in any adverse conditions common to your location.
‘Allstar,’ for example, was bred to be resistant to Anthracnose, bacterial and Fusarium wilts, and Phytophthora root rot.
This cultivar is available from True Leaf Market already inoculated with rhizobium bacteria that encourage the seedlings to fix nitrogen in the soil.
You can find one-ounce packets for small areas, and one- and five-pound sacks for larger areas.
If you buy seeds from a local farmer’s co-op or similar entity, they will probably be inoculated and coated with a fungicide like Apron. That’s something to be aware of if you’re committed to organic growing.
And while that coated seed can work for a cover crop or growing animal feed if you aren’t worried about the chemicals, please remember that inoculated or coated seed is not suitable for growing sprouts that you plan to eat.
You can find M. sativa seeds for sprouting in four-gram and four-ounce packets, and one-, five-, and 25-pound bags, from True Leaf Market.
An organic option is available as well, in a variety of packet sizes.
For fungicide-free seeds you can also grow as sprouts or microgreens, Botanical Interests offers 30-gram packs. That’s close to 13,000 seeds. Just make sure you inoculate them yourself if you’re growing them as green manure.
Managing Pests and Disease
While alfalfa isn’t a particularly picky plant to grow in the garden, you do have an added incentive to avoid pests and disease.
Either can render the plants unsuitable to use as green manure, mulch, or a compost component.
On the plus side, you won’t have to fret as much about most four-legged garden pests the way you would with the typical garden flower or vegetable.
Unlike prize petunias or lettuce, it’s not a big deal if certain herbivores eat part of this crop.
Here are some of the main culprits:
Herbivores
One nice thing about growing alfalfa outdoors is that for once, you probably won’t care if deer eat it!
It’s such a vigorous, sturdy plant that they’re unlikely to consume enough to harm the plants, and might even leave your other veggies alone in favor of the leafy legume.
Rabbits, mice, and other herbivores might nosh on the plants as well. But they won’t usually eat too much.
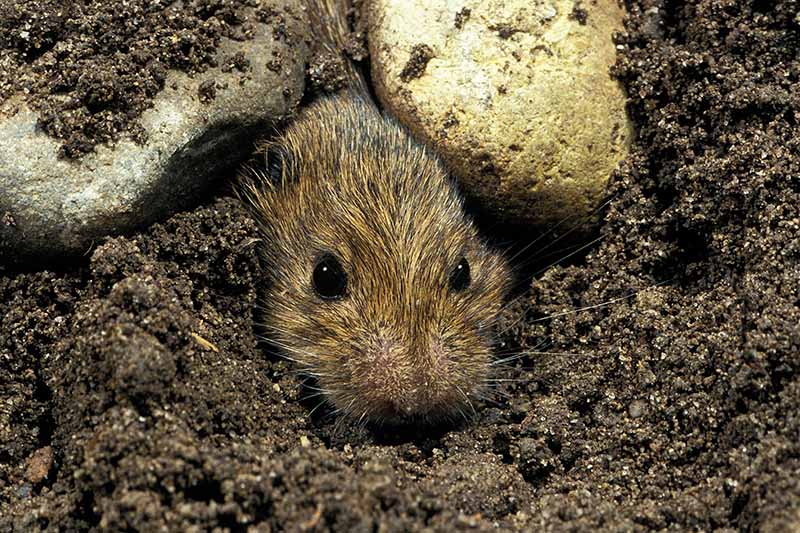
It’s a little more of a problem if voles get in on the action, since they also consume the taproots.
If you’re growing a plot as an ongoing source of mulch or compost, instead of tilling the whole stand under, voles in the area that are eliminating taproots will diminish yields the following season.
Your best defense here is fencing that extends at least 10 inches into the ground around the plot you’ve planted, along with keeping weeds and debris away from all of your garden areas so rodent pests won’t take up residence.
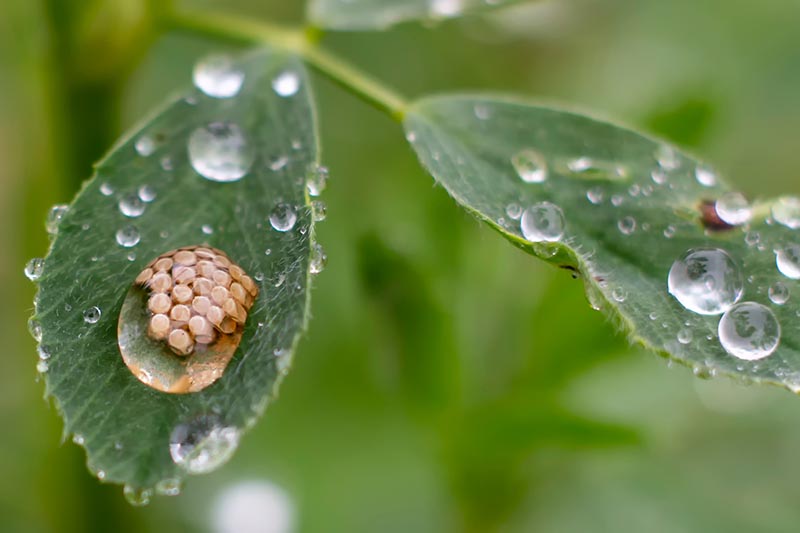
Insects
As for insect pests, they are rare with this typically robust plant, but you may need to watch out for a few.
Depending on your area, pests might include alfalfa weevils (Hypera postica), aphids, armyworms, cutworms, Japanese beetles, leafhoppers, and whiteflies, among many others.
Infestation varies wildly by location, so this is a good one to check out with your local or regional ag extension service.
You can pretty much avoid unwanted bugs by planting in the fall instead of the spring, when beetles, cutworms, and leafhoppers really get going, especially in warmer growing areas.
The weevils hatch and start destroying plants even earlier, usually sometime in February, as do aphids and armyworms. Planting when they won’t be around is the best defense.
Disease
Yes, this is putting the cart before the horse.
But it’s important for home gardeners to think about avoiding all of the potential diseases during the soil preparation and growing stages, versus trying to treat them once you spot damage.
That’s because, in addition to diseases making it difficult for the plants to keep growing, you cannot till infected plant material into the soil as green manure, or it will spread the pathogens.
It also defeats the whole purpose of growing alfalfa as a cover crop, mulch, fodder, or a component of the compost heap if you must treat any of these diseases by spraying the plants with chemicals.
You wouldn’t want residue from chemical sprays to be on any plant you plan to feed to animals, nor do you want the treated plant material or the spray itself to be left behind in the soil.
It’s even worse if you don’t take proper precautions and the plants contract a disease that can be spread via soil or water.
Then they can infect other plants in your garden, or leave behind a soilborne pathogen that can keep infecting new crops planted in that space for years to come.
Okay, now I’ll back up and describe the diseases I’m hoping you can bypass.
Anthracnose, bacterial or Fusarium wilts, common leaf spot, downy mildew, and Phytophthora root rot are among the top contenders.
Symptoms vary from one ailment to the next, but be wary if your alfalfa leaves start turning yellow, young seedlings wilt abruptly, the foliage gets lesions so large the plants can’t photosynthesize, or the roots start to decay.
As for the best preventive measures, Extension Plant Pathologist Paul Vincelli and Extension Forage Specialist Ray Smith at the University of Kentucky say the most important step is selecting resistant seed varieties.
Vincelli and Smith also recommended maintaining the soil pH and ensuring that soil drains well to help the seedlings grow quickly and vigorously, which tends to enable them to resist most diseases more readily.
Only harvest when the stems and leaves are entirely dry, too, as cells or spores of many harmful plant pathogens can travel in droplets of water.
And make sure to thoroughly clean and dry your hands, tools, and equipment before working in the garden.
Watch out for those insects I mentioned above. Aphids, leafhoppers, and whiteflies are particularly prone to becoming vectors for the spread of diseases that can harm your stand.
Harvesting for Mulch or Compost
When you’ve seeded this legume as a cover crop, for mulch, or to add to compost, it’s essential to either pick or till the plants before they go to seed.
To use it as “green manure,” work the entire plant, blooms and all, into the garden plot at least a few weeks – or preferably a whole season – before planting veggies in the restored, amended soil.
Here’s the best method:
Once about half of the plot has bloomed, and before it starts forming seed pods, cut it to about two inches tall with a scythe, clippers, or an electric mower.
Then till the plants and mown stalks back into the soil until they are four to 10 inches below the surface, and leave them to decompose.
You can spread the clippings on a clean tarp or blanket and dry them in the sun for a few days before using them to mulch around the yard and garden.
A word of caution, though. When you mulch with dried alfalfa, you run the risk of attracting the many herbivores that like to eat it, which include pests like rats, rabbits, and deer.
You can also add the clippings to your compost, where their high nitrogen content will make them break down quickly and also accelerate decomposition for the rest of the plant material that’s in there.
Learn more about what to compost and how to use it to benefit multiple aspects of your home garden in our beginner’s guide.
If you’re growing a perennial stand for compost or mulch, you should skip the step where you till the stalks into the soil.
Instead, keep the plot watered and weeded, and you may have another “crop” of stalks to dry for mulch or to add to compost within 40 to 45 days.
You can’t necessarily go by the calendar on this one though, since temperature, available rain, and the health and age of the plants can all impact the amount of time it takes them to regrow and bloom.
Be sure to observe the plot occasionally, since any harvest always needs to be done ahead of seeds forming.
The seeds will grow in your compost or around any areas where you mulch, as well as creating a new bed of alfalfa in the area where you were using them as a cover crop.
Harvesting for Animal Feed
It’s a balancing act to know when to cut alfalfa to dry for animal feed. The yield continues to increase right up until the blooms are in full flower. But the nutritional value of the feed deteriorates as the plants mature.
To get high-quality feed without sacrificing too much volume, try harvesting just as the first buds start to bloom.
If you’re planning to keep harvesting new growth from the same stand for consecutive seasons, cut the stalks two inches above the soil.
The idea is to leave the crowns in place, along with the axillary buds that form where the leaves join the stems.
They’ll start regrowing new stems and leaves immediately if it’s not time for their winter dormancy. If it is the last cut of the summer, they’ll still need that bottom two inches to form new plants the following spring.
If you leave less than two inches in place, the plant can only regrow from the crown, not the axillary buds. You’ll diminish both yield and the health of the plants if you cut too much at harvest time.
And it’s best to wait at least 40 days to try to cut again, or the alfalfa will have difficulty forming thick stems for subsequent cuttings.
If you see some growth and make a follow-up harvest for feed after waiting only 25-35 days, you may get a modest yield. But you’ll harm all the harvests going forward by weakening the plants and forcing them to produce new stems from the crowns, not the buds.
If you’re planning to work the remaining stems and roots into the garden as green manure, you can cut the stems all the way down to the soil line.
Let the cut stalks dry thoroughly before feeding them to any livestock. The blooms and buds are also edible and nutritious, but take the same precautions with them as you would for any homegrown alfalfa used as animal feed.
Quick Reference Growing Guide
| Plant Type: | Perennial legume cover crop | Maintenance: | Low |
| Native to: | Asia | Tolerance: | Cool temperatures, heat, drought |
| Hardiness (USDA Zone): | 2-9 | Soil Type: | Average, depleted, loam |
| Season: | Spring-fall | Soil pH: | 6.0-7.0 |
| Exposure: | Full sun | Soil Drainage: | Well-draining |
| Time to Maturity: | 60-70 days | Attracts: | Ladybugs, lacewings, pollinators, predatory beetles, songbirds |
| Spacing: | 2-6 inches | Companion Planting: | Flowers that need pollinating |
| Planting Depth: | 1/2 inch (seeds) | Order: | Fabales |
| Height: | 24-36 inches | Family: | Fabaceae |
| Spread: | 2-3 inches | Genus: | Medicago |
| Water Needs: | Moderate | Species: | Sativa |
| Common Pests: | Deer, moles, rabbits, voles; alfalfa caterpillars, alfalfa weevils, aphids, armyworms, potato leafhoppers, white flies | Common Diseases: | Anthracnose, bacterial wilt, common leaf spot, downy mildew, Fusarium wilt. Phytophthora root rot |
Introducing Alfalfa, an A-1 Cover Crop
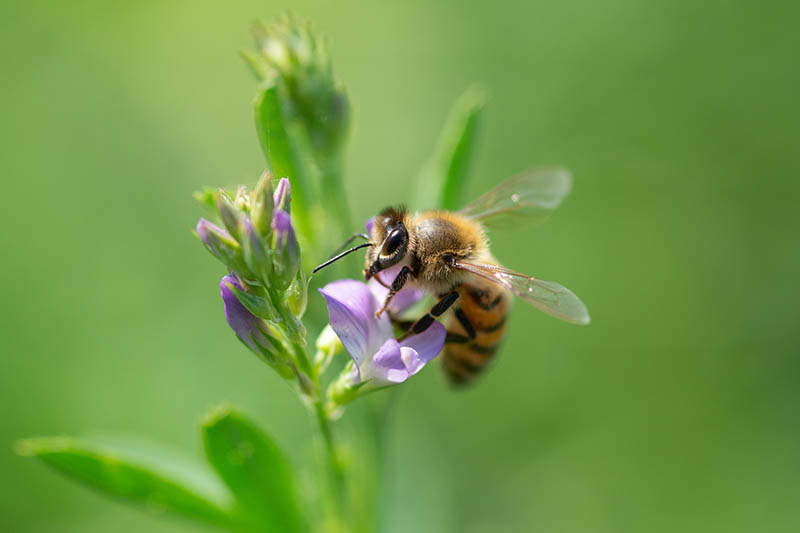
Did I mention that bees love the blooms of this traditional forage crop? And that even small stands can attract and sustain many different varieties of songbirds?
And the scent when the stalks are newly cut is fresh and comforting, in the same way as laundry dried on the line, cedar chips in a dog’s bedding, or lemon balm crushed between your fingers.
Alfalfa is just so appealing! Thank goodness it’s fairly straightforward to grow.
Still, you may have tips about planting this perennial legume that I didn’t cover here, or further questions. If so, the comments section below is ready and waiting for your input.
And if you are interested in learning more about cover cropping, check out these guides next:
Please I want to know if alfalfa can be nursed in seed trays before transplanting them to the garden or farm? I am planning of growing them on a acre of land to feed livestock
Hello Winslow! You could technically start alfalfa indoors, but it’s not a good strategy for a whole acre–too much work, and they don’t necessarily transplant well. If you live here in the States, the very best time to plant alfalfa outside is coming right up, so I would just wait and do that. You can sow alfalfa any time from spring to fall, but autumn is the best time since you avoid competing with summer weeds and the foliage will still grow in the cool weather. Last, if you’re itching to grow alfalfa indoors, check around and see if someone… Read more »
THANKS SO MUCH FOR ALL THIS VALUABLE INFORMATION. AS A CHILD, GROWING UP ON A FARM IN SOUTH AFRICA, MY FATHER PLANTED LUCERNE AS ANIMAL FODDER. NOW, AT 73 YEARS OF AGE, I AM GETTING ALL NOSTALGIC ABOUT THE WONDERS OF CHILDHOOD FARMLIFE. I WILL SOW MY SEEDS IN AN OPEN SPOT IN MY GARDEN IN THE RETIREMENT VILLAGE I NOW LIVE IN AUSTRALIA – – AND AWAIT THE GLORIOUS GREEN PLANTS AND THEIR BLUEST OF BLUE FLOWERS ONCE AGAIN!! GOD BLESS!
Aw, Elise Menne, what a fine memory you’ve shared. Please keep us updated on your new plot of alfalfa. I can almost see those beautiful blooms from the other side of the world. All the best, and happy gardening.