Beta vulgaris subsp. vulgaris var. altissima
These days, it’s pretty common to stumble upon a home garden where nutritious red (and orange, purple, pink, golden, or striped) table beets are growing, but sugar beets are still mostly the domain of commercial and livestock growers.
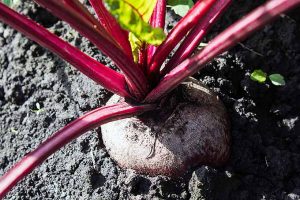
Beetroots, garden beets, table beets – whatever you call them, these are probably the type that you’re most familiar with. But sugar beets are something different.
Admittedly, that’s probably because they lack that earthy flavor and pleasant texture of their more familiar root veggie siblings. But that’s no reason for the home grower to ignore sugar beets altogether.
These plants offer many uses beyond creating the granular white stuff that we use to bake our cakes and sweeten our morning coffee.
They’re entirely edible – roots, tops, and all. Once you learn how easy it is to prepare them, you might wonder why you don’t see them around more often.

We link to vendors to help you find relevant products. If you buy from one of our links, we may earn a commission.
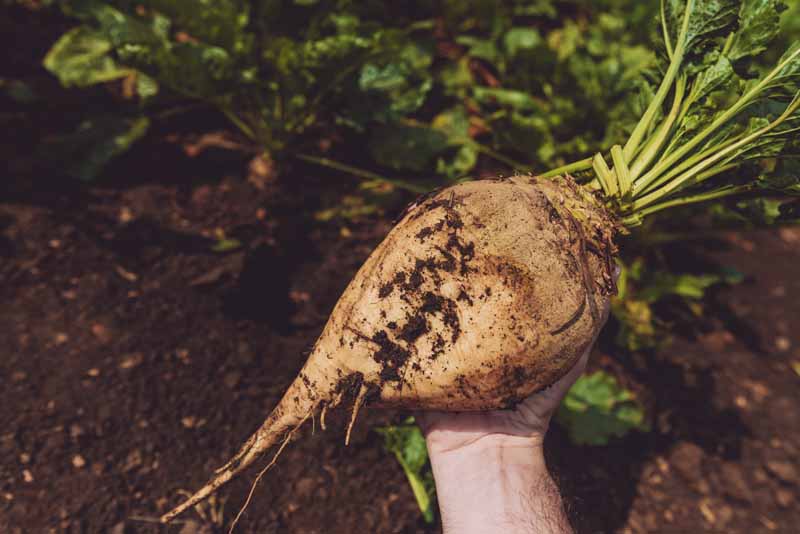
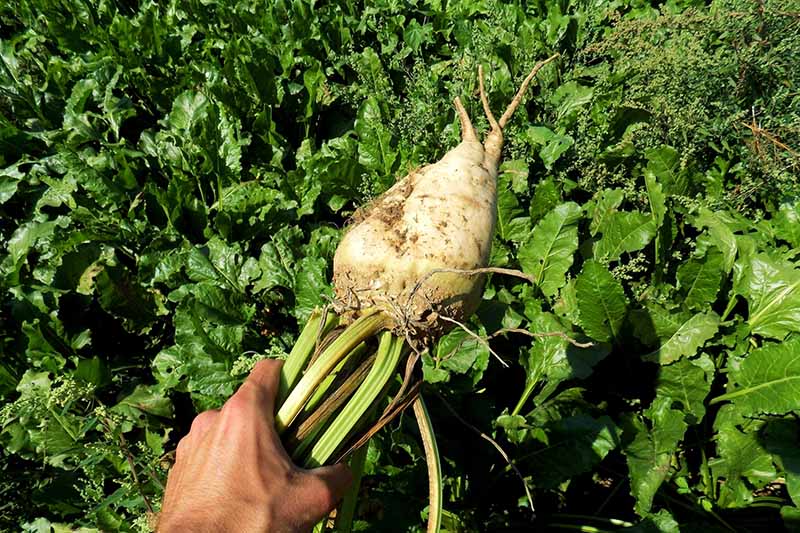
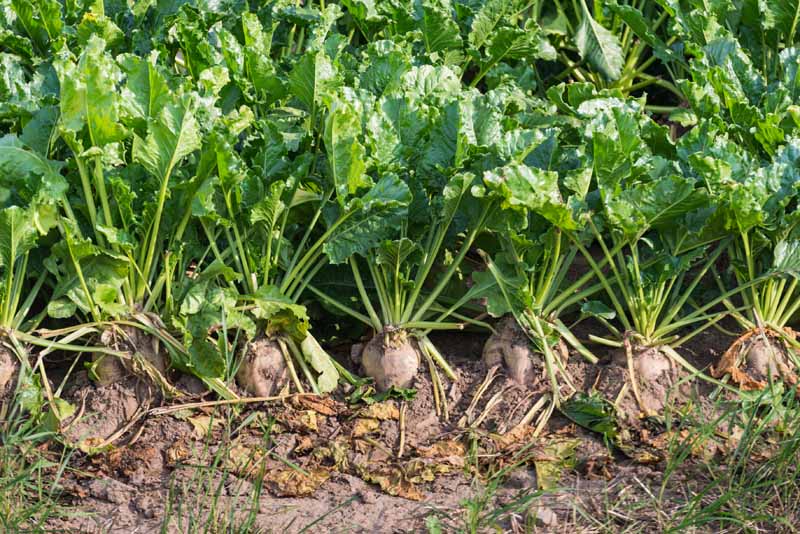
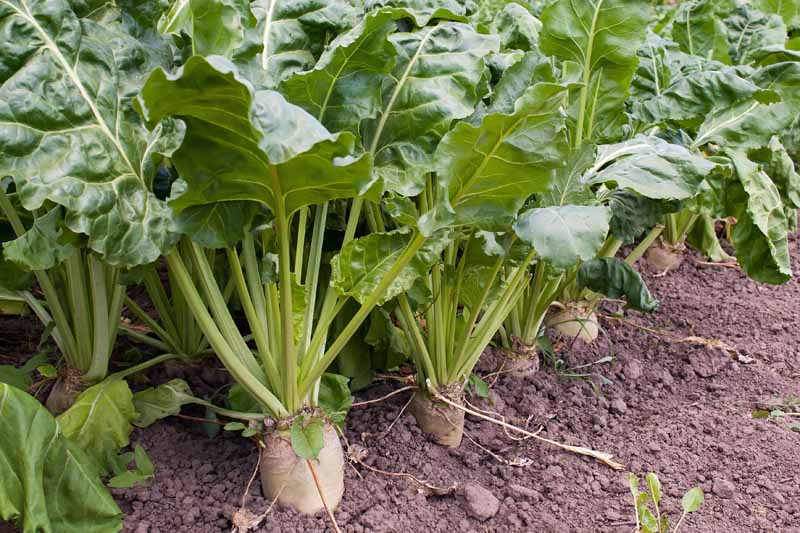
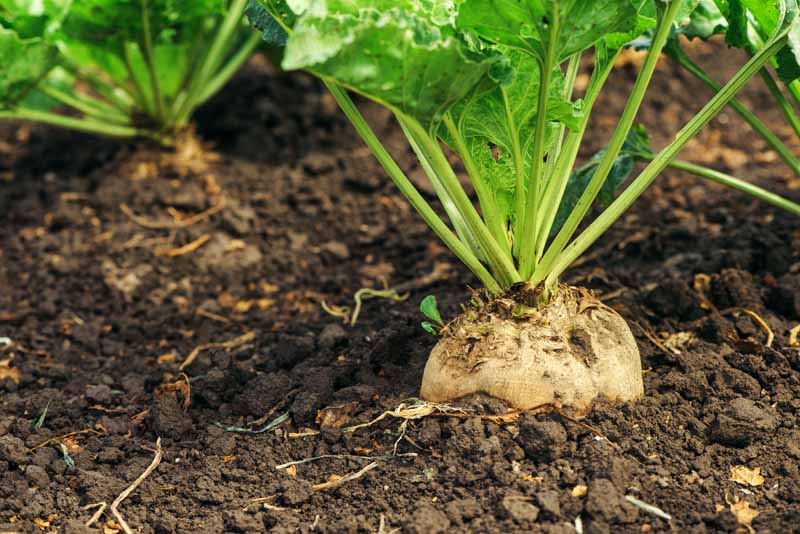
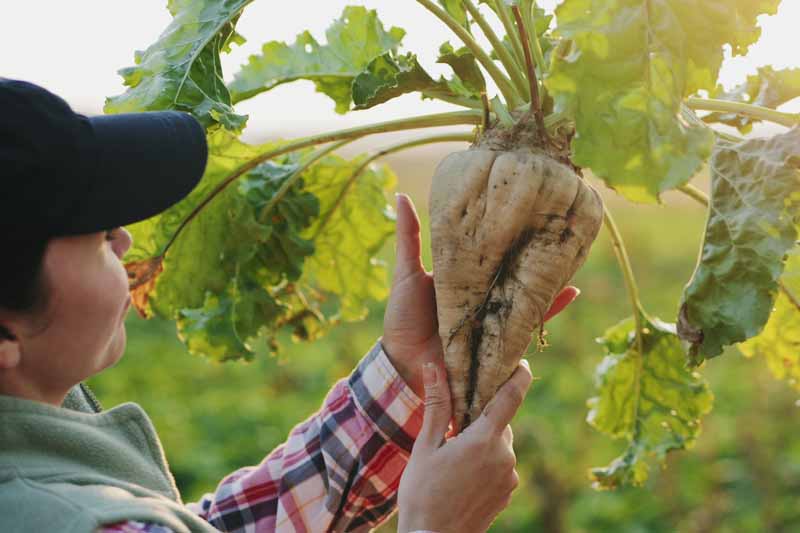
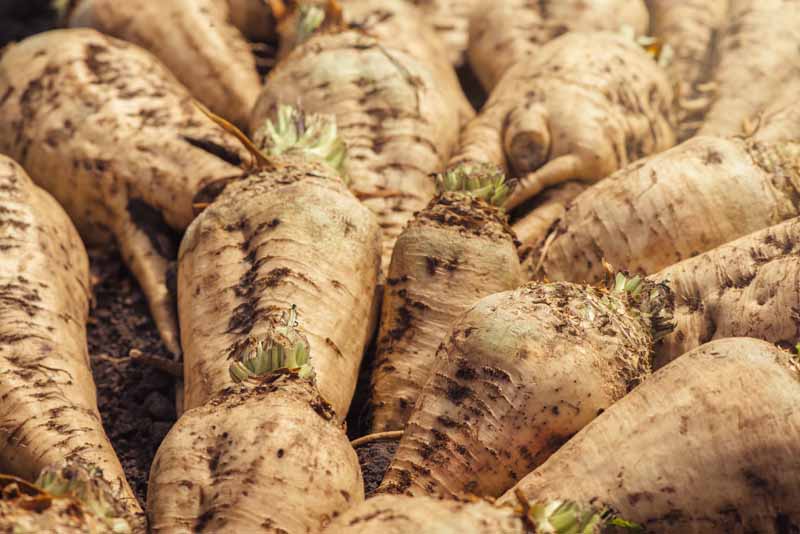
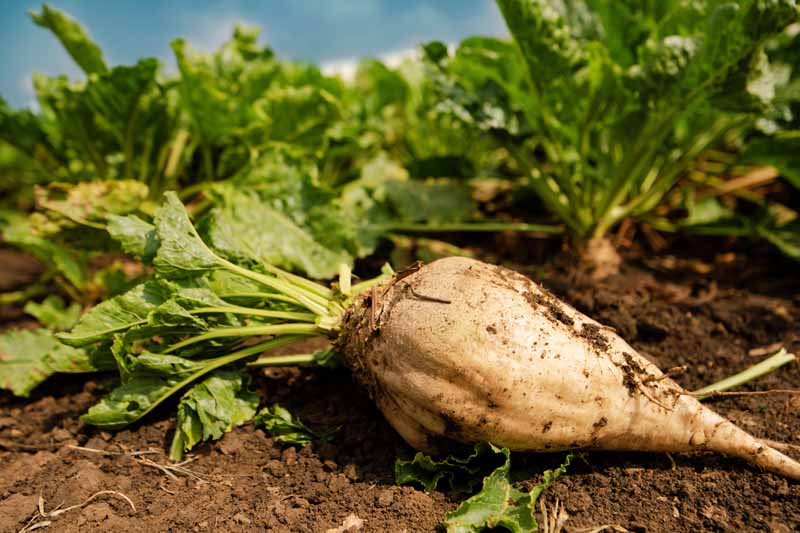
Unlike the majority of their more famous relatives, sugar beets are creamy white and usually much, much larger. They look similar to massive potatoes with a pointy end, as if a red beet tripled in size and turned white – perhaps it saw a ghost?
As you’d expect from such large roots, these can take twice as long as table beets to mature. They also differ from their relatives in that they contain fewer vitamins and minerals, and have a texture that is quite a bit tougher.
Sugar beets have a slightly sweet, bland flavor, a bit like a potato sprinkled with a little sweetener.
This color and flavor difference comes from the fact that they lack betalains, which lend the red (or golden) color and some of the characteristic “beet-esque” flavor to the roots.
Even if you don’t plan to use them to make a sweetener, they can be used as fodder for deer, horses, cattle, sheep, goats, and other livestock.
But what about growing sugar beets as a garden veggie? Yep, you can do that, too!
Here’s what’s ahead in this guide:
What You’ll Learn
I’m a big believer in trying new things in the garden. You never know when you’ll stumble across a plant that will become your new gardening go-to.
Ready to give sugar beets a chance? Sweet! Let’s go!
Cultivation and History
All beets are thought to have originated from the wild variety (Beta maritima), which grows along the southern coasts of Eurasia.
The modern sugar beet was developed and refined in the 18th century from white fodder beets, which were common and less sought-after than the red type.
Humans first figured out how to isolate sugar from the root in 1747, when German chemist Andreas Marggraf demonstrated that the crystalized sucrose from beets was the same as that from sugarcane.
Franz Karl Achard, one of his students, took the idea and ran with it, establishing the sugar beet as a commercial crop in Europe.
Basically, we can thank him for the sugar beet industry and the availability of cheap sucrose in Europe and the United States.
At the beginning of the 19th century, most sugar in Europe was obtained from cane grown in the West Indies using slave labor. During the Napoleonic wars, the English blockades prevented sugarcane from reaching France, and another source of sugar was needed.
Napoleon ordered the planting of 32,000 hectares of sugar beets in northern France, and before long, there were factories in Austria, Germany, and Denmark.
After the fall of Napoleon, the demand for sugar beets declined as the trade routes were opened up, and cane sugar was imported from the tropics.
With the end of slave labor in the West Indies, the European-grown crops gained a foothold and had become well-established by the 1850s.
Sugar beets reached the US shores in 1836, and the first commercial operation started in California in 1879.
During World War II, the United States government was so concerned with the dwindling sugar supply that they encouraged farmers to expand their beet crops.
When Japanese-Americans were forced into internment camps, many internees worked growing and harvesting the economically important plant.
Laborers in Malheur County, Oregon were the only ones allowed to live outside of internment camps in the state because their work was deemed necessary to fill in for labor shortages.
In 1944, during the Dutch Famine, people resorted to eating sugar beets and tulip bulbs, which might tell you a bit about how palatable they are (don’t worry, we’ll give you some tips on how to prep them so they’re tasty).
Commercially grown sugar beets are mostly used today to make sweetener. Decades ago, they were also used in the US to produce alcohol, though that’s no longer as common. People in other countries like the Czech Republic still use them to make alcoholic drinks.
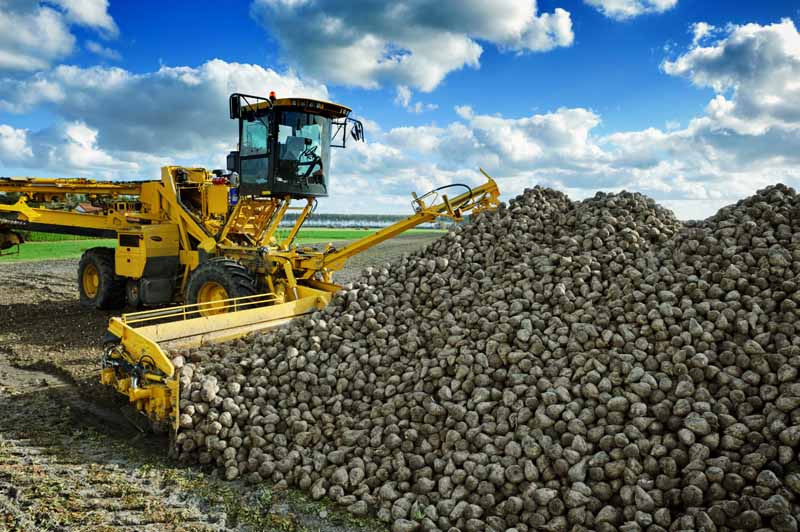
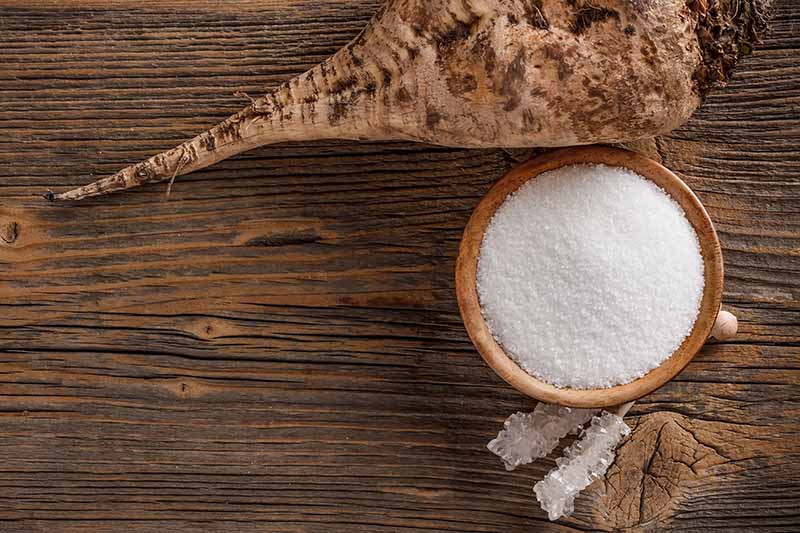
It’s hard to imagine how a big, bulky tuber like this one – each one can grow to an average of two to four pounds, sometimes more – turns into that intensely saccharine product that you can use to sweeten your coffee.
Basically, the beets are sliced thinly after harvest and the juice is extracted. It’s then purified and heated to make a syrup, which is also popular in many parts of the world. That syrup can then be crystalized, and voila! You’re rolling in the sweet stuff.
The plants can also be used to make molasses. Unlike cane molasses, beet molasses isn’t as sweet and is primarily used in animal food.
Andrew Sowell, agricultural economist at the Economic Research Service branch of the USDA reports that the sugar beet industry in the US accounts for 55 to 60 percent of the sugar produced domestically.
In case you were wondering: yes, there is a difference in flavor between cane sugar and beet sugar, but it’s subtle.
Beet sugar has a slightly earthier, burnt-sugar flavor, while cane sugar is a bit fruitier. Though it’s often sold as generic “sugar” without the original plant source identified, you may be able to find pure beet sugar in stores.
Try doing a taste test yourself by purchasing both beet and cane sugar at a specialty grocer and comparing them side by side to see what you think!
There’s an added plus for vegans – beet sugar doesn’t require processing with bone char to make it pure white, while refined cane sugar does. If white granulated sugar processed without animal byproducts is what you’re after, this may be the way to go.
It’s worth noting, however, that as with corn, most sweeteners made commercially using beets come from genetically modified plants. If that’s something you prefer to avoid, look for organic beet sugar.
In US commercial production, these crops are grown mostly in Minnesota, North Dakota, California, Idaho, Oregon, Washington, Colorado, and Montana.
Many farmers toss out the leaves when they harvest the roots, but some commercial livestock operations buy up the leftover leaves to use as fodder.
If you’re thinking of feeding the leaves to your animals, keep in mind that while they are highly attractive to veggie-loving livestock, they are best used as a supplement since beet leaves alone fail to provide enough protein to serve as the sole source of nutrition for grazing animals.
And even if you use the roots yourself to make a sweetener, the leftover pulp is loved by sheep, cattle, and horses.
Clever scientists are also figuring out ways to turn the leaves that are left to rot in the fields each year in the Netherlands into a gluten-free, vegan protein that can be used as a substitute for soy in making meat alternatives.
On top of that, the byproducts of processing the beets into sugar are used to make alcohol, pharmaceuticals, and baker’s yeast. Processing waste is also used up as a soil amendment in the form of lime.
The sugar from beets makes an effective road de-icer. Some experts are trying to turn beets into an alternative fuel, as well.
Propagation
The easiest way to propagate sugar beets is by sowing seeds directly in the garden. You can start your seeds indoors and transplant seedlings, but keep in mind that beets don’t generally take well to transplanting.
Still, it can be a smart option if you’re struggling with certain plant diseases or timing issues (more on that later).
Most growers in the cooler northern regions plant in the spring. In warmer, semi-arid regions, this plant is grown as a winter crop starting in the fall.
From Seed
All beets are biennials, producing flowers and seed in the second year of their lives. But we usually harvest them in their first year, because that’s when they taste best.
So how on earth do we get seeds?
Most sugar beet seeds are produced in places like Oregon and Washington, where the weather is temperate enough that the plants can survive over the winter to produce flowers and set seed in the second year.
I mention this because you’ll need to live in an area with the right climate if you’re hoping to save your own seeds. Otherwise, you’ll have to rely on purchasing the seeds you need.
If you want to leave a few plants in the ground at the end of the season to develop seeds, let them grow into their second year rather than harvesting.
The leaves will die back and re-emerge in the spring. By mid-spring, they’ll form flower heads, and by the summer, the pollinated flowers will go to seed.
Once the seed heads turn brown, clip them or pull up the entire plant, and hang them in clusters to dry.
When the entire stalk is completely dry, shake the plant and run the stalks through your hands to release the seeds. You may store them in a dark, cool place in envelopes or jars with lids for several years, until you are ready to plant.
Keep in mind that sugar beets will cross-pollinate with anything in the same family, including Swiss chard and table beets. Keep plants apart if you want to harvest seeds that will grow true.
Once you have your seeds, put them in the ground when the soil temperatures are around 55 to 65°F, after the last frost date for a spring planting.
In the fall, put seeds in the ground when air temperatures are reliably below 85°F, and you have about 90 days before the first hard freeze is predicted for your area.
You should till your soil well at least two inches down before planting, pulling out any rocks that you encounter. Rocks will stunt growth, or make the roots grow funky and misshapen. Plant within a week of tilling.
Sow the seeds an inch deep into the soil and press the earth firmly on top. Don’t skip this step, because the seeds need good soil contact to maintain the moisture levels they need to germinate.
The closer you plant your seeds together, the smaller and sweeter your beets will be, according to Linzy Carlson and Jim Bauder at Montana State University Extension’s Water Quality Program.
However, keep in mind that you don’t want to crowd them. Spacing about four to six inches between plants hits the sweet spot.
You’ll need to thin out your seedlings as they emerge, because each seed pod contains multiple seeds. That means you’ll probably see two or three seedlings popping up in each place where you sowed.
If you want to start your seeds indoors, sow them in biodegradable peat pots to make the transition easier. Plant them in a seed-starting mix at the same depth, with one seed per four-inch pot.
Put the pots in a warm area with indirect sunlight. While light isn’t necessary for germination, it helps to keep the seeds warm.
Once seedlings have two true leaves, you can transplant them outdoors.
Be sure to harden your seedlings off before you plant them out. That means placing them in a sheltered spot for an hour on the first day and increasing the time spent outdoors by an hour for the next six days. After a week, you can put them in the ground.
Seeds are sensitive to fluctuating moisture levels as they are germinating and sprouting, so stay on top of the water situation. The soil shouldn’t be saturated, but it shouldn’t be allowed to dry out either.
Imagine a well wrung out sponge. That’s the moisture level you’re aiming for.
You should see seedlings emerge anywhere from four days to three weeks after planting, depending on the weather conditions.
From Seedlings/Transplanting
It’s rare to come across transplants at a nursery or plant outlet, even those geared towards commercial growers and people who raise livestock.
But perhaps you have a friend who is growing seedlings and they want to hand off a few, or you started seeds indoors yourself.
If that’s the case, you can technically transplant beets, but keep in mind that the long taproots won’t appreciate the shock of the transition and you may lose your plants.
To transplant, cut away the base of the peat pot or gently remove the plant from its container. Plant directly into prepared soil at the same depth it was growing in the container. Gently fill in any gaps in the soil and water well.
You can set out seedlings at the same time when you would sow seeds, to get a head start on the growing season if you have a short spring with early heat.
You can also put them in the ground outdoors later than you would sow seeds to avoid issues with pests and disease (more on this below).
How to Grow
Beets need two things to grow well: full sun and loose, well-drained soil.
This is a plant that needs more preparation than care, meaning you need to thoroughly prepare the planting site, but once the plants are established they won’t demand much of your time.
As I mentioned above in reference to planting seeds, you absolutely must till the soil down two inches if you are planting in the ground. Remove any weeds or rocks.
Before planting, test your soil to determine whether it’s deficient in any important macro or micronutrients, such as nitrogen, potassium, phosphorus, calcium, boron, copper, sulfur, magnesium, or cobalt.
Amend your soil as needed. These plants prefer a pH between 6.0 and 8.0.
Keep a very close eye on weeds as the seedlings are emerging. Young beets are slow to mature and can easily be outcompeted by weeds, which will cause them to fail to thrive.
They need to stay constantly moist but not wet.
Once they get a bit larger, the big, leafy foliage will shade the ground and crowd out any weeds. At that point, allow the top inch of the soil to dry out between irrigating.
Sugar beets can become cracked or malformed if they don’t get enough water, so you don’t want them to get too dry. However, they are more resistant to underwatering than table beets because they have a much deeper root, which can access water deep in the soil.
In general, the seedlings are most susceptible to frost, disease, wind, chemicals, diseases, and pests during their first 30 days, before leaves develop their waxy coating. Once you get past that point, they’re pretty robust.
Even more than their table beet friends, these plants can handle the cold.
Despite being cold-hardy, turnips and brussels sprouts may turn up their toes in intense cold weather that reaches freezing temperatures, while these tough plants just keep going. The cool weather intensifies their sweetness as well.
As long as you’re only experiencing a brief frost or light freeze above 29°F, you can leave the plants in the ground.
Once a hard freeze hits, anything below 29°F, the plants will stop growing. You definitely want to harvest before this point, unless you are keeping some plants in the ground to save seed the following year, because the ground will probably become too hard to work.
Note that a freeze in the beginning of the growing season when the seedlings are young and tender could kill the plants, so cold weather isn’t always beneficial to this plant.
Fertilizer
These plants can tolerate average to poor soil, but for the best results, they’ll appreciate some additional feeding.
You need to carefully balance the nitrogen level of the soil. Too little, and you’ll have reduced yields and yellowing leaves. Too much reduces the sucrose levels in the roots.
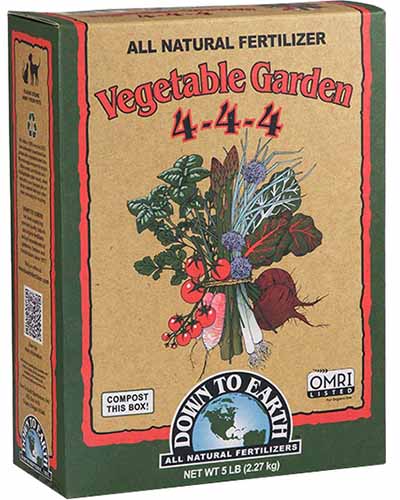
Down To Earth Organic Vegetable Garden Fertilizer
Assuming your soil test comes back indicating that you don’t have a particular deficiency to worry about, you can use a balanced product like Down To Earth Organic Vegetable Garden Fertilizer, which you can purchase at Arbico Organics.
Apply it as a side dressing once a month, and stop fertilizing two weeks before harvesting.
If your soil is low in nitrogen, apply a blood meal fertilizer like this one, also from Down To Earth and available from Arbico Organics.
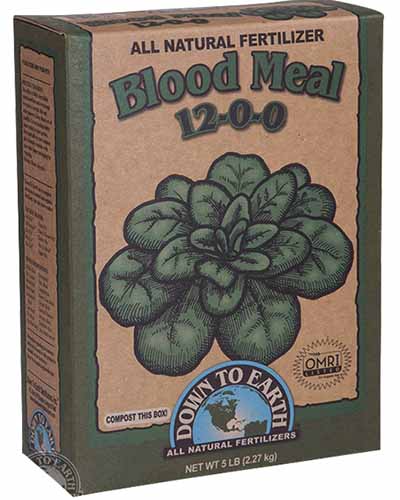
Be sure to use it as directed to avoid leaf burn, and if you’re applying it along with a general fertilizer, reduce the recommended application amount by half, depending on your soil test results.
As with all root crops, don’t use any type of fertilizer that you must dig into the soil. You could end up disturbing the roots and damaging your crop.
Crop Rotation
According to extension sugarbeet specialists A. W. Cattanach and A. G. Dexter, along with E. S. Oplinger of the Department of Agronomy at the University of Wisconsin-Madison, crop rotation increases yields in beets.
Rotate your crops every year, and don’t grow any plants in the Beta genus again in the same spot for at least three years.
Growing Tips
- Be sure to till and loosen the soil well before planting.
- Beets are heavy feeders, and they need regular applications of fertilizer.
- Keep the soil moist but not wet.
Cultivars to Select
Most seeds that are available to home gardeners are sold in seed catalogs and nurseries under the generic name “sugar beet” or “fodder beet.”
Commercial growers have access to a variety of cultivars, many of which are genetically modified for resistance to glyphosate.

Heirloom sugar beet seeds are available in a variety of package sizes from Eden Brothers.
Heirloom ‘White Detroit’ seeds are available from True Leaf Market. Introduced in 1892 by the D.M. Ferry Seed Company, this popular variety hails from the Motor City.
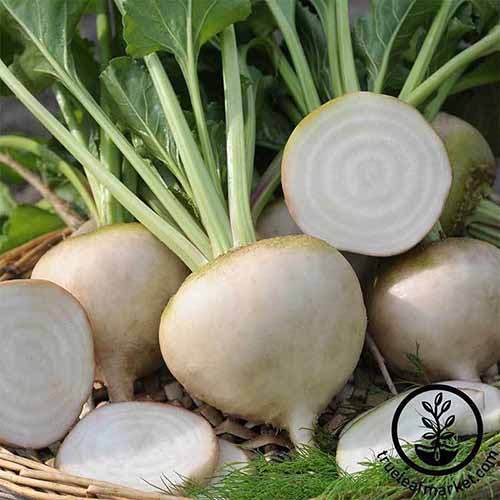
This cultivar matures in 55 days. It’s super sweet, and great for cooking, pickling, or making syrup.
And since these types of beets are white, you won’t have to worry about staining your hands or your countertops when you prep them.
Managing Pests and Disease
Regardless of whether you face animals, insects, or disease pathogens, it’s always a smart idea to take a daily walk through your garden and examine your plants for problems.
When it comes to managing unwanted issues in the garden, an ounce of prevention really is worth a pound of cure.
Herbivores
Just as your livestock are sure to love sugar beets, so do wild animals that you may not intend to feed.
Deer and rabbits are likely to be your two biggest four-legged foes, but don’t underestimate a determined horse or goat that escapes into the garden.
Deer
Oh my, do deer love sugar beets. They apparently have a sweet tooth that rivals our own.
Beware: you’re going to have to battle these ungulates for your share of the leaves and roots.
On the bright side, once a root has become established and large, if a deer does manage to nibble off the top, new leaves will quickly grow back in.
Protecting your crop from deer is a whole topic in itself, but your best option is fencing. Read more about building your own DIY deer fence here.
If you don’t want to erect a 10-foot fence to protect your crops (that’s how high deer can jump when they really, really want to get at your sweet, delicious beets), you can create a box out of chicken wire.
This involves erecting four three-foot-tall fences around your garden and then rolling chicken wire across the top of the fences as a sort of lid.
Electric fencing is also extremely effective.
Rabbits
Rabbits also love these sweet plants, and you may find them nibbling on the leaves and any exposed root tops.
Just as with deer, a short fence with chicken wire secured across the top is your best option. I’ve bent simple chicken wire domes over my crops and they have been effective too.
You can also purchase large wire cloches that you can lower over your individual plants. But if you have a large garden, fencing is your best bet.
Insects
Bugs and plants evolved together, which is probably why there isn’t a single crop that I know of that is totally free of pest insect visitors.
That said, sugar beets are remarkably hardy against most pests. Here are several that you might encounter:
Aphids
Aphids are about as common a garden pest there is. And while the annoying insects are known for damaging all kinds of plants in the garden, infestations are often severe when it comes to these vegetables.
That’s because sugar beet root aphids (Pemphigus populivenae and P. betae) don’t just stick to the foliage.
They eat the roots as well. In large enough numbers, they can severely reduce your harvest size and decrease the sucrose levels of your roots by more than 30 percent.
In other words, this isn’t a type of aphid that you can just spray off the plants and forget about. Ridding your garden of these pests is going to require some extra work.
Young aphids of these two species don’t have wings, and they are both light yellow to dark brown, with most being a pale yellow. As they mature, the females develop clear wings and can grow up to two millimeters long.
They leave behind a sticky substance called honeydew that can attract sooty mold.
Other host plants include cottonwoods and poplars, so don’t plant your crop near these trees. These insects can also infest table beets, Swiss chard, and alfalfa.
There are a few fundamentals that you should have in place to avoid an infestation of aphids.
First, make sure your plants get enough water. I picture these bugs just waiting around, rubbing their forelegs together in anticipation of drought-stressed plants.
Then, be sure to rotate your crops. And finally, keep weeds out of your garden. Lamb’s-quarter, pigweed, foxtail, knotweed, dock, and other species in the Rumex genus are all hosts for this pest.
Once these bugs gain a foothold in the garden, there isn’t a lot you can do to stop them.
They can’t fly far, however, so if you rotate your crops so that you aren’t planting beets or any other hosts in the same spot, there’s a chance you might be able to avoid them next year.
That’s because they overwinter in the soil, so if they emerge and can’t find a host nearby, they’ll die off.
There’s another type of aphid known to attack beets called the black bean aphid (Aphis fabae). These are similar to other common aphids and should be tackled the same way.
Learn more about how to deal with aphids in our guide.
Cutworms
There are several cutworm species out there who love nothing more than to nosh on your B. vulgaris. Watch out for army (Euxoa auxiliaris), pale Western (Agrotis arthogonia), variegated (Peridroma saucia), and dark-sided cutworms (Euxoa messoria).
All cutworms are around one to two inches long at their full size, though they can vary in color from pale gray with stripes to brown or green.
It’s easiest to identify them by disturbing one when you see it. It will curl up into a protective C shape.
Cutworm damage is pretty easy to spot. Most often, they’ll nibble through the stalk of a plant, cutting off the leaves. It’s not unheard of for them to completely defoliate a young plant and kill it.
On the bright side, cutworms are only a problem during the spring and early summer when they are feeding, so if you grow your plants in the fall, you don’t have to worry about a potential infestation.
If you’re growing in the spring, young plants are most susceptible. The little critters will nibble off the leaves at the crown, and then your plant is toast.
An organic pyrethrin-based insecticide will knock down these pests, but it’ll potentially harm bees as well.
Be careful to only apply any natural pyrethrins that you use to the beet plants, which bees don’t visit in the first year of growth since they won’t be flowering.
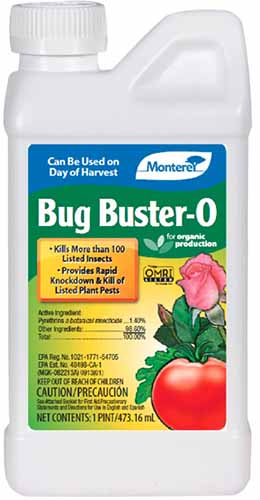
Monterey Bug Buster-O, which you can pick up at Arbico Organics, is a reliable option that contains Pyganic® pyrethrins, and you can use it in the garden up to the day of harvest.
It’s also easy to use, by simply mixing it with water and spraying it on the plants and soil.
Be sure to use caution and follow package instructions closely when spraying any types of chemicals in the garden, organic or otherwise. Read our guide for more tips.
Flea Beetles
Flea beetles aren’t terribly common on sugar beets, but you might run into them from time to time.
There are several species that may attack your crop, including the Western potato flea beetle (Epitirx subcrinita), the tuber flea beetle (E. tuberis), the pale striped flea beetle (Systena elongate), and the three-spotted flea beetle (Disonycha triangularis).
These tiny pests are about the size of a pinhead, and they may be black, brown, or tan, striped, solid, or spotted. No matter what they look like, they all love to nibble shot holes in foliage. They’re more of a spring or summer pest than a fall pest.
A small infestation can make your leaves look less than picture-perfect, but a large one can turn your foliage into lace.
Use white or yellow sticky traps placed a few inches above the soil to nab the beetles as they move around, and sprinkle talcum powder on your foliage to repel them.

You can pick up some of these handy pest fighters at Arbico Organics.
Beneficial nematodes are a useful treatment, as well. Arbico Organics carries their Triple Threat Beneficial Nematode product to address a range of pests.

Triple Threat Beneficial Nematode
Read more about ridding the garden of flea beetles here.
Root Maggots
Besides cutworms, root maggots are perhaps the most common insect that attacks sugar beets.
The sugar beet root maggot (Tetanops myopaeformis) feeds on the roots of plants and is especially common in the Midwest, Idaho, and Washington.
If you’re growing your crop in the fall, this pest isn’t much of a problem. Adults lay eggs in the soil in the spring, and the green 1/3-inch-long larvae emerge in summer.
They can kill developing seedlings and they’ll cause black, oozing lesions on the roots.
Floating row covers put in place in May and June are perfect for preventing the adult flies from landing and laying eggs. Also, avoid planting near spinach and Swiss chard, which act as hosts to the larvae and adults.
In the fall, till your soil deep and well to kill off any larvae. They won’t do any damage right away, but they’ll overwinter in the soil and emerge in the spring to start the life cycle all over again.
Sugar Beet Nematode
Sugar beet nematodes (Heterodera schachtii) are microscopic worms that can cause some serious damage.
Because you can’t see them, you have to watch for the damage. One small section of your crop might be impacted, or an entire field could be in a large operation.
Seedlings can be slow to emerge or may not pop up at all. The foliage may turn yellow and be stunted or wilted. Underground, the roots may be extremely fibrous and stunted as well.
Roots may even have galls and the plants could collapse.
The best way to avoid these nematodes is to prevent them from spreading by cleaning your tools and the soles of your gardening shoes with a 1:10 bleach to water solution.
You should also regularly rotate your crops and don’t plant anything in the beet family in the same place for at least two years.
If you do struggle with these pests, before planting beets in the same spot, solarize the soil by securing clear plastic over the area for several weeks during the heat of summer.
Wireworms
Like aphids and flea beetles, this isn’t a particularly common pest, but it’s something you should keep an eye out for.
Wireworms are the larvae of click beetles from the Elateridae family, so named because they make a clicking sound when they’re turned on their backs.
The adult beetles don’t do any damage, but their quarter-inch to inch-long larvae devour seeds and seedlings, as well as roots and stems. Look for the larvae, which are yellow or brown, moving on and in the top few inches of the soil as you weed.
Impacted plants may fail to germinate, or seedlings can die off. Older plants may exhibit missing pieces in the lower parts of the stems, as well as stunted growth.
They particularly love wet soil, so it’s doubly important to make sure your soil is well-draining to ward off these pests. You can also start plants indoors so they will be large enough that they can withstand feeding by these pests once you put them in the garden.
You should also avoid planting late in the season so your plants won’t grow into the summer when the bugs are most active.
It’s rare to see a major outbreak of these pests, so you shouldn’t need to worry about using insecticides.
Beneficial nematodes help with this pest as well.
Disease
Unlike table beets, sugar beets aren’t bothered by too many diseases. There are only a handful of things you need to keep an eye out for.
Cercospora Leaf Spot
Cercospora leaf spot is a disease that results in spots on the foliage that can eventually merge and cause the tops to die back. It’s caused by the fungus Cercospora beticola, which thrives when the weather is warm and humid.
Crop rotation is key to avoid this disease, so don’t plant any type of beets in the same place more than once every three years. You should also clean up any plant debris in the soil, since the fungi can live on fallen leaves.
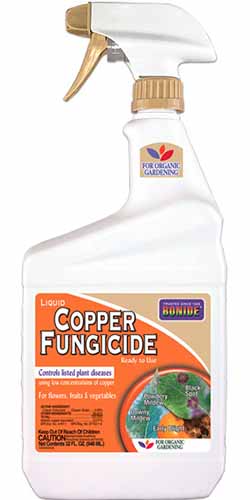
If your plants are infected with leaf spot, your best bet is to turn to the big guns: fungicides. Arbico Organics carries Bonide Liquid Copper, which is an easy-to-apply fungicidal spray.
Keep in mind that many types of fungi can develop resistance if you use the same fungicide products repeatedly in the garden.
That said, if you don’t plan to eat the leaves or use them as animal fodder, the roots should be fine and you can just let the disease do its thing. You might get a slightly reduced harvest if more than a third of the leaves are killed.
If you’re worried about it spreading to nearby crops like spinach or Swiss chard, pull the plants and destroy them.
Find more tips on treating cercospora leaf spot on beet plants here.
Powdery Mildew
Is there any plant that powdery mildew doesn’t like to hang out on? Sugar beets aren’t exempt from this common disease, which is caused in this case by the fungus Erysiphe betae.
When the weather is dry, with warm days and cool nights, powdery mildew comes out to play.
You’ll notice powdery fungal spots forming on the leaves and shoots. As the disease progresses, the leaves may turn brown and die.
Fortunately, perhaps because it’s so common, we have developed some pretty effective ways to deal with this annoying issue.
First things first, if you know you have a powdery mildew problem, space your plants a little further apart when you’re planting them in the soil and thinning seedlings.
Then, trim out some of the leaves (up to a fourth of them) as the plants mature, to promote good air circulation.
Always water at the soil level rather than on the foliage. This is a good garden practice in general, and it can help to ward off a whole range of diseases.
Finally, spray your plants with a preventative mixture of equal parts milk and water every three days when the weather is right for powdery mildew.
If it does show up on your plants despite your best efforts, trim away any impacted leaves, but try to retain at least three-quarters of the foliage on each affected plant.
A sulfur-based fungicide is an effective treatment option if your plants do get this disease. Spray it on the leaves or apply it dry as a dust treatment.
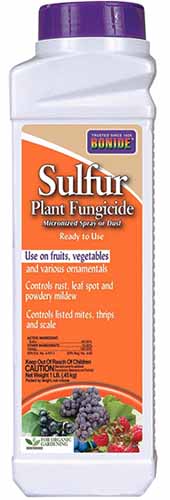
You can pick some up from Bonide at Arbico Organics.
Root Rot
Root rot is caused in sugar beets by the fungi Aphanomyces cochlioides and Rhizoctonia solani, and less commonly by Phoma betae, Pythium aphanidermatum, Fusarium spp., and Thielaviopsis basicola, the latter of which causes an infection known as black rot.
These organisms live in the soil and can cause roots to be stunted, develop lesions, or rot away.
Both dry and wet types of rot may occur and they can be hard to tell apart. That’s because you can’t examine the roots easily to figure out which type they have.
Dry rot causes dry, sunken lesions on the beets, while wet rot results in wet, mushy patches.
You’ll often see black thread-like lesions extending from the soil and up the stems if plants are infected. The foliage of the plants may also look brown and dry.
Black rot, as its name suggests, may cause roots to turn black.This disease is particularly annoying because it can cause the roots to rot away almost entirely underground, while the foliage may look healthy above ground. Sneaky!
The fungi that cause rot prefer warm weather in the 70s and 80s, and lots of moisture.
To prevent root rot, consider starting plants indoors in the later winter or early spring, so they’ll reach maturity before the air temperatures outside soar above 70°F.
In the fall, plant after high temperatures in this range have passed.
You should also make sure your garden is gloriously weed-free, especially of plants like pigweed and lamb’s-quarter, which serve as hosts to these pathogens.
As with many diseases, good sanitation is also key. Wash your tools in a bleach water bath each time you use them.
Harvesting
Ideally, if the temperatures have been consistently between 60 and 80°F during the day and 40 to 50°F at night, your roots will be ready to pull out of the ground in 90 to 160 days.
Some varieties may grow quicker or slower than this average, so be sure to check your seed packet.
If you can see the crowns poking out above the soil line by an inch or two, they’re likely ready to pick.
To harvest, dig down gently into the soil next to the plant using a garden fork. Loosen up the soil, and then push the fork deep into the ground and tilt it slightly to dislodge the root. Using one hand, gently pull the tops while you use the fork to lift.
Commercial growers cut off all the tops prior to harvest, and you can do that as well. However, it might make harvesting a bit more of a challenge as you won’t have the tops to tug on.
People who raise deer often leave their beet fields accessible, so these animals can graze on the foliage before harvesting the beets.
Keep in mind, however, that encouraging wild animals to graze on vegetable crops that will be used for food is not usually recommended, since they may leave potentially hazardous waste behind as well.
Deer droppings are not a recommended fertilizer for the garden, since they pose a potential disease risk.
A period of at least 120 days between raw manure application and harvest of root crops is recommended, according to Paul McKenzie, area agent in agriculture at the North Carolina State University Cooperative Extension.
If you plan to store and use all of the tops as forage, cut them at the soil level and allow them to dry for a few days in the field until they feel dry to the touch before storing.
If you want to harvest the leaves for yourself, cut a few of the younger leaves off the plants as they are growing. The young leaves are much tastier than the mature ones – the younger the better.
Just be sure to leave enough foliage behind that each root can get the nutrition it needs. Never take more than a third of the leaves at a time.
Also, as you thin your growing plants, feel free to pick a few leaves and nibble away.
Don’t wash them until you’re ready to get cooking.
Storing and Preserving
You can store sugar beets for a short while after pulling them from the ground, but don’t wait too long if you want to make syrup or sweetener. The sucrose deteriorates quickly.
If you want to make a snack or a side dish, there’s no rush. Brush off the excess dirt, but don’t wash the roots until just before you’re ready to use them. Put them in a cool, dark location in a bed of sand or sawdust.
Thinking of making a homemade sweetener out of your harvest? Here’s how to do it:
Wash and peel the beets and slice off the tops. Shred or finely chop them and then put them in a pot with enough water to cover. Bring to a boil.
Reduce the heat to a simmer, and continue to cook until mushy. Strain out the liquid and reserve.
Line a colander with cheesecloth and press the pulp in small batches, collecting the liquid that comes out. It can help to twist the cheesecloth really tight to squeeze out every bit of juice.
Return all of the liquid to the cooking pot, and simmer on low heat until it reduces. It will have a thick honey-like consistency and brown color when it’s ready. Note that reducing the syrup will take several hours.
Line a baking sheet with waxed paper, and pour the reduced syrup on top. Cover with perforated plastic wrap or aluminum foil. Place it in a cool area with good air circulation.
Allow it to dry and crystallize, which can take several weeks to a few months, depending on how thick of a layer you have and the level of moisture in the air.
To speed things up and help make the final product easier to handle, you can break up the forming pieces every few days. Or, if you just can’t wait, feel free to use the syrup as a sweetener in its liquid form!
Once it has dried, the result is a sweetener similar to raw sugar. Note that your homemade sugar won’t be white, since it hasn’t been refined.
Break up the dried sweetener into usable pieces. Pound it in a mortar and pestle, or grind it as needed in a clean pepper mill or spice grinder.
About 20 pounds of beets should yield one to two cups of sugar.
Store leaves harvested for forage in a cool, dark place until you’re ready to use them. The tops can last for several months this way, but be sure to turn the leaves occasionally to prevent mold.
If you want to keep the leaves for yourself, you can store them unwashed and wrapped in plastic in the refrigerator crisper drawer for about five days.
You can also freeze them. To do this, wash the greens and then steam them over a pot of boiling water until they’re soft and wilted. This takes about three minutes for a couple handfuls.
Then, dip the greens in ice water to stop the cooking process. Drain the water, dry thoroughly, and place the leaves in freezer bags.
Recipes and Cooking Ideas
It’s undeniable that sugar beets simply aren’t as palatable as table beets. But that doesn’t mean you can’t eat sugar beets as you would any other garden vegetables.
However, it’s worth noting that the roots have been bred for their high sugar content, not their nutritional value. Don’t expect all the marvelous health benefits that you get from beetroots. They can still be a sweet treat, now and then.
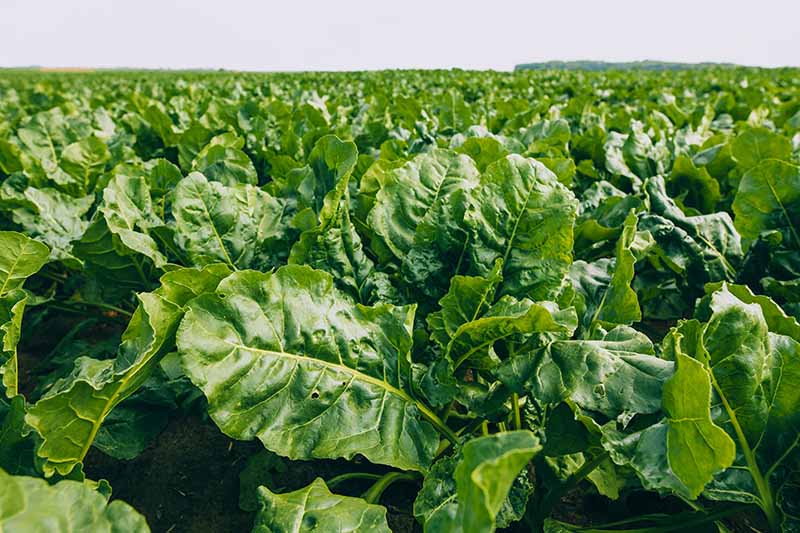
The leaves, on the other hand, are more nutritious than the roots.
Eat the leaves as you would chard or kale, but note that they can be quite fibrous. Younger leaves are tastier, with a more tender texture.
Don’t expect them to be sweet, however. All that sucrose is focused in the roots, not the foliage.
I prefer them roasted with some olive oil, or added to a soup. If you’re planning to eat them raw in a salad, chop them finely.
Even better, shred them with some kale and cabbage to make a killer coleslaw.
If you aren’t using the roots to make a sweetener, cook them as you would potatoes, or other types of beets. They have a texture similar to potatoes and can be roasted, boiled, or grilled.
While you can eat them raw, I prefer them chopped up and roasted with butter, or shredded to make sugar beet latkes.
Quick Reference Growing Guide
| Plant Type: | Biennial root crop | Tolerance: | Frost |
| Native to: | Southern Europe and Asia | Maintenance: | Low |
| Hardiness (USDA Zone): | 3-10 | Soil Type: | Loose, free of rocks |
| Season: | Spring, fall | Soil pH: | 6.0-8.0 |
| Exposure: | Full sun | Soil Drainage: | Well-draining |
| Time to Maturity: | 90-100 days | Companion Planting: | Bush beans, kohlrabi, lettuce, onions |
| Spacing: | 4-6 inches | Avoid Planting With: | Spinach, Swiss chard |
| Planting Depth: | 1 inch (seeds), same depth as container (transplants) | Family: | Amaranthaceae |
| Height: | 14 inches | Genus: | Beta |
| Spread: | 12 inches | Species: | Vulgaris |
| Water Needs: | Moderate | Subspecies: | Vulgaris |
| Common Pests and Disease: | Deer, rabbits; aphids, cutworms, flea beetles, root maggots, sugar beet nematodes, wireworms; Cercospora leaf spot, powdery mildew, root rot | Variety: | Altissima |
Get Ready for a Sweet Surprise
They aren’t as common as their more famous siblings the table beets, but sugar beets deserve a place in the home garden.
This is one of those versatile plants that can not only feed you and your family, plus your horses and cattle (and the neighborhood deer), but on top of that, you can make a natural sweetener that will have you turning your nose up at that processed white stuff the next time you’re offered some at the local coffee shop.
Be sure to let us know what you think after your sugar beet growing adventures – and don’t forget to share any recipes you come up with!
Hopefully, you feel prepared to tackle this under-appreciated veggie after reading this guide. If so, you might wish you arm yourself with more beet-growing know-how. Check out these guides next:


Could you run these through a juicer to extract the juice? And could you use a dehydrator to crystalize it? And if so, would you cook the beets before running them through the juicer?
Sure, you could absolutely run them through a juicer. I’ve honestly never tried dehydrating the juice to obtain the sugar. I imagine that it won’t be quite as sweet and might not crystallize because you haven’t boiled out the sugars, first. That’s just a guess on my part. It’s certainly worth a try, though. I would peel beets, cube them, and soak them in water for 15 minutes or so before juicing. Let us know how it goes!
Oh, I am so excited to run across your article! My sugar beet seeds just shipped (one of several new types of plants I’m growing this year in our 1-acre garden). Making more and more of our food is one of my top priorities but sugar and salt were tripping me up. I’m so excited to be able to give this a try.
That’s awesome, I’m so glad you’re giving it a try. These are an underappreciated crop, or sure. Let us know how it goes!
How long will the sugar beet syrup keep? Should it be refrigerated?
Hi Mia, sugar beet syrup can last a year or two, so long as you keep it in an air-tight container in a cool, dark area. No need to refrigerate, but doing so might extend the life by a month or two.