It’s pretty easy and convenient to pick up a pack of tomato seedlings from your local garden center and plug them into the soil.
So you might wonder, what are the advantages of starting these veggies from seed?
The first reason that comes to mind is that starting your own tomatoes from seed at home is a good way to save money, leaving room in your gardening budget for other essentials.
You can typically buy a packet of about 20 seeds for the price of one seedling.
We link to vendors to help you find relevant products. If you buy from one of our links, we may earn a commission.
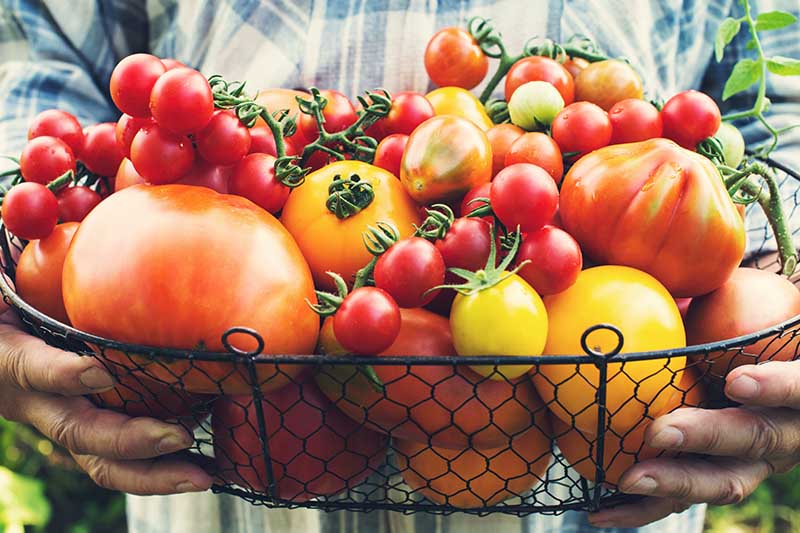
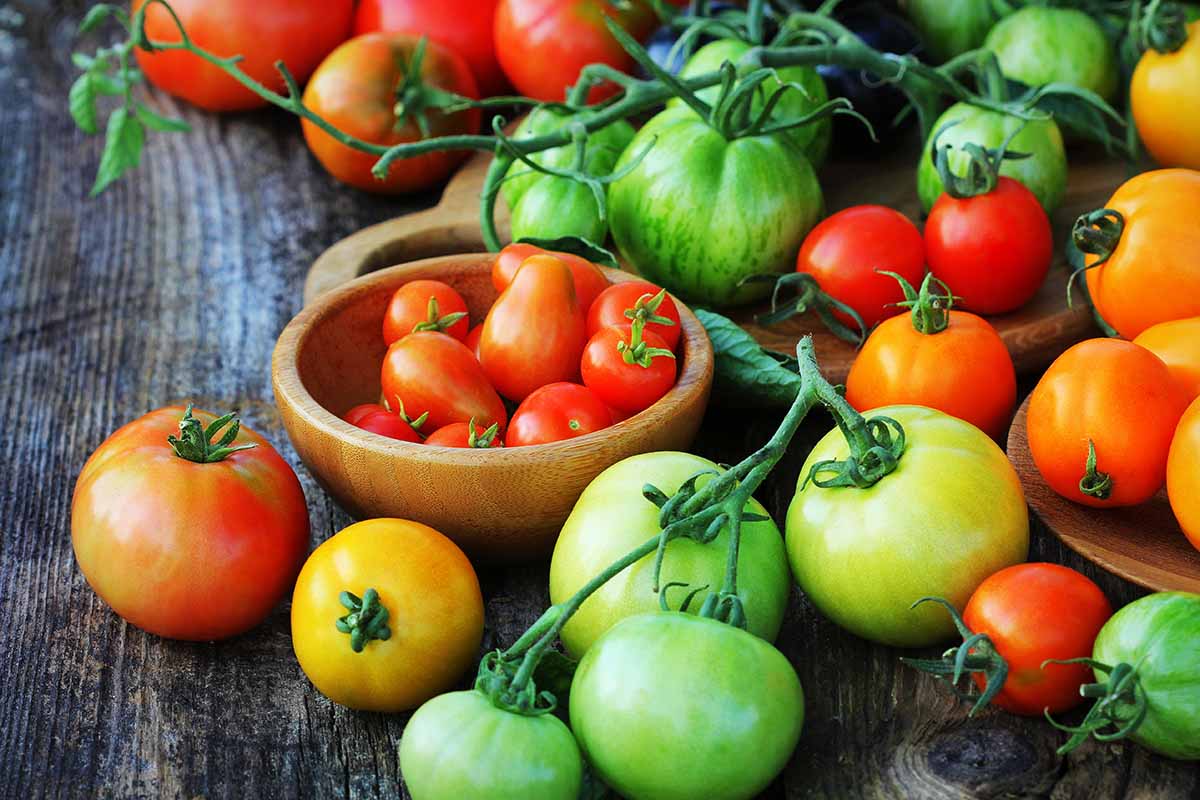
But the real motivating factor for me and many other gardeners is that starting tomato seeds at home opens up a dizzying selection of varieties for us to choose from – including less common cultivars we’re unlikely to find as transplants at our local plant nurseries.
So, whether you’re looking for a juicy, jumbo, sweet slicer or a tiny, tart cherry, there’s an incredible array of colors, shapes, ripening styles, culinary uses, and flavors to choose from when you start your tomatoes from seed.
Best of all, growing tomato starts really isn’t that hard!
Here’s an overview of what I’ll cover:
What You’ll Learn
In preparation for growing your own tomatoes from seed, you’ll need to gather some supplies.
Gather Supplies
Some of these are necessities, such as:
- Seeds
- Starting mix or soil
- Containers
- Spray bottle
Supplies like plant markers, a widger, and a germination station are highly recommended, but there are many options for you to choose from for these, including some DIY possibilities.
There are also a couple of items on this supply list – grow lights and heat mats – that may be luxury bonus items, or may be required, depending on your setup.
Find more seed starting supply and equipment suggestions here.
Tomato Seeds
If you’re starting tomatoes from seed at home, you’ll probably want to take advantage of your increased options and grow some varieties that you wouldn’t be able to buy as transplants at your local nursery.
Seed catalogs contain a huge selection of varieties including:
- Short season
- Long season
- Determinate and indeterminate
- Cherry
- Grape
- Plum
- Cocktail
- Yellow
- Orange
- Indigo
- Purple
- Black
- White
- Striped
With many tomato cultivars fitting within three or four of these categories.
When you have all your supplies gathered up, you’re almost ready to start your tomato seeds.
There’s just one important step to take care of before you get your hands dirty:
Getting the timing right.
Know When to Sow
It’s important to know when to start your tomato seeds so the seedlings are ready to be planted out at the right time.
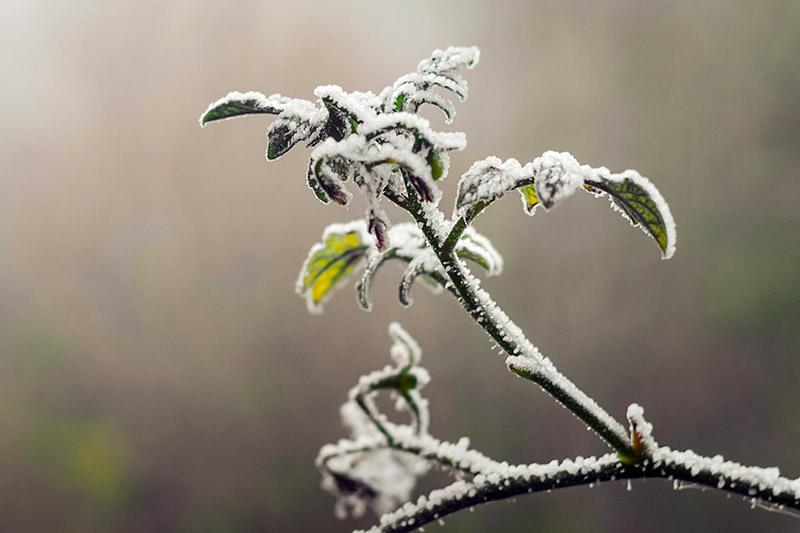
The best time to transplant these summer veggies is a couple of weeks after your average last frost date.
Planting a couple of weeks after this date helps to provide a little wiggle room in case a freak late frost decides to sweep through your area.
First, determine the average last frost date for your area.
If you don’t already know it, you can look it up at the Old Farmer’s Almanac. Just type in your zip code and the tool will calculate your average last frost date and display it on the screen. Easy!
Most seed packets recommend starting tomato seeds four to six weeks before your last frost date, but they assume you will set out your transplants close to this date. I recommend being a bit more cautious than that.
If you sow your seeds just four weeks before the last frost, then your starts should be ready for transplanting two weeks after the predicted last frost. Make sense?
So take the average last frost date for your region and count back four weeks. This is when you should begin your tomato seed starting project.
Learn more about when is the best time to sow vegetable seeds indoors and outdoors in our helpful guide.
Prepare Trays and Sow Seeds
Now you’re ready to get started, so let’s go.
Place some starting mix in your seed trays. Fill each cell loosely, then gently tap the tray to remove any air pockets.
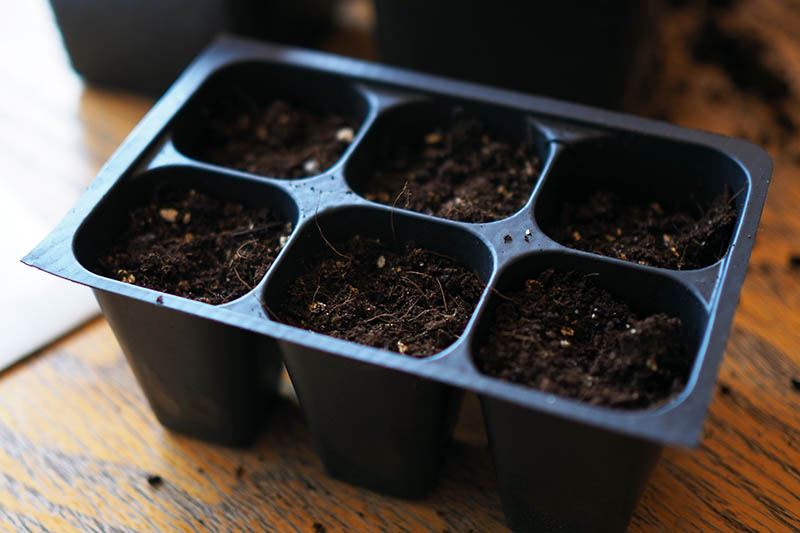
You want the soil to fill in the cells without becoming compacted. Loose soil will allow your plants’ roots to spread out nicely, but compacted soil will not.
Gently smooth the surface of the soil to make it level. Leave three quarters of an inch of head space at the top of the cells, above the soil line.
Learn more about trays and pots for starting seeds.
Sow Seeds
Shake out some seeds from your seed packet into your hand.
To make up for any that may not germinate, sow two to three seeds per cell.
Place one seed on the surface of the soil, and repeat with the others, spacing them out an equal distance from each other.
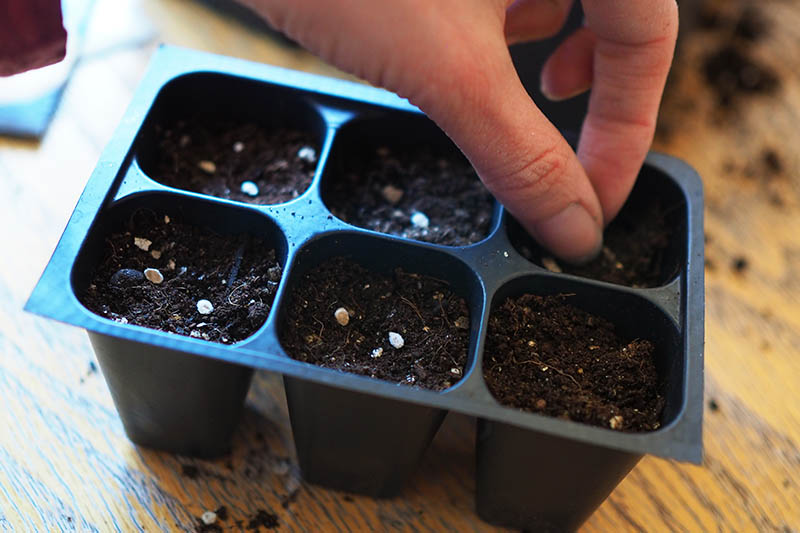
Grab a pinch of sterile planting medium and sprinkle it over the seeds, covering them with about a quarter of an inch of starting mix.
Then, gently pat the surface of the soil to smooth it.
Water Gently
Water the seeds with your spray bottle, spraying until the soil is moist, but not waterlogged. For me, this is usually about four or five squirts.
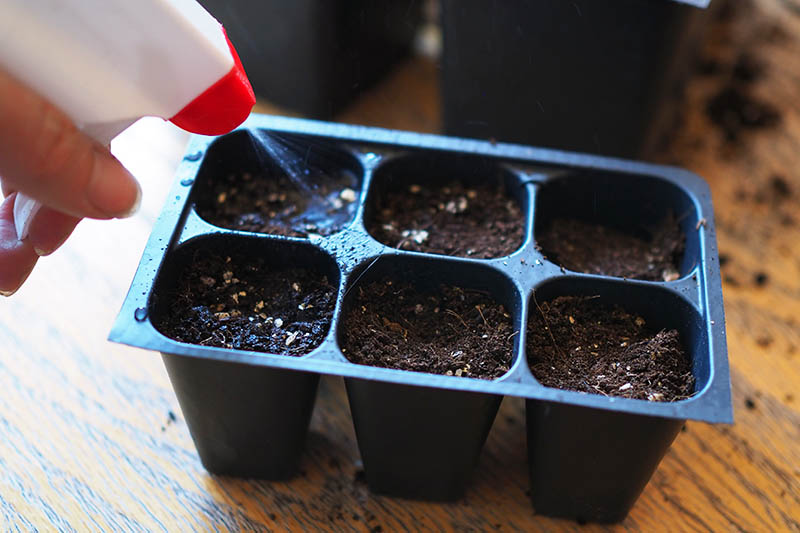
After germination, when your seedlings are larger, you will want to water more thoroughly, with a small watering can or teapot.
But while you wait for the seeds to germinate, keep using the spray bottle to prevent overwatering or dislodging the seeds.
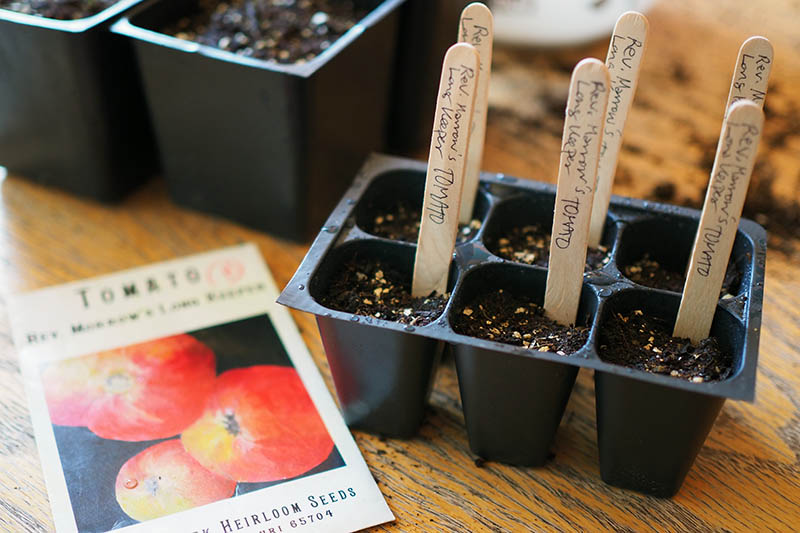
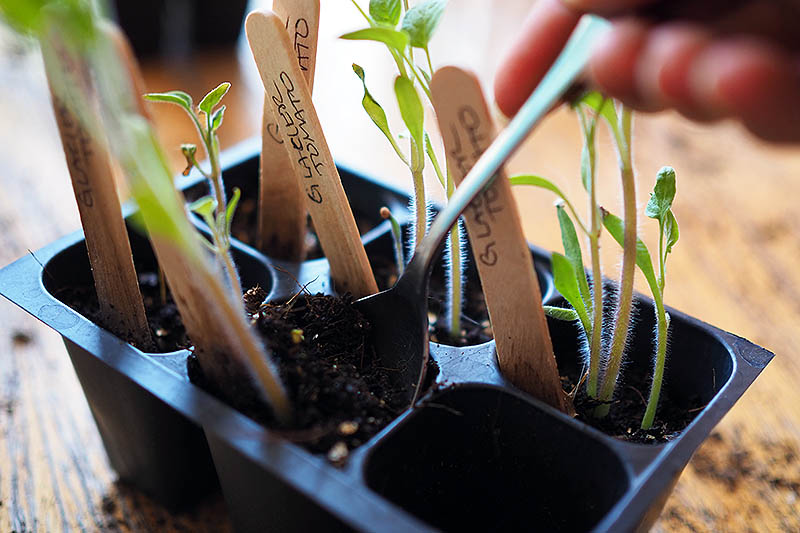
Write the name of your variety and the date seeds were sown on as many seed markers as you need, and stick them in the tray along the edge of the cell, away from where you placed your seeds.
Move to the Germination Station
Place your seed trays in a warm and humid location – your “germination station” – whether this is a greenhouse, cold frame, terrarium, grow dome, or just under some plastic wrap.
If your seed tray or pots are placed next to a warm window, you may not need a heat mat.
But if you do need extra heat to maintain the soil in your trays at the recommended 65 to 85°F, place a heat mat underneath them.
You won’t need to expose your trays to light until the tomatoes sprout. Though some types of seeds require light for germination, tomatoes do not.
Check your trays once or twice a day, and water with your spray bottle when the surface of the soil is dry.
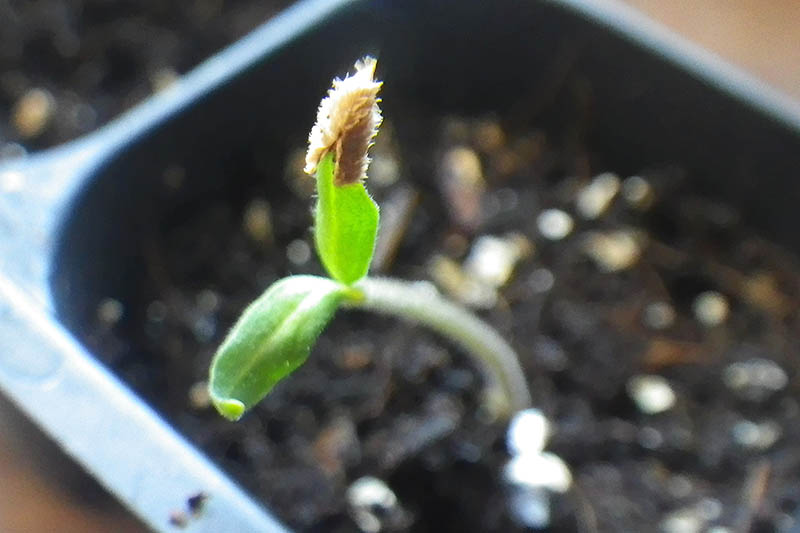
Within a week or two, the seeds should start to germinate. Tiny seedlings will rise out of the soil, perhaps holding the seed cases they just emerged from aloft on one of their seed leaves, or cotyledons.
If you used plastic wrap over your seed trays, remove it now.
Provide Light
Make sure you are ready to provide light to your newly emerged tomatoes – whether it’s sunlight from a bright, south-facing window or artificial light from a grow light.
If you are using a grow light, place it two to three inches above your starts.
When using a window for light, your plants will lean towards the window. To correct for this and encourage your plants to grow straight, rotate your seed trays every few days.
If your “germination station” is a greenhouse, cold frame, terrarium, or domed tray, you can leave your plants there to grow.
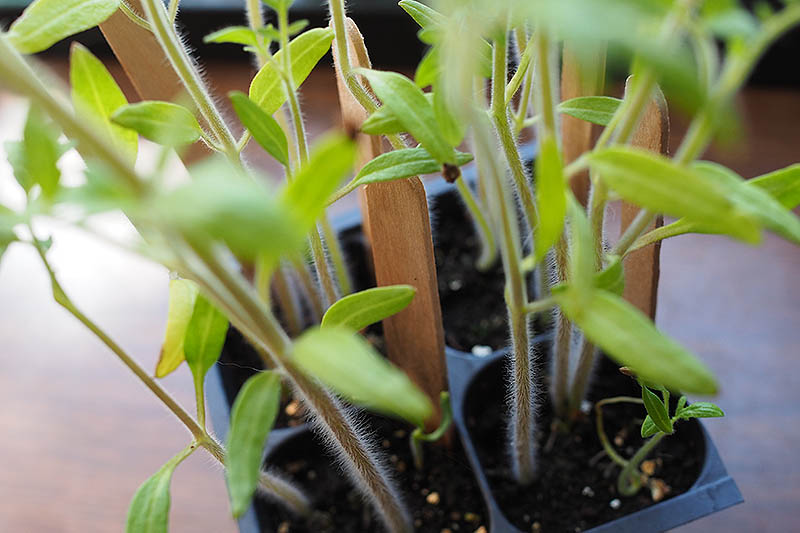
Daily Care of Your Seedlings
You will need to care for your young tomatoes every day.
- Water once or twice a day with your spray bottle when the surface of the soil is dry.
- When starts are bigger and require more water, switch to a small watering can or teapot.
- Ensure there is adequate ventilation around your seedlings so the temperature doesn’t get too hot. Interior temperatures over 95°F will stunt growth.
Optionally, you can expose your young tomatoes to the breeze of a gentle fan, or gently brush your hands over their leaves a few times a day.
The purpose of this is to simulate wind and help strengthen their stems.
Thin Your Starts
If the majority of your seeds germinate and you end up with two or three plants growing in each cell of your tray, you may need to thin them.
If you allow the seedlings to grow too close together their roots will become tangled, so it’s best to sacrifice some of them and keep only the strongest plant in each cell.
If you will be repotting your seedlings in the next step, you can thin them at the same time.
The safest way to do this to avoid disrupting the roots of your remaining plant is to use a small pair of scissors to snip the stems of the rejects, just above the soil line.
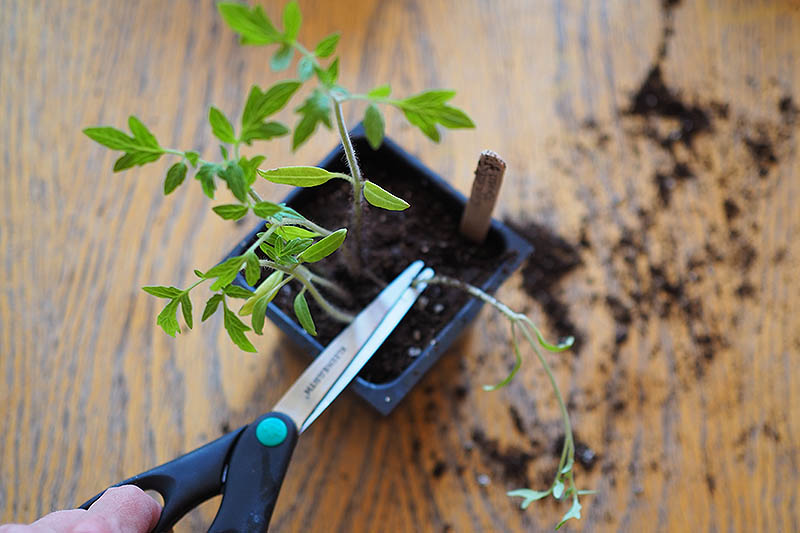
Continue snipping until you have just one strong tomato seedling in each cell.
If seedlings are not overly crowded when you’re ready to repot or transplant into the garden, and all of them look strong and healthy, you should be able to gently remove each of them from the soil for repotting without culling any.
Repot and Harden Off
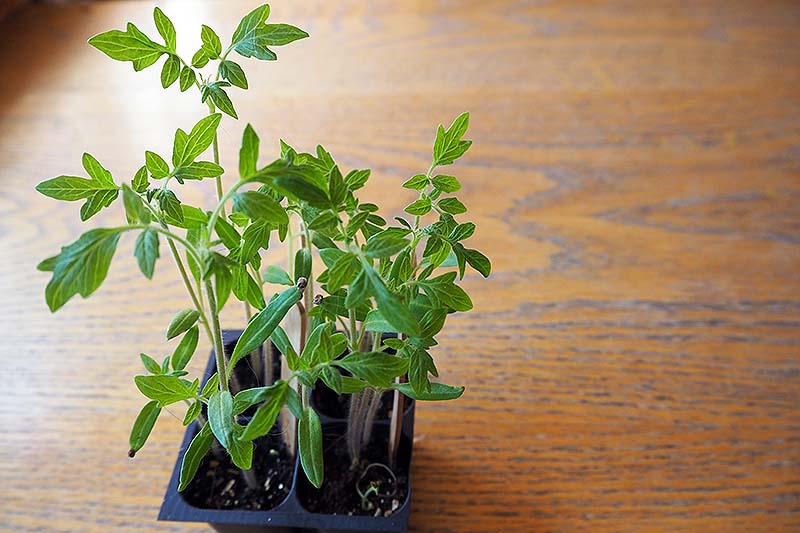
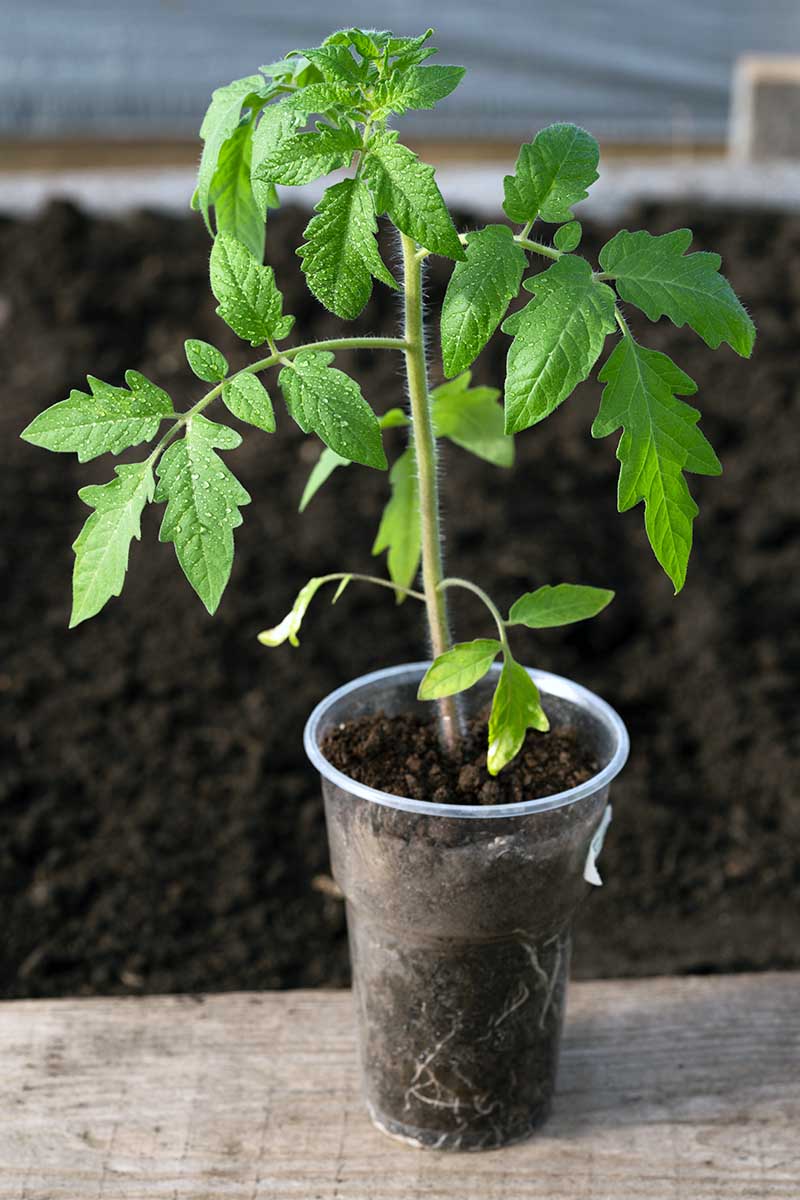
When your baby tomatoes have at least two or three sets of true leaves, they can be transplanted into larger sized nursery pots – unless you are ready to transplant them directly into the garden or their summer containers.

Repotting will give your tomatoes more room for root development, allowing them to grow larger and stronger before you transplant them out into the garden.
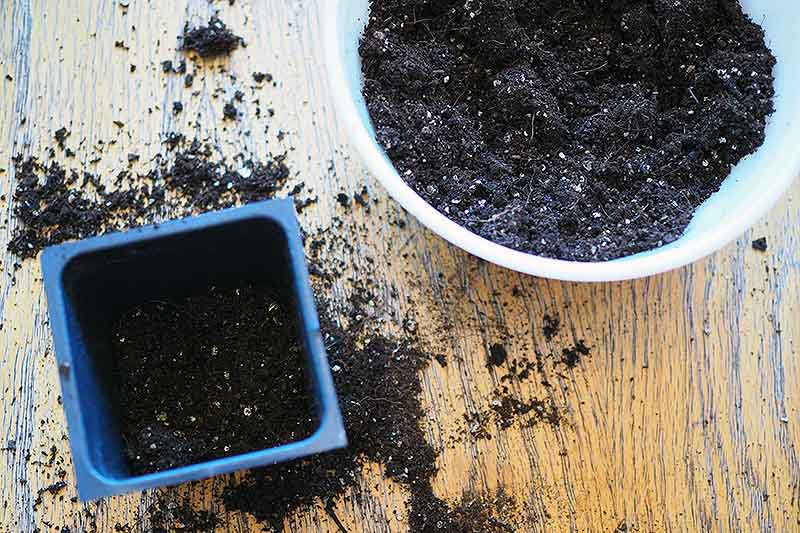
Prepare your nursery pot by filling it halfway with potting mix. Tap the pot to let the soil settle, but not so much that it becomes compacted.
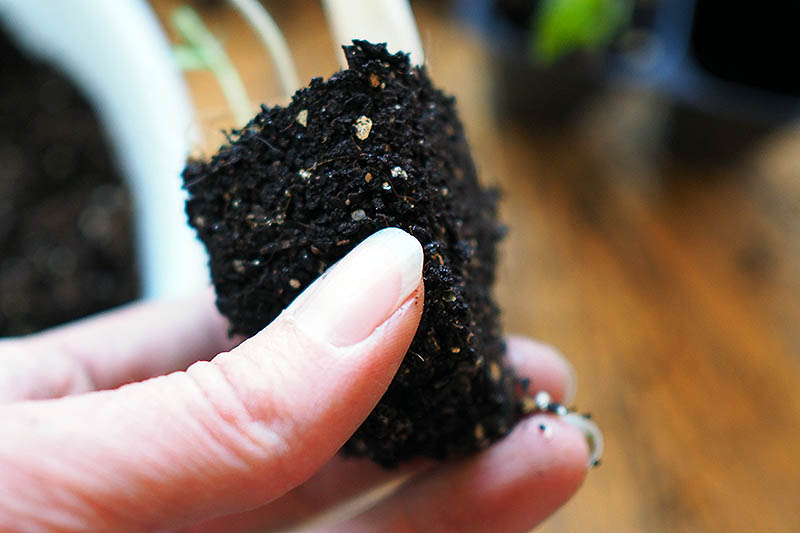
Repotting from Biodegradable Seed Trays
If you started with a biodegradable tray, use a pair of scissors to cut the cells apart so you have separate pots to plant.
Trim down the rim of each cell so it is level with the soil.
Place a biodegradable tray cell directly into the larger sized pot, being careful not to tear it. Add potting mix so it’s level with the soil of the transplant. Repeat with the rest of your seedlings.
Repotting from Non-Biodegradable Seed Trays
Gently remove tomato seedlings from the tray one at a time with a small spoon or widger.
Place the spoon as far down into the cell as possible to avoid damaging the roots.
Pull up with the spoon – your tomato should be freed from its first container!
Hold the soil instead of holding the seedling by its stem, which is susceptible to disease if it’s accidentally bruised or damaged.
Now you’re ready to place your tomatoes into their new pots.
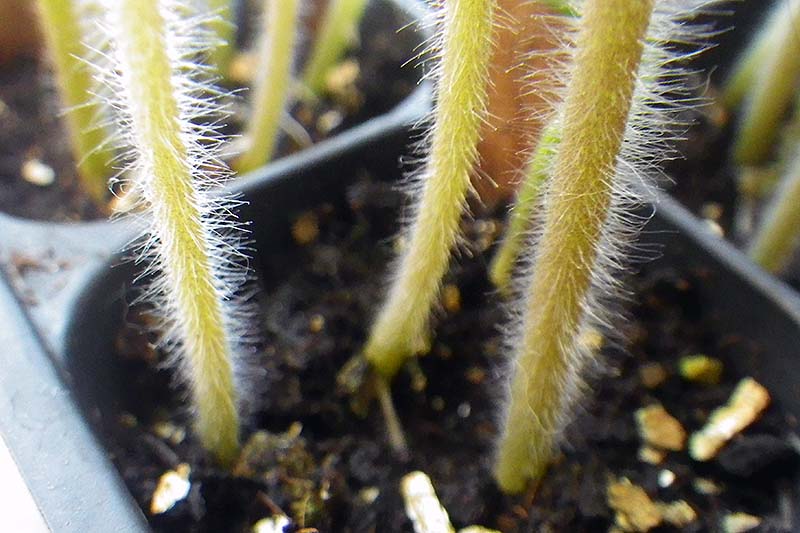
Tomatoes are one of the few plants that do well when their stems are buried deeply in the soil.
This can introduce rot in other plants, but if you sink part of a tomato’s stem in the soil or bury it, the hairs on the stem will turn into adventitious roots.
Remove any lower leaves from the bottom two-thirds of the stem, and make sure the tomato still has at least two sets of leaves above the soil. Leave enough stem free so that there are at least a few inches between the soil and the leaves.
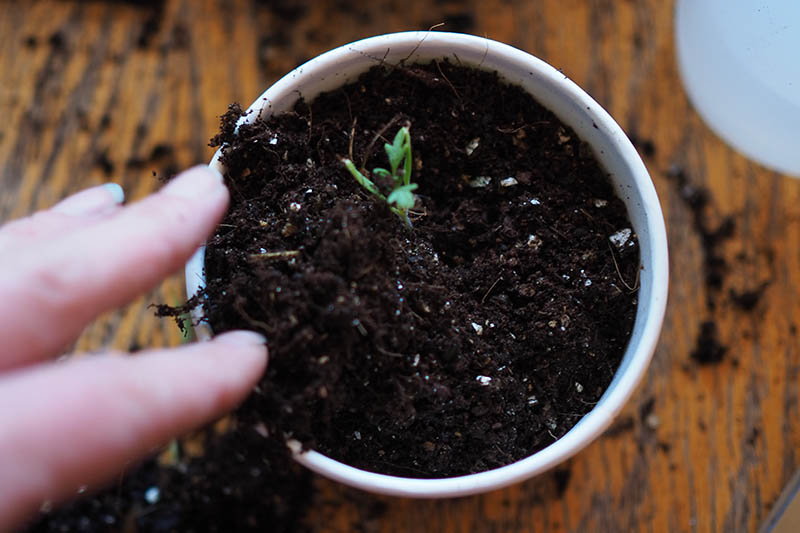
Add more soil until there is only a half an inch or so of head space at the top of the nursery pot, tap the pot gently to settle the soil, then water with your spray bottle or watering can.
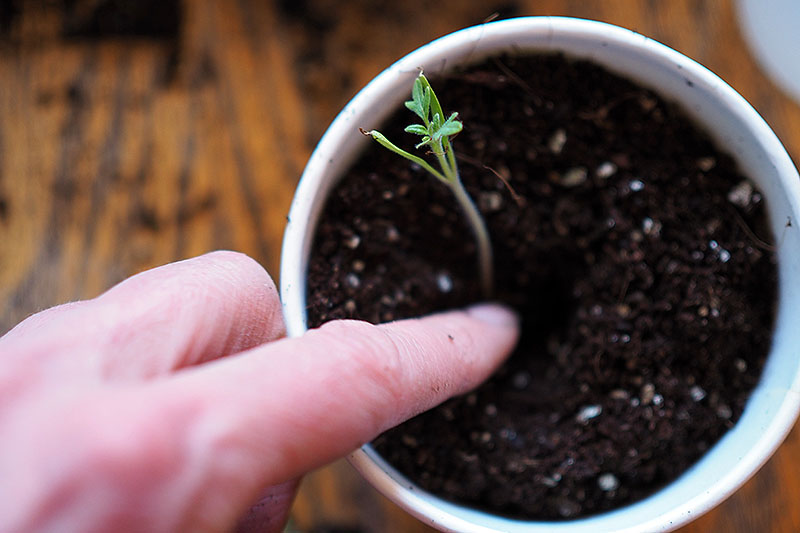
Poke a hole into the middle of the soil with your finger.
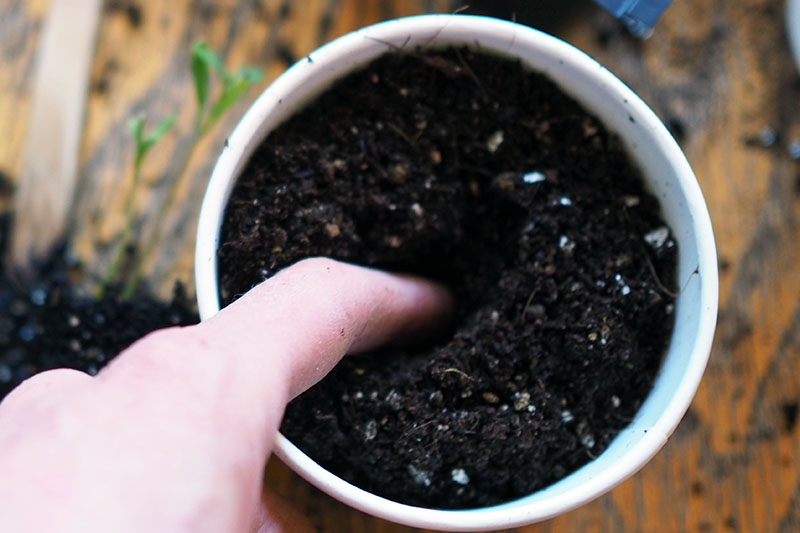
Place the young tomato into the hole, sinking it down as deeply as possible without bending the stem.
Add soil, filling the hole and the nursery pot. Gently tap the pot on your work surface to settle the soil, until there’s about half an inch of room at the top of the pot.
Water your repotted tomato and return it to the germination station, place it next to a sunny southern window, or set it back under grow lights, keeping the light two to three inches away from the top of the plant.
As you approach your transplant date, continue with your daily care.
Harden Off
Your next step will be to give your tomatoes a transition period to adjust from their protected life in your home, greenhouse, or cold frame to their new location out in the elements.
Providing this transition period is called “hardening off.”
Tender transplants are vulnerable to outdoor weather conditions. Providing them with a gradual transition to the outdoors will help them become stronger and more resilient.
During the hardening off period, gradually introduce your plants to the outdoors during the day for a few hours at a time, slowly increasing the amount of time they spend outside and the amount of direct sunlight and wind exposure they receive.
Here are some tips for hardening off your plants:
- Give your plants a seven- to 14-day transition period.
- Start the hardening off process in a shaded, sheltered location.
- Gradually increase sun exposure and time outside.
- Protect plants from wind for the first week.
- Water plants less frequently during the hardening off period, but do not let them dry out or wilt.
- Only begin hardening off when outdoor daytime temperatures are above 50°F.
Hardening off your young plants may seem like a lot of work. But it’s work that will pay off with bountiful harvests of fresh, delicious summer tomatoes from vigorous plants.
Transplant to the Garden
When is it time to transplant your tomatoes to your garden or pots and containers?
After hardening them off, and preferably two weeks after your last frost date.
Tomatoes need soil temperatures of 60°F or higher for growth, so if your soil isn’t that warm yet, hold off on transplanting them until it is.

You can check your soil temperature with a soil thermometer. Keep in mind that this is not the same as the ambient air temperature.
When you’re ready to transplant, water your plants well before their big transition into outdoor soil.
Dig a hole a little larger than the pot from which you are transplanting, and add some worm castings or compost to the soil.
If you used a biodegradable pot, don’t remove the transplant – the pot will go into the ground. Just make sure the rim of the biodegradable pot isn’t sticking up above the ground.
Trim it before planting it so the top is level with the potting mix, the same way you did with your biodegradable seed starting trays.
If your tomato is in a plastic pot, squeeze the sides of the pot to loosen it, and tilt the plant sideways to slide it out. Try to avoid pulling the plant out by the stem.
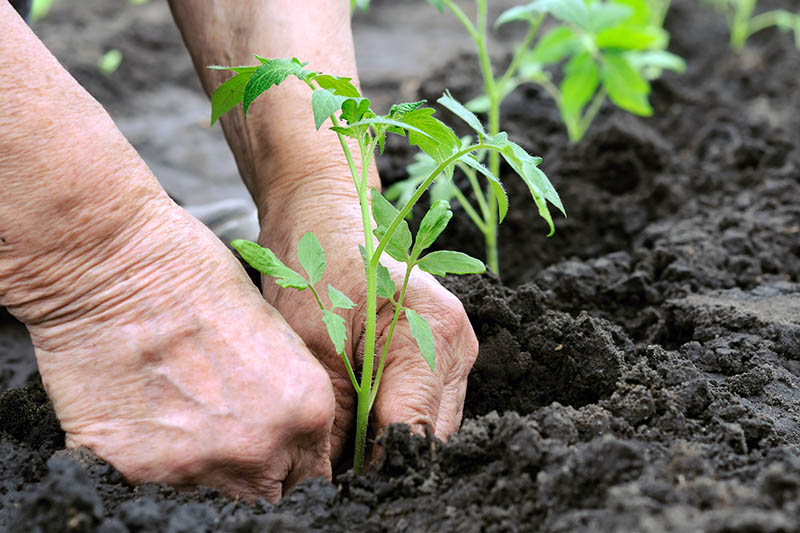
Plant your tomatoes at least as deep as their seed leaves. Planting more deeply is preferable, and will help your plants develop a strong root system.
If your plants are leggy – which they hopefully won’t be if you followed all of the above instructions, but sometimes it happens – you can lay them sideways in a trench in the soil rather than a hole, with just the top several inches of stem and a couple of sets of leaves remaining above ground.
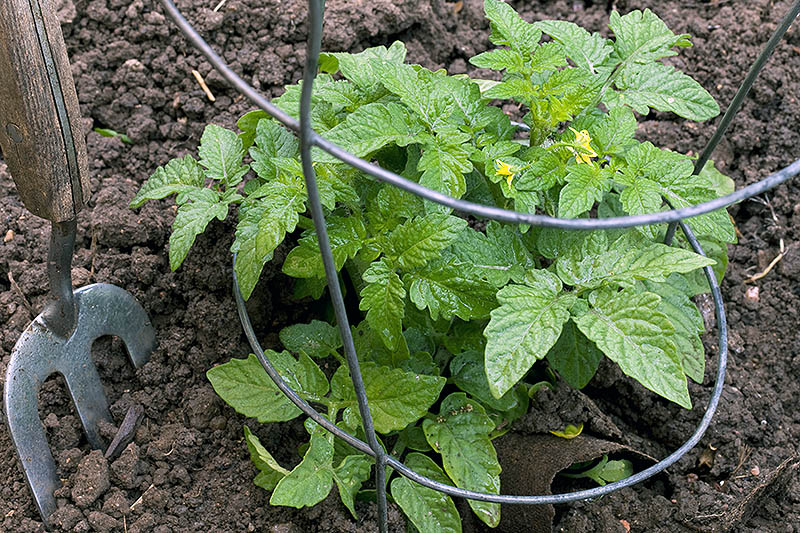
Go ahead and stake your plants now, so you won’t disturb their roots later.
Keep your newly relocated plants well-watered for the first couple of weeks after transplanting.
For further guidance on transplanting your tomatoes into the garden, see our complete guide to growing these summer veggies.
Seed You Later, ‘Mater
Nice work, gardener! You are now ready to let your plants grow, and await boatloads of delicious homegrown tomatoes.
Have you started tomatoes from seed before? Do you have any other tips for success to share? If so, I’d love to hear them, so tell me your thoughts in the comments.
Or if you have previously been unsuccessful at growing tomatoes from seed, perhaps this article helped you troubleshoot what went wrong. Let me know!
Looking for more tomato growing and harvesting information? Be sure to check out some of our other guides next:


I sometimes place large rocks about 6-8 inches away from plants, to not interfere with the roots but to give them more warmth to grow by.
Also, if I do the inverted tomatoes I like to hang them on the south side of the brick house. I have harvested tomatoes as late as November, in Detroit, Michigan that way, because of the heat to the plant during the day and the bricks give off warmth at night for a longer growing season.
Way too much info all we need is depth, how many weeks to harvest and where to plant while spread from another plant. Not pages n pages of descriptions
Hi Barbara, I’m sorry this article is not what you were looking for! I always try to make sure to explain things for beginning gardeners who might need more detail. The information you’re interested in – depth, weeks to harvest, and spacing – should be listed right on your seed packet. In case you missed it in the article, you should plant your tomato seeds 1/4 inch deep. As far as weeks to harvest, that depends on the tomato variety – usually this ranges from 50-80 days but can be longer, depending on the variety. And… Read more »
Barbara — I am appalled at how rude you are. First of all, you had no right to speak for the rest of us when you used the word “we”. Personally, I very much appreciated all the information provided — every bit of it. It helped me tremendously. Others likely too. If you’re not interested in that kind of information then DON’T READ IT. And keep your rude mouth shut. The world doesn’t revolve around you. Thank you Kristina for an excellent article.
Daniel,
Thanks very much for letting us know you found the article helpful! Best of luck with your tomato growing adventures!
What a wonderfully detailed article! This step-by-step guide is exactly what I’ve been searching for. Thank you so much for putting so much time and thought into helping beginners like me. My quarantine garden thanks you. 🙂
Hi Elizabeth! Thanks so much for taking the time to leave a comment – and I am THRILLED that this guide was what you needed! Best wishes to your garden and tomato plants!
Thanks so much! I truly needed to read this. Cannot wait to start the journey of gardening and harvesting tomatoes.
Hi Wendy, I’m so glad the article helped! Best of luck to you on your gardening journey! Enjoy!!!
Kristina, thank you for this article. Wonderful written and super informative! I just started gardening last year and I did container tomatoes but it was not a good start and will do it differently this year and trying to start earlier from seeds. I also will have my tomatoes in the ground and hope they will do better this year.
Hi Stephanie,
I’m so glad you found the article helpful!
It can take a couple of years to get into the swing of growing your own food, but I think you’ll find that your success rate will increase year after year. And it’s so satisfying!
Best of luck with your tomatoes this year, and feel free to pop back on here if you have any questions – we have lots of great articles and knowledgeable seasoned gardeners here at Gardener’s Path!
Happy seed starting!
As a nerd that enjoys all the reasoning behind why I am being told to things a certain way – this article was perfect! Thank you for the detailed information! Can’t wait to up my gardening game this year!
Annie,
You and I must think alike! Personally I want to know how everything works and why.
And thanks so much for letting me know you found this article helpful.
Best of luck with your tomato seedlings!
When I use a grow light, do I need to keep it on 24/7? Or is there like a natural day/night cycle I need to replicate?
Hi Sarah, That is an excellent question, and unfortunately I don’t have a very straightforward answer for you. The amount of time needed under grow lights will vary widely depending on the type of grow lights you use. I’m linking here to an article from the University of New Hampshire Cooperative Extension that includes a chart showing different light outputs and hours of exposure needed. Keep in mind that if you also have sunlight in addition to the grow lights, the seedlings would need less time under the grow lights. If you’d like a general rule of thumb, however, many… Read more »
Once my seedlings come out of the starter trays, I transplant my seedlings in a water bottle. I cut the water bottle in half, put some drainage holes in the bottom. Plant my seedlings and then I put the other half with the cap back on the bottom half. As the plant grows I can add more dirt around the stem. I hope this helps. Happy gardening.
Hi Teri,
Thanks for sharing your tip! I love this idea for creating a mini greenhouse for your tomato seedlings.
Happy gardening to you!
please explain determinate and indeterminate tomato plants. I have seen it on the labels and wonder if they should be planted differently from each other Thanks Hojo
Hi Hojo, we’ve got an entire guide about the difference between determinate and indeterminate tomatoes which gives you all that info and more! Happy gardening!
I enjoyed your article and I was able to understand it clearly. Thanks again.
Thanks very much for the feedback, I’m very glad you found the article helpful!