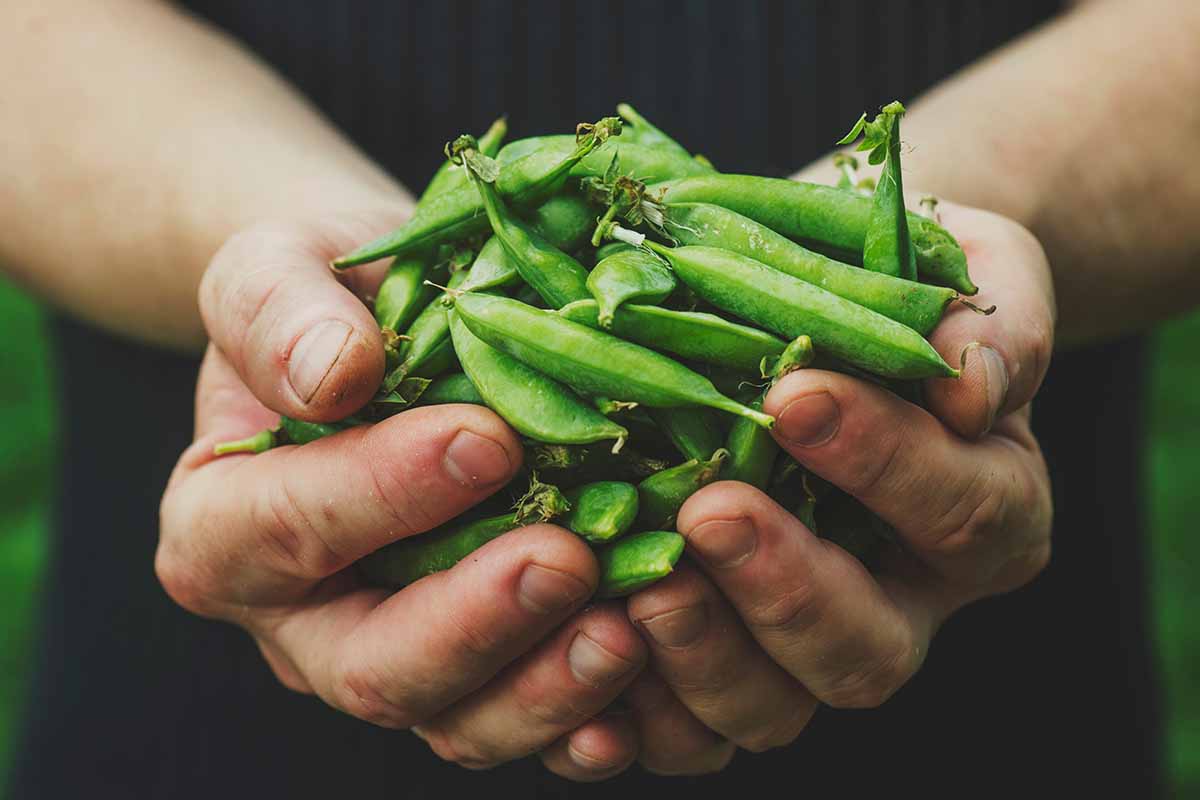
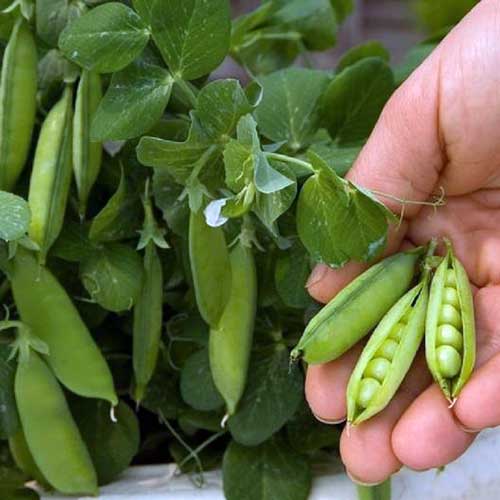
Did you ever have the chance to shell freshly harvested peas as a kid?
It’s so fun! Each one hides its contents like little prizes earned from all the nurturing you provided through the growing season.
Well, if you didn’t have that experience in childhood, there’s still time to make up for that as an adult. And the best part is – a garden isn’t even necessary to enjoy it!
Sneak a few fresh, sweet peas into your mouth when no one is looking. We won’t tell.

We link to vendors to help you find relevant products. If you buy from one of our links, we may earn a commission.
Sugar snaps and snow peas don’t even need shelling; they can be added to the menu directly after harvesting with nothing but a rinse in between.
Planting and growing any of these in containers is ridiculously easy, and we’re going to cover it all. You’ll be a potted pea planting pro by the time you’re finished!
Here’s what we’ll cover:
What You’ll Learn
Getting Started
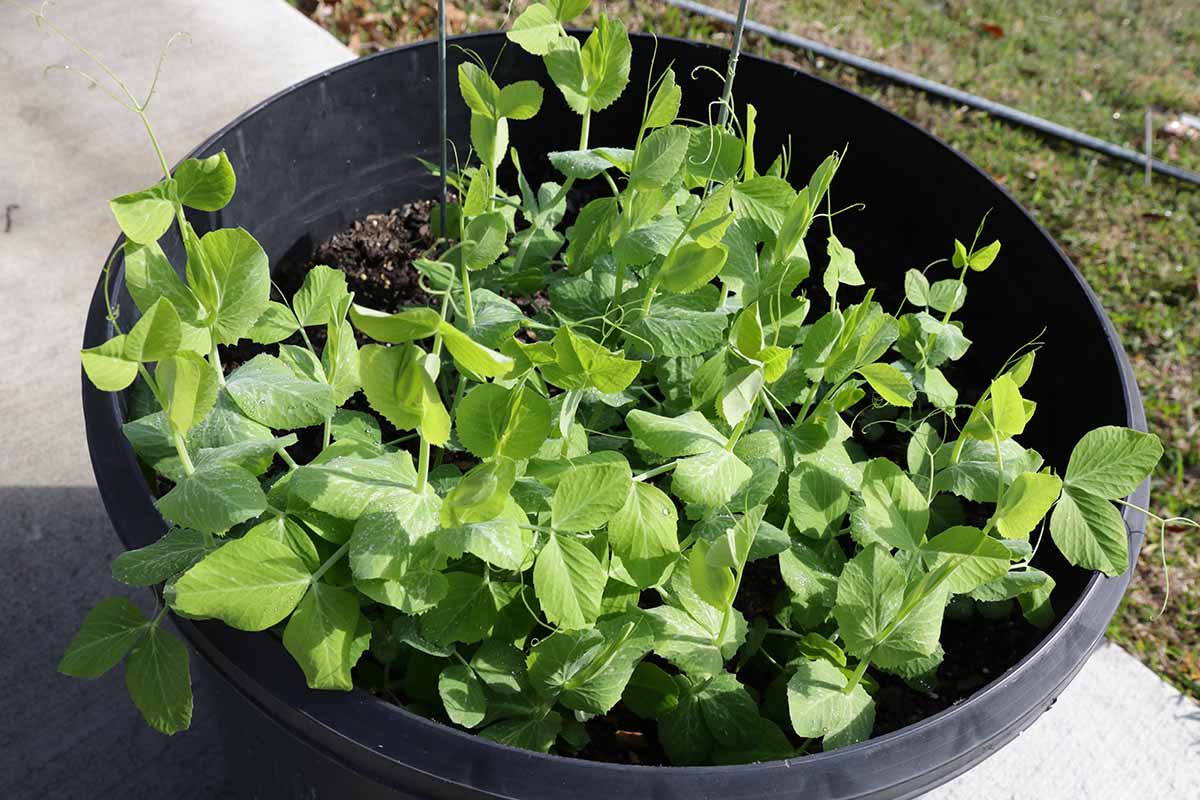
Since they have a small root system, you don’t need a very spacious vessel to pot peas. This is good news for those who are planting a balcony, patio, deck, or porch garden. They’ll fit right in.
What’s great about this method is that a smaller pot or planter, supports, sunlight, water, and healthy soil are really all you need to begin.
Why Grow Peas in Containers?
Because of their naturally vertical growth habit, peas will produce a lot of food within a small footprint.
Based on my own experience – and of course, depending on the variety that you choose – 20 plants can be grown in four window boxes along a fence, yielding enough peas for several meals.
A few more can provide a big enough harvest to can or freeze for later, if you have the space.

Some varieties, known as bush types, don’t grow very tall and generally won’t need as much support. Several of these, such as ‘Tom Thumb’ and ‘Little Marvel,’ were bred just for container growing.
Peas belong to the legume family, also known as the nitrogen-fixers. In a symbiotic relationship with beneficial bacteria in the soil, nitrogen is pulled from the air and converted to a form that plants can use.
Early, short-season varieties easily allow for succession planting, so it’s possible in most areas to sow several sets before the heat of summer sets in.
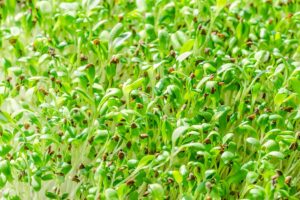
It only takes a couple of weeks for peas to grow to a few inches in height after they germinate, so you can enjoy fresh shoots throughout the season if you opt to grow them as microgreens with successive plantings as well.
If you want to get fancy and put the vining types to use, it’s possible to train them to make a productive, living privacy fence for the duration of the growing season.
Another bonus is that all parts of edible pea plants – from the seeds and new shoots to the blooms, pods, and leaves – may be eaten. However, shelling peas have fibrous pods that are unpleasant to chew.
There is also an important distinction to make between garden peas and the sweet pea, Lathyrus odoratus. Sweet peas are flowering plants with beautiful, highly scented blooms. They are also legumes, but all parts of this species are toxic.
Let’s touch on what to look for in a suitable potting vessel to begin.
Choosing the Right Container
As I mentioned, there’s no need for a gigantic pot. A depth of about eight to twelve inches provides plenty of space for the small, shallow root system it’ll need to accommodate.
As a rule of thumb, width is more important than depth, and you’ll want to grow multiple plants for a sizable yield.
One such as this gorgeous, rustic, 12-inch Barnacle Rounded Egg Planter from Terrain is perfect. It’s made of glazed ceramic with an antique finish, and it has a drainage hole at the bottom.
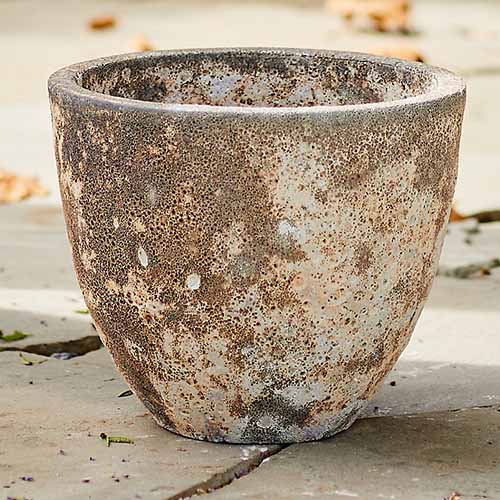
Be sure to choose a pot that provides good drainage, and consider one made of a porous material such as ceramic to allow for transpiration.
Unglazed terra cotta containers absorb and lose moisture through their walls, so potting in these can make it easier to prevent overwatering.
Just bear in mind that, while unglazed ceramic is healthier for the roots, it can increase the need for frequent watering.
A wider, trough-shaped planter is also a great choice for growing peas if you want to produce a higher yield.

This 36-by-nine-inch window box, available from Home Depot, is a good choice – although it is made of plastic, which doesn’t allow for transpiration.
You’ll need to be sure to punch out drainage holes in a plastic container like this one.
Preparing Your Container
A newly purchased container is usually good to go, although a quick rinse with water and a spray with neem oil can help to kill off any pathogens that may have hitched a ride from the garden center.
Reused planters will need a bit of attention prior to planting.
Use warm, soapy water to scrub these out well. Prepare a solution of one part bleach to nine parts water and submerge each container fully to kill any pests, eggs, or pathogens it may contain.
Leave your containers in the solution for about 30 minutes, and then rinse thoroughly until they no longer smell like bleach.
Drainage holes should be added to containers that don’t already have them. If this isn’t possible, choose something else to plant in.
Now, your pots are ready for growing a new crop of peas!
How to Grow
Most types of peas can withstand the low temperatures of early spring. Mature bushes or vines can often power through a light freeze and will continue growing even in temperatures around 40°F.

Soil temperatures determine how early the seeds will sprout. Aim for temperatures around 50 to 60°F for the fastest germination – anything below this, and the wait will be longer.
Growing in a container means soil temperatures will generally be lower than they would be in the ground.
In USDA Hardiness Zones 3 to 9, late winter to spring is the best time for planting peas. In Zones 9 to 11, fall or winter is best.
The contents of seed packets are dried thoroughly so they don’t grow fungus or mold during storage. Soak the seeds in room temperature water overnight to allow them to rehydrate.
Drain them afterward, or add the water to the soil they’ll be planted in.
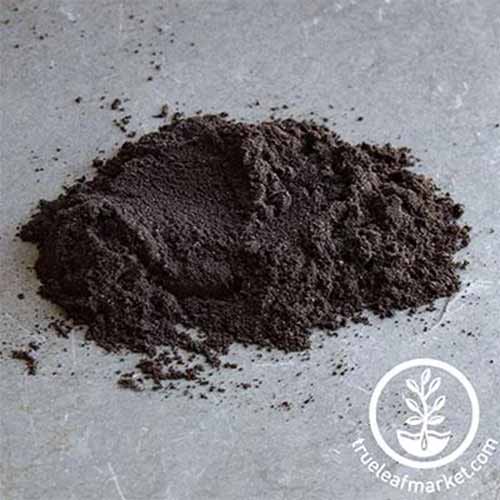
For the best results, sprinkle them with an inoculant such as this Cover Crop Inoculant for Pea, Vetch, Bean, and Lentils, available in sizes ranging from a quarter-ounce to five pounds from True Leaf Market.
Begin by filling the pot with fresh potting soil. Peas grow best in soil with a pH of 6.0 to 7.5, which is in line with what you’ll find in most commercial mixes.
If you want to make your own, aim for a blend that’s porous and that provides a balanced mix of nutrients, or a higher percentage of phosphorus.
Well-rotted manure is an excellent organic amendment for growing peas, but you should avoid adding nitrogen-rich amendments like blood meal.
Water it well and allow any extra moisture to drain off.
It’s best to direct sow rather than starting seeds indoors since legumes don’t transplant well.
Plant the seeds about two to three inches apart at a depth of about half an inch, covering each over lightly. Bush types can be spaced a little further apart, about three to four inches.
Place them in a spot with full sun for about eight hours per day. Dappled sunlight is also acceptable during the warmest part of the day when growing peas, which is usually in the afternoon.
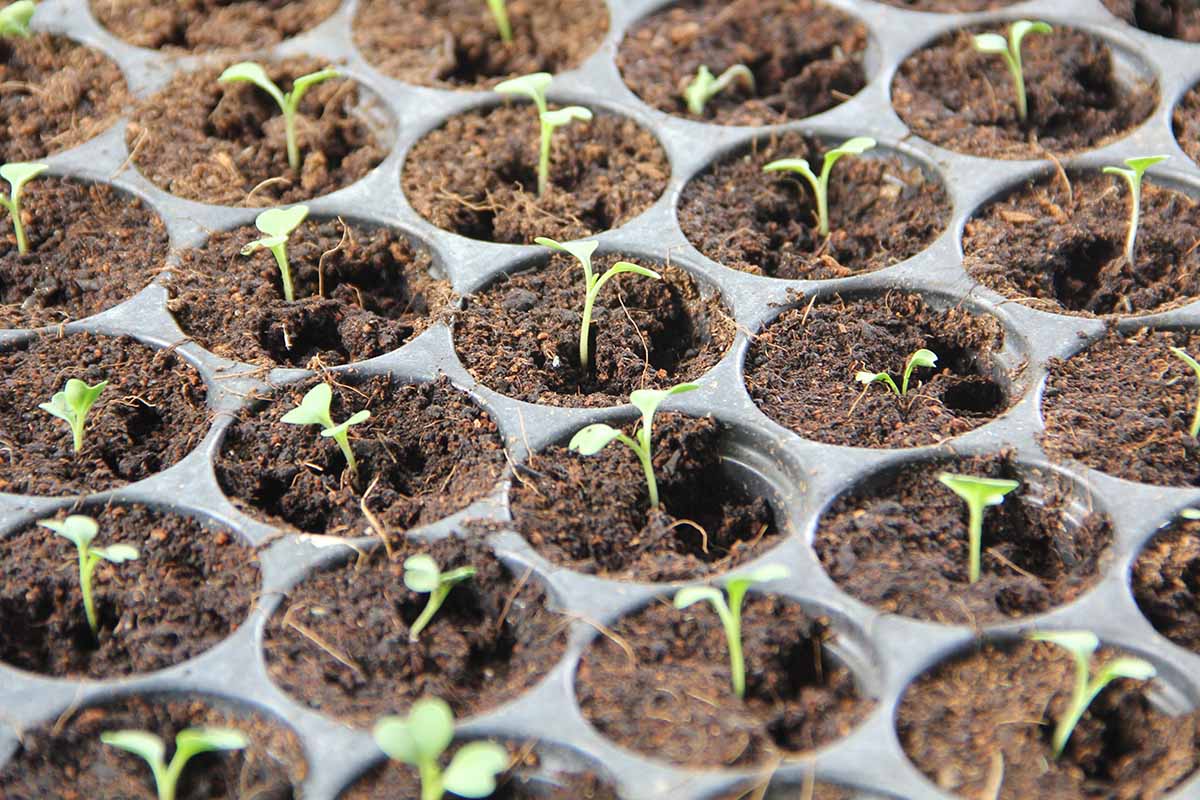
Germination usually takes place within a few days to a week in ideal temperatures, and young shoots don’t need support until they’re about eight to 12 inches tall. From this height to maturity, providing something to climb or cling to is important.
Support
Rather than waiting until they’re tall enough to need support, it’s best to install stakes or other types of supports that will be pressed into the medium before the root system has filled out, to avoid causing damage.
Two long bamboo stakes crossed at the top and tied with twine can create a low-cost trellis, and the stakes can be reused.
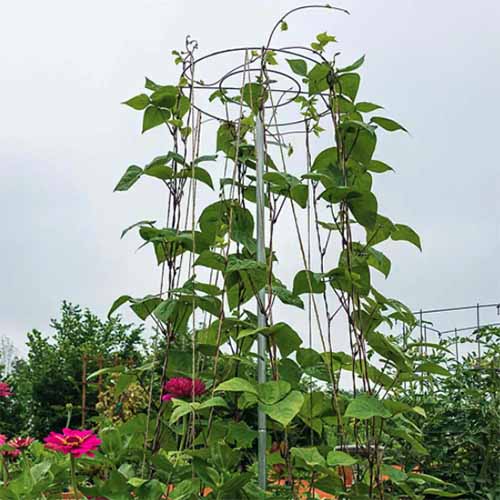
A tall tomato cage is also suitable, as are pre-made trellises such as this Bean Growing Tower from Gardens Alive! that’s available via Home Depot.
Whichever type you use, anchor it well so it doesn’t fall over from the weight of the vines or in heavy winds. Bush types need less support, but they do usually need something to hold them upright.
Troubleshooting
Overcrowding isn’t a major concern unless high humidity is expected. Humidity coupled with densely packed foliage can lead to the development of powdery mildew.
Space the plants further apart at planting time to prevent this, if humidity is a concern in your region.
Climbers in the legume family tend to reach for whatever is closest and may attach to and climb up other vines, which can sometimes lead to choking. Do your best to separate the vines if they start to intertwine so each plant has its own dedicated area.
Succession and Split-Season Planting
As I mentioned, peas can be planted in succession for continued harvesting throughout the season.
To succession plant, the first set of seeds is sown about four to six weeks prior to the average last frost date in your region. One to two weeks later, a second set is sown.
This can be repeated several times so you will have plants that are maturing just as others are sprouting.
Splitting crops into two cool-weather seasons is also an option.
Spring-sown crops will begin to wither and stop producing in mid- to late summer. Remove the dead vines and compost them if they don’t show signs of disease or infestation.
You can start a new crop in the same pot, or use the nitrogen-enriched medium to grow leafy greens and move the peas to a different vessel.
It’s possible to start with packaged seed peas again, or if you’ve let some pods on your own plants mature and dry, you can start your own. Because peas are a cool-weather crop, wait until the heat of summer has begun to ease before starting a second round.
The second cycle is planted in the same way as the first, allowing at least 50 days for maturity, depending on the type you sow, before freezing temperatures set in.
Some gardeners recommend stirring in some untreated wood chips or sawdust to absorb excess nitrogen before you replant. But note that this might not be the best option for growing healthy plants.
Starting with fresh soil may be a better bet, and you can always conduct a soil test to check the nutritional makeup and pH of the soil.
Container Care
In the absence of rain, offer about an inch of water per week throughout the growing season and make sure the excess drains off.
As the season continues and outdoor temperatures begin to rise, add a two- to three-inch-thick layer of shredded mulch to the soil surface to keep the root zone shaded and cool.
Harvest mature pods often. Frequent harvesting increases productivity, so plan to check for mature pods every two to three days.
Fertilizing isn’t necessary, especially if you’ve inoculated your seeds ahead of time, but some nutrients can become depleted in soil that has been used for succession planting.
In this case, simply top dress midway through the season with a two- to three-inch-thick layer of compost.
A low-nitrogen fertilizer can be applied once per season when buds are setting, but be sure to apply it sparingly in a contained environment like a planter since the mineral salts in fertilizers tend to build up.
A packaged product should be diluted to 50 percent strength before application.
A better choice to prevent buildup, burning, or overfertilizing is to simply amend midseason with well-rotted manure. Add no more than 20 percent of the total volume of the container.
Growing Tips
- Choose a container that is wider than it is deep to pack more plants into the available space.
- Use a trellis or other type of support to keep plants upright.
- Sow peas 4-6 weeks prior to the last frost, or wait until the soil temperature is at least 50°F for faster germination.
Varieties to Select
Since there are a few different kinds of peas that can be grown in a container, we’ll cover those next, along with some suggested varieties to consider.
Shelling Types
Peas that grow inside a pod that must be removed and discarded prior to use are known as shelling types, or sometimes referred to simply as garden or English varieties.
They are commonly separated into early, midseason, or late season varieties. This refers to the time they take to mature after planting, with early varieties being ready to pick first.
Little Marvel
Bush peas can be somewhat more manageable in containers because they generally need less support than vining types, and often remain compact.
‘Little Marvel’ is one variety that ticks all these boxes while producing small, sweet peas with pods that can be eaten before they mature.
This cultivar will power through late winter, or it can be sown in late summer and grown until early winter in many regions.
Seeds are available in a variety of packet sizes from Eden Brothers.
Tom Thumb
A dwarf variety is an excellent choice for container-growing, and ‘Tom Thumb’ is one of the most popular and productive options available. It can be planted as an early or late season crop.
This cultivar reaches just eight to 12 inches in height once mature, with productive yet compact vines that need little to no support. They can be planted closely together at just two to four inches apart.
Organic seeds are available in one-ounce or quarter-pound packets from Eden Brothers.
Wando
One of the best-known types of shelling peas, ‘Wando’ is an heirloom hybrid developed by crossing ‘Laxton’s Progress’ and ‘Perfection.’
The result is a hardy producer that generates three-inch pods, resists disease, and can be planted as an early or midseason crop.
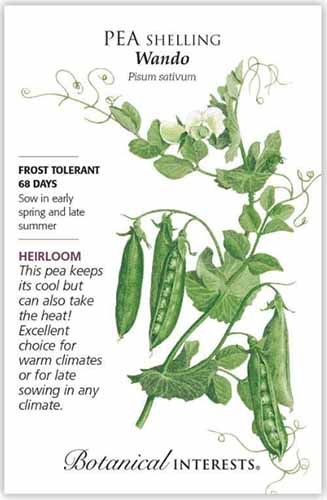
Seeds are available in packets of 80 from Botanical Interests.
Find more suggestions in our guide to 17 of the best shelling pea varieties.
Edible Pods
Whereas shelling types of peas have pods that must be discarded, some have edible pods.
Snow peas are harvested before the peas inside plump up, when they’re still tender and flat. These are excellent in stir fries.
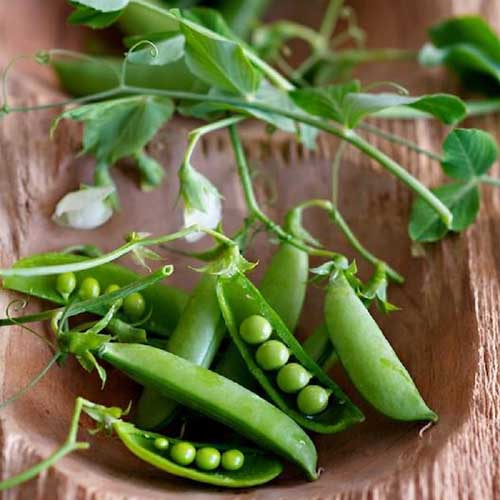
Sugar snap peas are plump and sweet, with pods that aren’t as fibrous as those of their shelling counterparts. These are often eaten raw, and they make a tasty, crisp addition to cold salads.
Oregon Sugar Pod II
For delicious, sweet snow peas in the spring or fall, ‘Oregon Sugar Pod II’ is a great choice.
These vigorous vines show strong disease resistance, reach heights of less than three feet on average, and produce four-inch pods that are ready to harvest in about 60 days, while they’re still flat.
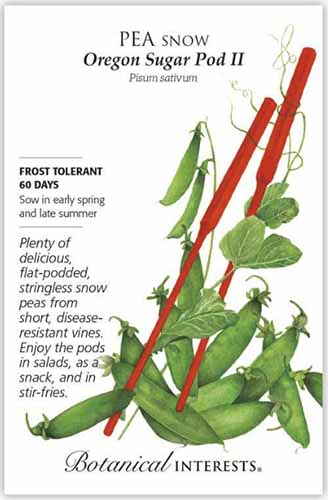
Conventional or organic seeds are available from Botanical Interests.
Find a detailed growing guide for this variety here.
Sugar Snap
There’s nothing quite like an heirloom variety to make you feel nostalgic. Sugar snap peas are one of the best producers, and the sweet, fleshy, three-inch pods are packed with tender beads of flavor.
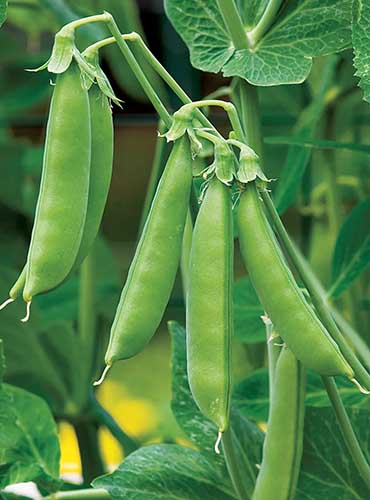
But keep in mind that this type produces vines that reach six feet in length or more, so they will need adequate vertical space and lots of support.
Packets of 300 seeds are available from Burpee.
Find some more excellent suggestions in our guide to growing snow peas.
Managing Pests and Disease
There aren’t many pests or diseases to be on the lookout for, especially when you’re growing peas in a container rather than in the ground. We’ll touch briefly on a few that can sometimes become more than just a nuisance.
For more in-depth information on pests and disease, check out our complete guide to growing peas.
Herbivores
By and large, you will typically see less damage from herbivores when plants are grown in containers.
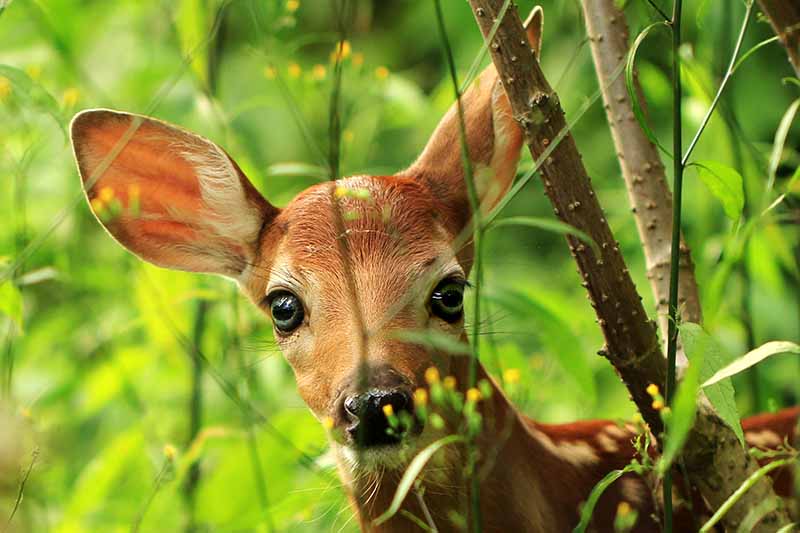
Raccoons, groundhogs, rabbits, deer, and squirrels are just a few of the many creatures that would love to nibble on those tender leaves and pods.
But they may be deterred from approaching if they have to venture onto your deck or porch to access them.
Bird netting can be wrapped around the plants and pot, and secured well to prevent any adventurous critters from munching.
Insects
Insects are also of low concern, which is great news, isn’t it? Even though beetles, moths, cutworms, and stink bugs all enjoy legumes, they don’t tend to infest these plants to the point of die-off.
Stink bugs can be pulled off and dispatched, and cutworms can be removed from the soil and dropped in a bucket full of soapy water.
But there are two other common pests to keep an eye out for, and they may need to be dealt with a little more aggressively.
Aphids
We all know just how annoying aphids can be, and most of us know that their feeding habits can also lead to the spread of disease.
Spraying with neem oil or insecticidal soap is the easiest way to rid your legumes of these pests, but there are some other methods that may work well – find complete information in our guide to dealing with aphids.
Grubs
In-ground legume plantings are unlikely to be largely affected by grubs when there are other food sources available, such as grass roots, for instance.
But they may make an appearance in containers as well, and can cause a lot of damage when there is only one crop available to decimate.
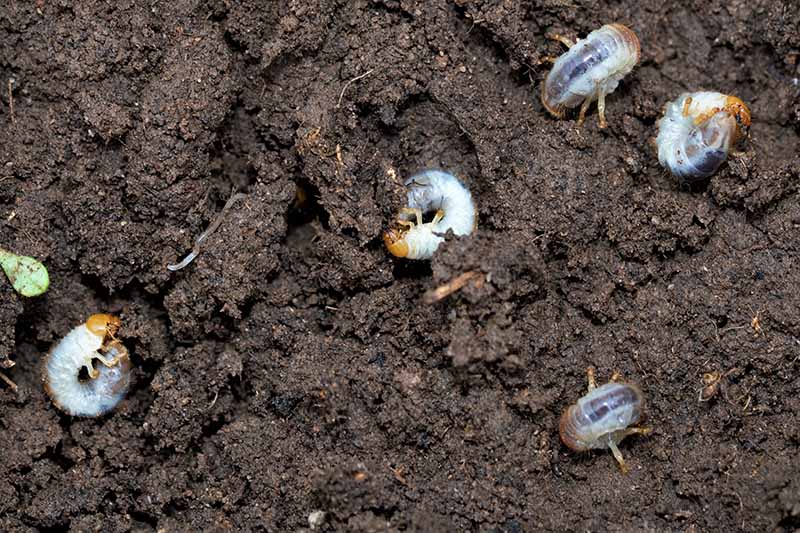
Grubs are the larvae of several types of pest insects, such as Japanese beetles and weevils.
These pests are excellent parents who carefully shop around for a safe environment to lay their eggs, and there’s no space more prime than your easily accessible, well-tended potting soil.
After hatching, some types of grubs will voraciously eat the roots they have access to underground, but you may not know they’re there until signs of distress appear. Yellowing, unexplained stunting, and die-off can all be symptoms of their presence.
Unfortunately, the only way to be sure that they’re the culprits is to dig them up. One option is to harvest as many peapods as possible and then carefully unpot your plants.
Dump the soil or rake through it to see what you unearth – you can’t miss their gray to white, curled bodies against the dark medium.
Any grubs that you find can be placed in a shallow dish where the birds can grab a quick snack. Otherwise, they can be dispatched by dropping them into soapy water. You can bag the infested soil and discard it in the trash.
Sanitize your container and refill it with fresh soil before replanting your peas – but remember that they don’t always respond well to transplanting, and may not survive.
Discard any that are too far gone before replanting, if the damage has progressed to that point.
Another option is to treat the soil with beneficial nematodes that will target grubs. This is particularly useful against Japanese beetle larvae, but certain types can be used to combat other varieties of grubs in the potting soil as well.
This type of treatment won’t hurt the plants, and you won’t need to dig them up if you go this route.
Disease
There are a couple different diseases that may present themselves, but we’re going to discuss the most common one – powdery mildew.
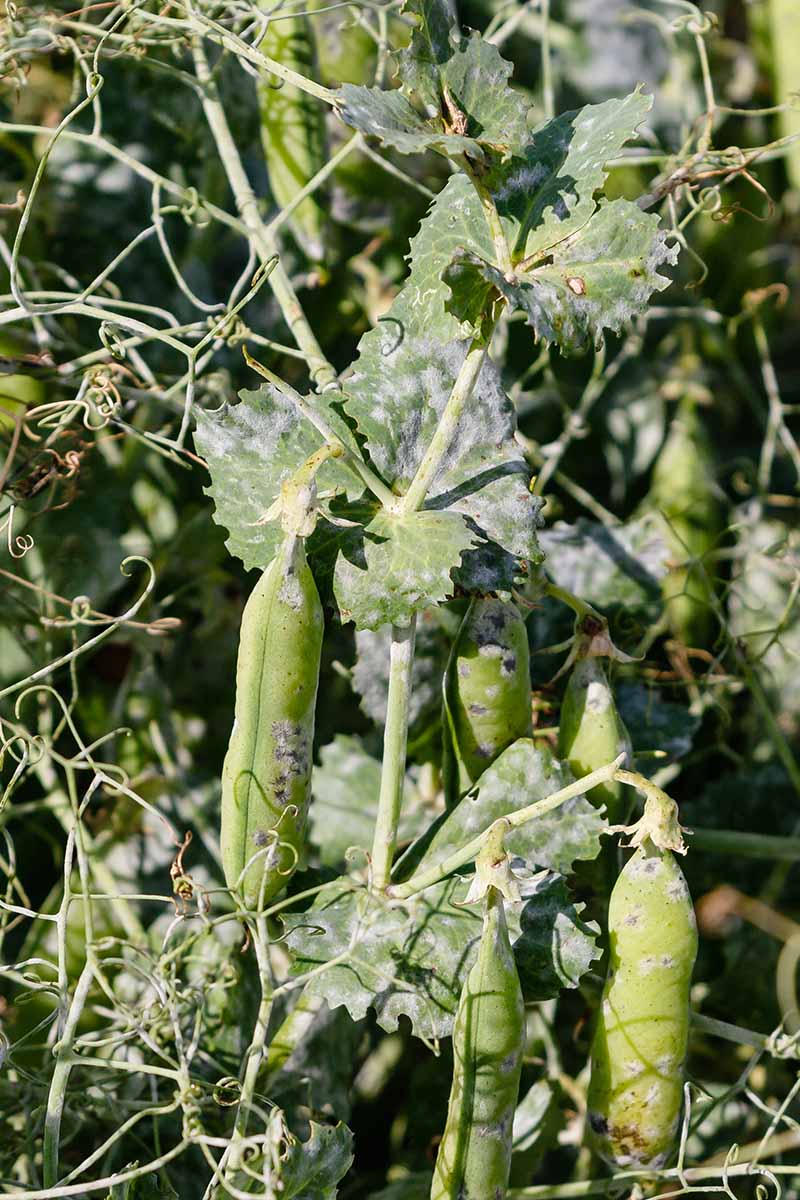
Powdery Mildew
On legumes, powdery mildew shows up as a dusty white film on the leaves and stems. This is caused by a fungus called Erysiphe pisi.
This ailment is more often seen in later-season plantings, as the evening dew keeps the leaves moist, allowing the pathogens to take hold. Dense plantings are more likely to suffer.
If left untreated, powdery mildew can kill the plants. Spraying with a preventative fungicide is the best way to avoid having to deal with problems later, particularly if powdery mildew has been a problem for you in the past.
If you spot signs of mildew developing, a fungicide can be applied at first sight as well.
Various homemade remedies may help as well. Read more in our guide.
Any material that is dead or dying should be removed and discarded in a sealed trash bag. Burning is also suitable for disposal in areas where it is permitted.
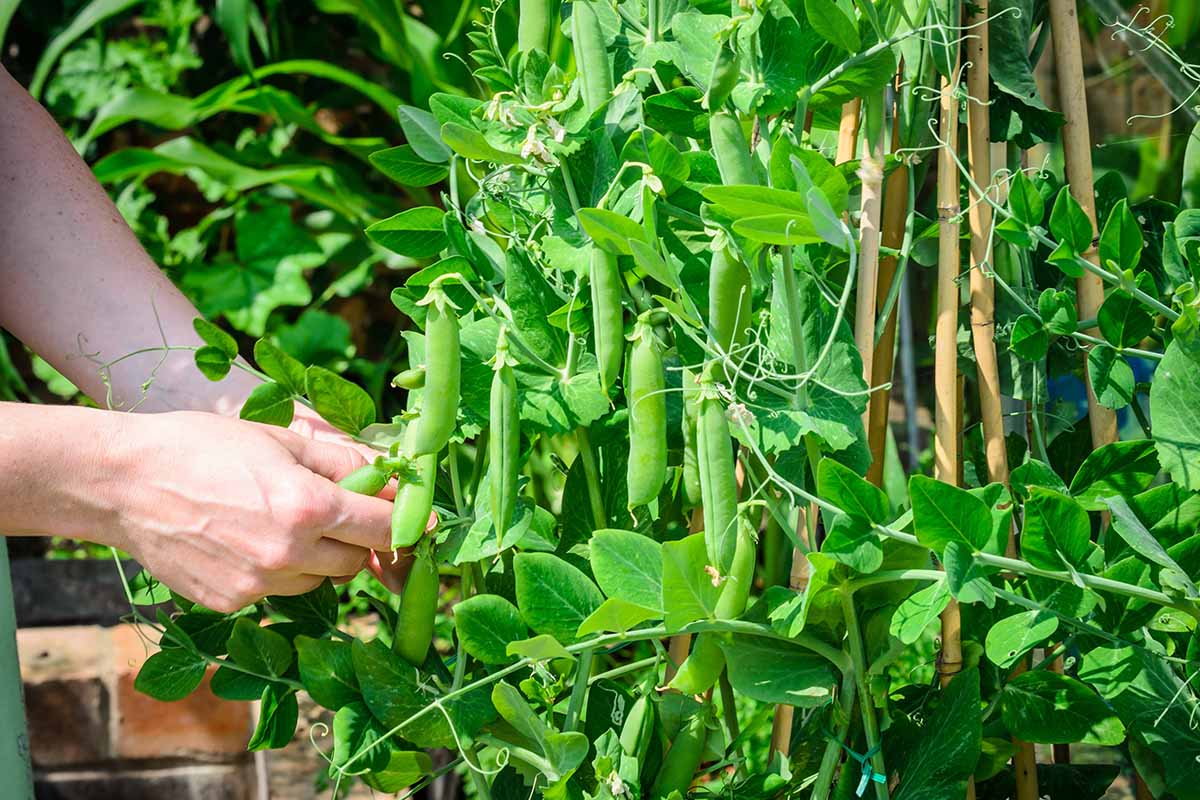
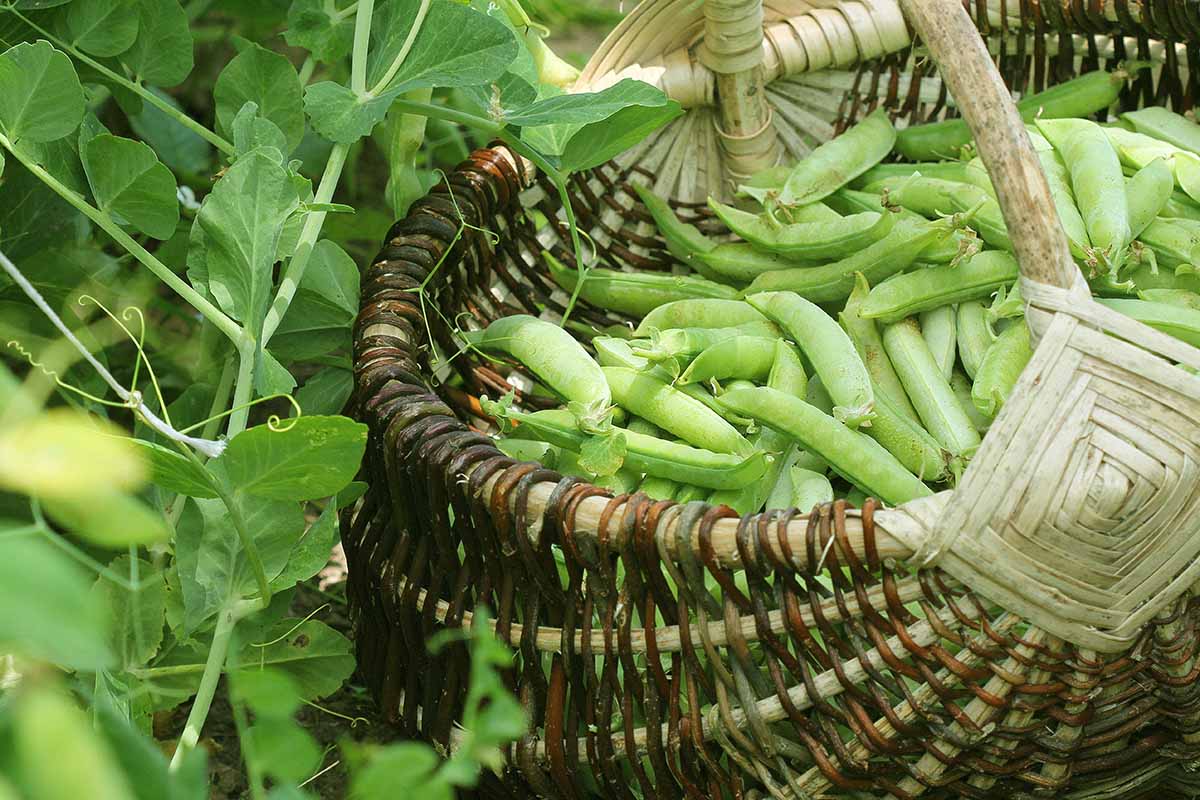
Harvesting
Bring a basket along or something else to hold the collected pods, and comb through the vines or shrubbery to find the mature ones that are ready to pick.
Working in one direction is easiest, so you don’t miss any. I prefer to start from the bottom of plants and work my way up.
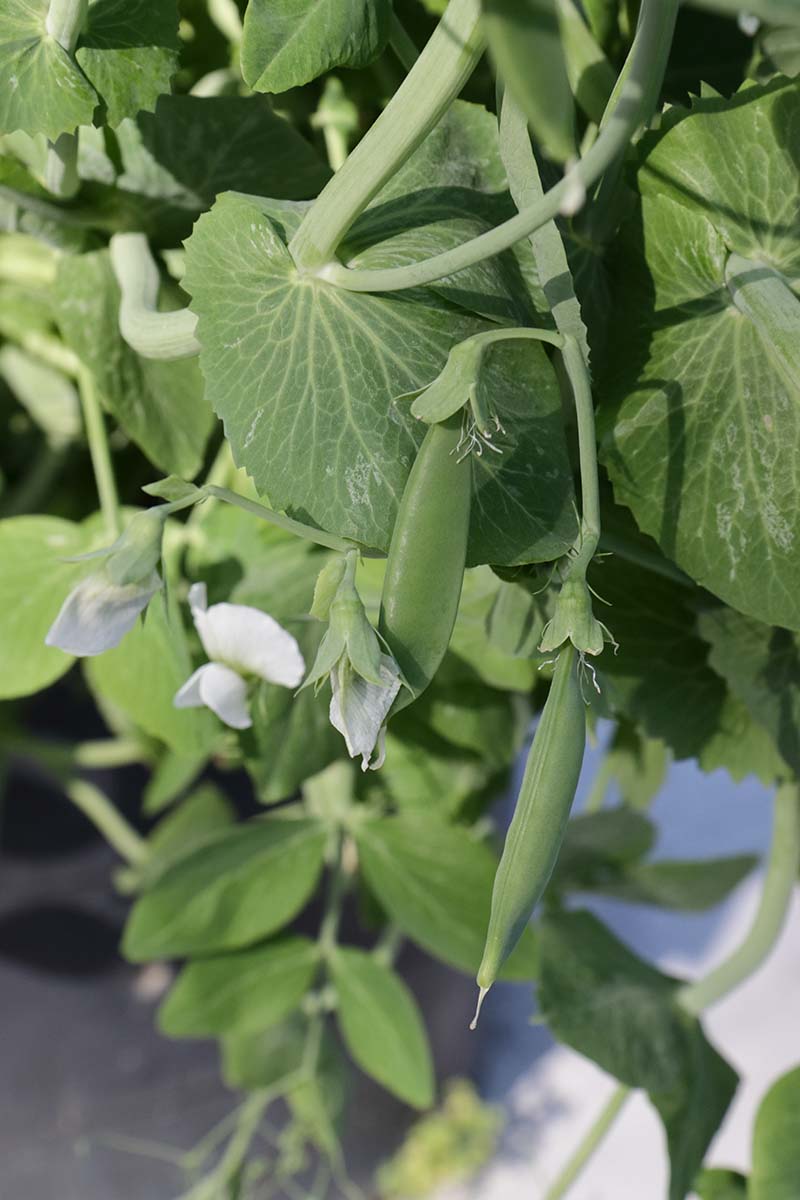
Peapods that feel firm and plump should be carefully plucked from the stems, unless you’re growing snow peas. These should be harvested when the pods are two to three inches in length, still flat, and firm to the touch.
Immediately after harvesting, place what you’ve picked in the refrigerator, or process the peas first and then chill them. They’ll keep for about a week.
Find more tips on harvesting peas here.
If the blooms, shoots and sprouts, or leaves are what you’re after, bring a set of clean pruning shears or a garden knife and simply cut them off at the base where they meet the stem.
No Pea Pods?
Plants that experience issues such as a lack of water, insufficient sunlight, low soil fertility, or disease may not develop pods. Visit our troubleshooting guide to help you sort out the problems.
Recipes, Cooking Ideas, and Preserving
There are many, many recipes out there that include peas. And what else would we expect with a delicious vegetable that has been enjoyed since the Bronze Age?
Shelling varieties should be processed by removing the peas from the pods and giving them a rinse. Types with edible pods can simply be rinsed clean and prepared as you like.
They are perfectly delicious all on their own, fresh from the harvest. Sauteing homegrown peas in a pan with a pat of butter and a pinch of salt takes just a few minutes and makes a sweet and savory addition to a meal.
While they take more prep time, other recipes such as chicken pot pie or beef stew aren’t complete without a cup or two of these little green gems.
Add them in unexpected places, such as in these yummy mini green onion frittatas with peas and feta – find the recipe on our sister site, Foodal.
Snow peas can also be sauteed, or added whole to stir fry dishes – especially Asian recipes like chow mein! Visit Foodal for that recipe as well.
Sugar snaps are a favorite for my children. We’ve grown them many times and they often pinch them from the vines and eat them any time they pass by.
With an abundant harvest that you can’t use right away, there’s no need to let those veggies go to waste.
It’s easy to freeze them by simply blanching them in boiling water for two to three minutes, plunging them into ice water, and then storing them in a sealed zip-top sandwich bag.
They can be stored for up to six months in the freezer, or consider canning them if you’ve produced a bumper crop. Pressure-canned peas can be stored for 12 months or longer.
Perfectly Potted Peapods!
There are so many vegetables that can be grown in a container garden, but some require special adaptations and a lot of attention.
Not so in this case – even if you plan to pop another round or two in for the season.
Have you sampled the leaves or shoots? I have, and I think they’re delightful, but I’d love to know what you thought.
What’s your plan? Snow, sugar, or shelling? We’d love to see your setup and hear all about how your season is going. Please share via the comments section below.
If potted veggies are your thing, check out these container gardening guides next, to expand your garden even more: