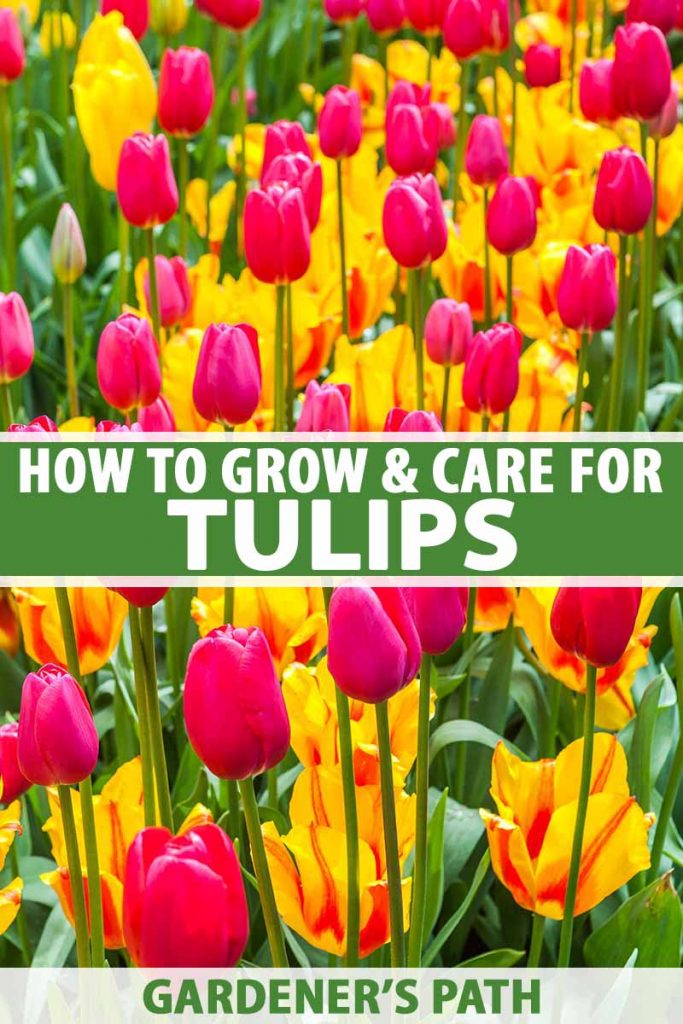
Tulipa spp.
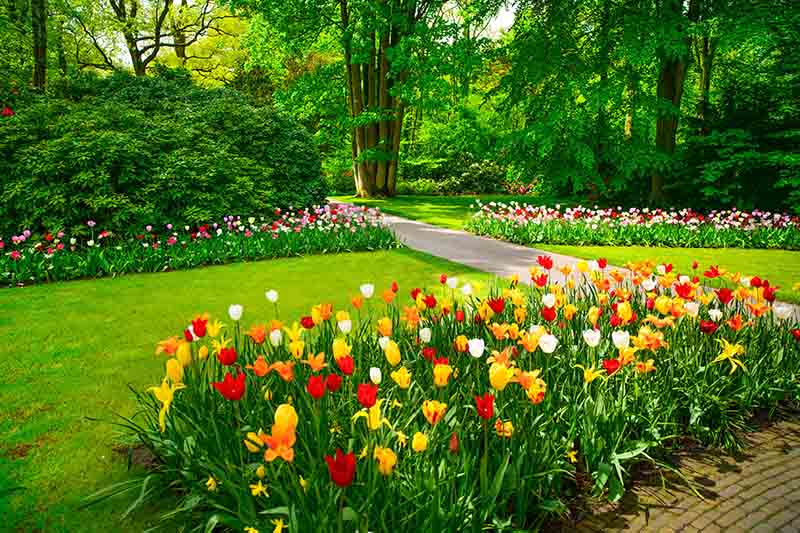
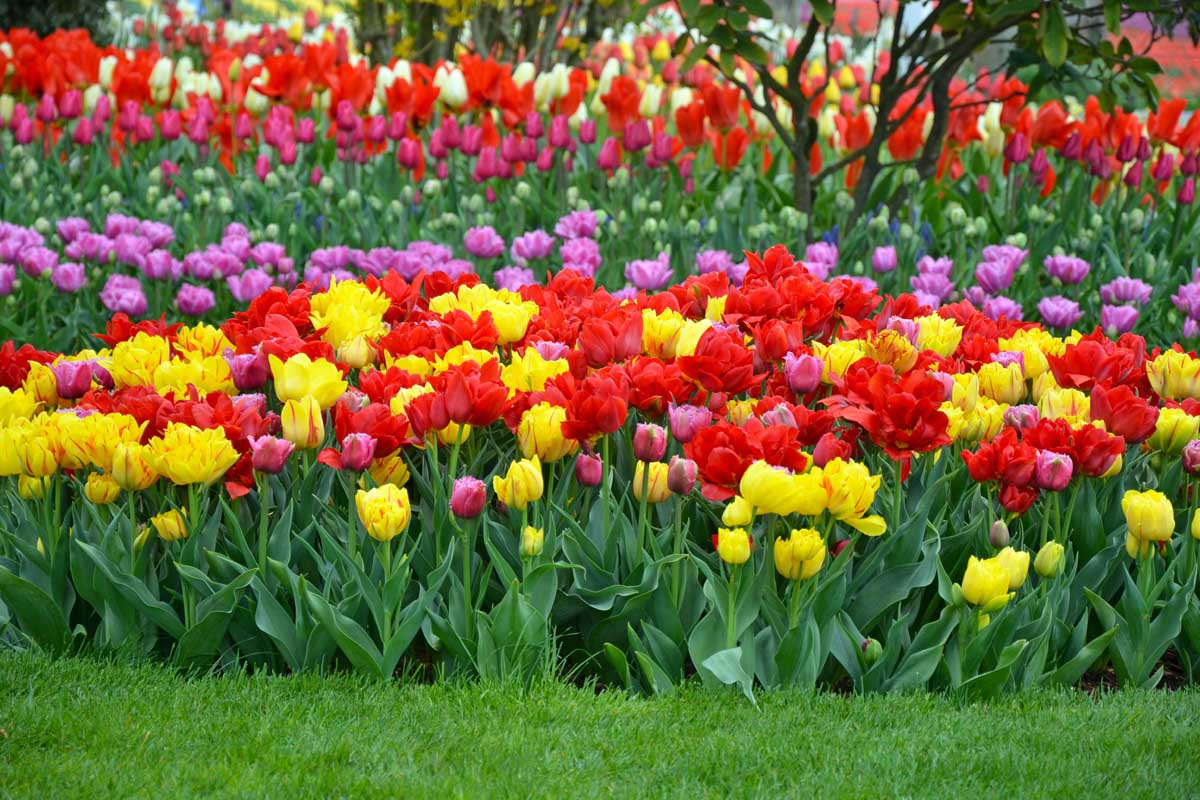
Have you ever visited a botanical garden on a warm spring day and marveled at tulips in a rainbow of colors, with shapes ranging from cups to stars, contrasting striations, and ruffled edges?
Now’s your chance to bring a taste of that awesome display home.
The tulip, Tulipa spp., is a colorful perennial flower in the Liliaceae, or lily family. It’s best suited to growing in USDA Hardiness Zones 3 to 7.
True botanical species as well as cultivated hybrid varieties are available.
We link to vendors to help you find relevant products. If you buy from one of our links, we may earn a commission.
This guide contains all you need to know to grow and care for tulips, as well as an introduction to the many varieties from which to choose.
Here’s what I’ll cover:
What You’ll Learn
To begin, let’s look at tulips through the years.
Cultivation and History
In ancient times in the Ottoman Empire, especially the portion that is now Turkey, tulips found their way out of the wild and into cultivation.
By the 1500s, they were imported to Holland, and were the subject of a horticultural text by French botanist Charles de l’Écluse.
He cultivated the species and introduced it to market in the Netherlands, where it became a popular subject of artists, and a coveted garden plant among the upper crust.
For about a year in the 1600s, there was an outbreak of “tulip mania,” in which frenzied buying drove the prices up and bulbs became as expensive as houses. When prices finally dropped, the bubble burst, and many investors suffered financial ruin.
Today, the greatest number of tulips are grown in the Netherlands, home of the world’s largest flower auction in Aalsmeer.
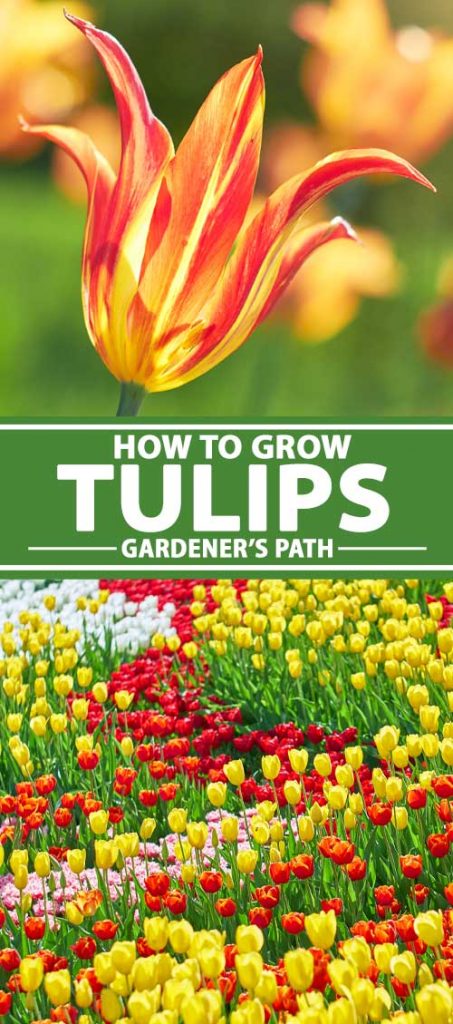
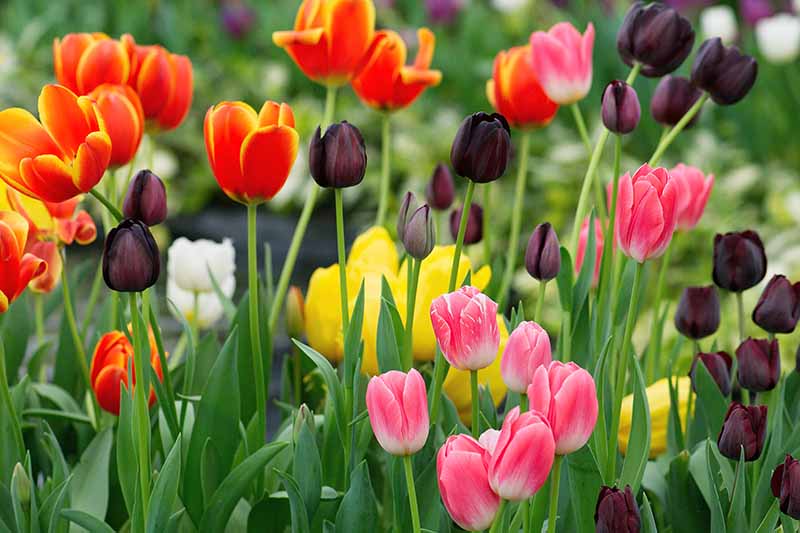
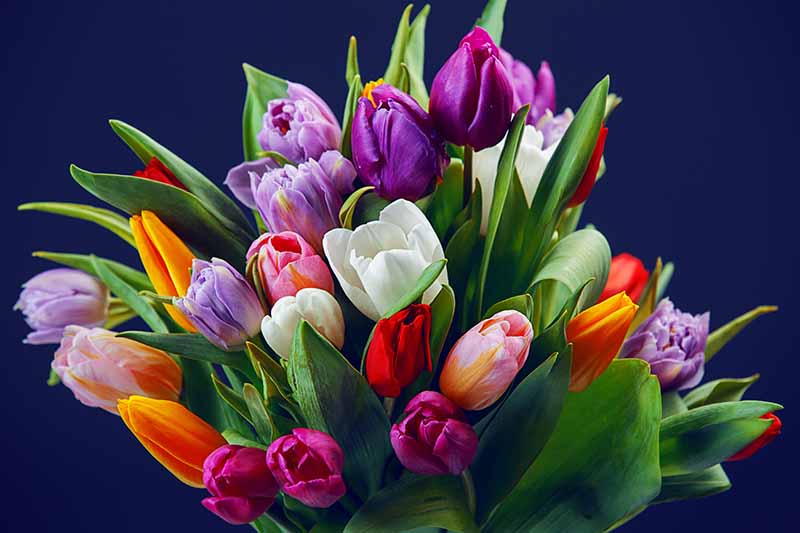
There are many varieties to choose from, with options for early-, mid-, and late-spring blooms.
Sizes range from petite, four-inch botanical species to colossal hybrids topping out at almost three feet.
All colors are available, with the exception of true blue.
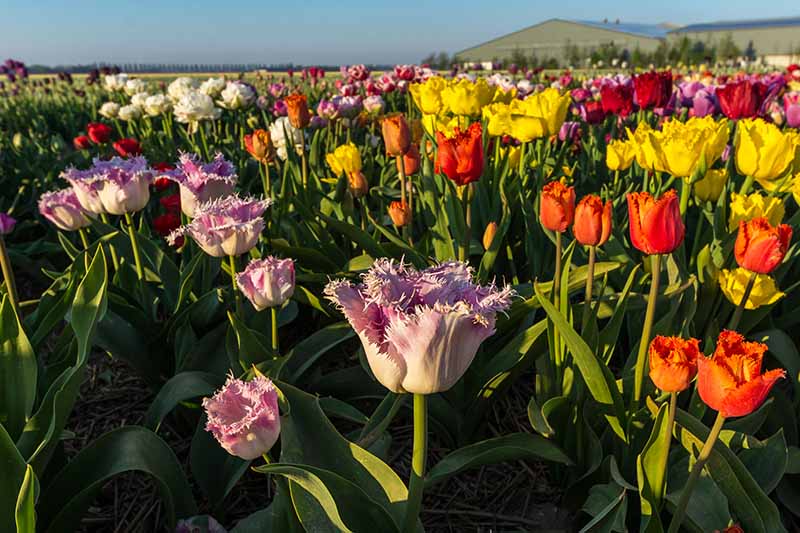
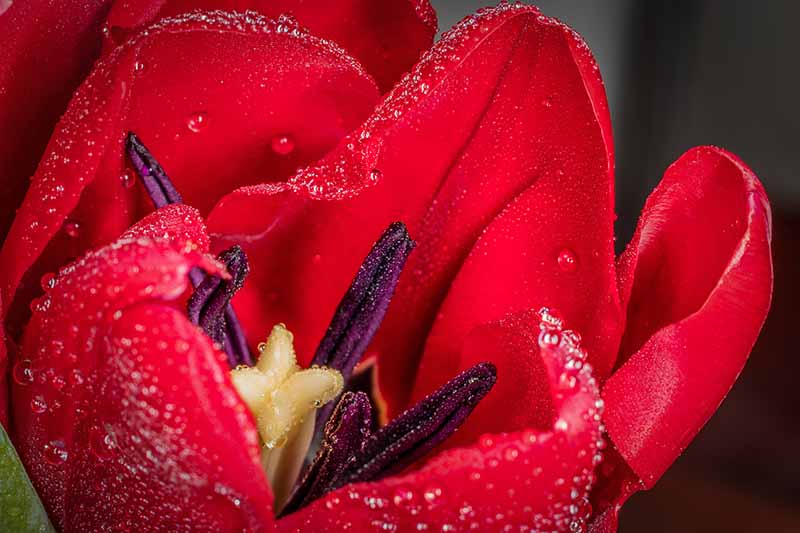
Unique characteristics like solid or variegated colors, fringes, ruffling, and single or double rows of tepals – the word for the characteristically indistinguishable petals and sepals of tulips – make for an exciting array of choices.
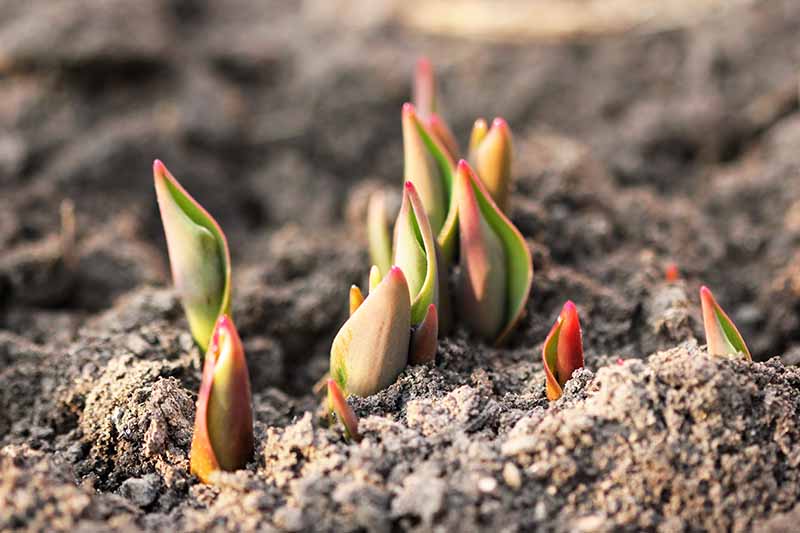
The foliage consists of fleshy green leaves, sometimes tinged with purple, and a leafless, hollow stem.
While they are perennials, some of the fanciest hybrids are known to look fabulous the first year, but lose their vigor in the second. For this reason, many professional and home gardeners grow tulips as annuals, lifting them out of the ground at season’s end, and starting with fresh bulbs the following year.
Propagation
Tulips are usually grown from bulbs, although the flowers do produce seeds.
Botanical species set seeds worthy of collection, as they will produce a clone of the parent plant. However, it can take years for seeds to germinate, form bulbs, and produce flowers.
Hybrids, on the other hand, are often infertile, and even when viable seeds are produced, they do not replicate the traits or quality of the parent plant.
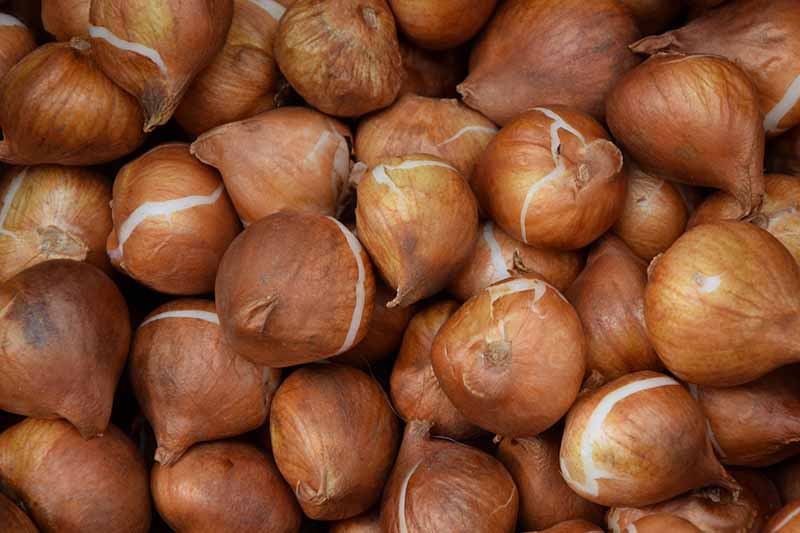
When selecting bulbs in person, look for ones that are firm and unblemished, with few or no tears in the papery outer coating.
Avoid those that are soft, damaged, without wrappers, or shriveled and shrunken. Rotting or dried up bulbs are unlikely to grow.
When purchasing online or via paper catalogs, seek out reputable purveyors who guarantee their products.
Nurseries, garden centers, and online or catalog dealers offer bulbs in late summer, shortly before it’s time to plant them in the fall.
Pre-chilled varieties are available to those gardening in warm regions. For those of us in regions with cold winters, like me, nature provides the chill hours needed to stimulate growth.
While annuals are lifted and discarded after blooming, perennial varieties enlarge each year, as “daughter” bulbs form and grow from the original bulb.
How to Grow
Tulips are easy to grow. Let’s find out how.
Timing
According to researchers at Cornell University, the ideal time to plant bulbs is in the fall, when soil temperatures are in the 40 to 50°F range. The chill enables them to establish sturdy roots.
In regions that don’t have cold winters, buy pre-chilled bulbs as mentioned, or chill them yourself by placing them in a mesh bag in the refrigerator, away from fruits and vegetables, for six weeks prior to planting.
If you receive bulbs as a gift in springtime, go ahead and plant them after the last average frost date has passed, and before temperatures heat up. They’re better off underground than on a shelf in the shed where mice or mold may ruin them.
Location
Choose a location that gets full sun. In the warmest regions, part shade is beneficial. You can plant them in the ground or in containers that are at least 10 inches deep.
Soil
Conduct a soil test if desired, to determine the nutrient content and pH balance.
The ideal soil is of average quality and well-draining. Bulbs that sit in standing water are prone to rotting.
Amend the soil as needed with compost or leaf mulch, and sand or gravel, to achieve a loose, crumbly consistency. The pH should be slightly acidic to neutral, ranging from 6.0 to 7.0.
Work the earth (and amendments, if applicable) to a depth of eight to 10 inches.
Fertilizing
For first-time planting, the University of Illinois Extension recommends the addition of two cups of bone meal per 10 square feet, and five tablespoons of 10-10-10 soluble fertilizer or bulb fertilizer.
Use a slow-release product, to avoid burning the bulbs. Blend it into the soil for the same reason, rather than sprinkling it into the planting holes.
Bulbs contain all of the food they need for one growing season, so if you are growing them as annuals, fertilization is optional.
For perennials, apply your balanced, slow-release product twice a year – once in fall, after temperatures have cooled down and root growth is underway, and again in spring, as the first sprouts appear.
Depth and Spacing
There are different schools of thought on how deep and how far apart to plant bulbs.
A depth of three times the diameter of the bulb is a good rule of thumb. This usually translates to a depth of four to six inches.
Some people swear by a standard depth of eight inches. However, they tend to be in warm locales, where pre-chilled bulbs and deep planting are essential for strong root formation.
Researchers at Cornell University suggest an old method called “top planting,” in which bulbs are shallow planted at a depth of only two inches, followed by an application of two to four inches of mulch on top.
Some theorize that shallow planting can cause bulbs to dry out in the summer heat, and planting them too deeply may result in fewer flowers.
Experience is going to be your best teacher here.
As for spacing, place bulbs two to six inches apart, depending upon the mature width of the variety you’ve chosen, and whether you want a dense or loose arrangement.
Small botanical species can be planted closer together than the larger hybrids.
Other considerations are whether you are growing yours as annuals or perennials.
For a cutting garden of annual plantings, Clare Nolan, author of “In Bloom: Growing, Harvesting, and Arranging Homegrown Flowers All Year Round,” recommends “planting them close together, but not touching – like eggs in an egg carton.” This is an excellent way to get the most out of a small space.
And for perennials, you may want to leave some growing room.
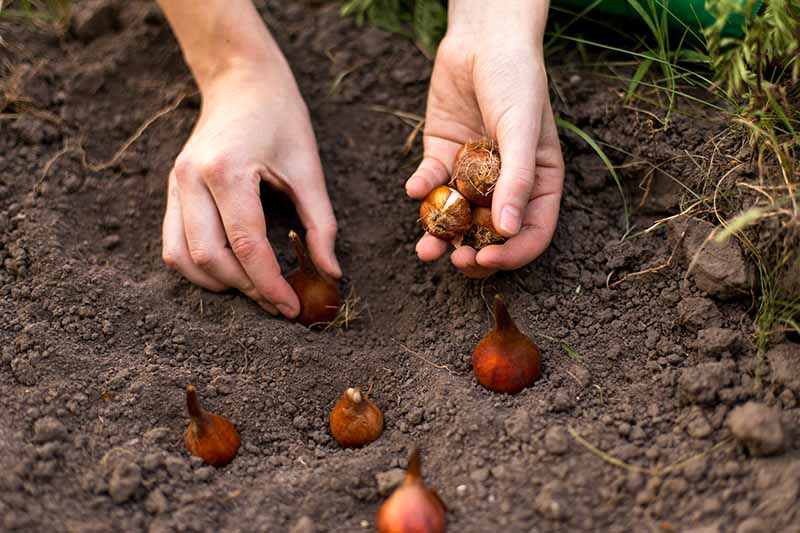
Here’s how to set bulbs in the ground:
If you are only planting a few, you may want to dig individual holes. For mass plantings, dig an entire bed to the proper depth.
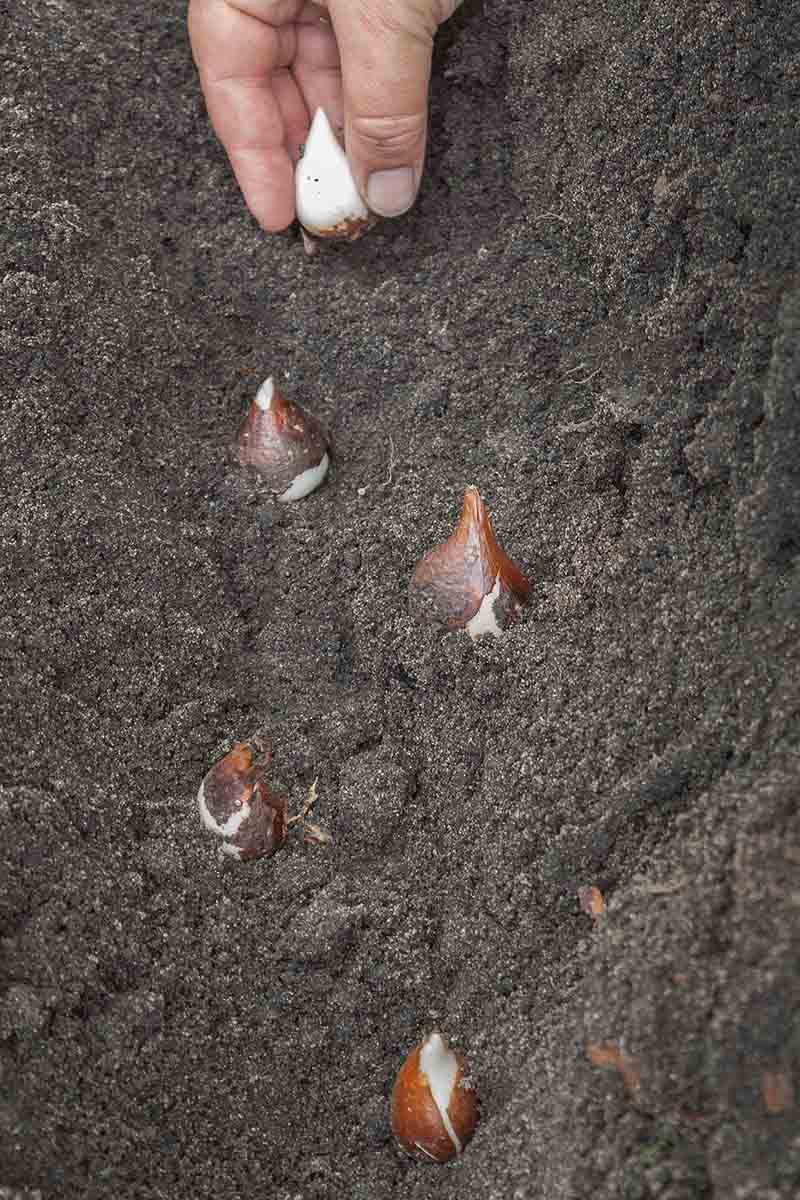
Place the bulbs into the soil point side up, and nestle them securely. Don’t worry too much if you forget to do this, as the shoots will eventually find their way up.
Choose a pattern that suits your design scheme. For the appearance of blossoms in a woodland setting, group bulbs in clusters. For a more formal arrangement, plant rows in an alternating fashion, (plant-skip-plant-skip) for crisp, diagonal lines.
Backfill with soil and gently tamp it down.
Moisture
After planting, water thoroughly with a gentle spray. In the absence of rain, water to maintain about an inch of moisture per week during the growing season.
After they have finished blooming, watering is no longer necessary. For this reason, you should avoid planting anything with tulips that requires summer irrigation, as the extra moisture may rot the bulbs.
Flowering and Foliage
Tulips generally grow one flower to a stem, but there are some multi-headed varieties available. And unlike many flowers, deadheading, or the process of cutting off spent flower stems, does not promote further blooming.
As the tepals begin to fade and drop, you can cut the flower stems down to the base. While this doesn’t promote further flowering, it may conserve energy in the bulb that would otherwise have gone into the flowerless stem.
If you are growing them as annuals, you can pull the bulbs from the ground at this time, before the withering foliage becomes unsightly.
For perennials, cut the flowerless stems all the way down if you wish, but do not remove the foliage. It is essential that the leaves remain to feed the bulb for next year. Let them wither undisturbed.
Growing Tips
Tulips reward our best efforts with incredible colors, shapes, textures, and sizes for fabulous garden displays.
Some varieties are quite luxurious, with a price tag to match.
Here are a few ways to protect your investment and enjoy the blooms of your dreams:
- Be certain that your soil drains well. Take the time to add sand or gravel if necessary. Rotten bulbs are a huge disappointment.
- To grow tulips as perennials, leave the foliage on after flowering, unsightly as it may be, to support next year’s growth.
- For protection from hungry vermin, plant near daffodils, a flower they seldom bother. Or, loosely wrap a wide-gauge wire mesh around bulbs before planting. For a large expanse of bulbs, line the planting bed with mesh and place the bulbs on top before backfilling with soil.
- If you grow in containers, be sure they have adequate drainage holes. Line the bottom with a single layer of pea-sized gravel before adding the potting medium.
- Remember that pots dry out quicker than ground soil, so check them every five days for moisture, to make sure the potting medium never completely dries out. But don’t allow them to become waterlogged.
- Have black walnut or other trees that produce juglone? Tulips are immune.
With quality bulbs and good care, you can expect your tulips to put on a spectacular show.
Maintenance
If you are growing them as annuals, plant new bulbs each fall, and lift them out after they have finished blooming in the spring.
They only maintenance they need is an optional application of bone meal and fertilizer at planting time as discussed above, watering at planting time, and providing adequate moisture throughout the growing season in the absence of rain.
For perennial planting, sow bulbs in the fall, apply bone meal and fertilizer as directed, water at planting time, and water during the growing season if it doesn’t rain.
In addition, you may cut down flower stalks that have bloomed, but remember not to touch the foliage while it withers as it feeds the bulbs for next year’s flowers. After the foliage dies, you can clear it away or leave it to decay naturally and break down into the soil.
Avoid watering garden areas where you have planted bulbs that are now dormant, to prevent them from rotting.
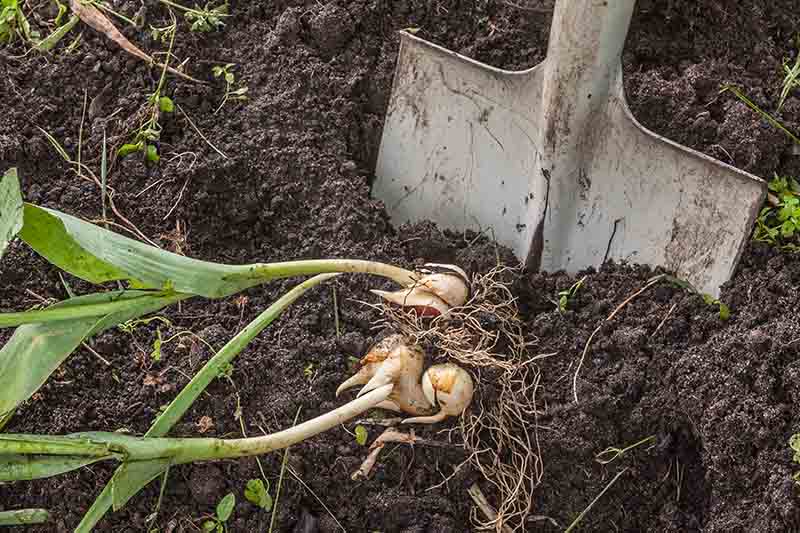
Every few years, you can divide clumps of bulbs in the fall. Simply dig them up and tease the “daughter” bulbs apart from the mother. Immediately plant them elsewhere, so they can establish roots before winter dormancy.
When spring returns, apply bone meal and fertilizer again, working it into the soil around the bulbs. If you choose to apply mulch for a neat appearance in the garden, be careful not to cause the ground below to become oversaturated, as this may promote rotting.
You can also add a one-inch layer of a fine mulch like coconut coir to well-draining containers to help with moisture retention. This can be beneficial in warmer regions.
Cultivars to Select
Now that you know how to grow and care for tulips, we’ll turn our attention to the different varieties. As mentioned, there are botanical species as well cultivated varieties available.
Some flower early in the spring, others at midseason, and still others as spring yields to summer.
All of them can be grown for one season and lifted after blooming. Some are especially well-suited to perennial cultivation. Be sure to read product descriptions carefully and make your choice accordingly.
Once you know the time when you want your flowers to bloom, and whether you’ll grow them as annuals or perennials, it’s time for the best part – choosing your favorites.
The following is a list of tulip categories that help distinguish one type from another, and provide a framework for exploring the thousands of varieties available to the home gardener.
Types of Tulips
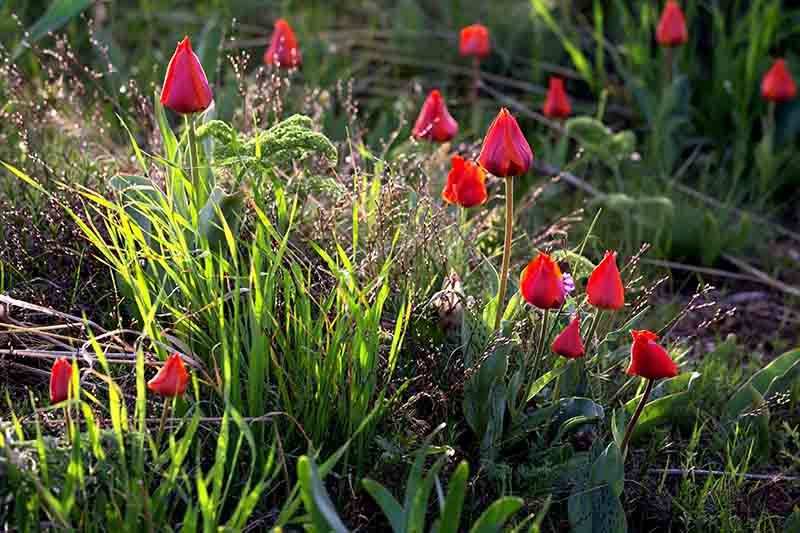
- Botanical species
- Darwin Hybrid
- Double Early
- Double Late (Peony)
- Fosteriana
- Fringed
- Greigii
- Kaufmanniana
- Lily-Flowered
- Multi-Headed
- Parrot
- Rembrandt
- Single Early
- Single Late
- Triumph
- Veridiflora
Each type has its own unique characteristics, and in some circumstances, these categories overlap. For example, there are double late fringed varieties.
Learn more about the different types of tulips in our full guide.
Here are three awesome cultivars to get you started:
Candy Apple Delight
This is an outstanding example of a Darwin Hybrid, a showy flower that is highly recommended for perennial growing, as it remains vigorous year after year.
Darwins have classic blooms that are slightly wider at the base and narrower at the top, like a pyramid.
Stems average 20 to 24 inches, with spread of about six inches. Bulbs are 4.7 inches (12 centimeters) in diameter.
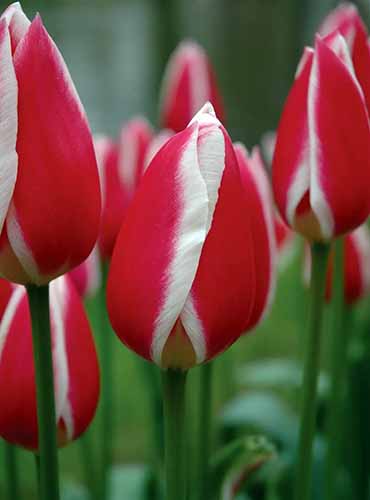
Bicolor ‘Candy Apple Delight’ boasts a stunning red with white edging combination.
This is an excellent choice for beds and borders. Tall varieties benefit from planting in locations sheltered from damaging winds.
Bloom time is late spring, and they are well worth the wait.
These are available in various quantities from Burpee.
Honeymoon
This fringed variety is white and satiny like the finest bridal attire. The flowers are cup-shaped. Heights range from 12 to 16 inches with a spread of about six inches. Bulbs are 4.7 inches (12 centimeters) in diameter.

Fringed types add textural interest to the garden, and the white flowers make a bold statement in a monochromatic landscape design, or as a neutral companion to mixed pastel varieties.
Bloom time is from mid- to late spring.
Find bags of 10 bulbs now from Burpee.
Apricot Parrot
Parrot tulips are ruffled beauties. This softly scented selection embodies the essence of spring in an alluring combination of pink, green, and cream.
Heights are between 18 and 20 inches tall and the spread is about six inches. Bulbs are 4.7 inches (12 centimeters) in diameter.

Parrot tulips are exotic and showy, and make exquisite stand-alone specimens.
Give them a circular garden all of their own in the front yard, or plant them in tall, stylish containers that flank the front door.
Find bags with 10, 20, 50, or 100 bulbs now at Eden Brothers.
As you shop, be sure to note the height of your favorites, as this is an important factor to consider as you design your landscape.
Tall types like the Darwins make for stunning back-of-bed anchors or stand-alone specimens.
Medium-height fringed varieties mingle well with other plants of similar stature, and feature nicely in the middle position of a display with both taller and shorter plants.
And tiny, four-inch botanical species show to best advantage in rockeries and front-of-bed positions.
Looking for More Options?
Find the perfect cultivar for you in our “Types of Tulip Flowers: 15 Beautiful Divisions.”
Managing Pests and Disease
Starting with quality bulbs is the best way to get off on the right foot when it comes to managing pests and disease. Order from reputable dealers, and when hand-selecting, choose the firmest, least-blemished ones with the paper coating intact.
Provide good drainage to prevent water pooling that may lead to insect infestation, fungal growth, and rotting.
Even with best practices in place, there may still be issues that crop up. Let’s look at some of the insects and herbivores that like to munch on tulips, common diseases, and avoidance measures.
Pests
While healthy tulips are least susceptible, some pests to watch out for include:
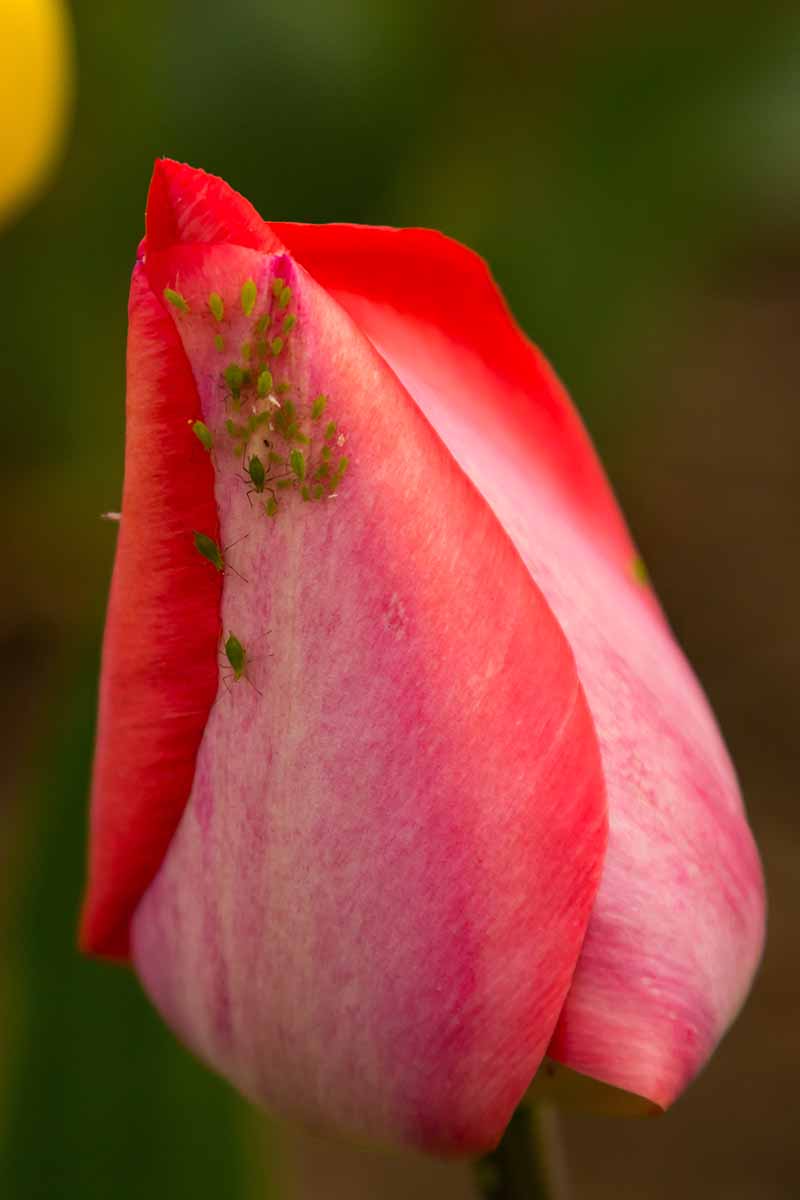
- Aphids
- Bulb mites
- Slugs and snails
- Spider mites
- Wireworms
To minimize aphid and mite damage, check plants daily. Pick off individual pests if you can, otherwise aim a gentle stream of water at them to rinse them off. For large infestations, apply an insecticidal soap or neem oil.
Proper drainage goes a long way toward inhibiting slug and snail activity, as they prefer damp environments.
The wireworm is the larva of a click beetle, and it eats through bulbs. Unfortunately, it also lives below ground, and its presence usually goes unnoticed until plants wilt, bulbs are dug up, and the offender is identified.
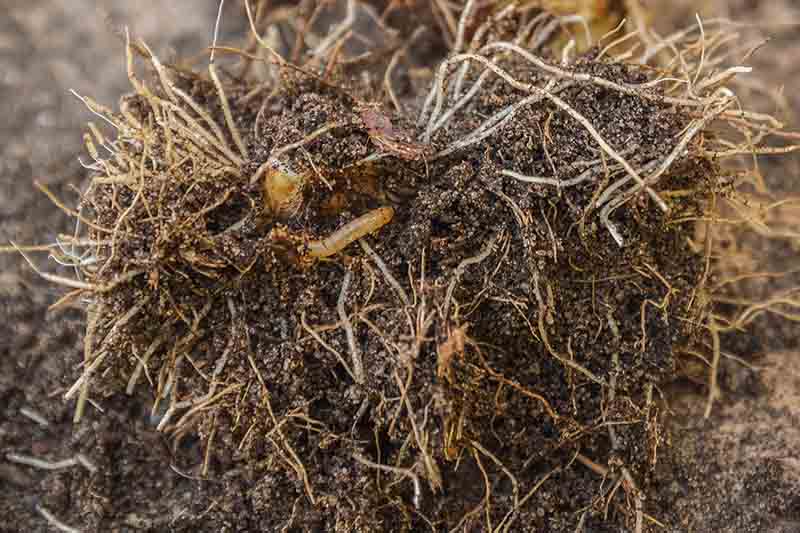
An application of diatomaceous earth may help salvage remaining plants.
Other ways to inhibit pests are by attracting birds and beneficial insects to the garden with lots of nectar-rich spring-flowering plants, and by weeding regularly.
Halting pests in their tracks is a good way to avoid the transmission of insect-borne plant diseases, such as mosaic viruses.
Herbivores
In addition to hungry bugs, the following wildlife visitors to your garden are likely to enjoy munching on your tulips:
- Chipmunks
- Deer
- Gophers
- Groundhogs
- Mice
- Moles
- Rabbits
- Squirrels
- Voles
To stop them from nibbling at your bulbs, wrap bulbs or line beds with loose wire mesh, or interplant with daffodils, as recommended above.

As many of you know, my dad was an avid gardener. He was repeatedly foiled by foraging wildlife, but made peace with the deer when it came to his tulips.
Each year, they ate the foliage of his red and yellow lily-flowered lovelies down to nubs so short, they bloomed on the ground. It seemed the hungry critters only liked the green parts, so he felt they had come to a workable compromise.
You may want to try laying rose bush clippings with sharp thorns around your plants that are unpleasant to little critter feet. I wouldn’t bother with any of the natural repellents, as they wash away with the first rain.
Learn more about protecting your tulips from deer.
Diseases
Tulips are prone to a number of diseases. Let’s examine a few of the most common.
Basal Rot
Basal rot, Fusarium oxysporum, aka gray rot, is a fungus that makes its way through the bulb and into the flower, rotting all in its path.
Botrytis Blight
Botrytis blight, Botrytis tulipae, aka tulip fire, is another type of fungus. It affects foliage, inhibiting growth and causing deformities.
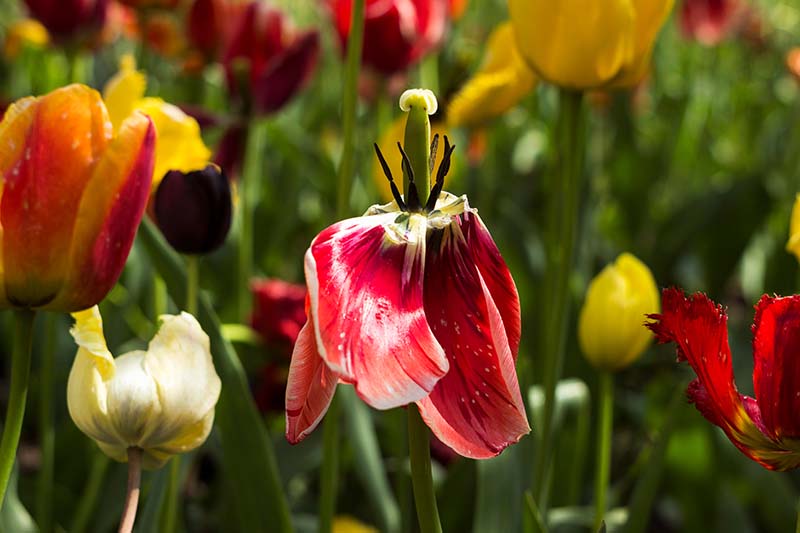
Tulip Breaking Virus
Tulip breaking virus, Arabis mosaic, aka Tulip Mosaic Virus, is one of a number of mosaic viruses. This one causes unnatural color mottling on both flowers and leaves, and weakens plants, resulting in tepal and foliage breakage.
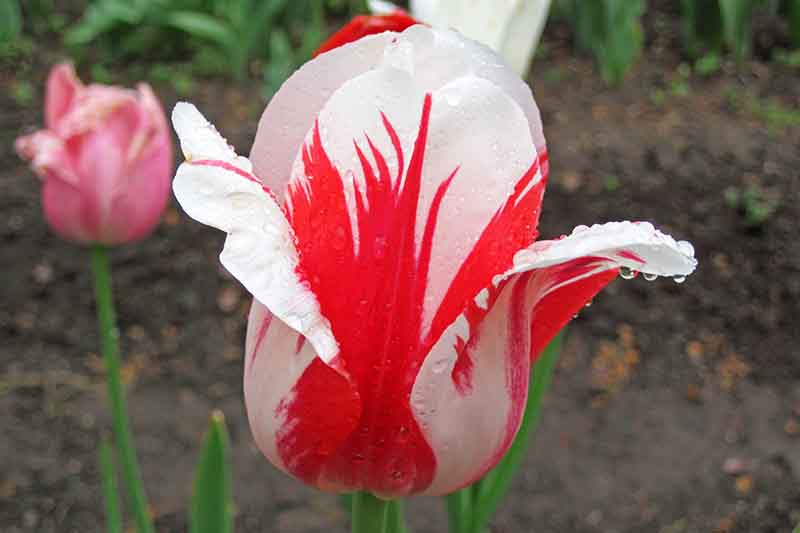
Such color anomalies were all the rage during the period of tulip mania, and today’s “broken tulips” are derived from those with the virus. According to researchers at the University of Illinois Extension, “broken tulip varieties should not be grown either near tulips with solid colors or near lilies.”
Some of the same viruses infect both lilies and tulips, and each host plant can act as a source of infection for the other.
The same experts go on to say, “plant bright-colored pink, red, purple, and brown tulips in separate beds from dark-colored, white, or yellow varieties.”
So, while it won’t kill your tulips, mosaic virus can certainly cause some aberrations! In addition, the broken portions are vulnerable to pest infestation, particularly by aphids.
Tulip Crown Rot
Tulip crown rot, Sclerotium delphinii, is a fungal condition in which the bulb and bottom of the stem are coated with a white fungus that causes the bulb to rot, and reddening of the foliage.
To contain the spread of a viral or fungal outbreak, remove all affected plant material and dispose of it in the trash.
An application of fungicide may protect remaining plants from further fungal outbreaks, but viruses do not respond to this treatment.
You can read more more about identifying and treating crown rot here.
The best defense against viral, fungi, water mold, or bacterial attacks is healthy, pest-free plants.
Also, see our guide “9 Reasons Why Tulip Leaves May Turn Yellow Prematurely” for other cultural and disease related problems and mitigation strategies.
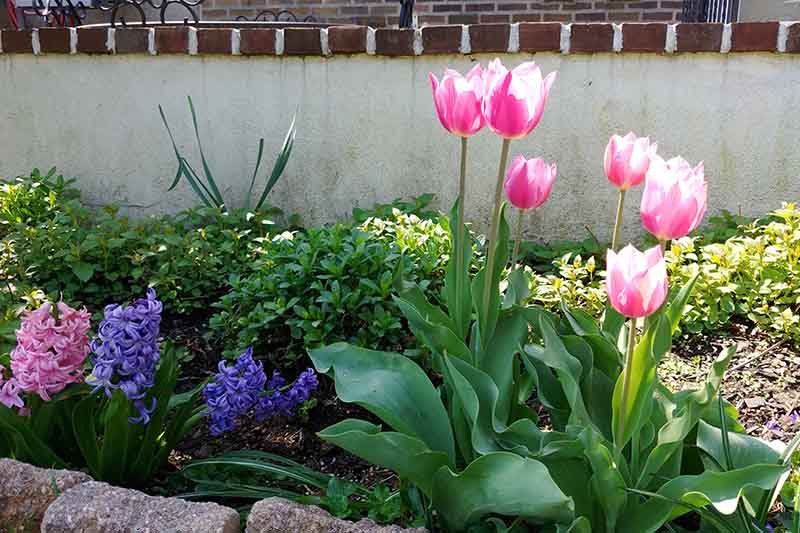
Best Uses
For classic spring curb appeal, plant tulips in beds, borders, containers, and window boxes.
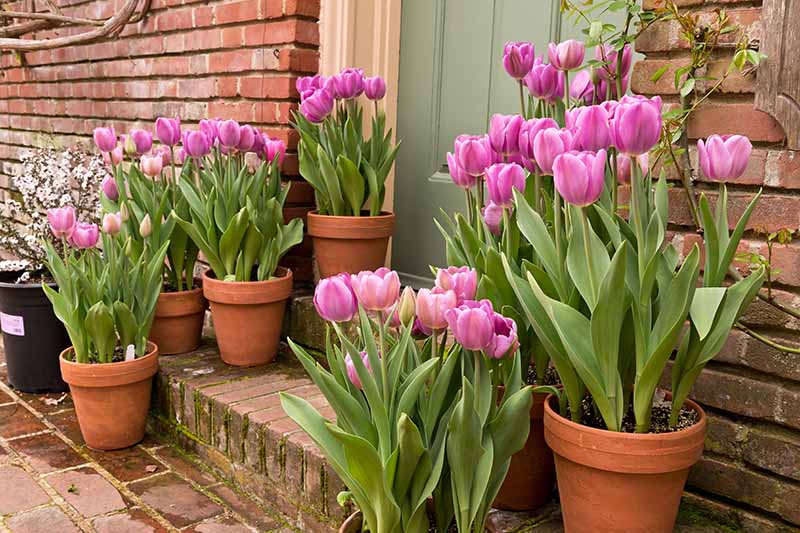
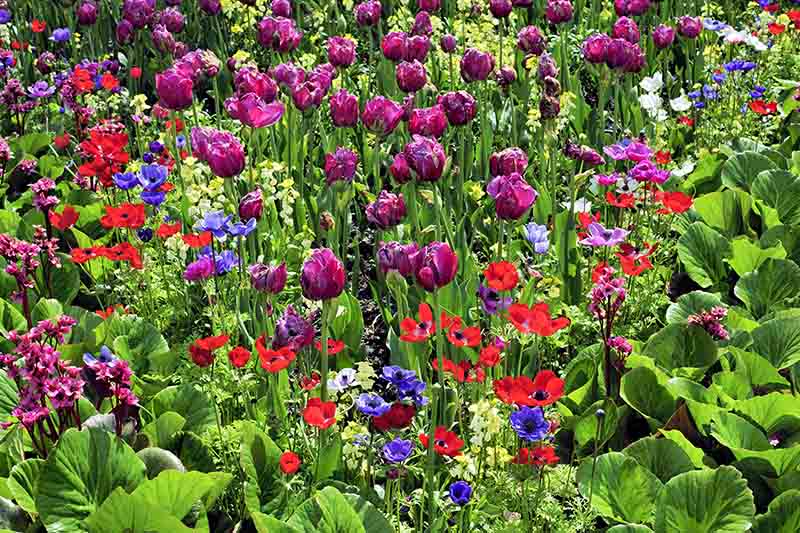
Fashion generous sweeps of color with mass plantings in either a solid color or complementary assortment.
Mix tall and short varieties of contrasting colors to add depth and interest to your garden design.
Place your favorites in clusters beneath azaleas and lilacs.
Interplant with bold bluebells, or dainty columbine and forget-me-nots.
Add tulips to existing beds of other bulbs like crocus, daffodil, daylily, grape hyacinth, hyacinth, and snowdrop.
And here’s a tip: to cover those unsightly post-bloom leaves, plant ground covers like pachysandra, periwinkle, speedwell, and vinca that can camouflage them with glossy foliage and petite blossoms.
Cutting and Arranging
Tulips make wonderful cut flowers you can arrange yourself.
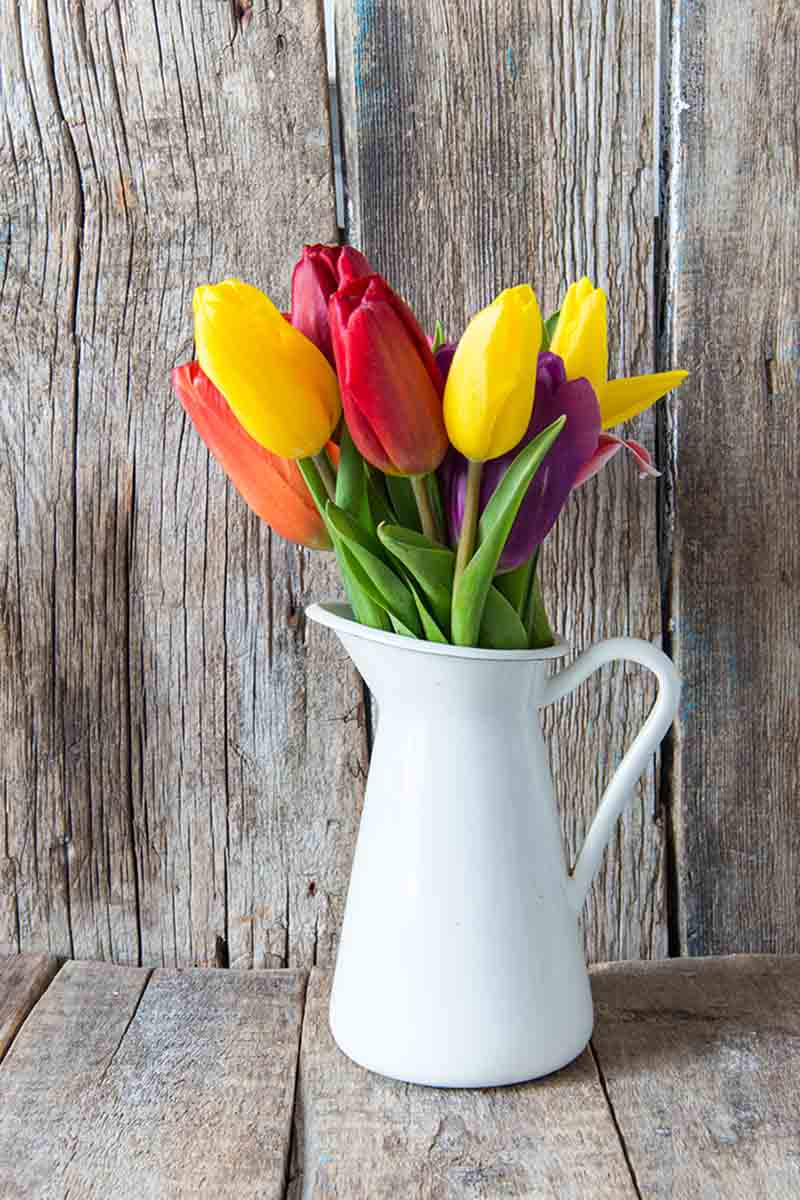
Here’s how:
Cut stems when flowers are in the bud stage, when they are just beginning to show what color they’re going to be.
Make your cuts on a 45° angle to create as much surface area as possible for the stem to take up moisture. If you are growing yours as perennials, take stems only, no leaves.
Use a tall, supportive vase, or place among other flowers, to help them remain upright.
Change the water in the vase and give the stems a quarter-inch cut each day.
Keep the vase out of direct sunlight. Tulips are phototropic and will turn toward sunlight, twisting their stems as they do so.
In addition, the stems keep growing after they’re cut, so make them a little shorter than you need so they don’t distort a carefully planned arrangement.
Quick Reference Growing Guide
| Plant Type: | Bulbous perennial | Flower / Foliage Color: | All colors except blue; green, sometimes tinged with purple |
| Native to: | Turkey | Maintenance: | Low |
| Hardiness (USDA Zone): | 3-7 | Soil Type: | Average |
| Bloom Time / Season: | Spring | Soil pH: | 6.0-7.0 |
| Exposure: | Full sun | Soil Drainage: | Well-draining |
| Spacing: | 2-6 inches | Attracts: | Birds |
| Planting Depth: | 4-6 inches | Companion Planting: | Azalea, bluebell, columbine, crocus, daffodil, daylily, forget-me-not, grape hyacinth, fragrant hyacinth, iris, lilac, pachysandra, periwinkle, speedwell, and vinca |
| Height: | 4-30 inches | Uses: | Beds, borders, containers, mass or mixed plantings, window boxes; cut arrangements |
| Spread: | 4-6 inches | Family: | Liliaceae |
| Tolerance: | Black walnut trees | Genus: | Tulipa |
| Water Needs: | Moderate | Species: | Various |
| Common Pests: | Aphid, bulb mite, slug, snail, spider mite, wireworm; chipmunk, deer, gopher, groundhog, mouse, mole, rabbit, squirrel, vole | Common Disease: | Basal rot, botrytis blight, tulip breaking virus, tulip crown rot |
Extraordinary Dazzlers
We’ve discussed a wealth of information on tulips, from their remarkable early heyday to planting depth and spacing, tips for growing success, maintenance, pests and disease, best uses, cutting and arranging, and my favorite part – the many cultivars to choose from.
About five years ago, I received a pretty Easter basket of flowers from my daughter and son-in-law. After the holiday, I planted the bright pink tulips out front, beneath my pink weigela and white ornamental weeping cherry.
I don’t know the specific cultivar, but they seem to be a single late variety. I call them my “mutts,” because they are somewhat generic and tough as nails.
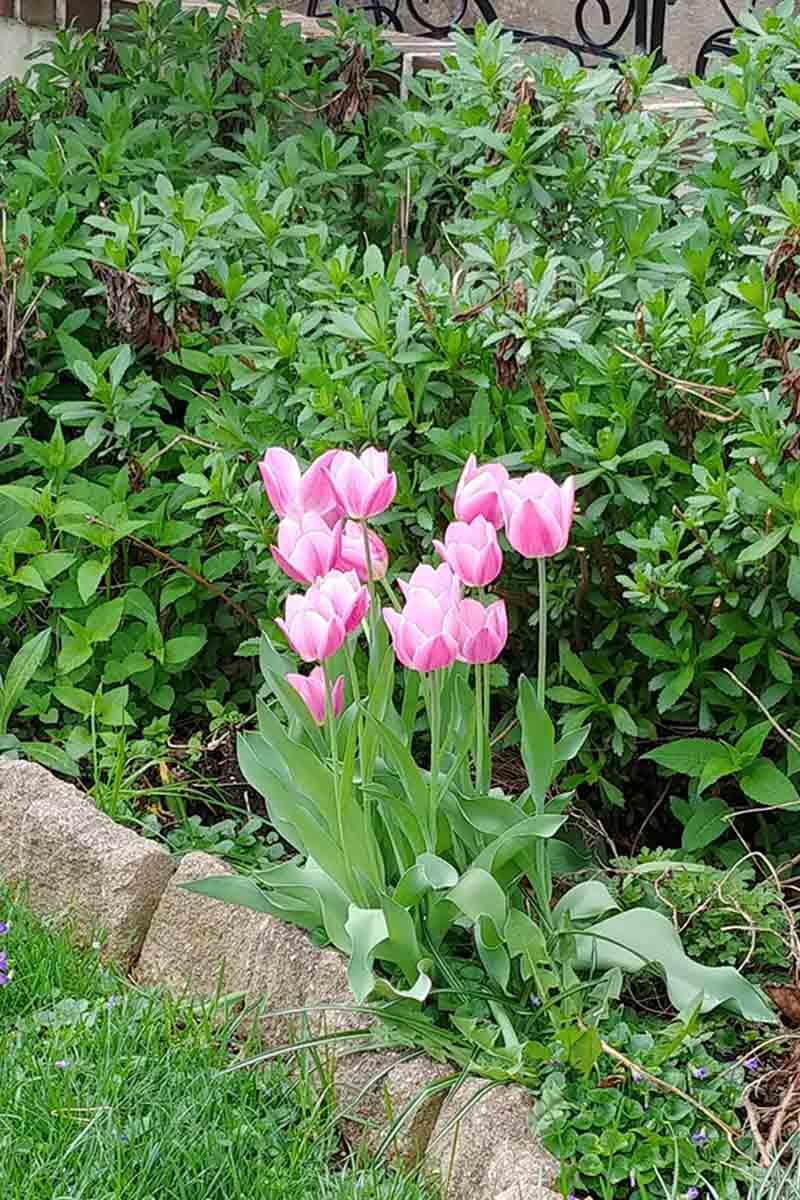
I kid you not, these tulips have withstood both extreme cold and intense heat. And, I’m ashamed to admit, they haven’t received any supplemental water or fertilizer since the day I planted them. The bugs and critters don’t bother them, and they’ve never shown any signs of disease.
Each year, the cluster gets a little bit bigger and is as strong as ever.
Extraordinary, or what?
So, you don’t have to be fancy to have lovely spring tulips in the garden, and there’s nothing to lose by leaving them in the ground to prove their worth from year to year.
From botanical species to the rarest hybrids, and everything in between, tulips are a flower to love. Which will dazzle visitors to your home this spring?
Tell us how your garden grows in the comments section below.
And you want to add more colorful flowers to your garden, you’ll need these guides next:
Your article covered the topic wonderfully. My mother used to grow tulips 60 years ago and pulled them from the soil after they had bloomed, placed the bulbs into a paper bag, and stored them in the basement of our home. In mid to late fall, she would pick a spot and re-plant them separating the daughters from the mature bulbs. now to my questions. Should I cut the stems once flowers petals have fallen away or let the top of the stem mature into seed? Second, should I remove the bulbs from the soil and bag them in a… Read more »
Hi Peter – As a few of my closest relatives and friends are graduates of St. Joe’s, I know we can discuss gardening amicably. I’m glad you enjoyed the article. Your mother must have had a lovely garden. After your tulips bloom, allow the leaves to remain as they are. Cut the flower stems to their bases. Some folks worry that this opens the bulbs up to pooling water and rotting. However, leaving the stems attached and letting them go to seed deprives the bulbs of energy for next year’s flowers. This is an ongoing debate. Try both ways, if… Read more »
This isn’t a question on tulips but ground cover – what would u suggest for NC clay soil?
Hi Mary –
With clay soil, you may want to look into native grasses, like pest- and disease-resistant pink muhly grass, Muhlenbergia capillaris.