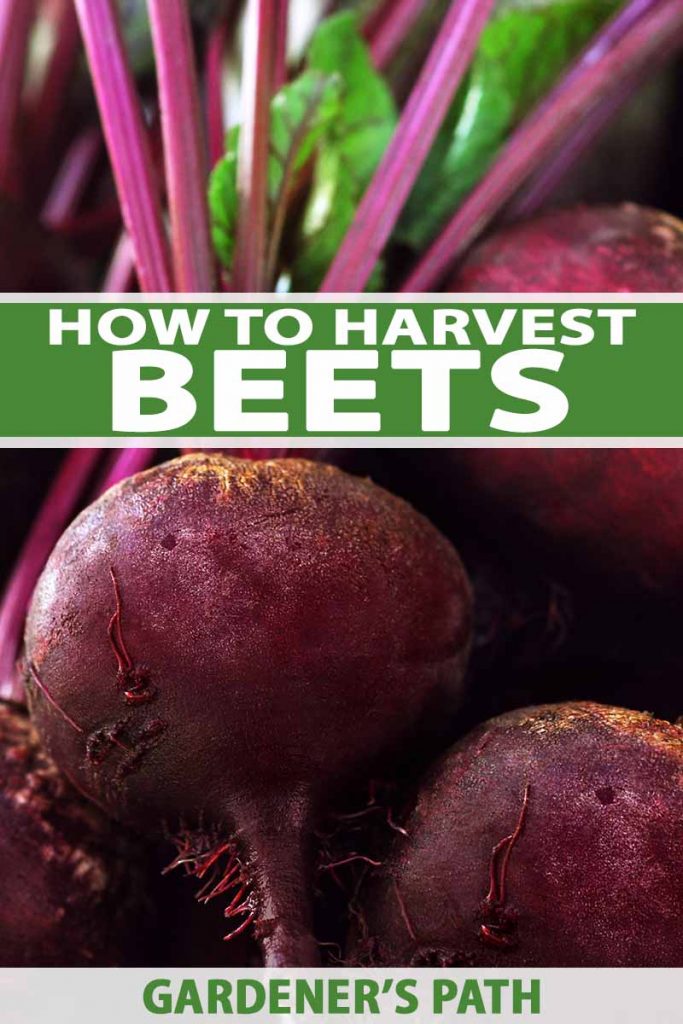
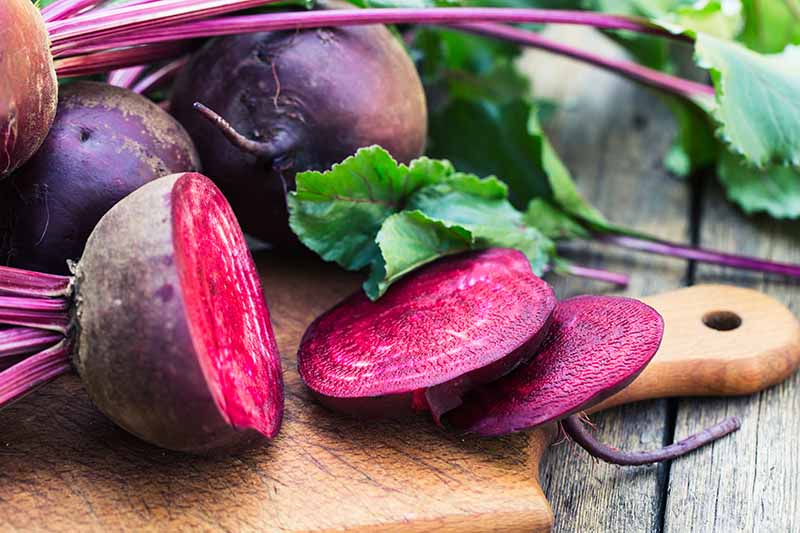
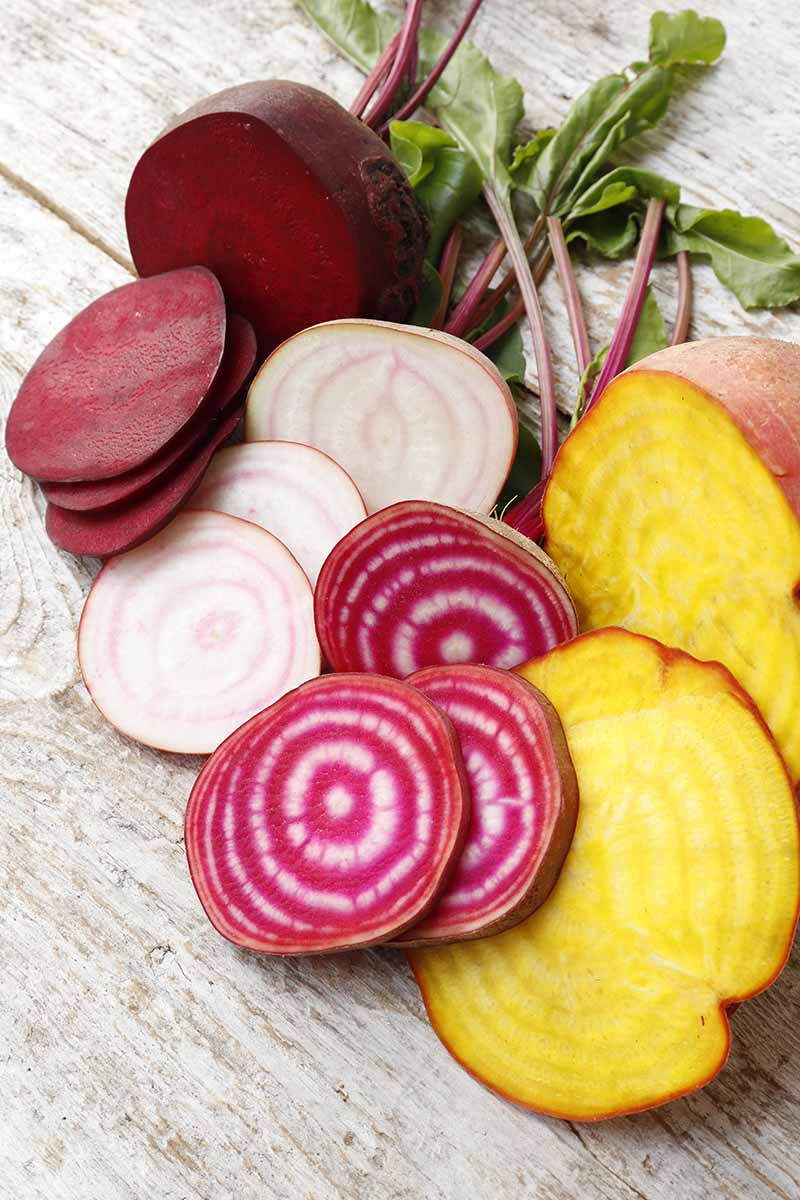
Beets are truly one of the most stunning vegetables.
Fire engine red, golden yellow, deep purple, or candy cane striped, their range of colors and flavors never ceases to amaze me.
No matter the variety, just a few slices of these juicy, vibrant roots can transform any ho-hum dish into an extravagant delicacy.
Not to mention, they are incredibly nutrient rich, easy to grow, and simply delicious.
It’s no wonder I always set aside a large swath of garden space for growing these classic beauties.

We link to vendors to help you find relevant products. If you buy from one of our links, we may earn a commission.
But getting them into the ground is the easy part. Once you have a patch growing, how do you determine when they’re ready to harvest? And what can you do with an exceptionally abundant crop?
Harvesting beets may seem like a guessing game. Luckily for you, with our simple tips and tricks, it is actually quite easy.
What’s more, there are so many easy ways to preserve them for later use, you won’t have to worry about growing more than you can eat all at once!
What You’ll Learn
Harvesting Beets
Figuring out when to harvest your beets depends on a few factors, including the variety, the time of year they were planted, and the average temperature where they are growing.
Personal preference also plays a role. Beyond varietal standards, not everyone agrees on what size beet is best.
While some people argue that the smaller roots have more flavor and juiciness, others prefer to allow them to reach a larger size before picking.
Allowing them to grow a bit larger is certainly fine, but be warned that if you wait too long to harvest, they may become fibrous, soft, or wrinkled, and will eventually start to lose some of their succulent flavor.
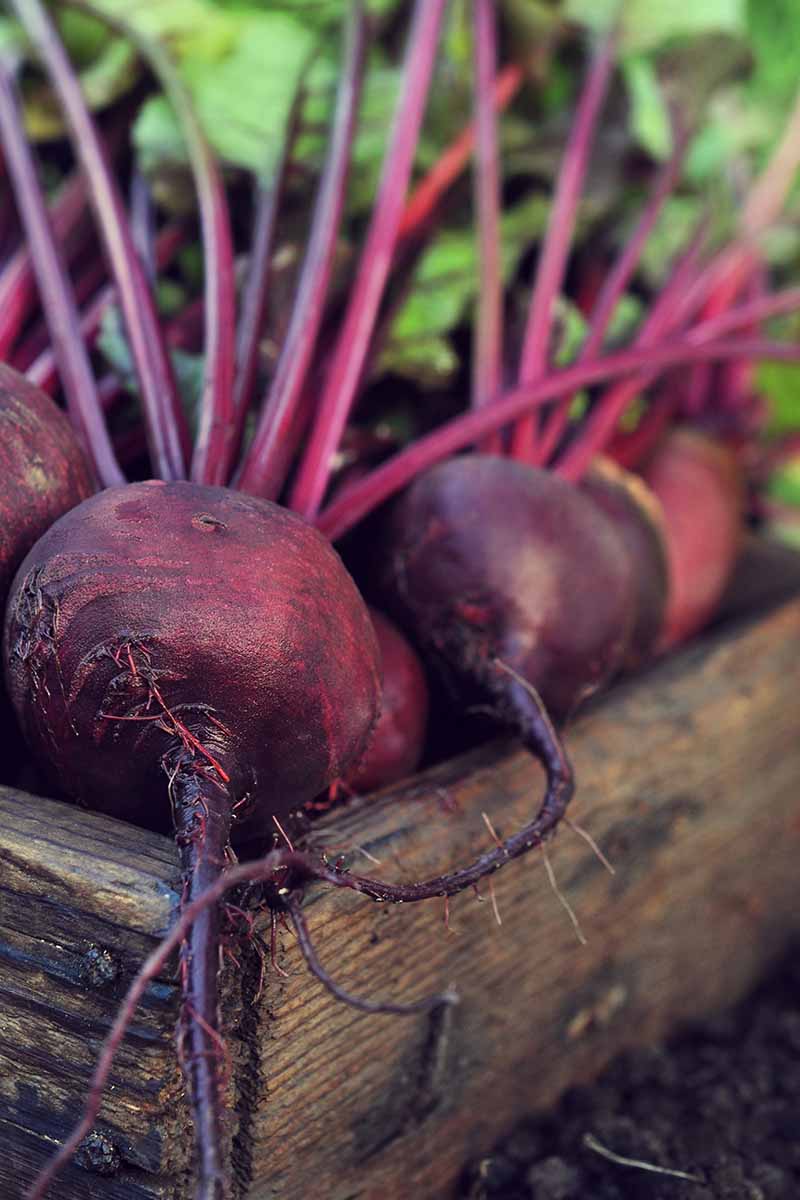
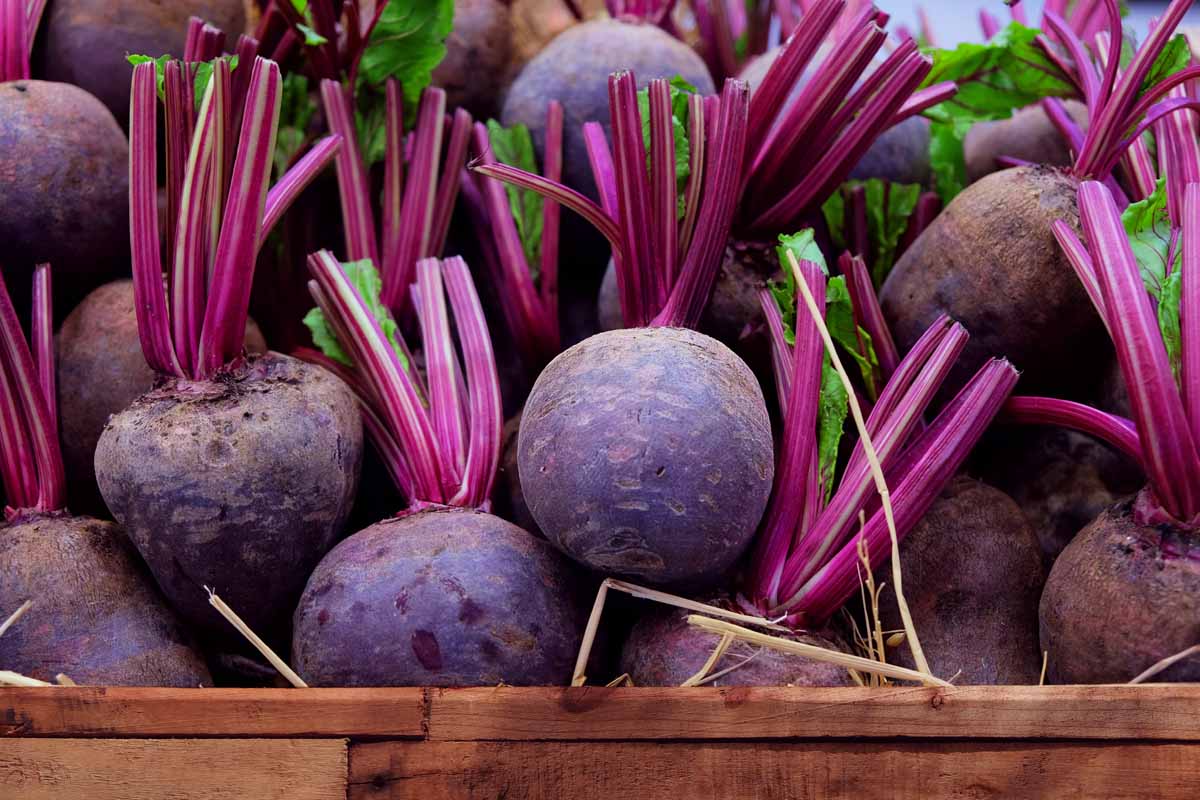
The best beets tend to be dark in color, juicy, and firm, with a smooth surface.
In general, the roots are ready to harvest when they are a few inches in diameter, somewhere between a golf ball and a tennis ball size. Expect to harvest your crop around 50 to 70 days after planting.
To determine whether they are ready to be harvested, clear away some of the mulch or soil around the top of your beets and look for crowns protruding above the soil line. If you can see an inch or two sticking out above the soil, it’s a safe bet that they are ready for pulling!

Keep an eye on the leafy greens growing from the tops. If the greens are beginning to look wilted – and you know the crop is near its time to harvest – the root is likely passing its prime and should be picked right away. Don’t confuse leaves wilting due to frost damage or lack of water!
If your roots don’t look quite ready and a frost is in the forecast, don’t fret! Beets are a cool weather crop, and a light frost or two can actually sweeten their flavor. Just make sure to dig them up before the ground freezes.
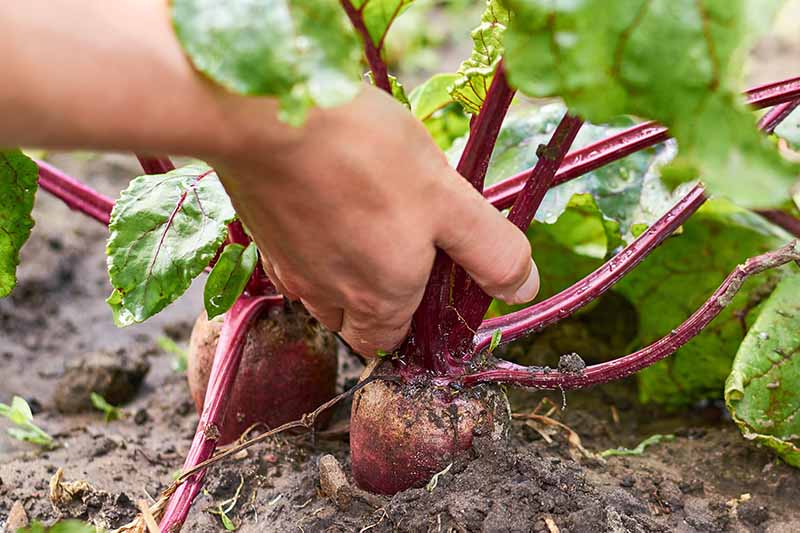
When you have decided it’s time to harvest, use a garden fork or knife to gently loosen the soil around each plant, being careful not to accidentally slice into any of the roots.
Once the soil is loose, grab hold of the green tops and lift carefully, while simultaneously prying the soil underneath with a hand fork or garden knife.
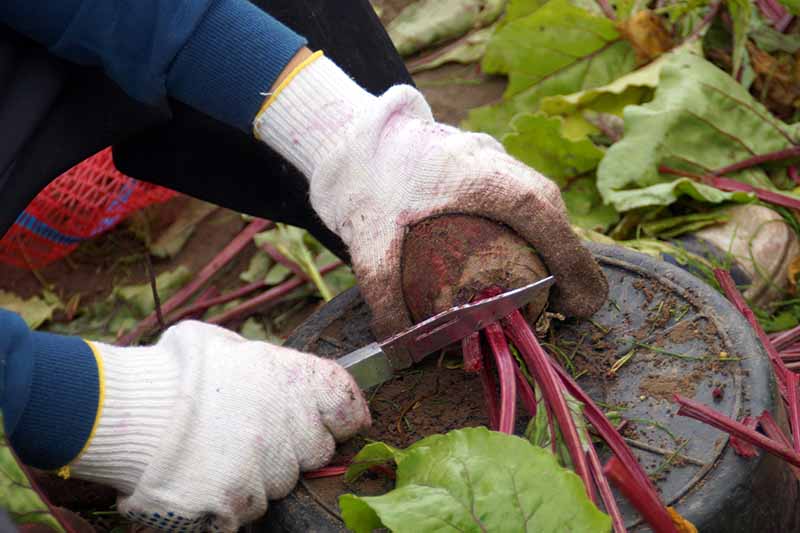
You can remove the tops by cutting them or twisting them off with your hands, leaving about an inch attached to the root. This will keep the plants from bleeding their juices and also help to keep the roots fresh for longer.
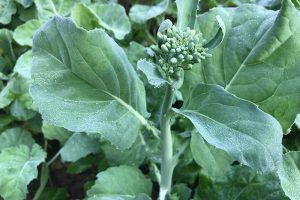
And don’t dispose of those leaves! The greens themselves are delicious and nutritious, with a slightly bitter flavor resembling Swiss chard.
You can also choose to harvest the greens sparingly throughout the season while the roots are still growing. Just make sure to only take a couple from each plant at a time, otherwise root growth could be inhibited.
Tip: If you water your crop a couple of days before you plan to harvest, it will help the plants to come out of the soil more easily. If you’ve got rain in the forecast, plan your harvest after they’ve had a good soaking.
Preserving Beets
When you decide it is time to harvest your beetroots, have a plan for what you want to do with them. The greens will last a few days in the refrigerator. Without further preservation, the roots will last in storage for only a few weeks.
Remember to separate the greens from the roots, leaving an inch or two of stem protruding from the roots. Store the greens separately from the roots.
If you plan to use your beets roots soon, you can wash them. Otherwise, do not clean off the dirt right away. Instead, place them in a dry, shady location until any excess soil that is still clinging to them has dried, then it off gently.
It is best to only wash beetroots with water right before you plan to use them, as excess moisture will encourage faster rotting.
In the refrigerator, they will keep best in a perforated plastic bag in the crisper drawer. This prevents them from drying out and becoming soft.
To store the roots long term, they should be covered in sand or sawdust in a wooden box or crate and placed in a root cellar, or another well ventilated cool location like a garage or basement. They do best in a cold, moist location in the range of 32-40°F with 95 percent relative humidity.
Prepare your storage crate by pouring some sand or sawdust on the bottom and layer your beets on top. Continue to alternate layers of sand and roots, ending with a final layer of sand on top. When you want to eat some, just pull them out from the top layer.
Check for spoilage every so often by removing the beets, disposing of any that have gone bad, and repacking them in the same type of material. They should keep for up to 5 months this way.
Be sure to set aside a few to eat fresh! They are at their best right after harvest, delightfully crisp and juicy, with the highest nutrient content. Eat any blemished ones first, since these will be the most likely to rot during storage.
You can also freeze them. It’s best to cook beets prior to freezing, as the raw roots tend to become grainy in the freezer.
Here’s the easiest way to do this:
- Boil whole roots for about 30 minutes, or until they can be pierced easily with a fork.
- Remove from the water, wait until they are cool enough to handle, and peel off the skin. The skins should slide off easily. Small ones can be frozen whole if you choose, and larger ones can be chopped into slices or cubes.
- Once chopped or sliced to the desired size, spread them out on a baking tray and flash freeze them, to prevent them from sticking together.
- Once they are completely frozen, you can remove the tray and repackage into freezer bags or containers. They are best used within 12 months.
- When you are ready to eat them, just remove the beets from the freezer and allow to defrost before cooking.
Tip: Vacuum sealing is a great way to prevent freezer burn and extend storage life. You can check out a review of the top vacuum sealers on our sister site, Foodal.
Fermenting beets is another method of preservation, and an incredibly healthy way to consume them that’s rich in healthy probiotics. The liquid produced by this ferment is known as kvass, a healthy beet juice tonic popular in Russia and Eastern Europe for boosting the immune system. (Think kombucha – but made with beets).
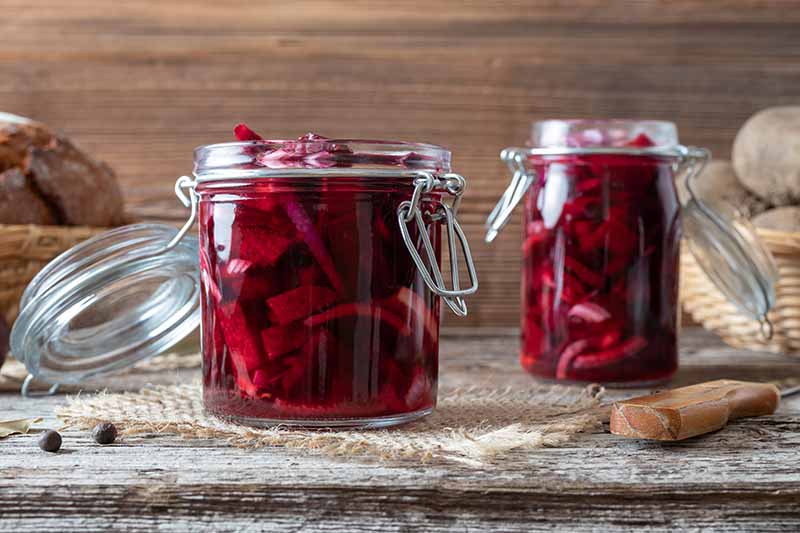
Lactofermentation is the process of using salt and water to bring foods to life! As the beets stew in a brine of water and salt, beneficial bacteria begin to grow and multiply. These healthy bacteria consume the natural sugars in the beets, producing lactic and acetic acid, which in turn preserves the vegetables.
These healthy probiotics, similar to those found in yogurt, create a delicious pickled condiment that will populate your gut with beneficial microbes.
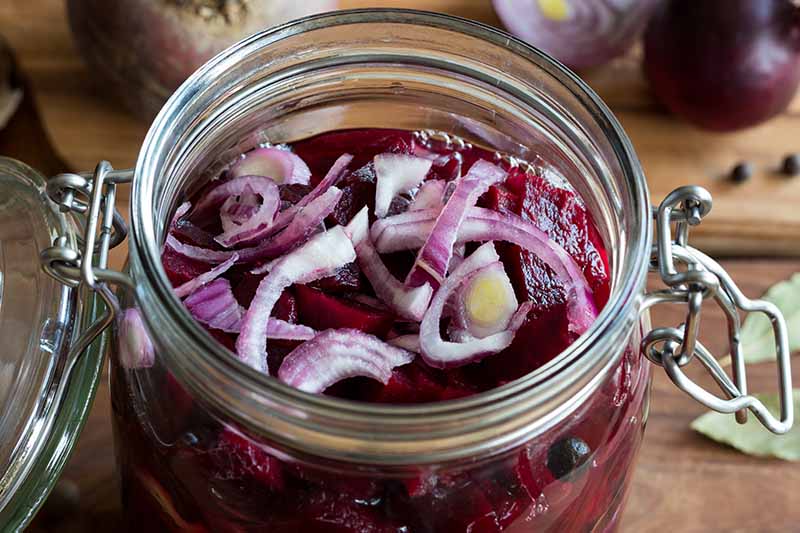
Fermenting beets is incredibly easy. All you need to do is chop up the raw, peeled roots and place them in a jar or fermenting crock. You can add other ingredients if you choose such as garlic, peppercorns, dill, or bay leaves.
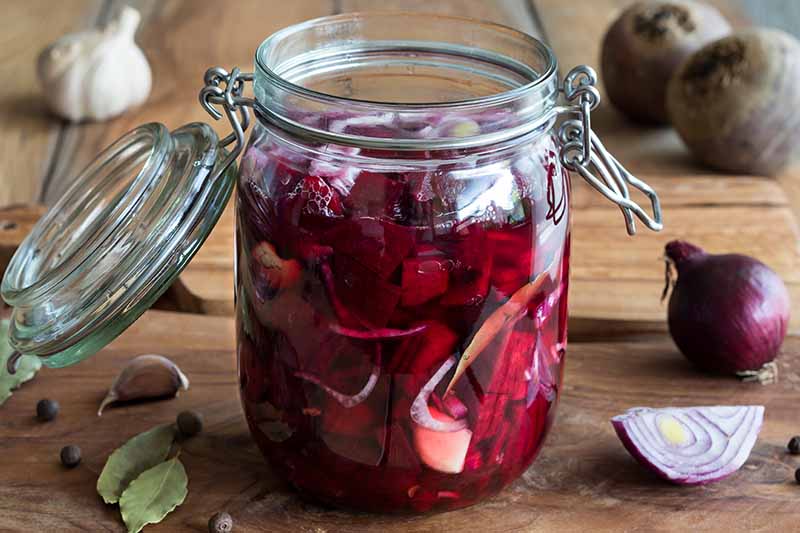
Next, combine water and salt in a bowl to make a brine, stirring until the salt is completely dissolved. Make a 2% brine solution by adding 1 tablespoon of sea salt for every 4 cups of water. Pour just enough brine into the crock or jar, cover the vegetables completely, and place a weight on top.
If you are using a fermenting crock, it likely came with a set of weights for this purpose. If not, you can fill a plastic zip-top bag with water and place it on top of the chopped roots. You want to make sure that the vegetables are completely submerged, and not exposed to the surrounding air.
Tighten the lid and keep your crock or jar at room temperature in a dark spot in the kitchen for about a week or so, or until bubbles to appear on the surface. The perfect temperature range for beneficial bacteria to grow is 65-78°F.
Put the jar somewhere that you will remember to check on it. You want to examine it periodically to make sure the veggies are still covered in liquid, and that there is nothing moldy or funky growing on top.
If a white film appears on top of the ferment, do not fear – it is most likely just yeast and poses no health risk. Just remove the film with a slotted spoon and discard it. If your pickles ever have a slimy texture or unappealing odor, discard of the batch and start again.
Eventually, the ferment should start to bubble!
Taste it every few days. It will be ready when the flavor becomes salty and a bit sour. The length of time this can take will vary depending on the ambient temperature and brine concentration, but you can expect the process to take approximately 7-10 days.
When it is ready, remove the weights and store the ferment in a tightly lidded jar in the refrigerator. It should last for up to 3 months.
Alternatively at this stage you can strain off the bright red liquid, or kvass. It has a salty, slightly sour flavor and can also be used as a base for making borscht, the traditional Eastern European soup.
Recipes and Cooking Ideas
The most wonderful things about beets is that they can be eaten in such a huge variety of different ways, each bringing out unique texture and flavor profiles of the vegetable.
One of the most popular dishes made from beets is borscht, the deep red, hearty Eastern European soup – that’s often more like a stew – traditionally eaten on Christmas Eve and Easter. The red roots give it the earthy color and flavor, and its characteristic slightly sour undertones come from the use of beet kvass as a base.

Roast them to bring out their juicy sweetness, ferment them for a hint of sourness, or eat them raw for a delightful crunch. And don’t forget to mix up the varieties and colors for an impressive rainbow effect.
No matter how you prepare them, beets will always add a bit of beauty and a flash of color to your meal!
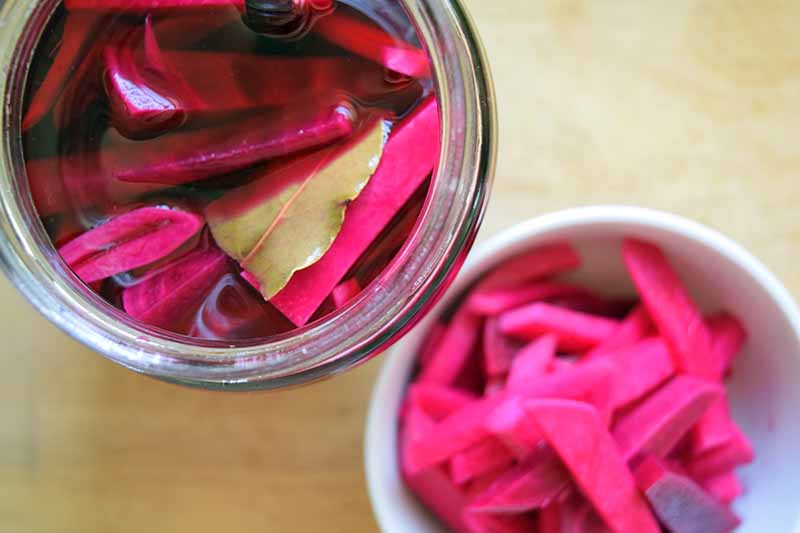
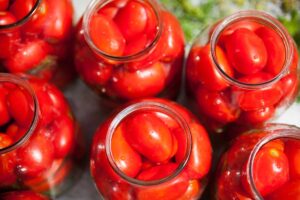
One of my favorite ways to preserve beets is by pickling them.
A bit easier and less time consuming to prepare than a fermented version, our sister site, Foodal has a wonderful recipe for quick-pickled beets and turnips.
Crunchy, tart, and salty with just a touch of spice, this is one snack you won’t be able to stop eating. It makes a delicious addition to sandwiches and salads, too.
Sometimes simple is best.
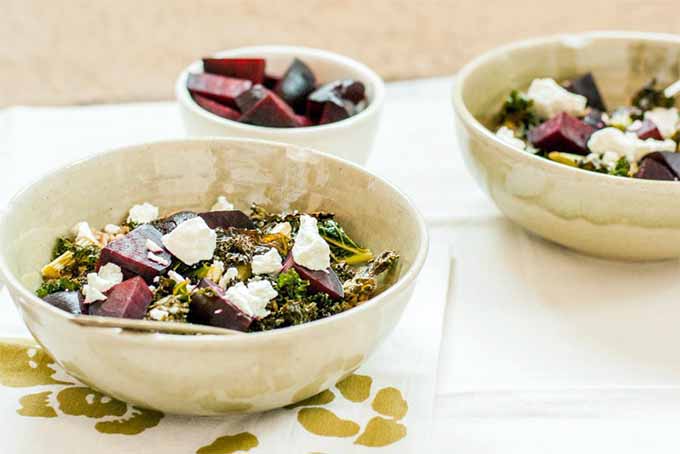
Kick off a hearty dinner with this light and fresh green salad featuring arugula, beets, and goat cheese. It’s great for an easy summer lunch, or serve it as a refreshing start to a multi-course meal. Head to Foodal for the full recipe.
There is nothing like roasting to bring out the delectable sweetness of a beet.
For a hearty and heartwarming roast, try this recipe of coconut ginger roasted kale with beets, farro, and goat cheese. Salty, spicy, and subtly sweet, this flavorful combination is veggie perfection. Get the full recipe on Foodal.
Not in the mood to cook your beets?
Why not start off your day with a crisp glass of apple, beet, and carrot juice? Incredibly healthy, refreshing, and delicious, this recipe from Foodal will surely provide an energetic start to your day.

Last but certainly not least, don’t forget about those nutritious greens!
You can cook and eat them as you would any other type of leafy green. Toss them raw into your next salad, saute them with some eggs, or use them as a garnish! Try this recipe for sauteed garlic beet greens from Foodal.
Brighten Up Your Kitchen
There is practically no end to the creative ways in which you may enjoy beets, and add them to your diet.
For this reason, I always make sure to plant a big patch in my garden each year. I know I can pull them all up and store them easily, and I will always have a supply when I get a craving for something juicy, bright, and delicious!
What’s your favorite way to preserve and prepare these colorful root vegetables? Share your ideas and questions in the comments below!
For more information about growing and harvesting beets, be sure to check out some our other guides including:

Great article! Very helpful and especially thorough.
Answered all the questions of this 1st time Beet grower. Thank you