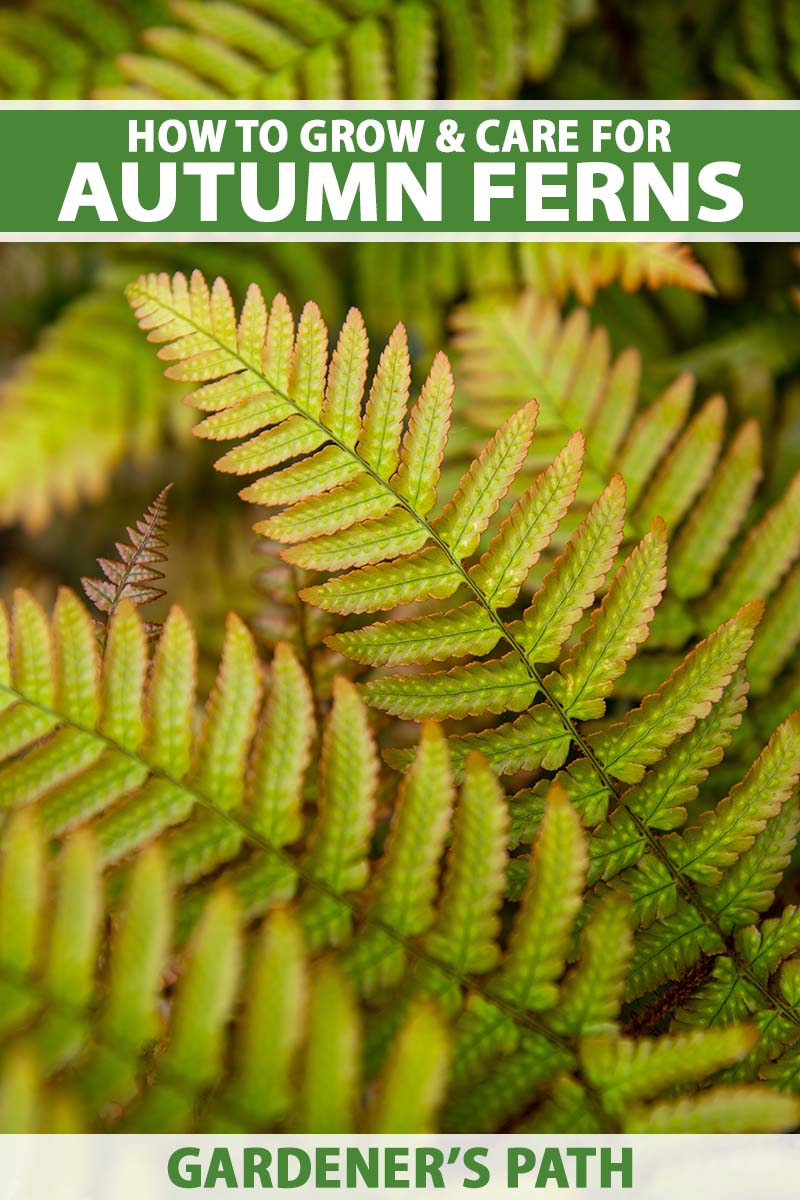
Dryopteris erythrosora
It’s no contest – green is the color most often associated with plants.
And it’s easy to see why – what with green being the color of chlorophyll, it’s no wonder our language is peppered with common phrases like “going green” and “green thumb.”
If a scavenger hunt included a green plant, it would be the easiest item on the list to find.
We link to vendors to help you find relevant products. If you buy from one of our links, we may earn a commission.
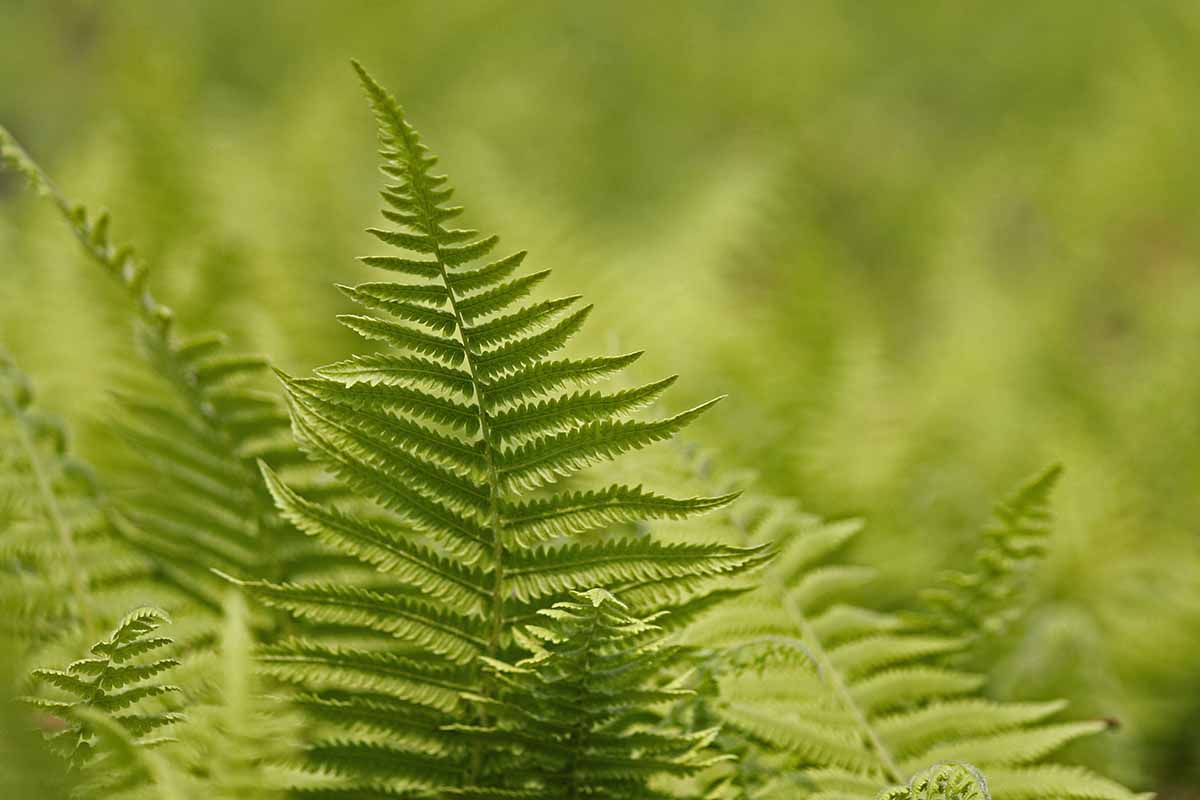
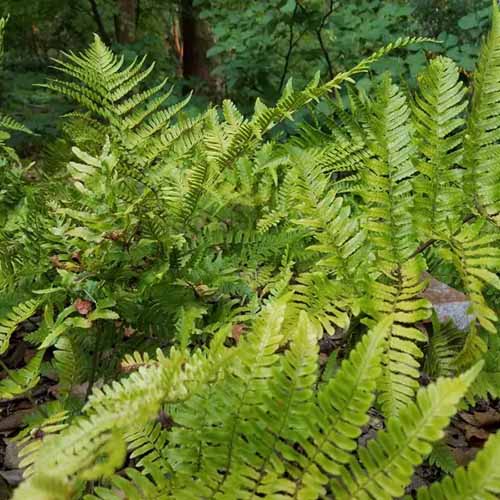
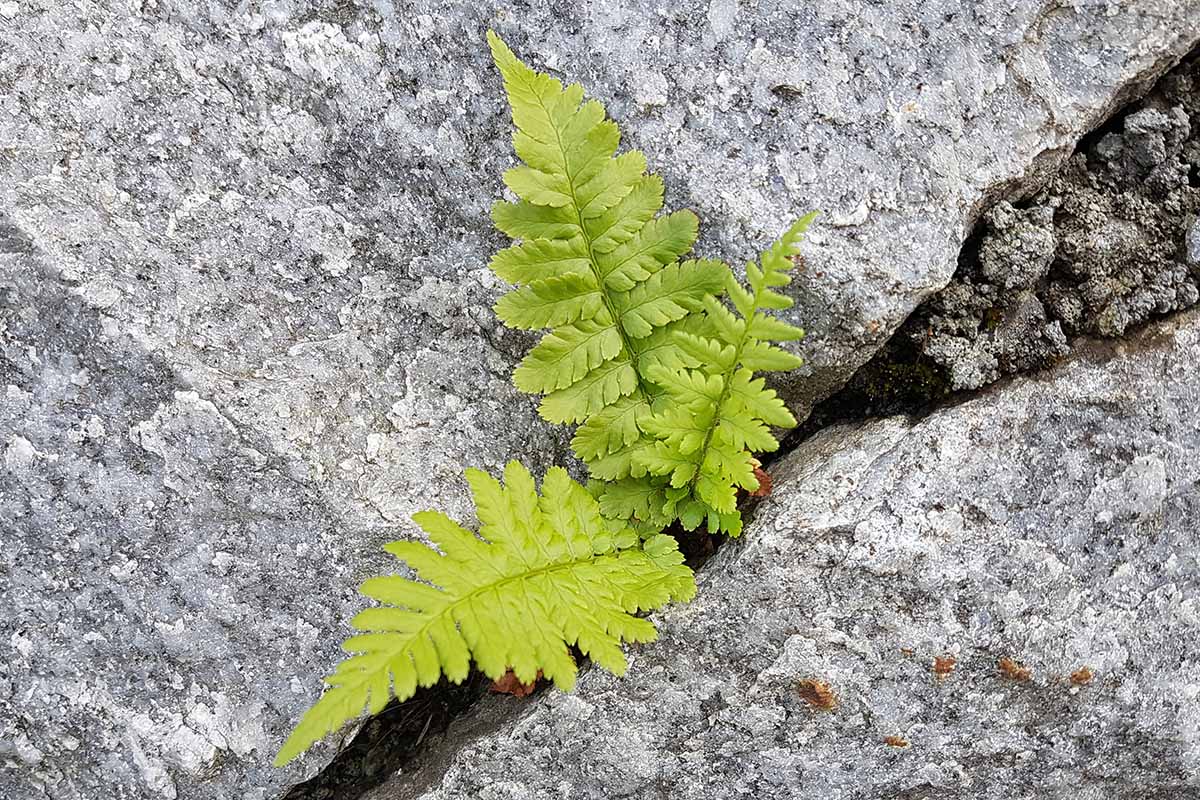
Even among plants, ferns are well-known for their greenery. Since they don’t flower, their fronds are all that they have, ornamentally. Which is fine, because a fern’s green foliage is just what the doctor ordered… most of the time.
But it’s not horticultural heresy to look at a fern, sigh in discontentment, and think: Plain old green again? Can’t a gardener get a different shade of fern up in here, for a change? With the autumn fern, you actually can.
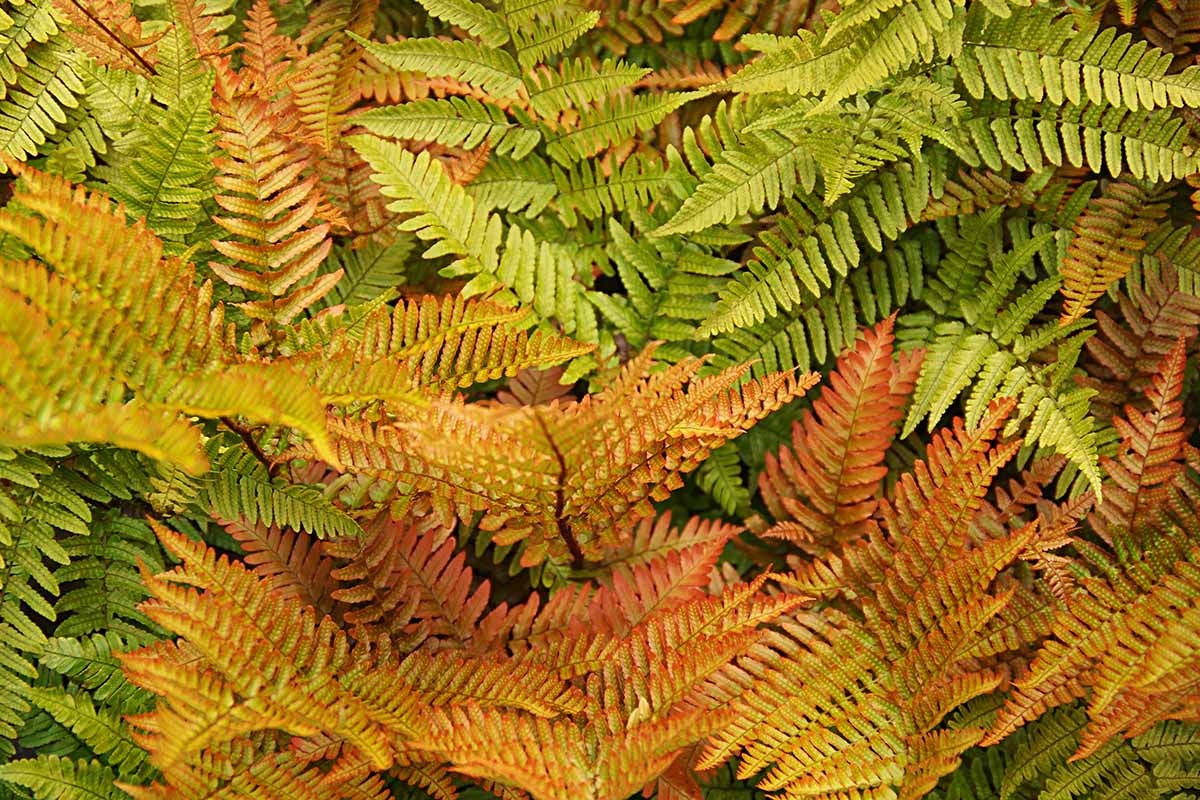
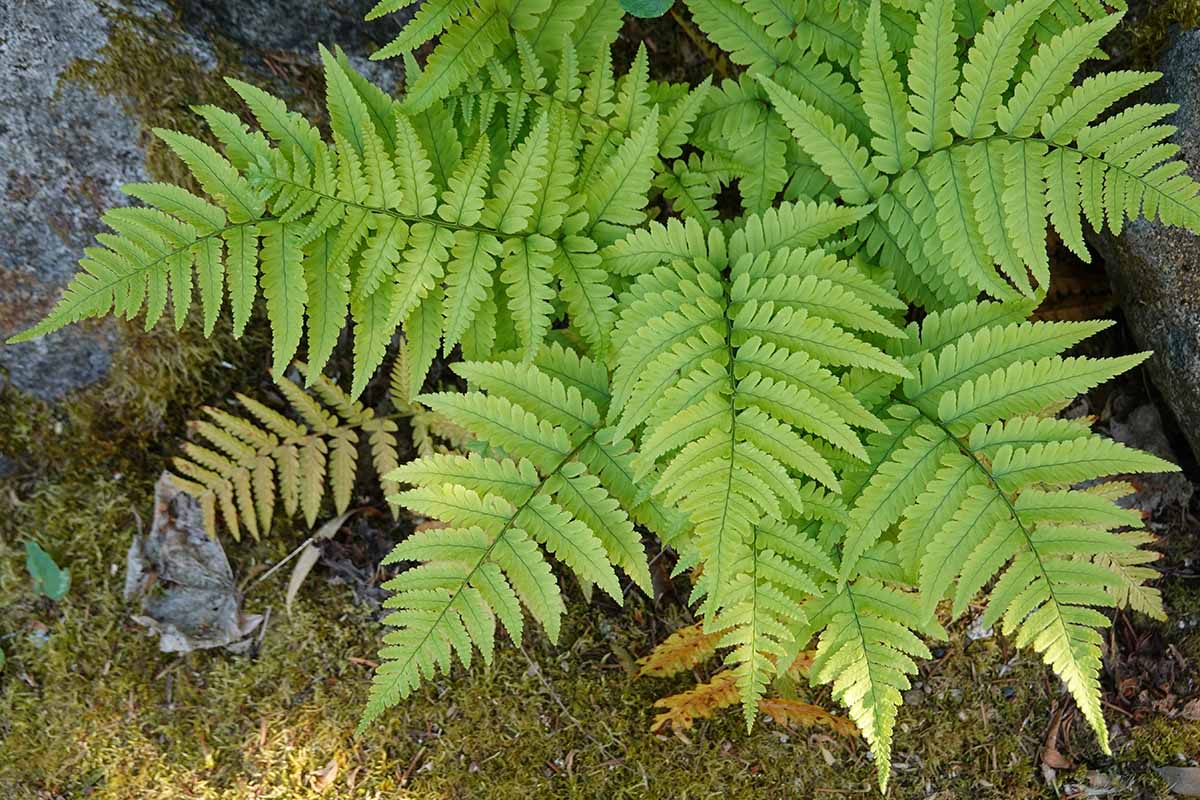
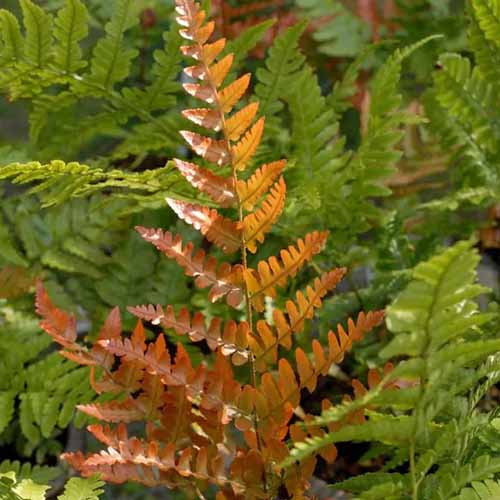
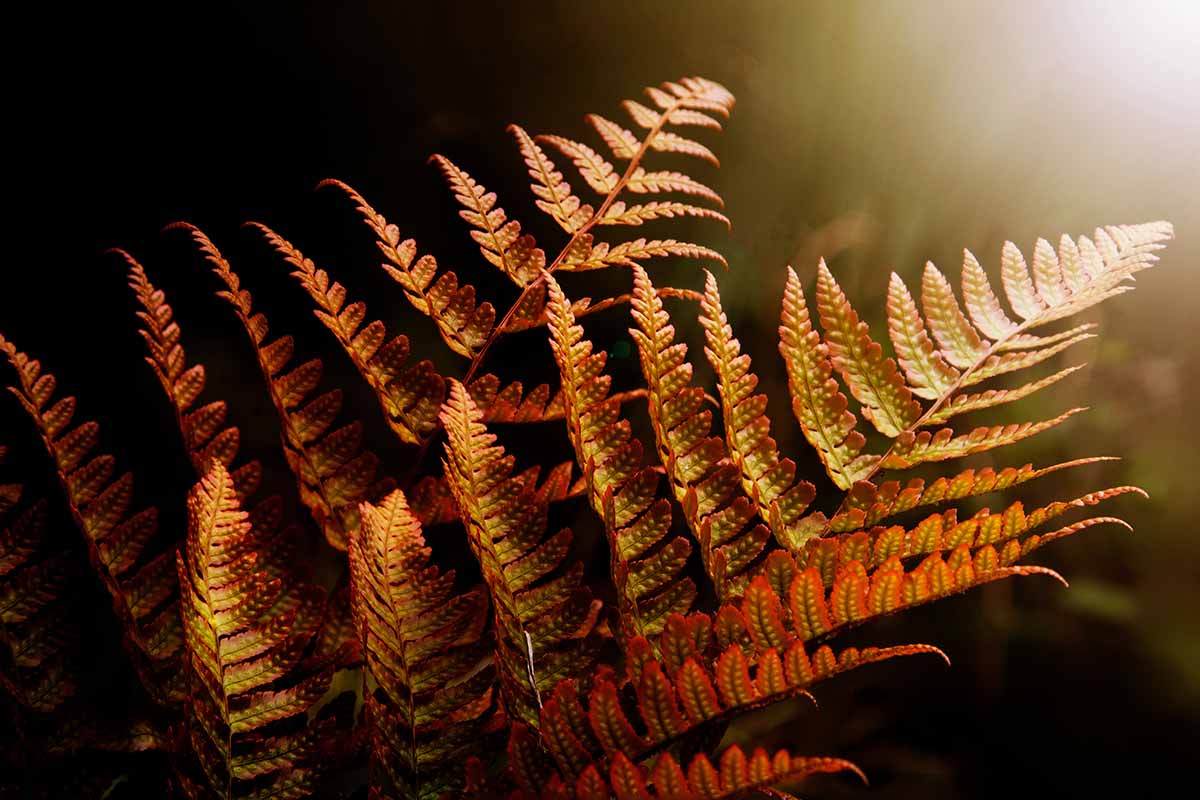
Autumn ferns, aka copper shield or Japanese wood ferns, actually start out their growth in spring with a coppery tint to their foliage, then mature to sport a more yellowish-green hue as the growing season progresses. Both colors offer a nice change of pace from the green shades seen in other ferns.
Along with its unique color scheme, toughness, and a compact growing habit make D. erythrosora an undoubtedly worthy planting.
Ready to learn how to grow your own? Here’s what we’ll cover in this guide:
What You’ll Learn
Cultivation and History
Best grown in USDA Hardiness Zones 5 to 9, autumn ferns originated in east Asia, in China, Japan, and the Philippines.
Commonly found growing in the hills and low mountain areas of the region, these plants have since been introduced to North America.

As a whole, ferns are very old, with ages ranging from “ancient” to “really ancient.”
Fossils of species from older families such as the royal (Osmundaceae) and filmy ferns (Hymenophyllaceae) have been found that date back to 210 million years ago, way back in the Carboniferous Period – a time of amphibian dominance, massive arthropods, and coal formation en masse.
D. erythrosora, however, is one of the wood ferns (Dryopteridaceae), a group that didn’t show up in the fossil record until 75 million years ago, during the Cretaceous Period – a time characterized by the awesomeness of the Tyrannosaurus rex, the arrival of flowering plants, and the mass extinction event that wiped out the dinosaurs.

The autumn fern survived, and has lived on to see the present day, finding aesthetic success as an attractive ornamental planting.
But it hasn’t forgotten where it came from, bringing with it a prehistoric aura which reminds onlookers that they’re just the most recent blip on Earth’s ridiculously long timeline of existence.
Propagation
Ferns such as D. erythrosora don’t make seeds, but actually reproduce via spores, which you can use for propagation.
Division is another form of propagation that’s fairly easy, while transplanting is the easiest technique of all. Let’s examine each method, in descending difficulty.
Via Spores
Spore propagation is the hardest, yet coolest method on the list. But first, here’s a quick crash-course in fern reproduction – just so we know what the heck we’re even doing here.
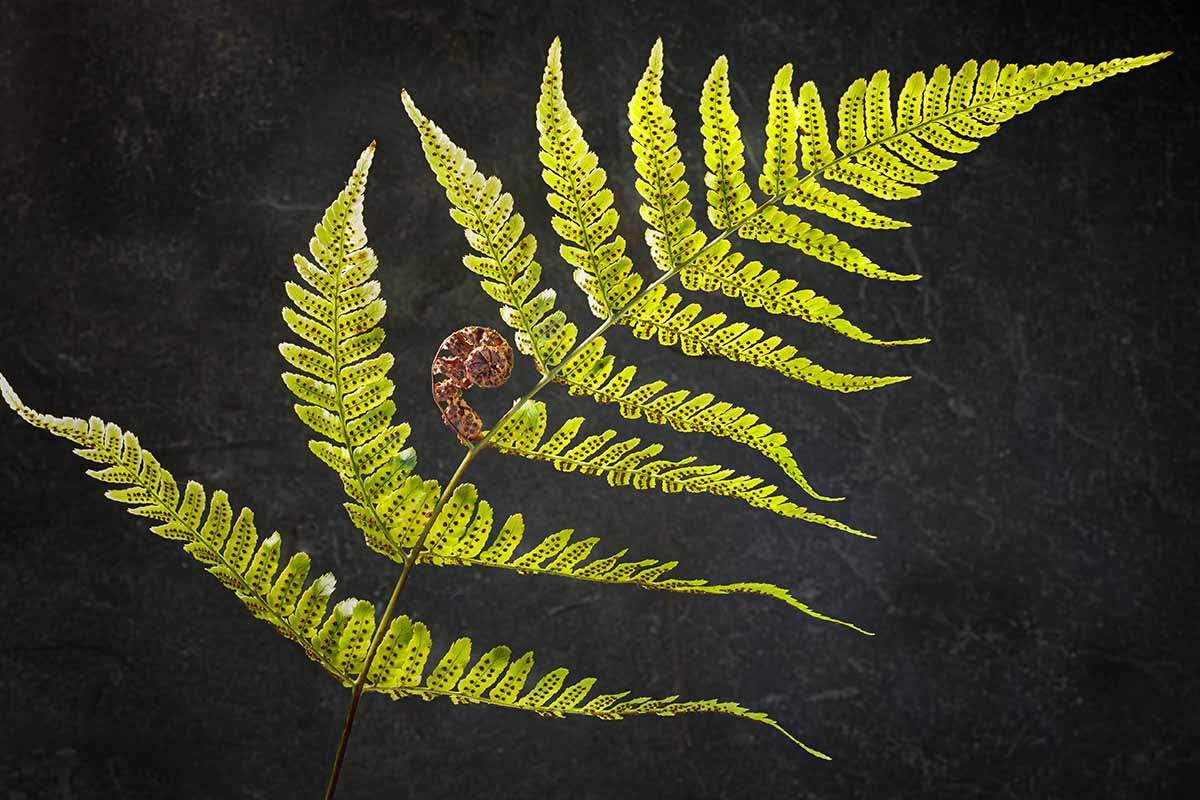
On the underside of a fern’s fronds are sori, and each sorum contains sporangia.
Each sporangium produces spores, which release from the fronds, land elsewhere, and germinate into small, heart-shaped structures called prothalli. A prothallus develops organs that produce ova and antheridia, aka egg and sperm cells.
Within the prothallus, sperm fertilizes an egg and results in a sporophyte, which develops into a full-grown plant… and presto! The cycle continues.
The spores of this plant tend to drop in late summer, so you’ll need to be vigilant around this time. You’ll know that an autumn fern’s spores are about to drop when the sori have turned a deep red and begin to split open.
Fun fact: erythrosora means “red sora.”
At this point, select a healthy-looking frond and cut it away from the rest of the plant with a sterilized blade.
Place the frond sori-side down on a sheet of white or waxed paper, then cover the frond with an additional layer of paper. Place it somewhere where it’ll be undisturbed and protected from drafts.
When you uncover and remove the frond from the paper 24 hours later, you should see a spore-print in the shape of the frond on the paper’s surface. If you harvested the frond too late or too early, the print will be faint or absent.
Put the spores in a paper or waxed envelope, then store it in the fridge. Next, you’ll have to choose when you want to propagate. Spores can sprout in any season and stay viable for years, so don’t feel rushed to sow them!
Once you’ve decided it’s sowing time, fill a three- to four-inch plastic pot with a 50/50 mix of sphagnum peat moss and perlite.
Tamp it down and water it thoroughly. Then, take a match-head-sized clump of spores and spread it evenly across the surface of the growing media. Seal the pot in a gallon-sized plastic zip-top baggie.
Place the pot and baggie on a sunny windowsill, and keep the growing medium moist.
If you’re in the Northern Hemisphere, placing yours near an east-facing window in summer or a south-facing window in winter is optimal. Maintain indoor temperatures of 65 to 75°F.
In several weeks, a film of green prothalli should form on the surface of the medium. Once these grow a quarter-inch tall, mist them to kickstart fertilization.
If you remove the pot from the bag to do this, make sure you reseal the bag around the pot once you’re done.
If no sporophytes have formed after 12 weeks, take an appropriately-sized dose (according to package instructions) of houseplant fertilizer, and dilute it down with three parts water to one part of the recommended amount to create a quarter-strength solution. Apply it to the potting medium.
Once the baby ferns emerge, leave them alone until they grow an inch or two tall, while continuing to apply quarter-strength fertilizer every three months.
Once they’ve reached an inch or two in height, tease apart the plants into two- or three-plant clumps.
Either put these clumps into their own pots, or place them all in a single tray – filled with the same growing media as before – with the clumps spaced two inches apart.
Keep them insulated and humid like you did before, whether it’s with a plastic baggie or a terrarium of some kind.
In two weeks, you can slightly unzip or leave the cover open a crack to start acclimating the plants to less humid conditions. Nine months or so after you sowed the spores, you should have plants ready for hardening off.
On a spring day, take the baby plants outside, leave them out in full or partial shade for 30 minutes to an hour, then bring them back inside.
Do the same thing the next day, but add an extra 30 to 60 minutes of exposure. Repeat until they can withstand a full day outdoors.
Congrats! Your ferns are now ready for transplanting!
Via Division
Division is easier than spore propagation, but a bit more involved than simply transplanting. Since autumn ferns have rhizomatous roots, you should utilize rhizome division.
Most ferns could stand to be divided once every three to five years. You can divide whenever you want additional plants, but if the center of your fern is dead or hollow, or if the leaves are smaller than normal, these are other signs that it’s time to divide.
Primo division times include spring – when new growth is emerging – and after the first frost in fall.

The day or two before division, deeply water your D. erythrosora. Cut the fronds back to six inches above the ground, then use a shovel, spade, or garden fork to dig a circle around the plant, while keeping four to six inches away from the greenery.
Utilize your tool as a lever to lift the plant out of the ground. Shake any loose soil off of the roots so you can see what you’re doing, then place the plant on a tarp.
Using a sharp, sterilized blade, cut the root ball into separate but equally-sized sections.
Four daughter plants is usually a good number to shoot for, but fewer or more divisions are also acceptable, depending on the intended size of the parent plant and their new homes.
After the dividing is done, it’s time for transplanting!
Via Transplanting
The same method works here, whether you’ve purchased potted plants from a nursery or propagated your own.
Prepare holes in their new locations that are slightly larger than the size of the transplants’ root systems. Then lower the transplants into the holes. Backfill with adjacent soil, water them in thoroughly, and keep the soil moist.
Be sure to check out our fern propagation guide for more tips.
How to Grow
Autumn ferns are tough, so a slight deviation from their ideal environment won’t kill them. But if you’re trying to grow vibrant, gorgeous specimens in peak health, then it would behoove you to stick to their optimal growing conditions.
Climate and Exposure Needs
As stated earlier, these plants grow best in USDA Hardiness Zones 5 to 9. Any exposure that ranges from partial sun to full shade is suitable.
Soil Needs
D. erythrosora is at its healthiest in soil with good drainage. Texture-wise, these ferns can grow very well in silty loam. An acidic soil is ideal, so try to keep the pH below above 5.5 and below 6.0.
These plants love soil that’s rich in organic matter, so working two to three inches of compost or well-rotted manure into the soil at planting time and as a side dressing each fall will go a long way in providing that fertility.
Water and Fertilizer Needs
Autumn ferns need their soil to be kept moist, up until and beyond establishment. Choosing a moist location that also drains well is ideal. But at the same time, they’re also pretty drought-resistant, so they can survive just fine with less water.
This shouldn’t be regarded as a free pass to treat them like cacti, but rather, as insurance in case you happen to drop the ball on irrigation in a given week during a stretch of dry weather.
If you keep up with your organic amendments to the soil, you won’t need to supplement with additional fertilizer all that often. A single application of a balanced, slow-release granular fertilizer every spring is all that’s required.
Jack’s Classic All-Purpose Fertilizer
For one-and-a-half pounds of a balanced, 20-20-20 NPK Jack’s Classic fertilizer from J R Peters, head over to Amazon.
Growing Tips
- These plants prefer partial sun to full shade exposure.
- Provide organic, slightly acidic soils with good drainage.
- Optimal irrigation entails keeping the soil moist, but dry conditions are tolerable once established.
Maintenance
Other than proper cultivation and snipping off dead or damaged fronds, D. erythrosora is pretty low-maintenance.
Feel free to kick back and enjoy the fruits of your labor!
Varieties and Cultivars to Select
You can’t go wrong with the standard autumn fern, which is available in quart-size containers from Nature Hills Nursery.
But there are a couple of cultivars out there which scratch ornamental itches that a plain ol’ D. erythrosora can’t quite reach.
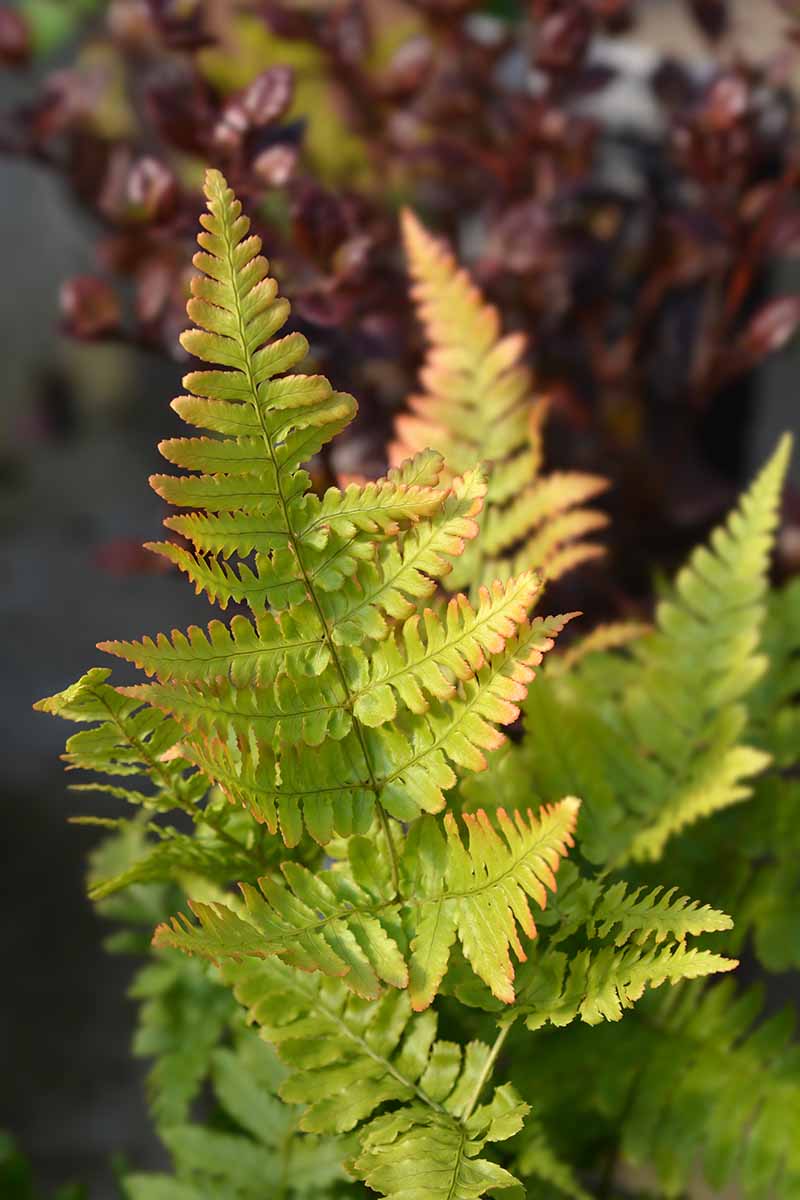
Brilliance
The visual splendor of ‘Brilliance’ is so stunning that it seems to have outpaced the standard species in the ornamental plant business.
While everyday D. erythrosora foliage emerges with a red to orange to yellow hue in spring, and doesn’t develop shades of yellow-green until summer.
Oftentimes, those coppery shades make a reappearance in autumn after the first fall frost. Basically, if you want an autumn fern that spends more time exhibiting a copper color instead of green, ‘Brilliance’ is the cultivar for you.
You can purchase ‘Brilliance’ in a #1, #3, or two-and-a-half-quart containers from Nature Hills Nursery.
Prolifica
Unlike the standard species, ‘Prolifica’ has light green fronds that are leathery, narrow, and finely cut.
In addition, these fronds emerge with pinkish new growth that doesn’t fully mature to green until late summer.
If you’re looking for a unique texture and color in your autumn fern, ‘Prolifica’ is an excellent pick.
Purpurascens
D. erythrosora var. purpurascens (syn. D. purpurella) is pretty similar to the standard species, except for the way it grows, reaching three-plus feet in height – which is nice for when you want a larger-than-usual fern.
The other big difference is the color of this variety’s emerging foliage. It’s more of a cinnamon-red than a copper-red – so not quite as purple as the name implies.
Managing Pests and Disease
Luckily, there are no serious pests or diseases known to afflict the autumn fern. It’s a real tough cookie, one that is especially resistant to deer and rabbits.
However, there are a few insects and conditions that can impair the health and aesthetics of D. erythrosora, in ways that may negatively affect its performance in the garden. Let’s take a look:
Insects
In case you need more motivation for keeping your plants free of infestation, insects can also serve as vectors for pathogens that may infect your plants. By really cracking down on pesky bugs, you’ll also reduce the incidence of harmful disease.
Aphids
Aphids are typically green, translucent, and soft-bodied insects that use piercing mouthparts to feed from plants, oftentimes transmitting disease as they do so. Additionally, they excrete honeydew as they feed, which collects on plant surfaces.
This honeydew, while sounding sweet, is anything but – it interferes with plant photosynthesis, attracts ants, and can lead to the development of black sooty mold.
Aphids can be sprayed off of plant surfaces with blasts of high-velocity water, as long as the water won’t damage foliage.
Additionally, applications of horticultural or neem oil may be used for eliminating these pests without harming beneficial insects in your garden.
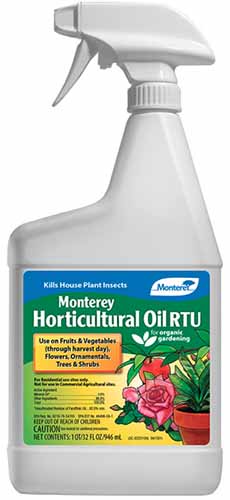
Monterey offers pest-suffocating horticultural oil, available from Arbico Organics.
Learn more about how to deal with aphids in our guide.
Mealybugs
Mealybugs are white, cottony creatures that clump together on fronds, leaf axils, and roots. A mealybug infestation can stunt a plant’s overall growth and cause the death of infested plant parts.
A pyrethrin soil drench will help to prevent and treat infestations.
PyGanic Gardening sells pyrethrin concentrate in eight-ounce containers on Amazon.
Make sure to follow the package directions when diluting the concentrate before application.
If you’re concerned about the sensitivity of the fronds, horticultural oil or strong sprays of water should also help to eradicate these pests.
Scale
Scale are tiny, rounded insects that are either soft-bodied or armored. Both types can infest plants, and a massive infestation can weaken your plant or stunt its growth. Not good.
Control scale the same way you would control mealybugs: with a soil drench and sprays of water or horticultural oil.
Disease
The use of sterile gardening tools and sanitary growing media will help eliminate the occurrence of many diseases that could have otherwise been avoided.
Crown Rot and Root Rot
Whether the crown and/or the roots of your plant exhibit rotting symptoms, it’s usually due to human error via over-watering. When the roots of a plant don’t receive enough air, the roots and crown can suffer for it, exhibiting rotting symptoms.
Of course, these will be tough to see since they’re hidden underground or at the soil level. Severe rot leads to yellowing and wilting of the fronds as the condition progresses.
You can cut away rotted roots if symptoms are minor, but if the plant is too far gone, all you can do is try to learn from your mistake for next time.
Dig out and discard affected plants, avoid overwatering in the future, and be sure to only plant in well-draining soil.
Best Uses
An autumn fern won’t really jump out at you like a flower might, so these make a perfect accent for complementing other specimen plants. D. erythrosora also looks nice in containers, patios, or in compact spaces.
Believe it or not, it even works well as a ground cover, thanks to its short stature and densely packed growth habit.
In terms of garden themes, an autumn fern appears right at home in shade gardens, woodland gardens, and even fairy gardens.
And it goes without saying that if you ever need a splash of prehistoric interest, this plant has you covered.
Quick Reference Growing Guide
| Plant Type: | Herbaceous semi-evergreen or evergreen perennial | Foliage Color: | Red, orange, yellow (young), yellow-green (mature) |
| Native to: | Eastern Asia | Maintenance | Low |
| Hardiness (USDA Zone): | 5-9 | Tolerance: | Deer, drought, heavy shade, rabbits, salt, urban conditions |
| Exposure: | Partial to full shade | Soil Type: | Organic, silt loam |
| Time to Maturity: | 5 years | Soil pH: | 5.5-6.0 |
| Spacing: | 1-6 feet | Soil Drainage: | Well-draining |
| Planting Depth: | Soil surface (spores), depth of root system (transplants) | Uses: | Accent, container planting, ground cover, houseplant, floral display greenery, mass planting |
| Height: | 18-24 inches | Order: | Polypodiales |
| Spread: | 2-3 feet | Family: | Dryopteridaceae |
| Water Needs: | Moderate | Genus: | Dryopteris |
| Common Pests and Diseases: | Aphids, mealybugs, scale; crown rot, root rot | Species: | Erythrosora |
You’ve Got a “Frond” in the Autumn Fern
Like a true friend, an autumn fern won’t let you down. With its durability and unique color, D. erythrosora will serve you and your landscape well.
Don’t let the complexity of spore propagation faze you – once you get the hang of it, it’ll be as natural as growing from seed!
Any anecdotes, questions, or otherwise random remarks can make their way into the comments section below. The personal experiences of actual, in-the-trenches gardeners provide valuable insight, so don’t be shy in reminiscing!
And for even more fern guides, check out these articles next:
Hello,
I need help. I never had a fern before but I love them. I just recently purchased the autumn fern perennial plant online but when I planted them in my pot it turned brown and shriveled up. Is it still alive? Could it be that the stems died but the root is alive? How can I save my fern? Any advice would be great. I plan to get some fertilizer but not sure which one on best for my situation. Any help would be appreciated.
Thank you
Debbie
Hello, Debbie! I’m sorry about your fern… I can’t say whether your plant is entirely dead and unsalvageable, but trying to resuscitate it couldn’t hurt, especially since you love your fern so much. First things first, I’d double-check to see if you’re in USDA Zone 5 to 9. Any climate outside of those zones would be too extreme for the plant’s year-round survival. If you are, then great! From what you’ve told me, it seems like the plant is losing more water than it’s taking in, so I’d place the plant in a more shady spot and/or give it more… Read more »
great article!!
Why thank you, Jacqueline! I’m glad you enjoyed it!