Ferns are smart. Their reproductive strategy is to just flood the world with their spores.
Each frond can release millions of spores, and even if only a single plant takes, that’s still a lot of potential for future reproduction.
We link to vendors to help you find relevant products. If you buy from one of our links, we may earn a commission.
Fortunately, we humans have figured out how to harness that potential and benefit from this strategy so we can have lots of new ferns.
That’s not the only way of propagating ferns, though. We can also divide them, separate and transplant plantlets, or take stipe cuttings.
Propagating ferns can seem intimidating to some gardeners.
They don’t function like other plants. They don’t produce seeds, and they don’t have the same anatomy as many of the other garden specimens we’re familiar with.
But don’t worry! We’re going to lay out the process in an easy-to-understand way. Here are the topics we’re going to go over in this guide:
4 Methods to Propagate Ferns
Before we wade into a field of ferns, let’s go over some terms first so we’ll all be on the same page.
Each part of the fern that’s located above ground is known collectively as a frond. The part that emerges directly from the ground is the stipe or stalk.
The area from the point where the leafy part starts on the stipe to the tip of each frond is known as the blade. The stalk at the center of that blade is the axis or rachis.
From there, the leaves are called leaflets.
The center of each leaflet has a rachis, which is the midrib and looks like a continuation of the main stalk, and the individual division of that leaf is known as the pinnule.
When a frond is young, or newly emerged, it’s known as a fiddlehead or crozier.
That’s the curled part that people sometimes harvest to eat, with certain species. Underground, you’ll find a rhizome with roots emerging from it.
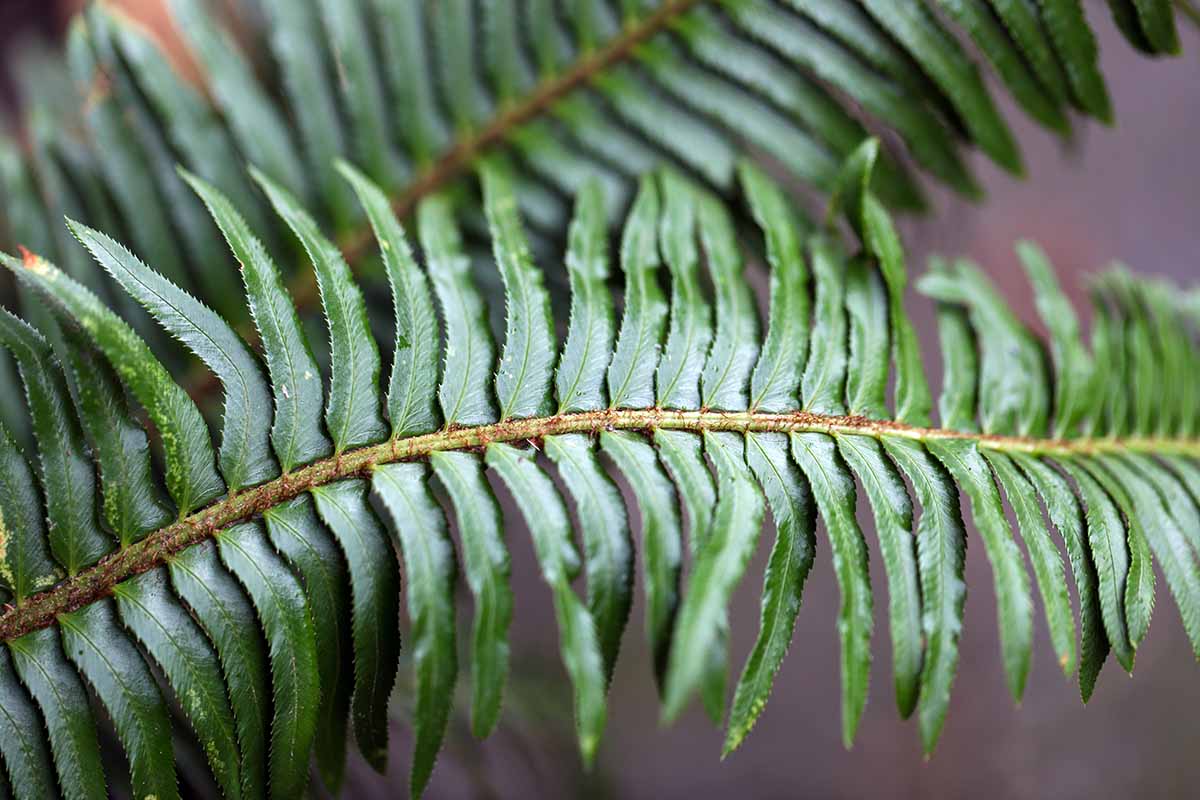
Not all ferns have all of these parts. For instance, sword ferns don’t have individual leaflets coming off rachis that emerge from the main axis. The rhizome grows parallel to the soil level in these plants, with fronds emerging along its length.
That’s it for our anatomy lesson for the day! But I’ll provide one additional tidbit before we dig in:
The main tip to keep in mind when propagating is that you want to keep everything sterile as you work.
Use fresh potting soil, clean your tools and containers, and wash your hands as needed throughout the process.
1. Division
Let’s start with the easiest propagation method. You can simply divide rhizomes into separate plants so long as your plant has more than one stipe coming out of the ground.
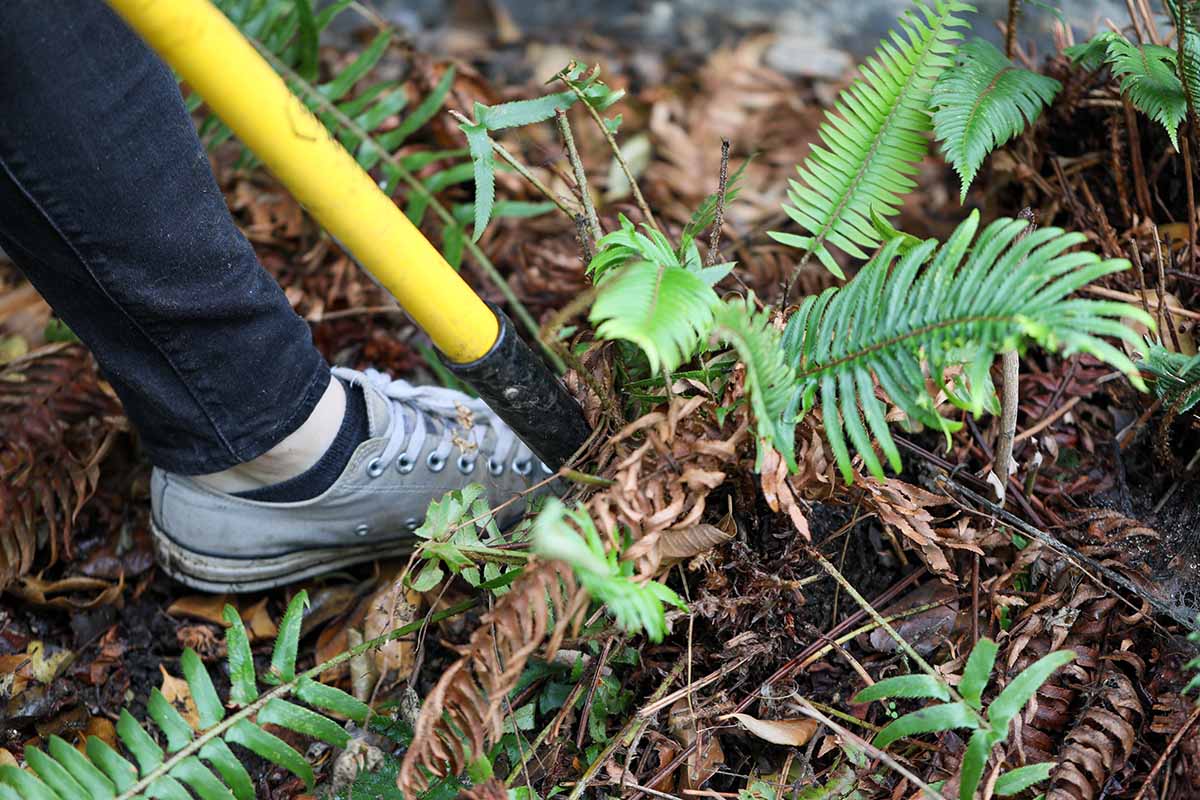
Use a clean spade to dig up a large clump of stipes and leaves. You don’t need to dig up the entire plant.
You’ll have the best luck with plants that have lots and lots of separate stipes (remember, that’s the “stem” of the leaf that connects to the rhizome) but you can do this with smaller, younger plants.
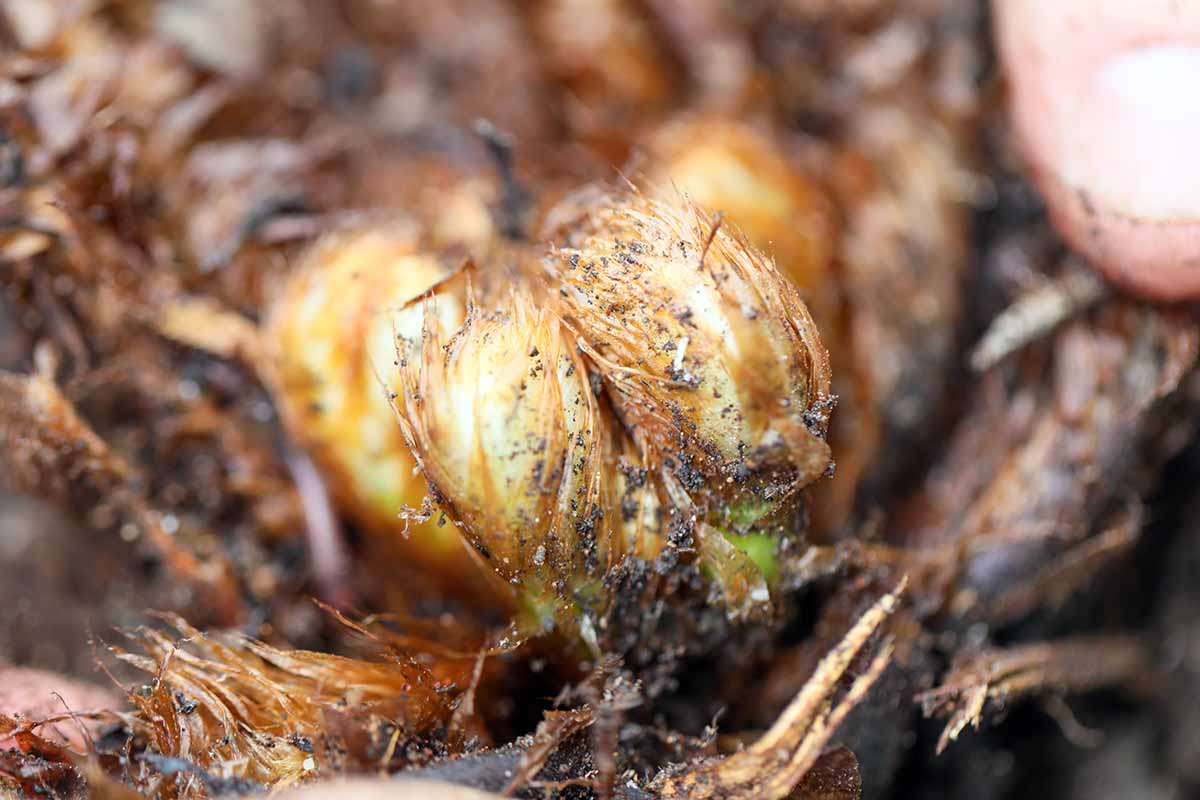
Once it’s out of the ground, knock away as much of the dirt as you can from the roots so you can see what’s going on in there.
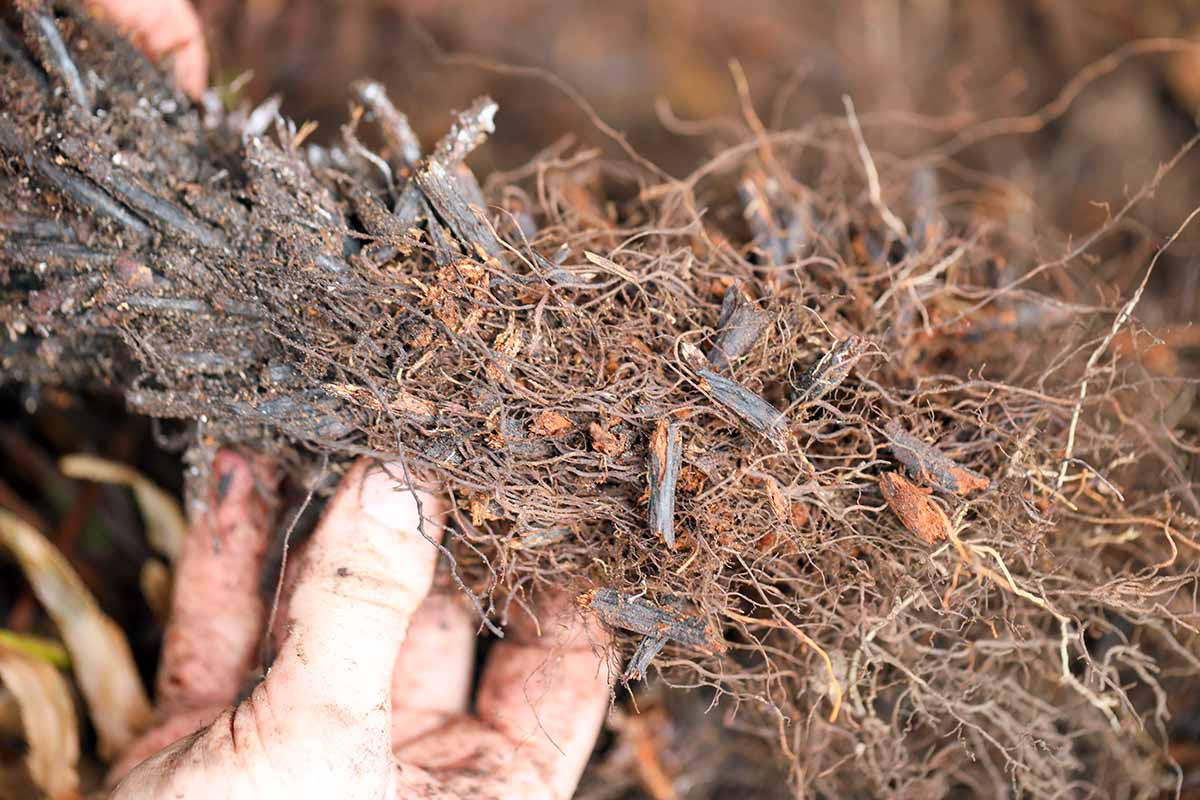
Rhizomes vary in appearance depending on the species, but they’re not usually very large. Aim for a piece with the same diameter as a chopstick.
Gently tease or cut apart a piece of rhizome with at least one stipe attached to each part you intend to propagate.
Plant each section at the same depth it was growing before in soil amended with lots of well-rotted compost or manure. Water well.
2. Plantlets
Ferns grow little plantlets that are sometimes called bulbils or proliferous buds. These can grow on the roots, rachis, or from the stipe and develop their own little root structure.
While you can remove these plantlets from the parent and place them in potting soil, it’s much easier and generally going to be more successful if you just bend the plantlet down to the ground and anchor it into the soil with some wire, while it’s still attached.
If you can’t quite reach the soil, feel free to use a container filled with potting soil to reach up to the plantlet instead.

Tuck it into the soil with the leaves positioned above the soil line and anchor it there with a wire.
Then, just treat the plant as you would any young fern, watering as necessary.
After a month or so, remove the wire and try tugging it gently. If it stays in place, it has developed roots, and you can cut it away from the parent plant.
3. Spores
As a fern leaf matures, it forms spores on the underside.
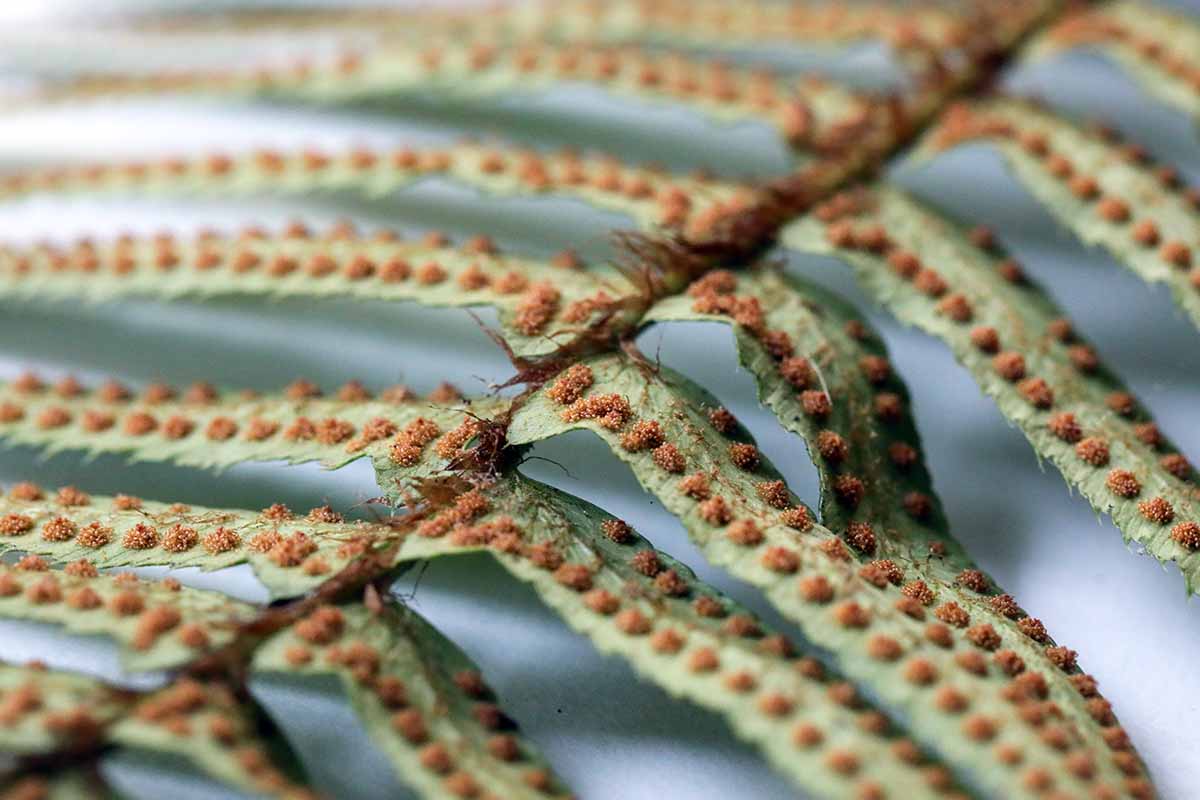
The spores are contained in little capsules called sporangia, which are contained in a sorus. These sori look like little black or brown bumps. Less often they might be gold or green.
When mature, most sori are a sort of cinnamon brown and they can be circular, oval, crescent-shaped, or many other shapes, though circular sori are the most common.
If you scrape the sori off of a leaf, you’ll be left with a pile of brown or black dust.
Some species, such as ostrich (Matteuccia struthiopteris) or sensitive ferns (Onoclea sensibilis) produce modified leaves that contain these spores, and you can just cut and place these on the paper.
Spores mature at various times throughout the year, depending on the species, and you can collect these to grow new plants at any time so long as they’re mature.
One of the first species to develop spores is the interrupted fern (Claytosmunda claytoniana), which release in May, while climbing ferns (Lygodium palmatum) wait until November to release their spores.
Collecting the spores is easy. Clip off a frond and lay it on a piece of paper. Put another piece of paper on top.
I like to fold the edges of the paper in case I knock into it accidentally while I’m fussing around the area. That way, any spores that might fall will be kept contained.
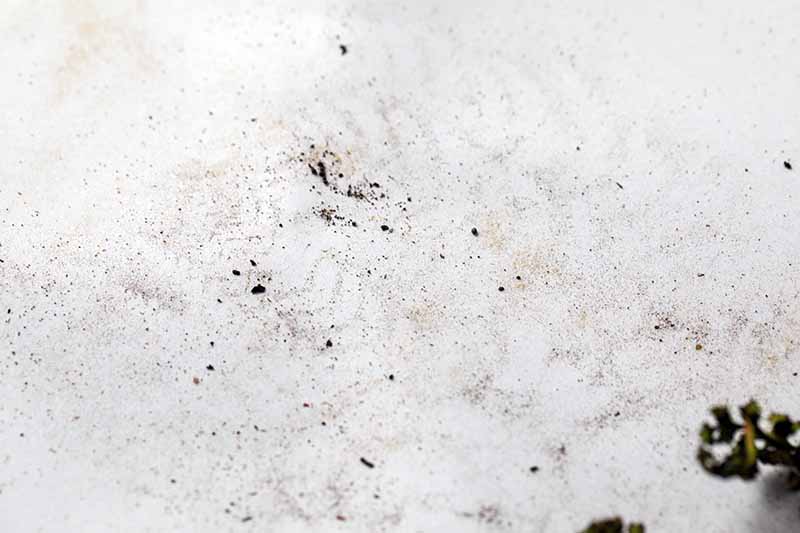
After a few days, you should see a pile of dust on the paper if you lift the top sheet and the frond. Those are your “seeds” for planting new ferns.
If there aren’t any spores on the paper, the sporangia weren’t mature yet. Toss this specimen out and start again. Wait a bit longer, a few more weeks or so, and harvest another frond.
Ripe sori will be plump and the edges will be sort of frayed looking. Since the spores mature starting at the base of the leaf and extending to the apex, look at the base first.
To ensure you get lots of spores, you might want to clip off a few blades from different parts of the leaves and lay them on the paper rather than using a whole leaf.
If you find leaves while on a hike or walk – after making sure you can obtain them legally! – put them in a plastic bag until you get home.
After they’re released onto the paper, discard the leaves. You can store the spores in wax paper in the refrigerator until you’re ready to plant.
Spores may be propagated at any time of year, but late winter is the best time to start.
The days are getting longer at this time and the spores will grow faster than they might if you started in fall, for example, when the days are growing shorter.
Once you have your spores, grab some sterilized canning jars or four-inch growers pots and put a few inches of an even mix of fresh, clean potting soil and vermiculite inside.
You need to be diligent about sterilization when growing ferns from spores. Don’t use dirty containers or previously used soil.
Water so the medium feels moist and then sprinkle the spores on the medium.
I find the easiest way to do this is to fold the wax paper in half to create a funnel and gently tap some spores out of the folded end onto the medium but do what works for you.
I have a friend who puts her spores in a shaker with large holes and then sprinkles the spores out of that.
Don’t do this when there’s a breeze coming through a window or if a fan is on nearby. You’ll have a spore explosion!
You want to add about a popcorn kernel’s worth of spores in a four-inch-wide jar or pot.
If you’re growing several species, don’t forget to label the containers. You might want to add the date, too.
Place a layer of plastic wrap over the jar and secure it with a rubber band. If you use a plastic grower’s pot, just place it inside a gallon-size freezer bag and zip it shut.
Place the container in a warm spot with bright, indirect light. You can also choose to use artificial lighting, but don’t place the lights too close to the containers – keep grow lights about a foot away and turn them on for 12 to 16 hours per day.
You want the spores to stay fairly warm, around 65 to 75°F, though a few temperate species can tolerate temperatures as low as 50°F. You might need to use a seed-starting heat mat to maintain the appropriate temperature, depending on when and where you’re growing.
Now it’s time to hurry up and wait. It takes several months for the little baby ferns to pop up. Just keep an eye on the jars and make sure the medium stays moist.
After a few weeks, you should see a green, translucent slime form on the surface of the medium.
Don’t worry, this is a good sign and not an indication that an evil green blob is taking over your propagation attempt!
If you plant too many spores in one jar, this green blob might never turn into ferns, so try to be careful not to be too heavy-handed when sowing. But don’t worry if you overdo it. You can thin out the growing blob at any time.
Just scoop some out with the end of a sterilized knife or some clean tweezers. You can toss it or put it in its own container.
If you got things right, this blob, which is made up of gametophytes and is known as the prothallus, will turn into a solid green mat. This is the beginning of your new ferns – we call these sporophytes!
If at any point the translucent film starts to turn opaque, it’s likely because algae is growing. Pluck the algae threads out with sterilized tweezers every day until the ferns can outcompete them.
Now, just let them grow away in their little homemade greenhouses, maintaining moisture as needed.
Within about three months you should see individual fronds forming. Once you do, start fertilizing with a mild liquid houseplant fertilizer diluted by half, applied once a month.

Dr. Earth Pump & Grow is my go-to. It’s mild and made using food waste from grocery stores. Pick up a 16-ounce container at Arbico Organics.
So long as they have enough space that they don’t start touching the plastic, you can leave them in there to grow for up to a year.
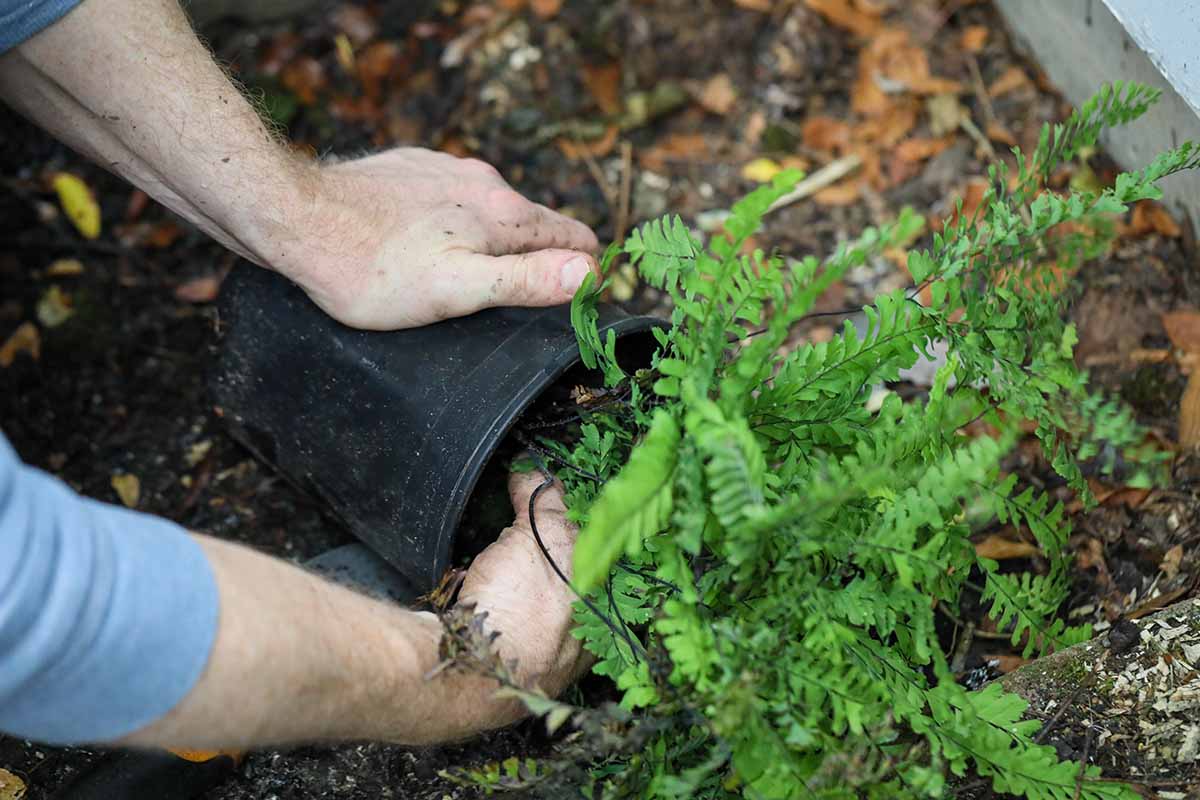
Once they’re large enough that you can handle them without causing too much damage, you can separate out each fern and plant it in its own container filled with potting soil.
There’s no need to cover the ferns at this point with plastic unless you want to.
When you’re ready to plant them outside, if that’s your aim, and assuming the weather is appropriate for your particular species, harden them off for two weeks and transplant away!
Hardening off ferns requires taking the plant and putting it outside in a shady, protected spot for 30 minutes before bringing it back inside.
The next day, do the same but leave the plant out for 30 minutes longer. For the next 12 days, add another 30 minutes until they can spend a full day outdoors.
Keep in mind that plants grown from spores won’t always grow true.
Any cultivated plants will often look more like the original species parent than the cultivated version you collected the spores from.
You never know what you’ll end up with, which is part of the fun, in my opinion!
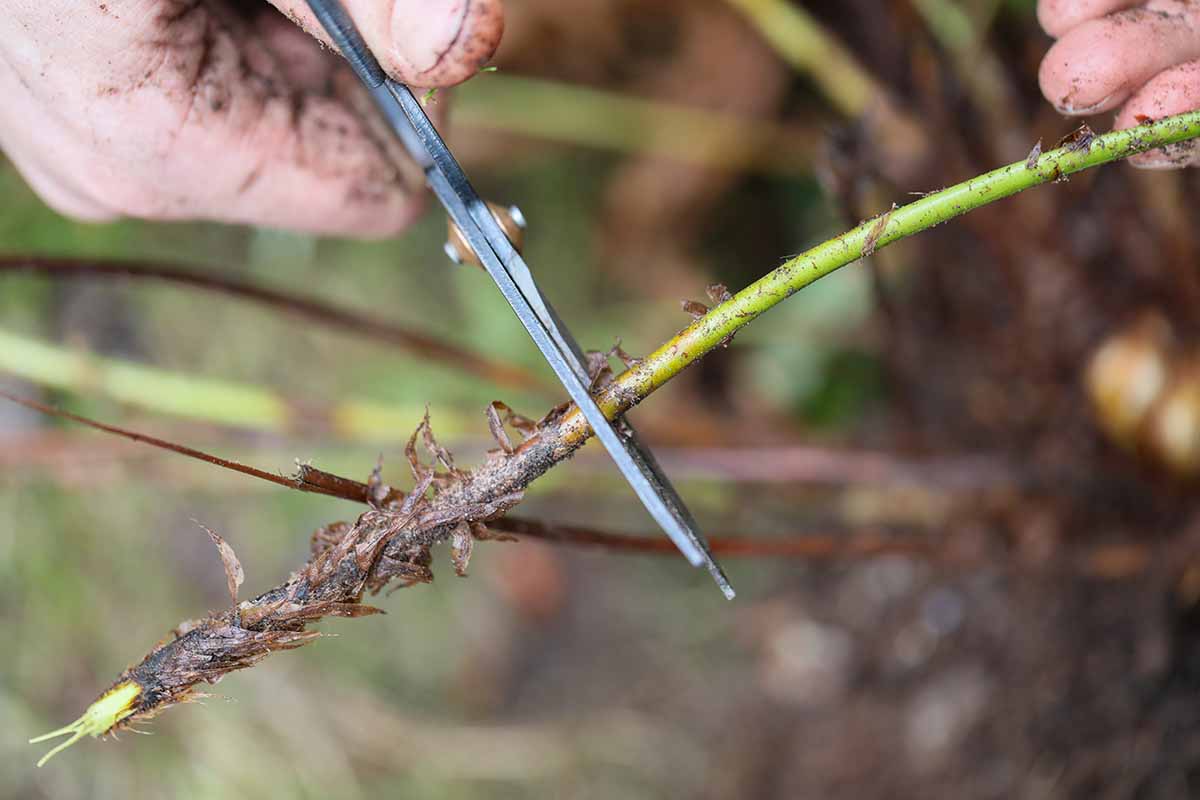
4. Stipe Cuttings
I saved this section for last because it only works on some species, and it isn’t very reliable. But if you’re up for some experimentation, why not give it a try?

For this propagation method, fill a four-inch container or a seedling tray with clean potting soil.
Cut a half-inch piece of stipe off at the base of the parent fern as close as you can to the soil. Keep track of which end is up.
Bury the cut stipe upside-down in fresh potting soil, with just a third of the cutting sticking up in the air.
Put the container in a gallon-size freezer bag and moisten the soil. Close the bag.
Place it in a spot with bright, indirect light. Every few days, open the bag and give the pot a spritz or two of water and check to make sure the soil feels like a well-wrung-out sponge.
After a few weeks, fingers crossed, you’ll start to see little bumps form on the end of the stipe. After a few more weeks, these will start to develop into fronds.
Once you have a few fully-formed leaves, you can remove the plastic and transplant them outdoors, after hardening off for a few weeks first.
This method definitely works with species in the Dryopteris and Asplenium genera, but feel free to try it with whatever you have.
Fill Your Garden with Ferns
Ferns are ready and willing to reproduce, you just have to know how to deal with their unique biology. It’s really not as difficult as it may have seemed to make lots of fern babies, right?
We hope this guide armed you with the details you need for success.
Let us know which method you try and how it works out for you. What species are you propagating? Fill us in on the details in the comments below.
Are you looking for more fern goodness? We love them, too! Here are a few other guides we’ve put together that you might find useful: