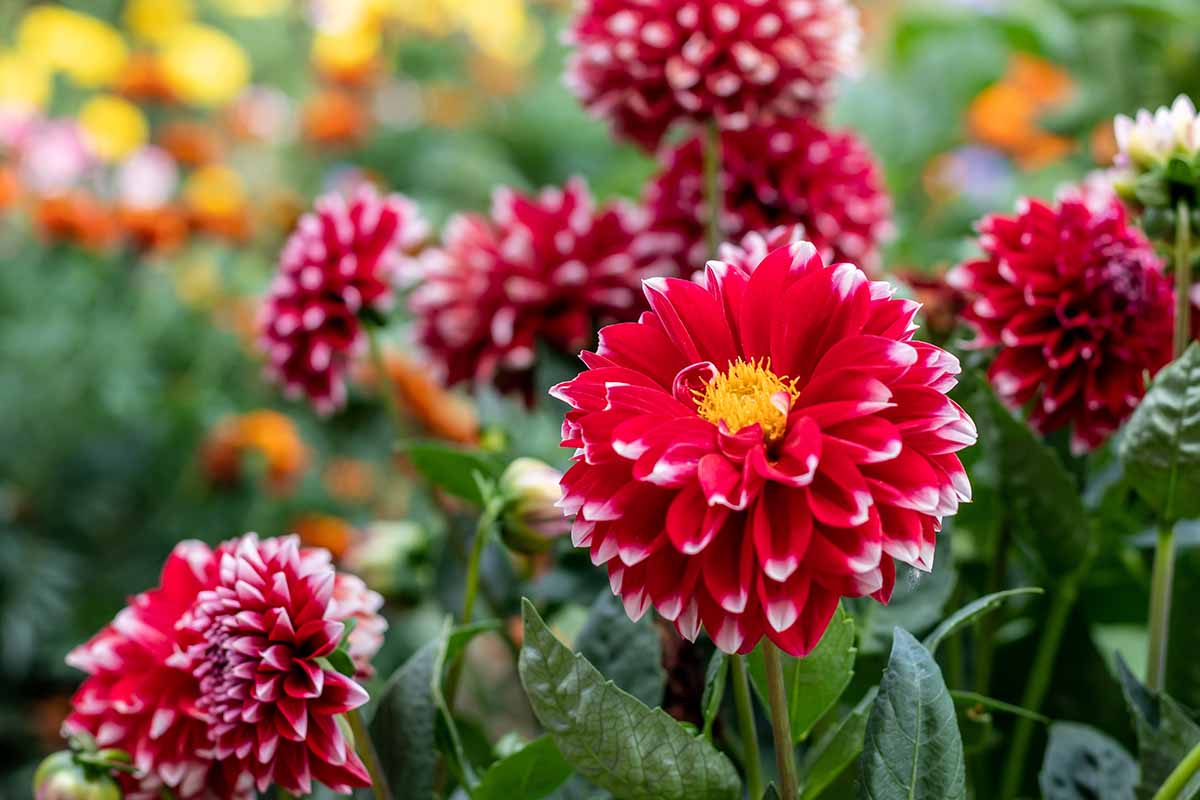
Every summer for the last 15 years, friends and family visiting my home have walked through a mass display of dahlias on their way to the front door. And luckily for us gardeners, dividing them to propagate more is incredibly easy.
I started with huge clumps of tubers dug out of my aunt’s garden. She was sick of growing the same color year after year, a prolific, hardy, vibrant pink dahlia with a creamy-yellow center, whose name she couldn’t remember.
We link to vendors to help you find relevant products. If you buy from one of our links, we may earn a commission.
Despite a lot of searching on dahlia websites and trawling through dozens of entries in the American Dahlia Society’s Online Classification Guide, I still have no idea which variety gave me such delight for so many years.
They were my first dahlias and I loved them from the moment they first began to bloom. I wasn’t previously a fan of pink, but it was a good thing I saw the light. These dahlias produced hundreds of flowers every year with very little effort on my part.
If you are new to growing dahlias, check out our guide for full cultivation instructions.
In this article, we will cover how and when to divide tubers to expand your dahlia garden. I wouldn’t expect any beginner to know intuitively how to divide these. I certainly didn’t!
Fortunately you can start off on the right foot, with the following tips.
Here’s everything we’ll cover in this guide:
What You’ll Learn
The 3 Important Parts of the Tuber
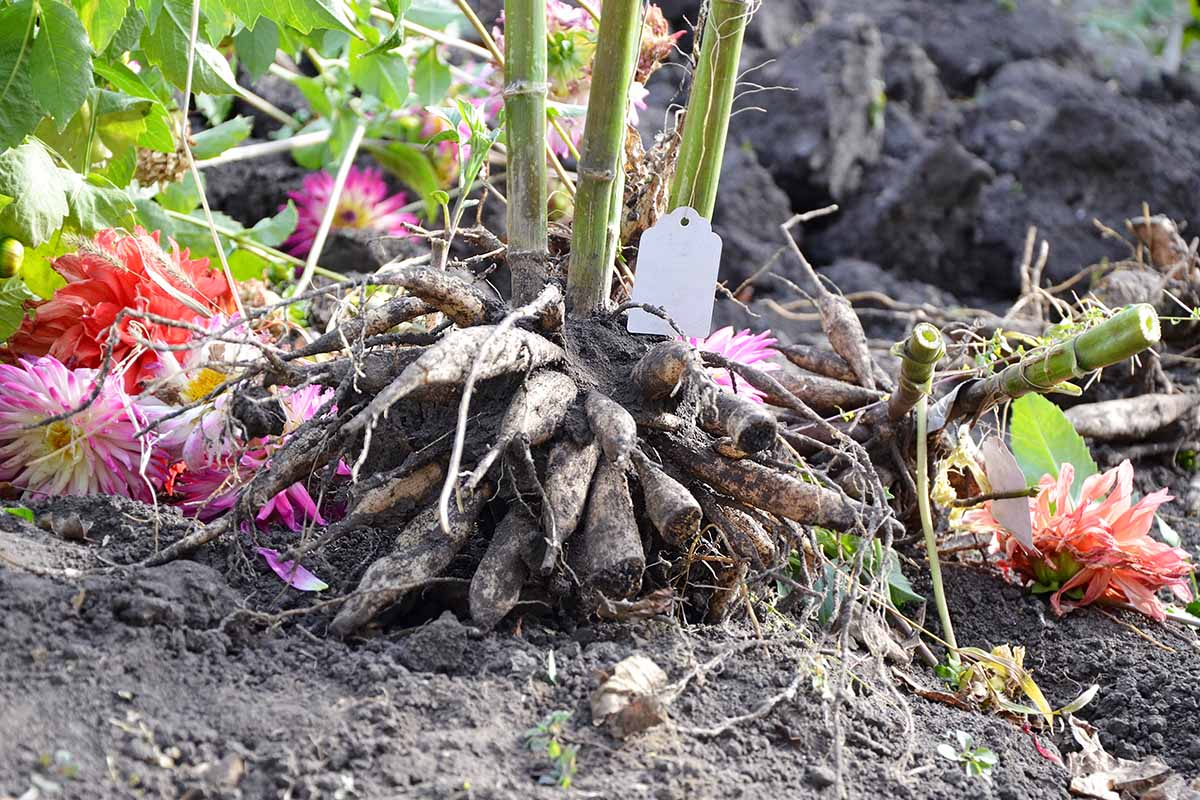
Tubers hold the gold that will become next summer’s spectacular flowers. A healthy one is firm, plump, and can be almost any size or shape, from bulb-like, to long and round like a yam, to quite slender like a young carrot.
The tuber is made up of three parts: the crown, the neck, and the body.
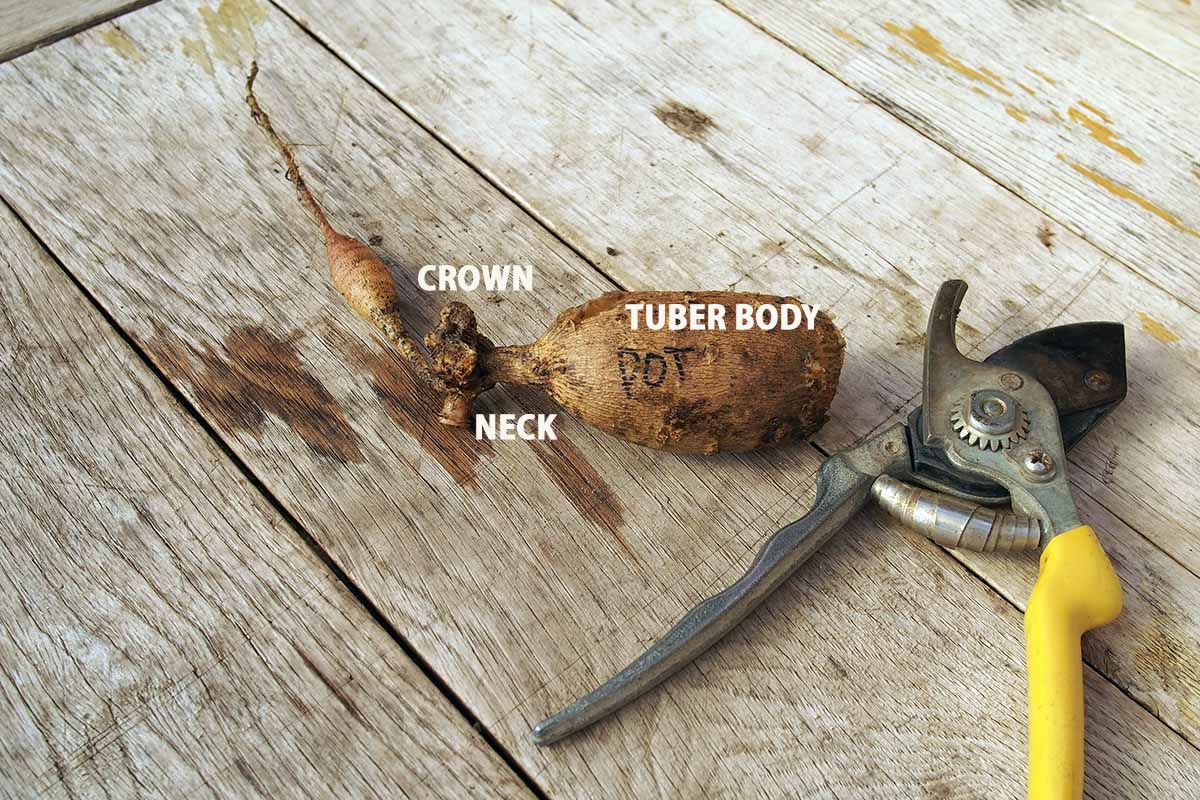
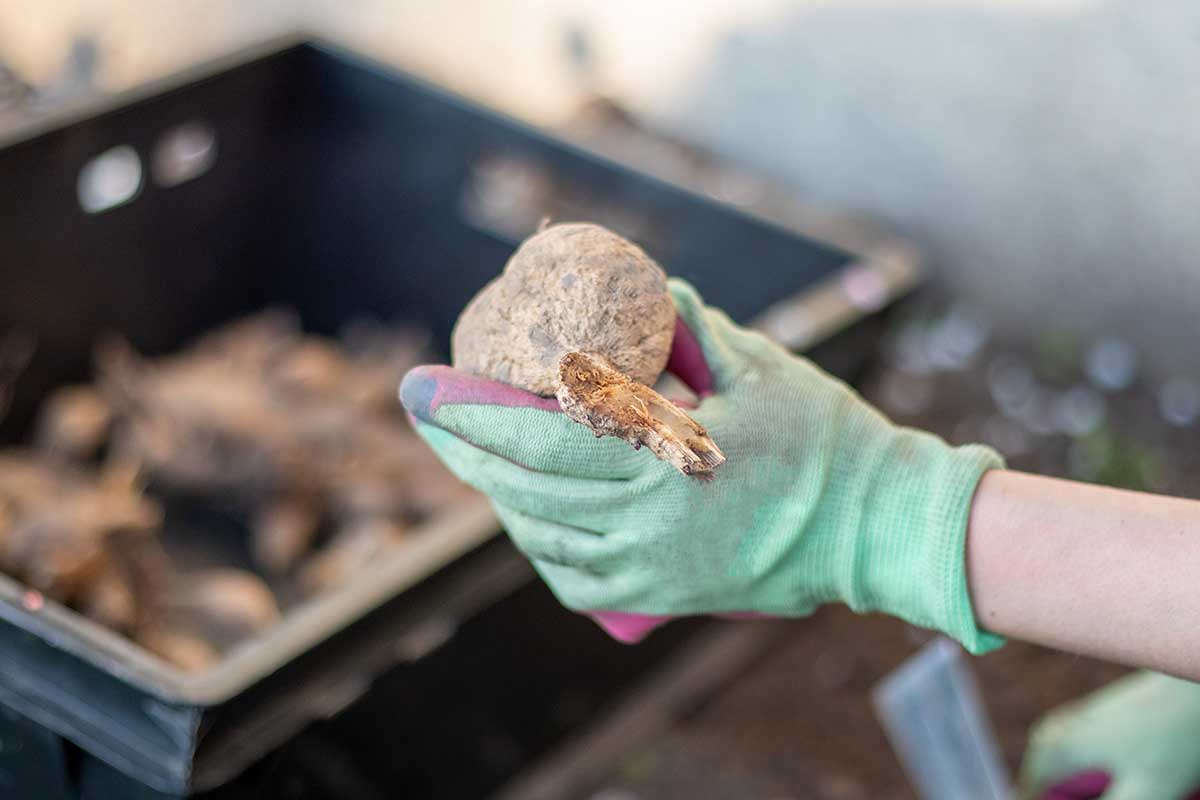
The image above shows a divided tuber ready for storing. Note the large crown, solid neck, and oval-shaped tuber body.
There are no signs of rot or damage, and a code denoting its name (Firepot) is written on the dry skin of the body with an indelible ink pen. The small tuber could be cut off or left in place.
A dahlia’s reproductive information is stored in the crown. It’s a knobbly bit at the top of the slim neck and may have stem remnants attached to it.
Next year’s plant will sprout out of the crown from “eyes” – also known as nodes, buds, or growth points – in spring.
In fall, the eyes can be hard to spot – they could be a small bump or even a barely perceptible round spot that’s a slightly different color to the rest of the skin.
The neck joins the body to the crown – if it’s damaged, bent too far, or broken, you’ll need to discard the whole thing.
The body is a carbohydrate-rich storage structure that holds nutrients safe through winter, then feeds the plant as it forms new stems and roots. A tuber needs to be big enough to provide the growing points with an initial burst of energy to generate growth, but it’s surprising how little it can be and still get the job done.
Michael Genovese is a specialist flower grower who runs Summer Dreams Farm in Oxford, Michigan. He’s divided hundreds of thousands of tubers and says the minimum volume required is equivalent to that of a AA battery.
If the body is badly shriveled it’s not going to support new growth. If the outside is dry and ridged, but you can still feel a firm flesh core underneath, it should still contain enough nutrients for a plant to grow and flourish.
One tuber that’s slightly different to the rest is called the “mother.”
If you look carefully at a clump once it’s dug up and dry, you’ll be able to spot one that looks darker in color, and possibly rounder and squatter than the others. The “mother” is the tuber that grew the plant whose flowers you’ve tended over summer.
Why You Should Divide Every Year
In colder climates – USDA Hardiness Zone 7 and below – freezing temperatures will likely kill tubers, so they must be lifted, stored over winter, then divided in spring and planted out, or lifted and divided in fall, then stored to wait for warm weather.
In Zone 8 and above, you can leave clumps in the soil for two or more years, then divide and replant them in spring after the last frost.
However, it’s best to lift and divide every year no matter where you live, as you’ll get better plant growth and more flowers than if you leave them in the ground.
The tubers are also much easier to divide the following year when you keep up with this task as part of your annual garden maintenance.
Clumps left in the garden for two or more years become very heavy, are time consuming to unravel, and there’s more risk of damage to the tubers as you process them.
I learned this the hard way, barely able to lift the huge clumps that developed over several years.
Other benefits of lifting, dividing, and storing include:
- Lowered risk of rot caused by cold, wet soil or diseases.
- Protection from predators such as chipmunks, gophers, mice, rats, and voles.
- Removal of mother tubers and those too small to reproduce.
You can also improve soil fertility in dahlia beds over winter, by adding compost and other amendments or growing nitrogen-fixing cover crops before replanting in spring.
When to Lift and Divide
Tubers will continue to take up and store nutrients until it becomes too cold and they go dormant.
The American Dahlia Society recommends lifting the tubers every year, either 120 days after planting, or in cooler climates, after the first frost that’s cold enough to kill the foliage.
A light frost may damage foliage, but if even a small amount of green remains, leave plants to continue growing. They’ll stop after the first frost, and this is when a lot of people choose to lift and divide as they can be certain the tuber has finished developing.
However, there are exceptions. If your area experiences a lot of rainfall and the soil is at risk of becoming soggy, don’t wait for frost – it’s better to dig the tubers out to reduce the risk of rot from bacterial or fungal infections.
Breeder Kristine Albrecht of Santa Cruz Dahlias, 75 miles south of San Francisco, digs up her 1000-plus dahlias in early October, at least a month before the first frost.
For her, it’s about the practicalities: it’s more enjoyable to do it while the weather is warm and the soil is still dry. If she waits until November, there’s more chance of heavy rain in her Pacific Coast climate and the result is a muddy mess that makes gardening miserable.
Once you’ve dug up your dahlias for storage, it’s then your choice whether you divide in fall, or do it in spring before planting.
There are pros and cons to both options. In fall, damp soil is easy to shake off. Tubers are higher in moisture which makes them easier to cut. Gardeners also tend to have more time to accomplish what can be a fiddly job.
The problem is it can be difficult to see the eyes and you may accidentally remove them as you cut up a clump. Read on to find out how to avoid that.
It’s much easier to see the eyes in spring. They may even start sprouting, removing all doubt as to their location. If you happen to break off a sprout, don’t panic – the eye will sprout again.
However, it can take a lot longer to untangle a clump in spring, with some varieties becoming so hard in storage over winter, you may need a power tool to cut them.
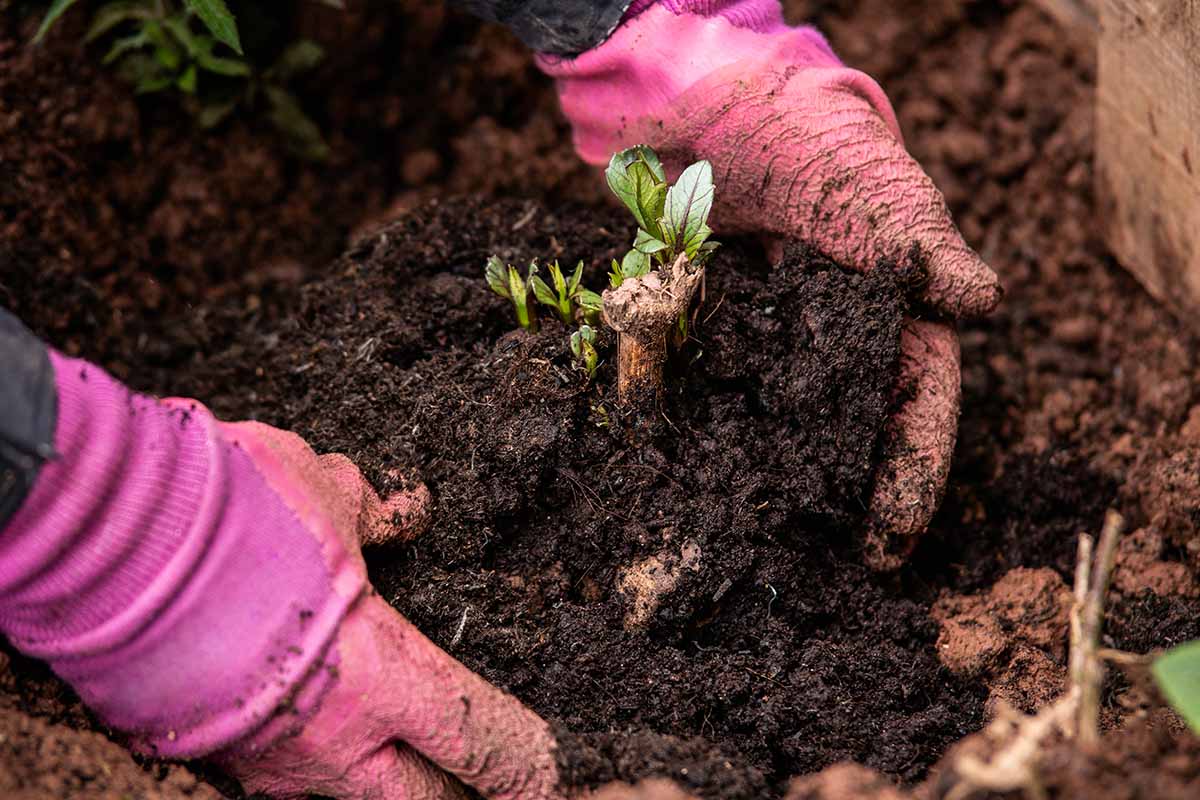
If you live in Zones 8 through 11 and choose to leave clumps in the soil over winter, the tubers will remain soft and in spring the eyes will be more prominent, making it easier to decide where to make your cuts. Gardeners in these regions can lift and divide, then replant immediately in spring.
In cooler climates, you’ll replant in spring after all risk of frost has passed.
Summer Prep for Better Tubers
Over summer, assess the health of the plants you wish to keep and make a note of those with:
- Poor or low numbers of flowers.
- Signs of a viral infection, such as conspicuous rings, patterns of lines, or a mosaic of light and dark green patches on leaves.
Discard these plants. Those that flower poorly despite ideal growing conditions are more likely to produce offspring with the same issue. However, if you’re dealing with a very large, overcrowded clump that has not been divided for a long time (or at all!) then division may improve flowering.
Infected plants can carry bacteria and viruses in the tubers and will then spread these pathogens to new plants in spring.
Tubers do most of their growing late in the season. In late summer or early fall, feed plants a high potash fertilizer – around a handful per square yard – so they take up extra nutrients.
A few days before you plan to dig, cut stems back to around six to eight inches high to create a handle you can grasp as you lift them out. Cutting back can also help to make eyes more prominent. If heavy rain is expected, cover the cut ends with foil, to keep the stems from filling with water.
Ensure you have the name of each variety on a label close to or attached to the plant while the dahlia is flowering so you can identify it once the flowers are gone. Options include:
- Using a plastic stake with plenty of writing space for long varietal names
- Cutting up a thin plastic container into strips, then tying the label around the plant stem with garden twine, a wire twist, or a zip tie.
You’ll need more labels during processing as each plant will provide multiple tubers.
Some growers use an indelible pen and write the name of the variety (or a code for long names) on the outside of the dried skin after lifting.
Tools You Will Need
It’s important to have a range of sharp, sanitized tools that make clean cuts.
A wound or ragged edge can serve as an entry point for bacteria, fungi, and viruses. If you’re storing tubers over winter, these may cause storage rot.
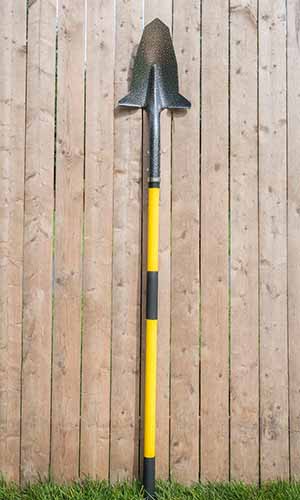
You’ll need a spade to dig up the tubers, and to cut big clumps into pieces for further processing.
I like this Spear Head Spade from Burpee, which has sharp edges and makes short work of compacted soil.
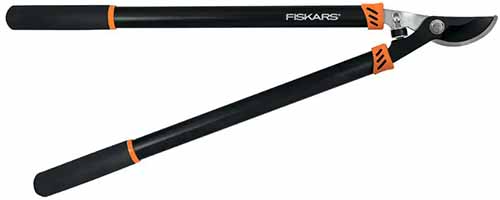
Garden loppers are excellent for cutting through a thick clump.
These long-handled bypass pruners from Home Depot have a low friction coating so it’s easier to make a neat cut.
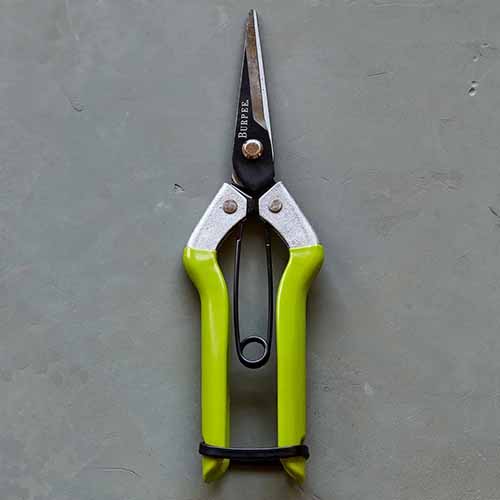
To make finer cuts when removing individual tubers, use garden shears or something similar with sharp blades that end in a narrow point.
I use these lightweight shears available from Burpee. They feature chrome plated, carbon steel blades that won’t rust and the rubber handles are comfortable.
If your hands aren’t strong enough to squeeze the handles of shears, using a knife and cutting board can be a good alternative. Having these available is also handy for slicing or cutting out little areas of rot.
To sterilize your cutting tools before and after processing a clump, place in a plastic bucket or container filled with a 10 percent mix of bleach and water – one part bleach to nine parts water.
It pays to have more than one set of cutting tools like shears on hand. You can leave one set to soak in the bleach solution while you use the other to process the next clump.
When you’re finished, store clean and dry tools in an airy place, especially if they’re prone to rust. Leave the blades open so any residual moisture can easily evaporate between joints such as where the blades join.
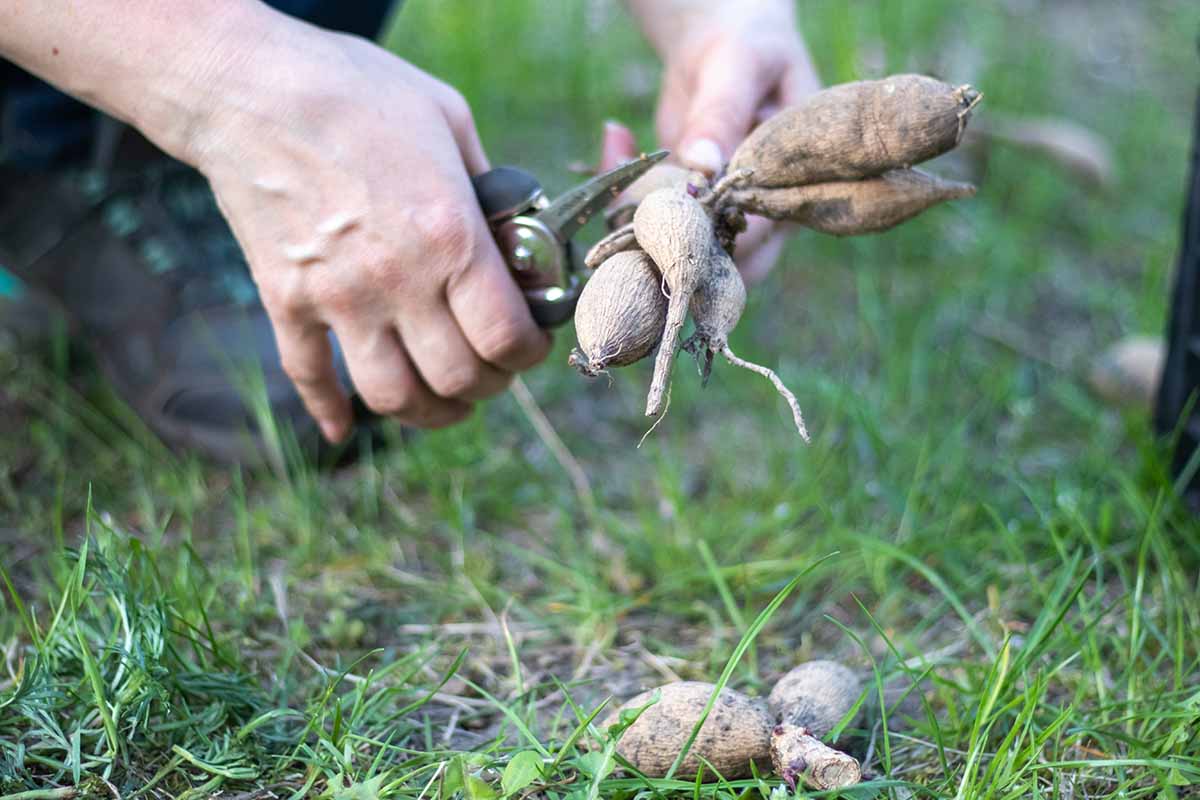
How to Lift Dahlias
Use a fork or shovel and slice down into the soil about 12 to 18 inches away from the clump, all the way around the plant. With each slice, lever the fork or shovel upwards a little to loosen the clump from the soil.
Be gentle or you risk damaging the tubers. The last slice should release the clump so you can lift it out of the ground.
Shake, brush, or use your hands to remove the soil around the clump.
Some growers use a hose to wash dirt off to help prevent diseases and remove any pests. Others leave surface dirt in place, believing it offers a layer of protection to the skin and helps to prevent shriveling.
The American Dahlia Society recommends leaving clumps in a low-humidity, covered area for a couple of hours to dry, which helps the necks to stiffen so you’re less likely to damage them during the division process.
However, in his book “The Gardener’s Guide to Growing Dahlias,” renowned UK dahlia breeder Dr. Gareth Rowlands recommends leaving them much longer – for several days – in a warm, dry place.
For the largest varieties, he also suggests turning them upside down so water can drain from the stems.
The Gardener’s Guide to Growing Dahlias
If you’re interested in purchasing a copy for your own gardening library, Dr. Rowlands’ book is available on Amazon.
How to Divide Dahlias
Once you’ve lifted your dahlias, it’s time to divide. Here’s how:
1. Cut Up Big Clumps
I failed pretty dramatically on my first attempt to process big clumps and the result was I killed off the beautiful puffy pink dahlias gifted to me by my aunt.
I had a grand idea to dig up and divide the several dozen plants and start with divided tubers in spring in revitalized beds.
The first problem? The clumps were so large after being in the ground in my Zone 9 garden for so many years that it was a struggle to lift them out of the soil. I resorted to using a sharp spade to hack the clumps apart while they were still in the soil.
There is a time and place for putting a spade through a clump of dahlias, but not the way I did it.
This is why the experts recommend lifting and dividing annually. There will only be a few tubers and they’ll be spread out around the base of the plant. They’re easy to lift and once free of the soil, you can easily cut them up.
It’s much trickier with big clumps that have been in the ground for two years or more. There will be many more tubers of different sizes, and they’ll be crammed around the base, forming a tight mass.
It’s almost impossible to divide a large, tightly tangled clump of tubers without accidentally causing some damage, such as leaving some without a crown or breaking or slicing off necks.
To make things easier, use a sharp spade to cut large clumps into four pieces. Take your time to work out the best place to cut.
Sit the clump on the ground with the old stems facing up. Place one foot firmly on the long, thin trailing roots to hold it in place.
Use your other foot to push down on the spade, slicing through the middle of the remnants of the main stem to create two halves. Then, cut the two halves in half again so you have four smaller clumps.
There’s no need for any of this effort as you’ll only have a few tubers to deal with if you’re lifting and dividing each year.
Wash off all of the dirt that you can see. This makes it easier to see where to cut, and you’re less likely to spread soilborne disease pathogens.
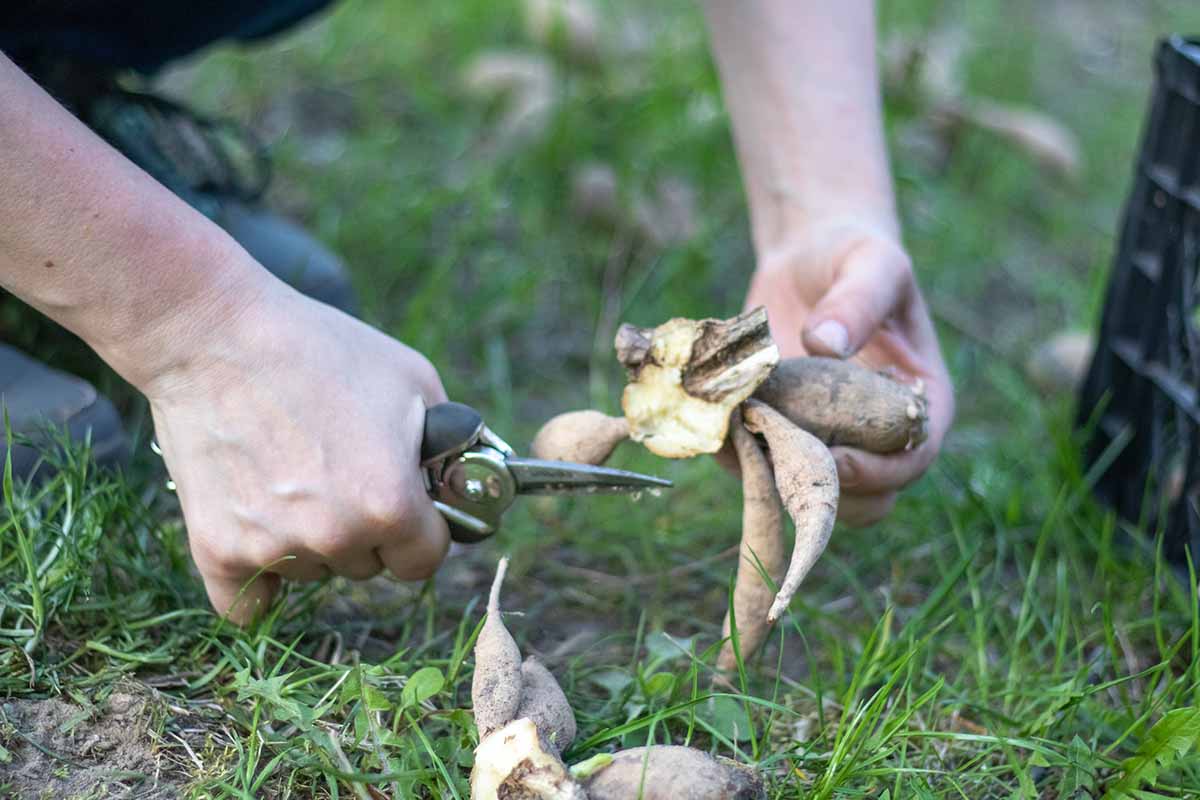
2. Remove What You Don’t Want to Keep
Cut off and discard:
- the very thin, trailing roots hanging from the bottom of the tubers
- the stem, where it attaches to the crown
- anything damaged or rotting – signs include spongy areas or dark brown spots in the neck, body, or crown
- the mother, with one exception
The mother tends to have a poor root system if replanted, producing weaker plant growth and fewer flowers, which is why most growers discard it.
The exception is if they only have a few tubers of a particular variety. In that case, the American Dahlia Society says the best option to improve stock levels is to store the mother over winter, take stem cuttings when it produces new growth in spring, then dig it up and throw it away.
If you’re going to divide tubers in spring, you can stop at this point and put them into storage.
If you’ve overwintered tubers in the garden or want to store them already divided, continue with the steps below.
3. Making the Best Cuts
Each tuber needs to have a crown attached that’s around a quarter to a half of a square inch in size. Even if you can’t see any eyes, this amount of crown is almost certainly going to contain one or more of them.
To divide a clump joined to a large crown, it’s best to make the first cut through the middle of the crown.
You may sacrifice some of the tubers underneath doing this as the crown may not be big enough to support every attached tuber, so angle the cut to prioritize the best ones.
Once you have a smaller piece of crown with several tubers attached, you can divide it further. Look for ways to cut so you ensure each tuber retains at least a quarter of a square inch of crown.
If a clump has tens of tubers and there are two or three too closely attached to easily separate each one so it has a quarter of a square inch of crown, it’s okay to leave a few tubers attached to one section of crown rather than trying to divide them up further.
4. Check for Disease
Once divided, cut away any stem tissue that’s still attached. This helps to prevent disease and discourages insects from chewing into the white flesh of the crown.
Take a thin slice off the base of each tuber body and check for rot or insect damage. You want to see clean, creamy white flesh, with no sign of brown.
If there are brown spots, keep slicing until you reach healthy tissue. However, if the brown areas continue and the tuber eventually has less volume than a AA battery, discard it.
If you reach healthy tissue and the size is okay, leave the cut end to dry and form a seal over about 24 hours or so.
At this point, dahlia expert Gareth Rowland suggests using a fungicide or dunking the divisions in a 10 percent bleach-to-water solution to kill any fungal spores that may be present.
If you use a fungicide, choose a broad spectrum contact spray or dust, such as sulfur, and follow the application instructions carefully as some can irritate the skin and eyes.
However, Alan Fisher – an award-winning grower of 30-plus years and senior executive of the American Dahlia Society – notes that he hasn’t found any difference in how well a tuber stores, regardless of whether or not fungicides are used. He doesn’t use them, saying what’s more important is cutting out any signs of rot or mold in the crown and tuber body.
Experiment to see what works best for you. If storage rot has been a problem in the past, a fungicide or bleach-water solution does offer extra protection. If you’re storing tubers over winter, check them regularly, remove any that are showing signs of rot, and do a final check before you plant them.
Ensure you label all the tubers from a clump before moving on to a different variety.
Once you’ve processed a clump, place your shears and any other tools into the bucket of bleach and water. Clean off any plant tissue caught in the blades. Rinse with clean water and dry before using on the next clump or putting things away at the end of the job.
Free Dahlias for Your Garden
The most important thing to know about dahlias is that once you start growing them, it’s likely you’ll want to plant more. Generously, the plant provides what you need to enjoy more of its delightful blooms for the price of just a little time.
Even with less-than-ideal techniques as a gardener who was new to growing these beauties, I’ve successfully divided dahlias in the years since. But I’d still have my beautiful pinks if I’d taken a bit more care.
Once you understand what the plant needs to grow, dividing tubers is easy and you can enjoy more of their happy faces over summer.
What are your tips for dividing dahlias? Let us know in the comments section below, and feel free to share a photo!
And for more delightful dahlia info, have a read of these guides next:
Thank you for the information. My neighbor is a Mennonite who grows many types of flowers as she does floral arrangements for weddings and has a few different dahlias for her brides and we took a liking to them and she has given us bad information like it is not important to clean shears between plants and she doesn’t and would come and bring her shears here and go cut flowers here that her brides wanted when they didn’t want hers and now I have had two tubers of different ones with gall and she said it was fine and… Read more »
Hello Sarah, I’m sorry to hear you’ve had a bit of trouble and I’m glad you found good advice in the article. Even with 600 tubers, I would recommend keeping an eye out for damaged or rotting spots. You may come across the ones that had galls, but even if you don’t, you can promote healthier divisions by following this advice from the guide: Take a thin slice off the base of each tuber body and check for rot or insect damage. You want to see clean, creamy white flesh, with no sign of brown.If there are brown spots, keep… Read more »
This is my first time growing the dinner plate dahlias. I was told to dig the up, but not how to care for them once this is done. I don’t understand how to divide the 3main parts to look for.
By the way, they were so beautiful. I absolutely love them. I want to continue growing them in the spring, but not sure of dividing them safely.
Hello, Joyce. I’m so glad to hear you have dinner plate dahlias you adore. This photo from the article spells out the parts of the tuber. You’ll most likely want to wait until the first frost has killed the leaves to look for them. After that, you can find more explicit directions on caring for the divisions in our guide to lifting and storing dahlias over the winter, which you can read here. And for more tips on keeping your lovely dinner plate dahlias healthy and blooming, read our dinner plate dahlia guide. Good luck, and please send us photos… Read more »