
Few things are as satisfying to the tomato buff as harvesting their own homegrown crop of red, ripe, and delicious fruits.
About the only thing more fulfilling is having your own stash of heirloom seeds, safely stored and waiting patiently for their turn to dazzle and delight.
Saving your own tomato pips is a great way to preserve those varieties that have proven themselves as dependable performers in your garden.
And it also prevents disappointment next season, when many cultivars disappear from store shelves if they didn’t prove to be popular.
We link to vendors to help you find relevant products. If you buy from one of our links, we may earn a commission.
Plus, saving your own is economical as well as convenient.
With your own private reserve, there’s no more shelling out top dollar for organic stock, or anxiously waiting for those packets to arrive in the late winter mail.
Now, let’s get into the four methods to save your own tomato seed for planting.
What You’ll Learn
Heirlooms and Hybrids
Before we delve into the mechanics of seed saving, it is important to note that only those collected from open-pollinated or heirloom varieties will produce true to the parent plant.
Pips collected from hybrid plants can be sterile.
And those seeds saved from hybrid varieties that do grow typically do not have the same characteristics as the parent plant – disease resistance, fruit size, vigor, and quantity of fruit can all be different.
To ensure your plants reproduce true to stock, only save seeds from open-pollinated cultivars.
Learn more about heirloom tomatoes in this guide.
Tomato Seed Basics
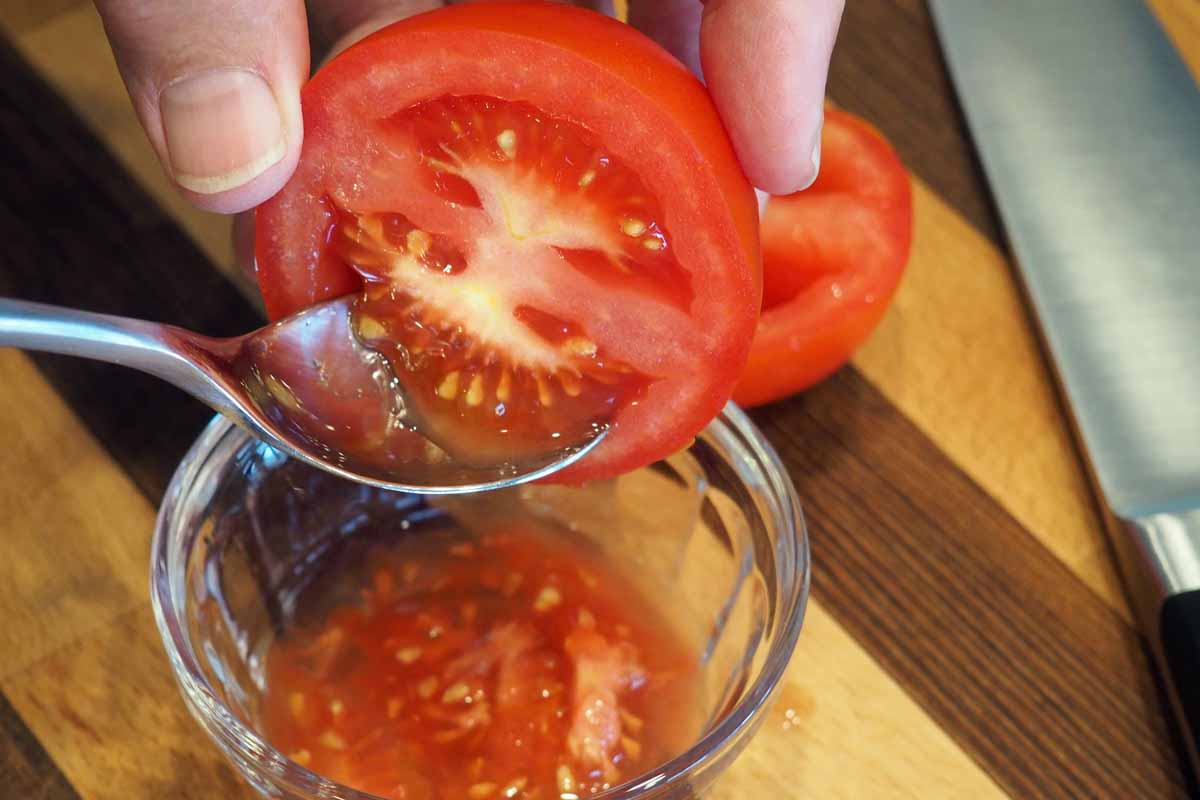
Collecting tomato pips is easy. Just slice the fruit in half and scoop out the gel into a small container.
But there are a few more steps you need to follow to ensure your stock is viable for propagation.
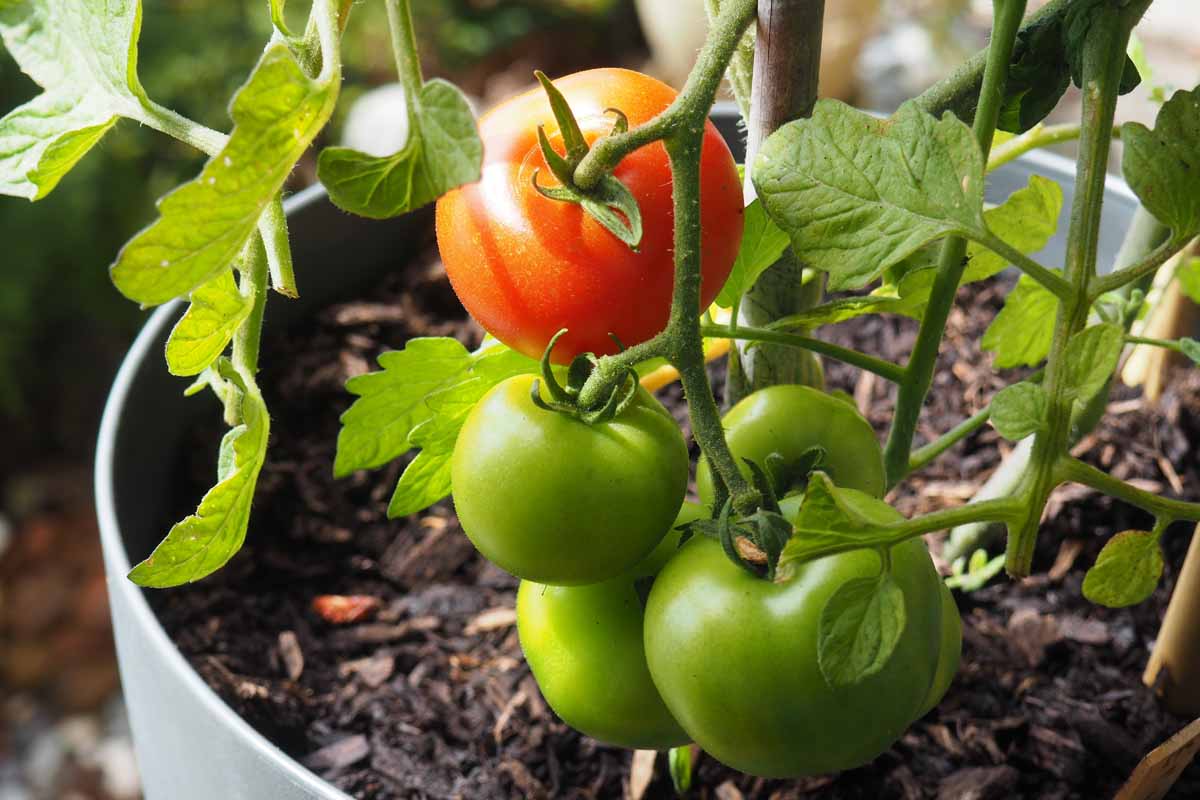
Choose fully ripe – or even over-ripe – fruit, and harvest the best-looking tomatoes from healthy, vigorous plants. Avoid fruits that are cracked or damaged, as split skins can provide an entry point for bacteria.
Choosing the most appealing fruit from the most robust plants promotes the same qualities in future generations.
You can prevent inadvertent cross-pollination by choosing fruits from plants that are grown away from other varieties, or by hand-pollinating your tomatoes.
The pips are suspended in a gel sac within the fleshy fruit. The mucilage gel inhibits germination, so removing them from the gel sac is a prerequisite for effective germination to take place.
A second reason to remove the gel is because it can provide a welcome environment for seed- and soil-borne pathogens.
Pips can be saved from all types of open-pollinated tomato plants – cherry, paste, and slicers from both determinate and indeterminate varieties.
Four Methods for Saving Tomato Seeds
There are four methods for saving your own tomato seeds for planting.
In the first method, you bury fresh seed at the end of the growing season for germination the following spring. The next three are ways to process collected seed for storage.
1. Burial
If you compost your tomato plants, you’ll know how readily volunteers sprout, popping up in your compost pile after a winter’s dormancy.
Planned burial is an easy way to take advantage of natural cycles to propagate your favorite Solanum plants.
Left on their own, fruits fall from the plant at the end of the growing season, decompose, and eventually rot away.
As the fruit rots, it activates a natural fermentation process that destroys the gel sac. The pips then remain dormant in the soil over the winter months, ready to sprout the following spring when the right conditions arrive.
This method requires some advance planning, as you’ll need to prepare next year’s tomato patch before burying the seed.
In late summer, choose your planting location and amend the soil as described in our guide to growing tomatoes.
Slice a healthy fruit into large discs, then “plant” them two inches deep in the soil. Add a two- to four-inch layer of winter mulch over the top.
In spring, after the soil and air temperatures have warmed and the risk of frost has passed, remove the mulch and gently loosen the surface of the soil.
If germination is successful, seedlings will appear promptly in warm weather. These can be left in place and thinned, or transplanted to another location.
This is the least controlled method, and you must wait for good weather, but it can still be a reliable way to produce a good supply of plants each year.
2. Drying Fresh Seed
Many gardeners have success simply by allowing the pips to air dry, gel and all.
However, those that have not been fermented typically have a lower germination rate, and a shorter shelf life of just one to two years under ideal storage conditions.
But for gardeners who only want enough product to start next year’s crop, this may be perfectly fine.
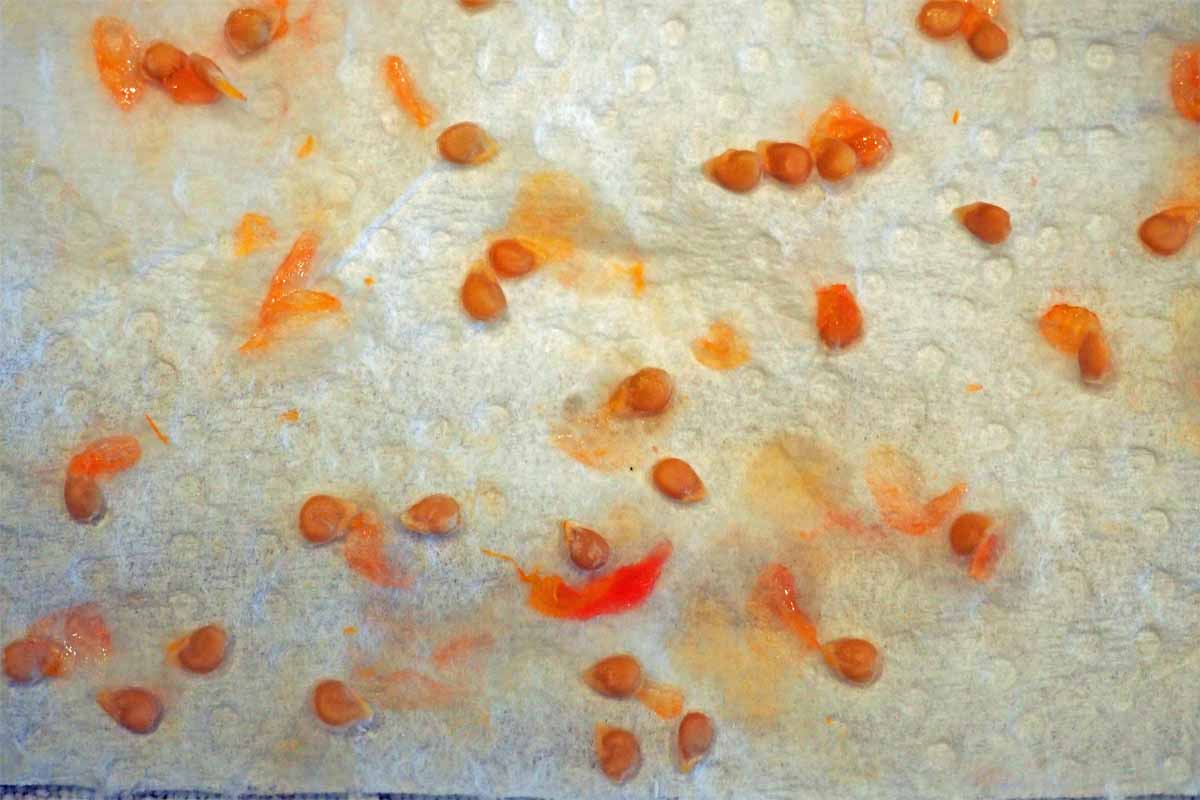
Slice a tomato in half and squeeze out the gel into a fine sieve. Rub the seeds lightly while rinsing under cold water to remove excess debris.
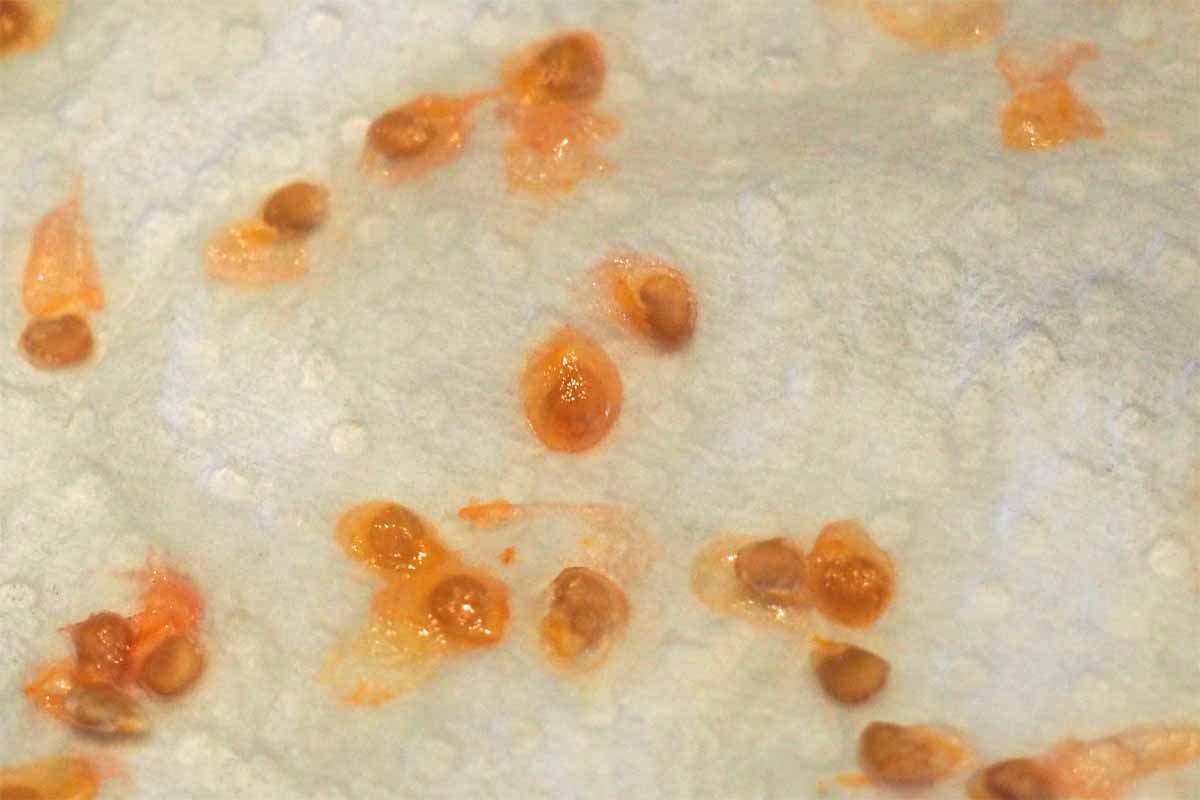
Flip the sieve and tap the pips onto a paper towel, spreading them out to separate them.
Label the towel with the harvest date and variety name.
Allow them to dry for seven to 14 days in a location with a temperature of about 70°F, away from bright light.
When they are dry, the pips will be stuck to the towel, which can be folded up for winter storage.
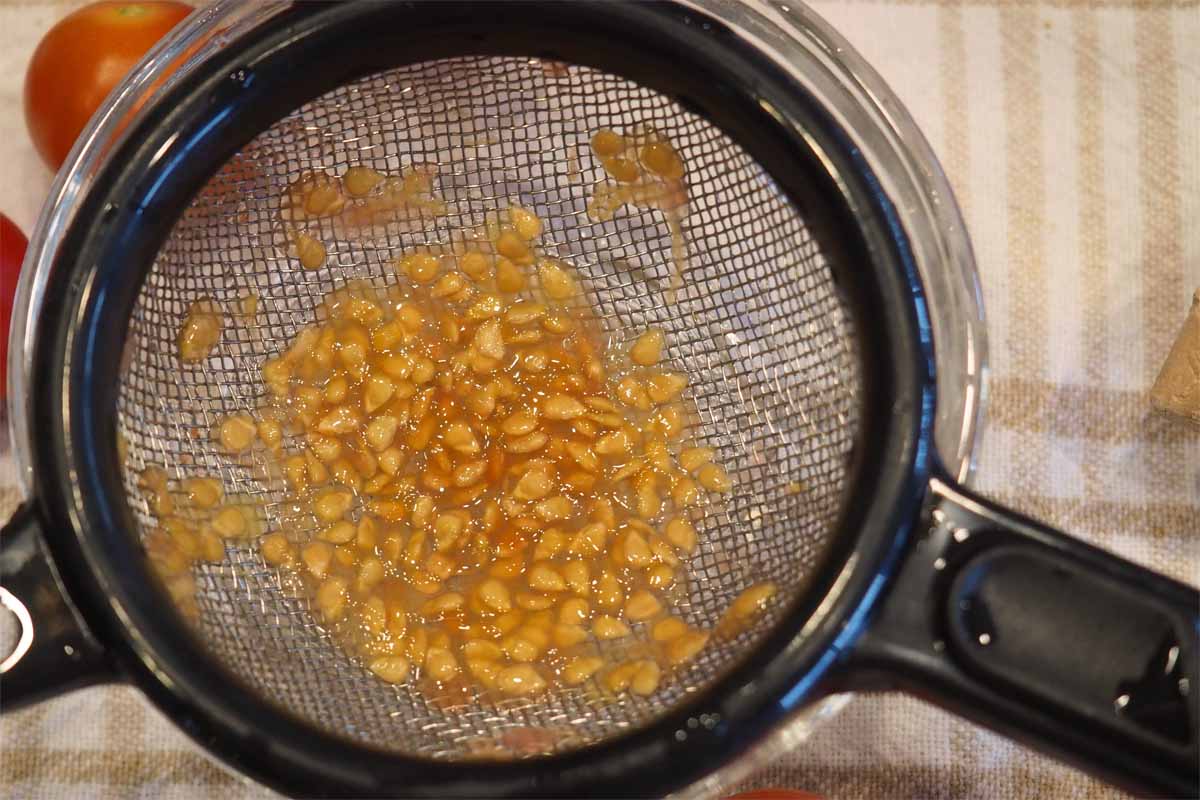
3. Rubbing
Rubbing the gel sac on a lightly abrasive surface, such as a fine sieve or paper towel, is an easy way to remove the gel from small quantities of stock – and it produces a high germination rate.
Slice the fruit in half and squeeze the gel into a fine sieve. Rinse under cool water to remove any debris.
Rub each pip individually in the sieve or on a paper towel to remove the gel sac.
Rinse again, then spread them out on a clean paper towel or screen to dry.
Allow to dry for seven to 14 days in a well-ventilated location out of bright light.
This is a bit tedious, but it works fine if you’re only collecting a few dozen seeds. For larger quantities, fermentation is a more efficient method.
4. Fermentation
The fermentation process is an easy and effective way to clean your stock in which the collected gel, juice, and seeds are allowed to ferment for one to three days.
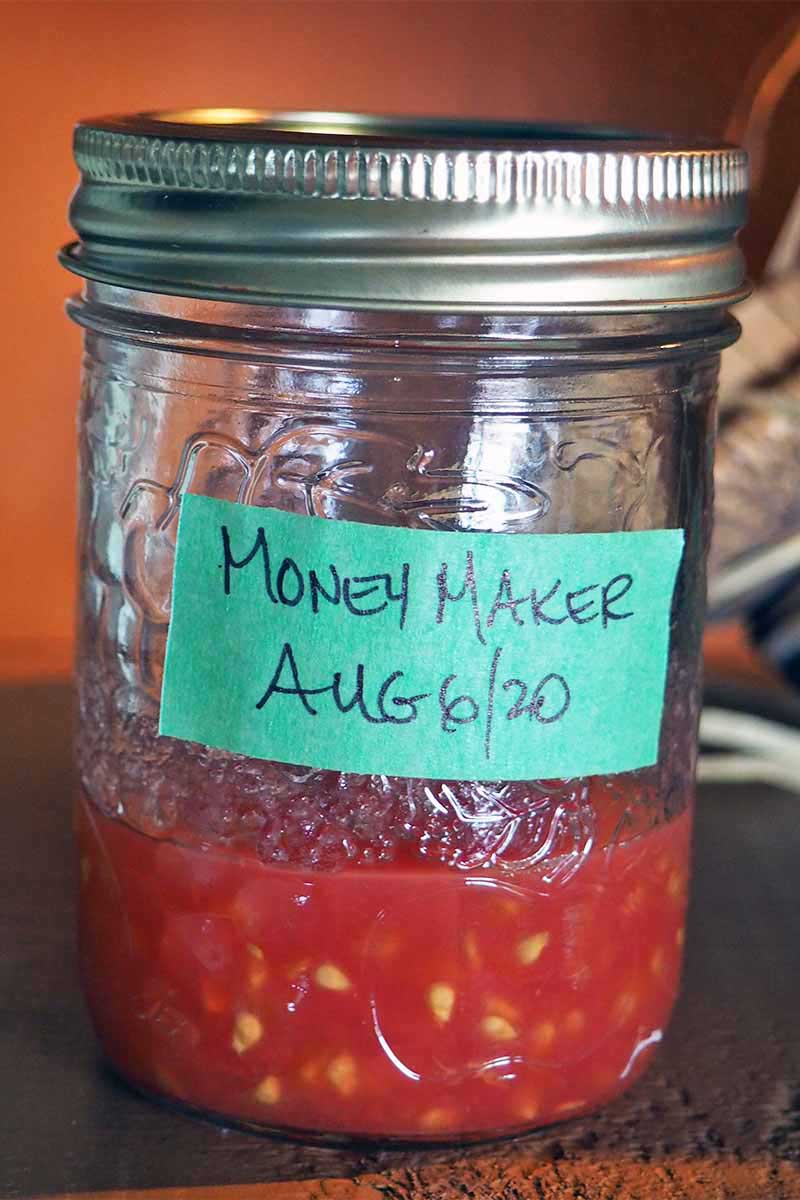
This is the most effective way to process large quantities and produces the cleanest stock.
Old school methods had fermentation going on for several days, allowing an aromatic head of scum to form before straining and drying.
However, more recent studies have found that longer fermentation times – of more than three days – have a negative impact on viability in terms of germination rate and the potential development of abnormal seedlings.
For this method, use the fruit of only one cultivar at a time to avoid mixing up your stock. And sanitize equipment thoroughly between batches to eliminate the spread of pathogens.
To ferment your seeds, rinse your tomatoes in cool water – discard any that are damaged, cracked, or show signs of disease.
Cut open the ripe fruit and squeeze the gel, juice, pulp, and pips into a glass jar or container with a well-fitting lid.
A citrus reamer can help to quickly extract all components.

Do not add water to the slurry because dilution will slow the fermentation process.
Label the jar with the date and variety name and set it in a room-temperature location (approximately 70°F), out of bright light.
For the next two days, stir the fermenting slurry once or twice a day, turning and submerging the pulp to prevent the buildup of mold.
Decant and rinse after three days. To do this, pour the slurry into a larger container and add three times the volume of water.
Swish the mixture a few times, then allow it to settle. The viable pips will drop to the bottom of the container.
Pour off the water, leaving the viable pips on the bottom. Repeat this process two or three times until all the gel and debris has been removed.
Pour the pips into a fine mesh sieve and rinse away any remaining gel or pulp with cold water.
Gently tap the strainer to remove excess water, then flip the strainer over onto a paper towel or screen and tap to dislodge the seeds.
Spread out the pips to separate them, and label the screen or paper towel with the harvest date and variety name.
Allow your collection to dry at room temperature in a well-ventilated location for seven to 14 days, stirring occasionally with your fingers to prevent clumping.
Storage
Store clean, dry pips in a paper envelope and place in a cool, dark, and dry location for the winter.

Be sure to label each envelope with the harvest day and variety name.
Tomato pips can be refrigerated, but this isn’t necessary. And they should not be frozen.
Stored properly, your rubbed or fermented seed stock will remain viable for four to six years.
Next Year’s Bounty
Saving your own tomato seed is economical and smart, a highly satisfying investment of time that ensures next year’s bountiful harvest.
If you plan on saving large quantities, go with the fermentation method. For smaller amounts, rubbing is a good alternative. And burying slices in the garden is always a fun adventure to try out!
Don’t forget to read our article on how to grow tomatoes from seed and get out your gardening journal to start planning next year’s crop.
How do you folks collect and save your seeds? Let us know in the comments below!
And for more information on growing tomatoes, check out the following guides next:

I have my first set of tomato seeds fermenting for a week. There was a little cloudiness but no mold layer and no bubbling like I have read would happen on a number of sites. Most of the seeds have dropped to the bottom, should I dry them now or still wait for the mold/bubbling? What is the longest you should ferment if you don’t see these signs? When the seeds drop to the bottom? Thank you!
Hi Lynn, a week is plenty of time for the fermenting juice to remove the gel sack – no need to wait for the mold or bubbling. The bubbling probably occurred, but it can be quite soft, often more like a hint of fizziness.
And the most recent studies shows that leaving them longer can actually harm their viability.
Most of your pips have dropped, so just jump in at the step to decant and rinse in the Fermentation section above, then store for the winter.
Thanks for asking, and enjoy next year’s crop!
I’m sure it varies but how many viable seeds can you get from a single tomato?
Hey Neil, the number of seeds per single fruit does vary a fair bit depending on the size and variety (a cherry tomato produces less seeds than a beefsteak), but a general rule of thumb is about 100 to 150 seeds in a single fruit. And given optimal growing conditions, they have a good germination rate as well, at about 90 percent for fresh stock. The germination rate declines as seed stock gets old, but Solanum lycopersicum seeds have a good shelf life as well and can be stored for 10 to 12 years in a cool, dry, and dark… Read more »