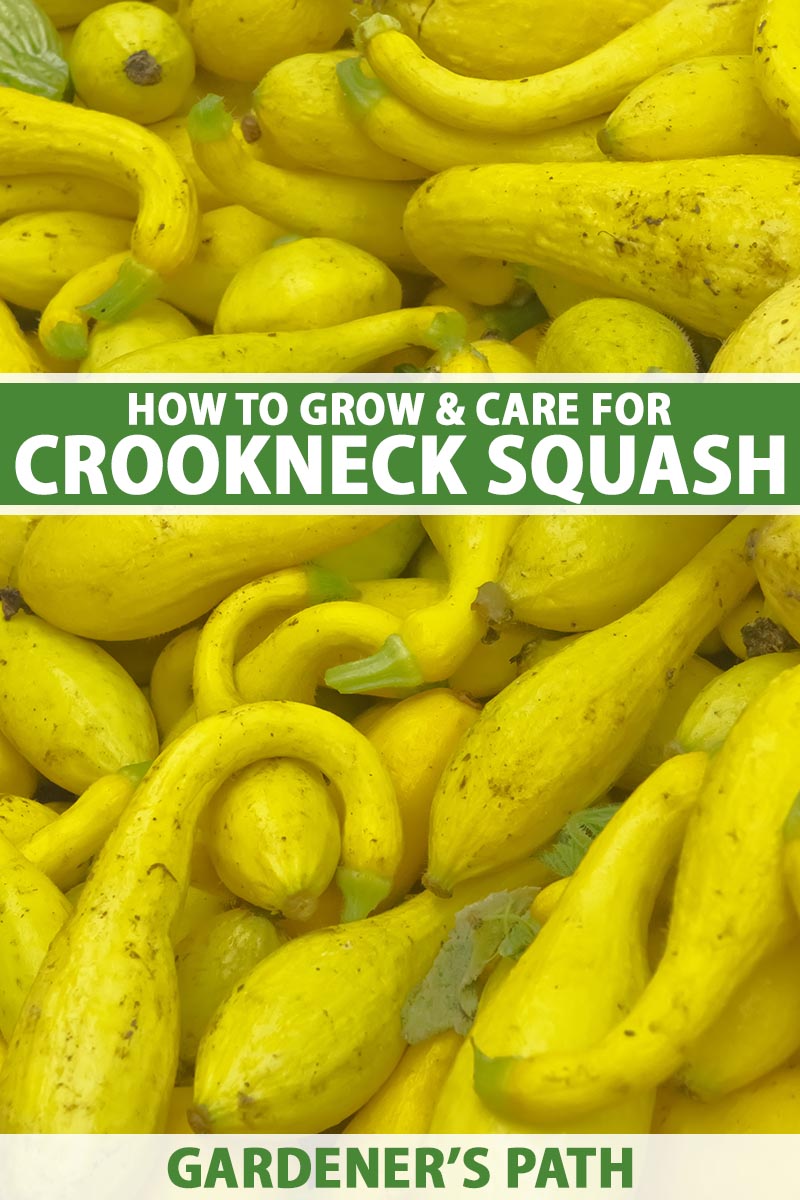
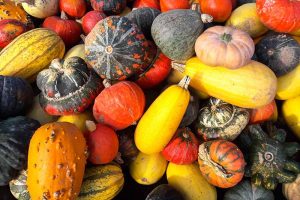
Cucurbita pepo
While I didn’t become a committed vegetable gardener myself until my late 20s, my introduction to the joys of growing one’s own food came a decade earlier in the form of a brown grocery bag of delectable crookneck squash.
We link to vendors to help you find relevant products. If you buy from one of our links, we may earn a commission.
In my small hometown of Williamsburg, Virginia, only a few families tended giant vegetable beds. My own family only went so far as to plant a lone parsley or tomato plant now and again.
But my friend Teri’s dad, Tilman Sandy, hailed from agrarian Appalachia and had a massive plot of veggies right next to his suburban lawn.
One summer morning, Teri and I were setting off on a weekend trip to my family’s beach bungalow, and she showed up with a sack of four-inch, bumpy-skinned, bright yellow crookneck squash, fresh from the garden. And a stick of margarine!
We feasted on nutty, tender, steamed squash slathered with melted “butter” that whole weekend – my introduction to being sustained by the food you grow yourself.
Nowadays, I plant at least four types of summer squash each year. I always plant at least a couple of crookneck squash, and not just for nostalgia.
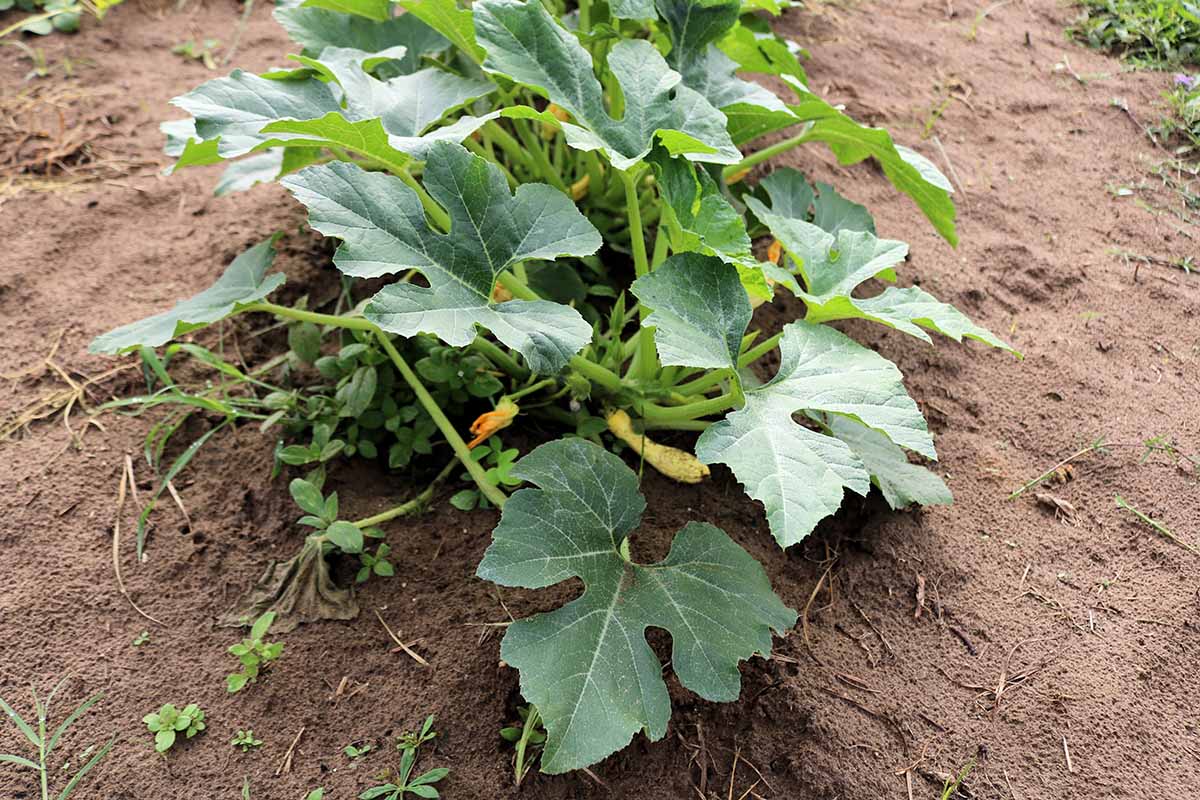
The prolific bush-type plants produce some of the most tender summer fruits known to man. And they truly taste like summer, too.
The yellow color also complements red tomatoes in summer gratins or side dishes, and the bulge at the bottom lends itself to stuffing.
Best of all, crookneck squash grows quickly and produces mightily.
If you haven’t grown this type, or you haven’t in a while, I’d like to be the one to introduce you to the joys of planting, picking, and eating these lovely, curved yellow summer squash this season.
Here’s what I’ll cover:
What You’ll Learn
Cultivation and History
Crookneck squash is both a modern favorite and an old-school choice for 21st-century gardeners.
I’m talking the wayback days, though, not just when your grandpa or the lady down the street grew it in the 1970s.
All types of squash we grow today can be traced back at least 12,000 years to seeds discovered in caves in Ecuador, where the plants grew wild.
Curcubita pepo is one of five species of squash domesticated in the ensuing millennia.
It’s a diverse species that includes acorn squash, straight neck, zucchini, and cocozelle, in addition to crookneck.
The crookneck type may have originated in New Jersey, grown by the Lenape people well ahead of European colonization.
Though they are also curvy types of squash, you shouldn’t mix up C. pepo crooknecks with their distant cousins, the “crooked neck” C. moschata varieties. These include cushaw and the vining tromboncino.
While those two are also delicious, it’s important to make the distinction because C. moschata growing habits and harvest schedules are slightly different from those of C. pepo.
Crookneck cultivars have been available to the home gardener for decades, with the ‘Early Summer’ variety appearing in seed catalogs in 1923.
Both hybrid selections and improved heirlooms offer increased disease resistance and better yields for the modern-day veggie gardener.
I’ll talk about a few of them in a minute. But first, let’s dive into how to sow and grow this delicious, prolific cucurbit.
Crookneck Squash Propagation
If you want to spend less than you would on starts from the nursery while gaining access to the greatest number of different varieties of crookneck squash, plan to grow them from seed.
Wait until all danger of frost has passed and nighttime temperatures are reliably above 55°F before sowing.
Cultivate the soil to a depth of at least 10 inches and amend it with plenty of composted organic matter.
Sow individual seeds an inch deep and 18 inches apart in rows two feet apart.
Tamp the soil over the seeds using a hoe or the heel of your hand, and water them thoroughly using the fine spray nozzle on your garden hose or with a watering can.
Keep the soil moist but not wet until they sprout in seven to 10 days.
You can also sow the seeds indoors about three weeks before planting them outside. This is a good idea for gardeners with a short growing season.
But if that’s not your situation, you risk disturbing the roots when you transplant, so I wouldn’t necessarily encourage indoor summer squash starts.
If you do opt to start seeds indoors, check out our guide for step-by-step instructions.
For crooknecks, plant the seedlings in biodegradable pots so you can slip them into their permanent home without uprooting them.
You may also be able to buy transplants. If you’re worried the season will conclude before you are able to harvest, spending a little more for transplants may make sense – if you can find them.
When you shop for crookneck starts in person, make sure to select those that are a healthy green color and free of spots or dead leaves that can indicate disease or problems with pests.
Avoid any that are already in bloom since they are more susceptible to transplant shock. Also, choose the kind sold in peat pots that go straight into the soil.
Once you’re home, water the starts thoroughly and let them drain completely before tipping any outer, non-biodegradable container on its side to ease the small crookneck squash plants out. Try to keep the root ball intact.
Ideally, you’ll only be removing the outer rim of plastic from a peat pot, which won’t hurt the roots. If the transplants came in plastic cells, be gentle when you take them out.
Transplant to an area of the garden where they will be spaced at 18 inches apart. Dig a hole for each deep enough so the plant will be at the same level it was in its pot.
Hold the seedling or transplant steady while you backfill with well-draining loam amended with plenty of organic matter, and water the transplants in.
How to Grow Crooknecks
If you’re systematic and consistent, growing a bumper crop of crookneck squash is fairly easy. Here’s how to proceed:
Location
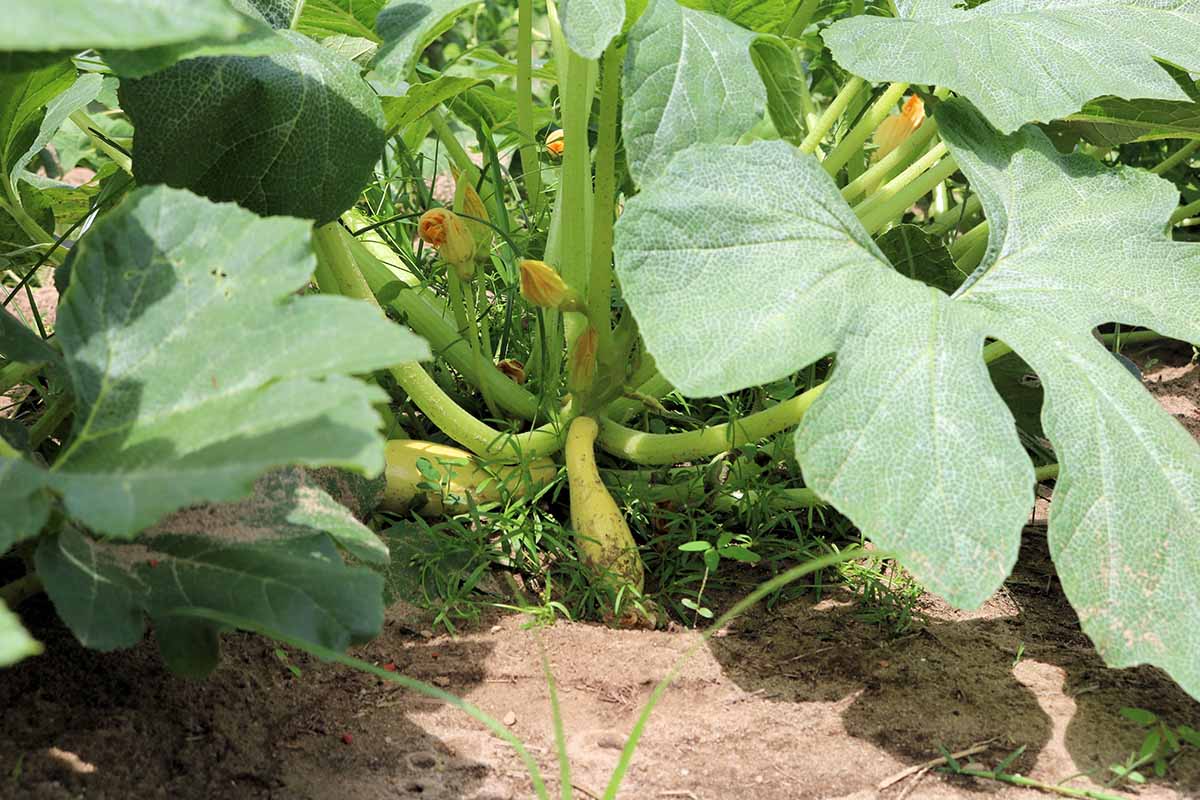
Grow your squash plants in a garden or raised bed where they’ll receive full sun with protection from strong winds. This is a bush variety, so it won’t need a trellis or other supports.
To steer clear of soilborne pathogens that can live on in the dirt for a year or more, choose a location where you haven’t grown any cucurbits for a year or two. This includes melons, winter squash, and cucumbers, as well as other types of summer squash.
When possible, start amending the soil the autumn before a late spring planting.
Start by working grass clippings, dry leaves, and composted organic material into the top couple of inches of the soil where you’ll plant.
If you can get a head start the year before, consider enriching the soil with a winter cover crop or “green manure” too.
Our cover crop guide for home gardeners offers great advice on using this simple option to build rich soil for heavy feeders like crookneck squash.
Gardeners who are preparing the earth just ahead of planting will still want to amend with organic matter, but it will need to be aged already. Compost that hasn’t broken down completely, whether manure or vegetable matter, can burn roots with its high ammonia content, for example.
If I didn’t have time to amend the soil the previous autumn, I like to work an inch or two of something like Gardener’s Gold commercial compost into the garden bed.
It’s sold in bags and derived from plant matter like leaves and grass that have decomposed for at least two years.
This amendment improves soil structure, aeration, and water and nutrient absorption.
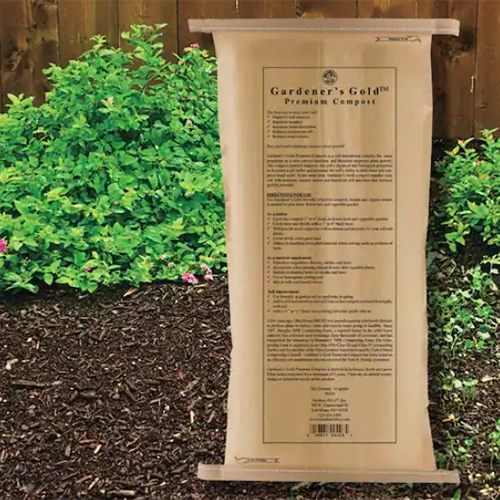
Gardener’s Gold Premium Compost
Gardens Alive! Gardener’s Gold premium bagged compost is available in 16-quart bags via Home Depot.
Whether you’re starting a season ahead or addressing soil health as you go, strive for soil with a pH that is slightly acidic to neutral. Crookneck squash prefers a pH range of 6.0 to 7.5.
You can use a kit to test the soil, but note that it will take several months to adjust the pH using additives like agricultural lime, because they break down slowly.
If the spot where you plan to plant doesn’t have a suitable pH, consider growing in a raised bed garden you can fill with potting soil.
Containers
If you’re opting to plant crookneck squash in containers, make sure to choose a pot that’s large enough.
Each of these bushy cucurbits will need its own pot that holds at least five gallons of growing mix. The container should also be at least 12 inches in diameter, though 16 is better.
Remember, that much soil can get pretty heavy, so plan to rest the pot on a stand with wheels on a level surface so you can roll it around as needed, or place it in its permanent location before it’s filled.
I like the idea of resting the heavy container on a kids’ wagon I can pull around to a new spot as needed once the season is underway.
This gives me options if I see my container crooknecks aren’t getting enough sun. It’s also handy if I want them closer to the water barrel during prolonged periods of hot and/or dry weather.
You’ll also want to choose a type of pot that retains moisture – plastic or metal, for example, not unglazed terra cotta.
It’s difficult enough to keep squash plants watered in summer without compensating for pots that dry out too quickly.
Water
When the seeds are germinating and while the seedlings are still a few weeks old, you’ll need to keep the soil they’re growing in damp but not wet.
Older plants require deep watering, so the roots won’t grow toward the surface seeking moisture.
Plan to measure your local rainfall and supplement as needed, so the plants receive about two inches per week in the summer months.
Always water at the soil line, not above the leaves, to avoid a buildup of moisture that can lead to fungal issues.
If you live in an area with hot summers, consider using soaker hoses or drip irrigation for your crookneck squash plants.
Mulch
These thirsty plants will appreciate a layer of straw or paper mulch applied to retain moisture once they have two sets of true leaves.
Be careful not to use commercial mulch that may contain herbicides or pesticides, which may harm plants and pollinators.
Apply a two-inch layer to retain moisture and suppress weeds, but leave a few inches of bare earth around the main stem.
If mulch makes contact with the plants, it can increase the risk of disease or pest infestation.
Fertilizer
If you amended the soil with plenty of composted manure or another type of soil builder, you probably won’t need to apply supplemental fertilizer.
Since container-grown plants will exhaust their nutrition more quickly, I do recommend feeding them once a month, starting once they’re about four weeks old and again at three-week intervals until they stop blooming.
A balanced liquid fertilizer diluted to about 50 percent of what’s recommended on the label is appropriate.
You may also want to fertilize in-ground plantings or crookneck squash grown in raised beds just once, when they first begin to bloom.
As I said, you can probably skip this step, but if you’re extra-ambitious about heavy yields, this strategy ups your odds of producing a bumper crop.
I like giving my blooming squash a boost with a mild, balanced fertilizer at bloom time.
Growing Tips
- Sow seeds or transplant starts when the air and soil are consistently warm, after all danger of frost has passed.
- Plant in full sun.
- Mulch when seedlings are a couple inches tall with two sets of true leaves.
Crookneck Cultivars to Select
When you are browsing your local plant nursery or garden center, you’ll often see seed packets labelled “crookneck squash,“ without a cultivar name.
There is a bit of variety available among crookneck squash cultivars. Some have smooth skin and others have a textured, “warty” appearance.
You may want to grow an early variety if you live where the growing season is short or when, like me, you are planting in an area where hot, wet summers increase the odds of certain cucurbit diseases and insect pests.
Pay close attention to which seeds are hybrids since they may boast improved yields or disease resistance.
But note that saved hybrid seeds won’t grow true. I don’t recommend experimenting with untested results in the second season when such a high-yielding home garden crop is at stake.
Here are a few of the top crookneck squash varieties to consider:
Golden Goose
Jack’s giant, eat your heart out. ‘Golden Goose’ is a hybrid with high-yielding potential and beautiful fruits: smooth and dark yellow with a gooseneck-style curve at the tapered tops.
The plants are compact, reaching just 24 inches tall, which makes them ideal for containers.

They’re fairly fast, too, taking 40 to 50 days to reach maturity, so gardeners who are planting late or live in areas where the season is short may want to grow this variety.
‘Golden Goose’ is available in 20-seed packets from Burpee.
Golden Summer
Trying to capture the feel of carefree summer days? This heirloom crookneck is a good choice for nostalgic vegetable gardeners.
‘Golden Summer’ produces scads of tender, yellow fruits you can boil and serve dripping with butter or add to a luscious squash casserole made with a family recipe.
This vintage variety takes a little longer than the new hybrids to produce, but you can save seeds at the season’s end and plant them next year. Expect fruits in 60 to 90 days.
These summertime delights are best picked when they’re about six inches long, but feel free to let a few grow twice that long and form hard shells later in the season, particularly if you want to save the seeds.
Use the curved, darker yellow mature fruits for fall decoration.
‘Golden Summer’ crookneck seeds are available in organic or standard packets and in bulk from Eden Brothers.
Pic-N-Pic
This is one of the types of yellow squash that gives it a well-deserved reputation for being fast-growing and prolific.
In fact, I’d dare say this disease-resistant variety may be hardy enough to keep the whole neighborhood in squash, with plenty left over to stock the freezer and pickle, can, and dehydrate to your heart’s content.
A Burpee-bred hybrid, ‘Pic-N-Pic’ plants begin producing tender yellow fruits about 50 days after planting and can continue for months if the weather holds.
The plants grow 24 to 30 inches tall and spread 36 to 48 inches across, which makes them compact enough to grow in large containers or small-space garden beds.
Harvest the fruits at four to six inches long for the best crisp texture and nutty flavor.
‘Pic-N-Pic’ is available in 65-seed packets from Burpee.
Managing Pests and Disease
While crookneck squash plants are fast-growing and tend to be prolific, they are by no means carefree where pests or diseases are concerned.
You can ordinarily avoid infestations and the ravages of disease with preventive measures. Here are the top foes to be aware of:
Pests
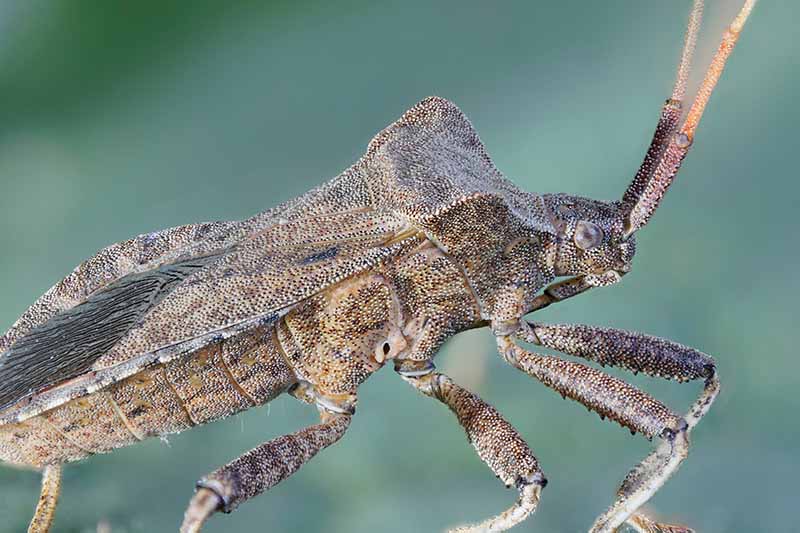
The bugs that love summer squash almost as much as we do range from teeny-tiny aphids and spider mites to easily-spotted cucumber beetles and squash bugs.
Here’s the thing, though: Advice for preventing infestation or combating these undesirable visitors is not one size fits all because the threat level and timing varies in different growing areas.
I grow vegetables in East Tennessee, for example, where squash bugs and vine borers are the top enemies, but they don’t get established until hot weather arrives.
So for me, the best preventive measure is to plant and harvest ahead of their arrival.
Gardeners in cooler areas like New England may not have as much trouble with the bugs that thrive in warm temperatures, but may still have trouble with, say, cutworms.
It’s a good idea to consult your local agricultural extension service to find out what you’re up against in your area and then tailor your approach to avoid those pests.
Since zucchini and crookneck squash are both varieties of C. pepo, they tend to attract the same bugs.
You can learn more about preventing, detecting, and combating them in our guide to common zucchini pests.
Diseases
A range of common vegetable diseases can affect crookneck squash.
They are caused by pathogens that include fungi, bacteria, or water molds that may be soilborne. Sucking insects such as aphids and squash bugs carry some of them from plant to plant.
Two of the most serious ailments include cucumber mosaic virus, which stunts plants and deforms their fruits, and bacterial wilt, which is spread by cucumber beetles and can slay all of your full-grown plants in a matter of days.
As you might with insects, it’s a good idea to check with your local ag extension to find out what you’re most likely to encounter in your area, so you can work extra hard to eliminate the conditions those pathogens favor.
Verticillium rot, for example, gets established in cool weather, while downy mildew thrives in humidity.
Your ag extension agent may also have suggestions for disease-resistant strains that grow well in your area.
No matter your region, it’s always best to try to prevent the disease versus attempting to cope with one as symptoms appear.
Some of the best strategies are the same steps you would take to grow healthy, prolific plants.
For example, proper spacing combats fungi that proliferate in too-humid conditions, while crop rotation can help to eliminate soilborne diseases like verticillium wilt.
Also, only water at the soil line, not from above the leaves, to avoid introducing an overabundance of moisture that may not dry quickly, risking fungal growth on the foliage.
Learn more about 11 common summer squash diseases in our guide to preventing and treating disease in zucchini.
Harvesting and Storage
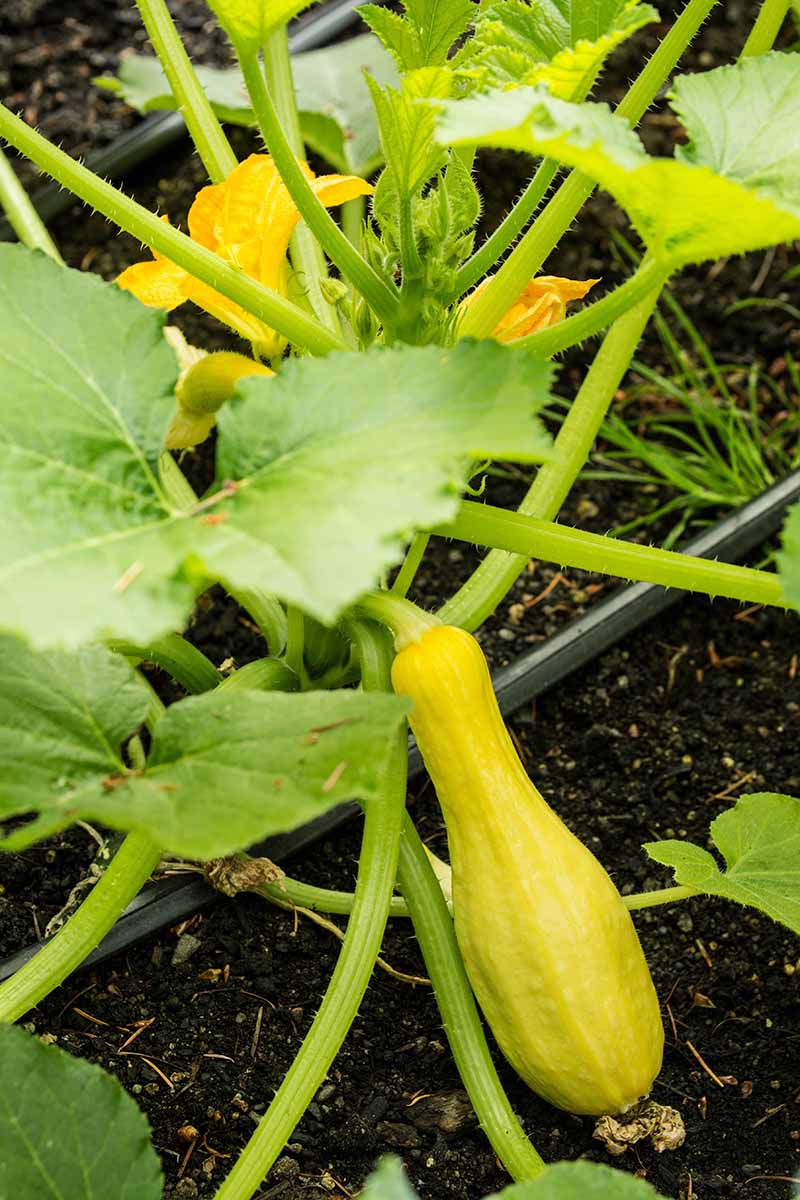
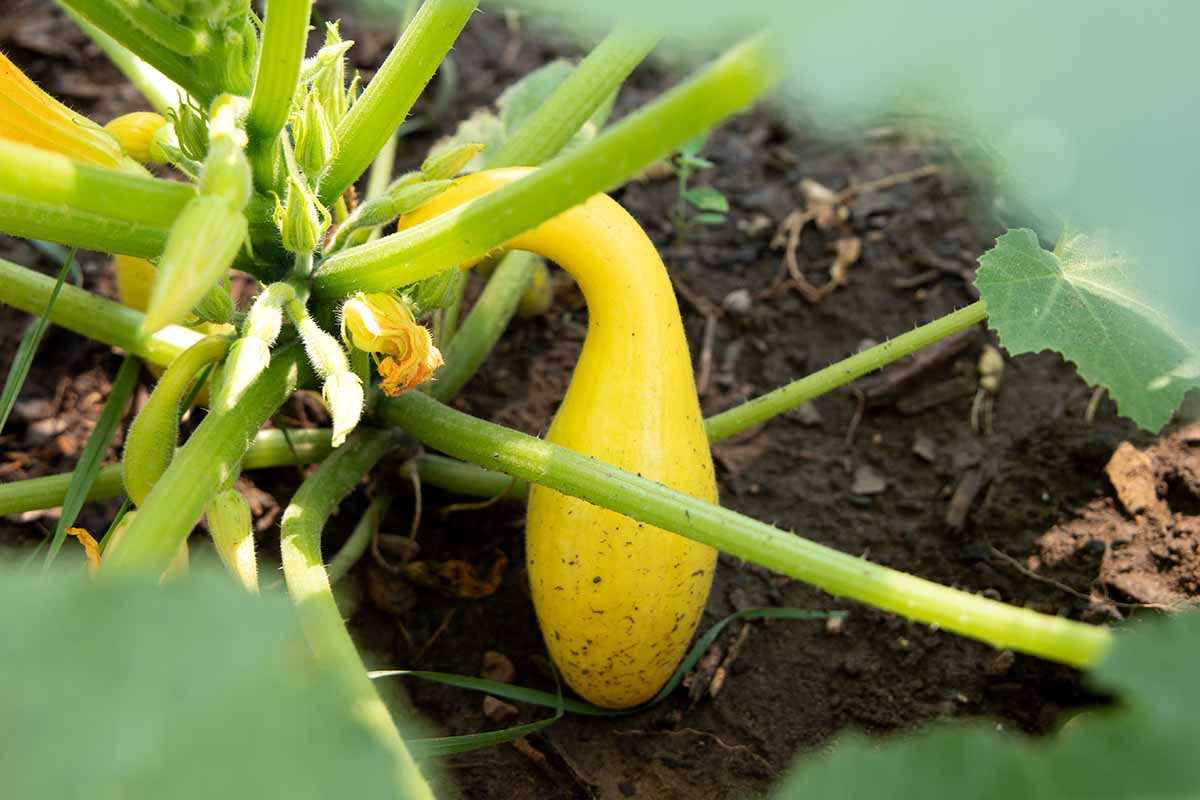
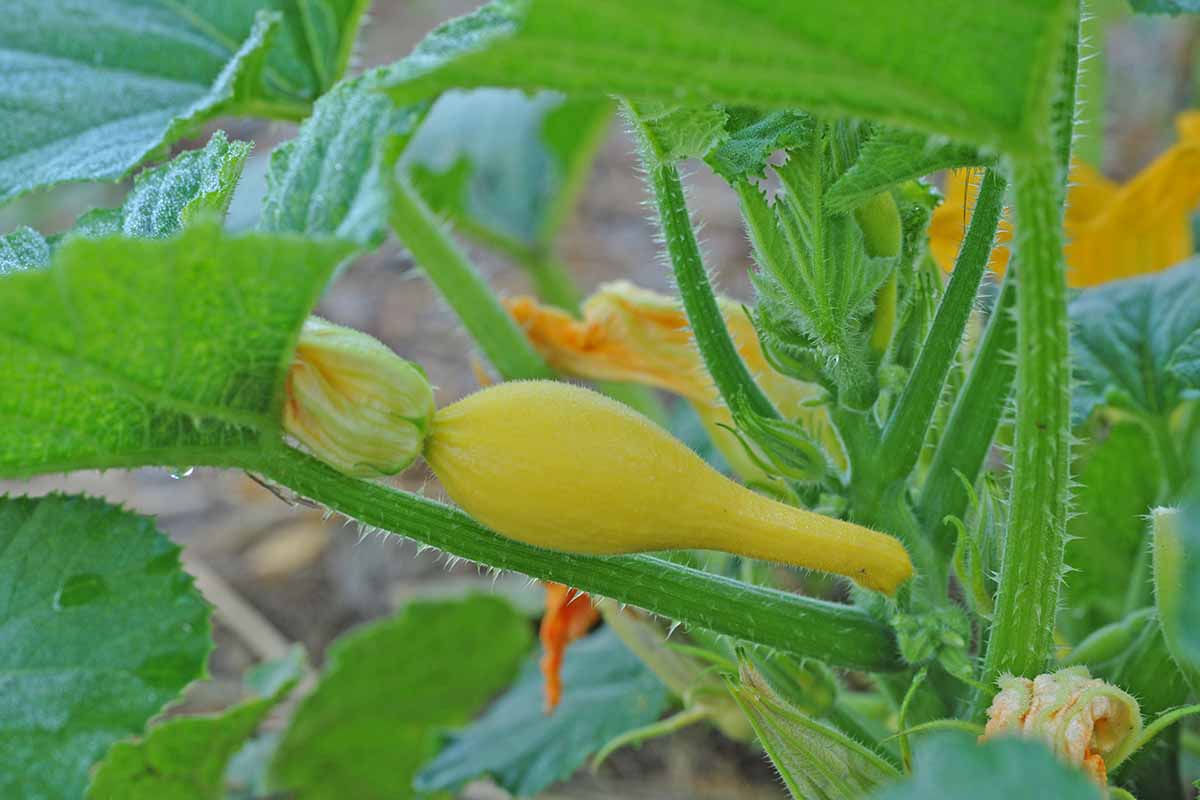
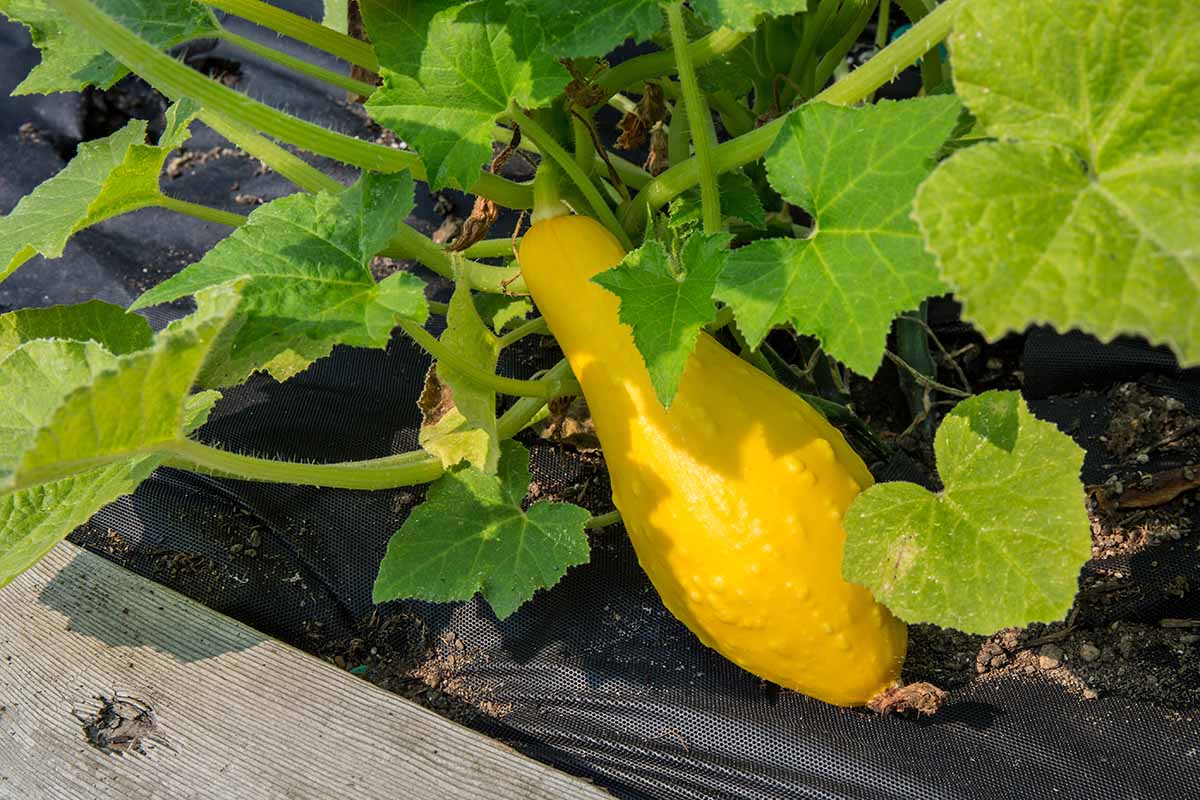
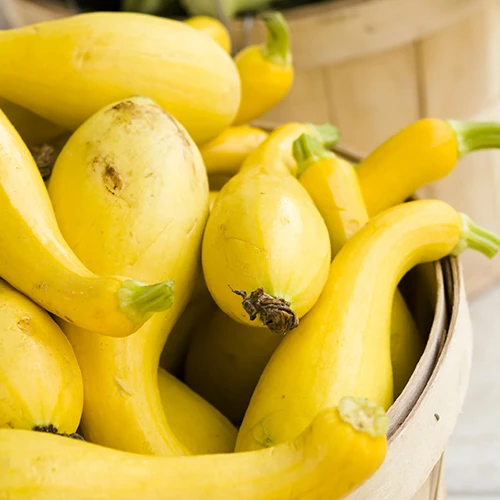
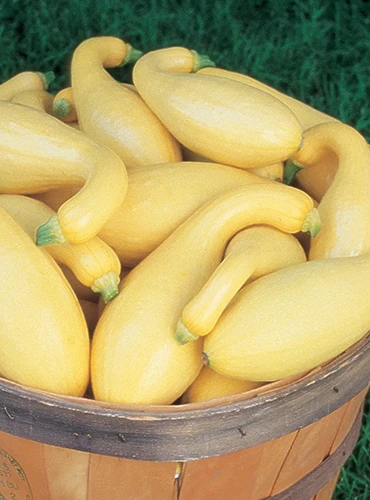
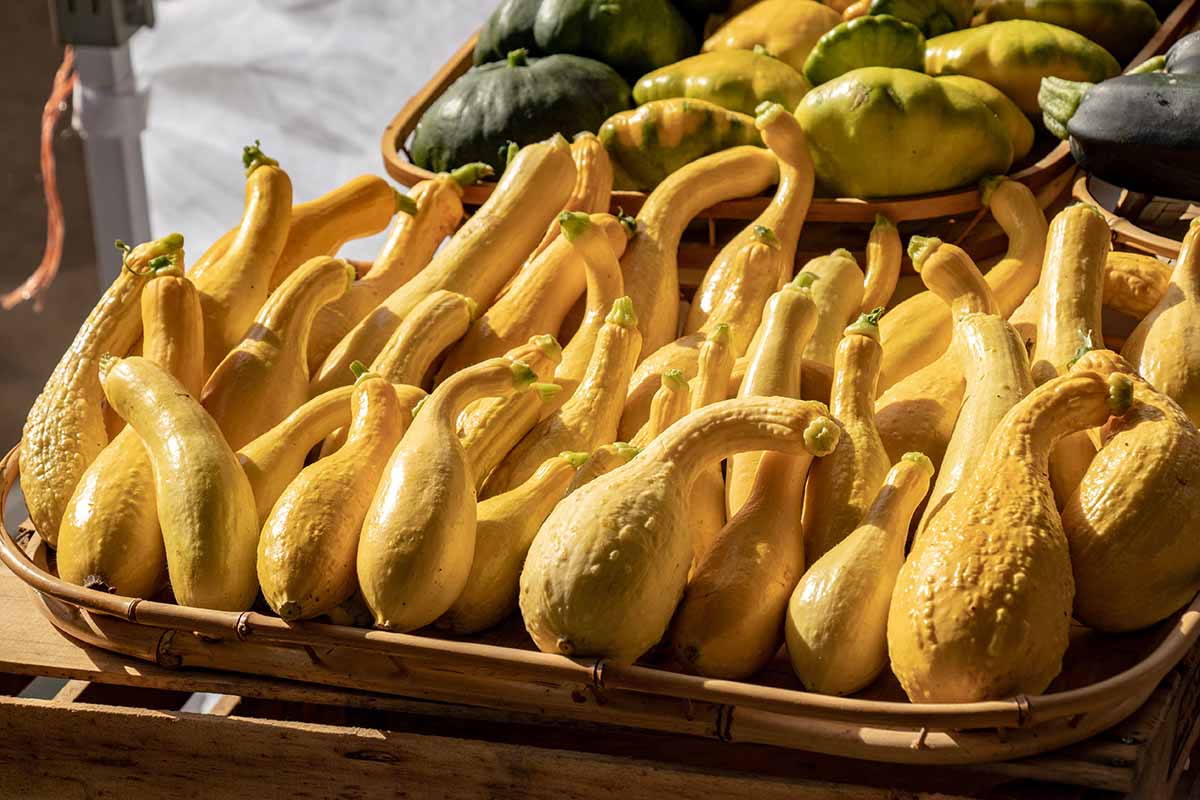
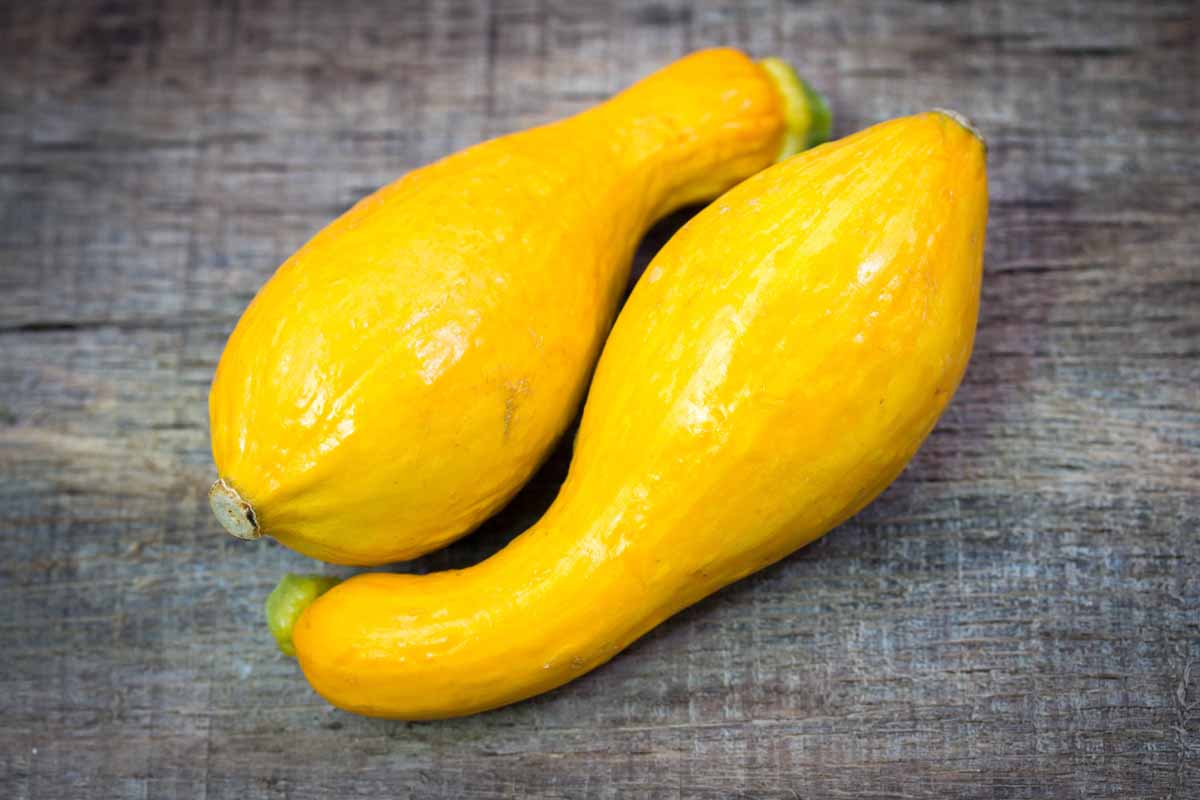
If you only draw one tip from this guide, let it be this: Pick crookneck squash when they’re young and tender.
You can harvest them when they’re just two inches long! But you should never let them get bigger than four to six inches long.
This is so important.
When they get any larger than that, the skin becomes brittle and the seeds in the rounded end become large, surrounded by stringy pulp.
Could you eat them? In a pinch, sure, but they won’t be the tender, nutty, silky-when-cooked produce you’ve worked so hard to grow.
And this is equally important: When you don’t pick the ripe fruits in a timely fashion, the plant will go into seed-producing mode instead of continuing to blossom and grow new fruits.
So it’s a win-win to pick yellow squash early and often.
Depending on your personality, you may need to set a cell phone reminder near the time when your plants should be reaching maturity and producing young fruit, or note it in your gardening journal.
You can find the anticipated number of days to maturity on your seed packet or in the seed catalog description.
Use a sharp, clean paring knife to cut the squash from the plant. If you try to twist it off with your hands (don’t ask me how I know this…), you might uproot the plant or damage the vine.
Handle the fruits carefully – it’s pretty easy to accidentally snap the narrow necks clean in two. If you do, just cook them immediately so the exposed surfaces don’t dry out or go moldy.
If you can, eat these tender, tasty veggies the same day you harvest them for a sublime flavor.
But if you aren’t able to prepare them that quickly, they’ll be okay on the counter for a day or two. Otherwise, store them in the fridge.
Be careful not to store squash in the same bag or area of the kitchen as any fruits or vegetables that produce ethylene, such as bananas, apples, tomatoes, or melons, which can make them develop brown spots and rot far more quickly.
Note that stored summer squash that are exposed to temperatures below 41°F may sustain chill damage which makes the texture mushy after they return to room temperature.
Standard food safety measures dictate that refrigerators should be set to 40°F or below, so again, using freshly harvested squash ASAP is preferable to refrigerated storage.
Freezing squash intentionally is still a good way to preserve it, but you’ll want to grate it first or blanch it in hot water, followed by a cool rinse before freezing.
We’ll discuss the many ways to preserve crooknecks to enjoy in the cold months next. Read on!
Preserving
I like to do my best to reassure gardeners growing a summer squash such as crookneck for the first time, but I will not go so far as to tell you that you’ll be able to salvage overly-mature fruits by preserving them.
It’s a common rookie mistake to wait too long to pick ripe squash, one which I hope you’ll avoid.
Those too-large, pithy, seedy squashes with the extra-large seeds won’t taste any better when you preserve them.
With that not-so-encouraging news out of the way, let me add that a properly harvested and preserved bounty from the squash garden can expand your homegrown food options well into the winter.
Start by making sure you pick the fruits when they’re still four to six inches long.
If they grow bigger than that, you may be able to cut the hard rind off and scoop out the seeds to yield a bit of flesh you can steam, stir fry, or boil, but that kind of pulp isn’t high-quality enough to try to save for the long term.
Instead, concentrate your efforts on the small, firm, and practically seedless squash you harvest.
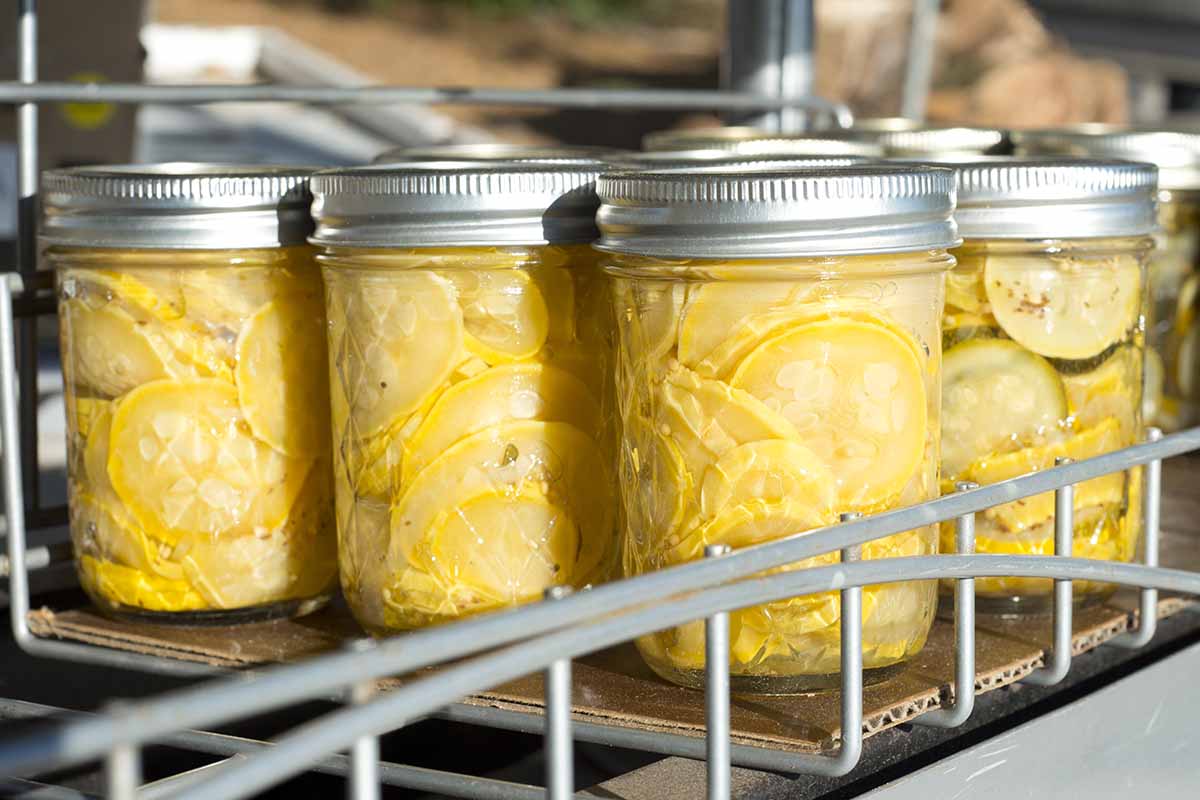
My favorite way to stock up is by making squash pickles.
You can also dehydrate thin slices of crookneck squash that you sprinkle liberally with your choice of salt and other seasonings.
Use your oven on a low temperature or a dehydrator to let the slices dry out and get really crispy. Place them in an airtight container and store them somewhere cool and dark, like the pantry.
Try grating a bunch of the squash, use it as a substitute for zucchini in bread or muffins, and freeze those.
Starting to get the idea? There are lots of appealing options here!
Here are two more for you:
Consider marinating fresh chunks in a store-bought or homemade vinaigrette and freeze the mixture to thaw and grill or roast later.
Or, make a batch of summer vegetable soup featuring plenty of these tasty cucurbits, and freeze portions in the size your family is most likely to use throughout the coming winter.
Recipes and Cooking Ideas
Crookneck squash is a core ingredient for summer side dishes and an inspiration to create new appetizers, salads, and even casseroles.
It has such high yields that you’ll have plenty for both the basics and some experimentation.
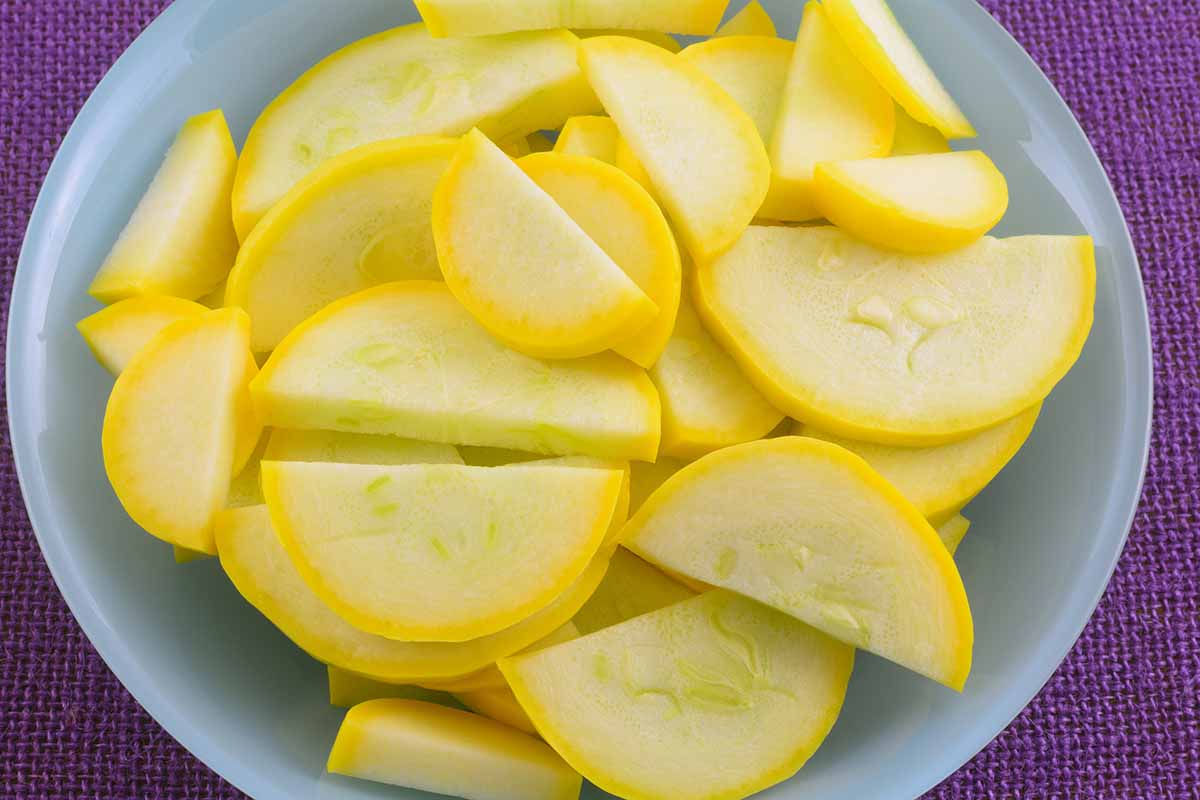
You can enjoy the young, delicate fruits cut into rounds or matchsticks and added to a platter of crudites. Just be sure to wash them and let them air dry on a clean dish towel ahead of serving.
Baba ghanoush hummus complements the mild, nutty flavor of raw squash on a veggie tray. Find the recipe for this tasty eggplant and legume dip on our sister site, Foodal.
For a side dish, remove the stem end, slice, and steam pieces of crookneck squash or poach them in vegetable or chicken broth.
To make a base for a shrimp or chicken entree, stir fry rounds of crookneck squash in vegetable oil, or braise it in olive oil.
I like to add minced garlic and sliced green onions to either preparation, but you should add other veggies, sauces, or herbs to suit your taste, along with your protein of choice.
Or, try a casserole with crookneck squash as the main ingredient.
There are loads of appealing options, but do keep in mind that you can make this type of dish throughout the year, not just in the typical comfort food season of autumn.

Foodal offers a green bean and summer squash casserole recipe that’s handy for using up both types of extras from your veggie garden at season’s end. Check it out!
As for those appetizers I alluded to, consider deep- or air-frying rounds, chunks, or planks of this or any variety of homegrown summer squash.
Start by substituting yellow squash rounds for the zucchini in Foodal’s recipe for fried zucchini with citrus sauce, and then experiment with coatings, cooking methods, and dipping sauces until you’ve established your favorites.
Quick Reference Growing Guide
| Plant Type: | Annual vetetable | Water Needs: | Moderate |
| Native to: | Mexico | Maintenance: | Moderate |
| Hardiness (USDA Zone): | 3-10 | Tolerance: | Heat, drought |
| Season: | Summer | Soil Type: | Organically rich loam |
| Exposure: | Full sun | Soil pH: | 6.0-7.5 |
| Time to Maturity: | 40-60 days | Soil Drainage: | Well-draining |
| Spacing: | 18 inches | Companion Planting: | Beans, borage, corn, dill, marigolds, nasturtiums, parsley, peppermint, spinach |
| Planting Depth: | 1 inch (seeds), depth of the root ball (transplants) | Avoid Planting With: | Potatoes, other cucurbits |
| Height: | 24-48 inches | Family: | Cucurbitaceae |
| Spread: | 18-48 inches | Genus: | Cucurbita |
| Growth Rate: | Fast | Species: | pepo |
| Common Pests: | Aphids, cucumber beetles, cutworms, leafminers, spider mites, squash bugs, squash vine borers, thrips, whiteflies | Common Diseases: | Alternaria leaf blight, bacterial leaf spot, bacterial wilt, blossom end rot, cucumber mosaic virus, downy mildew, fusarium crown and foot rot, powdery mildew, septoria leaf spot, verticillium wilt, yellow mosaic virus |
The Curvy Yellow Cucurbit
Whether you’d like to grow the old favorites you remember from childhood, or you’re looking for a reliable way to harvest a substantial amount of your own food, crookneck squash are ideal for the home garden.
Do you already grow these prolific vegetables? Drop a comment below and share your experience, or ask a question. We’ll do our best to get back to you ASAP!
And be sure to check out these summer squash guides next for more information:

So fun to read! I am also in my late twenties trying my hand at growing veggies and my hometown is Williamsburg as well! ☺️
Aw, Taylor, thanks for reading! We lived on Matoaka Court and I still have many close friends in the area. And good luck making it through the scorching July weather in the ‘Burg! I’ll be pulling for you.
I thought I would grow some plants and though them out this year. I overdid the tomato plants and now I have 16 plants and only 3 cucumber plants plus 2 squash plants (zucchini) but still excited to watch and see what happens. I live in SE Kansas.
Hello Bonnie. Good luck with your overabundance! You may find that three cucumbers and two squash are plenty, as long as you give them enough space for air circulation and make sure they have even, ample moisture throughout the hottest part of the summer. Good luck with all those tomatoes! They, too, will benefit from at least a couple of inches of space between the plant, an inch of water every couple of days when it doesn’t rain, and of course staking. If you end up with too many at harvest time, check out our guide for lots of tips… Read more »
Have a netting atop my umbrella yet found black worms in dirt or they were in the soil to egin with and I bought organic. lil aphids a few. Texas hot. Sure glad I found your post to not water top of leaves, which I was doing to cool them off.
Have blooms and they fall off, but no fruit yet?
It could be that the bees haven’t found the flowers to help with pollination. Your plants should have both male and female flowers. I have read this can be done with a cotton swab. Using the end of the swab gently pass it over the stamen of one flower and then using the same swab do the same over another flower.
Hello Susan. That is certainly a possibility, thanks for the suggestion.
Hello Deborah, I hope this info finds you in time for the next growing season.
Often the male blooms fall before any female blossoms begin to form fruit. I hope that was the only hold-up, but you can find other solutions in this zucchini guide that will also apply to crookneck squash.
Good luck!