Think there can only be one queen? Think again!
When you know how to propagate epiphyllums from cuttings, you can grow your own new plants and create a multitude of beautiful epiphyllum queens to surround you!
We link to vendors to help you find relevant products. If you buy from one of our links, we may earn a commission.
Growing epiphyllums from cuttings is not a difficult project, but there are a few not-so-obvious tricks involved that you’ll want to know about before you get started.
I’ve boiled down the epiphyllum propagation process to five easy-to-follow steps. Here’s a sneak peek at what’s involved:
How to Propagate Epiphyllums from Cuttings
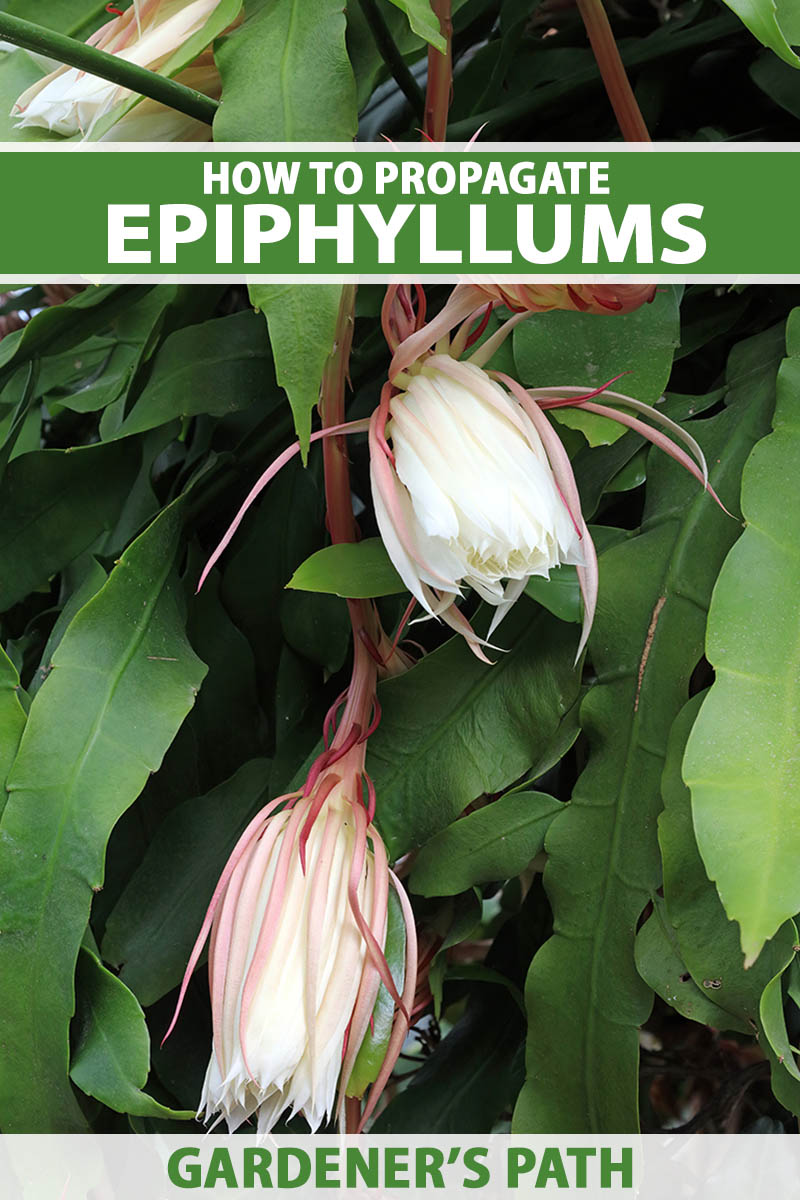
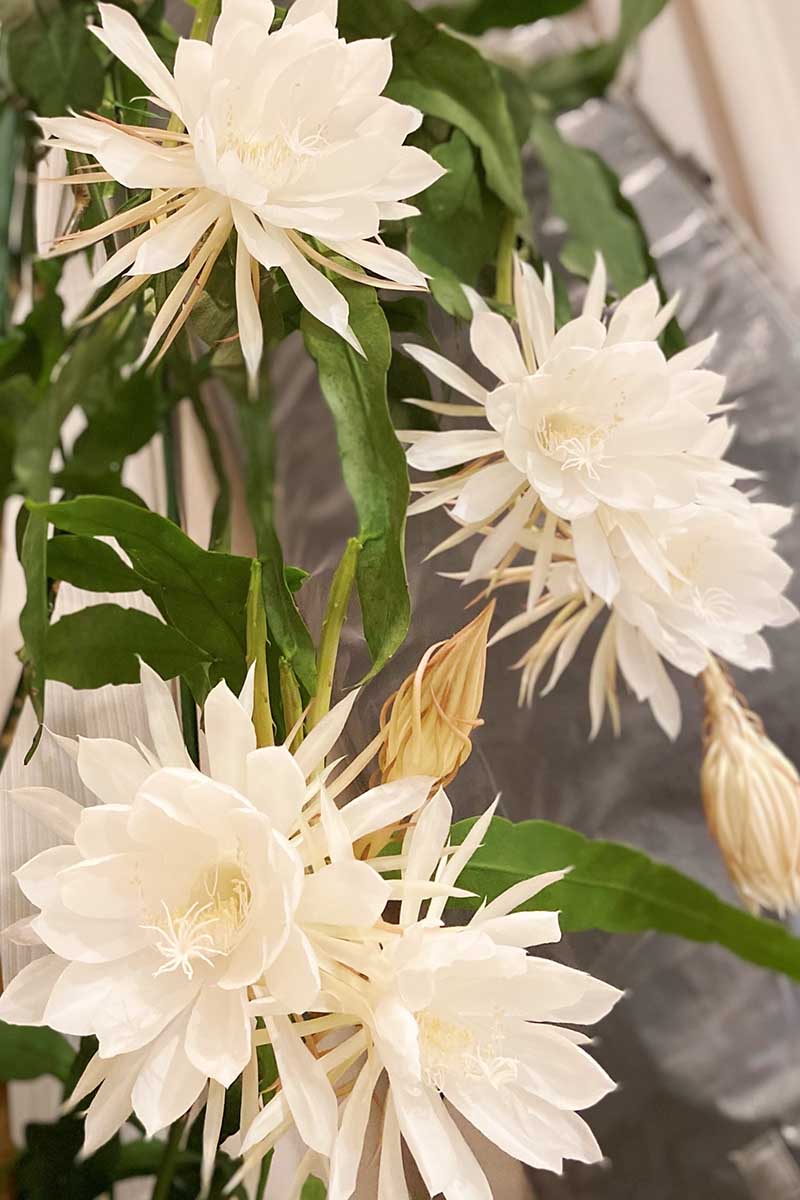
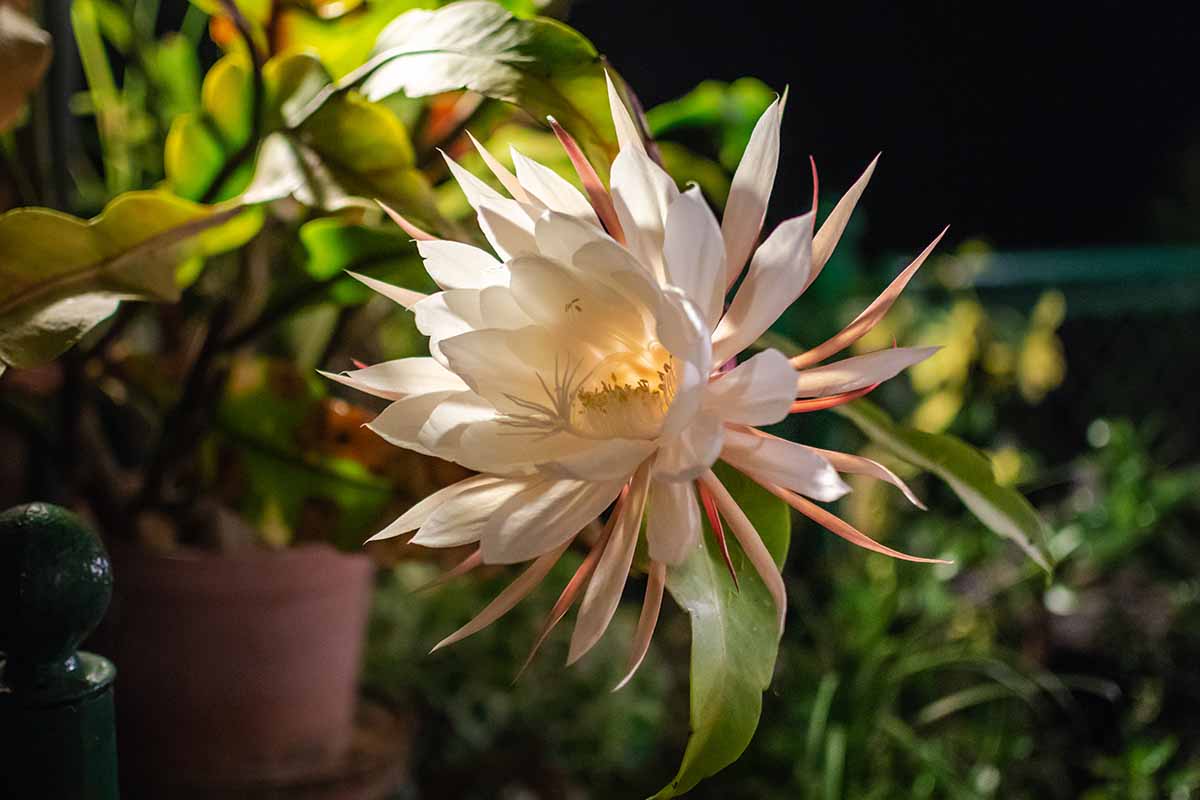
I’m going to walk you through the propagation process using queen of the night (Epiphyllum oxypetalum).
Before we start propagating, let me clear up some potential confusion around the common names of the subject of our article.
As sometimes happens in the botanical world, there is a bit of confusion as to which plant is the rightful owner of the common name of this plant, “queen of the night.”
(I have to say, I’m not sure that the plants really care what we call them anyway, but we indoor gardeners have to have some way to make sure we’re all on the same page when growing these various plants!)
So for us humans, let me point out that there are (at least) two species that go by the common name “queen of the night” – as well as another name, “night-blooming cereus.”
One of the plants is a forest cactus, and that’s the one we’re going to use to describe the propagation process in this article. This queen of the night is known botanically by the species name Epiphyllum oxypetalum.
Another contender for these two common names, classified as Cereus repandus or C. peruvianus, looks more like what you might expect from a cactus, the type you’d find growing in a desert landscape.
Sometimes this other cactus is called “Peruvian apple cactus,” but it is most well-known by the names “night-blooming cereus” and “queen of the night.” Of course it is!
(This should give you an inkling as to why botanical names are so important.)

What these two different species of plants have in common, besides both being cacti, is that they bloom at night, and their blooms are quite similar looking. Herein lies the confusion, no doubt.
However, there are some notable differences.
One of these plants – the epiphyllum – grows as an epiphyte in humid forests, while the other is a terrestrial plant that grows in arid deserts.
The desert cactus has large, columnar stems with sharp spines. The forest cactus, on the other hand, grows long, flat stems that are vine-like, and have no sharp spines.
Because of these differences, propagation will be a bit different between the two plants.
In this article we won’t be talking about the Peruvian apple cactus. Instead we’ll focus on propagating the epiphyllum – which is also called “Dutchman’s pipe cactus,” by the way.
And although we’re going to focus on propagating new specimens of this particular species of epiphyllum, the technique is also the same for other types of epiphyllums.
Not sure how to take care of your new plants once they’ve rooted? Be sure to review the growing and care requirements for epiphyllums in our guide, or bookmark it to read later!
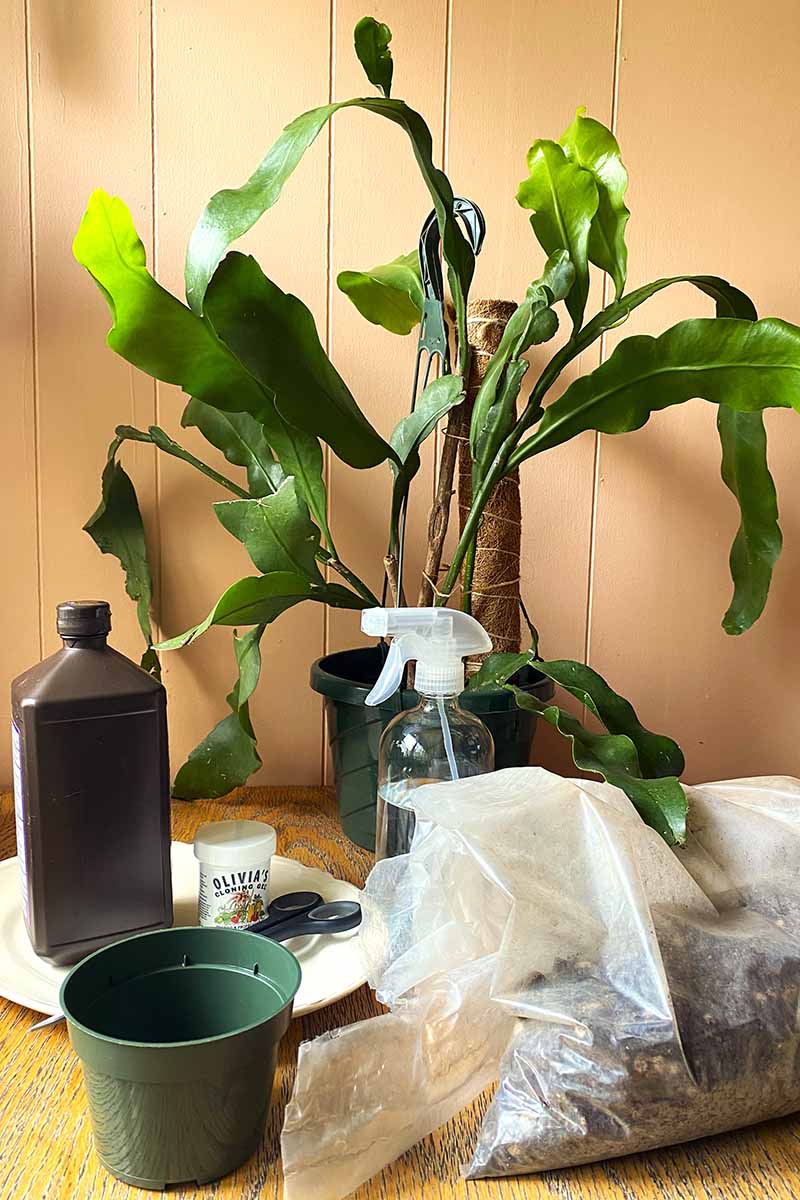
1. Gather Your Supplies
There are a few things you’ll need for propagating epiphyllums. I’m going to let you know what these supplies are and offer a few suggestions of where you might buy them.
First, you’ll need some epiphyllum cuttings, of course!
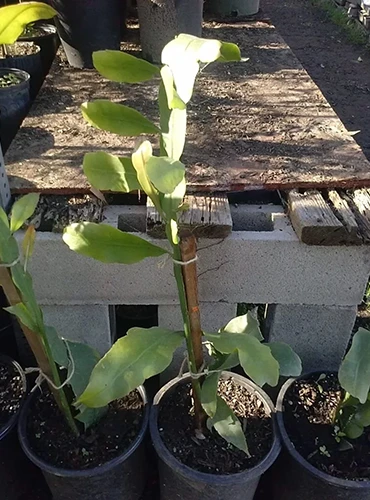
Make sure the cuttings are six to nine inches long, because part of the stem is going to be sunk into the growing medium. You want to make sure there’s still plenty of stem left above the soil line after planting.
I recommend you take more than one cutting to propagate if possible, because this will increase your chances of success. And nothing’s better for gardening morale than propagating new plants successfully!
Wondering where to source epiphyllum cuttings for this propagation project?
Assuming you don’t already have a plant to take propagation material from, you may be able to acquire them from a friend, a neighbor, or a fellow member of a houseplant forum – or you can purchase them online as well.

For instance, you can find eight- to 10-inch leaf cuttings of E. oxypetalum available for purchase via Amazon.
If growing the exact species E. oxypetalum is important to you, be vigilant in choosing a vendor – not all vendors that sell “queen of the night” epiphyllum cuttings for propagation are selling this species.
You might be interested in propagating a plant from a cutting in order to save money – as well as for the fun of it, of course!
But if you’re interested in practicing your succulent propagation skills and don’t mind buying a mature epiphyllum to use, one option is these live one- to two-foot E. oxypetalum plants that are available for purchase via Walmart.
In addition to queen of the night cuttings for propagating, you’ll also need a suitable growing medium.
While some houseplant gardeners like to use pure perlite for rooting epiphyllums, I tend to use the same growing medium to root cuttings as I do for my mature forest cacti.
My personal favorite is Tank’s Pro Cactus and Succulent Mix, a growing medium that is peat-free, and includes compost, coconut husks, and pumice, providing excellent aeration.
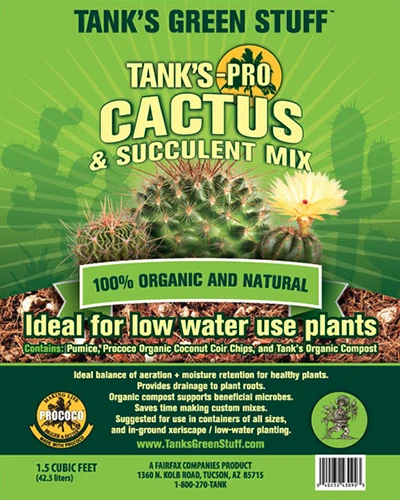
Tank’s Pro Cactus and Succulent Mix
You’ll find Tank’s Pro Cactus and Succulent Mix in one-, eight-, or 16-quart bags from Tank’s Green Stuff via Arbico Organics.
Next on your supply list is a plate or shallow box, a pair of scissors (if you are going to be taking a cutting from a live plant), and some hydrogen peroxide to sterilize the scissors with.
You’ll also need some small nursery pots – one for each new epiphyllum plant. Four-inch pots are a good size for this project.
It’s fine to reuse nursery pots from other garden plants, but I highly recommend cleaning them well with soapy water, and then sterilizing them by wiping them down with hydrogen peroxide first.
Finally, there’s one more optional item that you may want to include on your list, and that is rooting hormone, also known as cloning hormone.
Using this product isn’t absolutely necessary – it is possible to root epiphyllum stems without it, but a rooting hormone such as Olivia’s Cloning Gel will increase your chances of success and may speed up the rooting process.
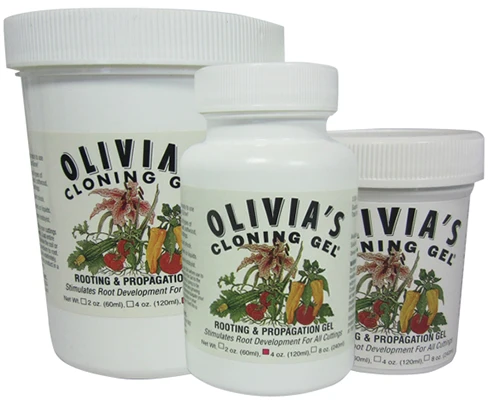
Olivia’s Cloning Gel is available for purchase in two-, four-, or eight-ounce jars from Arbico Organics.
2. Take Cuttings
Now that you have gathered all of your propagation supplies, let me pull the rug out from under you and tell you to put aside that growing medium and those nursery pots for now – you won’t need them for another 10 days.
If you haven’t done it yet, now’s the time to take cuttings from a parent plant – let’s call her Mama Queen of the Night.
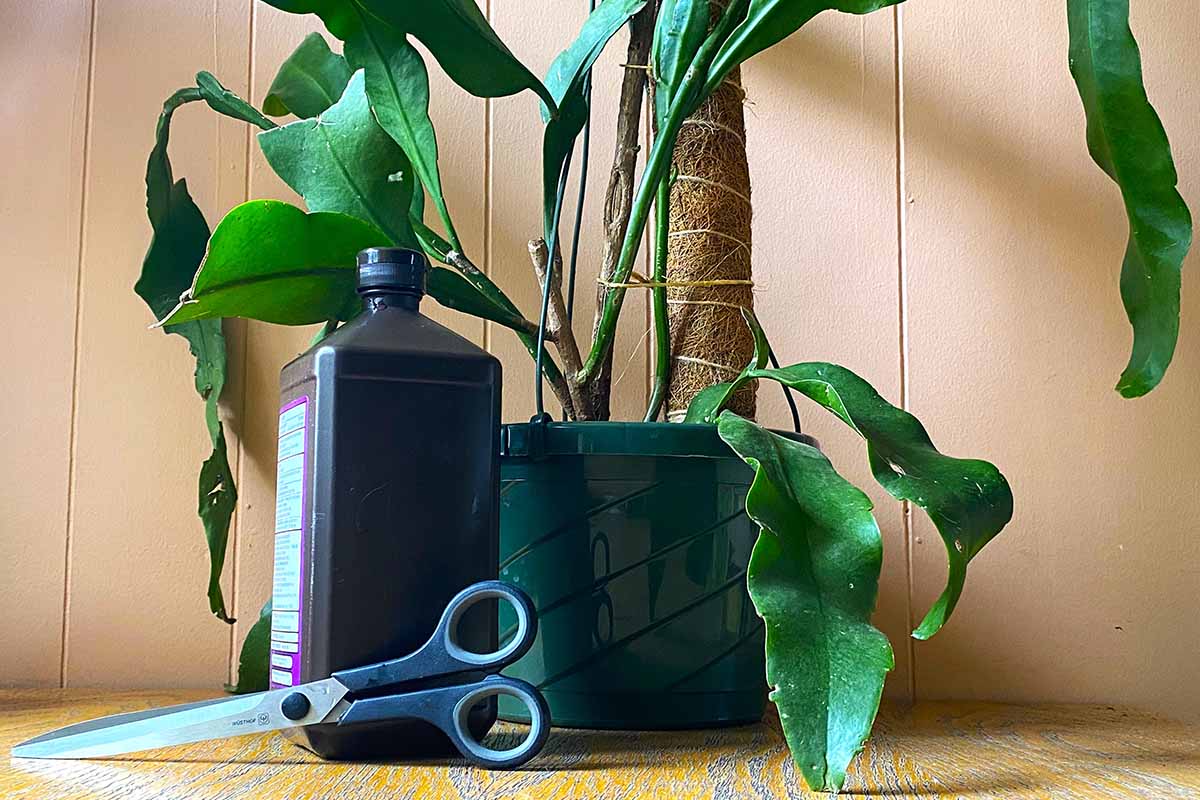
Use a pair of sharp scissors for this, and wipe them down with hydrogen peroxide first to sterilize them. The long blades of scissors are better suited to cutting across the wide stems of epiphyllums than garden pruners.
Now, before you use your scissors, consider this: the best stems for propagating are last year’s stems, ones that still have viable areoles.
This year’s stems will be more translucent, and a lighter green color. They aren’t ready for propagation yet, while stems from two years ago may not have viable areoles, so those aren’t suited to propagation either.
Look for stems that are darker green, then inspect the areoles.
An areole is a small indention in the side of the stem where new stems and flowers grow.
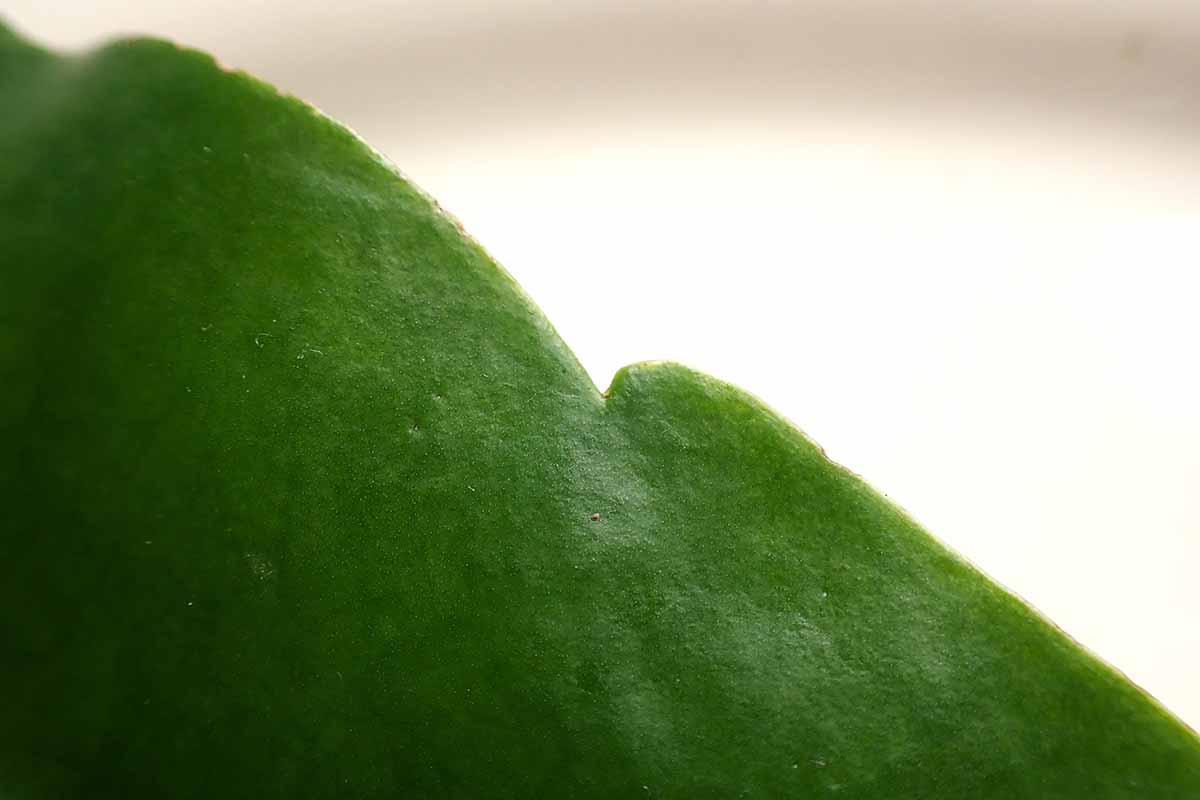
Areoles that are no longer viable for producing new stems or flowers will have a brownish color.
In addition to choosing a stem from last year’s growth with viable areoles, choose stems that are strong and healthy for propagating.
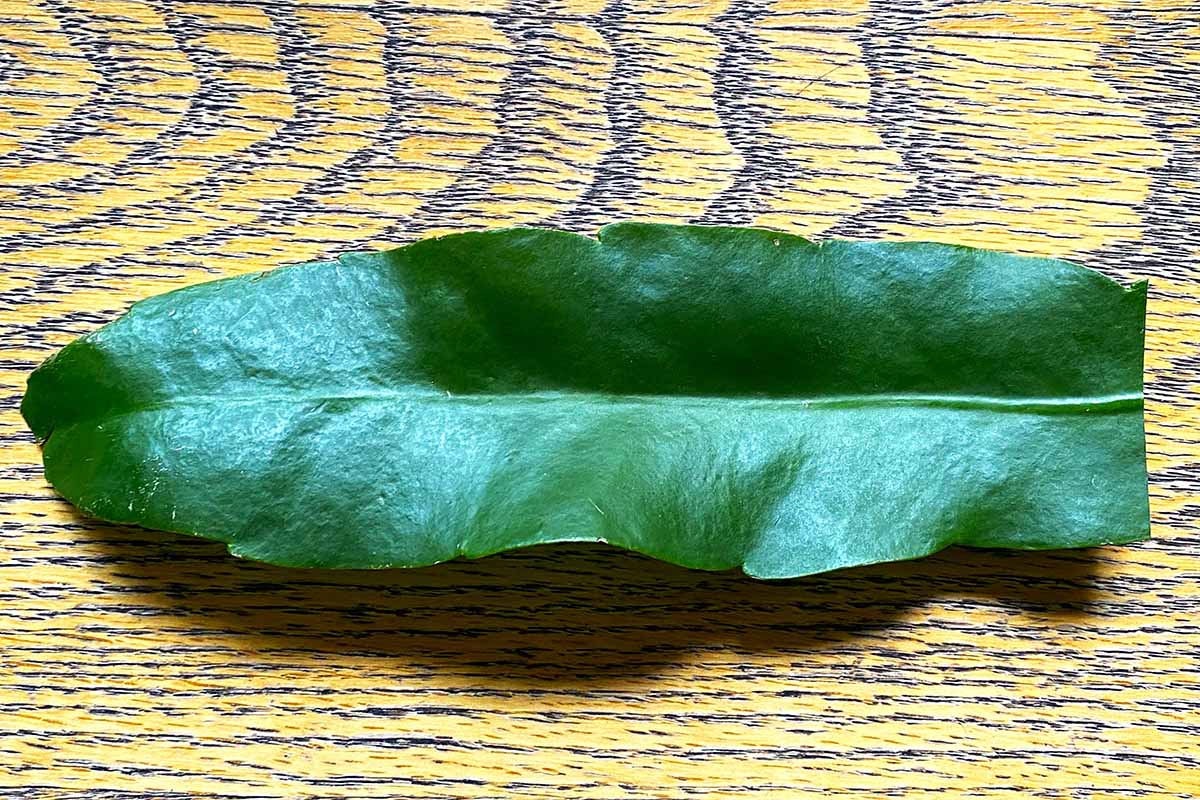
Once you have identified the leaves you’d like to harvest, take stem sections that are six to nine inches long, keeping in mind that this length is needed because part of the stem will be inserted deeply into the growing medium.
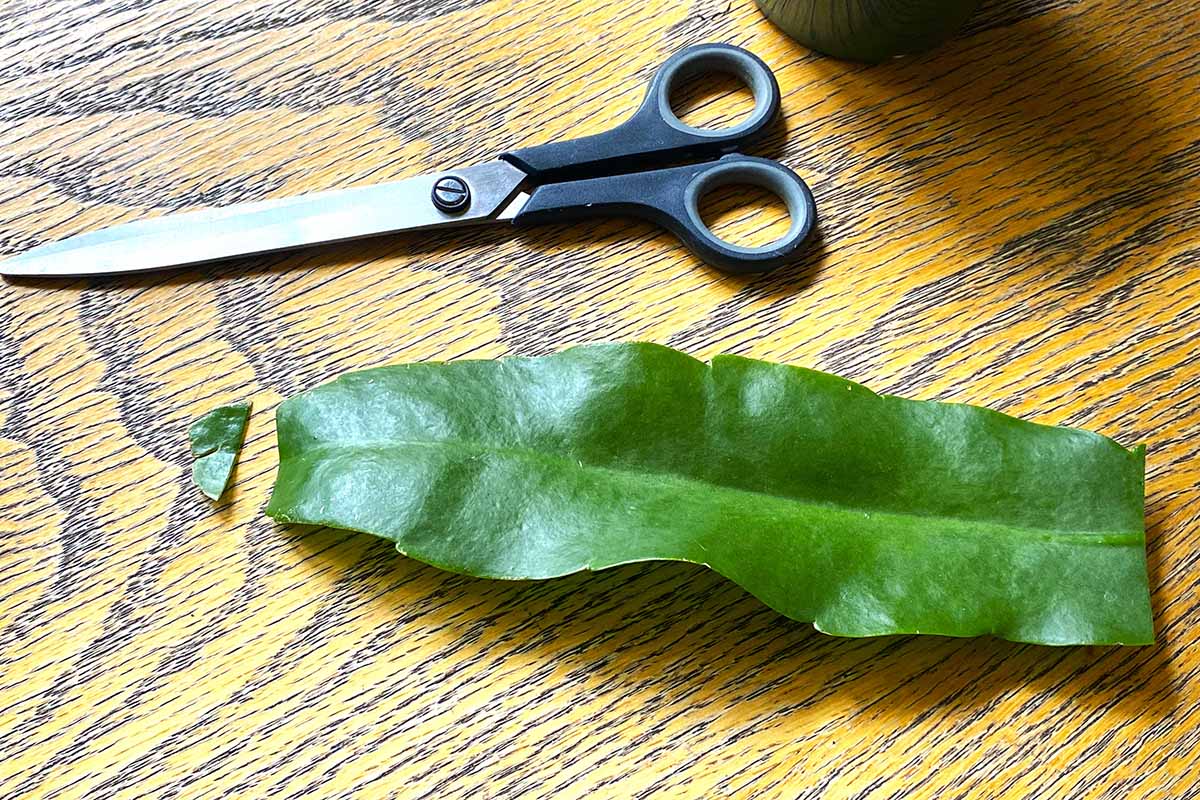
Now, trim off the top third of an inch of the cutting to encourage basal growth.
3. Let Cuttings Heal
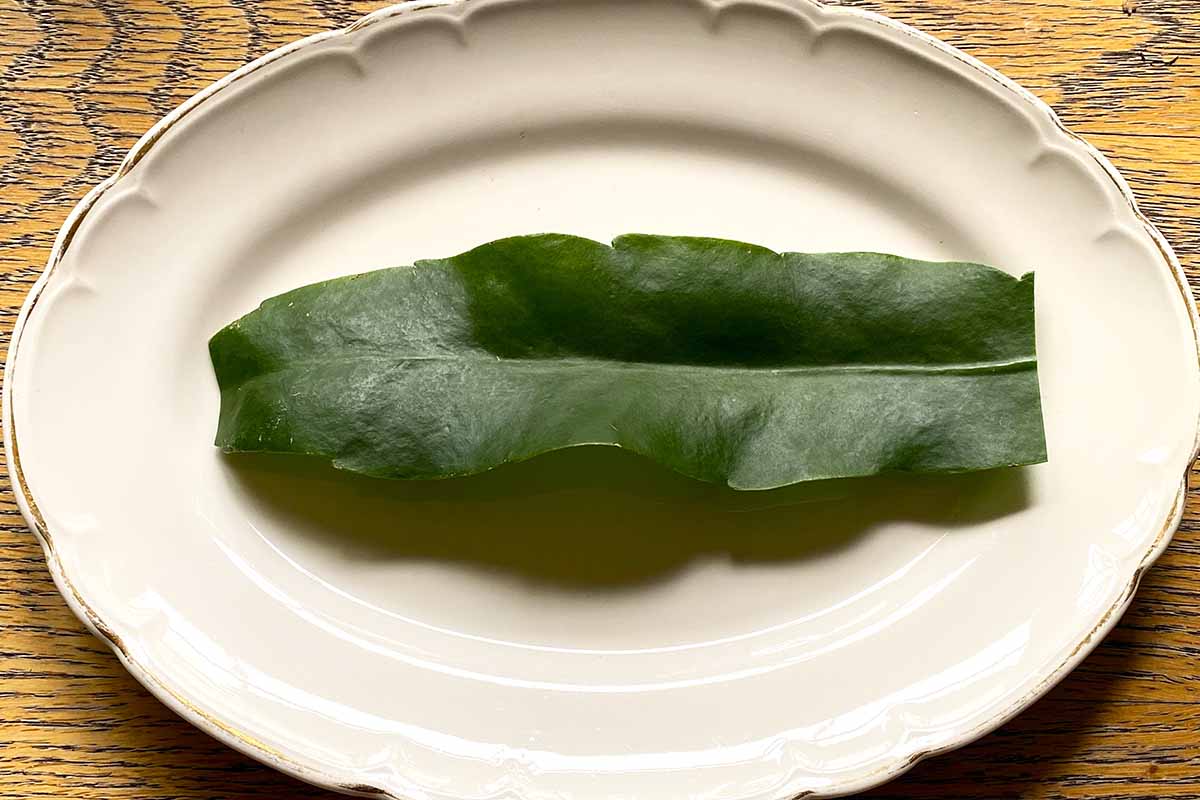
Grab a plate or choose some other flat surface that you’re okay with leaving your cuttings on for 10 days.
Now that you have taken your queen of the night cuttings, you are not going to insert them into the growing medium right away. Nope, not yet!
Instead, you’ll allow the cuttings to heal for 10 days in a cool, dark location. This is a standard step when propagating cacti.
If you’re planning to use rooting hormone, this is the time to apply it – before you set the clipped stems aside to heal.
Apply rooting hormone to the stem wound as well as the bottom two to four inches of the stem – the part you’ll be placing in the soil, up to the bottom three or four areoles.
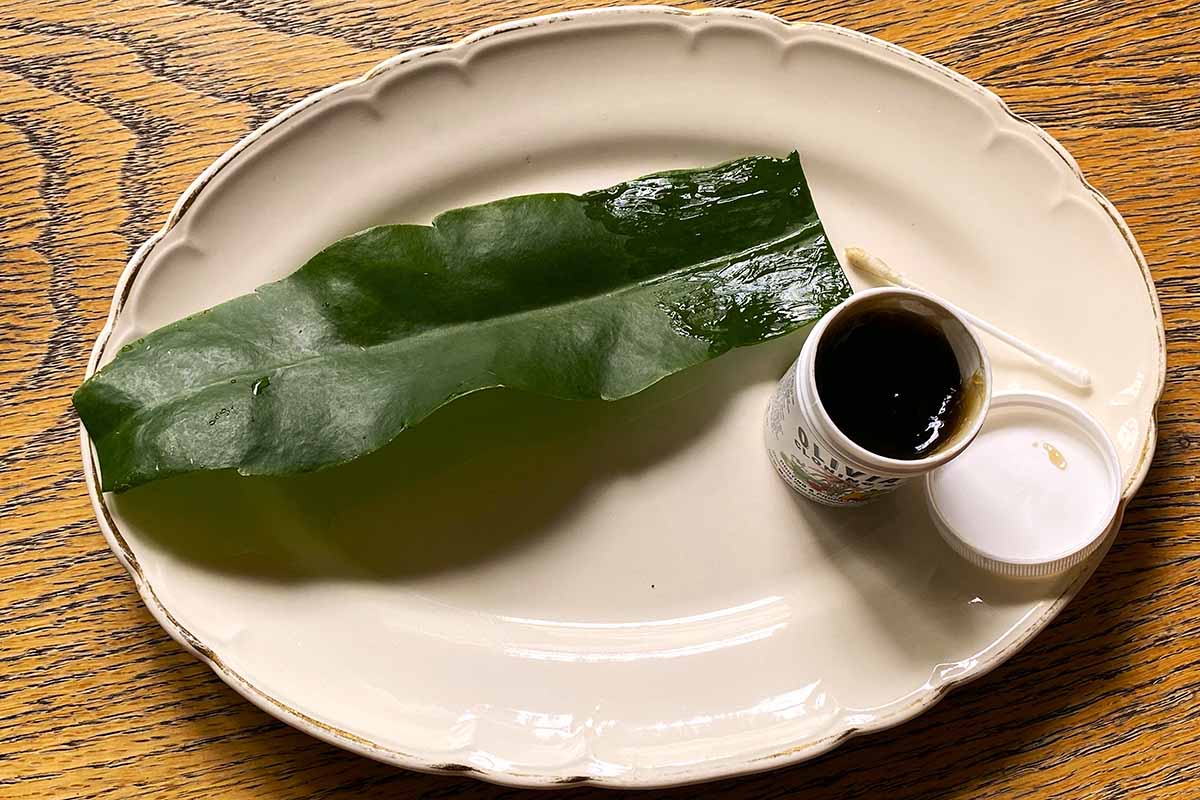
Once you’ve finished applying rooting hormone, lay the clipped epiphyllum stems on a plate or perhaps in a shallow box, and place in a cool, dark location, allowing them to heal for 10 days.
If, like most of us, you’re prone to forgetting about things that are stored out of the way in cool, dark locations, be sure to set yourself some sort of reminder on a calendar or make a note in your gardening planner.
4. Plant Cuttings
Once a callus has formed on the bottom of the clipped epiphyllum stems, it’s time to plant them!
You’ll need the nursery pots and growing medium for this step in the process.
When considering how deep to plant the stems, you’ll want to situate three to four areoles below the soil.
With one hand, hold the epiphyllum cutting in the nursery pot – it’s fine if the base of the stem rests on the bottom of the pot – and with the other hand, scoop growing medium into the pot.
Place enough growing medium in the nursery pot so that the stem will remain upright by itself, but don’t pack the soil in too tightly.
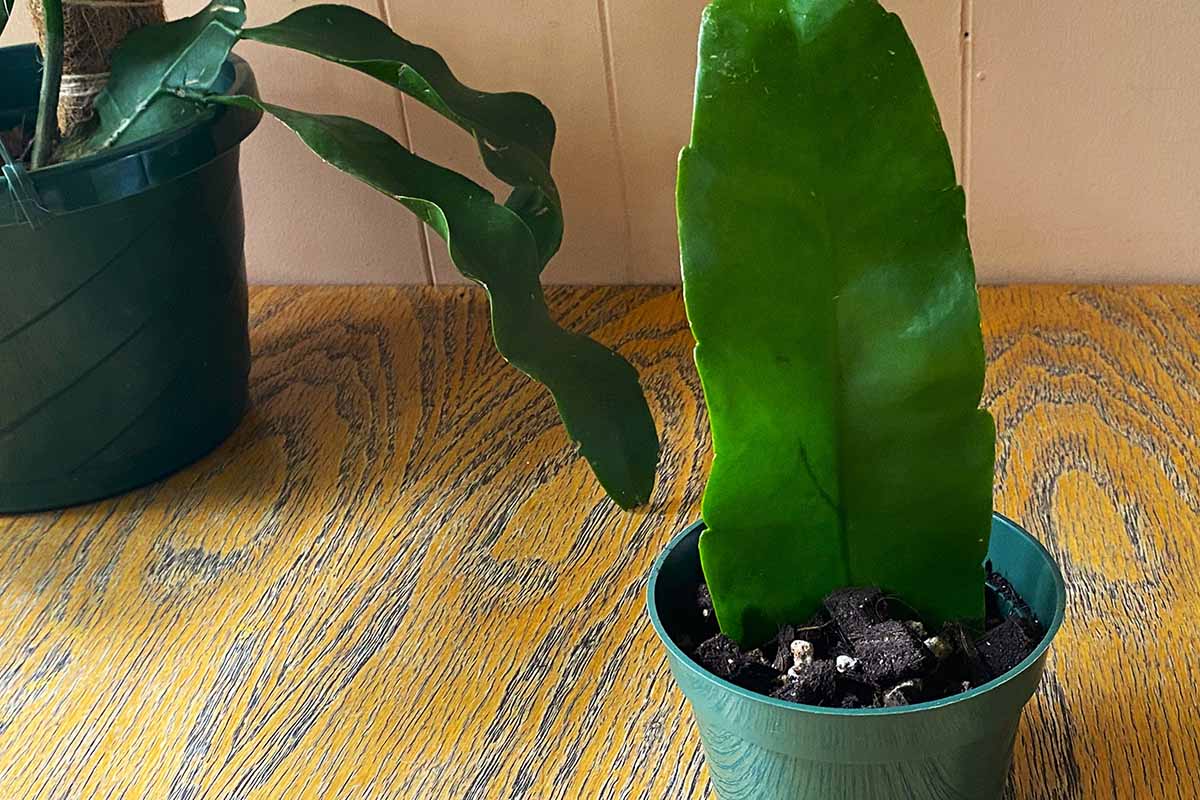
And as you’re filling the nursery pot, be sure to leave an inch of space between the soil surface and the rim of the pot to prevent any growing medium from spilling out when you water – though it’s not time for that yet!
5. Wait Before Watering
Did you think it was time to give your new plant a drink? Not quite!
For best results, it’s preferable to withhold water for two weeks.
Yes, this is probably the most counterintuitive and difficult part of the whole process.
Again, here’s another chance to put that online calendar or gardening planner to good use, and schedule a time for watering.
If the thought of not offering this propagated plant a drink from your favorite houseplant watering can makes you cringe, here’s something that might make you feel better: you can mist the queen of the night cuttings (but not the soil) daily to help keep them hydrated.
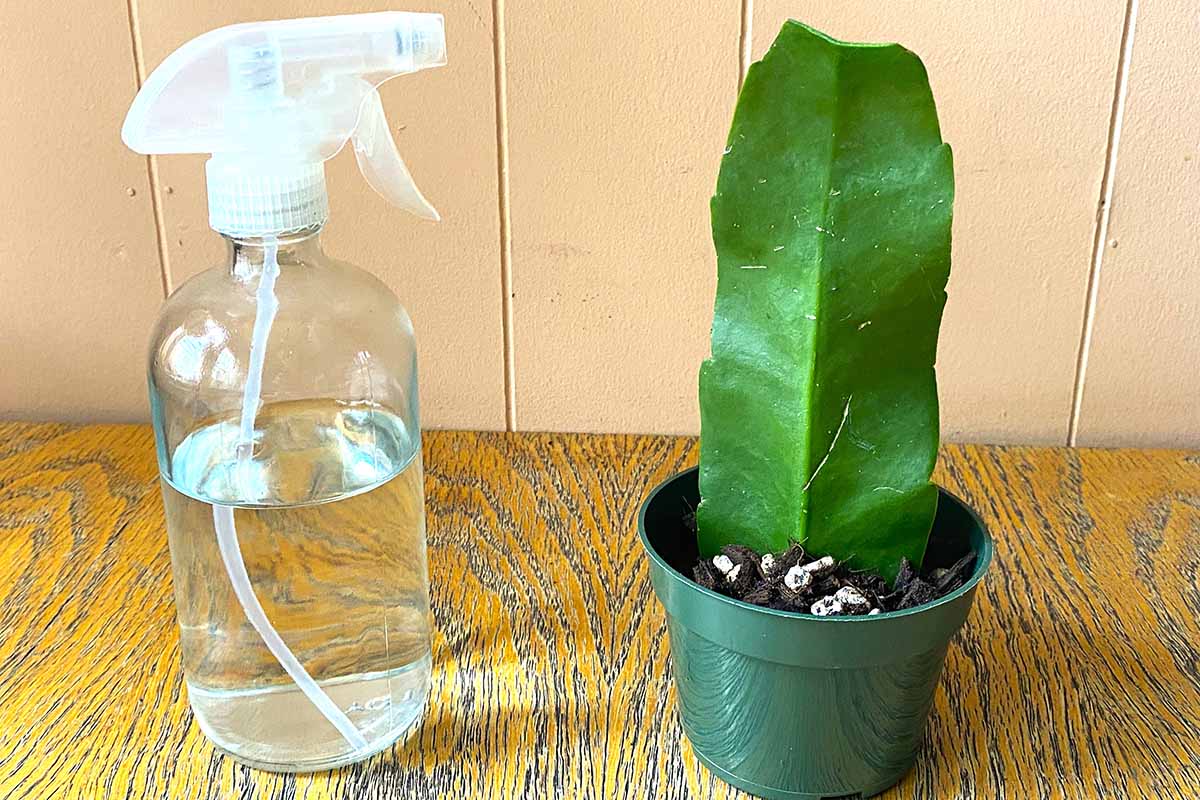
Keep these baby queens out of direct sun if temperatures are very hot – indirect bright light is a great choice.
And if you’re propagating during the winter, make sure to keep temperatures above 65°F.
Within two weeks the epiphyllum cuttings should be rooted, and should be starting to put out new growth.
At this point, you can begin to water normally, keeping the growing medium from ever going bone dry.
Easy as Pie Epiphyllum Propagation
And that’s it! You’re now ready to care for your propagated epiphyllum as you would a mature plant.
The method described for propagating epiphyllums in this article is just one way to tackle this project, though epi pros tend to consider it the best way.
Alternatively, you might choose to root several queen of the night cuttings in one larger pot, for instance.
Also, some indoor gardeners choose to root their epis in water rather than growing medium – though rooting in growing medium is better training for roots than water.
Have you tried a different method than the one presented in this article? How did it go for you? Let our readers know in the comments section below!
Want to keep feeding your cacti and succulent love? We have provisions for you right here:


I have a red one that is blooming now! It was upon my honeymoon (1973) it will be 51 years old this year! 9/4/73 It’s huge! Also have the Queen of the Night! I just root mine in water. I have taken cuttings and let them cure over … it’s helps w/plant rot! I ♥️ mine!
Hi Beverly, thanks for sharing your experiences with these wonderful plants! Happy epiphyllum gardening!
I’ve got recently two weeks ago 8 cuttings 4 of them have rooted nicely ,The Other 4 haven’t started …Will they root or is there something I’m not doing correctly
Hi Roger,
Sometimes these are slower to root, so I would give them some more time! As long as the cuttings still look healthy, you can keep waiting.
Hope this helps!
Hi, I have one plant for 5 years or so.
this year it is growing so much I have it now on the floor but shooting stem is touching the ceiling without any leaves. I want and need to cut but don’t know where. Can those stems be propagated?
Hi Ako,
You can cut back any stems that are too long and compost them. For propagating, it’s best to use the flattened ones that are from last year’s growth.
Hope this helps!