A bonsai makes a dramatic artistic statement no matter what shape the artist chooses, but there is something so striking about the cascade style.
That elegant arch and gracefully sweeping trunk evoke images of an old, wind-battered survivor clinging to the edge of a cliff.

We link to vendors to help you find relevant products. If you buy from one of our links, we may earn a commission.
A well-shaped cascade requires both a consistent, steady guiding hand and an artist who knows how to shape a tree without leaving any trace of their work behind.
In this guide, we’ll help you towards that end. Here’s what’s to come:
What You’ll Learn
This isn’t a process that can be completed in a week, so the sooner you start, the better. Let’s not wait any longer!
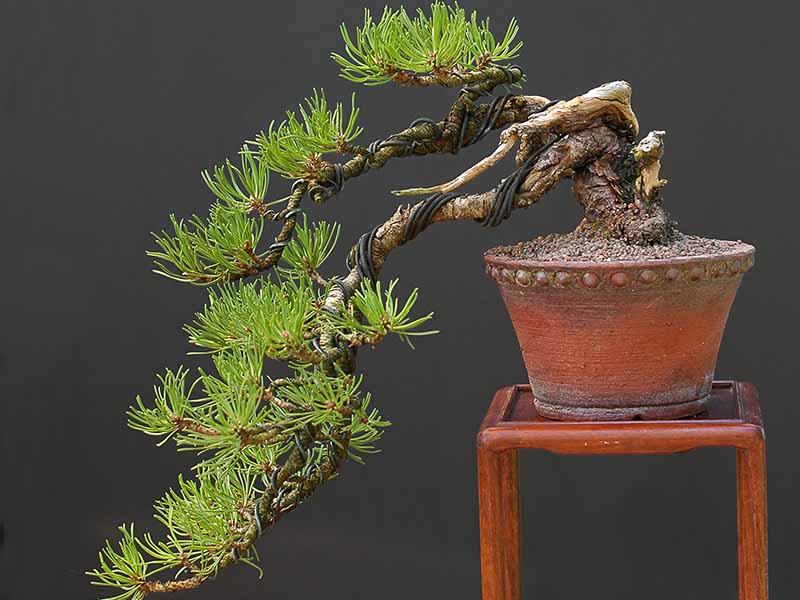
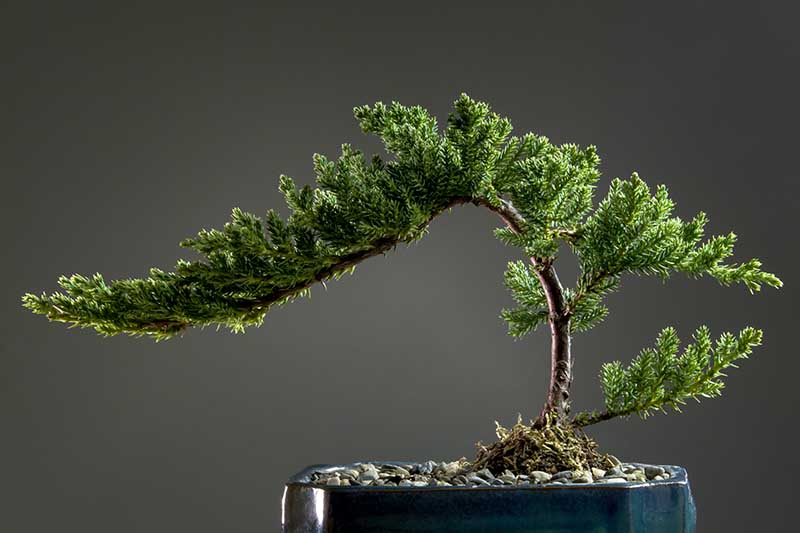
What Is the Cascade Style?
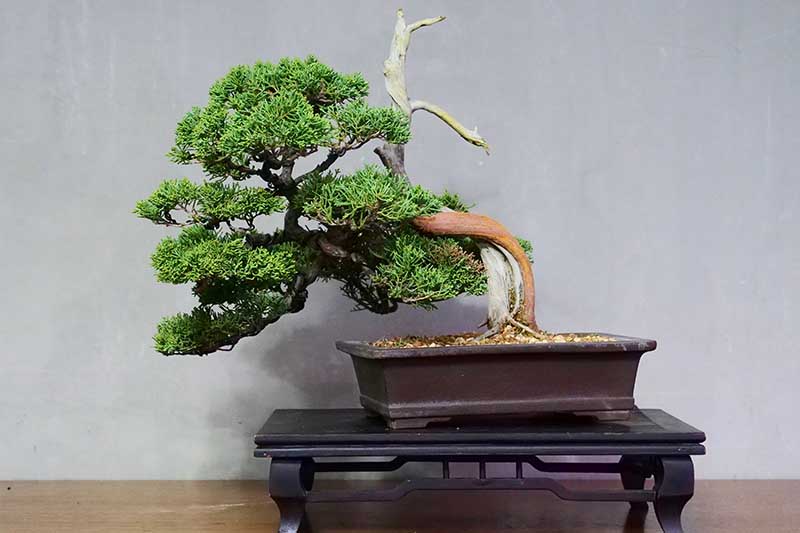
Cascade is a style of bonsai where the tree bends, arching over the side of its pot.
There are two types of cascading style bonsai: cascading and semi-cascading. With the former, known as kengai in Japanese, the apex of the tree extends below the container that the plant is growing in.
Trees in the latter category, known as han-kengai, extend below the top of the container, but the apex doesn’t extend below the base.
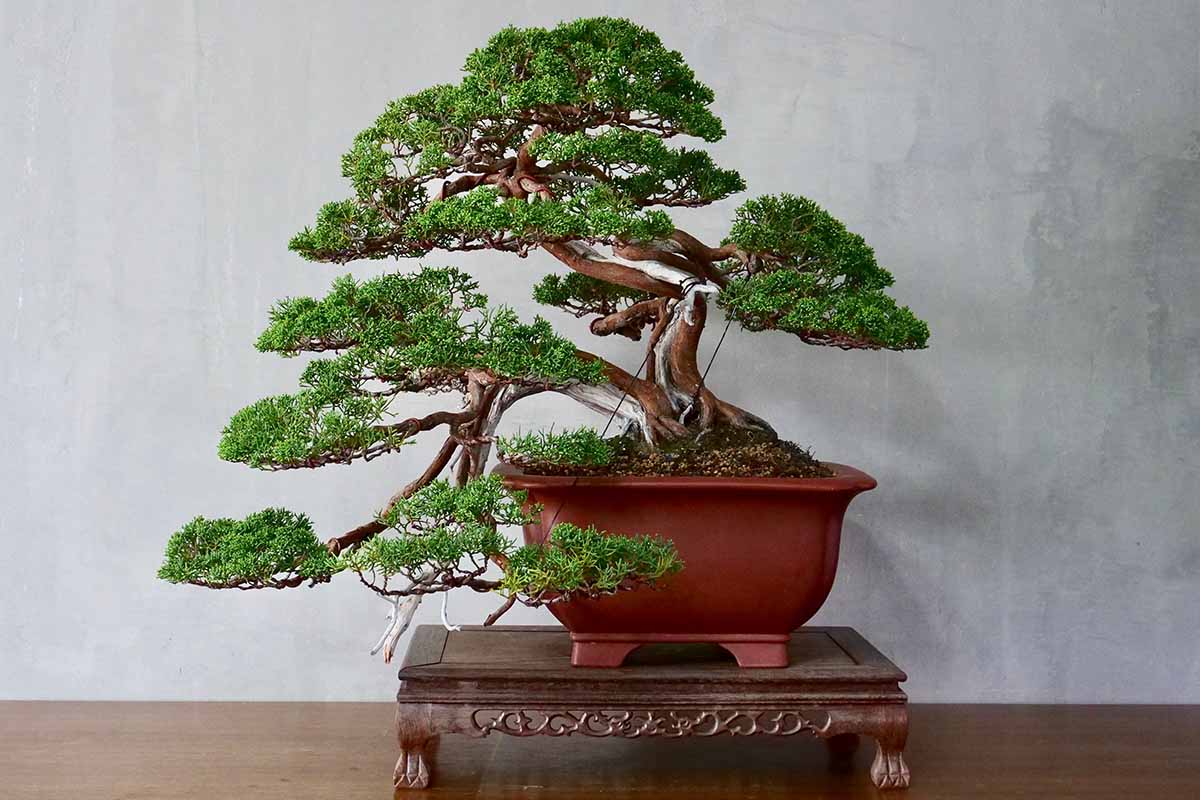
With both, the trunk should grow up for a bit before arching over and growing down. The arc can be gradual or dramatic.
The trunk can extend back up slightly after arching over, or it can continue straight down. It can also wind back and forth and doesn’t need to end with the apex being directly below the base of the trunk, though it typically does.
Regardless of the shape, the overall appearance should be one of balance.
Bonsai always has a “front,” and when you look at the tree from this angle, the whole display should appear balanced. That doesn’t mean it must be symmetrical, just that it should appear to have a sense of overall proportion.
The trunk should never touch the rim of the pot, and if the pot is square, the trunk should cross at or near a corner.
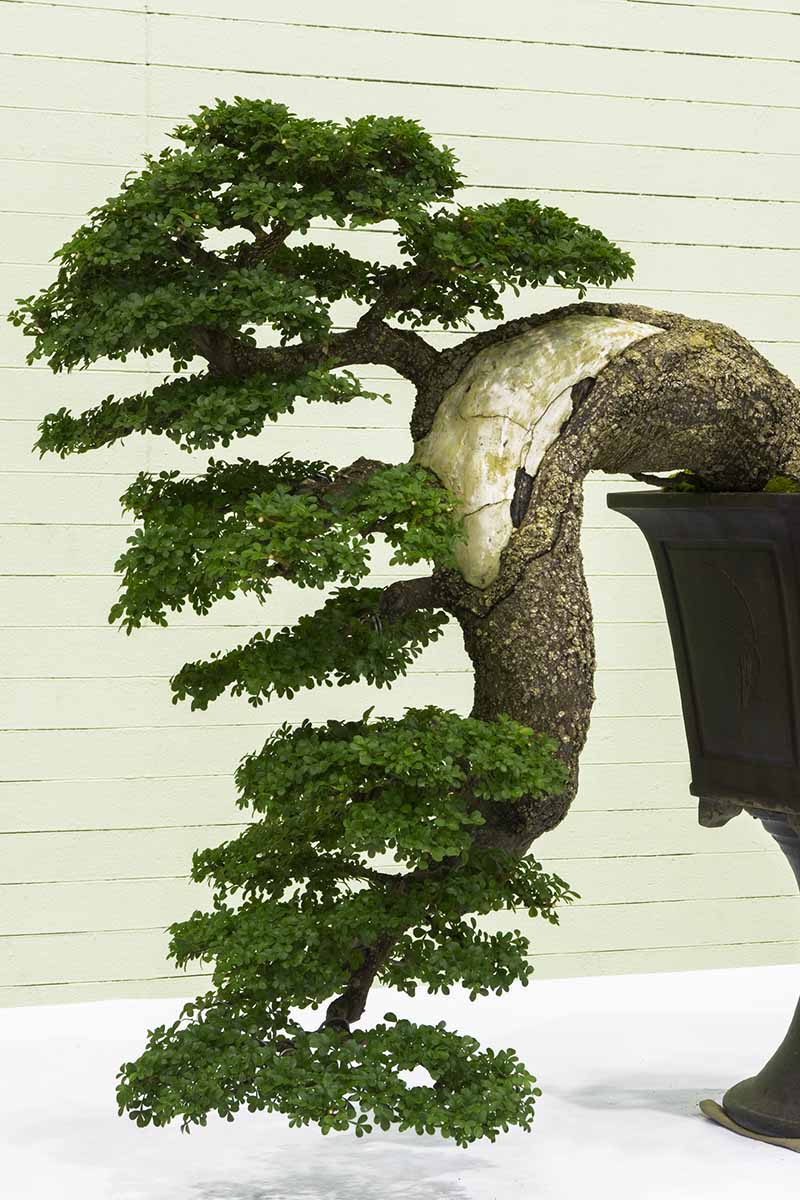
You can further divide these styles into single cascade, and double cascade.
In the first style (also known as informal), a single trunk grows out of the pot, arches over, and continues down, with the bulk of the crown being below the rim.
With a double (also known as formal), a first, smaller trunk creates a sort of canopy over the main trunk. And the main trunk cascades down as in the informal style.
Often, some of the roots opposite the trunk will be exposed to create some visual balance and to mimic how trees grow in nature. A tree that is dramatically curved and tilting usually has heavier roots on the opposite side, to anchor the weight.
The branches should be parallel to the ground, as the branches on full-size trees in the wild are.
Most cascading bonsai are made using evergreen trees like pines and junipers, because these are the kinds that typically grow this way in nature.

You’ve probably seen junipers growing on craggy cliffsides in a cascading shape, but it’s pretty rare to see an elm growing down the side of a rock face.
However, any plant can technically be made into a cascade. Let your imagination run wild. Cotoneaster and jade plants work particularly well.
Most cascading plants are grown in tall, deep pots rather than the wide, shallow ones that you may be more familiar with. This emphasizes the shape of the trunk and foliage.
When to Train
You can work on training your bonsai at any time of year, but new growth emerges in spring and younger growth is easier to train, with less risk of breakage.
If your tree already has a somewhat cascading shape, then training it shouldn’t take too long, perhaps just a year or two. But if you’re shaping a tree that is older or more upright, this process can take years, or even decades.
Potting
Because the bulk of the tree is hanging over the pot, the plant needs to be anchored well.
Young trees with immature roots might need to be wired into the pot to keep the tree from tipping over or pulling out of the substrate. A deep pot helps because it provides room for the tree to grow deep, stabilizing roots.
To anchor a plant, first determine how many drainage holes your container has.
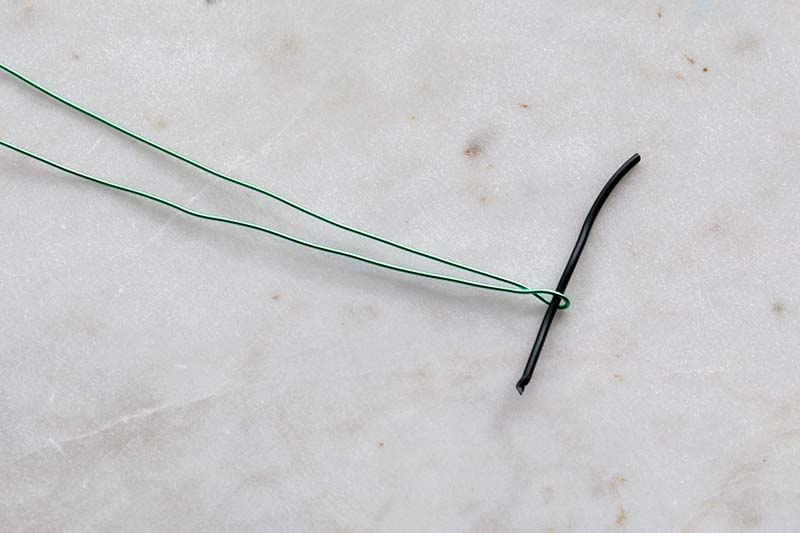
For a single-hole pot, you’ll need a cotter pin, a thick piece of wire, or a small casing nail. Loop a length of wire around the nail, leaving two tails on either side, so that the nail sits in the middle of the length.
You can determine how much length you need by measuring the width of the container at the widest point. Triple this measurement.
Hold the pin or nail lengthwise across the center of the hole on the outside of the container and pull the wire through.
For a multi-hole container, feed the wire down into a drainage hole and pull the wire up through a second hole.
Use the same measurement technique as described above, but add the length of the distance between the two holes to your measurement.
The wire should be pulled evenly between the two holes.
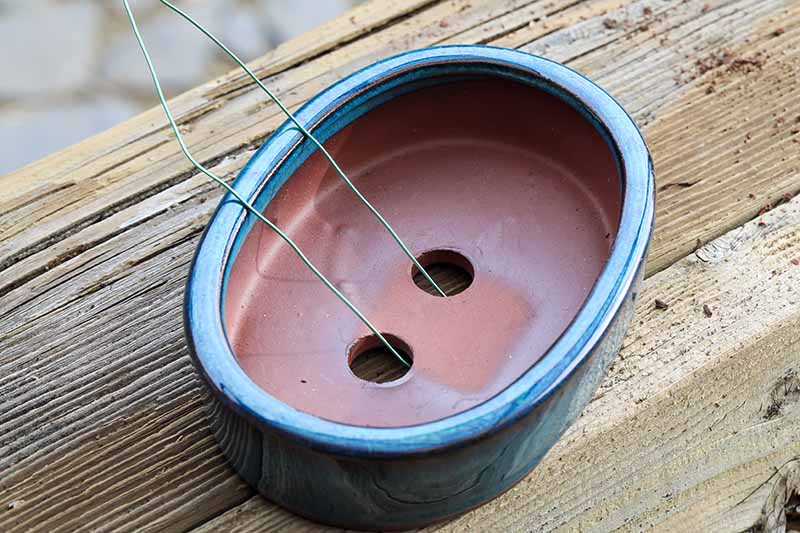
Place the plant in the container and wrap the wires around the root ball, holding it snug, but not breaking or dramatically bending any roots. You will likely have a bit of extra length of wire.
Tuck this into the middle of the root ball so the end is buried under the soil. You should position one piece of wire on either side of the root ball.
Fill the container with a bonsai potting mix. If you are placing a bonsai with a short root system in a deep pot, have a helper hold the tree in the exact spot where you want it, and then fill in with bonsai potting soil.
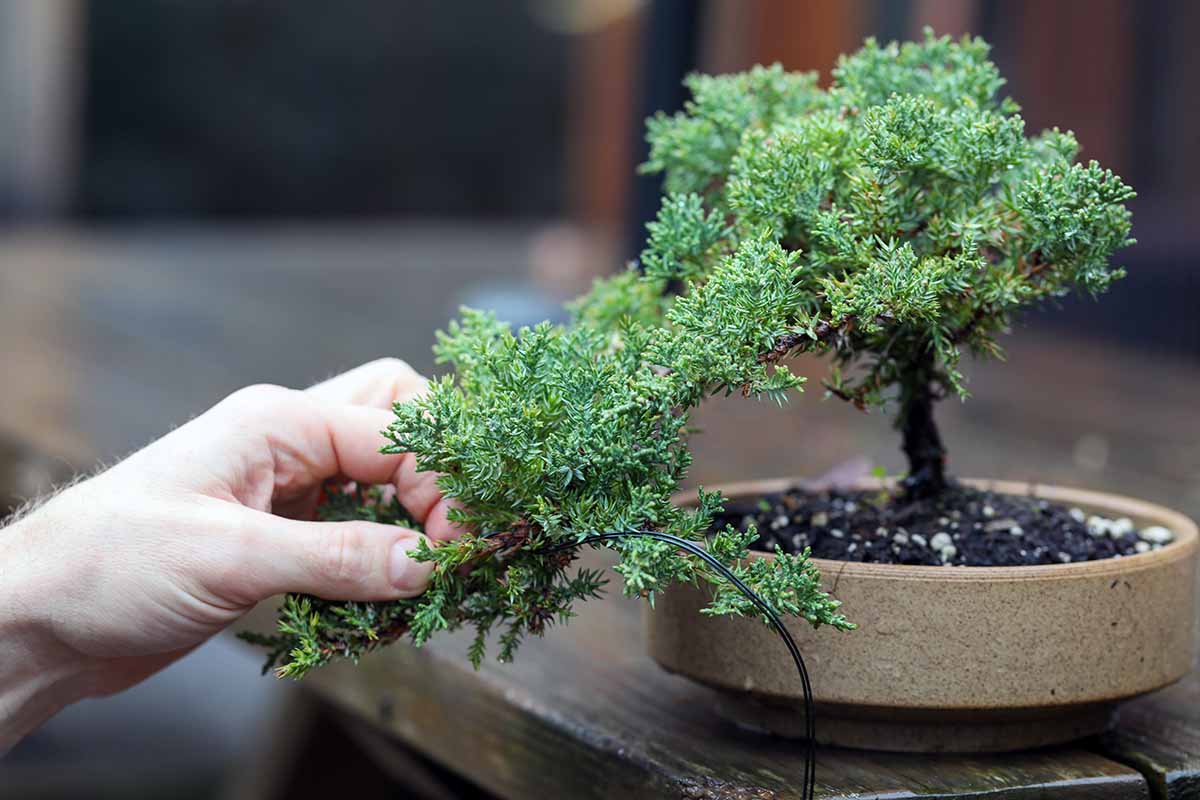
Training
Training is an essential part of teaching bonsai to grow in a cascade style. You should learn to become comfortable with the process, because you’ll be using it a lot.
If you have a tree that you particularly prize, you might want to buy a cheap sapling to practice on first.
You can purchase a juniper sapling for a few dollars, and not only can you use it to practice wiring, but it’s also useful for experimenting with pruning and repotting before you do it with the real deal. You might even end up loving your practice plant enough to continue training it as a bonsai.
To wire a bonsai, you’ll need flexible wire such as aluminum or copper. You’ll also need natural, undyed raffia, though this is optional.
If you are really bending the trunk a great deal, you might want to invest in a branch bender. This will make your job much easier.

Bonsai Tree Medium Branch Bender
Amazon carries a medium-sized bender, which is ideal for most projects.
Don’t use tape instead of raffia. If you want to protect the branch from wiring damage, raffia is your best option. It also provides some extra support to hold the trunk in place.
Soak the raffia in water for 30 minutes and then take out a small handful. Whip it to shake the excess water loose. Wind it tightly around the branch you are training. You want the raffia to be fairly thick, so use several layers at least.
Now, whether you used raffia or not, wrap the wire around the branch to hold it in your desired shape. Add the branch bender at this point, if using, following the directions provided on the packaging.
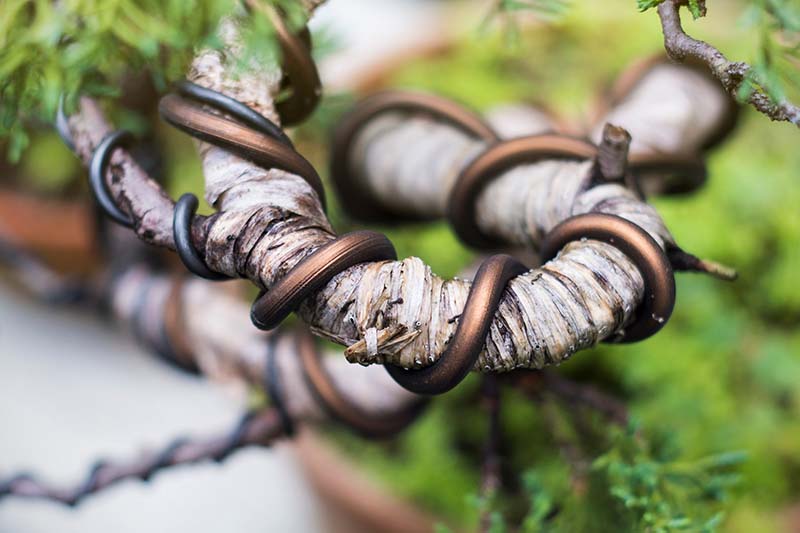
The raffia will dry on the branch, providing additional support to the shape you have chosen and protecting the trunk from the wire. It also helps to hold moisture, so the branch doesn’t crack under the pressure of bending.
However, you must remove the raffia after a few months because it does prevent photosynthesis in the area where it’s been applied.
You also need to check the wires and re-wire every so often to prevent the branch from growing into the wire. For a young deciduous tree, that could mean checking every few weeks.
For an older evergreen, you can leave the wire in place for up to a year.
When it comes time to remove the wire, carefully snip it away using a pair of wire snips. Unwinding the wire subjects the tree to further stress and damage.
A Natural Alternative
Some people opt to encourage a bonsai to grow in a cascading style using a more natural method. To do this, you will turn the pot on its side and allow the plant’s trunk to grow sideways towards the light.
This only works well if your soil is packed enough that it won’t fall out if turned on its side, and you absolutely must anchor the root ball.
You’ll need to straighten the plant upright to water and then return it to its side.
After you have the sort of bend that you want in the trunk, you can return it to an upright position and start training it with wire.
Cascade Bonsai Are Living Art
While they aren’t for the beginner, well-done cascade bonsai are works of art that always draw comments. Their graceful, arching shape takes years to perfect, but it’s well worth the effort.
What species are you making your masterpiece with? Let us know in the comments!
If you can’t get enough of the world of bonsai, you might be interested in one of our other guides on the topic, starting with the following:
I thought your article was very helpful ☺️
I’m so happy to hear that you found it useful, Lamont! Thanks for letting us know.
is it ok to stake a cascading juniper bonsai plant? thanks for your reply
Hi Irv, it’s absolutely fine! Do whatever you need to achieve the shape you’re looking for. Just be sure to check the binding frequently to ensure it isn’t digging into the growing plant.
Thanks for the great info. I appreciate learning about formal vs. informal style. I’ll try to style one in the formal style. Up to now, all of my cascades have a single (lonely) descending tail. With all of this in mind, I can visualize exciting possibilities for my next project. Big Thanks.