

Sedum spp. and Hylotelephium spp.
I grew up in neighborhoods where the ground covers of choice were predominantly wintercreeper, ivy, and periwinkle.
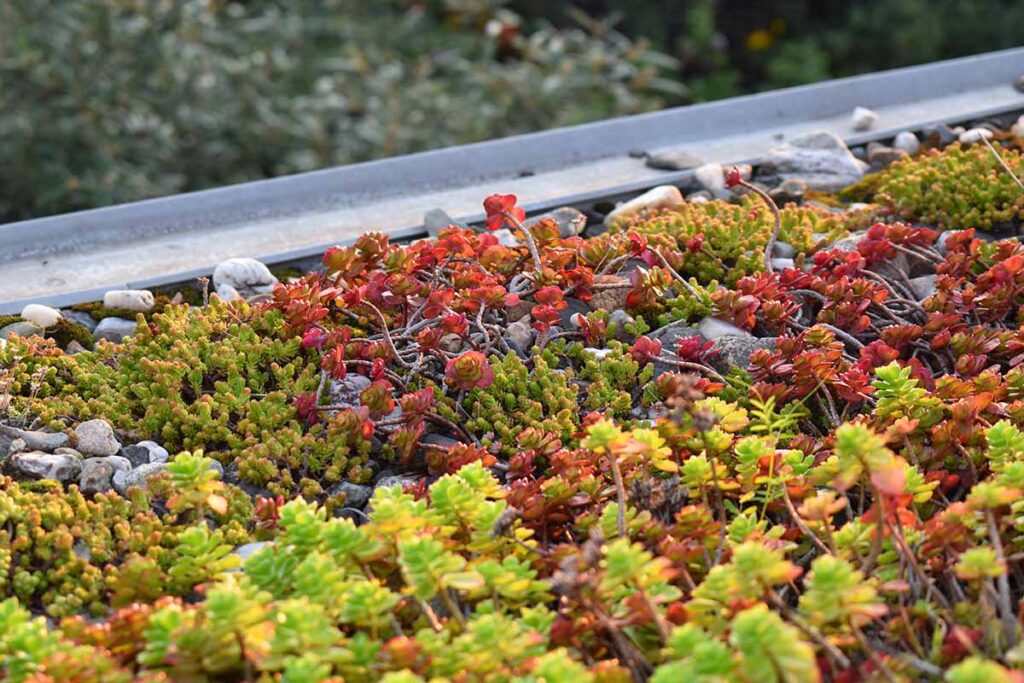
Landscape succulents are an exciting novelty for me, and when it comes to sedum aka stonecrop, an aesthetic mass or mat of it in someone’s garden is a breath of fresh air.
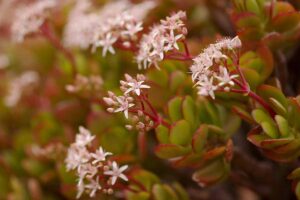
Stonecrop has fleshy leaves and thick stems for conserving water in hot, dry climates. Its blooms are typically star-shaped and they come in many colors, depending on the species.

We link to vendors to help you find relevant products. If you buy from one of our links, we may earn a commission.
A very versatile genus, Sedum includes both upright and creeping varieties and comes in annual, biennial, and perennial forms.
This plant performs as beautifully as it looks: it’ll withstand heat, drought, and foot traffic.
It’ll grow in rocky or gravelly soils, and infertile soil won’t be a deterrent. And believe it or not, stonecrop is actually cold-tolerant, as well!
If all that sounds appealing, then read on to find out how to grow and take care of these wonderful plants for yourself.
Here’s what I’ll cover:
What You’ll Learn
Stonecrop can be grown in USDA Hardiness Zones 3 to 10, but the exact range of zones depends on the species.
As a genus, Sedum originates from the temperate zones and tropical mountains of Asia, Europe, Northern Africa, and North America.

The common name stonecrop comes from its natural tendency to “crop up” in rocky areas.
The genus name Sedum comes from the Latin term sedeo, meaning “to sit.” This references the sitting and sprawling nature of stonecrop as it clambers over stones.
Sedum nomenclature has a history of instability. A new genus, Hylotelephium, was proposed in 1977 as a way of differentiating upright stonecrop from its low-growing brethren.
Quick Look
Common name(s): Sedum, stonecrop
Plant type: Flowering herbaceous succulent
Hardiness (USDA Zone): 3-10, depending on species
Native to: Asia, Europe, Northern Africa, North America
Bloom time / season: Summer, fall
Exposure: Full to partial sun
Soil type: Lean, sandy, gravelly, well-draining
Soil pH: 6.0-7.0, slightly acidic to neutral
Growth Rate: Slow
Mature size: 3-24 inches tall by 12-36 inches wide, depending on species
Best uses: Borders, containers, ground covers, green roofs, mass planting, perennial gardens, rock gardens
Taxonomy
Order: Saxifragales
Family: Crassulaceae
Genus: Sedum, Hylotelephium
Species: Kamtschaticum, spectabile, spurium, telephium
Hands-in-the-dirt horticulturalists are a bit slower to accept name changes than botanical taxonomists, though, so don’t be surprised if you find some inconsistent genera naming in your upright sedum research.
Confusingly enough, upright stonecrops are now taxonomically back with the rest of the sedums… at least in some gardening circles.
Sedum’s durability and versatility makes it an ideal planting for a variety of ornamental gardening scenarios.
Upright stonecrop species will shine as specimens or mass plantings in perennial gardens, while low-growing sedum is ideal as ground cover.
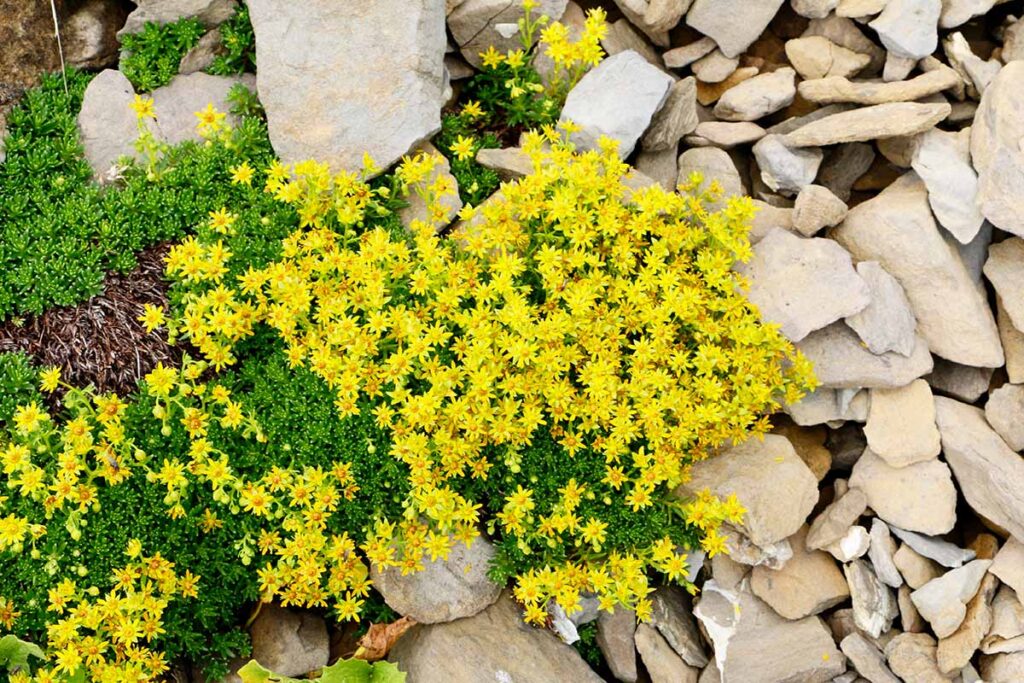
In general, stonecrop does well on hills, in gravel or rock gardens, and in the crevices of stone walls.
How to Grow
Since this is a general sedum growing guide, these directions will be a bit cookie-cutter.
Some supplemental research on your choice of stonecrop species will help you find the optimal growing conditions, but for now, the following recommendations will serve you well.
Climate and Exposure
Various species of Sedum are distributed worldwide, and are able to grow in many different temperature ranges.
As a genus, these plants will generally grow in USDA Hardiness Zones 3 to 10, but the exact regions vary between species.

Stonecrop doesn’t like excess humidity or waterlogged conditions.
Given its tolerance for heat and dry soil, err on the side of warm and dry over cool and humid. But stonecrop is tough, and it will make do in less-than-ideal conditions.
These plants grow in full or partial sun, but as a general rule, full sun – or at least six hours of direct sunlight per day – results in better growth.
If access to full sun exposure are limited, partial sun will do.
Just know that the more low-growing and vigorous the sedum species, the more shade it can tolerate before growing floppily, and vice versa.
Soil
Sedums prefer lean, well-draining, coarsely-textured soil.
This is best achieved with coarse sand, but gravel-heavy soils will work in a pinch. The ideal pH for these plants is slightly acidic to neutral, or 6.0 to 7.0.
Deviating from the above recommendations will most likely lead to problems.
Too much moisture retention can cause rotting, and a soil that’s too high in nutrients can cause leggy growth.
Water and Fertilizer
Supplemental irrigation is only necessary for established plants when the top two inches of soil is dry.
You won’t have to water that much and depending on rain, you might not have to water at all! Sedum is pretty drought-resistant thanks to its succulent leaves.

Since stonecrop does well in nutrient-deficient soil, supplemental fertilizer isn’t necessary.
Too much nutrition results in weak and leggy growth. If you absolutely must fertilize, working an inch of compost at most into the soil annually is more than enough.
Cultivars and Species
The Sedum genus consists of 600 or so total species – and that’s a gargantuan amount of stonecrop!
You can narrow the list down by deciding between upright and low-growing varieties, but even that leaves a lot of options. Let’s go over some superior sedums.
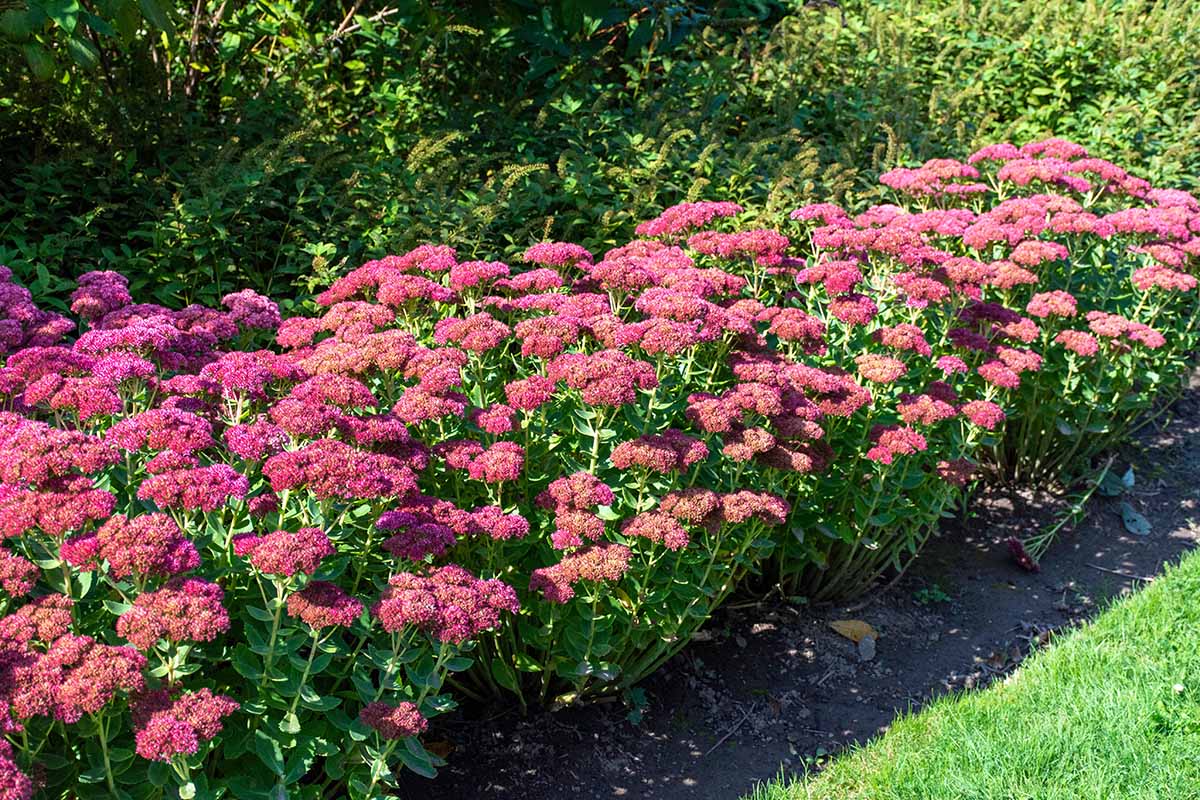
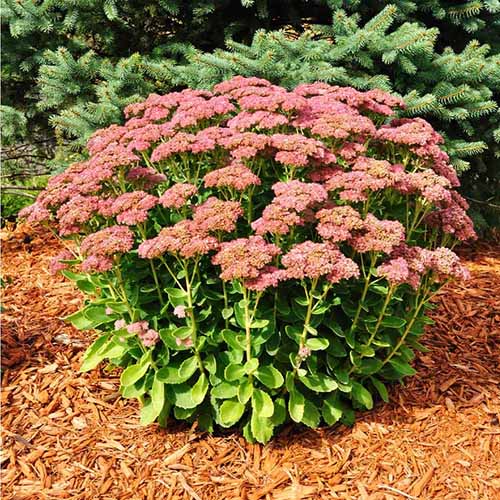
Showy Stonecrop
Also known as Hylotelephium spectabile or Sedum spectabile, showy stonecrop stands out as a specimen planting in the landscape, whether individually or en masse.

It’s topped with showy clumps of red, pink, or white flowers and the plant grows into a rounded shape, no pruning required.
As an upright species, it reaches 18 to 24 inches in height, which fits in nicely with the rest of your perennial garden.
For optimal growth, cultivate showy sedum in USDA Hardiness Zones 3 to 10.
There are some beautiful varieties available besides the standard species.
‘Brilliant’ is a premium showy stonecrop cultivar with bright pink flowers, while S. spectabile var. atropurpurea has deeply purple foliage.
‘Autumn Joy’ is a hybrid between S. spectabile and S. telephium, and its stunning year-round interest makes it one of the best garden perennials.
You can find ‘Autumn Joy’ plants available from Fast Growing Trees.
Find more tips on growing ‘Autumn Joy’ here.
Two-Row Stonecrop
S. spurium is a low-growing species that tolerates urban conditions remarkably well.
Reaching four inches in height – six when flowering – this species spreads as a dense mat in the landscape.
It looks amazing as both a ground cover and a complementary patch of growth between other plants.
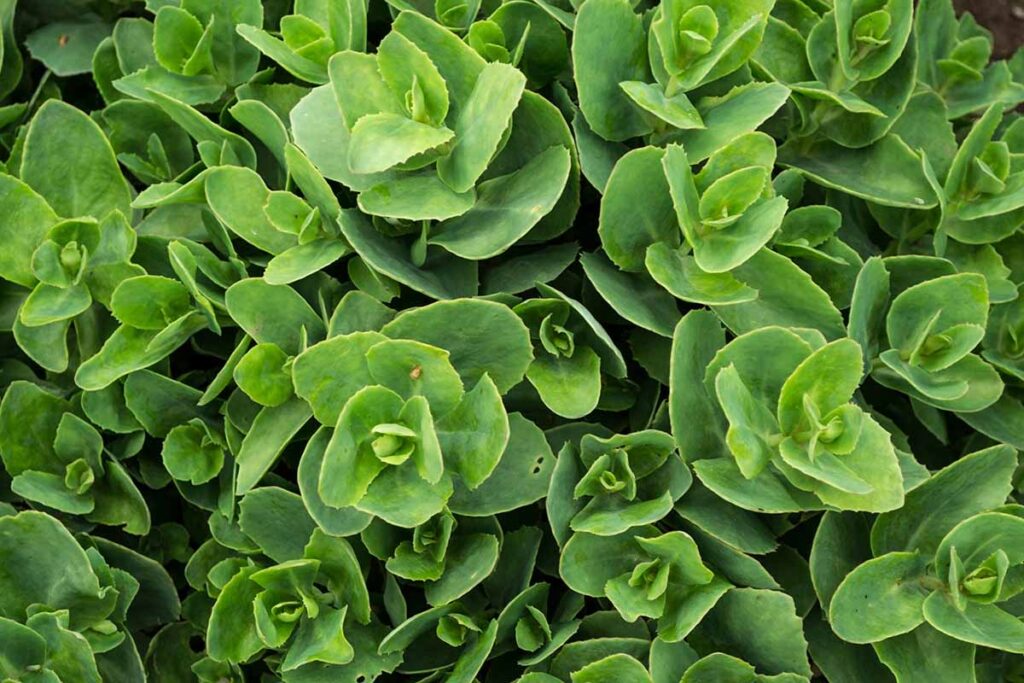
This plant has paddle-shaped leaves and rounded toothing on the margins.
Pinkish-red flowers protrude beyond the foliage. This stonecrop species thrives in USDA Hardiness Zones 3 to 8.
Notable cultivars include ‘Bronze Carpet,’ with reddish-bronze foliage and pink flowers, as well as ‘Fuldaglut’, which has scarlet flowers and deep red foliage.
This species can become invasive in certain zones if it’s not closely monitored.
Orange Stonecrop
S. kamtschaticum is an evergreen sedum that performs well on hillsides, within pockets in stone walls, and along borders, providing visual interest in these spaces.

Growing best in Zones 3 to 8, its light green leaves are long, skinny, and toothed on the ends. Flowers are yellow to start, but produce orange seed heads with age, hence the common name.
A cultivar worth mentioning is ‘Variegatum,’ which has many cool features. Its foliage is variegated, with white leaf margins that are flushed with pink.
The flowers are also a bit different: they’re a deeper, more intense yellow than those of your everyday orange stonecrop.
Want More Options?
Be sure to check out more of our recommended species and cultivars in our detailed guide: 31 of the Best Sedum Varieties.
Maintenance
Sedums are pretty low-maintenance, but there are some things you can do to keep them looking their best.
Pinching living flower heads before they fade or topple will strengthen the stems, if you’re working with less-than-ideal conditions that could result in flopped-over stonecrop.

In addition, pinching spent blooms will help clean up the plants, but it’s not necessary, since the dry flower heads will provide winter interest if left alone.
The only effort low-growing species need by way of maintenance is the occasional pruning if they go out of bounds and encroach on other plantings.
Learn about pruning sedum here.
Propagation
You’ve got a few options for propagating sedum: seeds, cuttings, division, or transplants.
Despite the satisfaction of growing from seed, stonecrop seeds don’t always grow true.
From Seed
Sow stonecrop seeds in spring or summer. The minimum temperature necessary for sowing is about 60°F.
Select a pot or a seed tray and fill it with a well-draining substrate such as a mix of three parts gardening soil, three parts sand, and one part perlite.

Moisten the soil, spread the sedum seeds over the soil surface, and add a very thin layer of vermiculite on top. Lightly spray it all with additional water.
Cover the container with glass, white paper, or a clear plastic bag.
Place in an indoor location such as a windowsill with indirect light for two to three weeks until seedlings appear, then remove the cover. Keep the medium moist.
After six to eight weeks, when outside conditions are acceptable, gradually acclimate the seedlings to direct sunlight outdoors.
At this point, you can move them into their new location.
Find more tips on growing succulents from seeds here.
From Cuttings
Before preparing your cuttings, fill a pot with a similar medium to what you might use for growing stonecrop seeds as described above.
To take a cutting from stonecrop, cut three to six inches of stem from a healthy plant in early spring. Remove the lower leaves and stick the cut end in the growing medium.
Mist the medium with water, and keep it moist until the cuttings develop roots, a process which should take six to eight weeks.
Wait another week or two before you harden them off before transplanting.
Via Division
To divide stonecrop, select a mature plant in the spring or fall and dig it up, being careful not to damage the roots.
Take the mass of roots and gently tease or cut it apart into the desired number of divisions, ensuring that each root clump has aboveground growth attached.
Learn more about dividing sedum here.
Transplanting
The ideal timing for transplanting is the beginning of spring or just prior to it, when plants are primed for new growth.
Dig a hole wide enough and deep enough so the root ball can fit with some room to spare in the hole, with the top of the roots positioned just below the soil line.
Place the plant in the hole, fill in the gaps with the surrounding soil, and pat it all down firmly. Water in the transplant.
For multiple transplants, you’ll want to space them out anywhere from six inches to two feet apart.
Err on the side of less space for low-growing types, and more space for the upright ones.
Pests and Disease
Luckily, sedums are somewhat resistant to deer, thanks to their bitter taste.
But when deer start running out of food in wintertime, poor flavor won’t deter them from taking some desperate nibbles.
You might be able to protect clumps of upright stonecrop with caging or netting, but for low-growing types that take up a lot of square footage, forget it.
Read about DIY deer fencing in our guide.
Squirrels and voles will eat sedum, too. For these pests, caging and netting are worthwhile options.
Rodent sprays can be applied to the plants directly, while rodent-repellent pellets can be applied to nearby soil surfaces and watered in so the roots are protected from subterranean pests.
Pests
Insects go hand in hand with disease, since they can also be vectors for pathogens.
Properly protecting your stonecrop against insects will go a long way in warding off disease, too.
Black Vine Weevil
Also known as Otiorhynchus sulcatus, mature black vine weevils are half an inch in length, with a bead-shaped thorax and yellow-haired wing covers.
The grubs are white and curved, with a brown head. The adults feed nocturnally on the leaf margins, while the grubs consume the roots.
Insect pathogenic nematodes can be applied to the soil to control the larvae.
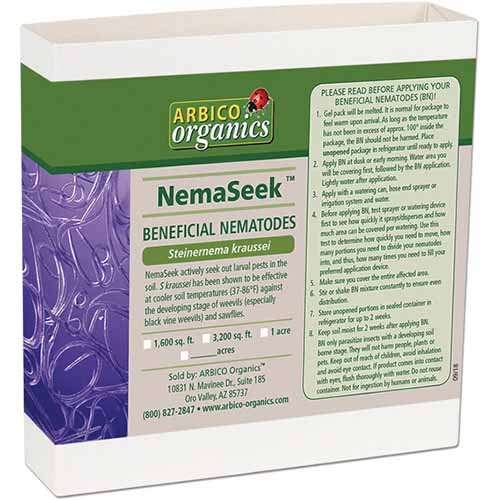
Some high-quality species suited to this purpose, such as Steinernema kraussei and Heterorhabditis bacteriophora, are available from Arbico Organics.
Mealybugs
Mealybugs are small, white to gray, segmented insects that feed on sap from leaf and stem tissues, which stresses and weakens your sedum.
Mealybugs can be removed by hand, blasted off with high-pressure bursts of water from the hose, or desiccated by dabbing a 70 percent solution of rubbing alcohol in water on the pests with a cotton swab.
Neem oil or insecticidal soaps work too, and if biological control sounds appealing, then introducing ladybugs will help reduce mealybug populations.
Learn more about managing mealybug infestations.
Scale
Scale are itty-bitty insects that suck the sap out of plant tissues, in a similar manner to mealybugs.
Control is also similar to what you might do with mealybugs: manual removal, water sprays, isopropyl alcohol, insecticidal soap or neem oil, and/or the introduction of predatory beneficial insects such as ladybugs are all valid means of scale control.
Want to learn more about scale insects? We’ve got a guide for that too!
Slugs and Snails
Slugs and snails are most active on cloudy or foggy days and at night, and oftentimes the only evidence of their presence will be slime trails and damaged plants.
Picking out slugs and snails with a gloved hand is effective for controlling these pests.
Disease
As with insect infestations, unhealthy plants are more prone to succumbing to disease.
In addition to properly cultivating your stonecrop, keeping garden tools sterilized and disposing of plant detritus will help prevent a lot of unnecessary infections.
Gray Mold
This disease is caused by the fungus Botrytis cinerea.
Cool and wet conditions are conducive to this disease, along with dead plant tissue like flower heads.
Pinching spent blooms will help to prevent infection. Fungicides can be used whenever symptoms start to show up. Thiophanate-methyl is an effective compound.
Powdery Mildew
Caused by the fungus Erysiphe, powdery mildew shows up on foliage as a medley of mycelium and spores.
High humidity can allow spores to germinate sans water. Powdery mildew results in overall weakened plants, thanks to the fungal parasite absorbing food from the host into itself.
Learn more about dealing with powdery mildew here.
Root Rot
The causal fungi for root rot are Rhizoctonia solani or Fusarium.
Symptoms include root systems and basal stems that become blackened or browned, rotted, and eventually collapsed. At the soil line, sunken-in lesions could also occur.
Unfortunately, the available fungicides are ineffective against root rot. All you can do for infected plants is remove and dispose of them.
Get Some Sedum… You Know You Need ‘Em!
Well, that was a smorgasbord of sedum know-how. And there’s even more to learn as you work with different species of stonecrop!
Hopefully this growing guide provides a solid base of knowledge in your quest to grow sedum for yourself.
But since this was a general stonecrop growing guide, don’t be afraid to deviate from it in order to better accommodate the particular species you’re working with.
Have questions? Comments? Put ‘em in the comments section below. I’d love to read them and get back to you!
And for more information about growing stonecrop in your landscape, check out these guides next: