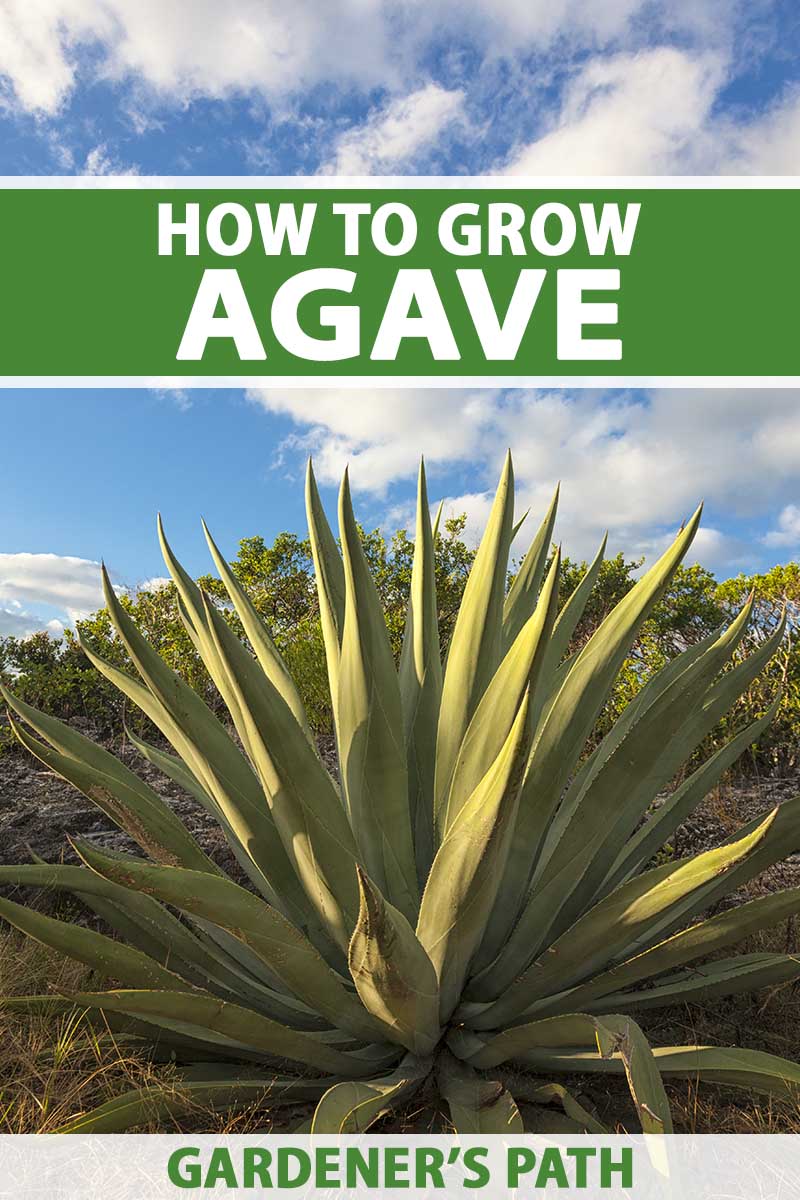
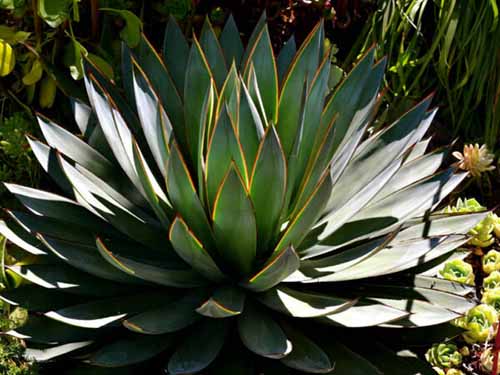
Agave spp.
Succulents exist in a vast array, their form and color ranging from tiny green bulbous leaves on a string-like stem to rosy-toned stumps that appear to be living rocks.
It can be hard to believe that agaves belong to this category as well.
At maturity, some may appear to be more closely related to a large variety of cacti rather than something like hens and chicks. But both of these are varieties of succulents, after all.
Because of their range in size and the means by which they self-propagate, Agave may be one of the most enthralling succulent genera in the world.
We link to vendors to help you find relevant products. If you buy from one of our links, we may earn a commission.
So, without further ado, let’s talk about agaves, and how to plant, propagate, and care for them in your landscape for decades of enjoyment.
Here’s what we’ll cover:
What You’ll Learn
Agave is one of those plants that makes you pull the car over when you spot it in someone’s yard.
Not only is it stunning in form and size, but if you happen to catch it in bloom, you may feel that you’ve stumbled across a true mystery.
What Is Agave?
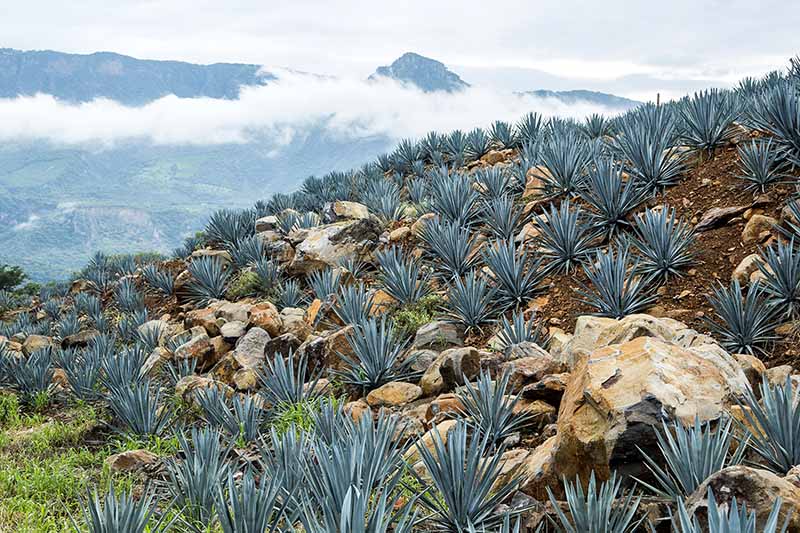
There are approximately 270 known species in the Agave genus. Some of these are used to produce food products, such as agave syrup, or alcohol, such as mezcal and tequila.
Others, such as the sisal plant, A. sisalana, are grown primarily for fiber, used to make rope and a variety of other products.
These plants belong to the Asparagaceae family. If that sounds familiar, it may be because it’s the same family that common garden variety asparagus belongs to.
There are more than 2,500 different species in this family, ranging from bluebells to snake plants.
If you’re fortunate enough to witness an agave in bloom, you’ll notice the relationship to asparagus, as the flowering stalk bears a strong resemblance.
Most species are suitable for cultivation in USDA Hardiness Zones 7 to 11, and generally thrive in dry climates.
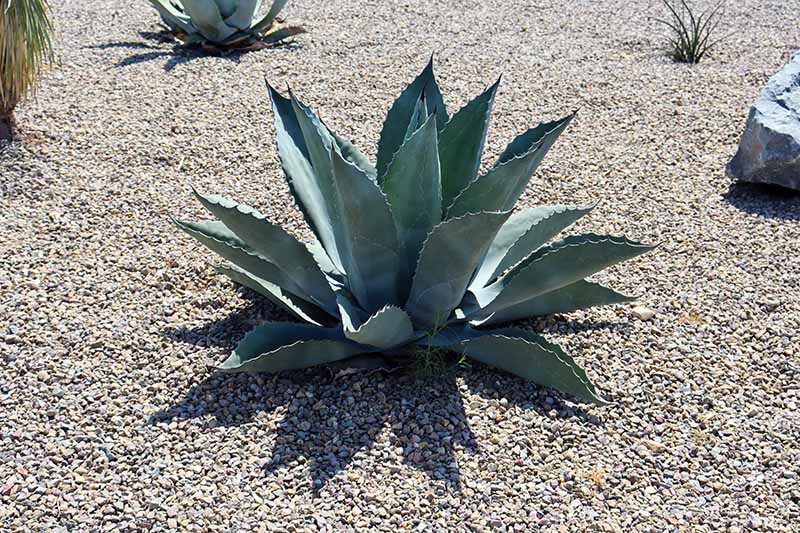
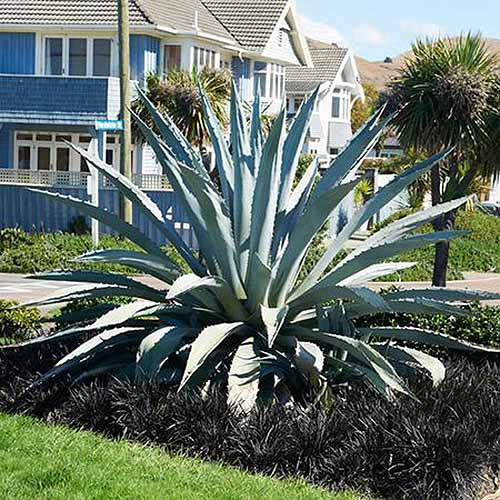
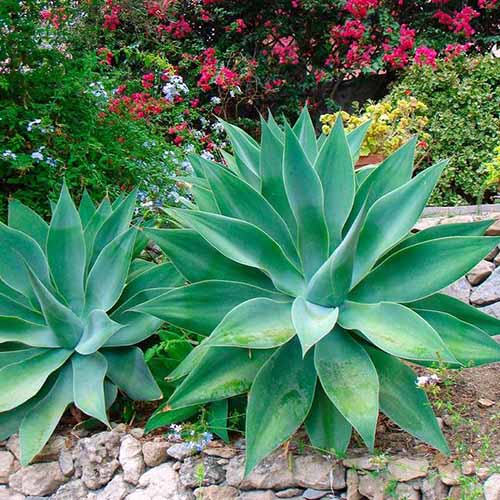
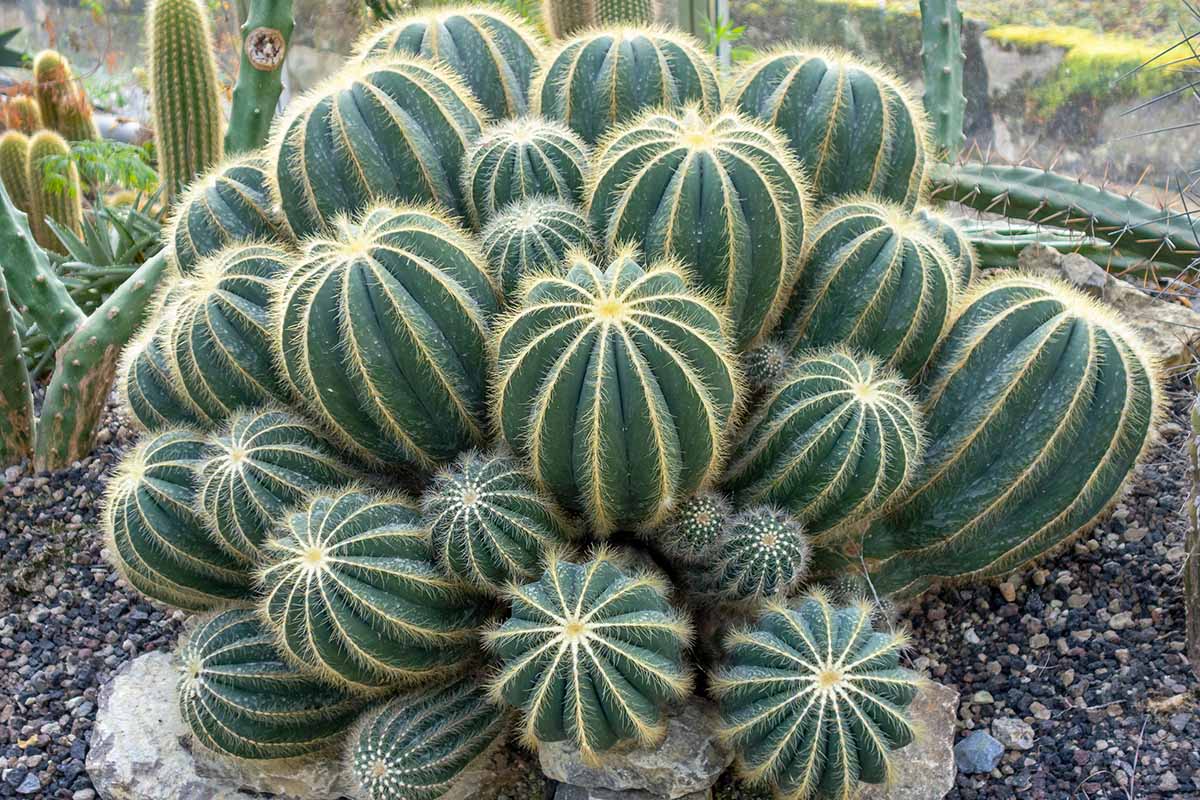
These herbaceous, rosette-forming succulents can be compact at just 12 to 18 inches, or reach 10 to 12 feet in height, with a similar spread.
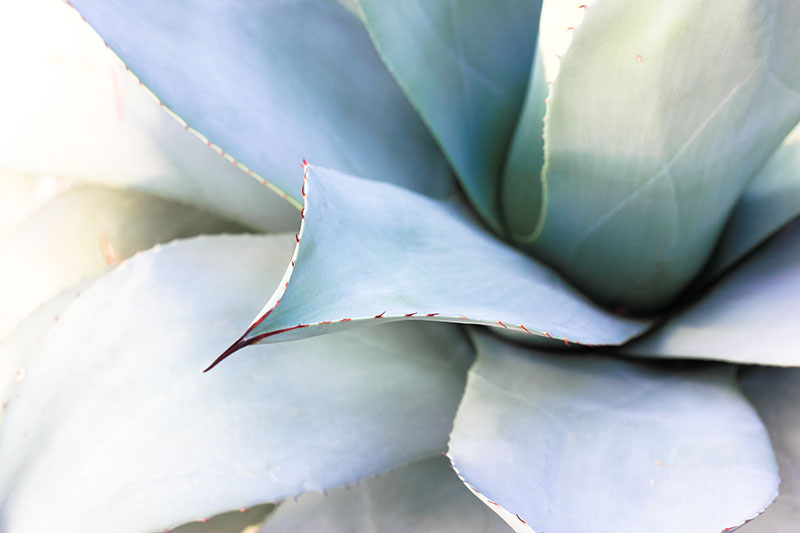
They’re cactus-like in structure, with sharp, hook-like spines along the perimeter of the leaves on all but a few species.
There are approximately 40 species that are native to the United States, most of which grow in the western and southwestern desert regions.
Some species, such as the foxtail agave, A. attenuata, grow on stalk-shaped, semi-woody stems like something from a Dr. Seuss book.
Many of these, such as A. deserti, which was found and named by botanist George Engelmann who discovered it in southern California in the mid 1830s, have become common additions in xeriscape plantings. This species is frequently chosen because of its tendency to produce offsets that fill in wide areas.
The American agave, A. americana, thrives in regions with high heat throughout most of the year where there is little annual rainfall, such as in parts of Arizona, California, and southern Florida.

This species is also known to tolerate subtropical and tropical climates, provided that it is growing in soil that does not hold water. Many other species can thrive in this type of climate as well.
Some of the most common agave species grown in the home landscape include foxtail (A. attenuata), which is one of few without marginal teeth; Caribbean (A. angustifolia), which has slender leaves tipped in silver-white; blue (A. tequilana) from which tequila is made; and whale’s tongue agave (A. ovatifolia), which has a distinctly rounded leaf shape.
Other species commonly grown as landscape plants include A. macroacantha, the black-spined agave; A. parryi var. truncata, the artichoke agave; A. potatorum, aka butterfly agave; A. lopantha, the center stripe or thorn-crested agave; and A. victoriae-reginae, or Queen Victoria agave.

One of the most distinct oddities of this genus is the octopus agave, A. vilmoriniana. This species is often chosen as a focal piece, with leaves that spiral and twist like some sort of land-mired sea creature.

Another species that stands out is A. geminiflora, the twin-flowered agave, which grows as a rounded mass of slender leaves.
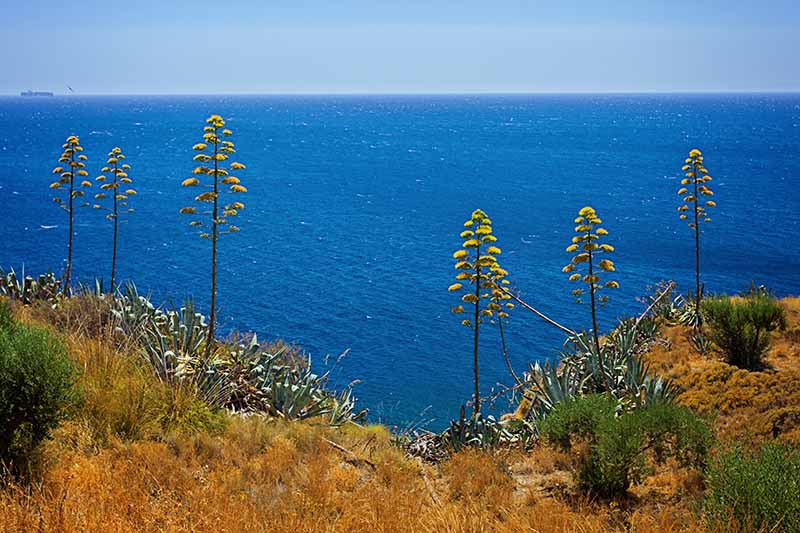
The majority of agave species are very drought tolerant, although some are native to grasslands or mountainous regions where they thrive in average precipitation, and even somewhat cooler temperatures.
They also tend to thrive even in poor soil, and can tolerate some salt as well, making them suitable for coastal plantings.
All agave species are monocarpic which means the plants send up one huge flower stalk in their lifetime, which then blossoms for several weeks to a few months, after which the plant dies.
Another common characteristic that they share is the presence of crystals known as oxalates in their leaves and stems, which are toxic to cats and dogs – sometimes fatally so if enough are ingested.
Keep an eye on your pets if you plant these in your landscape.
Cultivation and History
Most agaves are native to Central and South America. Some were first documented as being used by the Olmec people, who processed and fermented the juice and pulp of the plant to make an alcoholic beverage known as pulque.
The indigenous people of Central and South America continued to cultivate the plants for this purpose, and also used some species to create a variety of medicinal treatments.
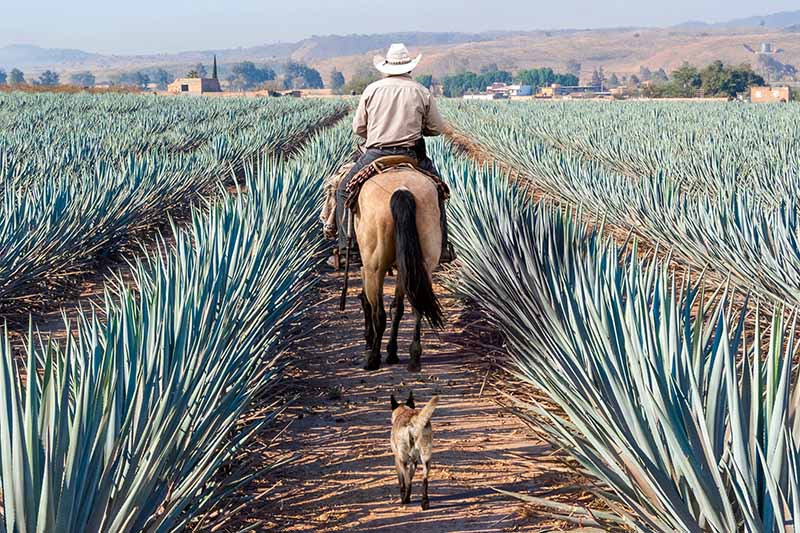
The Aztecs revered the blue agave to such a degree that they regarded their goddess Mayahuel as the personification of the plant.
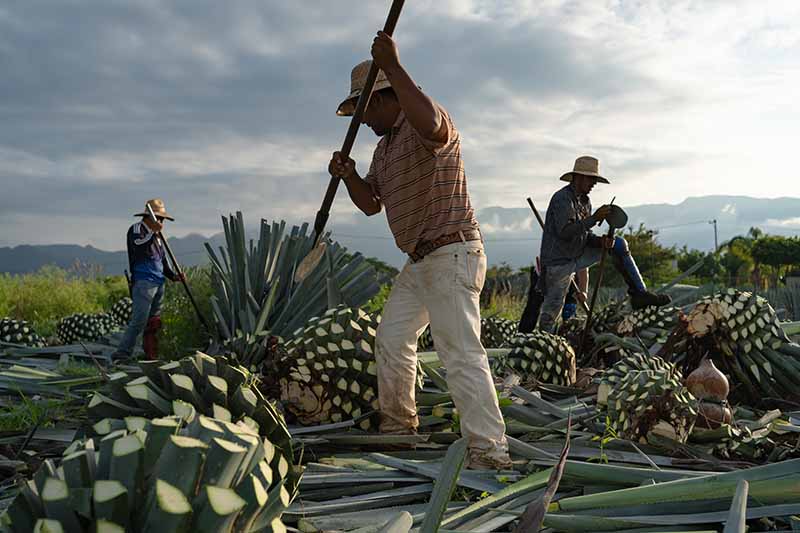
In Mexico, they’re still widely cultivated in Jalisco, where mature plants are pruned down to the central stem and processed to extract their sap, which is then fermented into alcohol.
Agaves, particularly A. americana, are sometimes referred to as “century plants” due to an apocryphal belief that they bloomed only once every hundred years.
In reality, the plants can survive for up to 25 years in ideal conditions, with some rare specimens living considerably longer, and most bloom when they are between 10 and 20 years of age.
Agave Plant Propagation
Most varieties self-propagate in two ways, by producing pups and seed.
Mature plants send out runners underground that produce sprouts known as pups. These can be found close to the parent plant in most cases, and will form a root system of their own. The pups make excellent transplants.
As mentioned, agave plants send up just one blooming stalk in their lifetime.
This stalk can be modest at eight to 12 feet in height, or it may tower over the landscape, reaching heights of 30 feet, with a thick, woody stem that resembles a massive asparagus.
This stalk produces clusters of blooms that branch out and open over a period of a few weeks to several months, depending on the species.
The blooms will eventually form seed pods and the stalk will die off as the parent plant can no longer support it. When the stalk dies, the parent plant typically begins to decline rapidly as well.
Some species may also self-propagate by producing bulbils, or tiny plantlets that form on the flower stalk.
When they’re mature, they’ll fall off and take root on the ground. They can also be collected and propagated at home.
If you’re lucky enough to witness the bloom of an agave, take lots of pictures, and be prepared to collect the resulting seeds or bulbils!
Perhaps you’ve got a plant that hasn’t decided it’s time to bloom yet. If that’s the case, there are a few other methods to propagate it – but if you ask me, they’re not nearly as cool!
From Seed
Agave seeds are triangular and flat, resembling those of a lily or yucca. Typically, if you’ve collected them from a pod that has opened on its own, they’ll be mature and deep black in color.
The size of the seed typically correlates to the size of the plant, with smaller plants producing smaller seeds.
In early spring, fill pots or a seed-starting flat with one part perlite or sand to one part compost or coconut coir. Avoid using soil that contains manure as it may prevent germination.
Any potting medium you use should be sterilized by spreading it on a baking sheet and baking it in the oven at 350°F for 10 to 15 minutes.
Be sure that any containers you choose are clean and that they have good drainage. Flat, shallow trays or pots are preferred over deep pots.
You may decide to purchase a blend specifically for growing succulents instead of formulating your own, such as The Valley Garden’s Organic Potting Soil for Cactus and Succulents, available from Amazon in a two-quart package.
Organic Potting Soil for Cactus and Succulents
I strongly recommend sterilizing purchased potting mediums as well, just to err on the side of caution, as fungi, other types of pathogens, and insect eggs and larvae are commonly present in bagged soil, unless it is specifically labelled as sterile.
Scatter the seeds about one-half to one inch apart on top of the soil, and cover them lightly with sand to hold them in place.
They do not need to be covered, but they’re very lightweight and can shift when water is poured over them. They shouldn’t be buried more than about one-eighth of an inch deep, as they need light to germinate.
It’s best to avoid wetting the seeds as they’re less likely to sprout if they’re soggy. Bottom-watering is the way to go.
Place the pots or tray in a larger container or in your sink with the drain stopped. Fill the larger container or sink with water to a depth that covers half of the height of the potting container. Allow the soil to absorb water just until the surface feels slightly damp.
You may choose to water traditionally, but avoid pouring water directly over the seeds. Once the soil has been moistened, cover the pots or tray with plastic wrap or a humidity dome, and place it in a location where overnight temperatures are consistently between 65 and 75°F.
A heat mat set between 70 and 75°F can also be used to keep the soil warm, as warmth will aid in germination.
If you’re looking for a mat that works well with several pots or a seed flat, try this one, that’s available from the Vivosun store via Amazon.
If you’re able to place the seeds outdoors in a sheltered location with partial shade instead, this will alleviate the need for completing the added step of hardening off later.
Droplets of moisture that collect on the plastic can drip back into the soil without inhibiting germination, but if the plastic collects a lot of water, you can open one corner to vent it.
In about three to four weeks when the seeds sprout, move them to a location that is sunny, but not in harsh direct sunlight. If you haven’t already vented the plastic, be sure to do so once they’ve sprouted.
Bottom water or mist the plants and soil well once or twice per week, depending on how quickly the soil dries out. If you’re gardening in an arid environment, you may need to mist more often. Keep the soil watered so it is slightly moist to the touch for the first few months.
Seedlings benefit from a diluted application of half-strength 20-20-20 (NPK) general plant fertilizer between their first and third month.
Allow the seedlings to grow until each one has at least three true leaves. It can take four to six months or more for them to reach this stage. When they do, you can begin to move them into direct sunlight.
Start by bringing them outdoors for a few hours in partial shade, and gradually increase the time and sun exposure.
After the seedlings have been acclimated to the outdoors, you can move them to their permanent location. Choose a spot with good drainage, and at least eight hours of sunlight per day.
Partial shade for part of the day is acceptable if your region experiences high heat, with temperatures above 80°F for most of the day.
Prepare a hole that is as wide and deep as the root system of the seedling; usually, a finger-poke size is sufficient.
Be sure that the hole is at least the distance of the mature plant’s spread away from structures or other plants unless you’re willing to relocate them as the agave grows to its mature size.
Note that agaves do not generally transplant well, as they develop a large root system with a taproot. It’s best to plant them in a permanent location.
Place the seedling in the hole, press the soil around the base of the plant, and water well to settle it in.
From Pups
Most agaves readily self-propagate by sending runners out underground. These runners will develop new plants, sometimes directly under the parent plant or just a short distance away.

The plants that sprout from the runners are known as pups, and after they form three to four leaves, they can be lifted and transplanted.
Any time when you plan to handle the leaves of the plant, be sure to wear thick gloves or use tongs to avoid being punctured by the extremely sharp tooth-like spikes along the margins of the leaves.
Note that there may be spikes along the central margin on the underside as well, unless you have a variety that is spineless.
Grasp the pup gently with your gloved hand, or with tongs, and use caution not to apply too much pressure – you don’t want to damage the plant or be injured. Agave leaves are surprisingly tough, but they can be punctured or bruised.
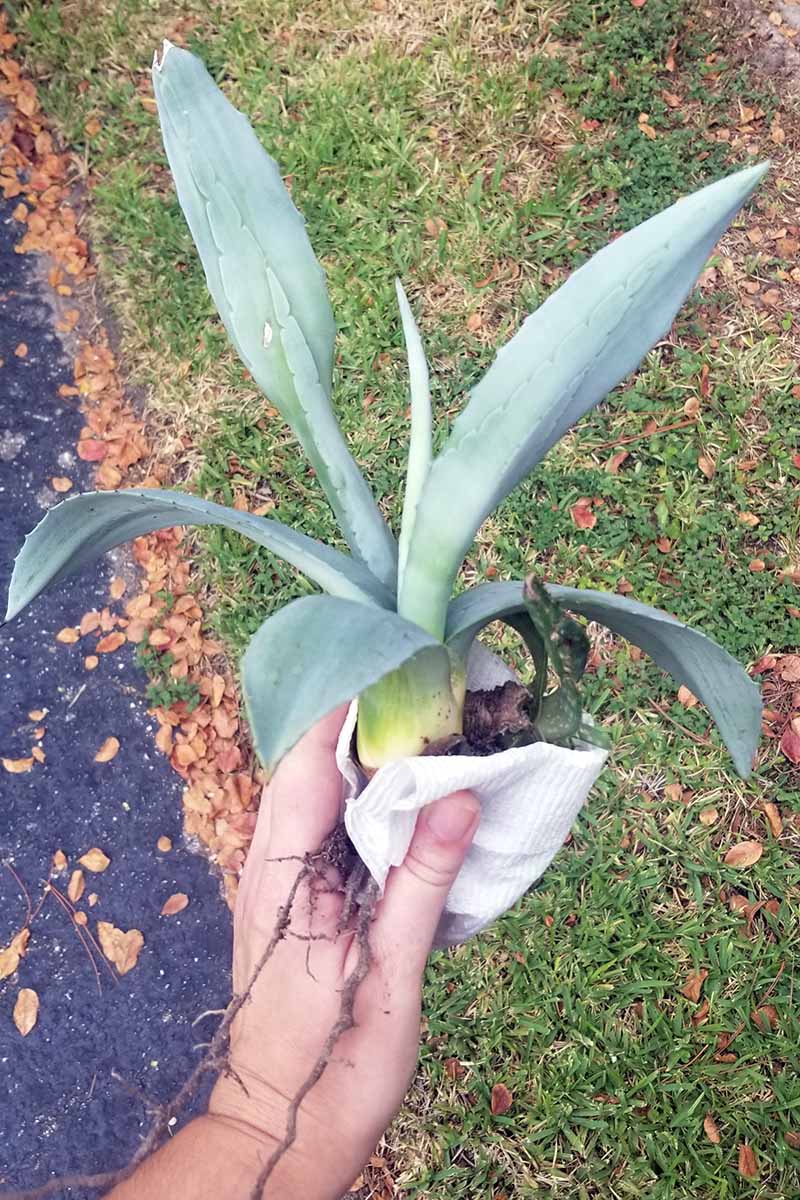
Gently pull the pup upward. If there is resistance, use a rocking motion back and forth, or a trowel to pry the soil up until the roots are exposed. If the pup is still attached to a runner, use a set of sharp garden shears to snip it free.
The pup can be transplanted to a pot or to a permanent location in the ground. If you plan to pot it, use a container that has good drainage and that is just slightly deeper than the existing root system.
From Bulbils
Bulbils can be transplanted in much the same way as pups. They sometimes develop aerial roots, but they may fall off the blooming stalk without roots as well.
Use a potting mix that is specially formulated for cacti and succulents, or mix one part perlite or sand with one part coconut coir or compost.
Fill the container and make a hole large enough to accommodate the root system, or seat the bulbil into the hole just below the soil surface.
Set the plant in the hole and press the soil around it, and then water it to settle. Place it in a location where it will receive at least eight hours of sunlight per day.
Note that it can take anywhere from several weeks to several months before the root system develops. Plants should be three to four inches in height prior to transplanting.
If you’re not sure whether the bulbil has taken root, you can give it a gentle pull – there should be some resistance, which indicates that roots have developed.
Bulbils that have developed aerial roots while still attached to the flower stalk, or ones that have detached and fallen to the ground, can be planted directly in-ground. They sometimes root on their own once they drop to the ground as well.
If they’ve already rooted in the ground and you want to relocate them, you can carefully dig them up in the same way you would when removing pups.
Again, making a hole that is about the same size as the root system is sufficient. Seat the plant and press the soil around it, then water to settle it in.
Transplanting Nursery Plants
I recommend buying bare root plants whenever possible. There are several advantages to this as opposed to buying potted plants.
First, you’ll be able to inspect the root system to make sure it’s healthy and free of fungi or root rot.
You’ll avoid transplanting pathogens, insect larvae, and eggs, if there isn’t any soil present to worry about.
You can also give the plants an immediate boost by planting them in fresh, healthy soil, where they can become established without suffering in the poor conditions they might experience in a grower’s pot.
To transplant a bare root or store-bought plant in a nursery pot, choose a site with good drainage where your plant will receive eight hours of sunlight per day, unless you live in a region where the light is coupled with consistently high temperatures throughout the day and night.
In high heat and harsh sun, provide partial shade.
Make a hole the same width and depth as the root system with a small mound of soil at the bottom for bare root plants. After inspecting roots and soil to be sure they are healthy, carefully remove the plant from its pot, and set it in the hole.
Spread the roots of a bare root plant over the mound and backfill around them with loose soil. Position the plant upright and hold it there as you backfill around the roots.
Press the soil around the base of the plant with your hands to secure it in place, and water it well to settle in. Be sure to provide one inch of water per week until the plant has become well established.
How to Grow Agave Plants
Like most succulents, agaves are super simple to grow.
They only have a few specific needs, and if you’re planting in an area where climate and weather conditions are ideal for your selected variety, you can pretty easily just let them do their own thing.
Spiny plants always remind me that they prefer to be left alone.
Watch out for your pets if these plants are part of your landscaping. It’s best not to let the dog help to water the spikey varieties, as the spikes on the leaf tips can be dangerous.
Agave provides excellent natural habitat for lizards, frogs, and snakes in some regions as well, so if you’re averse to hosting animals such as these near your home, you may want to consider planting something else.
Otherwise, they’ll make a wonderful addition for supporting local wildlife!
In regions that are semi-arid to arid where temperatures are typically high, such as in Zones 8 to 11, agave species that are heat and drought tolerant can be planted in the ground and left there year round.
While they could be planted in containers, I don’t recommend it for large varieties such as the American or blue agave (A. tequilana), as over time they’ll outgrow almost any container and need to be repotted frequently – which can be rather difficult with a plant this large and pokey!
Container planting works well for smaller species and cultivars. Use a container that is three to four inches larger than the root system of the plant, and make sure the pot has good drainage. Fill it with a mix of one part perlite or sand to one part coconut coir or compost.
We cover this in more detail in our guide to growing agave in containers. (coming soon!)
The root system of some of the larger types can be expansive, reaching several feet deep and just as wide, as these plants are well adapted to seek water in regions where rainfall is scarce.
They can also develop a large taproot as I mentioned before, and this means they do not transplant well.
Choose a site where the plant will have room to grow, and remember that some varieties can reach heights of six feet at a minimum, and sometimes as much as 12 feet, with a similar spread.
If a plant of that size eventually blooms, you’ll essentially be dealing with a tree-like, 15-foot (or taller!) blooming asparagus a la Jack and the Beanstalk, so be prepared.
The soil at the planting site should have good drainage with a mildly acidic pH of 6.0 to 6.8. These plants absolutely will not tolerate wet soil, and will protest by quickly becoming unhealthy or dying off.
Parts of the landscape that are on a slight incline make good potential planting sites, as do rock gardens – just be sure that the ground around the planting area has a flat basin to absorb water.
During the spring and summer, for immature plants that are not yet established, you should offer about one inch of water per week in the absence of rainfall, or if the soil is bone dry beyond the top four to six inches.
In late fall through winter, reduce the amount of water that you provide to one inch every two to three weeks.
Signs that plants are overwatered include yellow discoloration, wilting or shriveling, weakening of the central stem that causes the central portion of leaves to break off, and rotting near the base or in the roots of the plant.
Overwatering can also invite disease and pest infestation, so be sure to avoid it as much as possible.
Conversely, if your region consistently experiences severe drought, such as dry spells without rain for more than four months, you should plan to water young plants every week.
Once plants are one to two years old, they’re capable of tolerating longer periods without water – sometimes for several months.
You might also add a one- to two-inch-deep layer of pulverized stone or pea gravel over the area of the root system to help retain some moisture between watering.
It’s best to avoid using shredded bark mulch to retain moisture around these plants, as it can keep the underlying soil too wet.
In places where the water table is very close to the surface, such as in Florida, you’ll want to mound the soil up to provide more space for the plant to root with reduced impact from the available groundwater.
These succulents need at least eight hours of sunlight per day, but if your region experiences consistent daytime temperatures of 80°F or higher, and above 60°F overnight, you’ll want to provide some shade for young plants.
Planting near a tree with sparse foliage, such as a palm, will provide dappled sunlight and sufficient shade.
As agaves mature, they can generally tolerate more direct sun, but they’re still susceptible to sunscald when harsh sun is combined with high temperatures.
If you notice that your plant is producing runners and pups, you can gather and relocate them to avoid crowding, or give them away to friends and family. One healthy parent can produce dozens of pups in its lifetime.
Most outdoor agave plants do not need fertilizer unless they’re in their early growth stages, or if the soil they’re growing in is mostly sand or very rocky.
In their native environment, agaves receive minerals from the soil such as iron, manganese, and zinc, which are important for plant growth.
If your soil is mineral-deficient – which can be ascertained through soil testing – you can add liquid fertilizer, such as Organic Succulent & Cactus Plant Food by The Grow Co, available via Amazon, once a month in the spring and summer.
Organic Succulent and Cactus Food
Follow the instructions on the package for the size and age of your plant to avoid over-application.
And avoid using fertilizer on mature plants that is high in nitrogen, as this will encourage fast growth that can lead to earlier blooming – a mistake since these plants die after they bloom.
Growing Tips
- Most agaves grow best in semi-arid to arid regions where they will not receive too much water from rainfall.
- Always allow adequate spacing and keep the mature dimensions of your selected species or cultivar in mind.
- Provide plants under 1 year old with 1 inch of water per week and partial shade if your region experiences consistently high heat and low rainfall.
- Watch for the development of pups, and transplant them as needed to prevent overcrowding around the parent.
Pruning and Maintenance
In zones that experience high heat and harsh sunlight, such as in the southernmost third of the United States, or the deserts of Nevada and California, you may see some leaves turning gray or silver from sun damage.

Leaves that are damaged should be cut away, but again, use caution when handling this spiky plant, and always avoid pruning more than is absolutely necessary.
Excessive pruning can cause stress and lead to dieback, and open wounds may provide an entryway for disease pathogens.
Use a sharp, sanitized garden knife to cut damaged leaves off at the base where they attach to the central stem, and allow the cut to callus over. A damaged plant may send out runners in response to stress.
If your plant has suffered from disease or pest damage, you may also need to cut off damaged leaves to prevent further spread.
See the pests and disease section below for information on identifying and mitigating these concerns.
Agave Species and Cultivars to Select
There are so many species and cultivars to choose from that it can be a challenge to decide, but a good place to start is to narrow down the list based on your regional climate and Hardiness Zone.
Some agaves need a hot, arid climate to grow best while others thrive in more moderate climates.
Here are a few suggestions to get you started:
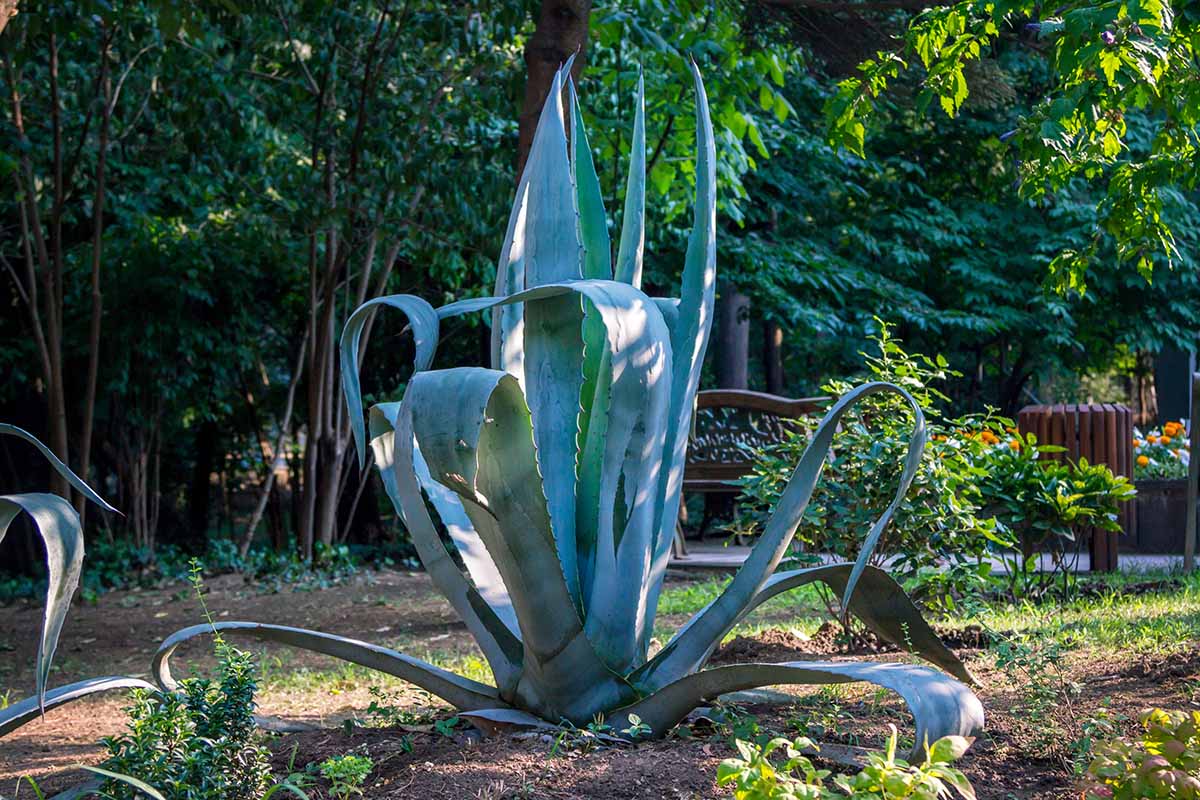
American
American agave, A. americana, features blue-green leaves with sharp spines on their tips and along the outer edges.
Growing to a mature height of four to six feet and a width of eight to 10 feet, this century plant makes a dramatic impact in the landscape in Zones 7 to 11.
You can find plants in three-gallon containers available from Fast Growing Trees.
Blue Glow
This variety is a hybrid cross between A. ocuhui and A. attenuata. The result is a compact plant, measuring one to two feet in height with a two- to three-foot spread.
The flowering stalk it will eventually produce can be eight to 10 feet in height.
The leaves are chalky blue-green with a red-orange or reddish-purple tipped leaf margin that has short teeth. This variety fits well into a landscaped bed or as a border planting.
‘Blue Glow’ can withstand winter lows down to 20°F. While it can tolerate full sun in cooler regions, it grows best in partial shade.
You can find plants available from Yarden.
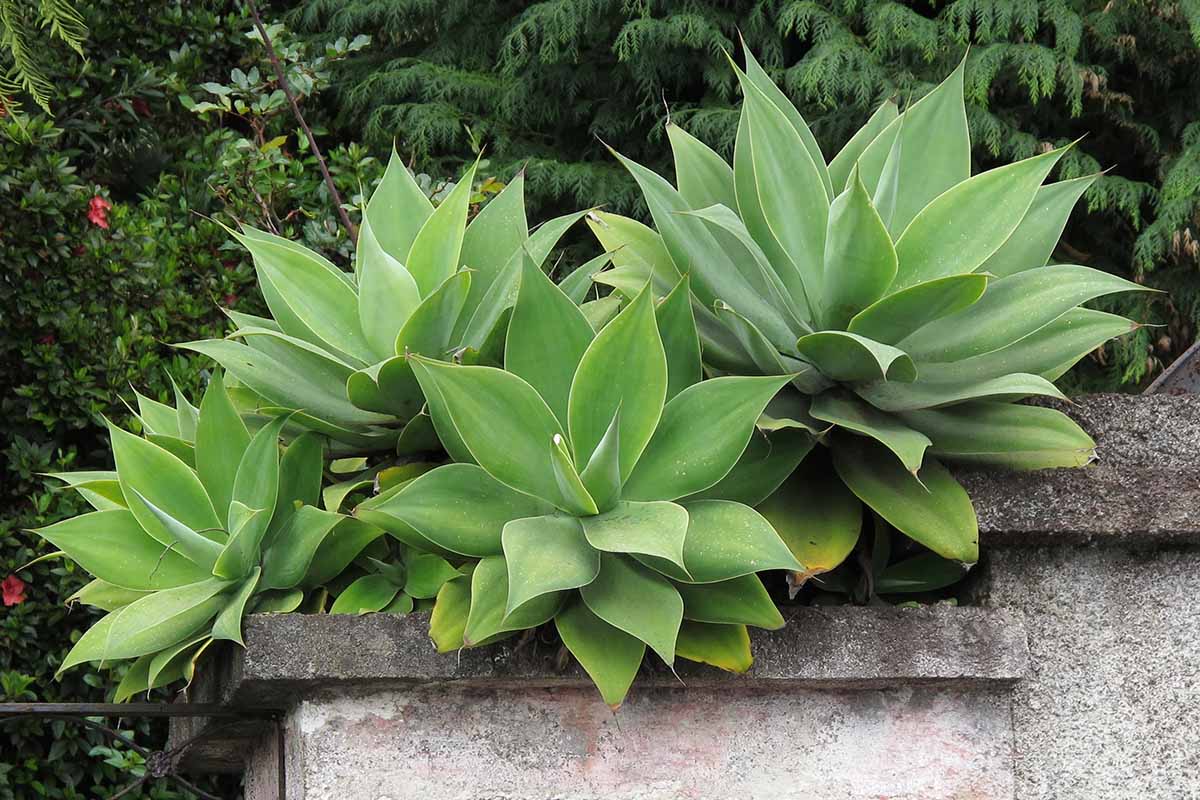
Foxtail
Foxtail agave (A. attenuata), aka swan’s neck, soft tip, or lion’s tail agave, has wide, green leaves that seem to shimmer with an almost silvery hue.
With no spines, this type is ideal for planting in landscapes where children and pets like to play.
This variety grows to a mature height of four to five feet, and width of six to eight feet. It’s suitable for growing in Zones 10 and 11.
You can find plants in three-gallon containers available from Fast Growing Trees.
Variegata
Large and spectacular, A. americana ‘Variegata’, is one that you’ll need lots of room for.
This type thrives in arid or semi-arid regions, or in subtropical to tropical climates in well-drained soil.
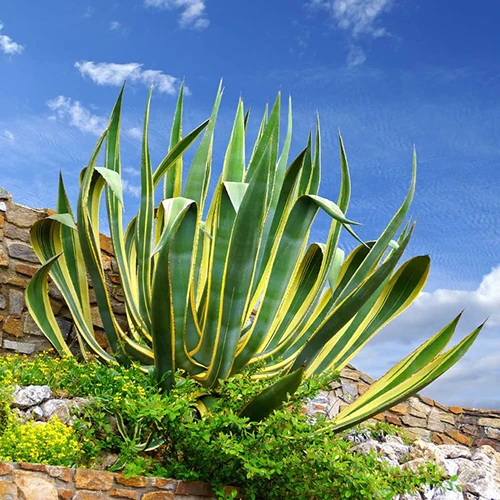
You’ll need to allow space for its massive six- to 12-foot height and equal spread, and keep the potential height of the bloom stalk in mind – these sometimes grow up to 30 feet!
You can find plants in five-gallon containers available from Fast Growing Trees.
Managing Pests and Disease
There are fortunately few animals that are brave enough to munch on these spiky plants, and just as few maladies that commonly afflict agaves. Most are easily avoidable when you take the proper precautions ahead of time.
Herbivores
While deer will typically steer clear of most agaves, they may decide that it’s worth the trouble to munch on a leaf or two if there is nothing else around to eat.
Aside from deer, wild burros and goats that live in desert regions may also nibble on agave plants from time to time. Whether they’re growing wild or planted in your yard doesn’t really matter to them, but the plants are unfortunately toxic to these animals, and ingestion may lead to death.
To avoid browsing, plant your agave in an area where you can limit access, such as behind a fence, so they’re out of reach.
Insects
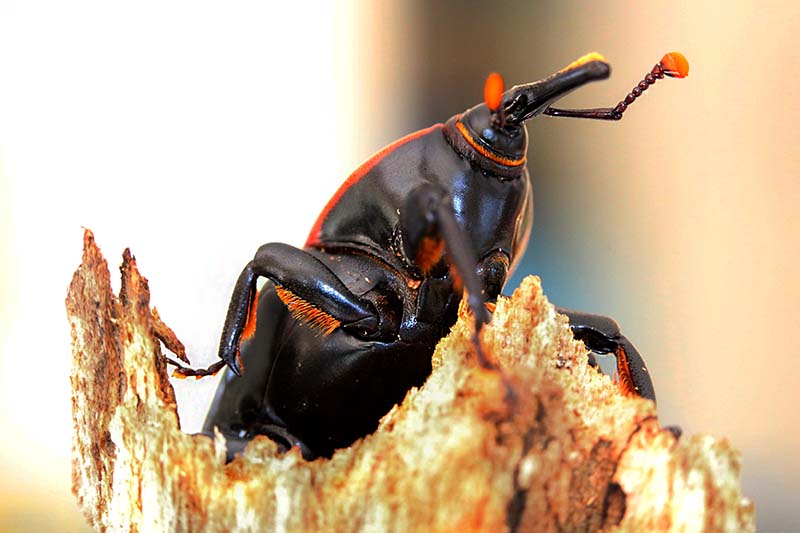
There is only one insect of real concern that targets various species of agave, but it’s a nuisance if it does infest your plants.
Sometimes referred to as the agave snout weevil or the sisal weevil, Scyphophorus acupunctatus is an insect that is known to feed on agave and yucca plants.
These beetles are half an inch long, with snout-like faces. These snouts contains mouthparts that they use to puncture plant leaves and suck out the fluid inside.
They’re generally brownish-black or gray-black, with a dull tone that helps them to blend into their surroundings.
The female of the species will bore a pencil-sized hole into the central stem of a plant at the base, and lay their eggs inside in the springtime.
Small yellow-brown grubs hatch within a few weeks, feeding on the interior of the plant, going mostly undetected until they pupate.
It’s most common to find weevils in plants that are beginning the blooming process, but they can sometimes be spread via the soil in the nursery pots.
Agave plants that are newly or improperly planted or overwatered may be stressed, and this makes them more susceptible to infestation.
Signs of infestation include damage to leaves at the base, near the central stem; wrinkling or wilting leaves starting from the bottom of the plant and moving up; and rotten areas along the core.
If the damage is severe, the entire plant may become loose in the ground and fall over, or it may be pulled up easily.
Because these beetles breach the surface of plants, disease pathogens can also enter, leading to potential fungal infection and rapid decay.
When the adults emerge, they tend to venture to other surrounding plants, and can colonize several in a matter of days.
It can be tough to control a snout weevil infestation, but applying neem oil or insecticidal soap in early spring and again at the beginning of summer can keep them off of your plants, and kill any that are already present.
Grubs or adults that are visible can be removed by hand and dropped into a bucket of soapy water to dispatch them.
It’s best to leave a wide berth between plants as a preventive measure, as a tightly clustered plantings can be colonized and ravaged quickly.
This is another reason why it’s a good idea to relocate pups that develop – it may save them from being infested.
Plants that show signs of a serious infestation should be removed to avoid spreading the pests to neighbors.
While there are chemical insecticides available that may aid in control, they can affect pollinators that might approach the blooms. Their use should be avoided if your plant is preparing to bloom.
Disease
Just as with pest infestation, agave is relatively unbothered by disease. There are only two common diseases that may cause enough damage to note.
Anthracnose
Agaves can suffer from anthracnose, a disease caused by Colletotrichum fungi. This is a common malady that can befall many plants, from houseplants to mature trees.
Also known as black spot, anthracnose presents in agave plants as sunken spots that start off yellow or brown and eventually turn black as the fungus causes severe decay.
It’s more likely to show up and can cause damage more quickly on new growth and young plants than on mature ones.
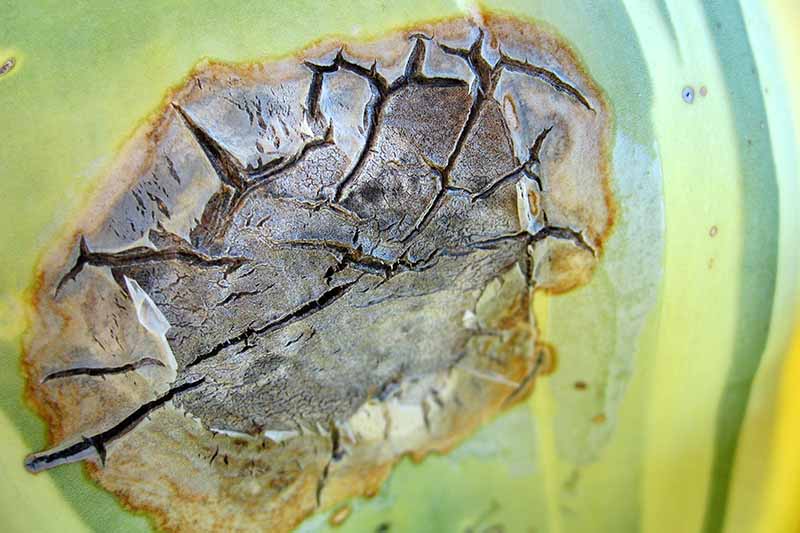
Fungal spores are spread through water, so overhead watering through spray irrigation or via heavy rainfall can distribute them. Soil with poor drainage can also harbor and spread spores, especially during periods of heavy rain with splashing.
If signs of infection are only present on a couple of leaves, you can cut them off using a sharp knife, and destroy or dispose of them away from other plants. Be sure to disinfect the knife between cuts and after pruning.
If you’ve caught the signs of infection early on, it may be worth applying a fungicide to prevent the rest of the plant from falling victim.
While copper-based fungicides can be applied to stop the spread, they tend to build up in the soil after multiple applications and can harm beneficial insects that live there.
If you’re seeing signs of widespread anthracnose on your agave plant, it may be too late for fungicides to work.
In that case, it’s best to remove and destroy affected plants to avoid spreading the disease to the rest of your garden or landscape.
Crown and Root Rot
Crown rot and root rot are both caused by bacterial or fungal pathogens, such as Fusarium oxysporum and F. solani, or Phytophthora cinnamomi, which take up residence and spread in warm, wet conditions, .
Fungal spores and bacteria can be spread through water, infected seed, or the introduction of an infected plant such as one purchased from a nursery.
Pruning infected plants during rainy periods, and infected seeds introduced by animals and birds, can also introduce and spread fungal spores and bacteria.
Signs of crown and root rot on an agave present as rotten, spongy leaf junctures; decaying central stem or leaf tips; wilting and shriveling; and rapid decomposition.
Root rot can be more easily dealt with than crown rot. First and foremost, be sure to let the soil dry out between watering as this can kill fungi or bacteria that are present in the soil.
If your agave is of a manageable size, you can dig it up, let the roots dry out, and trim away the sections that show signs of rot, such as brown or red coloration, or a slimy texture.
Spray both the roots and the hole you removed the plant from with a biological fungicide, such as Cease, available from Arbico Organics. Allow the roots to dry out again.
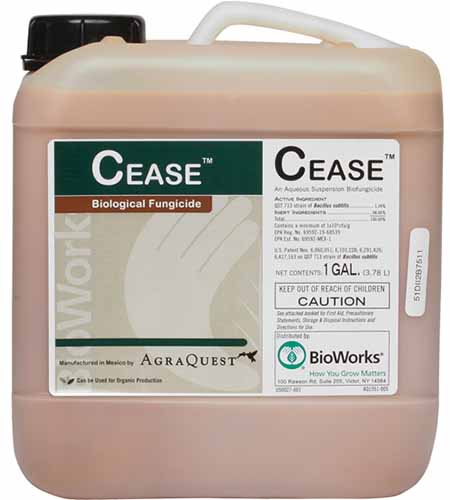
This product contains Bacillus subtilis, a species of bacteria that controls a variety of different plant pathogens.
You might consider moving the plant to a different location with better drainage to avoid reinfection.
In most cases, if crown rot is widespread, you will need to remove and destroy the plant. It’s unlikely to recover from serious damage.
Best Uses for Agave Succulents
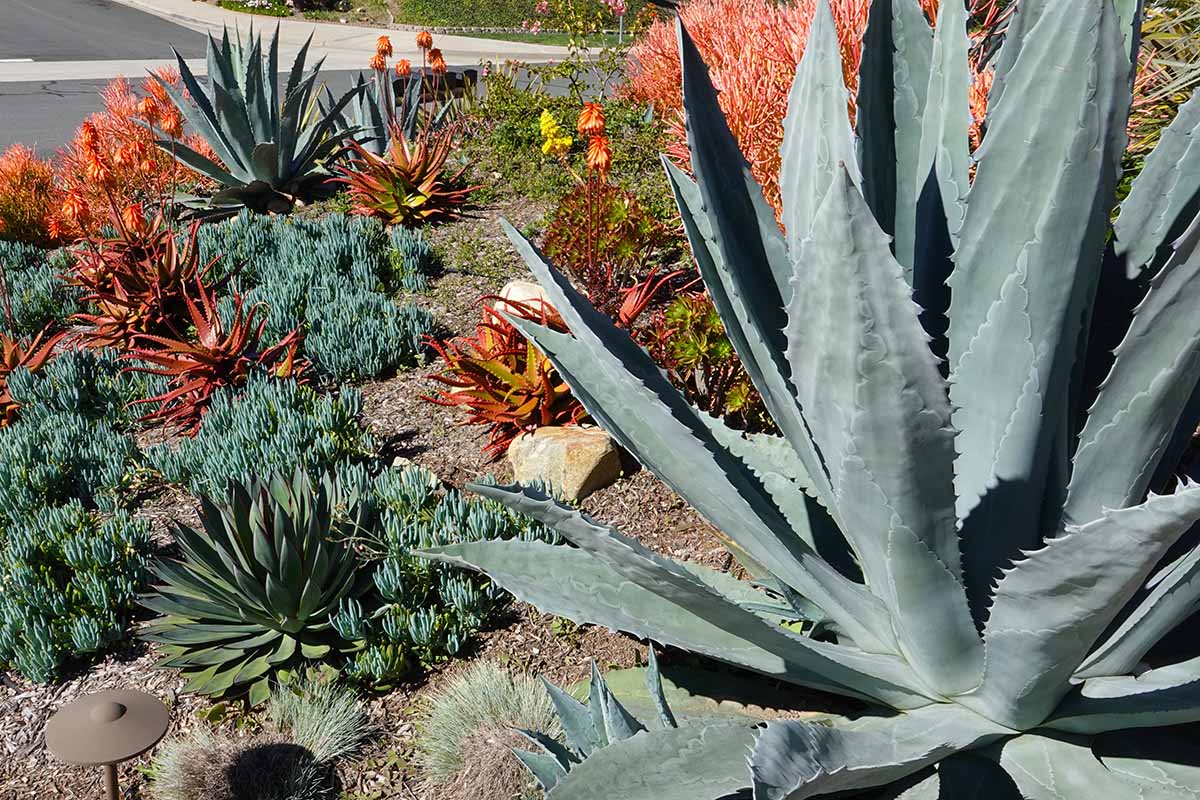
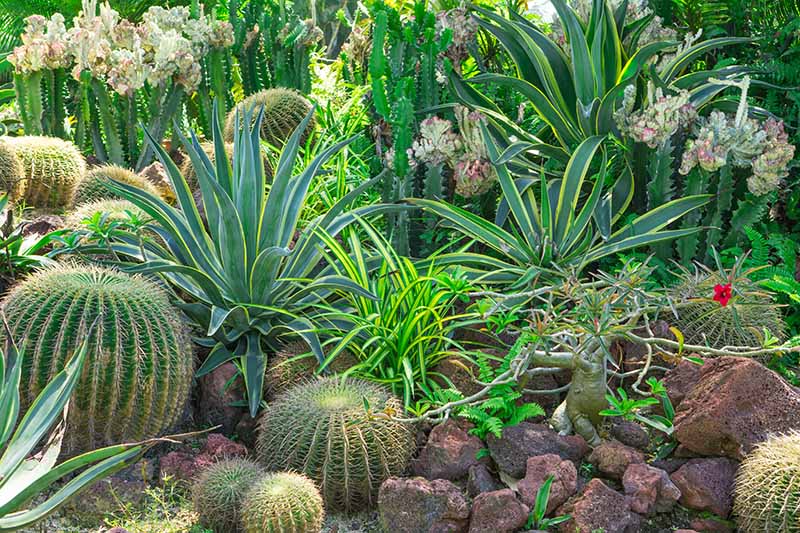
Agaves are perfect for creating natural, environmentally appropriate planting beds in desert regions.
They blend well with other plants that are suitable for xeriscaping, or landscaping in an arid environment by using plants that do not need supplemental irrigation.
For more information on planning a waterwise garden, see our guide to xeriscaping your yard for efficiency and aesthetics.
If you’ve got a very sandy yard with lots of open space, you might consider planting an agave as the focal point, or grouping several end to end near the property line to form a barrier that few people would attempt to cross – like a sharp living fence.
In regions where palm trees thrive, agaves make the perfect companion plants, as they grow well in the mottled shade from the palms.
A stunning bed can be created with palm trees, a few well placed agaves, some bougainvillea, lavender, and sage, blending textures, forms, and colors that complement each other.
Group the plants around Adirondack chairs and a chiminea for a serene retreat adjacent to your deck or patio.
Quick Reference Growing Guide
| Plant Type: | Perennial evergreen succulent | Flower/Foliage Color: | Yellow to yellow-green/Green to blue-green, variegated |
| Native to: | Central and South America | Maintenance: | Moderate |
| Hardiness (USDA Zone): | 7-11, depending on variety | Tolerance: | Sand, drought, rocky soil, salt |
| Bloom Time/Season: | Decennially or longer | Soil Type: | Dry, sandy, rocky |
| Exposure: | Full sun to partial shade | Soil pH: | 6.0-7.0 |
| Time to Maturity: | 10+ years | Soil Drainage: | Well-draining |
| Planting Depth: | 1/8 inch (seeds); root ball depth (transplants) | Companion Planting: | Aloe, bougainvillea, cacti, desert wildflowers, kalanchoe, lavender, ornamental grasses, palm trees, prickly pear cactus, sage, yucca |
| Spacing: | 4-14 feet, depending on variety | Uses: | Border, defensive planting, focal point, feature, xeriscaping |
| Height: | 2-12 feet | Order: | Asparagales |
| Spread: | 2-12 feet | Family: | Asparagaceae |
| Water Needs: | Low | Genus: | Agave |
| Common Pests and Diseases: | Snout weevils; Anthracnose, crown rot, root rot | Species: | Americana, angustifolia, attenuata, bracteosa, colorata, deserti, filifera, geminiflora, macroacantha, mckelveyana, montana, lechuguilla, ovatifolia, parrasana, parryi, parviflora, potatorum, salmiana, shawii, stricta, tequilana, titanota, toumeyana, utahensis, victoriae-reginae, vilmoriniana |
Sharp and Sharp-Looking for Not Quite a Century
If you have a large, dry expanse of yard that you need to break up with some living landscaping, agave is the perfect choice. It’s a stunning conversational piece as it grows, sometimes towering overhead like something from the time when dinosaurs roamed the Earth.
Creating a bed with these plants is easy and fun, offering years of enjoyment with little maintenance required. As a bonus, if you’re a nature lover, you’ll see lots of small creatures using the huge, flat leaves for shelter and shade.
If you happen to catch these plants when they’re in bloom, be sure to gather the seeds afterwards to start more and continue the cycle, or transplant the bulbils into new locations in the garden.
Have you had the opportunity to see an agave in bloom? Tell us about it in the comments below, and share some pictures if you’ve got them – we would love to see them!
And if you’re interested in more drought tolerant plants for your waterwise garden, have a look at these articles next:

Well written and very informative. Thanks!
Thanks Brian! I’m glad you found it useful!
my hated 10 ft high agave started blooming, original home owner planted a 3ft plant when they moved in ca.1975. It is 47+ y old (+ for original 3ft ht). I believe an a. americanus? 3/4 in long stabby end thorns, sawblade edges). I was gunna chop it from my foundation, I’ll delay the execution since it will die anyway
Thank you for this informative article. I have a large Agave ovatifolia that was beautiful when we bought our home, but in the last 8 months, has been damaged by roof repairs, cable installers and a tornado. Her leaves are full of debris. How can I clean it without hurting myself?
Hi Tamica! Thank you for your comment and your question. Sorry to hear about the damage to your agave. I can suggest two options to aid in removing debris – a long-handled broom can help to remove small objects from leaf surfaces. The other option is to buy a reaching tool from a retailer like Amazon or Walmart; they can help to extend your reach into those small, spikey spaces to retrieve objects that are deeply lodged. As for damage, that is harder to mitigate. Agave don’t produce new leaves or regrow once they’re damaged. It’s best to use a… Read more »
This article was very informative about the century plant. My story begins when I was a kid no more than 8-10 years old. Mother’s Day was the reason I got acquainted with my long term affair with a century plant. At such a young age I had no means to purchase a gift for my mother, however I remember that she once told me that she wanted a century plant of her own as she pointed out to me the specimen. Remembering my mothers fondness of the plant I went out on a excursion to seek a century plant out… Read more »
Pictures
Carlos, thank you for sharing this story! Century plants really can be an amazing legacy, especially after all the work and thought you put into that gift to your mother. I hope you can gift those new plants to your kids someday!
This is a start and will post pictures as it blooms
Thanks for sharing Bob! What a gorgeous garden you’ve got there!