Any plant is going to do better in the long term if it has the ideal setup to begin with, and this is particularly true for roses.
Given that a rose plant will likely be with you for at least a few decades to come, you don’t want to slouch on setting it up right.
It may seem pretty straightforward: dig a hole, put the plant in, fill it up, and voila! But not so fast. There’s more to it than that, and it’s all those little details that can set your plant up for success… or failure.

With so many pests, diseases, and other problems just waiting to plague your plants, it’s important to find the right spot, at the right time, and put them in the ground the right way.
That’s what this guide is all about.
We’ll walk you through step by step, to help you give your new roses just what they need to get started. Here’s what we’ll go over:
What You’ll Learn
By the way, this guide primarily deals with potted roses, though it also applies to bare root ones as well.
If you prefer to start with a bare root plant, head to our guide to learn even more about selection and planting.
Here we go!
1. Choose the Right Planting Time
While you can always plant whenever the soil is workable, your rose is more likely to survive and become well-established if you put it in the ground at certain times of the year.
Ideally, you will put your new addition in the ground when the weather is mild, and rain is a regular feature in the forecast.
That usually means the best time to plant is in the spring or fall, with spring being preferred in areas that have harsh winters, namely in USDA Hardiness Zones 6 and below.
Wait until the danger of frost has passed in the spring and the soil can be worked easily. In the fall, plant at least six weeks before the first expected frost date.
Don’t plant when the soil is wet, such as after a heavy rain storm, as this can cause it to compact around the roots. Avoid planting during extreme heat or drought conditions as well.
2. Site Selection
The second step is picking the right spot.
Site selection is super important! While it’s possible to grow roses in all kinds of places, the right site will make your life as a gardener so much easier.
So what does the perfect spot look like? This depends on the species, hybrid, or cultivar you choose, so make sure to read up on its specific requirements.
For instance, in Portland, Oregon, there are roses lining the freeways.

They receive little care in terms of maintenance, and the soil is definitively subpar, but they still bloom. The key is that they are mostly species or very hardy types.
Some of the old garden, showy, elegant types – like tea or damask roses – would never survive in that environment. These need a location with better soil, optimum sun exposure, careful spacing, and supplementary irrigation.
By the way, if a hardy rose is sounding mighty good to you right now, we have a guide to help you pick the right one.
While site selection depends on the variety you have, there are some general guidelines that apply to most types.
They prefer full sun, with morning sun in particular. A site that is well-draining and protected from wind is ideal. Don’t plant under trees.
When possible, you should also choose a spot where roses haven’t been grown in the past three years.
They also prefer fertile, loamy, well-draining soil with a pH around 6.0 to 6.5.
I like to put a potted rose from the nursery in place for a day or two in my chosen spot, to decide if I really like the position, and to make sure there isn’t any unexpected shade.
Also keep this in mind: your shrub won’t look so pretty in the winter. You might not want to put it directly in the center of an idyllic view outside your window, for instance.
It might look pretty now, but imagine what it will look like when it’s bare as well.
For more information on choosing the best location in your garden, head to our comprehensive guide!.
3. Create the Hole
Before you start digging, remove any weeds or grass from the area you plan to plant in. Use a garden fork to dig around the area, and remove any large rocks.
In a perfect world, I’d tell gardeners to dig a five-foot-wide by three-foot-deep hole (or one that’s even larger!) for each and every rose bush.
But I realize that’s totally unrealistic.
I sure as heck am not about to do that much digging, but I think this recommendation helps to illustrate the general idea nonetheless: the better a foundation that you are able to create for your roses, the happier they’ll be.
The more you can enrich and perfect the soil where you are planting, the better – unless you have perfect soil already, of course.

At a minimum, dig a hole that is twice as wide and just a bit deeper than the container that your shrub came in, or the size of the root structure.
Before you commit to a given spot, it’s always smart to test and make sure the soil has appropriate drainage.
Fill the hole with water, and let it sit for an hour. If the water hasn’t drained out in an hour, you need to amend your soil before you can put a rose there.
That means working in some compost at least two feet or more down and around the hole you already created.
Once you have that sorted, mix in roughly equal parts well-rotted compost and native soil that you dug out, to enrich it.
Compost helps amend soil texture whether you have clay, sand, or something in between, and it adds nutrients that your plant can use as it becomes established.
Alternatively, you can plant in a raised bed or container filled with purchased potting soil if you don’t want to or can’t create the right conditions for your rose.

Fill the base of the hole to the point that your plant will sit at the right height. If the rose is grafted, then you’ll want to place the bud union just above the soil level.
For people living in USDA Hardiness Zones 6 and below, you’ll want to bury the bud union by an inch or two.

If your plant isn’t grafted, you want the crown to sit at ground level. Those in Zones 6 and below should bury the crown by an inch.
It can be a little difficult to tell where the plant will sit before you fill the hole in with soil, but I find that placing a stick or other straight piece of wood or metal across the hole helps to act as a guide.
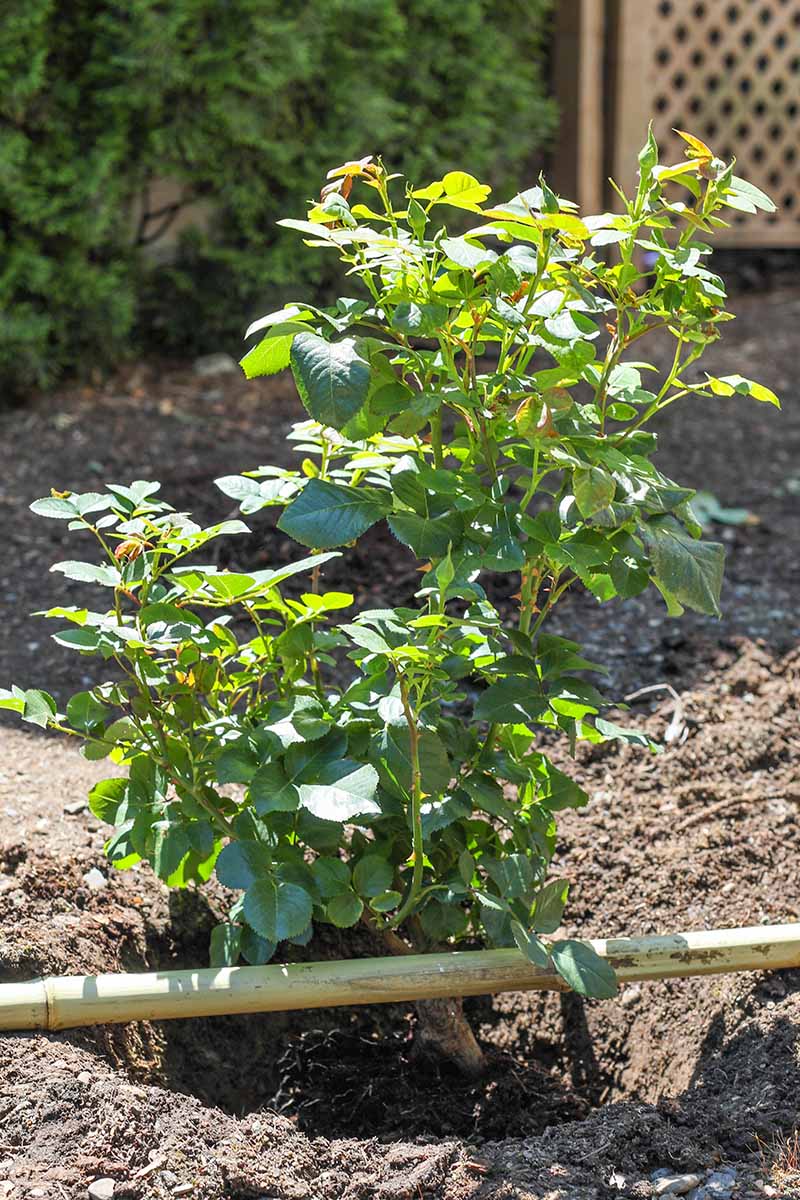
Lower the rose into the hole and you’ll be able to see where the crown will sit when it is filled up.
Then, create a small cone-shaped mound in the base of the hole.

The purpose of this mound is to create a support structure that encourages the roots to grow down and out, rather than straight down or around the perimeter of the hole you dug.
Don’t put fertilizer in the hole.
4. Prep the Plant
If you have a bare root plant, be sure to soak it in water for at least eight hours or so before starting this process. This adds moisture and helps it to emerge from dormancy.

Now, put on your gloves. Roses are great, but they can be vicious if you catch yourself on a prickle (also commonly known as a thorn).
Next, trim away any canes that are smaller than a pencil, until you have about three to five good-sized canes left.
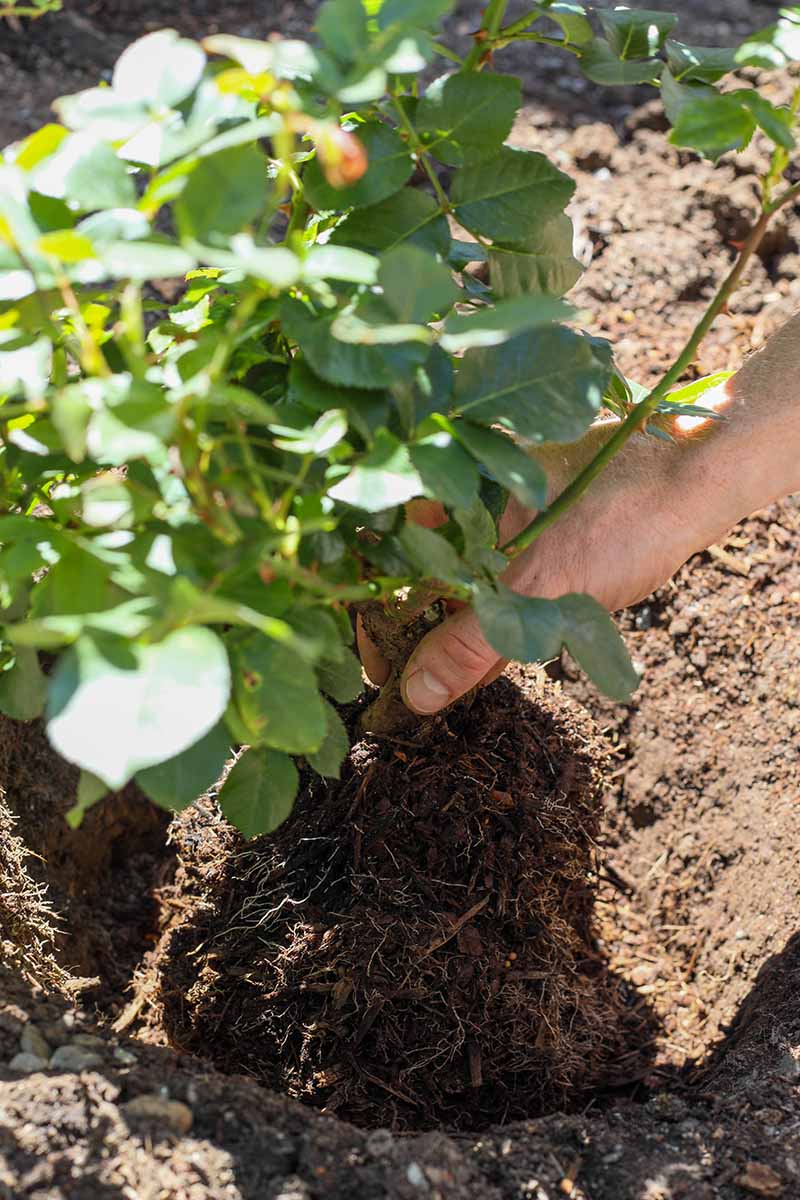
Gently remove the potted plant from its container by gripping around the base and wiggling it. Loosen the soil and spread out the roots gently, without breaking them.
For either bare root or potted plants, trim away any dead roots or canes using a clean pair of clippers.

Cut away any flowers or forming buds to the first five-leaf leaflet.
5. Put It in the Ground
Place the prepared rose in the hole, and arrange the roots over the cone of dirt you made in the base of the hole. Check to make sure the bud union or crown is sitting where you want it.
Slowly fill the hole with the soil and compost mixture, tamping down gently to remove any air pockets as you go. You don’t want to tamp too hard or you can smash the roots.
Once you’ve filled the hole by about two-thirds, soak it well with water to help settle the soil.
Check to see that the bud union or crown is where you want it to be, and then continue adding soil until the hole is full.
If the rose has settled too low, grip around the crown (you are wearing gloves, right?) and gently pull the plant up. Use a pumping motion to do this – think of the motion you might make when plunging a toilet.

Water again to settle the soil. Add more soil if needed to level the ground, and tamp lightly.
If you planted a bare root, heap compost around the canes until just the tops are sticking out. Again, head to our bare root rose guide mentioned above to read in more detail how to do this, and when to remove it.
For potted roses, some people like to trim the canes down to about nine inches in height. If you don’t want to trim that much, don’t stress about it. As long as you have removed any buds and flowers, it should be fine.
However, if your rose starts telling you that its root structure can’t support the top, by tipping over or leaning after you plant it, trim the stems and foliage back by at least a third.
You’ll know the plant is struggling if the foliage starts wilting in the heat or in between waterings.
Now, keep your new garden pal well-watered, and add soil if the hole you dug starts to settle around the base. For more tips on growing roses, we have a beginner’s guide to raising these beauties.
Give Your Rose the Right Start
Roses can be a bit demanding sometimes, there’s no denying it. But you’re less likely to run into trouble down the road if you give your plant the right conditions to begin with.

I hope that you find that this guide has set you up for success, and I have no doubt your roses will soon be the crown jewel of your neighborhood.
Don’t forget to show us the fruits of your labor by sharing your photos in the comments section below. Or, if you run into any problems, we can help with that, too!
Now that you’re a planting pro, you might want to expand your rose knowledge. If so, we have some helpful guides that you might want to take a look at next: