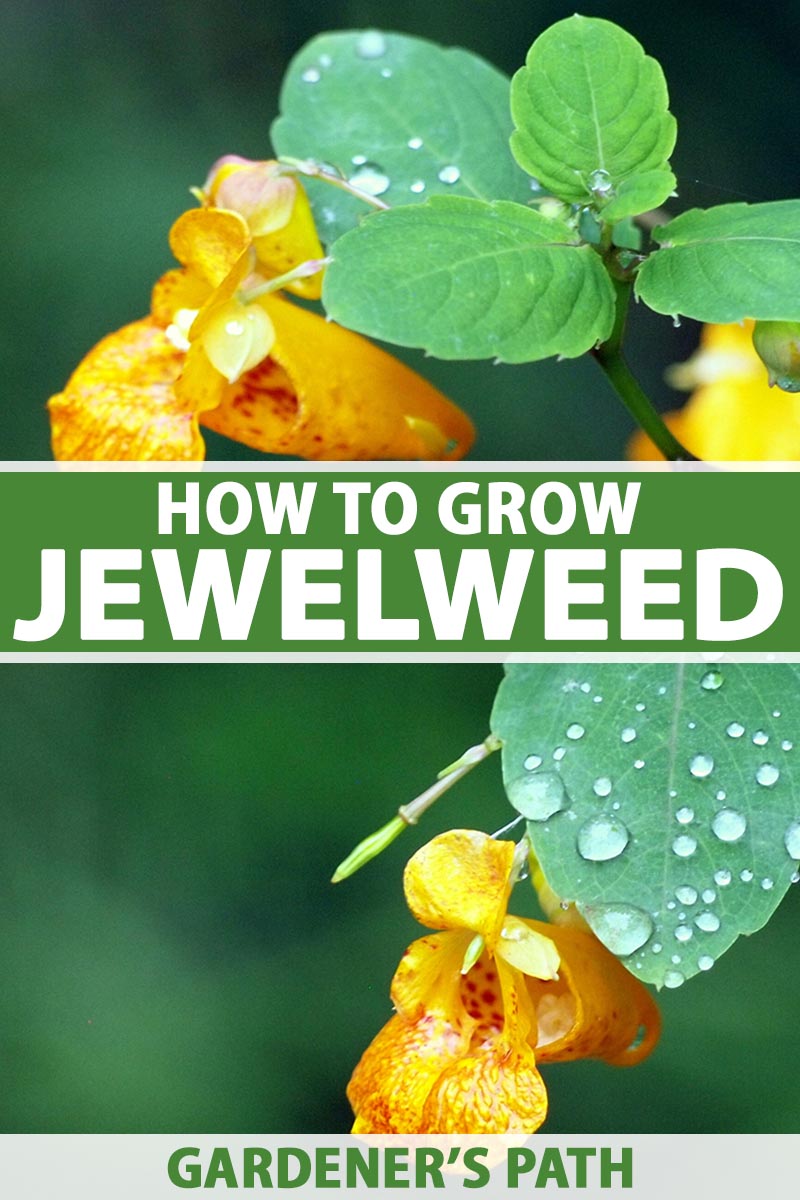
Impatiens capensis and I. pallida
Impatiens are commonly referred to as “touch-me-nots.”
While this nickname may conjure up images of a spiny cactus or other uninviting species, they’re actually lovely, flowering annuals.
The name is derived from the way that the plants disperse seed, flinging it in all directions at the slightest touch.
We link to vendors to help you find relevant products. If you buy from one of our links, we may earn a commission.
Two of these touch-me-not species, known commonly as jewelweed, are wildflowers that have garnered interest from gardeners due to their bright, distinct blooms.
Even though these species are typically found growing in the wild, luxuriating in shady embankments of the forest, they can also make a lovely, natural pollinator-supporting border planting in the garden or landscape.
Let’s take a look at how to include them in your garden plans.
Here’s what we’ll cover:
What You’ll Learn
There are over 1,000 known species of impatiens today, with I. walleriana being the variety most commonly grown in gardens.
No doubt you’ve seen these in residential and commercial landscapes, planted in colorful masses or borders where a gardener or landscaper wanted to add low-maintenance interest.
You can learn more about these in our guide to growing impatiens.
You might be planning to provide the same growing conditions as you would for these if you’re already familiar with the conditions they require, but not so fast!
Jewelweed needs some slightly different accommodations to thrive, mainly because these species are woodland plants rather than a cultivated variety.
Let’s start by getting to know a little more about them.
What Is Jewelweed?
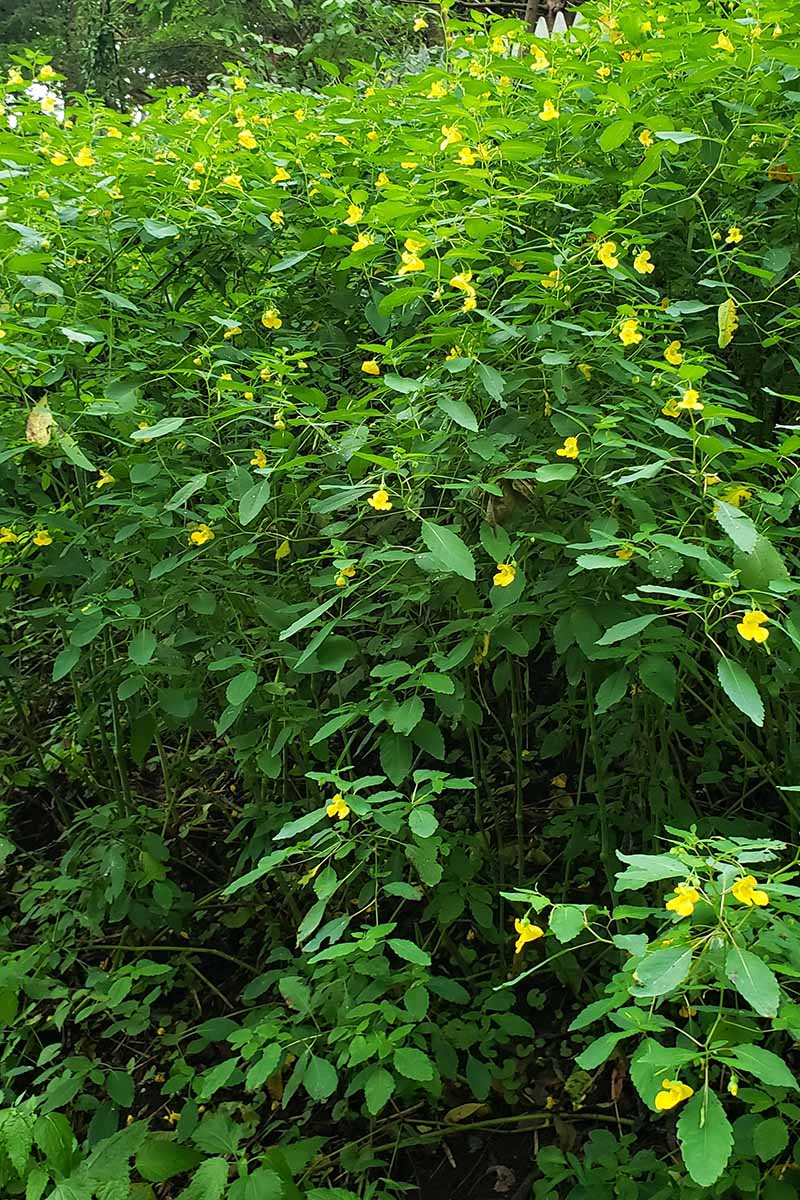
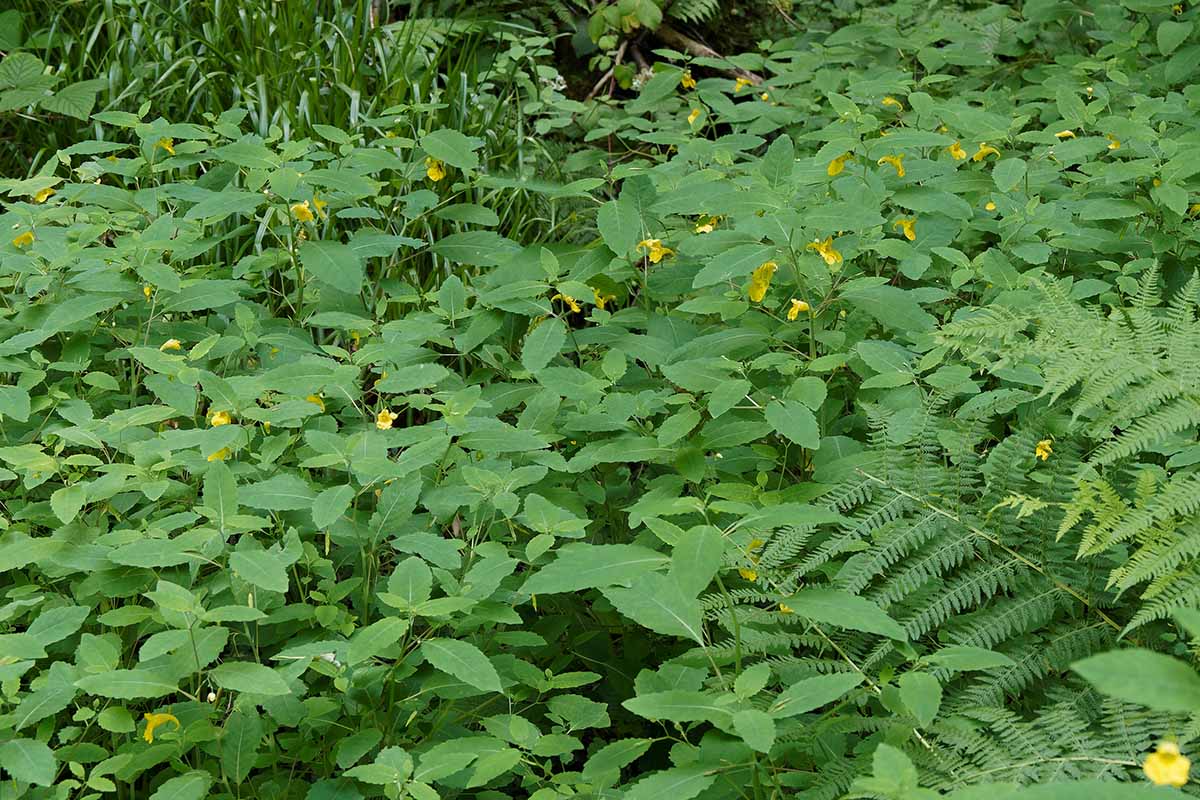
Two species of jewelweed are endemic to North America, where they’re typically found in gullies or ditches in or bordering the forest. They grow best in full shade with just a few hours of sunlight per day.
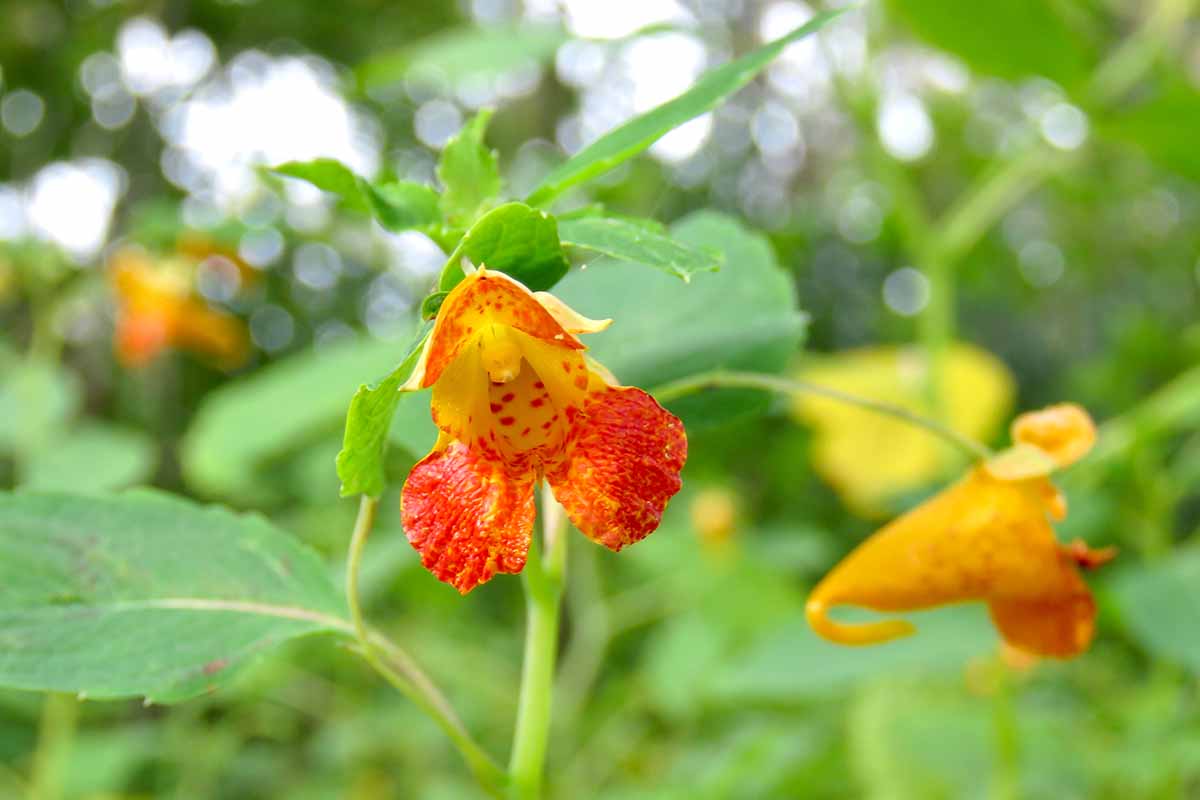
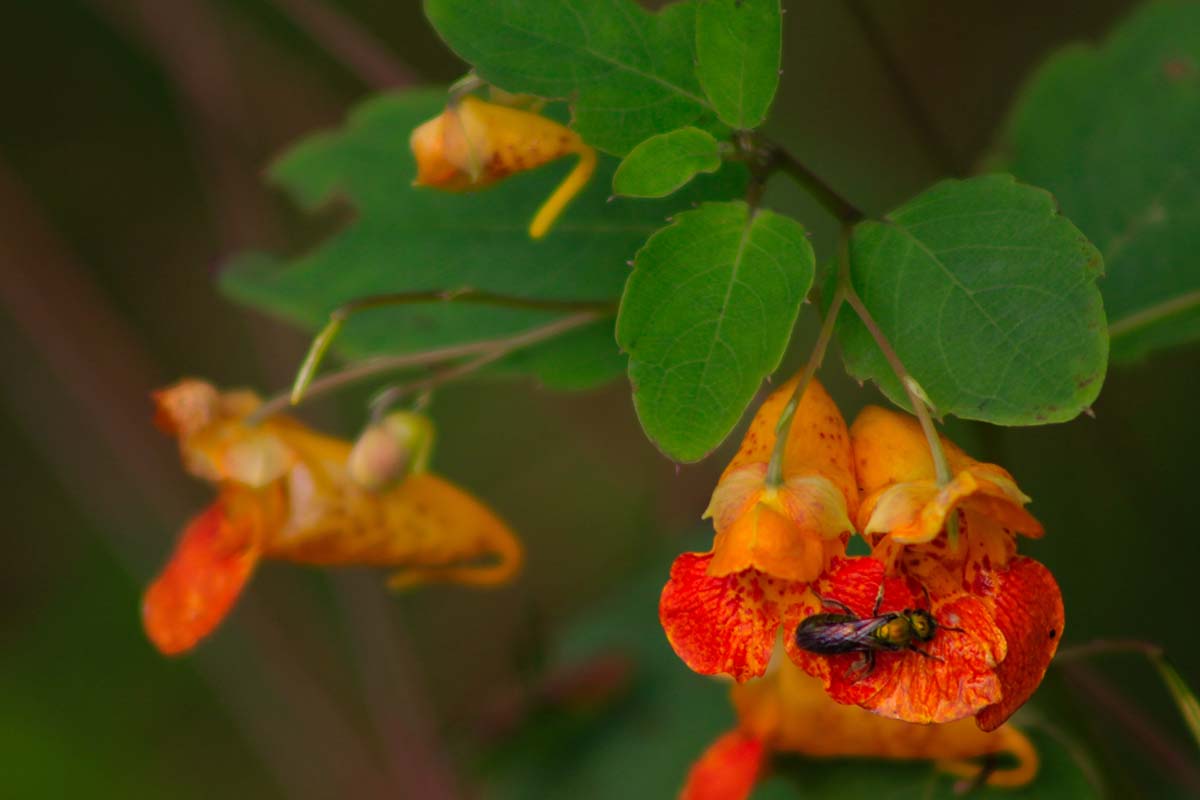
Like other impatiens, one type – I. capensis, the spotted orange jewelweed – prefers a lot of water and rich, loamy soil. Unlike its cousins, this species enjoys wet soil, and sometimes even standing water, as opposed to good drainage.
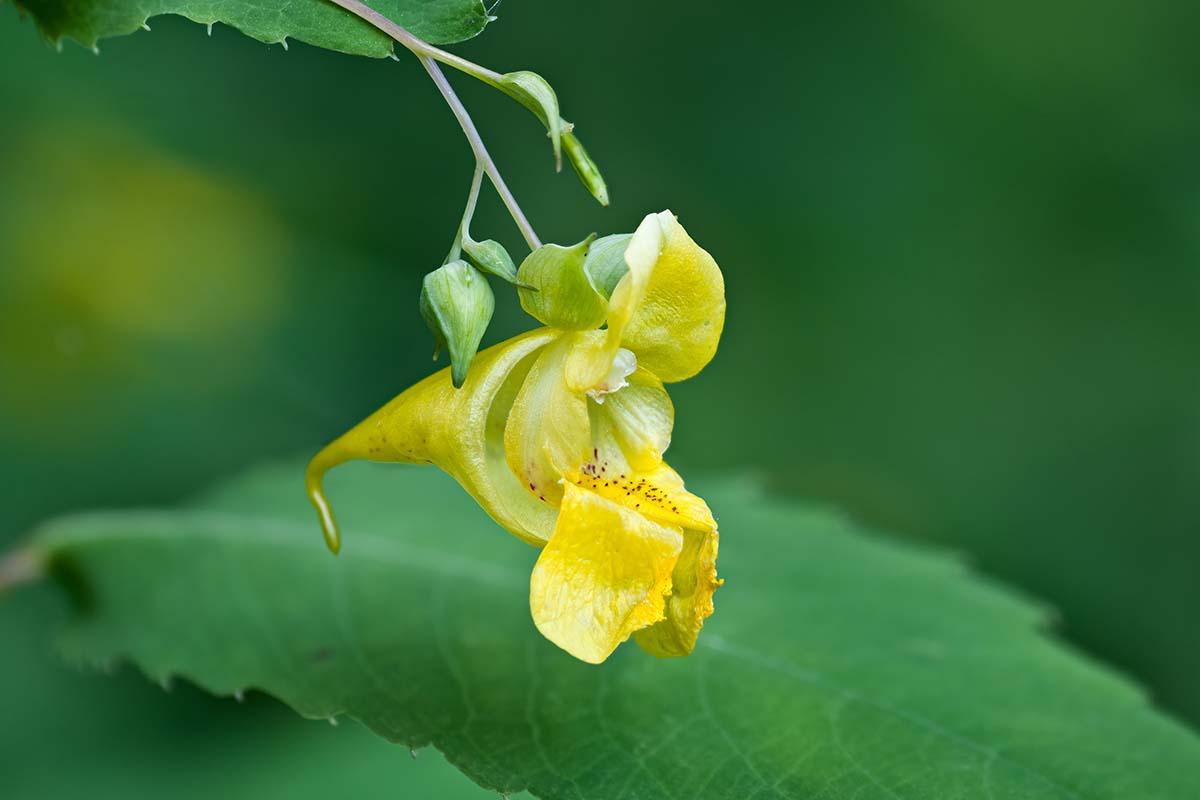
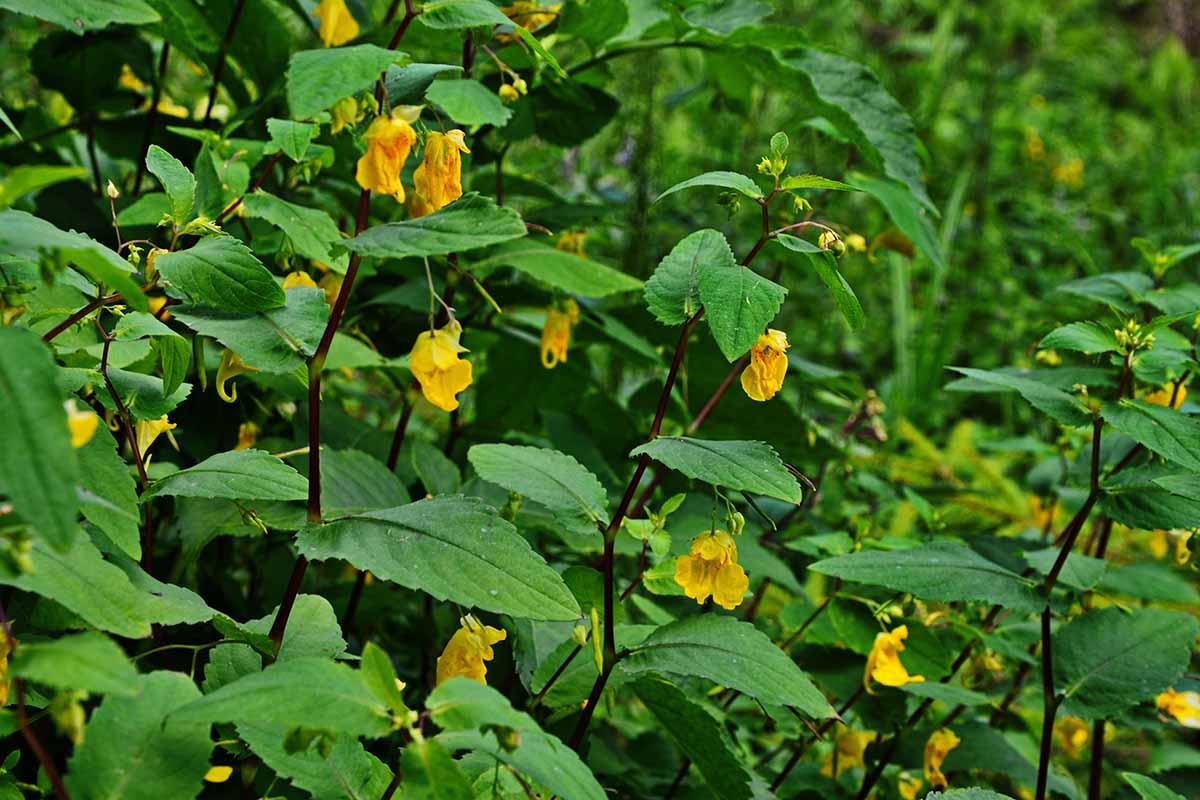
The other – I. pallida, or yellow jewelweed – doesn’t require as much water.
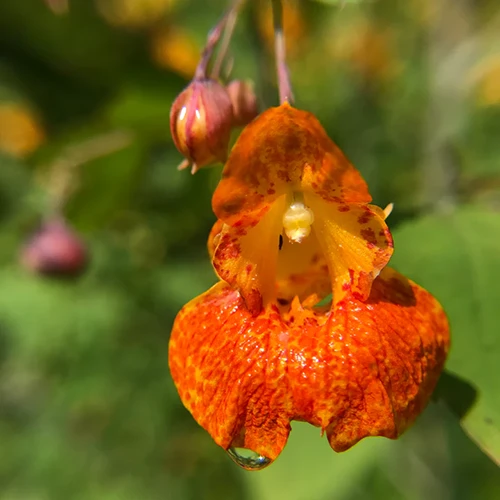
It’s unclear where the common name “jewelweed” comes from, but the bright, colorful blossoms are often cited as possible inspiration, or the way that water droplets collect on the silvery undersides of the leaves, glistening in the sunlight.
It’s important to differentiate these native plants from another species that may be referred to by the same common name.
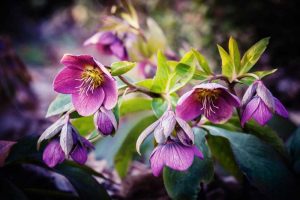
Himalayan balsam, I. glandulifera, is set apart by its purple blooms. With its origin in the Himalayas, this semi-aquatic species is known to be invasive on several continents, including North America.
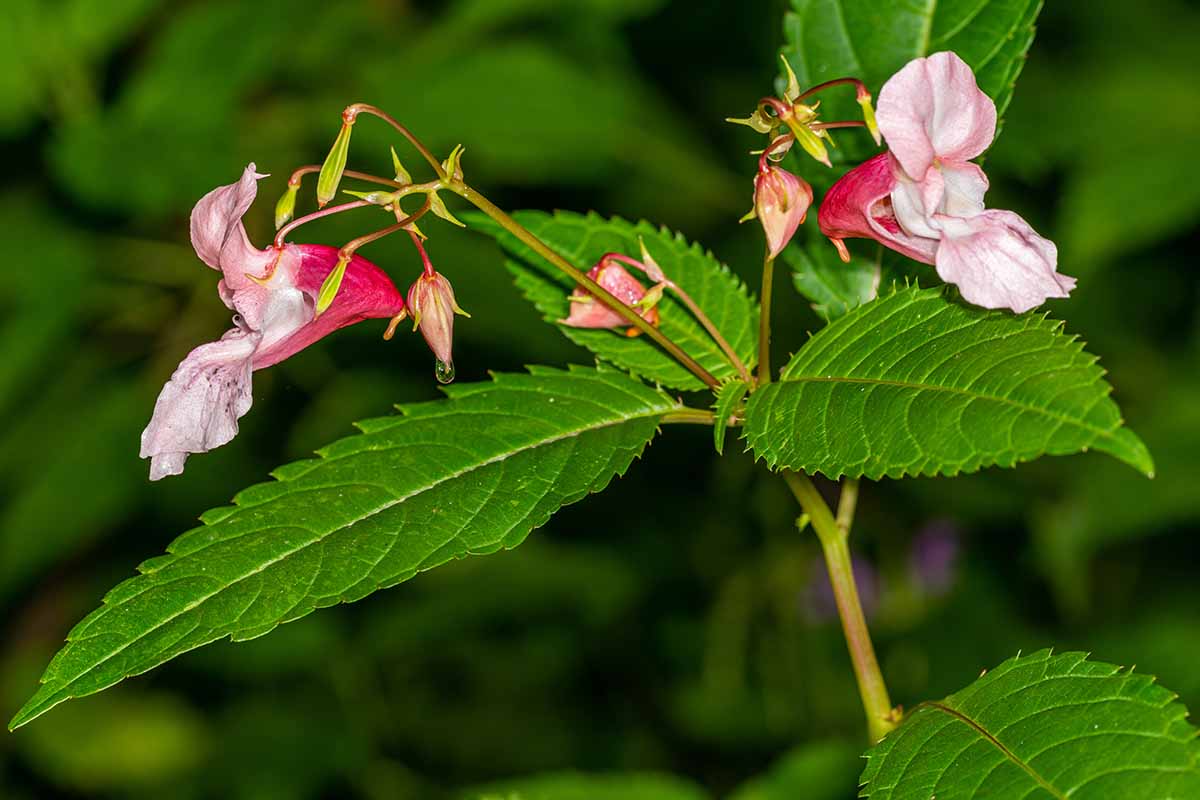
Sometimes referred to as ornamental jewelweed or policeman’s hat, this species is also found in woodland areas where the soil is moist or saturated.
So, how can we tell the native I. capensis and I. pallida apart from others in the same genus? Let’s take a closer look.
Anatomy
There are a few key visual differences between this and other varieties of impatiens.
Most annuals in this genus grow in a compact shape that rarely exceeds about 16 inches in height, although some can reach about 36 inches tall at maturity.
Both orange and yellow jewelweed sometimes leave these in the dust, at towering heights of between two and five feet.
The most common species found in gardens, I. walleriana, has a mounded habit. Not so with these wild cousins, though, which tend to branch into a more open, upright shape.
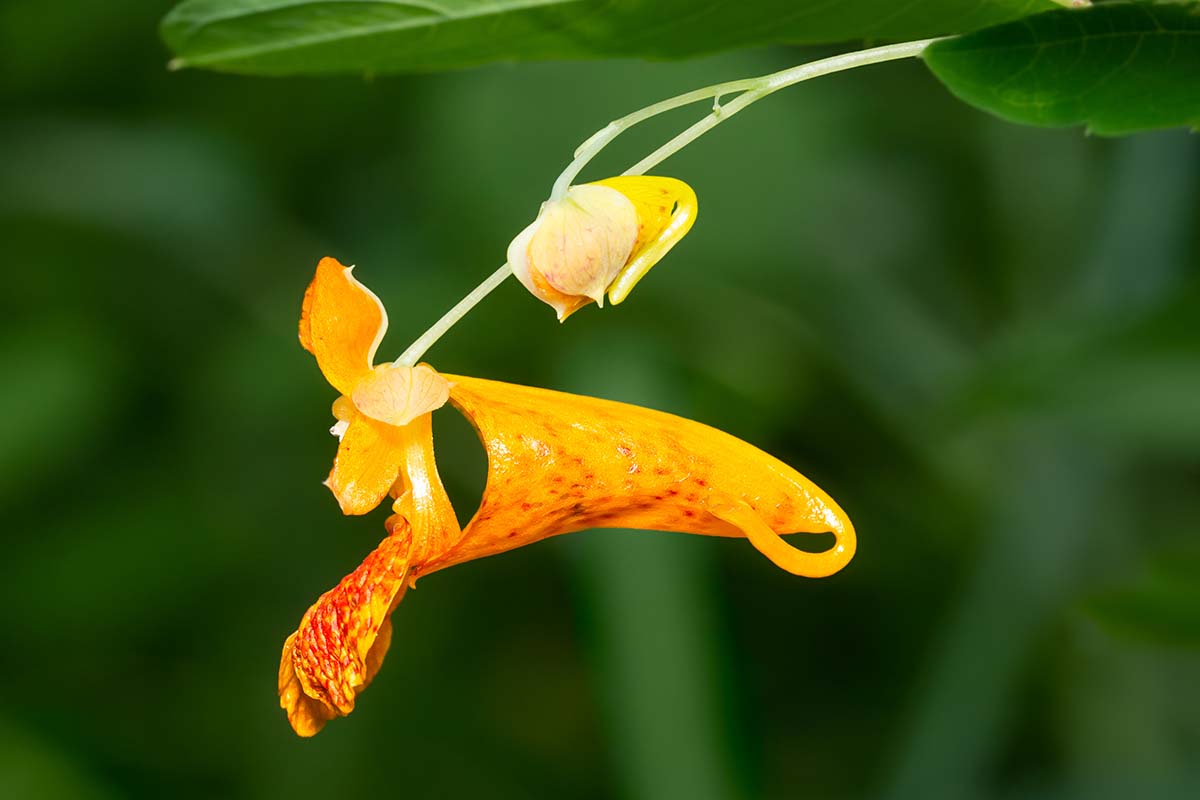
The blooms are another obvious difference. Whereas most cultivated impatiens have flat, symmetrical, and sometimes double or triple blossoms, jewelweeds have cornucopia-shaped, single blossoms.
At the end of each trumpeted bloom for both species, there’s a distinctive curved spur.
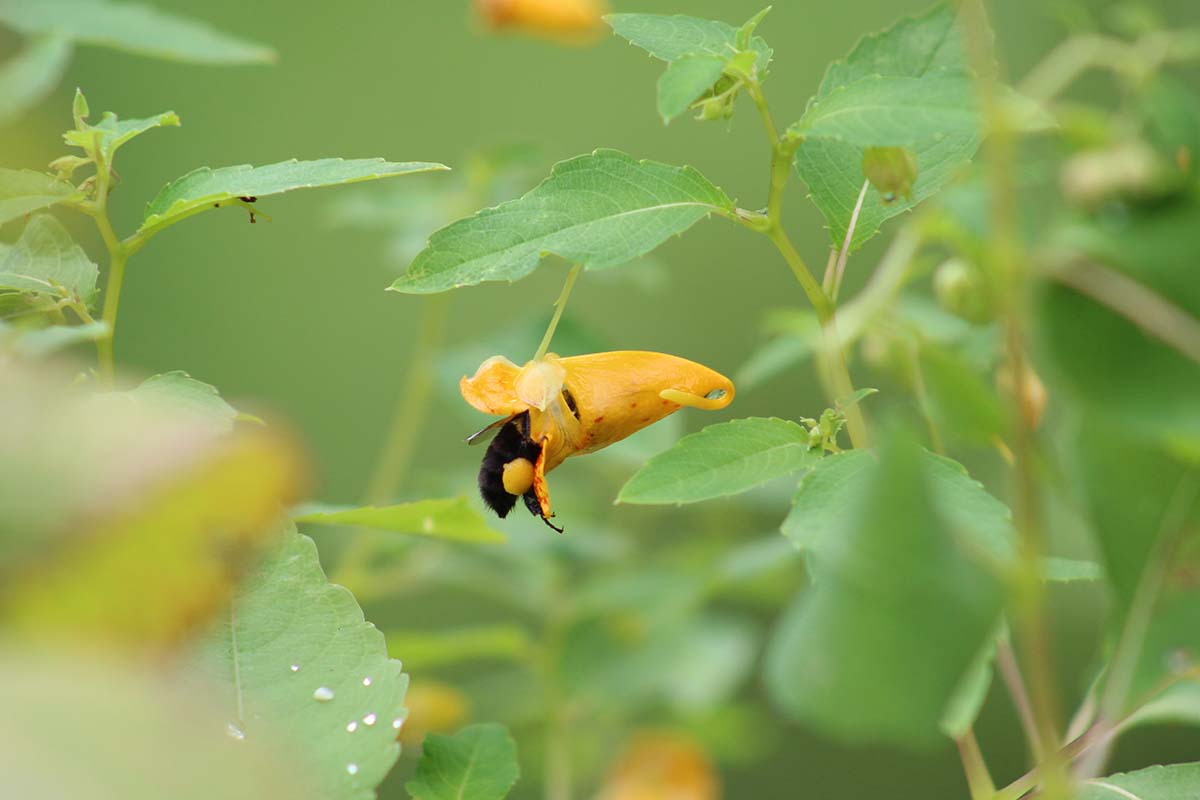
The lower apron of petals in I. capensis typically displays a pattern of orange spots, while the rest of the blossom is solid orange.
Flowers are yellow in I. pallida with a small patch of spots at the opening, though they may sometimes produce blossoms that are nearly white.
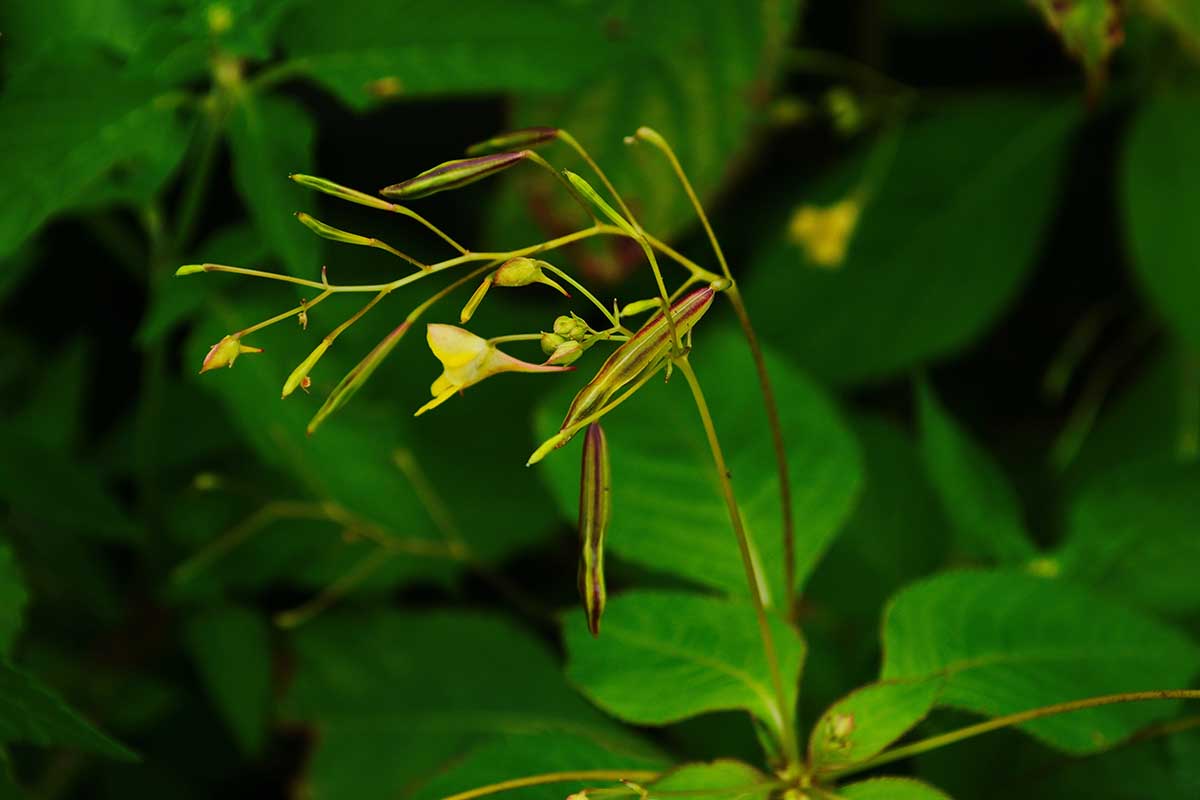
Interestingly, both species produce two types of blooms. Aside from the showy trumpets that attract pollinators, a second, less conspicuous type, known as cleistogamous flowers, develops as well.
These tiny green flowers do not open, as opposed to chasmogamous flowers, which do. They have no petals, and don’t require pollination to produce viable seeds.
When mature, these will form seed capsules that resemble small green beans. At the slightest touch, they’ll burst open and widely disperse their seed.
Because of this method of self-propagation, both species self-seed prolifically, either with or without available pollinators. Each year, as the pods burst, you can be assured that your garden jewels will return in the spring.
Cultivation and History
Orange jewelweed has a long history of use with indigenous peoples of North America within the plant’s range.
The watery fluids inside the stems were used for many purposes, from treating illnesses to easing itching and the spread of poison ivy rashes.
This has led to further study and the fluid has been tested in the modern day for efficacy in the treatment of poison ivy rashes.
While it has proven to be effective in aiding healing, it’s still unclear whether this is attributed to a compound called lawsone or to saponins. Both are produced by the wild touch-me-not.
Blossoms were, and are, used as a minor food source, as they’re edible and make a lovely, colorful addition to salads and cold vegetable dishes.
Both the pods and the seeds can also be eaten, although it’s best to consume any part of this plant in moderation as it’s extremely nutrient-dense and contains calcium oxalates and selenium. In some people, this combination can act as a laxative.
The shoots, leaves, and stems are also edible, although they must not be consumed without cooking. It’s recommended to boil them in two changes of water prior to consumption.
But, as with any wild plant, it’s important to test a small amount to make sure you don’t have an adverse reaction.
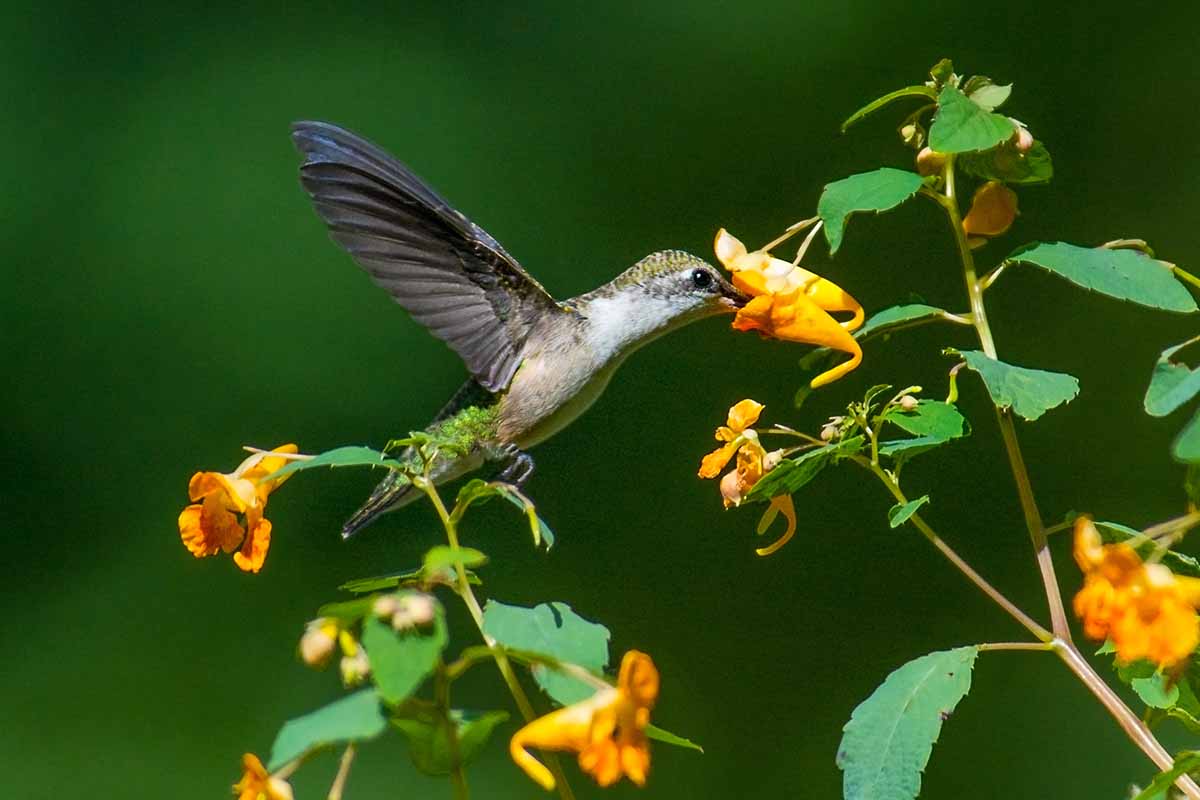
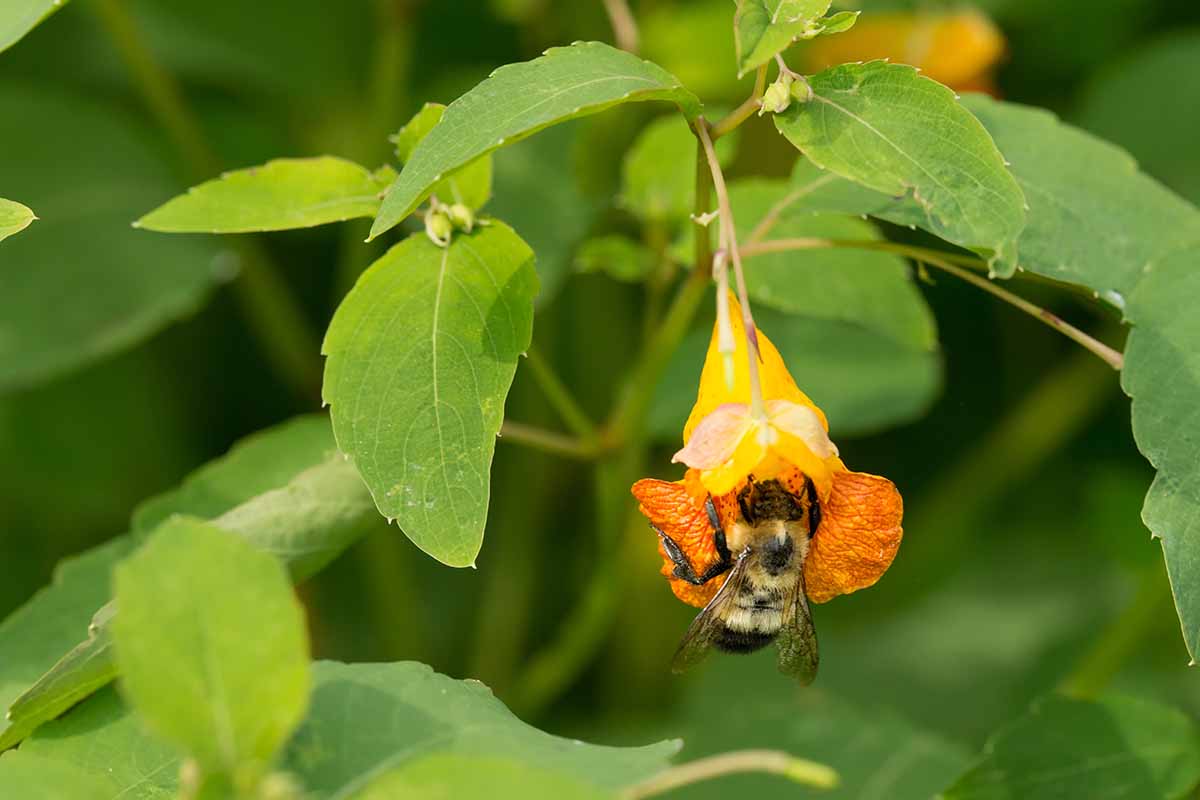
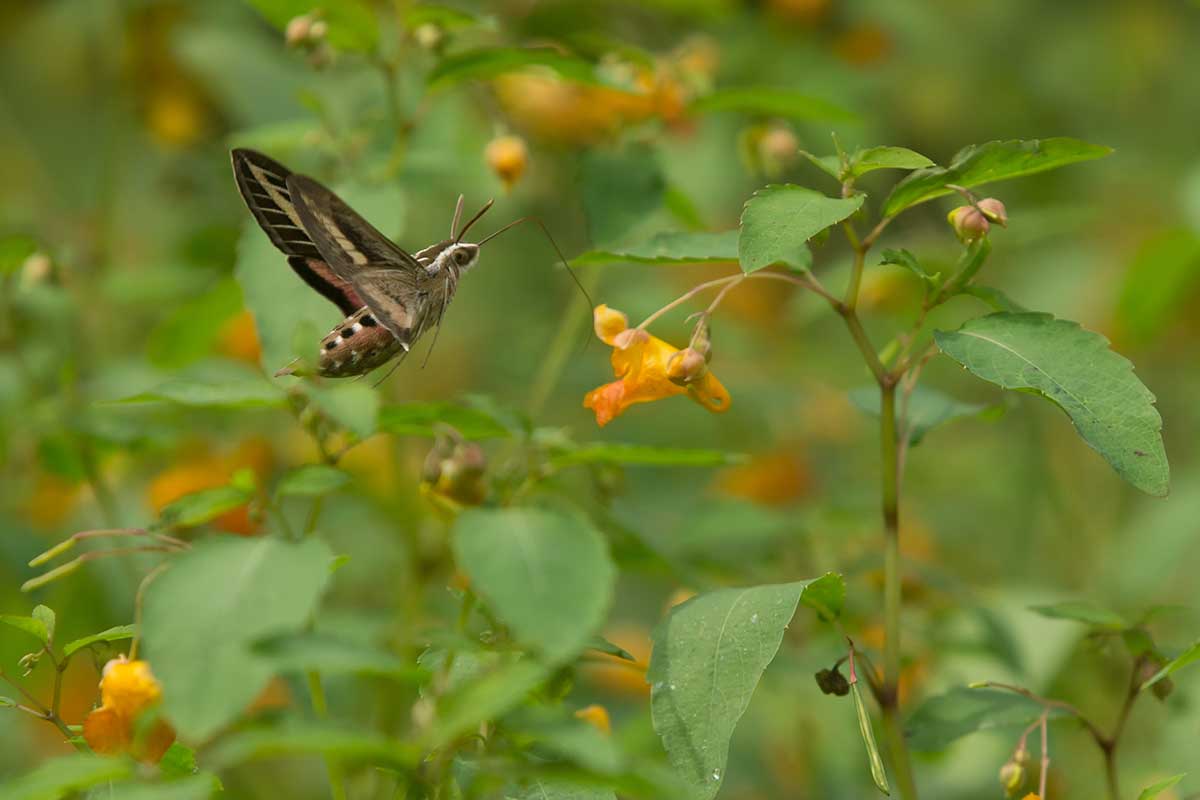
Pollinators particularly relish both the orange and yellow species, so bees and hummingbirds are often known to flit about between blossoms as they forage. Caterpillars and butterflies also rely on these plants for support.
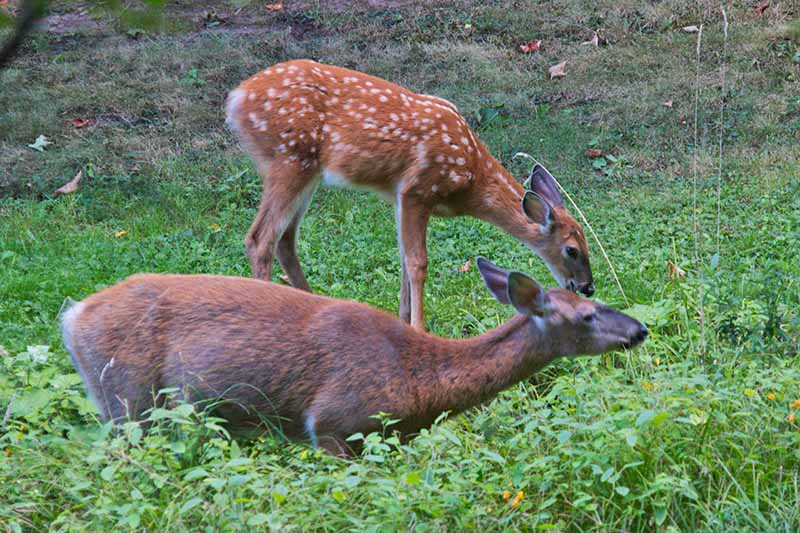
A host of animal species are known to rely on this food source as well, such as deer, grouse and pheasants, and other birds, so bringing them into the garden can also invite more fauna as well.
Bear this in mind when adding these to the garden layout to avoid inviting potential defoliators that might also like to snack on your other crops.
Propagation
As I mentioned previously, jewelweed really doesn’t need any help from us to self-propagate. It’ll readily reseed itself wherever it’s planted, and those seeds will sprout as long as environmental conditions are favorable.
However, if you’d prefer to start seeds indoors to transplant to new locations, that’s easy too!
If you’re starting from seed, you’ll most likely need to collect some from a wild source, since the seeds must remain moist to be viable.
Bring a paper or plastic bag with you and find a plant that has developed seed pods – these can usually be found between late summer and mid-fall.
Be sure to only collect seed from areas where this is permitted. Open the bag and hold it as close to the seed pods as possible.
A gentle touch is all it takes for the seed pods to burst open, and you’ll only need a few, depending on the number of specimens you intend to propagate. Once the seeds are collected, do not wait more than a few hours to process them as described below.
It’s best to start seeds outdoors if possible, to allow them to sprout on their own when conditions are appropriate. If you start seeds indoors, the seedlings shouldn’t be moved outside until after the last frost date for your area has passed.
From Seed
Seeds that have been collected will need a period of two to three months of cold stratification. This can be achieved indoors or outdoors.
Fill a resealable plastic sandwich bag with peat moss and moisten it lightly. Add the seeds and seal the bag, then place it in the refrigerator until about six weeks before the last frost date in your region.
You could also skip this step if you have a suitable area in your yard or garden to simply scatter the seeds on the soil surface.
Just give the ground a light raking to roughen it a bit first. The seeds need light to germinate, so don’t use more than a thin layer of soil to cover them.
Seeds should be sown outdoors in the winter to allow them to cold stratify naturally.
If you’re planning to use four-inch pots or a cell tray for propagation, prepare your container with rich, loamy soil. One part potting soil or coconut coir to one part compost works well.
Fill the cells nearly to the brim, moisten the substrate well, and make sure any excess water drains off. Place one to two seeds per cell, leaving them on the surface. You can use a light sprinkle of sand to hold them in place, if desired.
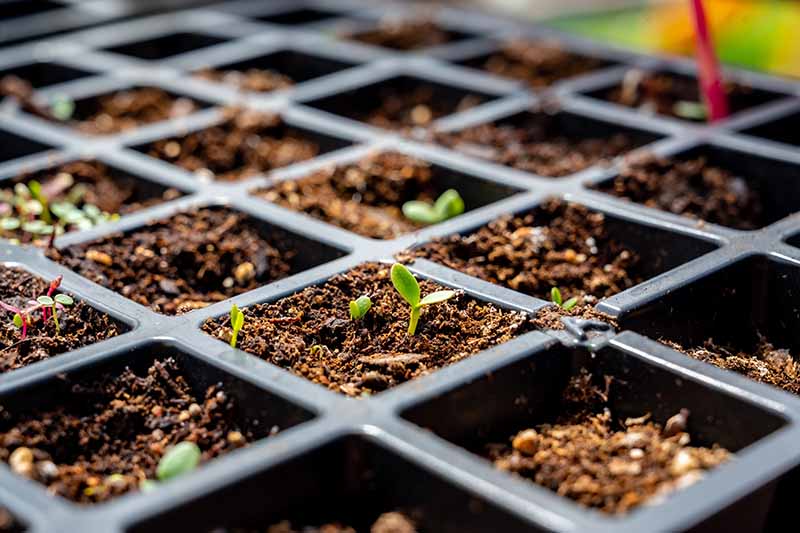
Be sure to check the moisture level every day. If the seeds dry out, they will not germinate. Give them a light spray of water daily to keep them moist.
While you can keep the tray indoors and they’ll germinate at room temperature, you could also move it outdoors to a spot where it will receive indirect sunlight for a few hours per day, if weather permits.
Starting outdoors also alleviates the need for hardening off the seedlings later.
Indoors, place the tray near a source of indirect sunlight. It can take six to eight weeks, or sometimes more, for germination to take place. Once they sprout, you’ll want to move them outdoors to their permanent location as soon as possible.
Be sure to harden off seedlings started indoors by gradually exposing them to the outdoors a few hours at a time, until they’re fully acclimated.
From Seedlings/Transplanting
Whether you’ve found starts available for purchase or propagated them from seed, you’ll eventually need to transplant your seedlings to their permanent outdoor location. I’ll cover the ideal growing site in a bit more detail in the next section.
After seedlings have been hardened off, prepare a hole as deep and wide as each planting cell or pot.
Carefully turn each out of its pot and place one in each hole. Even mature specimens have fairly weak stems, so don’t handle them roughly. Gently press the soil to firm it in place, and water in well to settle.
Space the plants about 18 to 24 inches apart and avoid letting the soil dry out for best results.
How to Grow
These species are native to a wide range throughout North America, and as such, they can be found growing throughout USDA Hardiness Zones 3 to 10.
And as I’ve mentioned, both orange and yellow jewelweed prefer woodland growing conditions rather than a heavily prepared plot.
Cultivating these species in the garden requires choosing a spot where they’ll be in full or partial shade, with ground that remains moist most of the time. The yellow type can tolerate slightly less moisture.
If you’ve got a patch available near a tree line, stream, or pond where the sun is dappled, that would be ideal. If not, planting near trees or bushes that cast shadows for most of the day would be the next best thing.
After your seedlings or starts have been moved to their home for the season, keep them consistently watered. If your region experiences average or above average rainfall, you may not need to add supplemental water.
In drier areas, you might be watering one to two times per week, depending on your soil and the temperatures you’re experiencing.
Bear in mind that this is an annual that will self-seed in the fall, so be prepared to offer enough space between the plants and other landscaping so they’re not competing for resources – these species are known to be rather aggressive competitors!
They can also become quite large, so be sure to allow adequate room for up to five feet of height and a two- to three-foot spread.
Wildflowers don’t generally need much in the way of fertilizer if their needs are being met at the planting site. It’s important to place them in a suitable location to keep them in good health.
Substrate at the site should be loamy and rich with organic material. Amend soil that is lacking ahead of planting by raking in two to three inches of compost, aged manure, or both.
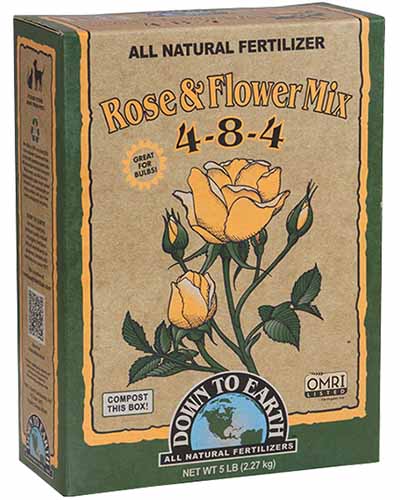
Down to Earth Rose and Flower Mix
Any fertilizer you might opt to use should be low in nitrogen to prevent excessive foliage growth at the expense of producing blooms, such as this DTE Rose and Flower Mix with a 4-8-4 NPK ratio that’s available from Arbico Organics.
Growing Tips
- Provide loamy soil and adequate moisture (slightly less for yellow jewelweed).
- Plant in a shady location where direct sunlight is limited to just a few hours per day.
- Avoid planting too closely to other garden plants as the seed pods burst and disperse seed widely.
Maintenance
Pruning jewelweed is not recommended. Doing so can reduce the number of blooms it produces.
Providing shade, adequate moisture, and enough room for these specimens to spread are the chief concerns.
At the end of the season, after the seeds have been cast upon the ground, it’s best to leave the site undisturbed. If you must cut back dead or dying material, do so carefully to avoid stepping on the seeds as much as possible.
If you’d prefer not to allow them to self-sow, be sure to snip off faded blossoms, or consider wrapping the entire specimen with a muslin or linen drawstring bag to prevent seeds from being dispersed if you’d prefer to save them.
Wrapping should be done toward the end of the season to avoid inhibiting pollinator access, but before the seeds mature and scatter.
Any escapees that sprout the following spring can be dug out and replanted elsewhere, given away, or plucked and added to the compost pile.
Where to Buy
Ready to add jewelweed to your landscape?
Earthbeat Seeds offers I. capensis seeds in packets of 25.
Managing Pests and Disease
Just as with most wildflowers, there are very few concerns for these species from insects or animals, as well as disease pathogens.
Herbivores
As I previously mentioned, deer are the primary defoliator for this species. If deer are a concern in your area, you may want to add a few additional plants to your garden to combat losses, or allow seed to spread naturally at the end of the season.
Birds and rodents might browse periodically, but they generally prefer the seed to the foliage.
If you’re worried that may inhibit growth from self-seeding, you can always collect the seeds and store them in cold stratification through the winter.
Insects
There are only a few insects that will disturb jewelweed. Some of these, such as caterpillars, need the plants as important food sources and will rarely eat enough to kill the host.
A specific species of aphid, Macrosiphum impatientis, or the jewelweed aphid, is known to colonize along the stems. Just as with many other types of aphids, they’re tiny and green.
Because the stems are not very sturdy, it can be difficult to control these pests. Normally, you could smash them or spray them away with a blast of water from the hose, but not in this case.
Spraying with neem oil or insecticidal soap is your best bet, although these should be used as sparingly as possible to avoid causing damage to pollinators.
Another common pest, Schizomyia impatientis, or the jewelweed midge, produces galls in developing buds.
Affected buds can range in color from pale green to nearly purple, and the midges lay their eggs on the interior and form colonies. As they mature, the adults will overwinter inside the galls, and emerge in the spring.
Galls should be removed and destroyed on sight to prevent further spread of these pests.
Disease
Most impatiens suffer from ailments from time to time, such as downy mildew. I. capensis, however, is an extremely resistant species that rarely falls victim to disease.
In fact, only rust caused by Puccinia recondita fungi is common enough to mention, and usually resolves itself in time. It rarely impacts blooming and isn’t known to spread enough to devastate a stand.
Signs of rust are spots that appear on leaves with a red, orange, or yellow coloration. Parts of the leaves and stems may become contorted or puff a bit.
Note that rust can spread to some grasses and shrubs, so if you’re concerned about neighboring specimens, you can use scissors to cut away affected material and discard it in a sealed trash bag.
Best Uses
Borders and mass plantings along a forest edge, stream, or pond are the best ways to add jewelweed to your garden or landscape.
If you have some boggy ground, these are the perfect choice to use up some of that extra water and add some beautiful blooms!
Pair these species with ferns, elderberries, and other shade- and moisture-loving species.
Planting in or near the garden will draw pollinators, so they can also visit your crops.
If you’re a beekeeper, they also make an excellent forage source when planted at an adequate distance from your bee boxes.
Quick Reference Growing Guide
| Plant Type: | Annual flower | Flower / Foliage Color: | Orange or yellow/green |
| Native to: | North America | Tolerance: | Shade, wet soil, boggy conditions |
| Hardiness (USDA Zone): | 3-10 | Water Needs: | Moderate to high |
| Bloom Time: | Spring, summer | Maintenance: | Low |
| Exposure: | Full to partial shade | Soil Type: | Loamy |
| Time to Maturity: | 2-4 months | Soil pH: | 5.0-8.0 |
| Spacing: | 18-24 inches | Soil Drainage: | Low to good drainage |
| Planting Depth: | Soil surface (seeds), same depth as container (transplants) | Attracts: | Bees, butterflies, moths, wasps |
| Height: | 2-5 feet | Uses: | Borders, mass planting, pollinator forage, wetland planting, wildflower repopulation, wildlife support |
| Spread: | 2-4 feet | Family: | Balsaminaceae |
| Growth Rate: | Fast | Genus: | Impatiens |
| Common Pests and Diseases: | Aphids, midges; rust. | Species: | Capansis, pallida |
A Wild Jewel in the Crown of Your Garden or Landscape
Adding native species to your garden is a wonderful way to support your local pollinators. They’ll repay you by visiting your edible crops, leading to better pollination rates and improved harvests.
There’s also no prettier plant that you could add to a soggy patch of ground in a shady spot where little else will thrive.
Do you plan to use jewelweed as a border planting, for pollinator forage, or for blooms to toss into a delicious, fresh meal? Let us know in the comments below!
Other titles that will help you to decide how to use wildflowers in your landscape and garden can be found here: