Symphyotrichum ericoides
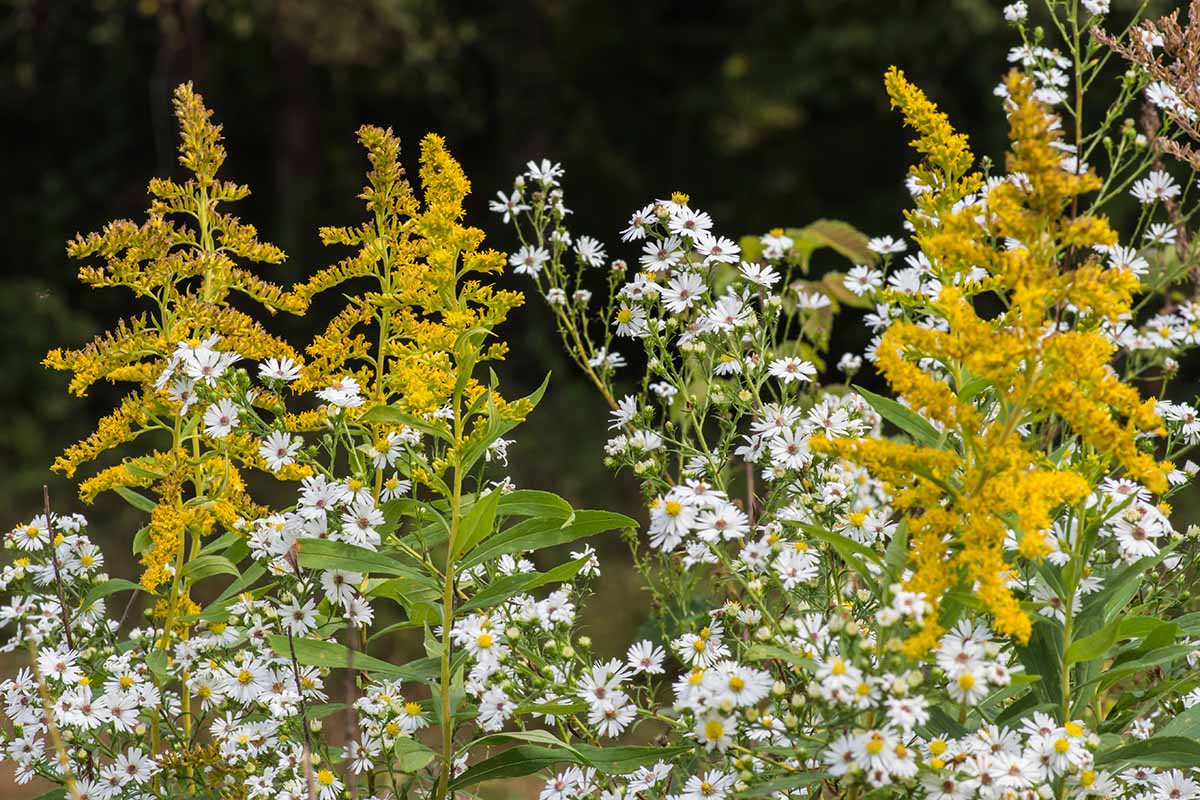
The heath aster, Symphyotrichum ericoides, formerly Aster ericoides, is native to central and eastern regions of the United States and Canada, where it is often spotted along the highway.

We link to vendors to help you find relevant products. If you buy from one of our links, we may earn a commission.
One of many flowers in the Asteraceae family that also includes chamomile, dahlias, and zinnias, S. ericoides is suited to cultivation in USDA Hardiness Zones 3 to 10.
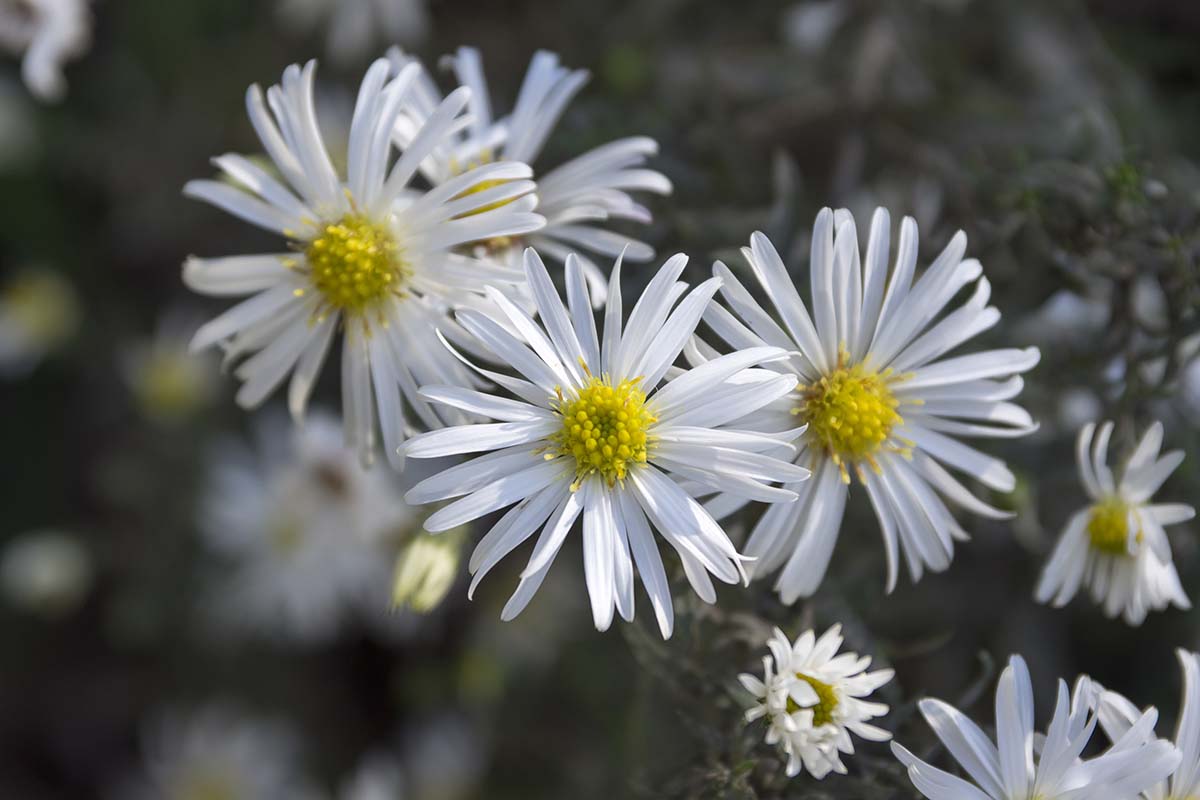
The plants produce copious quantities of tiny flowers from late summer to fall. Mainly white, there are also pink and blue varieties.
You’ll find a broad overview of aster flowers in our main growing guide. Additional guides delve into topics like individual species, troubleshooting pests and diseases, and maintenance through the years.
In this article, we’ll talk about growing heath asters in the home garden.
Here’s what we’ll cover:
What You’ll Learn
The heath aster, aka white heath aster, is a wildflower with a shrubby growth habit. It achieves mature dimensions of 12 to 36 inches tall and 12 to 18 inches wide. It is found in rocky areas, gravel road and rail beds, and grassy prairies or “heaths.”
Quick Look
Common name(s): White heath aster, snow flurry flower
Plant type: Perennial flower
Hardiness (USDA Zone): 3-10
Native to: Central and eastern United States and Canada
Bloom time: Late summer to fall
Exposure: Full sun
Soil type: Average to organically-rich, well draining
Soil pH: 5.1-6.8, acidic to slightly acidic
Spacing: 12-18 inches
Planting depth: 1/8 inch (seeds), depth of root ball (transplants)
Mature size: 12-18 inches wide x 12-36 inches high
Water Needs: Moderate
Taxonomy
Order: Asterales
Family: Asteraceae
Genus: Symphyotrichum
Species: Ericoides
Variety: Ericoides, pansum
Cultivars: Blue Star, Pink Cloud, Snow Flurry
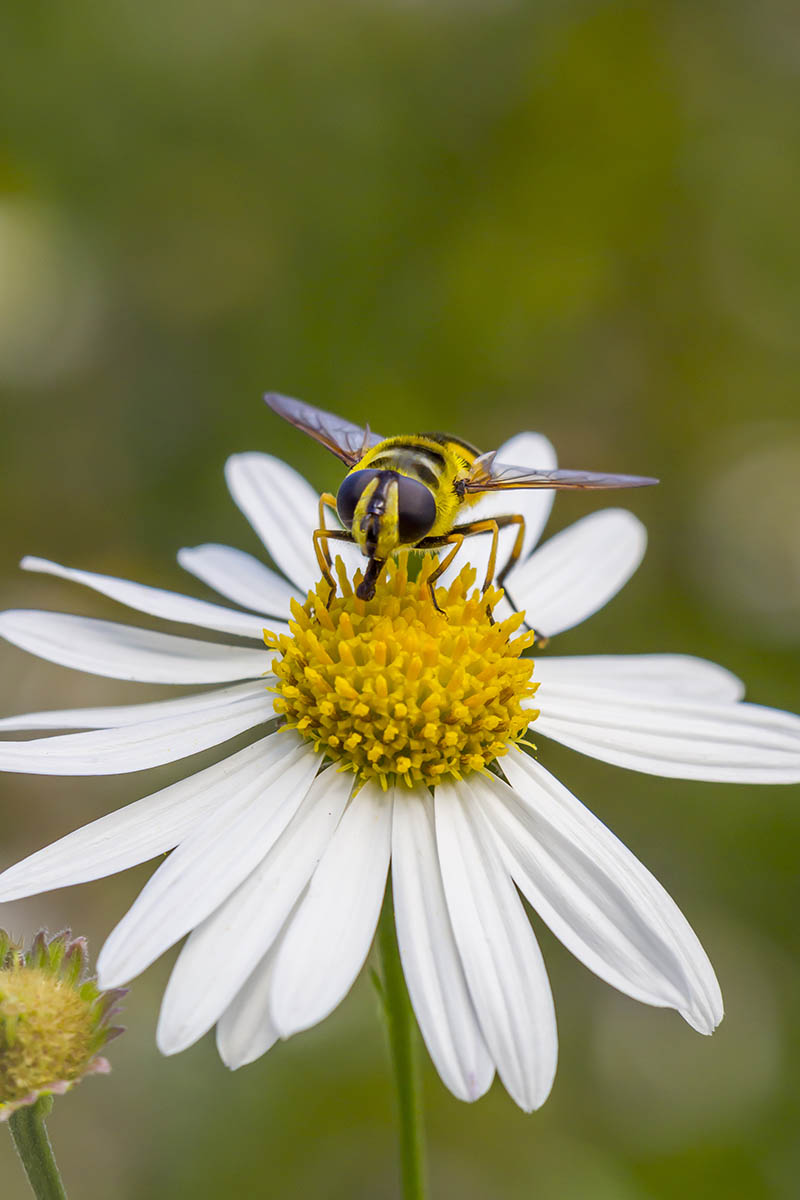
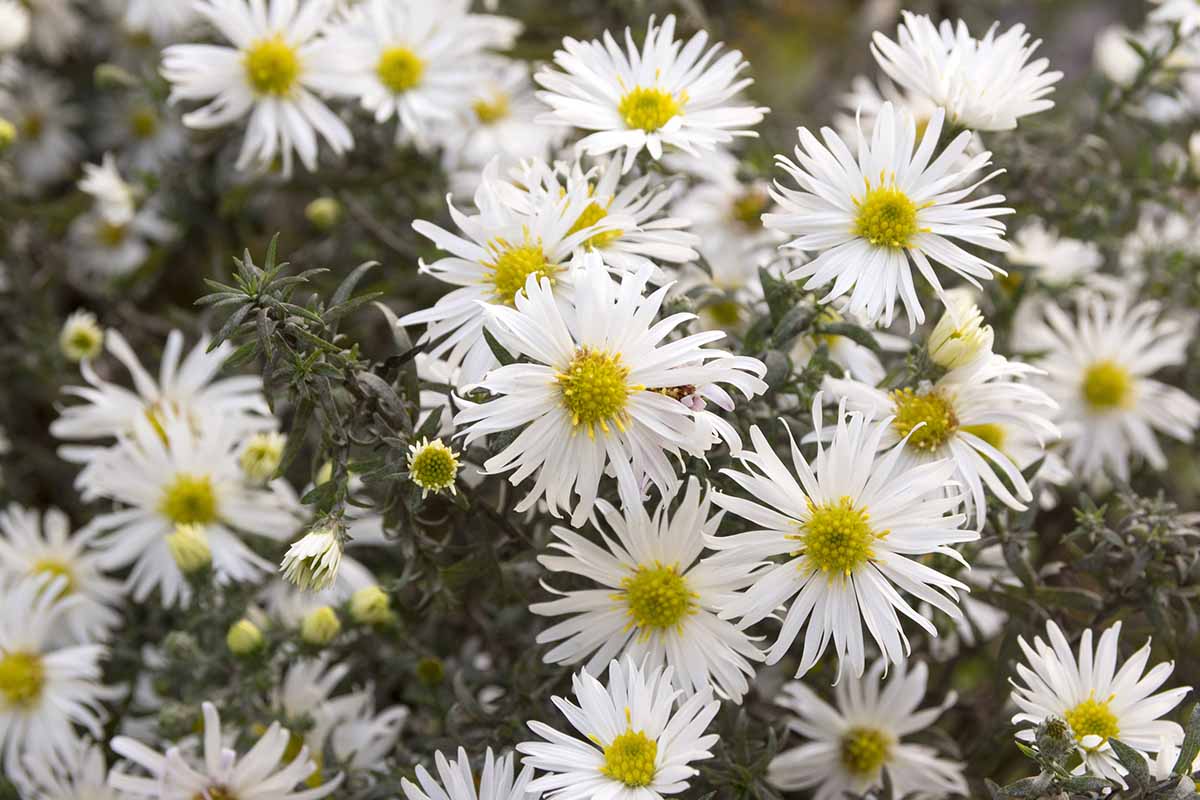
The stems branch and bear sprays of composite flowers that measure half an inch or less in diameter. They consist of colorful rays surrounding a yellow center disk of florets. The yellow shades to reddish-brown as the flowers fade.
The leaves are narrow, linear, and often slightly hairy. They are generally green but may be bronze.
There are two known varieties:
- S. ericoides var. ericoides
- S. ericoides var. pansum
Named varieties may have slightly dissimilar traits that distinguish them from the main species, but not so much as to be completely different species.
In this case, the rootstock varies slightly, with the pansum variety having a fleshier rhizome.
The heath aster has been mistaken for Pringle’s aster, S. pilosum var. pringlei, a white type that is also sometimes called a heath or frost aster.
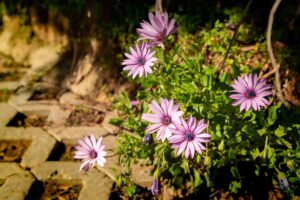
The aromatic aster, S. oblongifolius, is a lavender species that’s also commonly called a heath aster.
And another aster that falls under the heath umbrella is the amethyst aster, Symphyotrichum × amethystinum. It results from the natural crossing of the heath aster, S. ericoides, and the New England species, S. novae-angliae, in the wild with no breeder intervention.
How to Grow
White heath asters are rugged, adaptable plants that don’t ask for much but deliver an impressive cloud of tiny, daisy-like flowers in return.

Whether you’re looking to naturalize a meadow, fill in a pollinator patch, or add some late-season interest to your perennial beds, heath asters are up to the task.
Let’s go over what you’ll need to do to help them thrive:
Light
Heath asters love to bask in the sun. These tough perennials bloom best in full sun, where they receive at least six hours of direct light per day.
While they’ll tolerate a little shade, you’ll notice a dramatic drop in the number of blooms if they aren’t getting enough light.
Aim for the sunniest spot in your garden to encourage dense growth and a bounty of flowers.
Soil
These asters aren’t picky. They can thrive in everything from sandy loam to clay, though they prefer loose, well-draining soil with an acidic to slightly acidic pH between 5.1 and 6.8.
In fact, too-rich soil can cause them to grow floppy and lush rather than compact and flower-heavy.
S. ericoides exhibits an above-average tolerance of dry, rocky soil and clay as it experiences these conditions in its native habitat
Temperature and Humidity
Adapted to a wide range of climates across North America, heath asters are reliably hardy in USDA Zones 3 to 10. They shrug off heat and cold with equal ease.
While young plants appreciate a little protection from intense heat in their first season, established plants are resilient and don’t need coddling.
When planting, remember to take mature dimensions into account. These plants are prone to fungal diseases, especially powdery mildew, and poor airflow is one environmental condition that supports the activation of mold spores. Excess moisture is another.
Water
Once established, white heath asters are drought tolerant.
During the first year of growth, monitor the forecast for rain. Supplement as needed to provide an inch per week. Avoid oversaturation.
In years two and beyond, established plants exhibit above-average drought tolerance but still benefit from supplemental watering during extremely hot and dry periods.
Fertilizer
Skip the fertilizer. Heath asters evolved to thrive in lean soils, and rich conditions encourage floppy growth at the expense of flowers.
If you must amend the soil, a top dressing of compost in early spring is plenty to support healthy growth.
Companion Planting
Towards bloom time, you may notice that the lower leaves turn yellow and drop. This is common. It’s not unusual to have flowers in full bloom and stems that look like they are dying.
Consider placing shorter companion plants in front of them to minimize the appearance of “bare legs.”
Various shorter salvia cultivars fit this role nicely as they produce a lot of fleshy leaves to help hide the spindley aspects of the asters.
Container Growing
While not the most common choice for containers, you can grow white heath asters in large pots if you provide a lightweight, well-draining soil mix.
Choose a container with good drainage holes and place it in full sun. Keep in mind that container-grown plants dry out faster, so check the soil moisture regularly, especially in hot weather.
Overwintering
Heath asters are perennial workhorses that need little winter care. In late fall, after the first frost has blackened the foliage, cut back the stems to a few inches above ground level to tidy up the garden.
Mulching around the base with a couple of inches of shredded leaves or straw will help insulate the crown, though established plants are generally tough enough to survive without extra protection.
Cultivars to Select
The native species and cultivars of S. ericoides are available for the home garden.
S. ericoides provides an informal display, with a proliferation of tiny blossoms pollinators love.
White heath aster seeds are available from Everwilde Farms via Amazon in several packet sizes.
For a little more color and some different size options, there are three at least cultivars that have been developed but which can be a bit hard to source:
Blue Star
Mildew-resistant S. ericoides ‘Blue Star’ boasts sprays of lavender-blue blooms on 36-inch stems.
Pink Cloud
S. ericoides ‘Pink Cloud’ has sprays of pale pink blossoms on 36-inch stems. It is also mildew-resistant.
Snow Flurry
S. ericoides f. prostratum ‘Snow Flurry’ is noteworthy for its horizontal growth habit with tufts covered in snowy blooms. It is a mildew-resistant cultivar that matures to about 12 inches tall.
When shopping for either the native species or cultivated varieties, you may come across the Pringle’s aster, as mentioned previously. Beware that it can reach five feet tall, instead of the typical one to three feet of S. ericoides.
Maintenance
Throughout the growing season, monitor for pests and signs of disease. Prune off infested or infected stalks and discard them in the trash.
Leggy stalks may require staking with twine and metal or bamboo garden stakes to keep them upright.
If a branch bends and breaks, prune it off two inches above the crown, where the stems and roots meet, with a smooth, clean cut. A clean cut heals better than a ragged one and renders flora less vulnerable to pests and diseases.
Learn more about pruning in our guide.
At the end of the growing season, you have the option of clear-cutting all foliage to the ground or leaving it in place for winter interest.
With a plant as prone to powdery mildew as this one, I recommend cutting all stalks two inches above the crown and discarding them to avoid giving mold spores a place to overwinter. Discard pest- or disease-damaged stalks in the trash.
Then, apply a two-inch layer of mulch over the garden to retain moisture and insulate the crowns during the winter months.
Every three to five years, it’s wise to divide S. ericoides in early spring, when the first shoots appear.
Early spring is also the time to remove old mulch and apply a slow-release, all-purpose granular fertilizer.
By early summer, you can prune off the top third of all the stems to promote bushier growth in tall varieties.
Learn more about aster maintenance here.
Propagation
It’s easy to propagate these plants from seed, soft stem cuttings, transplants, or division.
Let’s consider each method.
From Seed
You can purchase seeds or harvest them from a friend’s plant. However, hybrids are not likely to produce replicas of a parent, so be prepared for surprises.
There are two options when starting from seed:
Start seeds indoors four weeks before the last spring frost date.
Direct sow seeds into the garden after the last spring frost date.
To start indoors:
- Fill biodegradable seed-starter cells three-quarters full with a potting medium that contains fertilizer.
- Place two seeds in each cell.
- Cover the seeds with one-eighth of an inch of soil.
- Place in a sunny location.
- Keep the soil evenly moist.
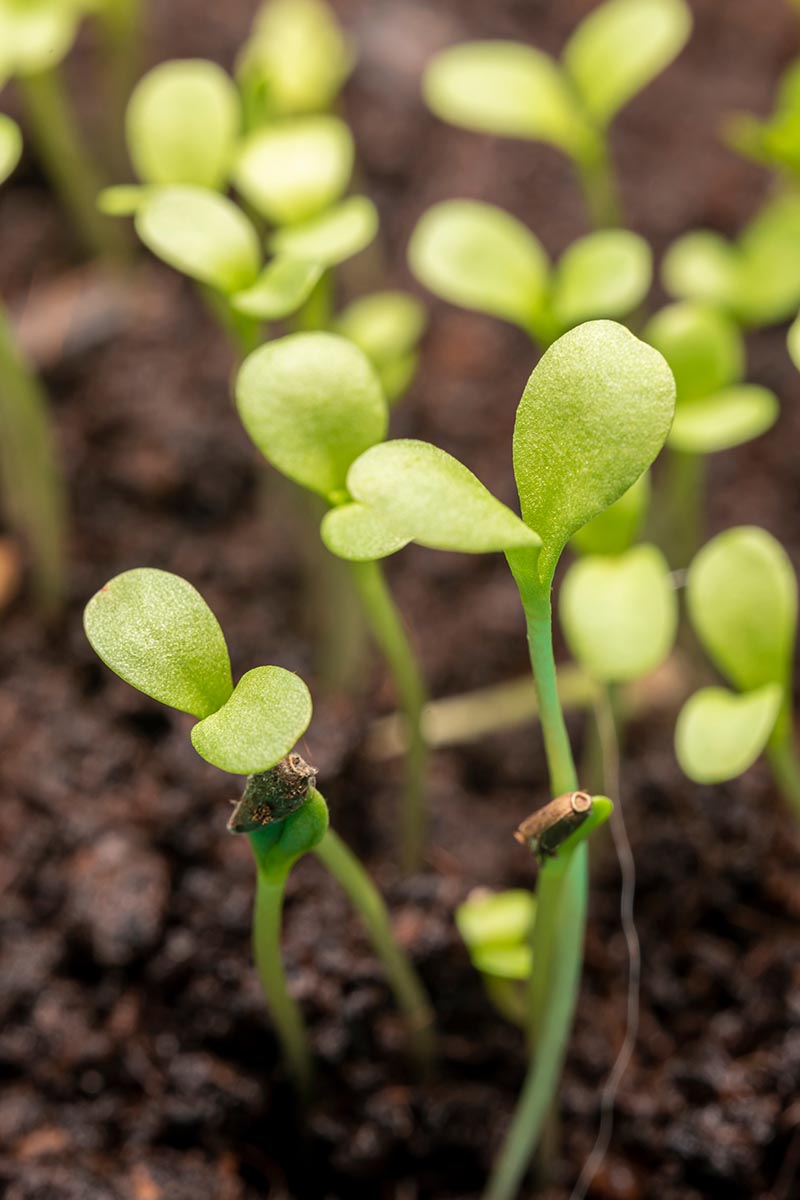
- When the seedlings have two sets of true leaves, thin them to one per cell.
- After the danger of frost passes, acclimate the seedlings to the outdoors for a few hours each day, increasing the time spent outside over about four days.
- Choose a sunny location. Prepare the garden soil by working it to a depth of eight to 12 inches to aerate it and make it crumbly.
- Space at intervals of 12 to 18 inches to allow for ample airflow and inhibit fungal growth.
- Set the biodegradable cells in the soil so the top of each cell is at ground level. Tamp the soil around the cells to hold them firmly in place.
Provide one inch of water per week, rain included.
To direct sow seeds:
- Prepare the soil in a sunny prepared garden bed.
- Sow one to two seeds every 12 to 18 inches.
- Cover the seeds with one-eighth of an inch of soil.
- Maintain even moisture.
- When the second set of true leaves sprouts, thin to one seedling per interval
Provide one inch of water per week as described above.
From Soft Stem Cuttings
If you have a friend you can ask, you can take soft stem cuttings from mature plants to produce an exact clone of a native species or hybrid variety.
Here’s how:
- In late spring to early summer, cut about six inches from the growing tip of a fresh, soft stem.
- Remove the leaves from the bottom four inches of the stem.
- Place the stem in four inches of water.
- Change the water daily.
- When roots grow, transplant the rooted stem cutting into the garden per the instructions below.
- Another way to root a soft stem cutting is to dip the cut bare stem in rooting hormone powder and plant it in soil.
- Select a biodegradable six-inch seed starter pot. Fill it three-quarters full of potting soil that contains fertilizer.
- Bury the dipped stem two inches deep in the soil and tamp to secure it.
- Maintain even moisture.
- When you see new leaves, you’ll know the stem has rooted.
Transplant it into prepared garden soil in a sunny location. You can settle the entire seed-starter pot into the soil with the top rim even with the soil surface. Tamp the soil firmly around it.
Maintain one inch of moisture per week as described above.
By Division
Another way to begin is with a mature plant that needs dividing.
As these plants grow, they self-sow via dropped seed and form an expanding network of roots, increasing their presence in the landscape year by year.
After three to five years, thinning helps to improve airflow, inhibit fungal disease, and invigorate blooming.
To divide, dig as soon as you see new shoots in early spring. Here’s how:
- Place a long-handled shovel four to six inches out from the center of a clump of shoots. Work around the clump, digging and lifting, until you can unearth it.
- Lift the entire mound of roots and soil from the ground and lay it on its side.
- Use your shovel or a sharp garden knife to slice through the roots and soil, and separate the mound into two or more individual sections.
- Transplant the sections or divisions into prepared soil in sunny locations.
- Apply a slow-release, all-purpose granular fertilizer around – but not touching – the divisions.
- Water well and provide an inch of water per week, including rain.
Transplanting Nursery Starts
Finally, in addition to starting with seeds, soft stem cuttings, or divisions, you can buy a plant.
You may transplant seedlings or more mature specimens. Either way, here’s what to do:
- Prepare the garden soil as described above.
- Unpot the plant and gently loosen tangled roots. If it is tightly root-bound, lay the unpotted plant on its side and rotate it slowly. As you turn it, use your knife to make shallow slices every few inches, cutting into the base of the roots and soil to sever some and loosen things up.
- Settle the unpotted plant into the soil. Tamp to secure it in an upright position.
- Apply fertilizer as described above.
- Water well and maintain one inch of water per week, rain included.
Learn more about how to propagate asters in our guide.
Pests and Disease
Asters have a reputation for being prone to certain pests and fungal conditions.
Some common pests to be aware of are:
- Aphids
- Chrysanthemum Lace Bugs
- Cucumber Beetles
- Leaf Miners
- Nematodes
- Slugs and Snails
- Tarsenoid Mites
Common diseases include:
- Aster Yellows
- Leaf Spot
- Powdery Mildew
- Rust
- Stem Canker
- White Smut
Take proactive measures to reduce the risk of pest infestation and disease, like growing various nectar-rich plants to attract beneficial insects that feed upon pests, and spacing for adequate airflow to inhibit fungal disease.
In addition, you can select mildew-resistant cultivars when available.
A product like organic neem oil, a natural fungicide and insecticide, may prove effective against infestation or infection.
Best Uses
Heath asters make excellent anchors for beds, providing a season-long, texturally-rich green backdrop for smaller plantings in front of them.
They also show well in single-specimen drifts and multi-species wildflower clearings.
Shallow roots and a hard-scrabble nature make heath asters well-suited to rockeries.
Smaller cultivars show well in informal borders, cottage, and cutting gardens, where a more compact stature is desirable. They are also an attractive option for container gardening.
Why not start a pollinator garden to attract bees, butterflies, moths, and other beneficial insects?
With room to roam, S. ericoides readily naturalizes and multiplies in the landscape.
An Informal Burst of Blooms
The heath aster brings volumes of tiny white blooms with cheery yellow centers to transitional summer-to-fall gardens.
Choose the native species for an untamed, informal look in drifts, clearings, and rugged rockeries. More compact cultivars are well-suited to beds and borders where more constraint is required.
Take out your garden planner and decide where you’re going to plant heath asters this year.
Provide full sun, moisture-retentive, well-draining soil, and an inch of water per week in the first year. Once established, plants have above-average drought tolerance, making them waterwise additions to the late-season landscape.
Do you grow asters? What are your favorites? Tell us about them in the comments section below.
If you found this article informative and want to read more about perennial asters, we recommend the following articles next: