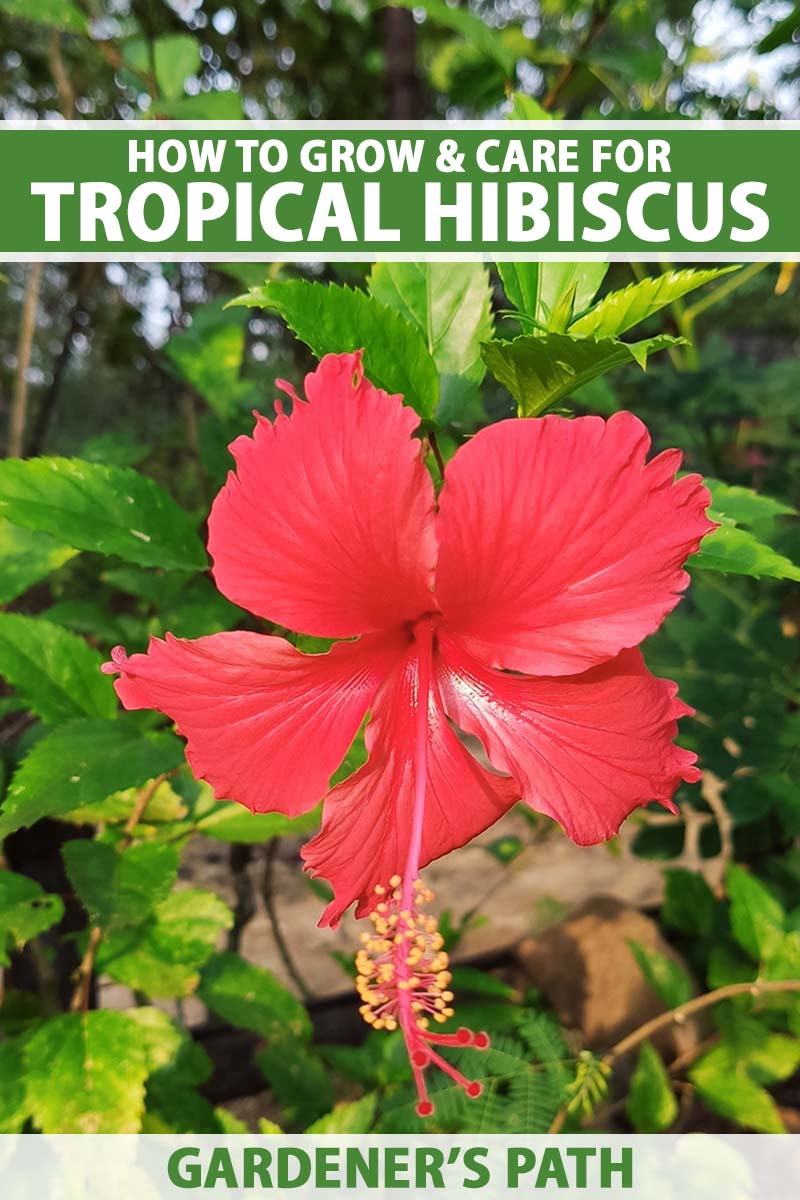
Hibiscus spp.
You might think tropical hibiscus can only be grown in places like Hawaii, Florida, southern Texas, and California, where the sun shines and the snow steers clear pretty much year-round.
These symbols of the tropics are native to regions that retain warmth and humidity through most or all of the year, so if you live in a warm climate such as USDA Hardiness Zones 9 to 11, you can plant them right in the ground. Lucky you!
We link to vendors to help you find relevant products. If you buy from one of our links, we may earn a commission.
However, these beauties, sometimes known as “fancy” types, can be grown in containers in areas where you spend part of the year walking in a winter wonderland.
They’ll need protection from chilly temperatures, freezes, and snow, of course, but it can be done.
Either way, they have their finicky points as most plants do, so it’s important to learn how to keep them healthy, thriving, and producing lots of stunning blossoms.
Want to get to know those fancy hibiscuses? Read on – here’s what we’re going to cover up ahead:
What You’ll Learn
What Is a Tropical Hibiscus?
I bet at least one key question came to mind when you read that title – aren’t all hibiscus varieties tropical?
And the answer is no. Some are, and some aren’t.

The mallow family, Malvaceae, is comprised of thousands of species of plants that are known to inhabit temperate and tropical zones throughout the world.
Along with hibiscuses, okra, marsh mallow (Althaea officinalis), and hollyhocks are all members of this family as well as many others, including some large trees like the baobab.
Some are native to swamps and bogs, such as H. moscheutos, or the swamp or eastern mallow. Others grow where it’s not necessarily swampy, but where groundwater is generally available all the time, such as in areas adjacent to bodies of water.
Avoiding Confusion
Before we begin discussing tropical, or “fancy,” hibiscus in more detail, an important distinction must be made. And when it comes to this topic, confusion abounds.
There are more than 200 known species in the Hibiscus genus and hundreds of cultivars and hybrids, both available on the market and growing in the wild all over the world.
About 35 of these species are native or endemic to the southern United States and Hawaii.
Colloquial names for the various species include rose mallow, China rose, and shoeblack plant. You may also see certain types referred to as “Hawaiian hibiscuses” but there is only one species that is native to the Hawaiian Islands, H. furcellatus.
Several others have naturalized and become endemic there since their introduction, such as H. arnottianus, H. rosa-sinensis, and H. brackenridgei.
All species are classified into hardy and tropical types. Hardy types remain dormant through the winter, dying back to the ground, and returning in the spring.
Tropical types are herbaceous or semi-woody and remain evergreen in tropical and subtropical zones. In cooler regions, if they’re left exposed to the elements, they’ll typically die off and will not return the following spring.
So, if you’re looking for a type that will thrive as an in-ground specimen in a temperate environment where fall and winter bring freezing temperatures and snow, you’ll want to consider those from the hardy category.
You can find more information about hardy hibiscus in our complete guide.
Even though rose of Sharon, or H. syriacus, is considered hardy, it has its own distinct characteristics.
We have a comprehensive growing guide on this species as well.
Now that we’ve distinguished the main differences between the two classifications, let’s talk a bit about the structure and life cycle of those tropical specimens.
Anatomy
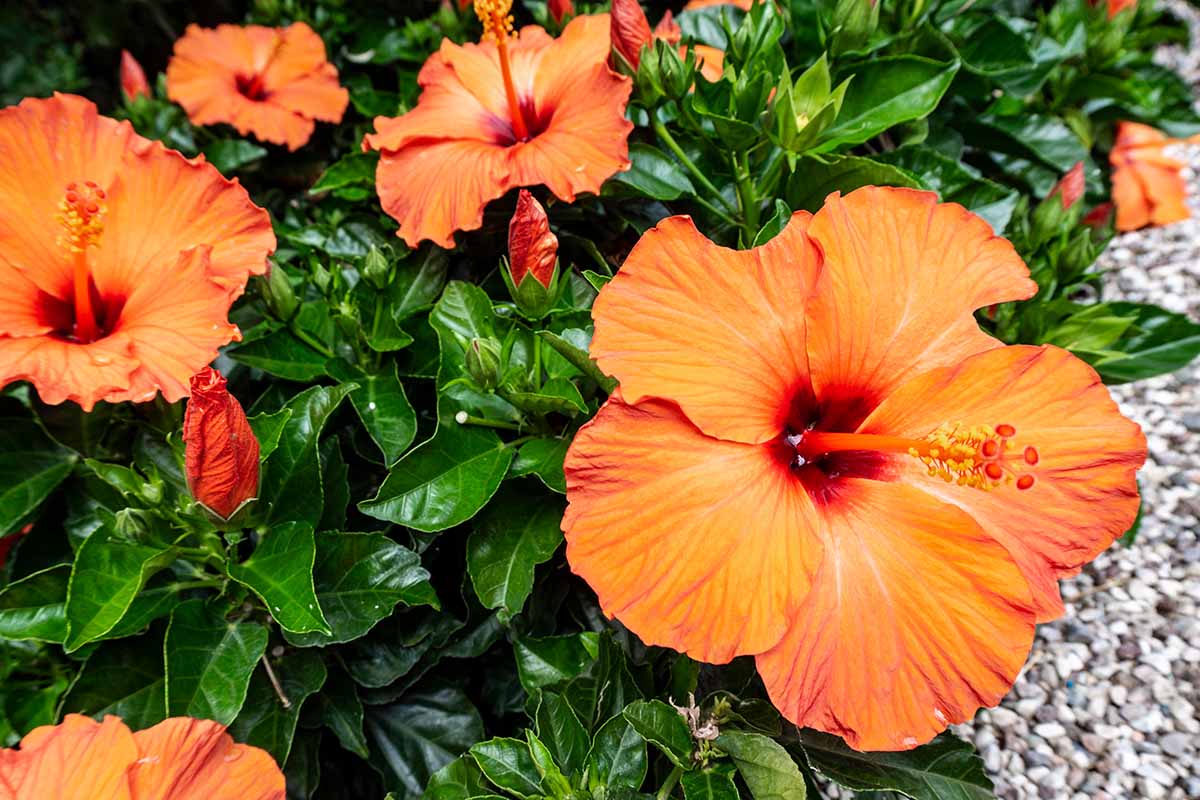
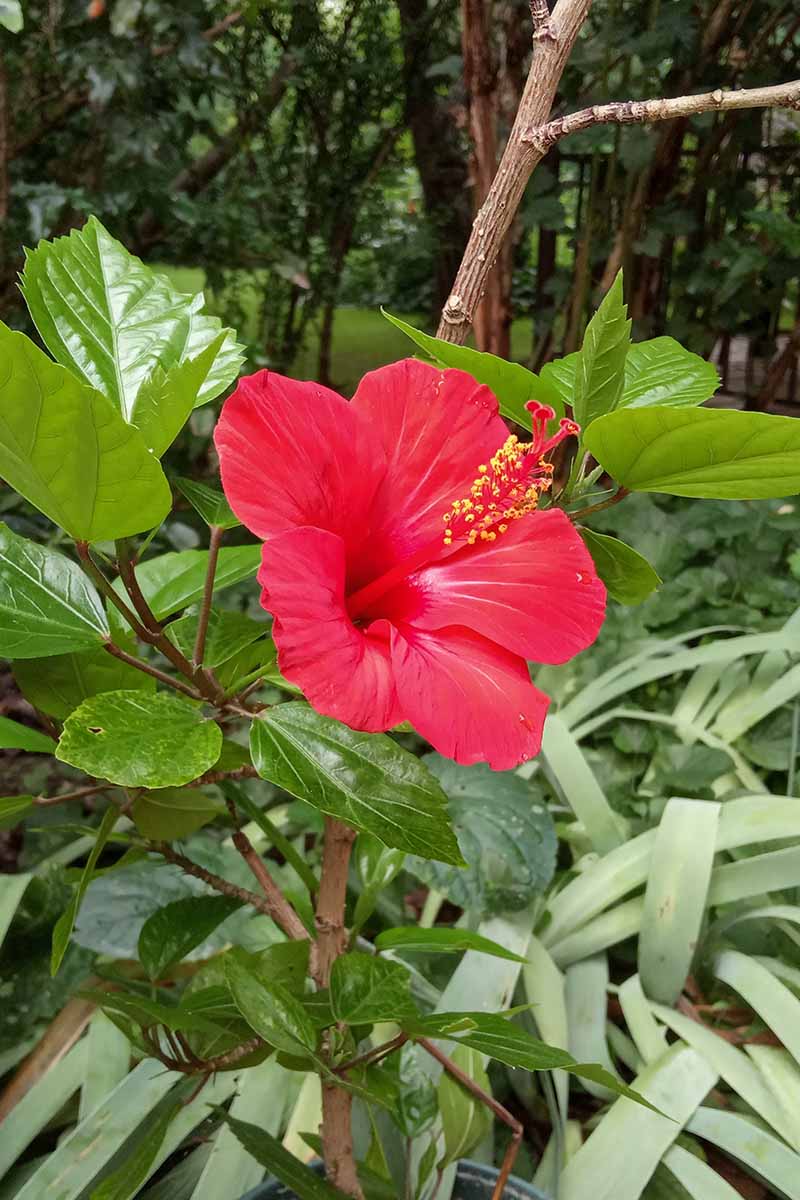
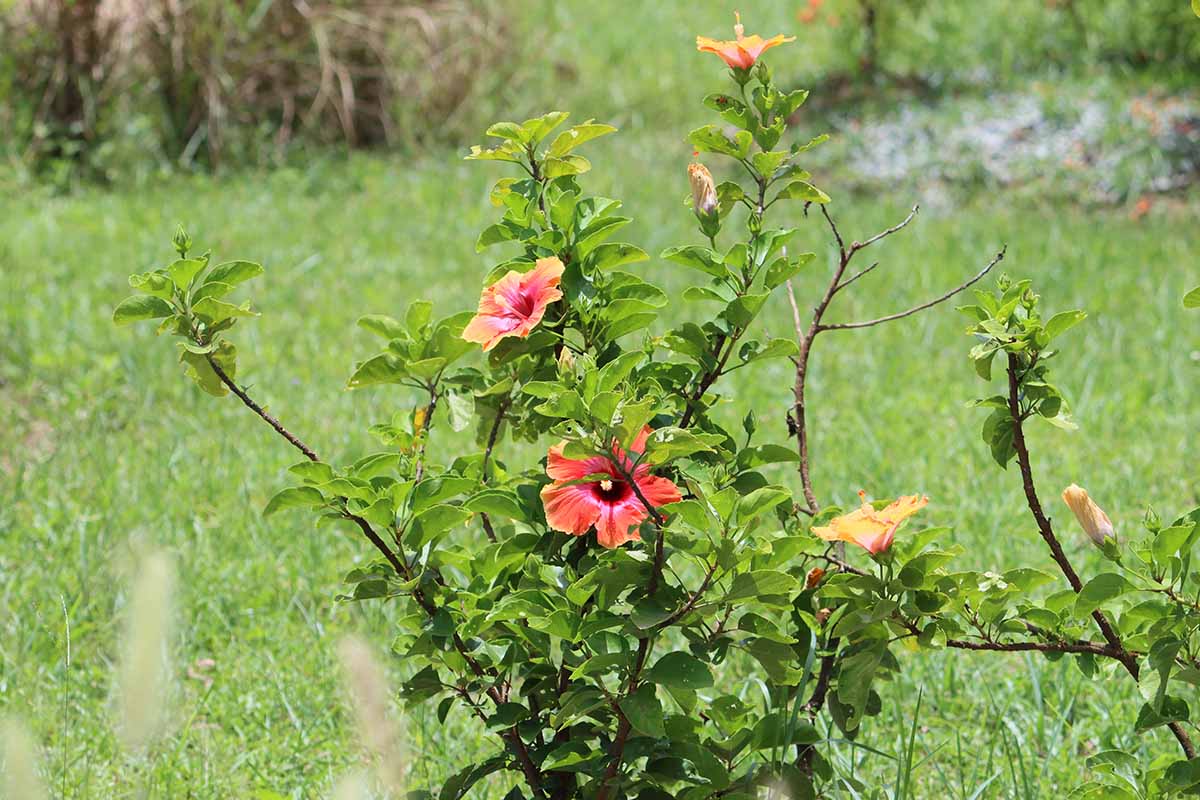
Most tropical hibiscus types are considered herbaceous shrubs or small trees. On average, they rarely exceed 10 feet in height with most topping out at about five feet, with a similar spread.
Foliage is most often green, although some specimens, such as H. mutabilis, or the Confederate rose, and H. acetosella, or red-leafed hibiscus, have leaves in tones of copper, purple, and burgundy. The latter hails from East Africa and is hardy as far north as Zone 8.
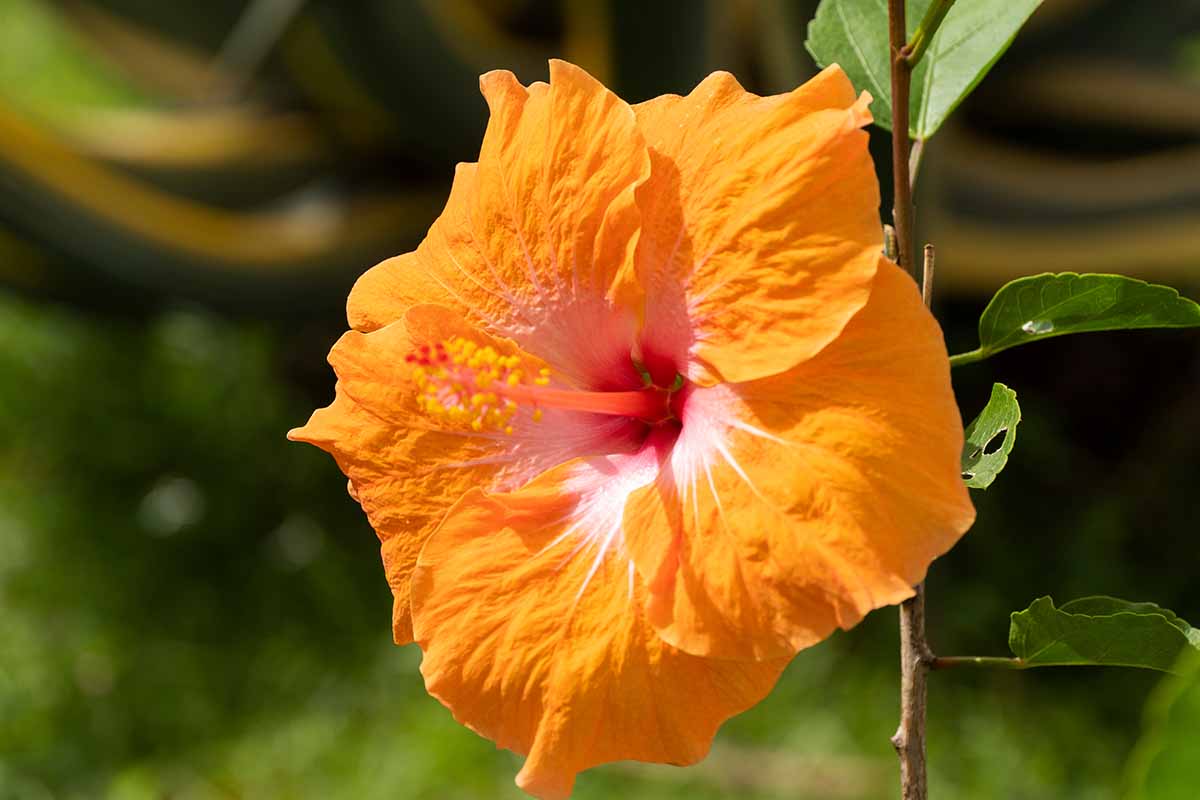
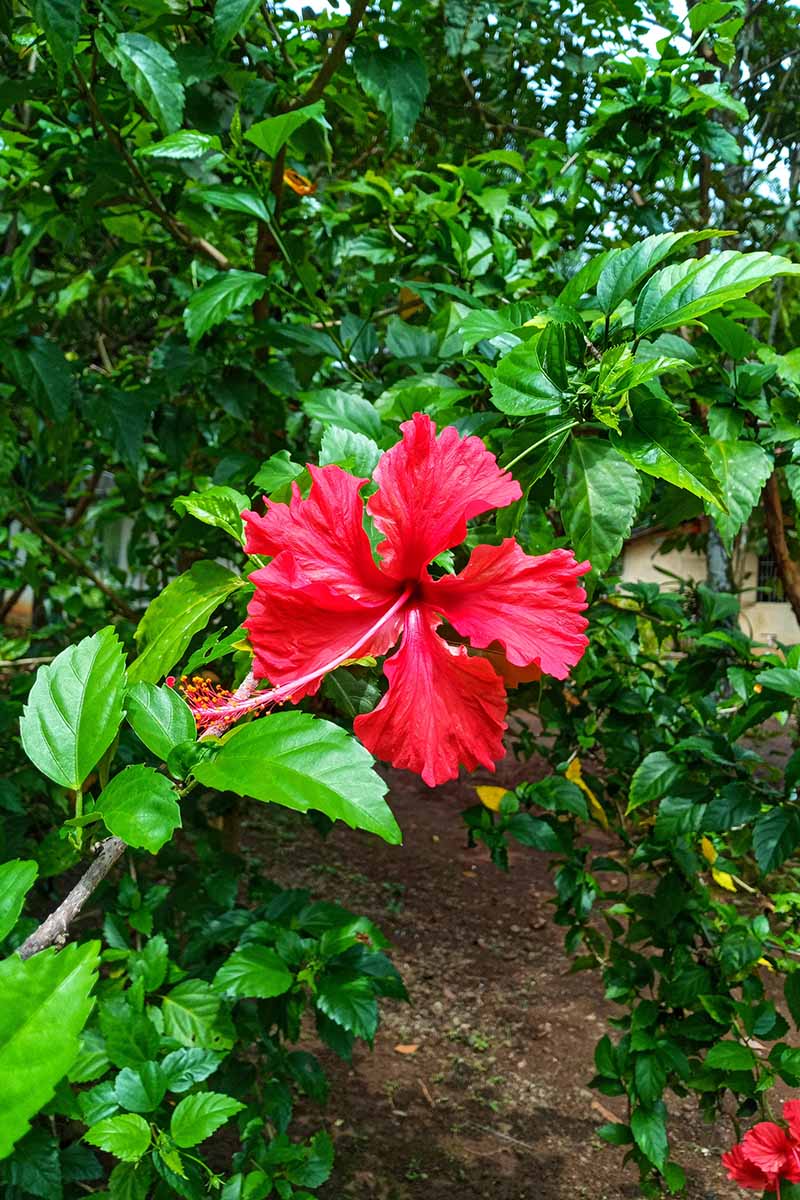
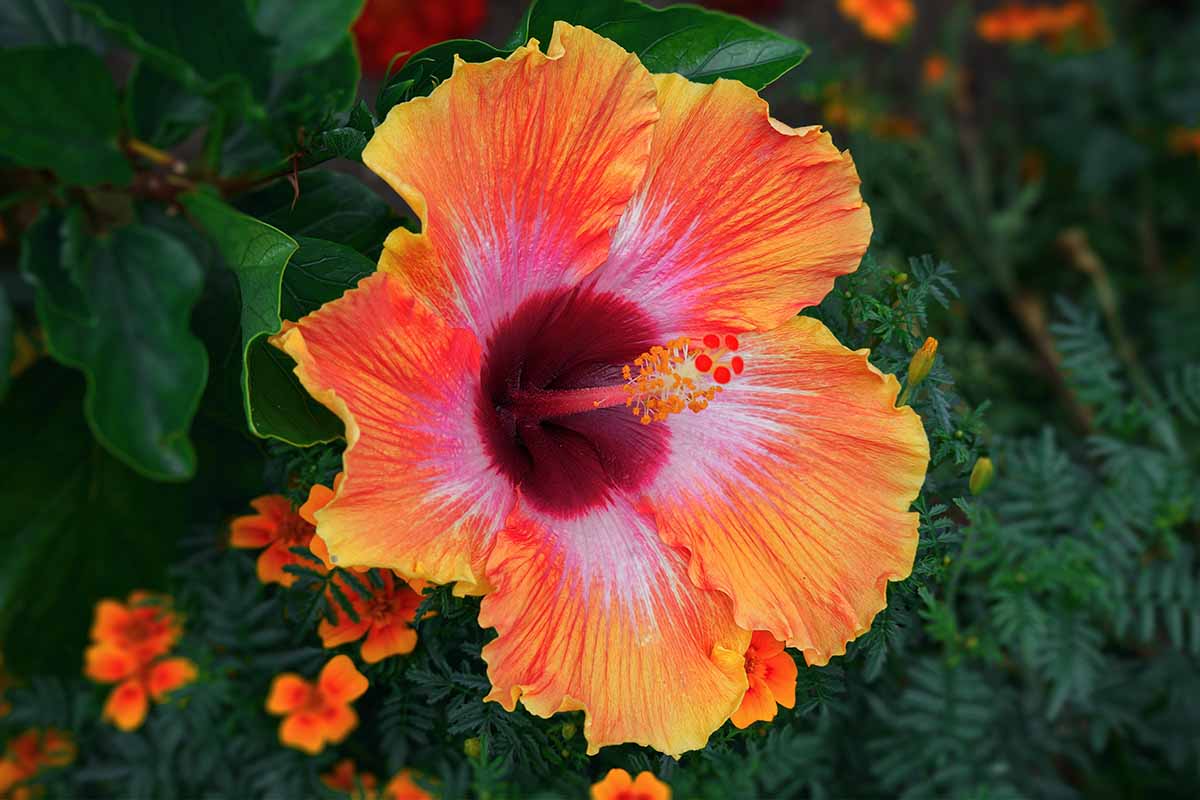
Whereas hardy types tend to come in colors such as red, white, and pink, the heat-loving blooms of tropical hibiscus offer a more vibrant and varied color palette.
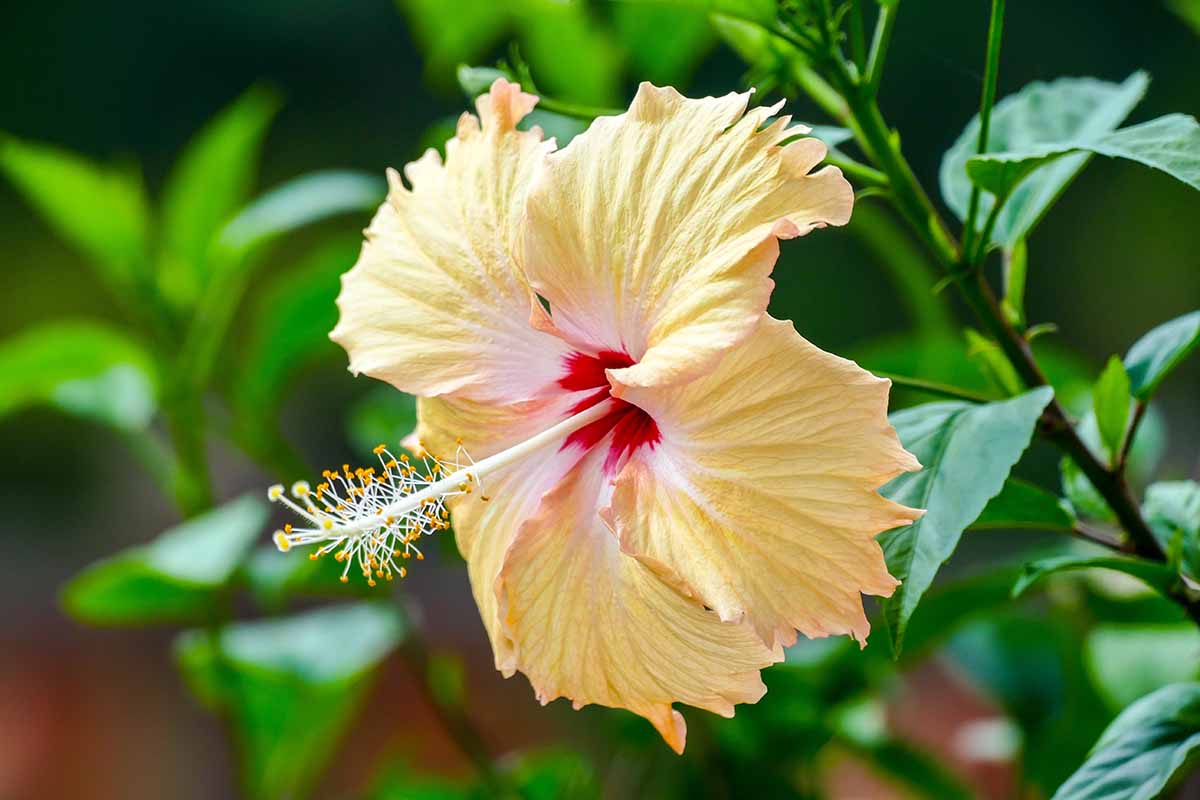
You’ll see them in shades of yellow, orange, scarlet, fuchsia, cream, and apricot, or a combination of these.
Blossoms may be single or double and typically range in size from three to four inches, or up to 10 inches for some.
Double blooms, such as those of H. rosa-sinensis ‘Butterball,’ also known as ‘Triple Yellow,’ have centers packed tightly with petaloids, giving them a form reminiscent to that of peonies.

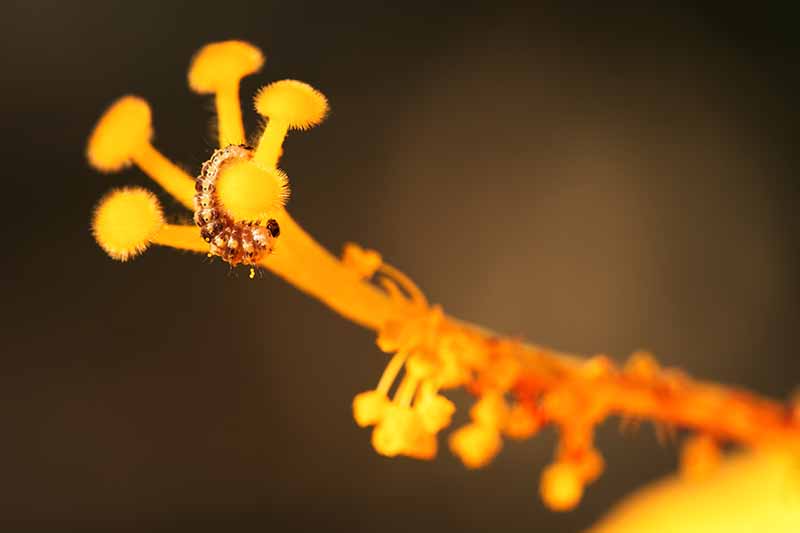
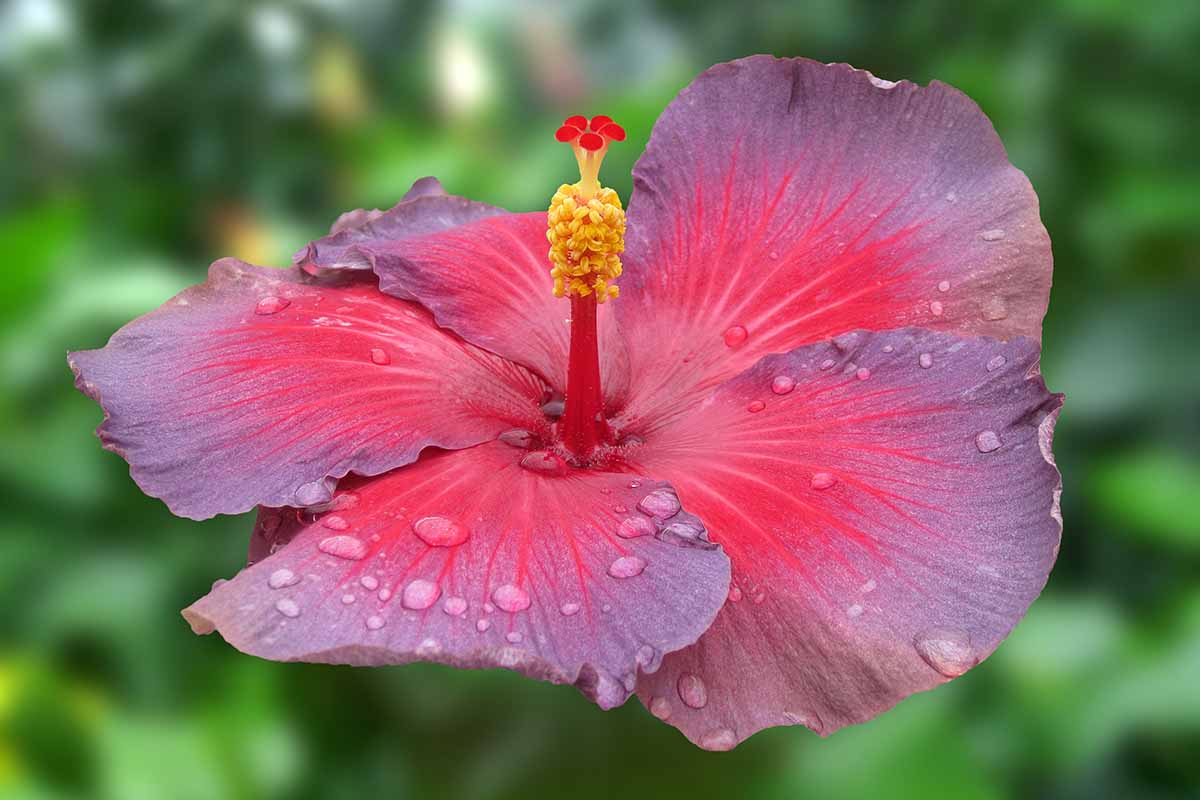
Distinctive, prominent styles – or pollination structures – two to four inches in length jut forth from the center of each bloom and can also exhibit a range of colors.
Typically, the style itself matches the tone of the center of the blossoms while the filaments and anthers are yellow or orange.
Single blooms have five large petals that overlap at the center and curve outward.
The margins may be smooth or frilled, and in some specimens, such as H. rosa-sinensis ‘Erin Rachel,’ the frilled margin is also tipped in a different color – bright orange against fuchsia-colored petals in this case.
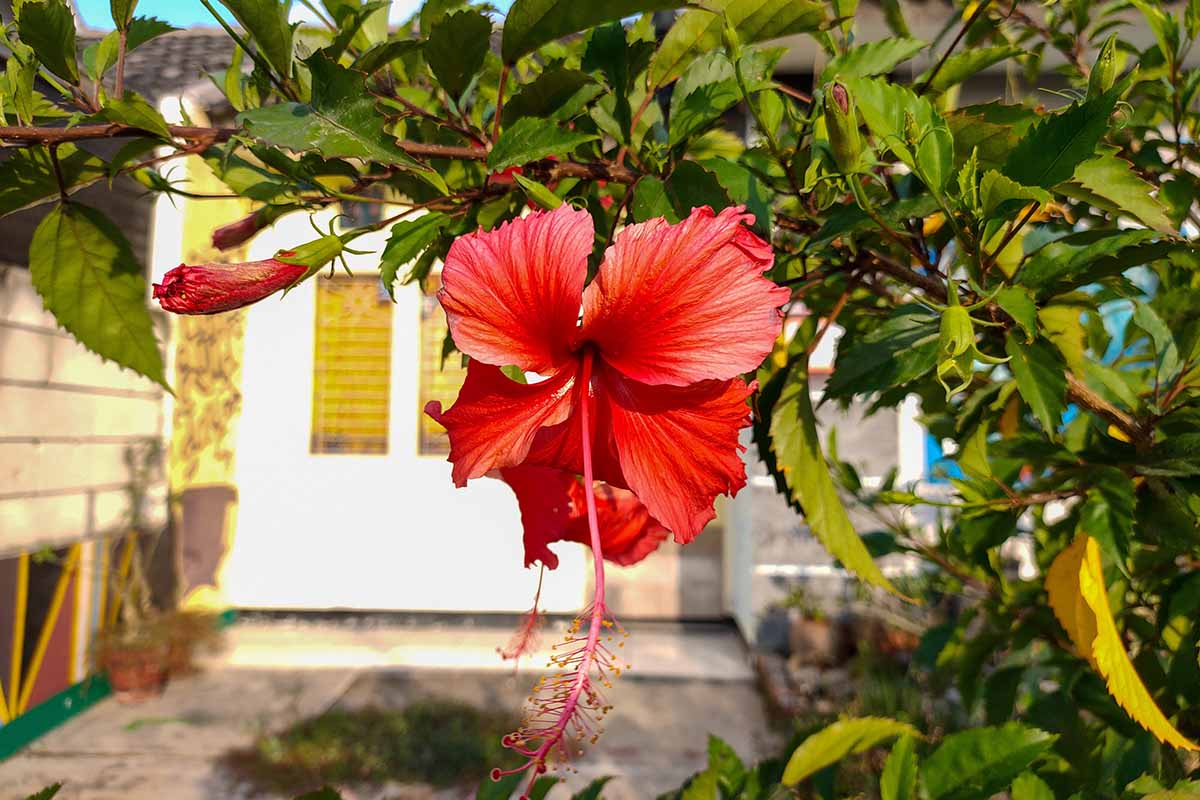
However, there are some species that deviate from this form, such as H. schizopetalus, also known as coral, fringed, or skeleton hibiscus.

This species is native to East Africa and, rather than having large, rounded petals, it has quirky, downward-facing blooms with deeply lobed and fringed petals that resemble branch coral.
While the blooms are smaller in this species, they’re extremely striking and can add interest in closer quarters, such as bordering a deck or outdoor sitting area.
Buds unfurl in the morning and each bloom lasts just one day, closing and wilting in the evening. Fortunately, in warm climates, buds continuously form on healthy plants.
Outside of Zones 9 to 11, blooming takes place in the late spring through summer.
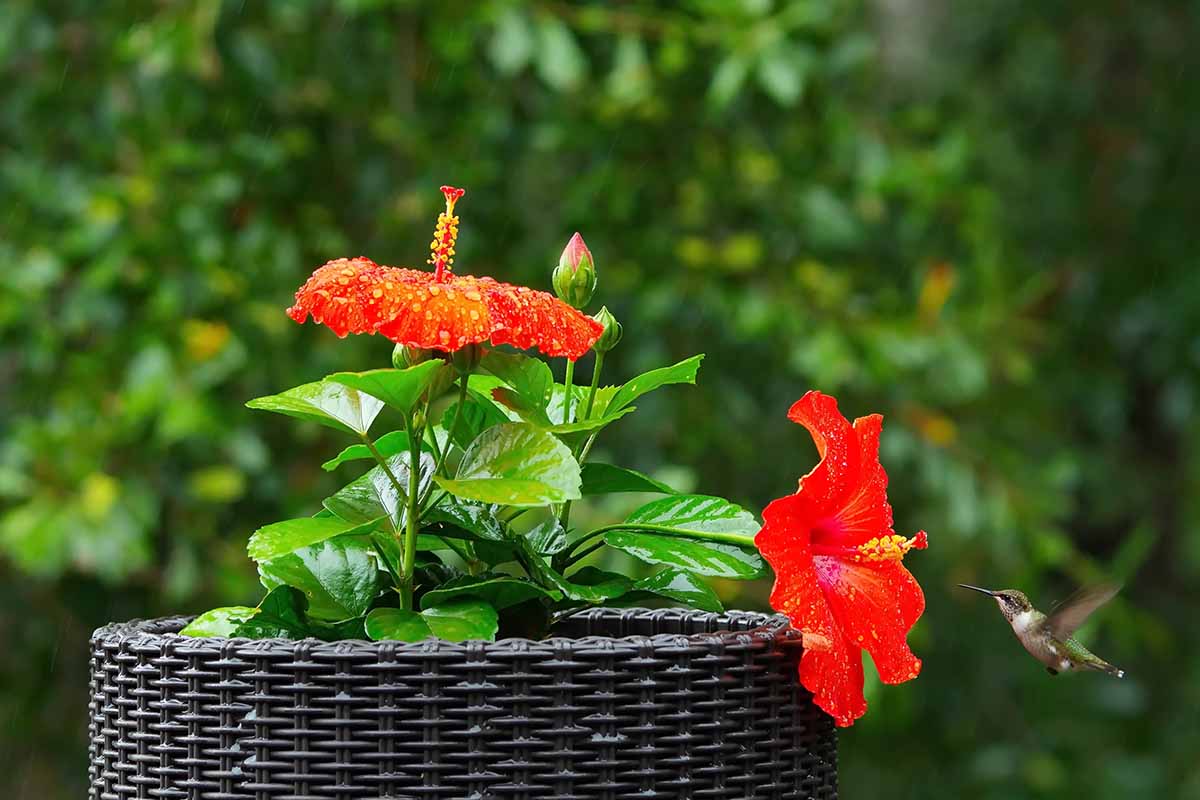
Hummingbirds and butterflies love the nectar from these flowers, but most of them have no scent to speak of. Still, the visual appeal they offer makes adding them to the landscape worthwhile.
We’ll briefly touch on some interesting points in the history of these species before we move on to propagation and caretaking.
Cultivation and History
Most tropical species are native to tropical regions of Asia, Africa, and Oceania, as well as Florida and Hawaii in the United States.
The blooms are featured as the national flower of Malaysia and the state flower of Hawaii, although most species grown on the Hawaiian islands were introduced and have since naturalized.
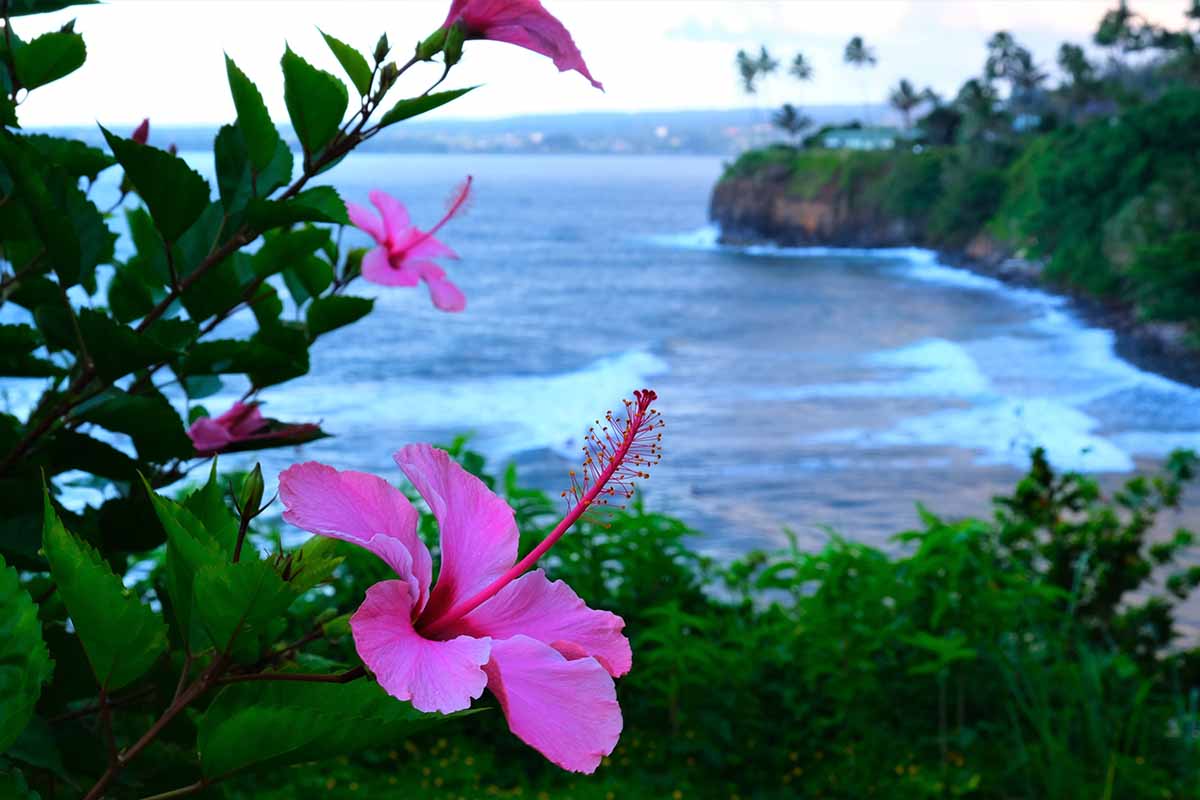
In the late 19th century, tropical hibiscus plants were introduced to Hawaii by the Chinese, and they became an immediate favorite thanks to their gorgeous blossoms.
Cultivation began here and was carried to the mainland soon after, garnering intense interest among gardeners in warm places like California, Florida, and Texas.
Because of the extreme popularity of the blooms paired with the destruction of natural habitats, the Hawaiian native species H. furcellatus is now considered endangered.
In Eastern and African medicine, extracts from the bark and leaves of these plants were historically used to improve cardiovascular health and treat high blood pressure.
Some species have historically been used for fiber production throughout China, India, and Africa. The fibers of H. tiliaceus are used to make rope and those from H. cannabinnus are used to make rope and paper.
Other species, particularly those that produce deeply colored blooms, are used as a source of dye for fabric and hair.
The common name “shoeblack plant” is derived from the historically African and Middle Eastern practice of using the blooms to polish shoes.
Fun fact: most species are considered edible and the blossoms are typically the part that is consumed. For others such as H. sabdariffa, an annual hibiscus species native to tropical Africa and commonly known as roselle, the leaves and seed pods are used as well.
The waxy calyces are collected after the blossoms wither and fall off, and used to brew a fruity tea known as sorrel or agua de jamaica. We’ll cover this species more in our guide to tea plants. (coming soon!)
So, how is propagation accomplished with these warm-weather wonders? On to the next topic!
Propagation
Propagation is easiest to achieve by taking cuttings from tropical types although air layering is an option as well, as is the case with most woody shrubs like camellias or roses.
We’ll cover both of these methods here, as well as transplanting specimens purchased from nurseries.
Starting from seed is a lesser-used method because cross-pollination often leads to variation from the parent specimen – and many tropical types are hybrids. However, it can be fun to produce new varieties with unique characteristics when using this method.
It’s important to note that seedlings should be given adequate time to develop a strong root system, so waiting three to six months to transplant after seeds germinate is the safest way to make sure they’re ready to move.
Though grafting is still occasionally used, it has gone by the wayside over the years in favor of easier methods. Rooting cuttings allows gardeners to clone the characteristics of the parent plant while eliminating the need for separate rootstock.
From Cuttings
The best time to take cuttings is when the plant is actively growing. For tropical hibiscus growing in warm regions, this can be done at any time of year except for winter, when plants are dormant.
In cooler zones, if you have a plant that you bring indoors during the winter, wait until spring when it begins producing new growth before taking cuttings. You can identify new growth by observing the stems, which will be bright green in most species.
Start by locating the third leaf node from the tip of a healthy branch. This is usually going to be about four to six inches down from the branch tip.
Using sharp shears or a garden knife, cut cleanly at an angle just below the third node. Remove all of the leaves except for the top two or three to allow photosynthesis to continue.
Pinch off the tip of the branch where the new leaves are beginning to grow. If there are any buds, remove those too. This encourages diversion of energy into root production rather than aboveground growth.
Remove about an inch of the green outer layer from the base of the cutting and dip the end into rooting hormone, if desired.
Bontone II Rooting Compound in powder form works well, and you can find it at Arbico Organics.
I don’t recommend starting cuttings in water due to the potential for disease and rotting, as well as the resulting weaker root system that develops.
Instead, prepare a planting flat with a mix of one part sand to one part coconut coir. Moisten it well but be sure any excess water drains away.
Press the cuttings in lightly just so they’re supported enough to stand upright. Do not compact the substrate around them.
You can stick them into your tray spaced about one inch apart, but be sure to transplant them soon after they begin to root to avoid entanglement.
Place the tray inside a clear plastic storage tote with a lid or cover the entire thing loosely with a plastic bag to retain heat and humidity. If you have a greenhouse, the tray can be placed there instead. Be sure to vent any cover if condensation develops to prevent overheating.
Sit the tray in an area where the temperature remains consistently between about 75 and 80°F, where it will receive about four to six hours of indirect sunlight per day. Mist the substrate daily to keep it moist as roots will not develop without moisture.
Monitor growth – wait no more than a couple of weeks after new leaves appear to transplant the rooted cuttings into individual four-inch pots.
Air Layering
Air layering is an easy way to create a new plant without removing it from the parent until it can sustain itself.
You’ll need a sharp, clean knife, rooting hormone, a plastic bag or sheeting and twist ties or a layering dome, and some coconut coir or sphagnum moss.
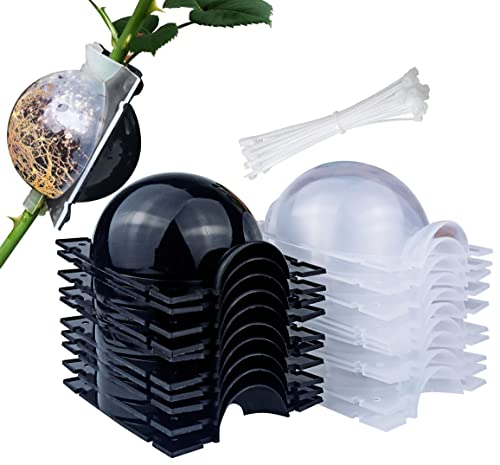
You can find a set of 10 domes with zip ties in this Air Layering Propagation Kit, available from Amazon.
Locate a branch 12 to 18 inches in length that shows new growth at the tip. Younger branches work best as the older, woodier ones can be a bit more resistant to rooting.
Using the knife, make a slit just through the outer layer of bark all the way around the branch, about six to eight inches down from the tip.
About one inch further down, cut another slit all the way around in the same way, and then make a straight cut through the outer layer of bark connecting the two.
Avoid cutting into the branch any deeper than the bark layer, or epidermis.
Peel off the bark and scrape away any cambium, or green material, below. You should have a one-inch section with no bark going all the way around the branch that is ready to root. Coat the exposed area lightly with powdered rooting hormone.
Next, fill both sides of the layering dome with moss or coir and dampen it well. If you’re using a piece of plastic or a bag instead, place it on a flat surface and mound your well-moistened rooting material in the center.
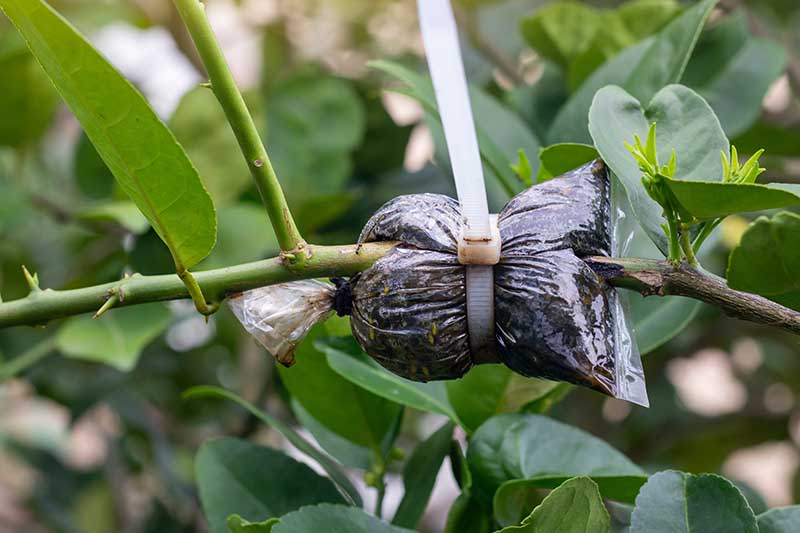
Wrap the plastic or close the dome around the branch at the cut, completely covering the exposed section. Use zip or twist ties to secure it in place.
Check on the progress of your layered branch every few days – as roots develop, you’ll start to see them through the clear dome or you will be able to feel them through the plastic.
Be sure to keep the substrate moist but not wet by opening one end and using an eyedropper or spray bottle to squirt a small amount of water inside.
It can take two to four weeks on average for the roots to grow in.
When the roots fill the dome or bag, it’s time to cut the branch free just below the exposed area closest to the parent plant.
Keep the roots wrapped and moist until you’re ready to transplant to a new location but work quickly to get your new specimen into the soil.
Transplanting
Your rooted cutting, layered branch, or purchased specimens are ready to transplant to a new home. Whether that’s a container or in the ground, you’ll need to prepare the site.
Always harden off plants you’ve propagated indoors gradually before transplanting. Expose them to outside conditions over a period of a few days to a week and move them from shade to sun for just a few hours at a time to avoid scalding and wilting.
Tropical hibiscus plants require soil that is organically-rich, well-draining, with a slightly acidic to neutral pH of 6.0 to 7.0. You may need to amend your soil with compost, sand, and/or bark substrate to allow for aeration and drainage.
If your soil is very compacted or clayey, you might consider planting in a raised bed instead of in the ground.
Hibiscus roots don’t grow deeply or widely. Prepare a two-foot-deep by two-foot-wide section of soil crumbling it well to aerate as you add any amendments.
Make a hole about the size and depth of the root system of the plant. Carefully turn the rooted cutting or nursery plant out of its container when you’re ready to place it in the hole, or unwrap the dome or covering for air layering. Avoid touching the roots as much as possible.
Seat it gently so the crown is level with the ground. Backfill around the root system and use your hands to compress the soil lightly to keep it upright.
Water in well to settle and monitor the moisture level for the first few weeks – avoid allowing the soil to dry out but make sure there’s no standing water present that isn’t draining away.
Container Planting
If you’re going to plant your new hibiscus in a container, you’ll want to choose one that is large enough to allow room for the roots to spread out, but not so large that the volume of soil will retain too much water.
For a young plant or transplant under about 12 inches in height, an eight- to 10-inch well-draining pot should be sufficient. Larger specimens will need larger vessels.
A mix of loam, sand, and bark substrate is excellent for water retention and providing adequate organic material without being too dense, allowing for aeration and drainage.
If you’d rather, you can purchase a pre-blended substrate like this Miracle Grow Cactus, Palm, and Citrus Soil, available in cubic-foot bags from Home Depot.

Miracle Gro Cactus, Palm, and Citrus Soil
Fill the container almost to the brim with your chosen potting mix, but leave space to make a hole about the same width and depth as the root system.
Moisten the soil thoroughly prior to transplanting and allow excess water to drain off. This is also a good time to make sure the holes in the bottom of the pot are providing adequate drainage.
Carefully turn the transplant out of its pot or unwrap the air layering materials, and seat your plant in the new container, leaving the crown level with the soil surface. Don’t bury the roots deeply as they need good aeration to thrive.
Backfill around the root system with soil, compacting gently to provide support. Once the specimen is in place, water it in lightly to settle and place it in its new location.
Give the soil a feel every two to three days to make sure it hasn’t gone dry – if it feels dry just below the surface, provide enough water to moisten it again.
Find more tips on growing in containers here.
How to Grow
As signs of spring start to appear and the chill leaves the air, it’s the best time to get started with installing your new hibiscus.
First and foremost, choose a sunny location where your plant will receive at least six, preferably eight hours of light each day.
In regions where temperatures frequently soar above 90ﹾF, you’ll need to provide afternoon shade to avoid heat stress and sunscald.
Planting under trees works well, or you could choose a spot where your house or another structure casts shadows during the warmest parts of the day.
Don’t install your new plants too close to the structure, though, as reflective heat can be too much for a hibiscus to handle on very hot days.
It’s important to make sure sun exposure is sufficient to prevent weak, sprawling growth with little to no blooming, so avoid areas that are always in full shade.
A layer of chipped bark or straw mulch about three inches thick can be spread over the root zone to keep the ground warm throughout cooler seasons, and keep it cool while retaining moisture when temperatures are steamy.
Planting in a cooler zone within the acceptable range for these plants, in Zone 8 or further north, looks a bit different.
Since you’re most likely growing your specimen as an annual or in a container in this case, you’ll want to be sure it receives as much sunlight as possible to keep it healthy and thriving. You can also choose a location close to a structure as mentioned above to benefit from that reflective warmth as well.
A location near a freshwater feature is ideal for consistently available groundwater, no matter which growing zone you’re in. This can reduce the need for regular watering, but soggy, marshy soil isn’t the best choice – these plants can’t stand wet feet.
If you don’t have a water feature in your landscape, you’ll need to provide supplemental moisture consistently. In the absence of rain, plan to offer one to two inches of water per week.
Fertilizing
The first application of fertilizer should be added in early spring, starting the year after transplanting. This will encourage a strong start to the new growth cycle, and help provide nutrients needed in preparation for blooming while temperatures are still cool.
Dr. Earth’s Palm, Tropical, and Hibiscus Fertilizer comes in a four-pound package. The slow-release granules provide nutrients in a 4-4-6 NPK ratio to help keep roots and foliage strong while encouraging buds to set.
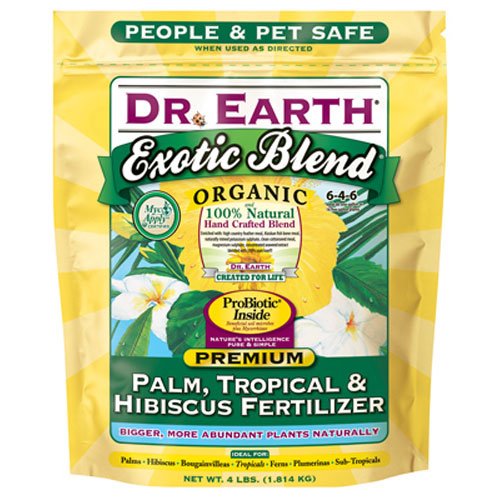
Dr. Earth Palm, Tropical, and Hibiscus Fertilizer
It’s available via Amazon.
Slow-release granules should be added about every two to four weeks, according to package instructions. Be sure that the soil is moist prior application for best results.
If you opt to use a liquid fertilizer instead, try this set of three products from FoxFarm.
Grow Big, Big Bloom, and Tiger Bloom Liquid Nutrient Soil Formula fertilizers are available in 16- or 32-ounce bottles from Amazon.
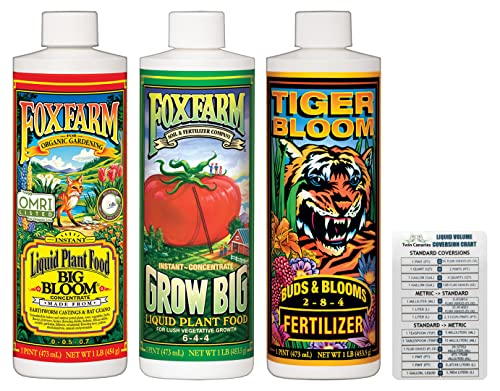
FoxFarm Liquid Nutrient Soil Formula
These products work in conjunction to provide exactly what your plants need to grow healthy and strong, set buds, and bloom like champs.
High potassium is a must for tropical hibiscuses, which tend to deplete potassium in the soil throughout the bloom cycle.
Apply the appropriate liquid from this set or your choice of liquid fertilizer based on package instructions. For these products, you’ll be using two of them at a time, depending on what part of the seasonal cycle you’re approaching.
If you’d like to add some naturally available sources of potassium, dried and crushed banana peels are an excellent organic source.
It’s not necessary to apply fertilizer in the fall or winter, and doing so may result in burnt, damaged roots or buildup in the soil.
Growing Tips
- Don’t plant too close to structures in climates that reach sweltering temperatures as reflective heat can cause scalding and damage.
- In warm climates, provide shade when temperatures exceed 90ﹾF.
- Avoid overwatering but be sure to provide consistent moisture.
Pruning and Maintenance
A seasonal trim will keep your hibiscus healthy and will encourage blooming the following spring since buds only appear on new growth.
Remove just the ends of the branches after blooming ceases, cutting no more than two or three leaf nodes from the tips.
Trimming after blooming has ended and before it begins again will also encourage a bushier structure, rather than allowing long, leggy branches to develop.
If your hibiscus is getting a little larger than you’d like, wait until blooming is finished for the season and remove just enough growth to return it back to the shape and size you desire.
Avoid removing more than about 30 percent of the total volume at a time, or a third of the total branches, since excessive pruning can cause shock.
Trim branches at the ends, leaving the main trunk and thicker, woodier branches intact. A couple of older branches can be removed periodically to let light in and improve airflow if growth has become dense and suffocating.
Blooms typically last for just one day, and after they fall off, the calyces will remain. If you’re not concerned with collecting seed, deadheading should be done by trimming off the calyces to allow energy to be diverted to other functions.
If damage from pests, sun, or weather has occurred, prune away only the damaged parts as soon as you see them. Sunscalded leaves, for example, can be trimmed off and the roots should be drenched well with water to help the plant recover.
Heat-stressed container-planted specimens can be moved to shade during the recovery period. In-ground specimens can be shaded at the site, with adequate ventilation, until they show signs of bouncing back.
If the temperature drops below about 50ﹾF, you may need to wrap your shrubs to avoid cold damage.
Burlap or another type of material such as this Insulating Garden Wrap, available in 12-foot rolls from the Nuvue Store via Walmart, will do the trick.

Be sure to remove it when the danger of low temperatures has passed to be sure your plant is receiving adequate light and prevent overheating.
Overwintering container plants indoors or moving them to a sheltered location in cooler zones can also help to keep them alive until the following spring, rather than dying off in the winter.
See our complete guide on overwintering for more details.
Cultivars to Select
I’ll cover a few popular tropical types here, but for a larger sampling, see the tropicals section of our roundup of the best types of hibiscus.
This guide also includes hardy types like rose of Sharon, so if you’re on the fence about which to plant, this handy list may help you to decide.
Most tropical hibiscus plants grown in home gardens are cultivars and hybrids of H. rosa-sinensis.
The H. rosa-sinensis cultivars mentioned below thrive in USDA Hardiness Zones 9 to 11, but can be planted as annuals in growing zones north of these, or potted plants may be overwintered indoors.
Midnight Tryst
If distinctive flowers are your thing, then this cultivar is a must-have! ‘Midnight Tryst’ arguably has one of the most outstanding color combinations available on the market.
With hand-sized, pale pink to lavender blooms that open to reveal a blue to purple starburst and a center of bright, shocking pink, this is one for the place of honor in your landscape.
This cultivar reaches somewhere between eight and 10 feet at maturity in ideal conditions. The green foliage can be pruned back to keep its size in check, and specimens should be spaced six to eight feet apart to provide adequate room to grow.
Find two- to-four-inch rooted cuttings available from Amazon.
Playboy
This gorgeous cultivar, with its large, peach to orange blossoms against deep green foliage, was developed by Hollywood Hibiscus in Grand Saline, Texas.
With a more compact size than some at just four to five feet in height at maturity, ‘Playboy’ was bred to have longer-lasting blooms that really wow with their deep, vibrant color. The breeder refers to this cultivar as “flirtatious,” and I must agree with them!

Group several of these compact shrubs together with three- to four-foot spacing for a stand of magnificent, space-saving color or pot them and place them around your deck or patio for a retreat with the look of the tropics.
Find ‘Playboy’ in two-gallon containers, available from Home Depot.
Rico Suave
Another stunner bred by Hollywood Hibiscus, ‘Rico Suave’ is one of their most colorful cultivars.
You’ll find midsize yellow blooms against deep green foliage to add a bright, sunny touch to your landscape, but a surprise lies inside – the center of each bloom is filled with deep burgundy, fading outward to fuchsia.
The stamens match the deep red centers and are tipped with golden anthers.

Just as with all of their cultivars, ‘Rico Suave’ was bred to have longer-lasting blossoms and a compact growth habit, reaching only four to five feet in height at maturity.
Imagine how gorgeous these would be gathered around a pergola or delighting in the afternoon shadow of a palm tree!
You can find one- or two- gallon containers of ‘Rico Suave’ available from Home Depot.
I could compile a list of a hundred different cultivars to recommend with all of the incredible colors and forms on the market today, but I have a feeling you’ll find that rabbit hole on your own!
Instead, let’s talk a bit about what you’ll need to watch out for in terms of maladies and unwelcome infestations that can befall your plants.
Managing Pests and Disease
It may come as no surprise that you’ll need to keep an eye on your hibiscuses. Not only do people love them, but animals, insects, and disease pathogens do as well.
Fortunately, these plants are relatively tough to kill. But obviously, you don’t want to leave that open to chance either. Here’s what you’ll need to be aware of to keep yours safe and thriving.
Herbivores
Most of the animals on this list are common in the garden and are known to wreck the place if given enough leeway. A few are specific to warm climates, and these can cause a fair amount of damage as well.
Here’s what you might expect to see:
Deer, Groundhogs, and Squirrels
No doubt you’ve heard all about how these four-legged creatures are always on the lookout for a fresh food source. Maybe you’ve experienced this yourself and you know firsthand just how tough it can be to keep their snoots off of your prized vegetation.
Both blossoms and foliage are at risk of damage in this case, so protecting the entire specimen may be a challenge.
We’ve got comprehensive guides for dealing with deer and setting up deer fencing available for you to read, and a guide to keeping squirrels off of sunflowers – which may be a different type of bloom but a lot of the methods mentioned are highly effective in this instance as well.
Groundhogs are also tricky to fend off. They burrow underground so it can be almost impossible to block their way or eradicate them from your landscape.
Fencing around your plants is often helpful, and you can also add some underground chicken wire in surrounding areas, buried three to four inches under the surface, to make it harder to burrow close by.
But the most effective solution by far for keeping wildlife from having access to those lovely blooms and foliage is to pot them and move them to a location that’s out of reach.
Reptiles
Personally, I’m not super offended when these reptiles pay a visit. I thoroughly enjoy them.
You should know that the idea of all turtles being slow-moving is a complete myth. The gopher tortoises here in Florida are much faster than I would have imagined!
Turtles and tortoises may be limited to foraging at ground level or just above, but iguanas often come from overhead if there are larger trees nearby – and both of these types of animals love to eat the blossoms. So, you can imagine that your hibiscuses might be in danger from all sides.
If you have a serious problem with either, you might already know that some turtles and tortoises are endangered, and therefore illegal to interact with in Florida and other states.
This means you won’t be able to relocate them or feed them by hand, but you can add alternative vegetation to your landscape to attract them elsewhere.
Check your local laws to be sure before you get yourself into a compromising situation. Local wildlife conservationists may be interested to know of their presence as well.
The best way to deal with damage caused by these animals is to provide other less-cherished plants as available food sources. Planting strawberries, lettuce, and other types of leafy greens will definitely turn their scaly heads.
Don’t install hibiscus near overhead access points. Create a barrier at ground level, such as a fence or block border. You can also wrap tree trunks in slick material to make it tougher for iguanas to climb up.
Avoid placing your flowers near flat, warm, open-access surfaces, because iguanas will definitely be attracted to these for sunbathing before or after a meal. If you have an enclosed patio or sunroom, you might consider placing containers inside it instead.
Mobility can reduce the likelihood of damage because container-grown plants can be moved indoors or to shelter from your hungry guests. However, vertebrates aren’t the only ones seeking sustenance…
Insects
Some pests are practically universally present in most regions. They visit many different types of plants, so they may start out in your vegetable garden and find their way to other species, or vice versa.
Some of these can feed and multiply out of control without fast and thorough attention. And unfortunately, a lot of these nuisance insects enjoy or almost solely feed on hibiscus.
Aphids, Mealybugs, and Whiteflies
These three pests are extremely common throughout the United States, although whiteflies tend to appear more often in the southern part of the country.
All of these are sucking insects, which means they puncture the exterior of plants to drain the fluids from the interior.
And when I say “drain,” I’m not joking – with a large enough infestation, they can pull enough fluid to stunt growth, cause discoloration, and create damage that leads to die-off. Young plants are especially at risk and can be quickly overtaken.
You can find complete information on dealing with aphids, mealybugs and whiteflies in our guides to each of these.
Caterpillars
There are several different types of caterpillars that you might see chewing and cocooning on your hibiscus and other mallow plants. Some are not only a nuisance, but potentially harmful to humans and pets as well.
It’s important to remember that caterpillars rarely defoliate a healthy host plant enough to cause death, so if you can avoid moving or touching these pests, that’s the way to go. It’s also best to never touch an unfamiliar species since you won’t know if it can inflict injury.
Those that have stinging capabilities often exhibit bright colors and complex patterns on their bodies.
If you do wish to move them, pull on some gloves or use a gardening trowel and bucket, to avoid getting stung.
If there are only a couple present, it can be fun and interesting to watch them live out their lifecycle knowing that your hibiscus will bounce back. Just keep kids and pets away from them to avoid a mishap.
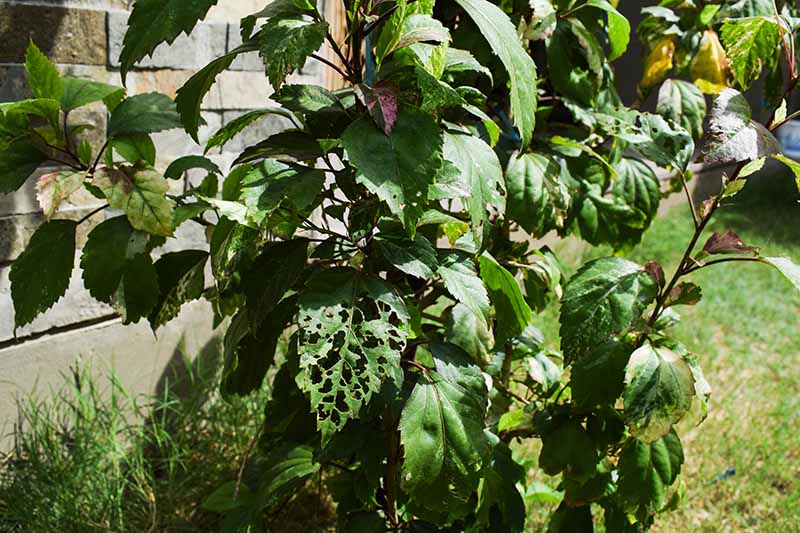
When these species are present, you’ll notice holes chewed through the leaves or sections missing along the margins, and you may see some silky threads or cocoons left behind.
Adult moths tend to lay their eggs in the spring in temperate zones, or in warmer regions, they may deposit eggs year-round.
If you happen to catch sight of the eggs on the undersides of leaves, you can smush them to prevent them from hatching.
Learn more about combating caterpillars here.
Disease
Along with the creepy-crawlies on our list of pests, you’ll also need to keep an eye out for some of the following diseases:
Botrytis
Botrytis, also known as gray mold, can appear on more than 200 different types of vegetation.
This disease is caused by a fungus called Botrytis cinerea, which spreads through spores that may lay dormant for any length of time until conditions are right to become active.
The spores can be transferred through the wind, water splashing or droplets, or simply by brushing against an infected specimen. They can even be transferred on infected garden tools.
Unfortunately, most strains of this fungus are fungicide resistant, so it can be tough to treat Botrytis. It’s best to think ahead rather than reacting to an already present outbreak.
Keep your hibiscus away from standing ground water. It’s especially important to do this in regions where it’s hot and humid through much of the year.
Make sure to open space in dense foliage by pruning periodically, but clean your tools with rubbing alcohol in between uses and between plants to avoid spreading spores.
Use mulch to cover the soil at the base of the specimen so water can’t splash up as easily, and when you water, avoid spraying directly on the foliage.
If you do notice an outbreak developing, which can look like moldy, fluffy gray areas, prune all affected material away and discard it in a sealed bag or burn it, if that’s permitted in your area.
If it’s spread too far, you may have to remove the entire shrub, especially if it’s growing adjacent to other vegetation.
Downy Mildew
Downy mildew can be caused by water molds (oomycetes) in the Bremia, Peronospora, or Plasmopara genera. Signs of infection include powdery, white to gray mildew formation on leaves and stems, and eventual spreading that can lead to die-off.
This infection is one of the most common in the botanical world, affecting thousands of different types of vegetation, including houseplants. It generally appears in regions where cool, damp evenings are followed by hot, humid days.
There is no known cure and fungicides will not kill spores, so the only way to mitigate damage from infection is to remove affected plant material and burn or discard it.
Prevention is the best treatment, so keeping your specimen pruned to facilitate good airflow and preventing moisture from remaining on leaf surfaces may help to keep an infection from developing.
Powdery Mildew
Just as with downy mildew, powdery mildew appears as white or gray, fuzzy-looking sections on leaves and stems.
Both of these diseases are caused by spores that are spread through contact with water or with the use of infected tools. However, where downy mildew is typically very resistant to fungicides, powdery mildew is a bit easier to treat.
Apply fungicide in the spring, before humid conditions become an issue, or as needed throughout the season.
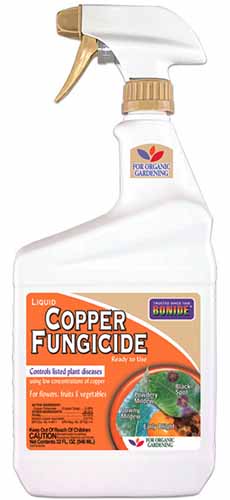
A product like Bonide Liquid Copper Fungicide works well, and it’s available in 32-ounce spray bottles, 16-ounce concentrate, or 16- and 32-ounce hose-end applicators, from Arbico Organics.
Use caution and to avoid overapplication as this can lead to fungicide resistance, making treatment more difficult.
Learn more about how to address powdery mildew in our guide.
Best Uses
Whether you plan to use a container or install your specimen in-ground, there are a lot of ways to include H. rosa-sinensis and other tropical species and hybrids in your landscape.
As I mentioned, adding them as a border planting around a fresh water feature not only looks beautiful, but it reduces the need for continual watering.
Adding some brightly colored blooms as a surround for a patio, deck, or pool area can provide the tropical touch you seek for those balmy summer afternoons.
Trim them into tree form and add them as corner pieces, framing beds, lower-lying flowers, or ground covers. They can also be included in mass planting layouts, such as those suggested in our guide to the best flowers for mass planting.
If photography is your thing, you’ll get countless snaps of hummingbirds, butterflies, and other visitors stopping by for a photo-op. Place tropical hibiscus within range of windows or near outdoor seating areas where you can await their arrival with your camera or phone in hand.
Select a cultivar with massive flowers, such as ‘Cherry Mojito’ or ‘Sex on the Beach’. These beauties sport huge, six to eight-inch blossoms that will grace your garden as a focal point like no other.
Quick Reference Growing Guide
| Plant Type: | Flowering perennial | Flower / Foliage Color: | Red, white, pink, lavender, orange, peach, bicolored / green, purple, copper |
| Native to: | Tropical regions of Asia, Africa, Oceania | Maintenance: | Moderate |
| Hardiness (USDA Zone): | 9-11 | Tolerance: | Heat, sun, sandy soil |
| Bloom Time: | Spring-fall | Soil Type: | Sandy loam |
| Exposure: | Full sun to partial shade | Soil pH: | 6.0-7.0 |
| Spacing: | 2-8 feet | Soil Drainage: | Well-draining |
| Planting Depth: | Depth of root ball (transplants) | Attracts: | Butterflies, hummingbirds, moths |
| Growth Rate: | Moderate | Uses: | Borders, container planting, features, focal point, pollinator support, specimen planting, shrubs, wildlife support |
| Height: | 2-15 feet | Family: | Malvaceae |
| Spread: | 2-12 feet | Genus: | Hibiscus |
| Water Needs: | Moderate | Species: | Acetosella, arnottiatus, brackenridgei, furcellatus, mutabilis, rosa-sinensis, schizopetalus |
| Common Pests: | Aphids, Io moths, hibiscus leaf moths, mealybugs, saddleback moths, sawflies, whiteflies | Common Diseases: | Botrytis, downy mildew, powdery mildew |
Sensational Symbols of the Summer Sun
Before I moved to Florida, I had no idea there were so many different species, cultivars, hybrids, and forms of this beloved tropical flower.
Now that I know, however, I’m obsessed with them! Are you a fan? What’s your favorite type? I’d love to know – maybe you can show me a new one that I haven’t seen!
Even though they grow best in steamy regions, it’s worth the added time and effort to bring tropical hibiscus plants home even in places where they’ll need to be potted – especially if you’re a fan of hummingbirds and butterflies.
If you’ve got a special one that you want to show off, we’d love to see your photos in the comments section below! And, as always, we’re here for you if you still have questions.
If you’re on the hunt for some new and dazzling tropical flowering plants, check out these guides next: