
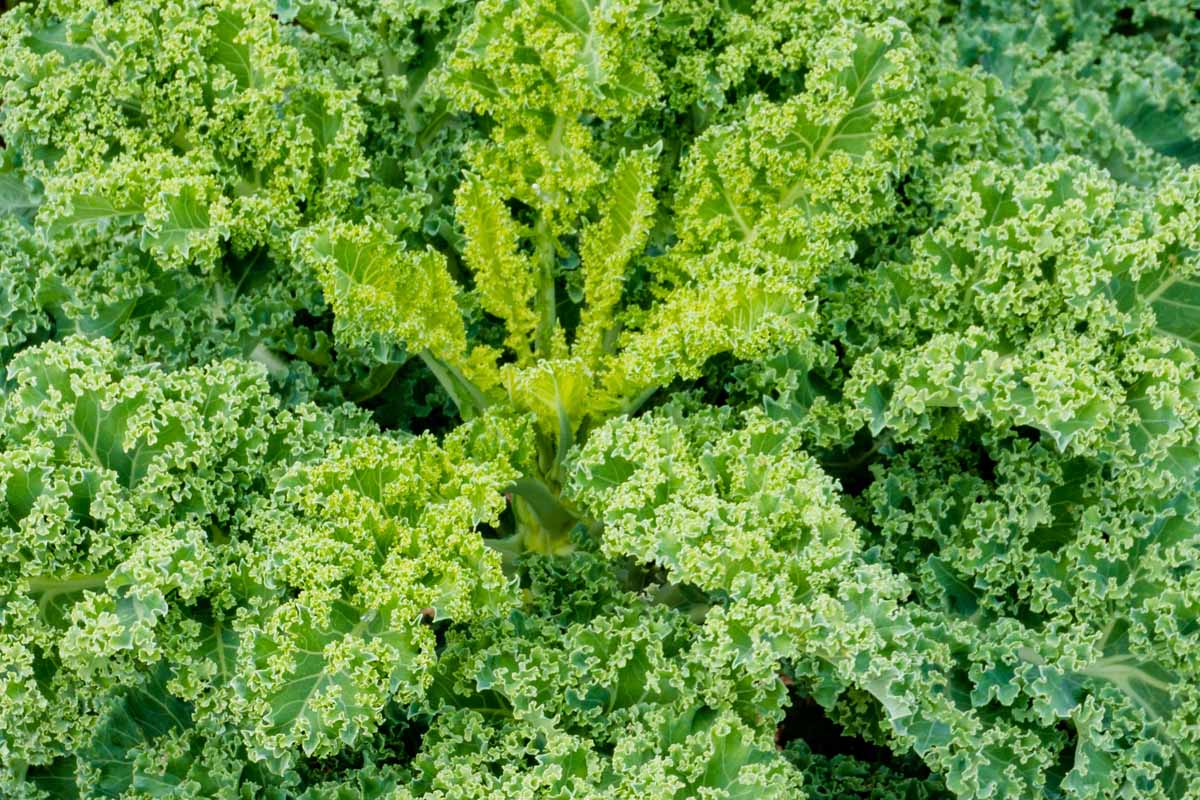
In the last few decades, nutrient rich kale has become widely popular as a healthy staple for meals and snacks. And home gardeners have readily embraced it in the veggie patch as well.
This easy-to-grow leafy green thrives in cool temperatures, and a generous selection of cultivars make it a beautiful and delicious addition to the garden.
A member of the Brassica genus, these plants are biennials. They produce leafy growth in the first year, then overwinter in the garden. In their second growing season, they resume growth, flower, then set seed.

We link to vendors to help you find relevant products. If you buy from one of our links, we may earn a commission.
With plenty of open pollinated varieties to choose from, reproducing plants true to their parents is easy. And you can begin your own organic, heirloom collection – a wonderful legacy your family will cherish for generations!
Let’s look at the easy steps involved to save and store your kale seeds.
How to Save Kale Seeds
Second Year Growth
Although it’s often grown as an annual, kale requires two years to complete its life cycle.
To collect seeds, you’ll have to let your plants overwinter. This is good news if you’re in USDA Hardiness Zones 7-10, because you’ll also be able to harvest yummy leaves all winter!
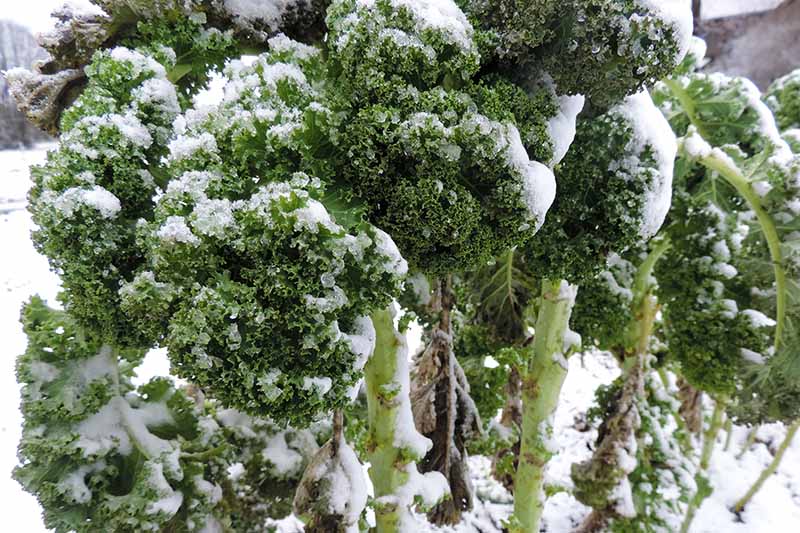
In late autumn, lay down a thick, 4- to 6-inch layer of mulch around the base of plants. Compost, grass clippings, leaf mold, sawdust, and straw are all good materials to use.
In spring, this cold weather brassica is one of the first plants to awaken and quickly yields fresh leaves early in the season. By summer, plants have finished their life cycle and will set buds before sending up tall flower stalks. Pods form shortly after.
Leaves can be harvested as long as the plant is viable, but the flavor will suffer once they flower. They’re still suitable for use in stir-fries and soups, but will be tougher and if eaten raw, they may taste bitter.
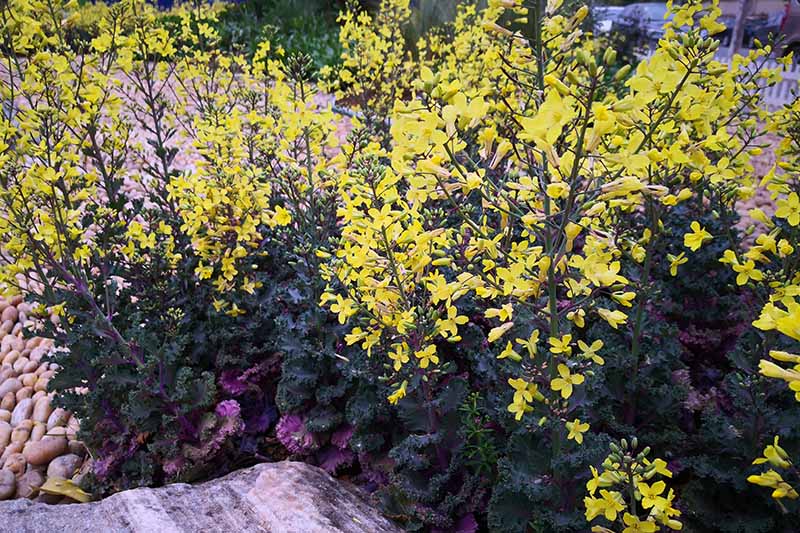
Gather Flower Stalks
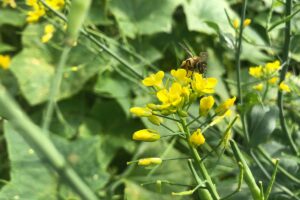
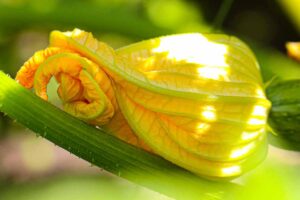
As temperatures rise, each plant sends up tall flower stalks that reach 3 to 5 feet high with large terminal racemes made of small yellow flowers.
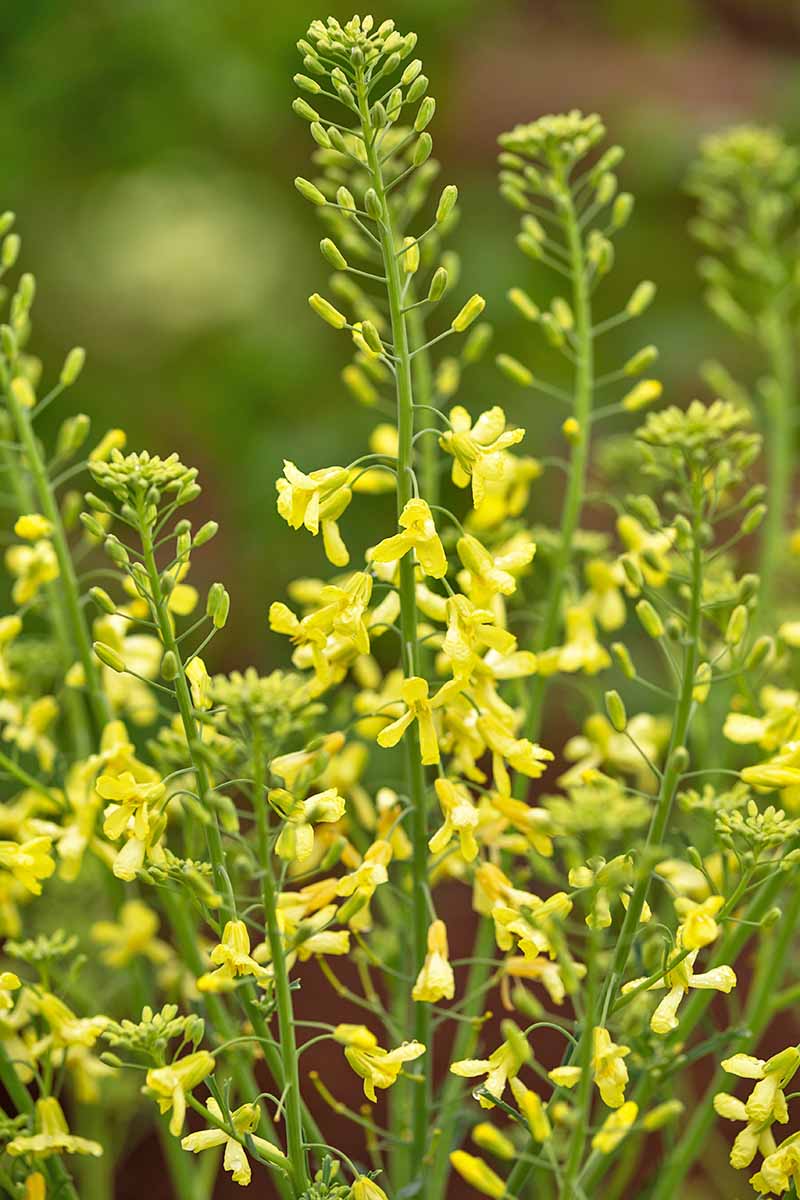
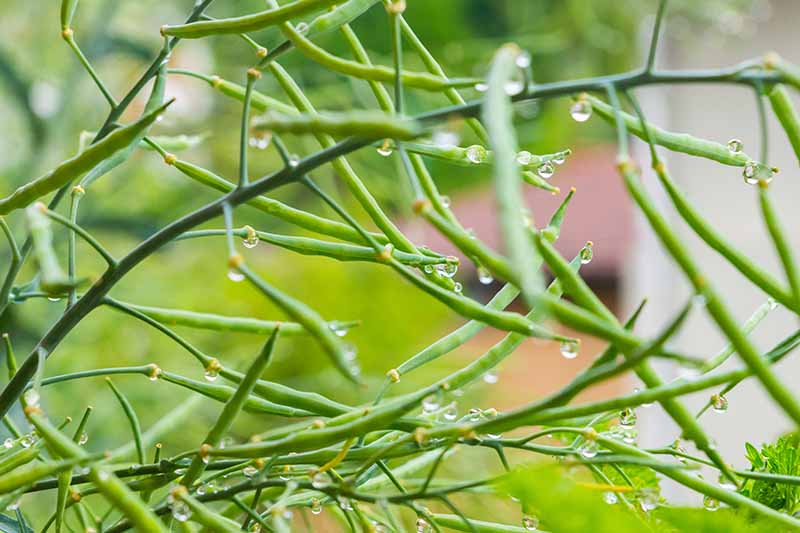
Once the flowers finish, long, thin pods form on the stalks.
And as they fade from green to beige, you need to act quickly to preserve the ripe fruit. Waiting too long can result in dry pods bursting open and dispersing their cache.
Flower stalks can be somewhat brittle, particularly in high winds. If stems begin to flop as they mature, gather a handful together and attach them to a bamboo stake for support to preserve your harvest.
Once the pods have ripened and begun to dry out, cut stalks close to the ground.
Invert the stems with heads and place them in a large paper bag. Tie off the opening with garden twine then hang the bags in a cool, dry location out of the wind.
In areas with high humidity, place only a few stems in each bag to avoid mold.
Once the pods are thoroughly dry, in 10 to 21 days, shake and slap the stems inside the bag to dislodge the seeds.
Winnow Out the Chaff
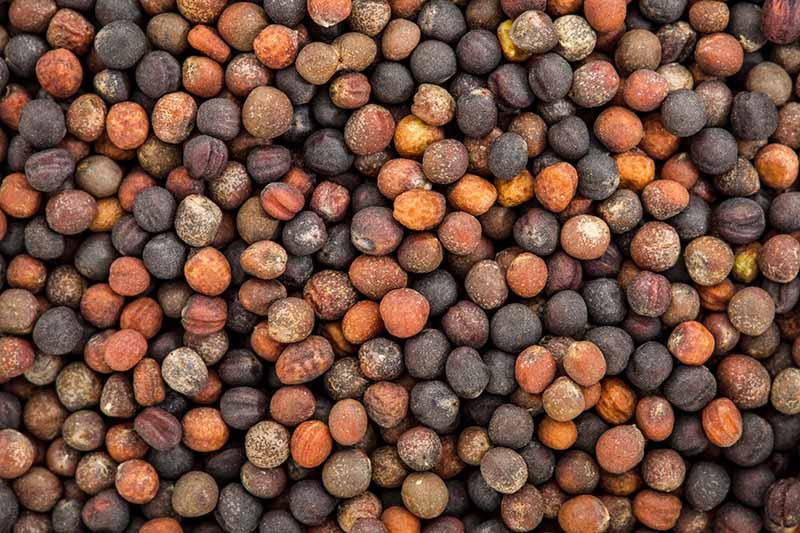
All varieties produce small, round seeds that are black, gray, or tan colored.
When collecting your own seed, the bits of dried casings and flower stems (or chaff) need to be separated from the seeds by a process known as winnowing.
This can be done using a screen calibrated with holes large enough for them to fall through as you gently shake it. Discard the chaff left on the screen when finished.
Or, on a breezy day, use a mesh strainer or winnowing basket to gently toss seeds up in the air and let the breeze take away the chaff. They need to be tossed high enough for the wind to catch the chaff and disperse it, but not so high as to lose them!
A third option is to dump seeds and chaff onto a large plate and manually separate the two, pushing the chaff aside and saving the seed.
Safe Storage
A single plant can produce hundreds of seeds, and proper storage conditions are required to keep them viable.
Store them in paper envelopes or ceramic or glass jars, then label with the plant name and date.
Once packaged, they require a cool, dark location that keeps their moisture content stable.
Temperatures of around 50°F with a humidity of 40 percent are ideal – which makes the produce drawer in your refrigerator a sweet spot for storage.
Other good locations include unheated garages, potting sheds, and root cellars. If your unheated areas flirt with temperatures close to freezing, place your seed containers in a small insulated beverage cooler before storing.
When stored properly, they will remain viable for up to four years.
Save a Seed, Sow Some Love
Saving your own open-pollinated seed is smart and economical.
It ensures plants grown from seed will be true to their parent, and you get complete control over their growing environment.
You’ll never have to buy seedlings again, and you can create your own heirloom lineage of plants – perfect for the self-sustaining or organic gardener.
Plus, you’ll never have that excruciating wait for your local garden shops or direct order companies to be stocked for spring before starting your plants!
Remember to overwinter your kale to collect the seed. And be sure to collect plenty.
Seeds make a great gift fellow gardeners will love, and can be used as tender to barter with at your local seed exchange.
What varieties are you folks saving? Let us know in the comments below.
And be sure to check some of our other guides on this delicious, nutritious green. Here are a few that might interest you:
Thank you for all this information! I have flowering kale and brocoli plants in my garden that I planted in the fall. I guess they don’t always need a whole two years.
I had no idea. I’ve been growing Kale for years but at the end of the year, I’d cut all the leaves off, made them into Kale Chips, lasting all winter and pulled out the plant and placed into the compost. This past year, one such plant, that the worms ate entirely, was still there only to start growing leaves before winter ended. I gladly ate many of them and enjoyed the fact the kale did this. Now months later, it’s turning to seed and flowering! I never knew that until I pulled up your site to see the innate… Read more »
So glad you found us and that you made this new discovery, Sandie! Isn’t it interesting that so many of our food crops are biennials that produce flowers and seeds in their second year? Carrots are the same way.
Something you might like to try next year, if you don’t plan to let all of your kale go to flower to save the seed – have you heard of napini kale? Though some cultivars are more tender than others, you can actually harvest those flower stalks and eat them like you would broccolini. Read more about it here.
Thanks for the information, I needed to know if I should keep the kale seeds in their pods when drying, and now I know to do so, best wishes
I have had some Kale that I had growing at another house. I brought them to this house and they were still beautiful – dark magenta centers, etc. I bought some from HEB Store that were supposed to be the same as my older plants but – they have yellow flowers growing from the tops. Not what I want at all!! I see on the computer that maybe I should them. What advice can you give me?
Hey Wesa, not sure what your question is… What is it you think you should do with them? Thanks!
Can the seeds be planted this fall? How long before the seeds can be germinated after harvest?
Hi Jeffery, for a fall crop, seeds should be planted no later than mid-summer. Mid-summer is also the time to plant seeds if you want to overwinter them. This allows time for healthy roots to form to withstand winter temperatures. But they don’t really grow in winter – at least not in my USDA Zone 9B garden. However, I do like to overwinter plants because it’s an easy way to enjoy a very early crop. Plants start to grow again in late winter and leaves can be harvested as early as March. That is, if your winters are mild enough.… Read more »
Grew kale for the first time ever last summer. Since it was still growing as winter approached, I let it keep growing and kept an eye on it. I was AMAZED that it continued to produce yummy leaves through the winter (we have moderately snowy/cold winters–nothing too extreme and a few inches of snow most years, with a few exceptions, of course). In the spring, sure enough, it bolted and started growing these huge flower stalks (FOUR FEET TALL (amazing!)). I let it do its thing, also considerate of any bees out and about that early in the season (it… Read more »
Brassicas are heavy feeders astrokmb, and you’re right to avoid replanting in the same spot. A light feeder like lettuce is good as a follow crop.
Sounds like you had a lot of fun staying with the your plants’ life cycle – it is incredible to watch how they shrug off winter then put on a great show of flowers and seed pods!
Enjoy growing your own next year!
I wish I had know this last year. I cut off all the leaves and froze them in single serve packets for my smoothies and this spring pulled out the stalks and composted them. I will definitely be saving all of the different varieties this year!
Hej thank you for your information. Is there a way to harvest kale seeds from the plant that is cut while the seed pods are still green? Mistakes were made 🙁
Hi Sanjica, it might be possible to save the seeds if the pods were close to ripening when they were cut.
If so, lay them on a tray in a single layer and allow them to dry in a warm, dry location out of direct sunlight.
Give them at least two to three weeks to dry, then remove seeds from the pods and store in an envelope in a cool cupboard until next growing season.
Unfortunately, if the pods were very green, i don’t believe they can be saved.
Thanks for asking!