While brussels sprouts may get a bad rap in some culinary circles, they don’t fare so poorly in my household.
On the contrary, my family will happily wolf down an entire pan of brussels without a second thought, particularly if they are glazed in maple syrup and accompanied by bacon.
I consider brussels sprouts – members of the Brassicaceae family – to be a real delicacy, slow to mature and expensive to buy. In my opinion, they are one of those veggies that is much tastier when picked fresh from the garden.
That is why I prefer to grow and harvest my own.

We link to vendors to help you find relevant products. If you buy from one of our links, we may earn a commission.
While you may be inclined to feel intimidated by these strange towering stalks with their funny little edible buds we refer to as sprouts, the process of harvesting brussels is actually not too complicated.
Let’s get picking!
What You’ll Learn
Maintenance and Pruning: A Little Goes a Long Way
If you want to get a decent harvest, there are a few important tips and tricks to know about the growing process.
Brussels sprouts take a long time to mature. During the long waiting period, doing a little bit of careful pruning can help you maximize your yield.
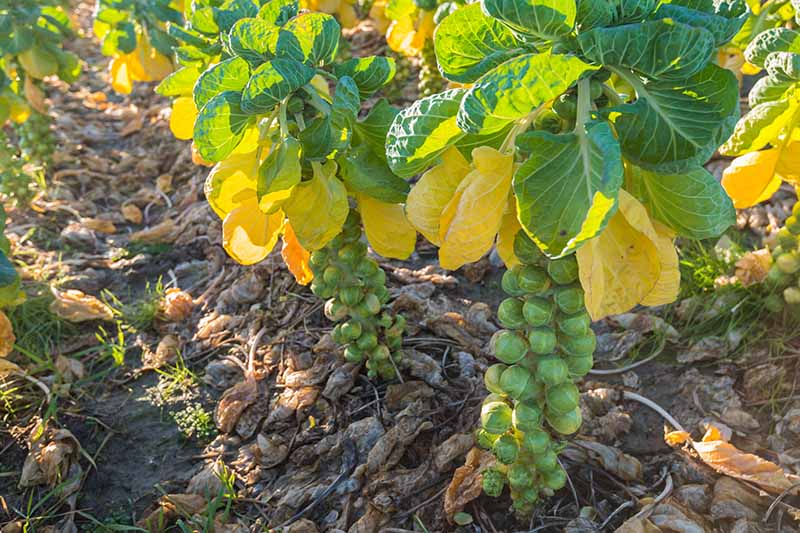
Throughout the growing season, observe your plants regularly and strip off any leaves that start to turn yellow.
If you choose, you can actually remove all of the lower leaves regardless of whether they are beginning to lose color. This will speed up the time they take to mature by encouraging the plants to direct energy towards producing buds.
Just be sure to always leave some of the larger upper leaves on the plant. It is necessary for the plant to retain some of its foliage for photosynthesis.
No need to toss what you’ve picked in the compost pile. Instead, you can save these young, tender leaves and cook them up!
Comparable to collard greens in texture, with a flavor reminiscent of kale, the baby leaves are quite yummy in a simple stir fry.
The larger, older leaves will tend to have a more bitter taste.

Your plants may also be pruned by a method known as “topping.”
Topping is the process of cutting off the growth tip of the plants when the buds are still immature.
This can also increase bud production, allowing a plant to put its energy into increasing the size of its buds rather than creating new leaves.
The best time to top the plants is in late summer, 4-6 weeks before the first expected harvest. To do this, cut off the growth tip where new leaves are forming at the top of the plant, above the first developing sprout.
Get more tips on pruning and topping your brussels sprouts here.
And for more detailed information on how to propagate and grow brussels sprouts, check out our growing guide.
When to Harvest
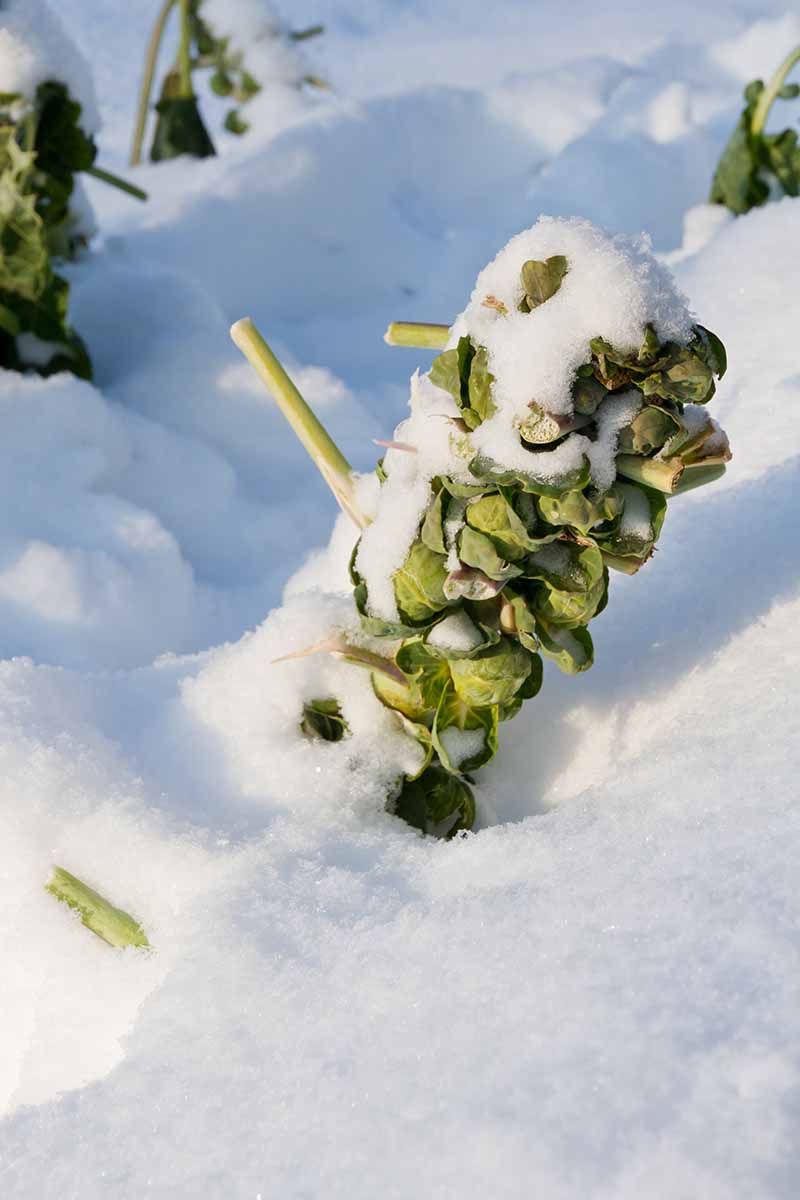
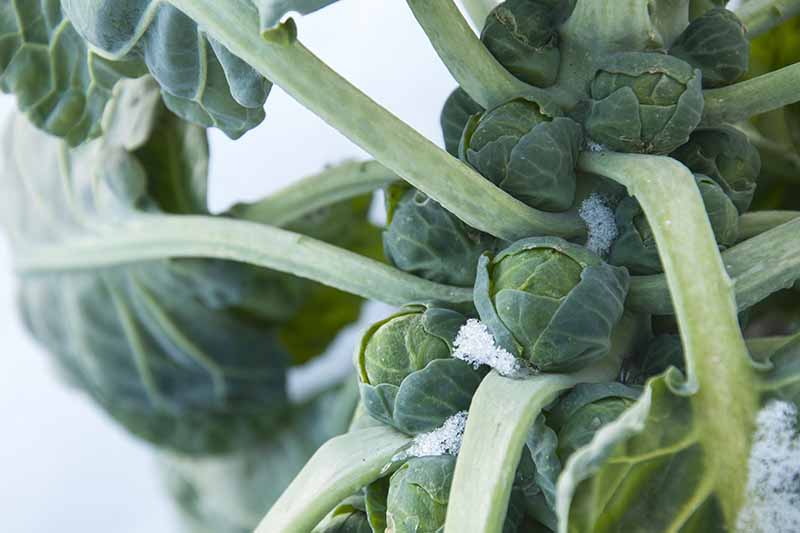
These crunchy cruciferous vegetables are a cool weather crop. They can survive some frost and snow, and in warmer climates can even survive the winter without any additional protection.
The best time to harvest is in the fall, after the plants have been touched by a few light frosts.
Frost actually improves their flavor. This is because the drop in temperature triggers the plants to devote energy to producing sugar.
Starch in the cells is broken down by specific enzymes into sugars. These sugars act as a natural antifreeze by lowering the freezing point of the liquid in the plant cells. This simultaneously protects them from frost damage and makes them taste sweeter.
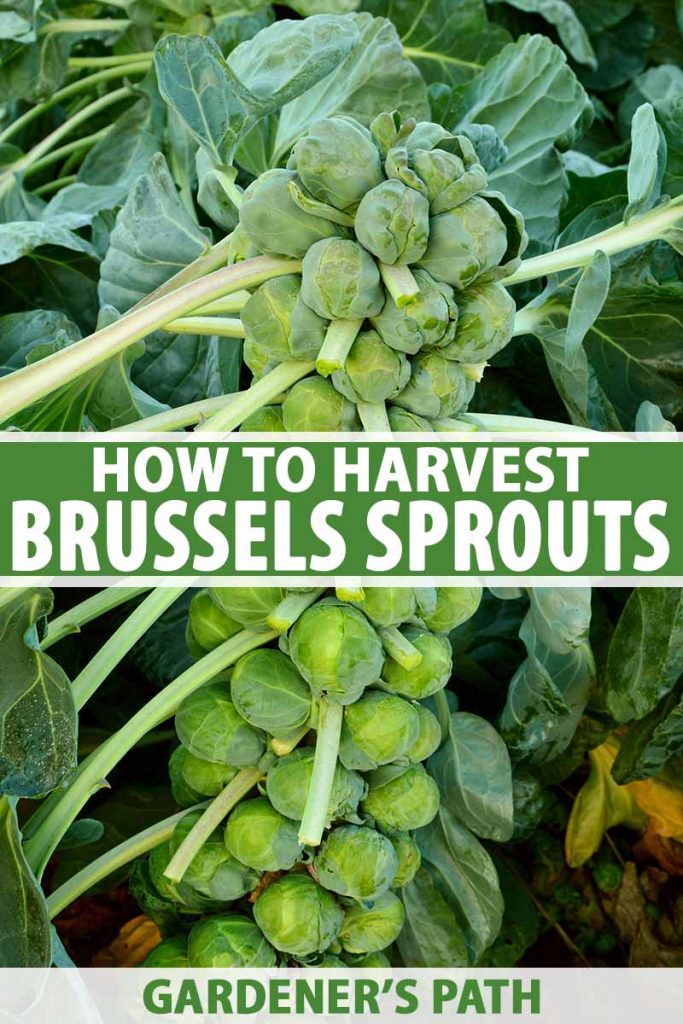
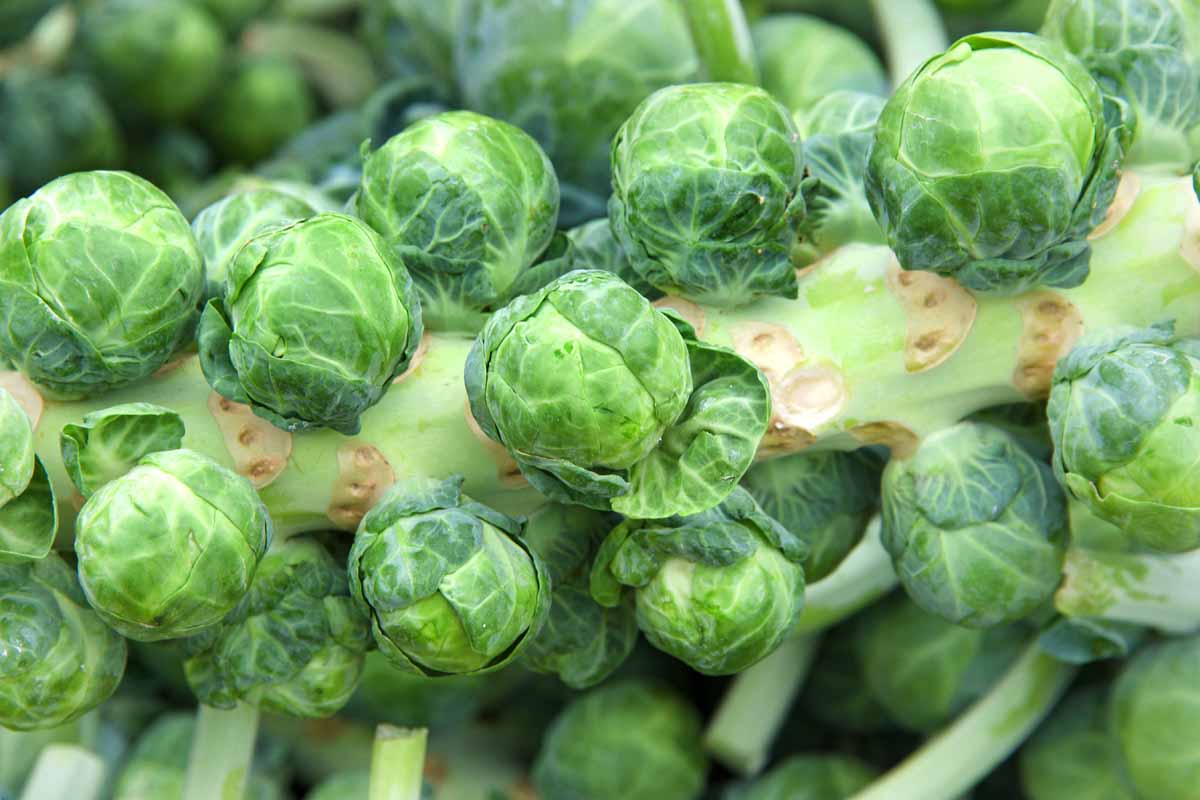
These plants take a long time to mature, sometimes over 100 days, depending on the variety, so patience is key. You want to pick them before the buds start to turn yellow and begin to open.
They should be firm, bright green, and about 1 to 1.5 inches in diameter.
You do not need to harvest all of the sprouts at once. All of the sprouts on a stalk will not mature and be harvest-ready at the same time.
As soon as at least a few are fully developed you can begin harvesting. As you pick them off, new ones will continue to form on the plant.
You can continue to harvest as long as there are sprouts on the plant. As the weather warms up, the plant will eventually bolt and no longer produce buds.
How to Harvest
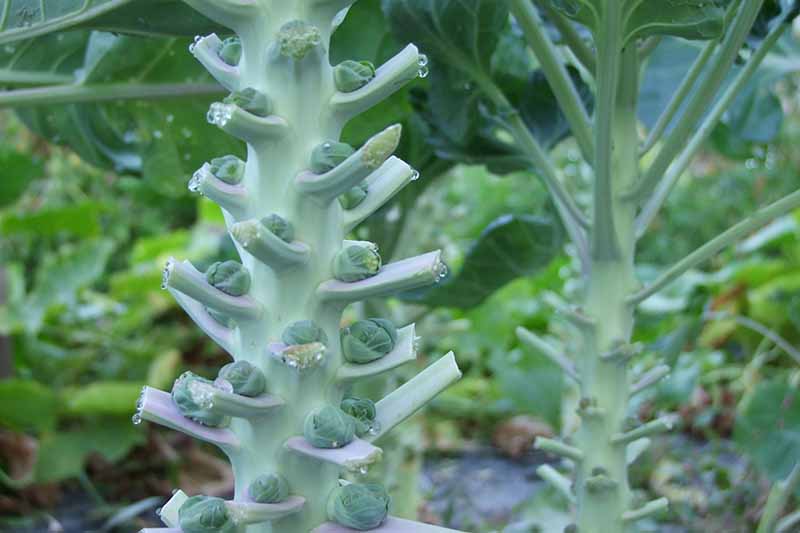
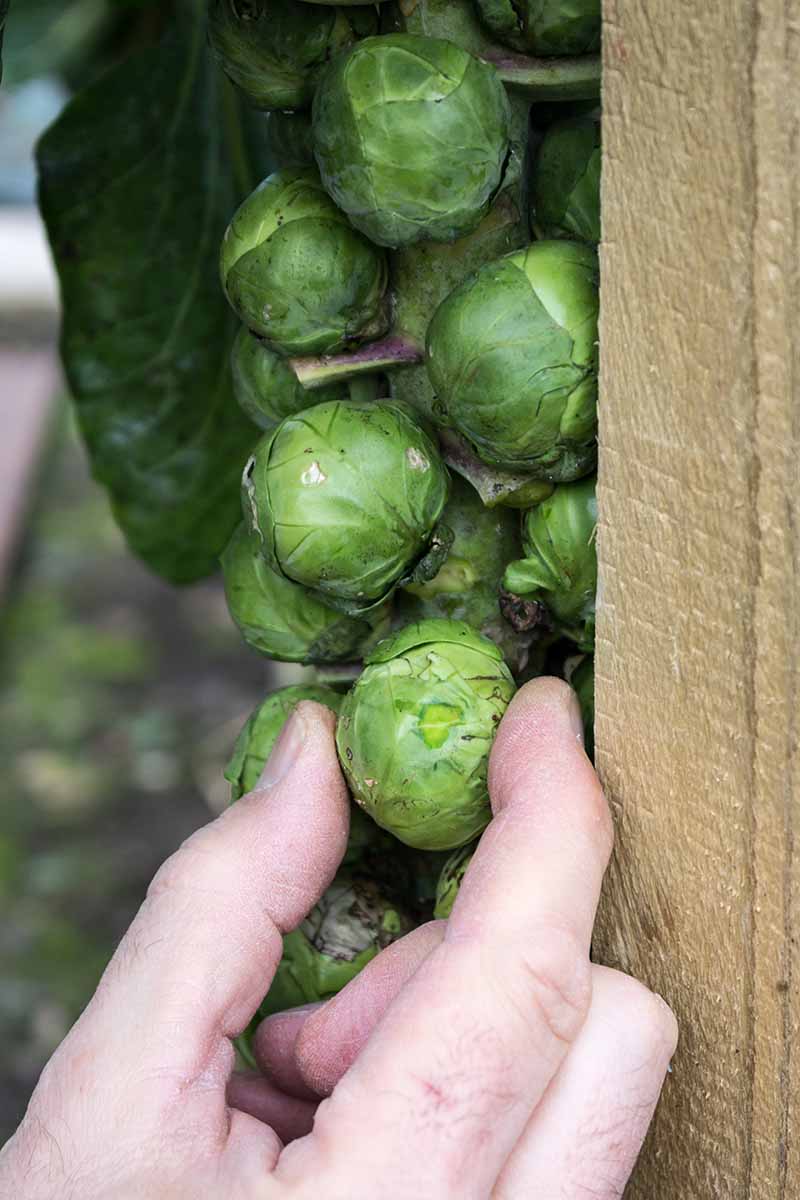
Brussels sprouts mature from the bottom of the plant upward, so the lowest ones will be ready first. When harvesting, start by picking those that are lower on the stalk, and work your way upwards.
Twist or snap off the buds, or cut them with a knife at the base where the sprout meets the stem. Be sure to pick them before they start to turn yellow, as they will become bitter and tough.
The early harvests won’t be as flavorful as those that have been exposed to a sweetening frost or two.
If you didn’t top the plant or prune the lower leaves earlier, you will want to do some tidying up as you harvest.
Removing the lower leaves below the sprouts you’ve picked will encourage the plant to grow upwards and continue to produce new buds. As you harvest, continue removing the leaves below the sprouts you pick.
As you pick them, new ones will develop quickly, but growth and production of new buds will slow as the weather gets colder. Growth will stop if you have a hard freeze and sustained temperatures below freezing.
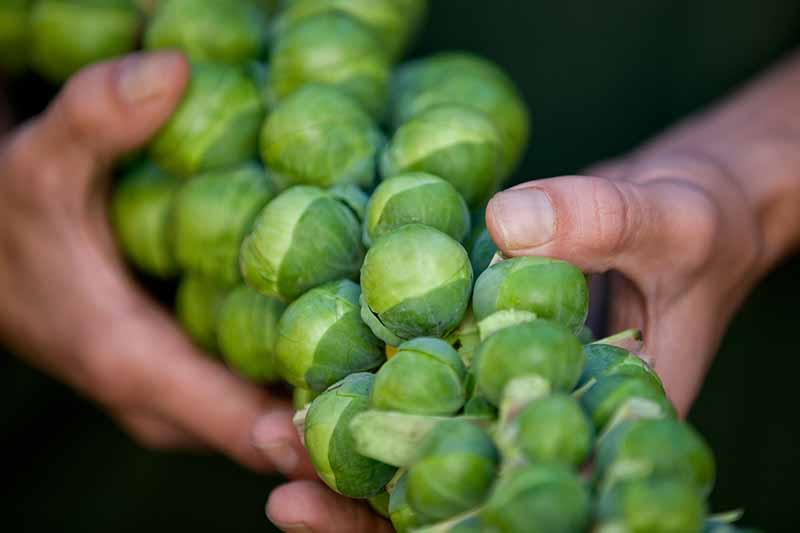
You can also choose to wait until a stalk is covered in mature sprouts and cut the whole thing down at once. To do this, either take a sharp knife and cut the stalk as close to the ground as possible, or grasp the top of the stalk firmly and pull it out of the ground.
After you’ve got the stalk out of the ground, simply twist or cut off the individual sprouts, discarding any that are yellowing or rotten.
Did you know that you can also eat the fibrous stalks? You just have to remove the woody outer layer and you can cook them just like you would a broccoli stalk. Or throw them in the pot the next time you make a vegetable stock.
Learn more about making soup stocks on our sister site Foodal.
Overwintering
To prolong your harvest, or in the case of later plantings, it is possible to overwinter your crops in the garden.
To do this, mulch heavily around the base of the plants prior to a deep freeze. Place a thick layer of straw or hay in mounds up to the top leaves, moving the mulching material out of the way when you want to harvest.
The mulch will protect your plants from the freezing and thawing cycles that cause cell breakdown and rot.
If it snows before a deep freeze happens, the snow itself will act as insulation for your crop over the top of your mulching material.
Once spring is in the air, however, they’ll quickly bolt and will start forming flower stalks in place of sprouts.
Read more about growing brussels sprouts in the winter here.
A Delicious, Homegrown Harvest
Homegrown brussels sprouts are delicious, and if you’ve got family members who are not so keen, once they’ve tasted a fresh-off-the-stalk sprout, they’ll never look back.
You could try enticing them with one of my favorites: simple, roasted sprouts – crispy and flavorful, you can find the recipe on our sister site, Foodal.
Why not get the kids involved in the harvesting process? Picking off sprouts or pulling up the odd looking stalks is fun and it’s a great way to encourage them to eat their greens!
Are you growing sprouts in your garden? What’s your favorite way of harvesting them? Let us know in the comments below.
For more information about growing brussels sprouts in your garden, try these guides next:

If you want to harvest some seeds, do you leave on sprout on a stalk for it to flower? Or how would one do this, to save seeds for the following year?
Great question! Yes, to harvest seeds you need to leave some sprouts on the stalk. Brussels sprouts are biennial, which means they would need to be overwintered in order to flower and produce seeds the following spring.
In the spring, allow the plants to bolt and seed pods to fully develop and dry out. Completely remove the dry pods from the plant, place them in a bag and use force to break open the seed pods. Seperate the seeds from the chff and store the seeds in a cool dry location.
Hello , my Brussel sprouts are still in my raised bed in PNW its now 1/31/2021 how do I know if they are still edible. Ive never grown them before. Thank you
Hi Steph,
If the sprouts still look and firm and green and don’t appear to be rotted, you can go ahead and harvest! It is fine to continue to harvest as long as there are sprouts on the plant. Eventually the plant will bolt, at which point it won’t produce new sprouts, and those still on the plant may start to taste bitter. Enjoy!
Living in Ontario, California, I have attempted growing brussels two years. Although I was able to harvest small crops that were delicious, my plants were destroyed by aphids. Other gardeners tell similar stories. Controlling aphids with water blast, lady bugs, safer soap even malathion(desperation) aphids win.
I live in Texas and recently harvested Brussels. I’ve never grown them before and I’m wondering will they survive a Texas summer? How can I try to grow them again?
My grandkids scarfed down even cold leftover brussel sprouts when I asked who wanted dragon eggs.
Haha! Nice one, Jim!