Phymatosorus diversifolius
For those new to growing ferns indoors who want to start off on easy mode, then this is the species for you.
Just like an actual kangaroo, the kangaroo fern is one tough customer.

We link to vendors to help you find relevant products. If you buy from one of our links, we may earn a commission.
Although the Aussie marsupial bests this plant at jumping, kicking, and carrying around joeys in a pouch, Phymatosorus diversifolius can survive with less water and humidity than other ferns.
Thus, it’s the perfect first pteridophyte for beginners!
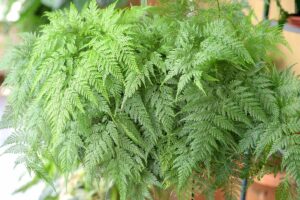
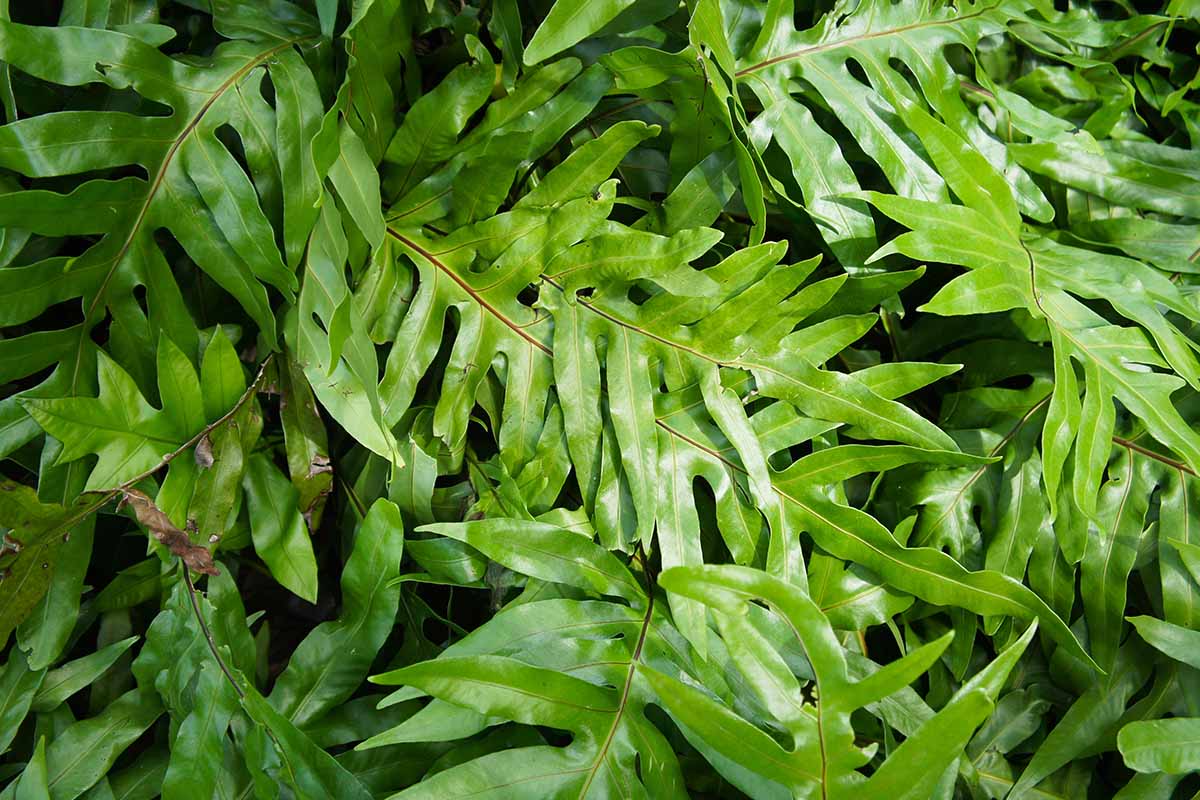
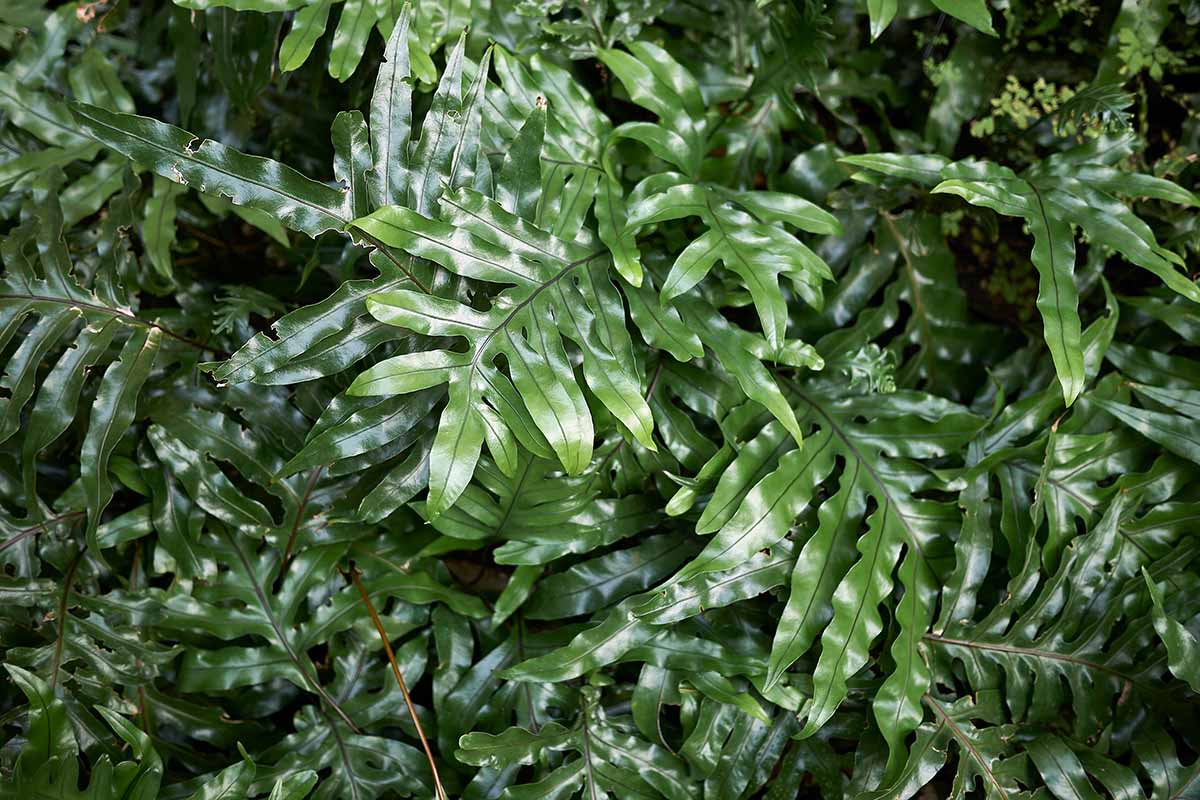
Durability isn’t the only reason to grow the kangaroo fern – with a spread of two to four feet and a height of one foot, it’s also quite lovely in appearance.
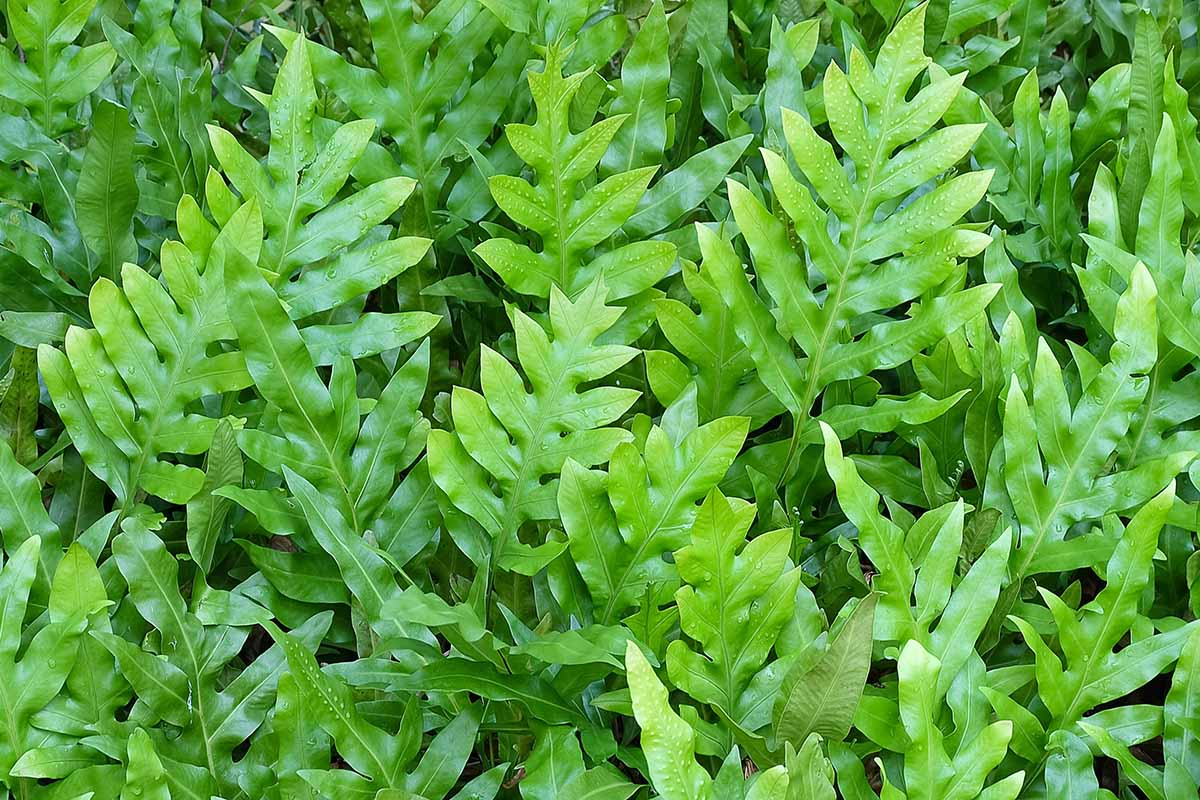
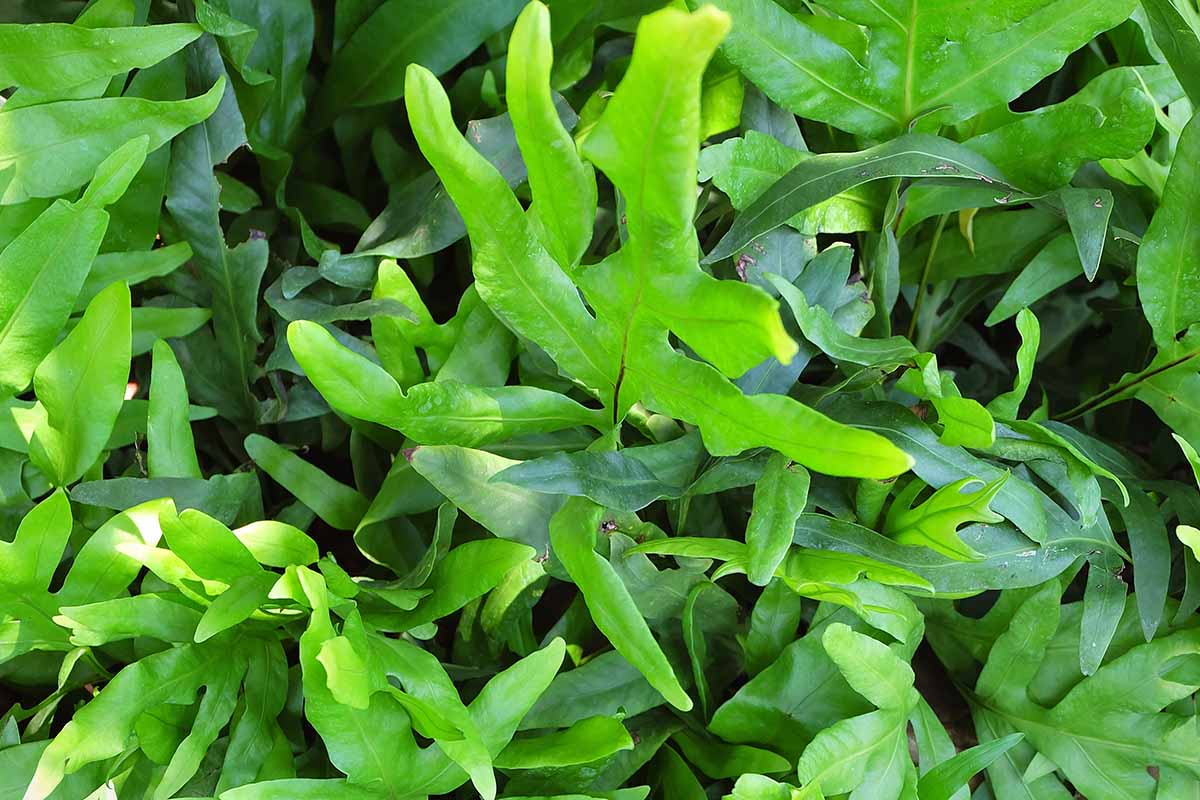
Its dark green, leathery, crinkled leaves resemble ’roo paws… if you use your imagination.
Combine that with a cascading habit that looks densely chaotic, and you’ve got a fern that screams “Crikey!”
Intrigued? Well, good news: we’ve whipped up this here guide for ya! The following tips and tricks for cultivating P. diversifolius will help you start off your growing journey on the right foot.
Here’s what we’ll cover:
What You’ll Learn
Cultivation and History
Grown best in USDA Hardiness Zones 9 to 11 outdoors, the kangaroo fern hails from Australia and New Zealand.
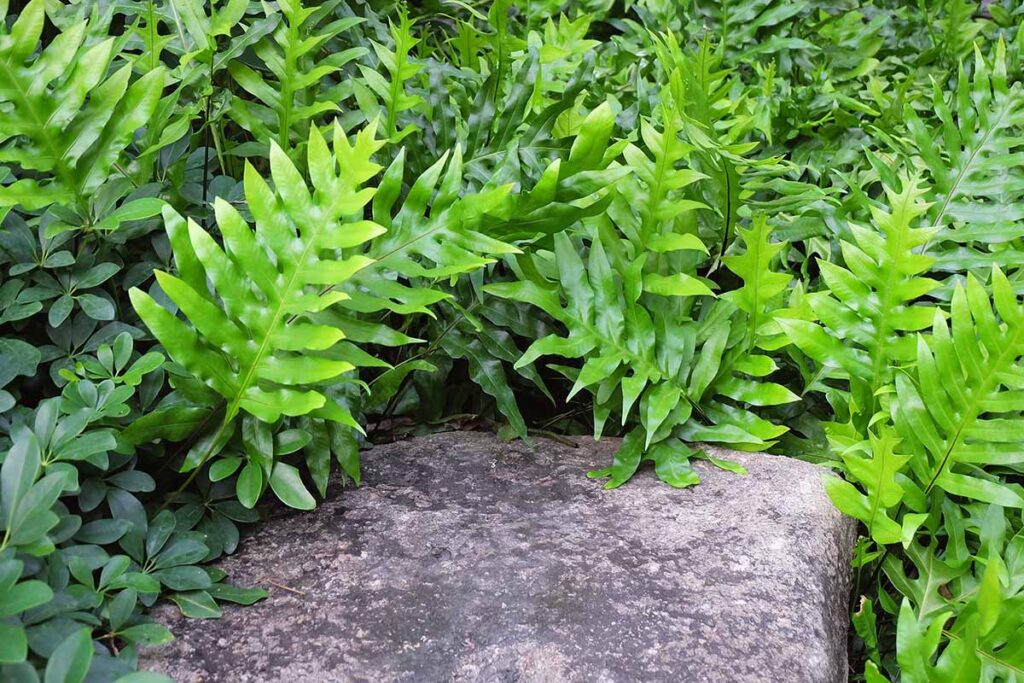
Its native growing sites within the Land Down Under include forest floors, cliff faces, and scrublands.
And within these spots, the plant can be found growing in moist and fertile soils more specifically, as well as directly on rocks, fallen logs, and other plants via their epiphytic roots.
A plant with many common nicknames, P. diversifolius also goes by kangaroo paw, kangaroo foot, or hound’s tongue fern.
It should not be confused with species of Anigozanithos, plants that also go by the common names kangaroo paw or catspaw.
As you dig into the Latin nomenclature, it becomes even more convoluted – Phymatodes diversifolium, Phymatosorus pustulatum, Polypodium billardieri, Zelandia pustulata, and Polypodium diversifolium, among others, are all synonymous names for this plant.
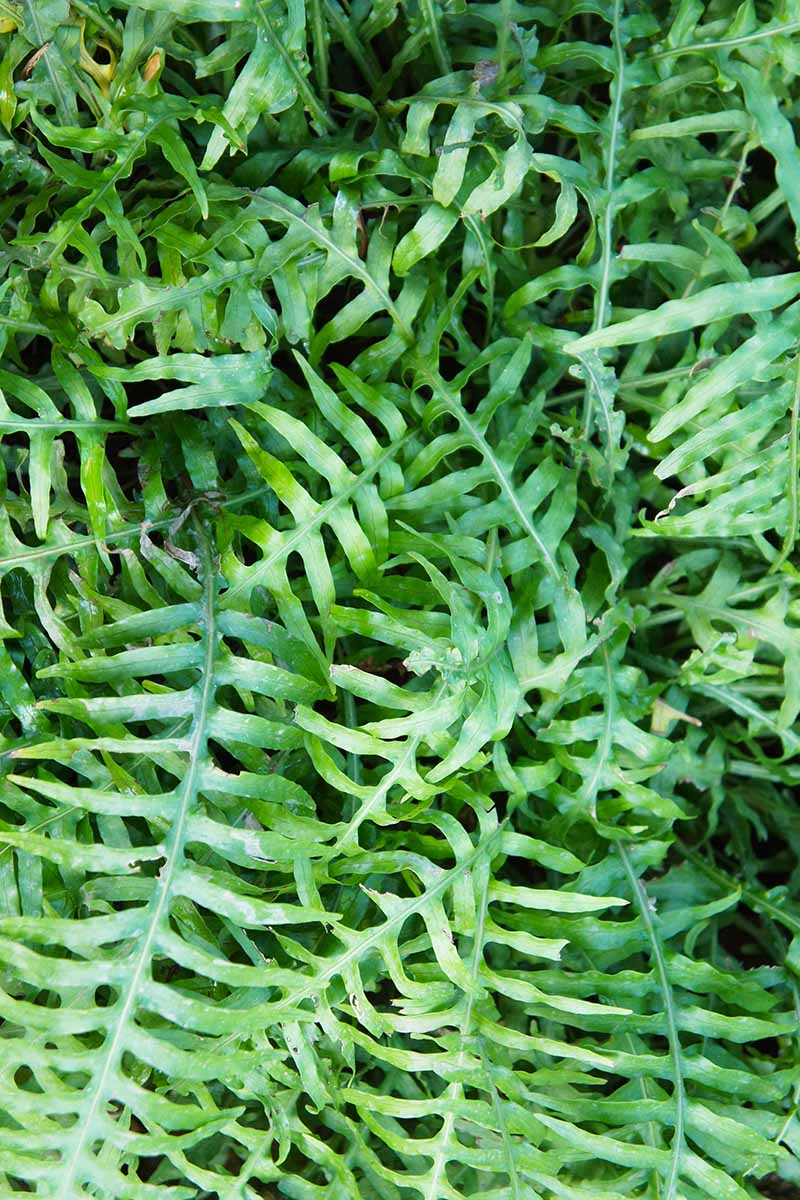
Personally, I’m a fan of the diversifolius epithet, which means “diversely leaved.”
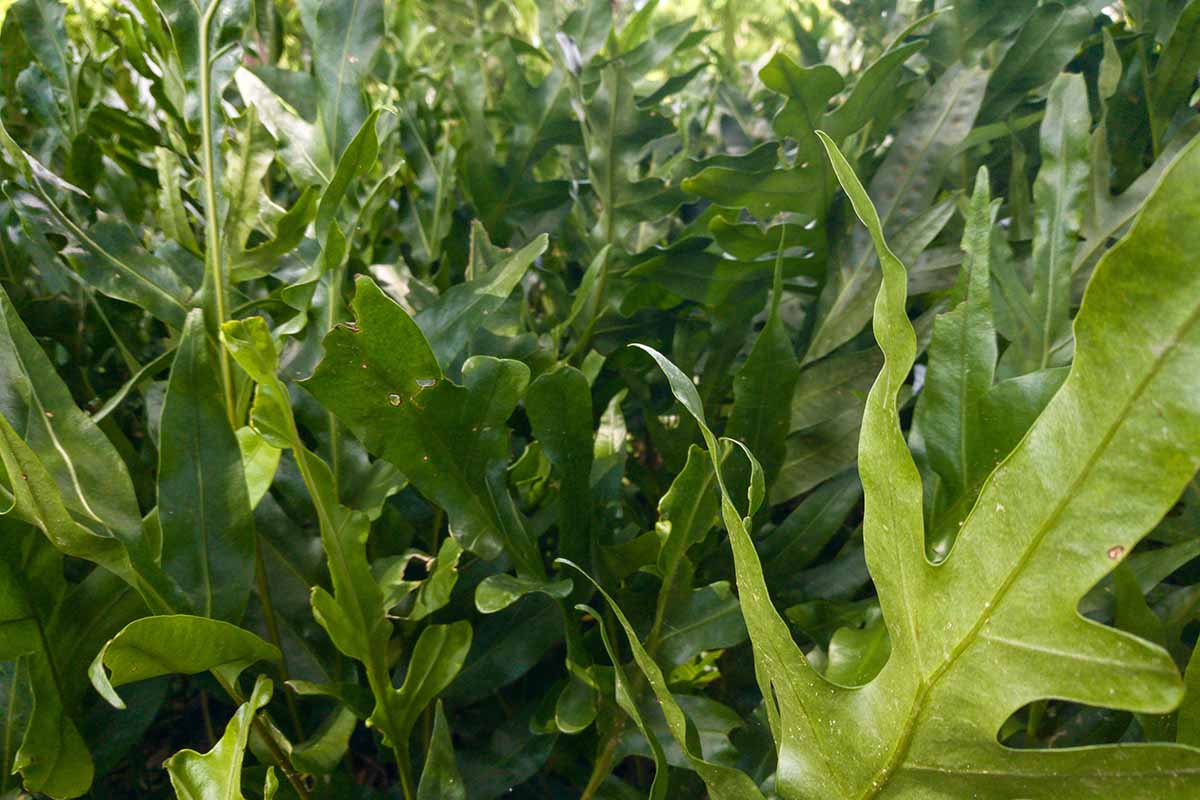
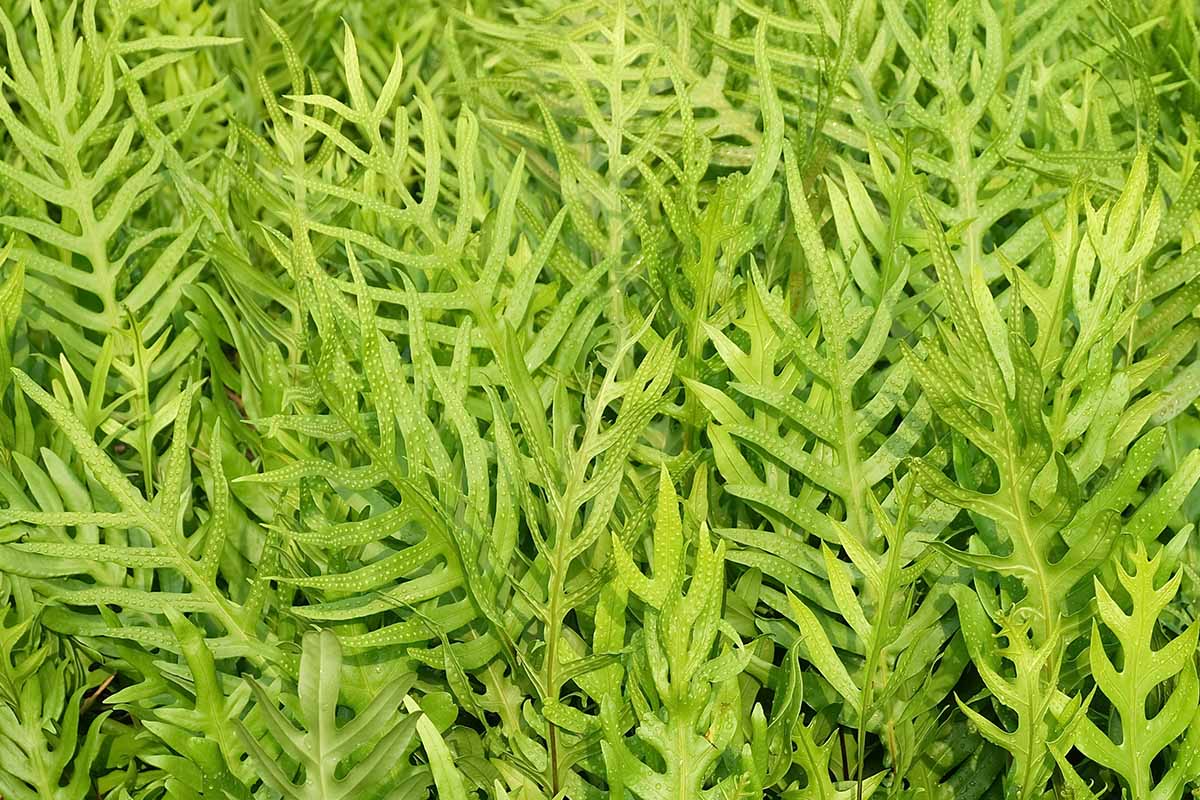
This is in reference to the variation that the fronds can have within a single plant – some look like the ’roo feet mentioned earlier, while others are just simple, elongated fronds.
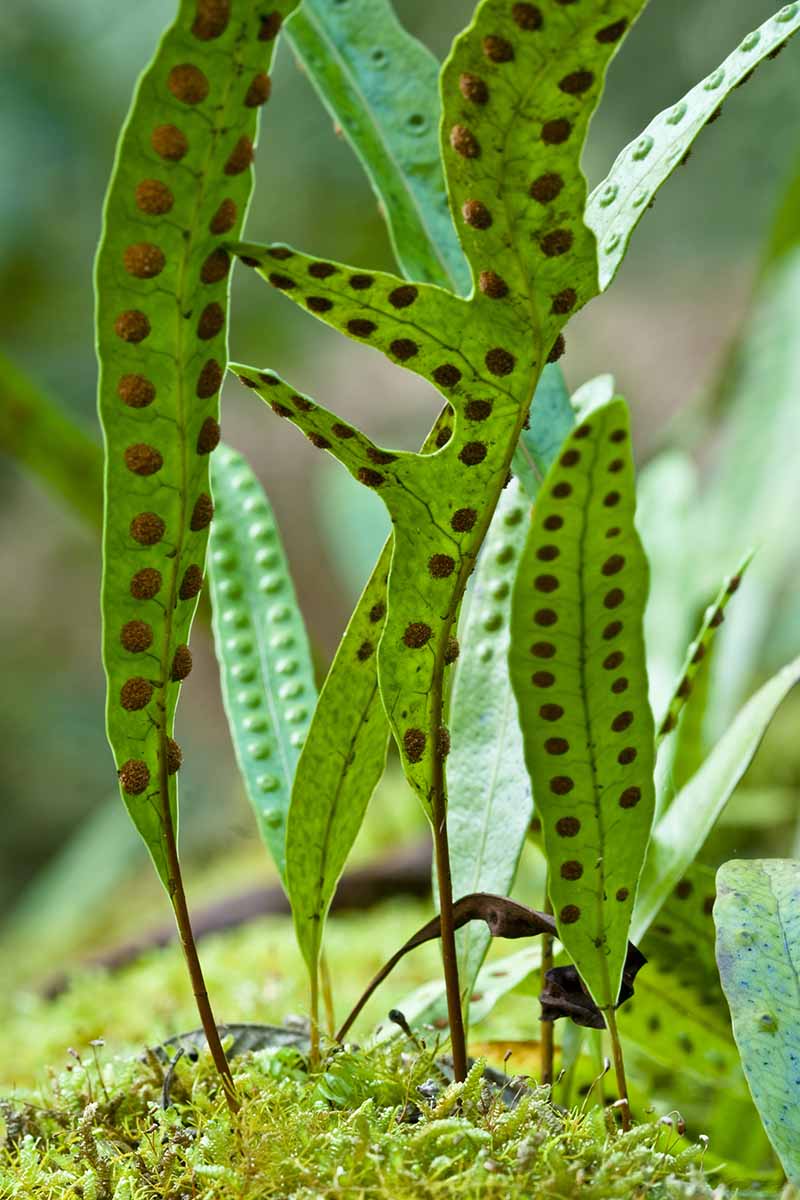
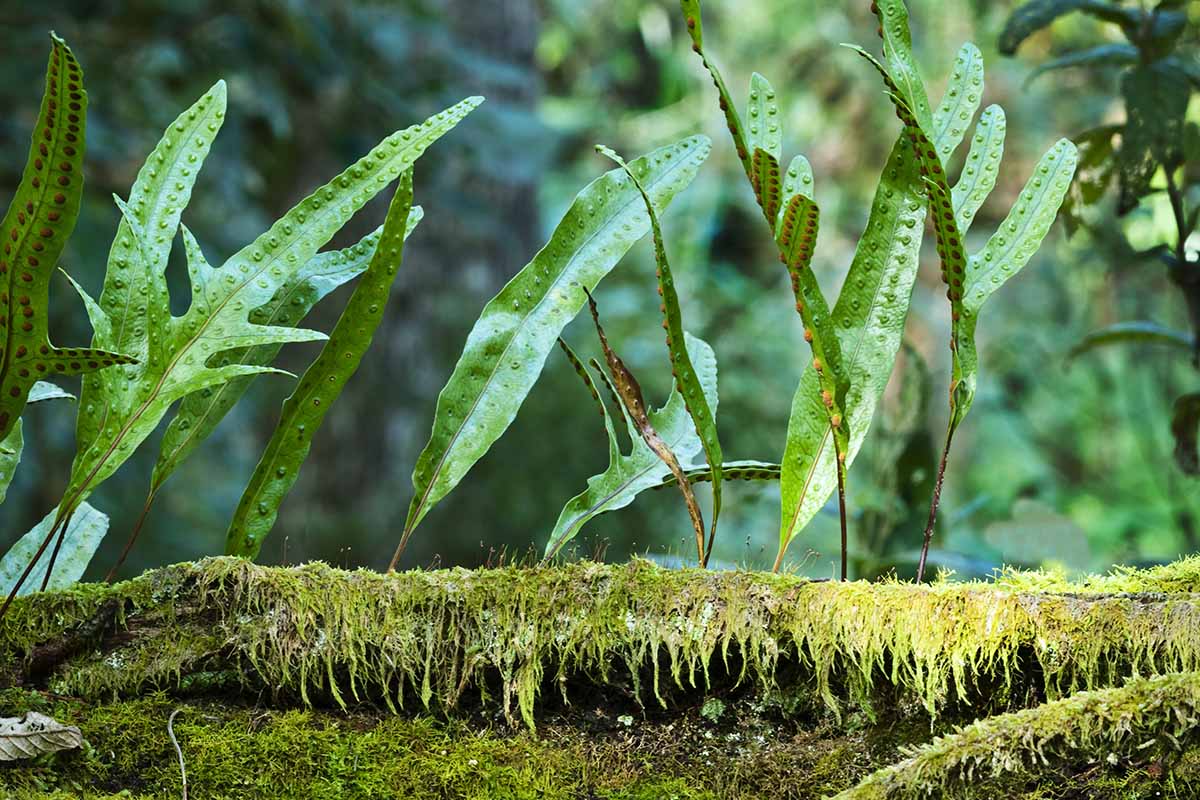
Either way, the plant’s spores are arranged in rows on frond undersides, and are sunk in so deep that the indentations create green raised bumps on the upper frond surfaces.
Propagation
Speaking of spores… it’s propagation time! You can do so by sowing spores, dividing plants, or transplanting.
From Spores
For those used to growing plants from seed, spore propagation can seem unusual and off-putting, like a deep-fried Oreo at the county fair. Or is that just me?
But unlike that ghastly culinary concoction, trying spore propagation is well worth it.
Propagating fern spores is involved enough to warrant its own guide, so give it a read if this is something you’d like to try!
From Divisions
If you’re jonesing for a propagule ASAP or simply weirded out by spores, go with dividing – it’s fast, and won’t leave you furious, as long as you have access to a mature plant to work with.
As a general rule, ferns can be divided every three to five years, but larger specimens can be divided whenever you desire more plants.
Once a plant outgrows its container, the center starts to die back, or overall frond growth diminishes – “can divide” becomes a must in these cases.
Give the specimen a hearty drink a day or two prior to division.
Remove the plant from its container – ideally while you’re outside, or over some newspaper that you’ve spread out on your work surface or the floor – and clean the soil off the roots a bit so you can see what you’re working with.
With a sterilized blade, divide the plant in half or into quarters, cutting through the roots as needed while keeping the fronds intact.
Avoid causing unnecessary damage while doing so, and work carefully. Now your divisions are ready for transplanting!
Via Transplanting
Once your P. diversifolius is divided or if you’ve acquired a potted transplant, obtain an adequately-sized container, with a diameter that’s about two inches larger than that of the root system.
And of course, choose a container with a drainage hole as well!
Fill the container with a coarse potting mix that allows for root aeration and ample drainage.
Dig out a hole – appropriately-sized for the transplant’s root system – and place the transplant inside.
Backfill the hole and moisten the soil, making sure to keep the soil moist up until and after establishment.
How to Grow Kangaroo Ferns
A kangaroo fern’s TLC requirements aren’t as “tender” as those of other ferns, but you still gotta treat yours right for healthy and happy growth.
Climate and Exposure Needs
To grow P. diversifolius as a houseplant, it prefers temperatures of 60 to 70°F. It can tolerate temps as low as 50°F or up to 75°F, but go beyond this range and you’ll run into problems.
As indicated by their dark and leathery fronds, kangaroo ferns prefer staying out of direct sunlight.
Therefore, you’ll want to provide indirect light by keeping them two to three feet from west-facing windows, and at least five feet from south-facing ones.
East- and north-facing windows are safe to place these plants right up against, though.
Another condition worth providing is humidity – at least 75 percent, to be specific.
Humidity can be increased by putting potted plants close together, setting them in a bathroom, or running a humidifier nearby.
You can also set containers atop humidity trays filled with pebbles that are partially submerged in water.
Soil Needs
As mentioned earlier, kangaroo ferns are epiphytic, meaning they can affix themselves to aboveground surfaces without needing to sit in growing media.
But given this plant’s mature size, it’s probably not going to be practical to bring a large hunk of rock or wood inside to use as an anchor.
Instead, you’ll want to provide a loose potting medium that allows air to reach the roots and excess water to drain.
It should also be rich in organic matter with a slightly acidic pH of 5.5 to 6.5. A 50-50 mix of coarse sand and an organic material such as peat moss, orchid bark, or coconut coir will do the trick.
Irrigation and Fertilizer Needs
“Fertile and moist” – a bit much for a dating profile, perhaps, but it’s quite appropriate for a P. diversifolius.
Said moistness is maintained by watering the soil whenever the surface feels dry. Maintain high fertility with a monthly dose of a complete, balanced fertilizer diluted to half-strength.
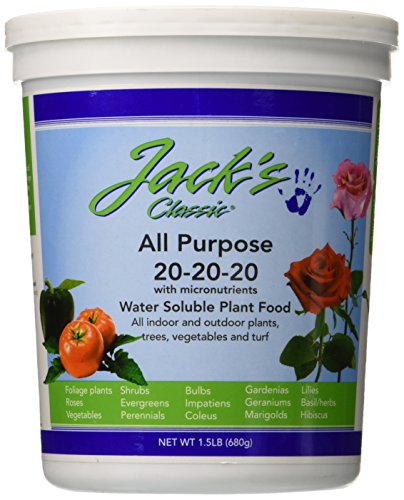
Jack’s Classic All-Purpose Fertilizer
JR Peters offers a water-soluble, 20-20-20 NPK fertilizer with supplemental micronutrients on Amazon.
Just use twice as much water when you mix it up according to package directions, or use half as much as what’s recommended.
Growing Tips
- Plant in a porous, well-draining, organic, and acidic growing medium.
- Provide indirect light, 75% humidity, and temperatures of 60 to 70°F.
- Water when the soil surface feels dry to the touch.
- Enrich the soil with monthly applications of half-strength fertilizer.
Maintenance
You should repot a kangaroo fern whenever it becomes root-bound, which is often indicated by roots poking out the bottom of the container through the drainage hole.
If you wish, you can also divide the plant at this time… but if not, continue with the repotting and move the plant into a container that’s one size larger than before.
Root bindage isn’t a huge issue for this species, so no rush! If you’d prefer to plan for this activity on a fixed schedule, repotting every two years is generally appropriate.
Be sure to make a note in your gardening journal!
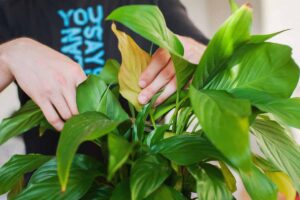
Additionally, you’ll want to prune any fronds that are chlorotic, necrotic, damaged, or sickly whenever you happen to notice them. Make sure to use sterile tools!
Where to Buy
Thankfully, you don’t have to go all the way down to Oz to acquire a kangaroo fern for yourself.
Specialty houseplant shops and tropical plant vendors should have this specimen in stock.
You could also hit up a fellow houseplant aficionado and score a division or batch of spores from them.
Horticultural conventions or trade shows may also be worthy avenues for plant acquisition, as well as making new botanical buddies.
Of course, there’s always cyberspace. California Tropicals offers an already-established P. diversifolius in a six-inch pot on Amazon.
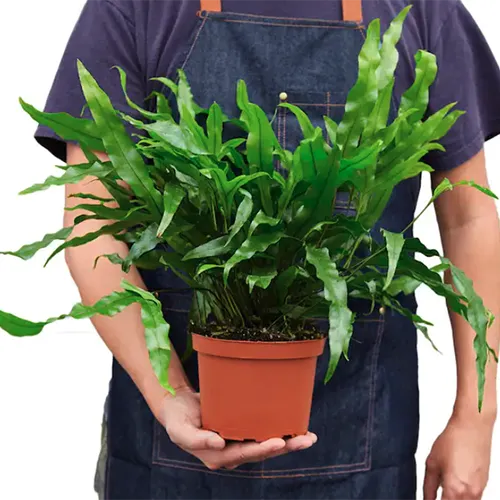
Kangaroo Fern in a Six-Inch Pot
And The Home Depot has a similar product available for purchase.
Managing Pests and Disease
When it comes to plant health problems, “warm, humid, and wet” poses a potent triple-threat. Makes so much sense, it rhymes!
Such conditions – the ones a kangaroo fern loves – can lead to increased pest infestation and infection in some instances, so you’ll need to keep alert.
Insects
Bugs can bring pathogens along with them as they feed, so preventing infestations can eliminate two problems for the price of one.
Aphids
Generally light green, soft-bodied, and super annoying, aphids munch on a plant’s phloem with their sucking mouthparts, leading to reduced growth.
All the while, they’re excreting a nasty honeydew, which can lead to sooty black mold.
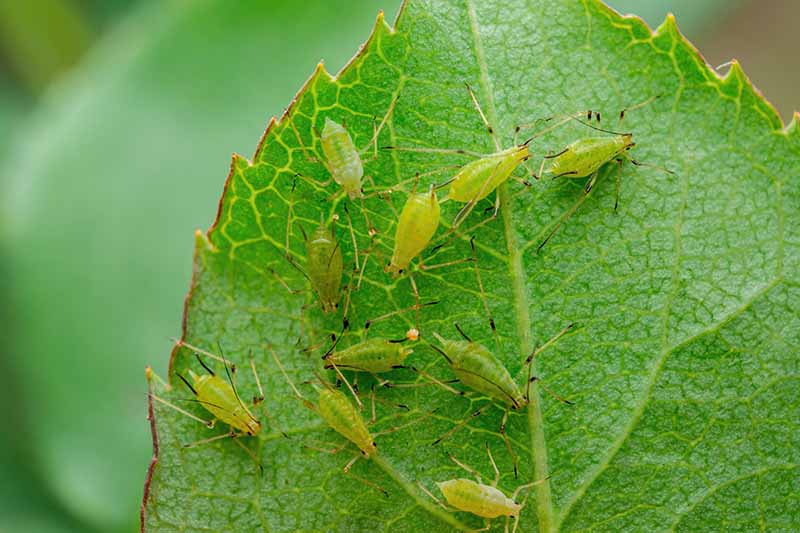
Just like vampires, aphids can be controlled with direct sprays of garlic water.
The impact of the water will knock the aphids off of leaf surfaces, while the sulfur and allicin compounds in the garlic will further repel them.
When sprayed directly on infested fronds, neem oil is also effective.
Bonide offers a ready-to-use neem oil concentrate that’s available on Arbico Organics.
Mealybugs
The white clumps of cotton-looking insects known as mealybugs feed and excrete honeydew in a similar fashion to aphids, and infestation symptoms such as stunted growth and necrosis may occur as a result.
For control, you can drench the soil with an insecticide such as pyrethrin, which is available in eight-ounce containers from PyGanic Gardening on Amazon.
Scale
When flush against leaf surfaces, these round-bodied pests look like the scales of a reptile, or perhaps something you’d want to show a dermatologist.
Regardless of what they look like to you, scale insects are another type of pests that suck – both literally and figuratively.
Said literal suckage tends to cause chlorosis, reduced growth, and other health issues.
Drenching the soil with an insecticide – as you would with mealybugs – is a solid means of controlling scale.
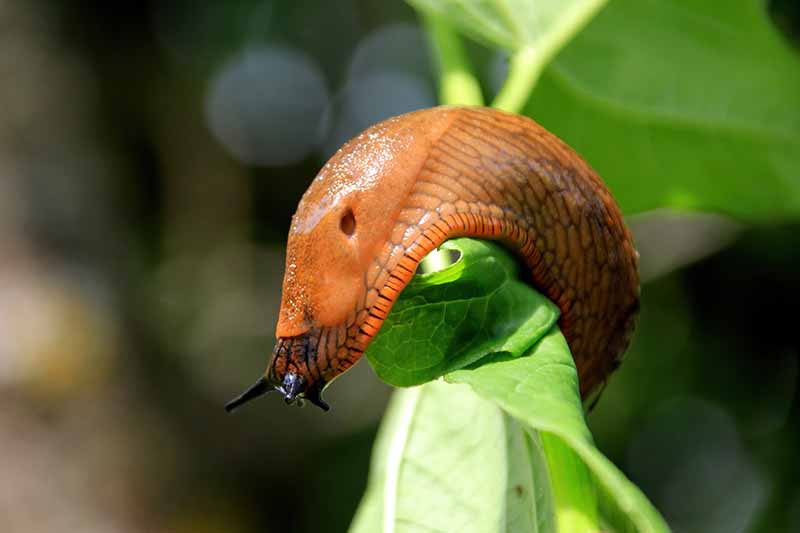
Slugs
The grossest pests on this list, if you ask me, slugs are shell-less mollusks that leave irregular, smooth holes in leaves created with their file-like tongues and disgusting slime trails in their wake.
Along with impairing the aesthetics of the foliage, said foliar damage interferes with photosynthesis, meaning the plant can’t feed itself as effectively in cases of severe damage.
Even if you’re not a green thumb, slugs in the home are an issue… so prevention is paramount. To reveal entry points, use a flashlight to follow the slime trails back to their point of origin at night.
Quick-expanding foam works to seal up holes and cracks, while salt, beer traps, or diatomaceous earth placed outside and across the entry point are all effective against these pests.
Inside the home, you should hand pick and dispose of slugs when you see them.
As a last line of defense, copper tape wrapped around containers shocks slugs upon contact, just like an electric fence.
Spider Mites
Think you’ll spot these pests with ease? You “mite” want to scale back your expectations.
Spider mites are tiny, ranging in length from a 1/20 to 1/50 of an inch. A hand lens may be necessary to spot these oval-bodied and bristly arachnids.
They can cause chlorosis, wilting, and leaf drop.
As with aphids and mealybugs, spider mites can be controlled with direct applications of insecticidal soap.
Disease
The kangaroo fern comes from Australia, so of course it’s gonna be tough. Few pathogens mess with this plant, but there’s one condition worth knowing about.
Root Rot
Root rot occurs when roots don’t receive enough oxygen because of excess water in the soil.
With its epiphytic capabilities, P. diversifolius is especially susceptible to this affliction, which leads to weak and necrotic roots.
Above the soil line, the shoots will suffer from weakness, stunted growth, and dieback.
To prevent root rot, avoid overwatering and provide a well-draining growing media in a container with drainage holes.
If your plant is already afflicted, remove the plant from its container and snip away any rotted roots and a proportional amount of shoots. If the specimen is too far gone, it should be pitched.
Best Uses for Kangaroo Ferns
The kangaroo fern grows wider than it does tall, making it ideal for spilling over the sides of a hanging basket or tall container.
P. diversifolius also looks fantastic when placed among other foliage-heavy houseplants, if you wish to go for that densely packed, “Rainforest Cafe” look.
Quick Reference Growing Guide
| Plant Type: | Herbaceous evergreen perennial, epiphyte | Foliage Color: | Dark green |
| Native to: | Australia, New Zealand | Tolerance: | More drought and less humidity than other fern species |
| Hardiness (USDA Zone): | 9-11 | Maintenance: | Low |
| Exposure: | Indirect light (indoors), partial shade (outdoors) | Soil Type: | Loose, rich |
| Time to Maturity: | 1-2 years | Soil pH: | 5.5-6.5 |
| Planting Depth: | Depth of root system (transplants) | Soil Drainage: | Well-draining |
| Height: | 1 feet | Uses: | Container plantings, hanging baskets, houseplants |
| Spread: | 2-4 feet | Family: | Polypodiaceae |
| Water Needs: | High | Genus: | Phymatosorus |
| Common Pests and Diseases: | Aphids, mealybugs, scale, slugs, spider mites; root rot | Species: | Diversifolius |
Make Like a Wallaby and Hop to It!
Have I conveyed the awesomeness of P. diversifolius effectively? There’s no time like the present – go forth and grab one!
Perhaps this plant will serve as your introduction to the world of ferns, or maybe it’s yet another clump of frondage in your ever-growing collection.
Either way, you’re sure to enjoy this addition to your home!
If any of your questions have gone unanswered, or if you simply have something you’d like to add to the conversation, the comments section below is ready and waiting.
For more fern facts, check out these guides next: