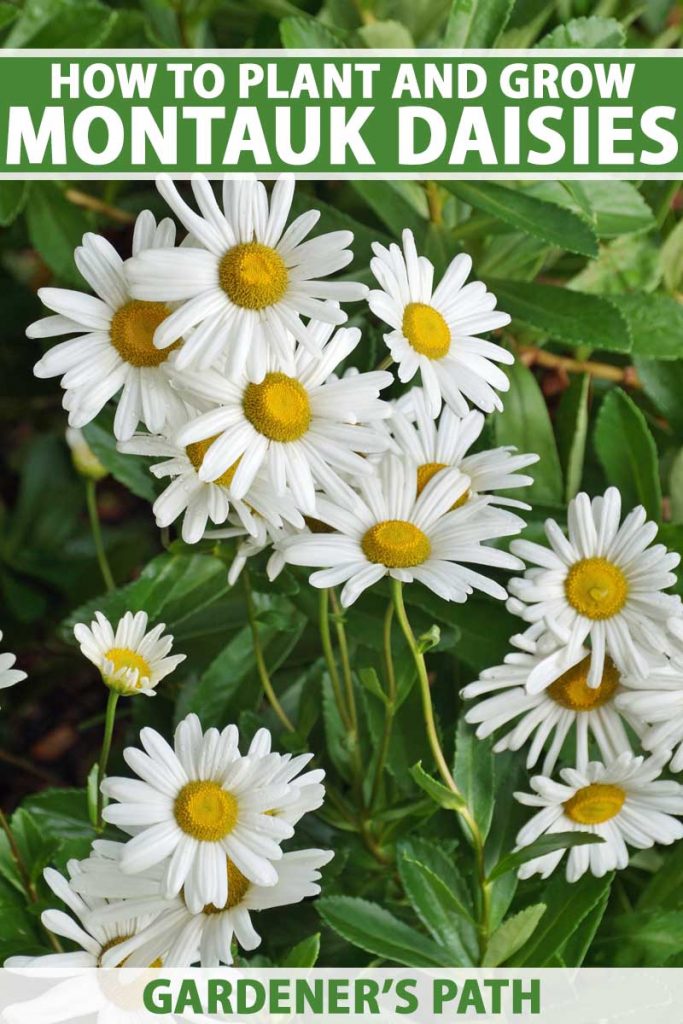
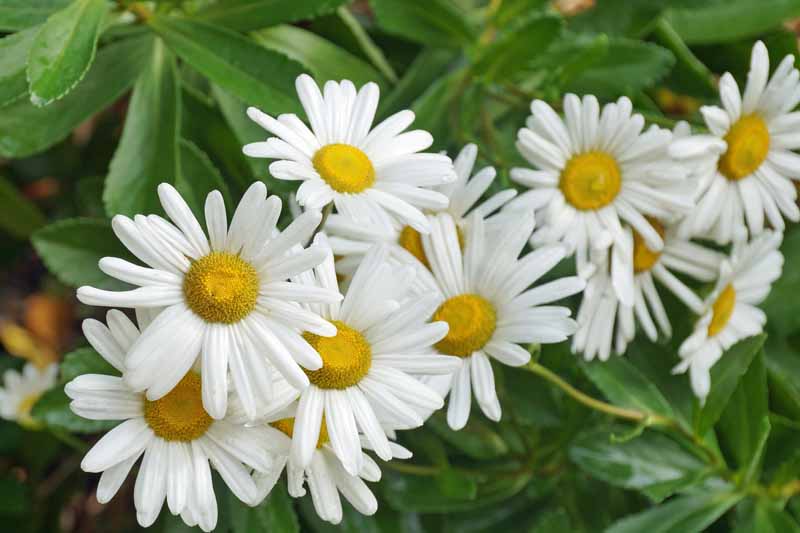
Nipponanthemum nipponicum
It was a balmy day in May when I broke ground on my first professional gardening gig.
My supervisor was pruning back these funny-looking, kinda stinky things that were somewhere between an herbaceous flower and a shrub in height and habit. I asked what he was doing.
“These are Montauks,” he said, “They don’t bloom until late summer, but you can push that back until fall by cutting them back now. Besides, if you don’t do that they get top heavy and fall over and look awful.”

We link to vendors to help you find relevant products. If you buy from one of our links, we may earn a commission.
And there we go, that’s all you need to know about Montauk daisies. Bet you thought I was going to pull you into some long-winded personal account of my time with these flowering plants, didn’t you?
Okay, that’s a bit of an exaggeration. We’ve got all the details on the kind and quality of care Montauks need to be at their best in your garden. Keep reading to learn more.
What You’ll Learn
Cultivation and History
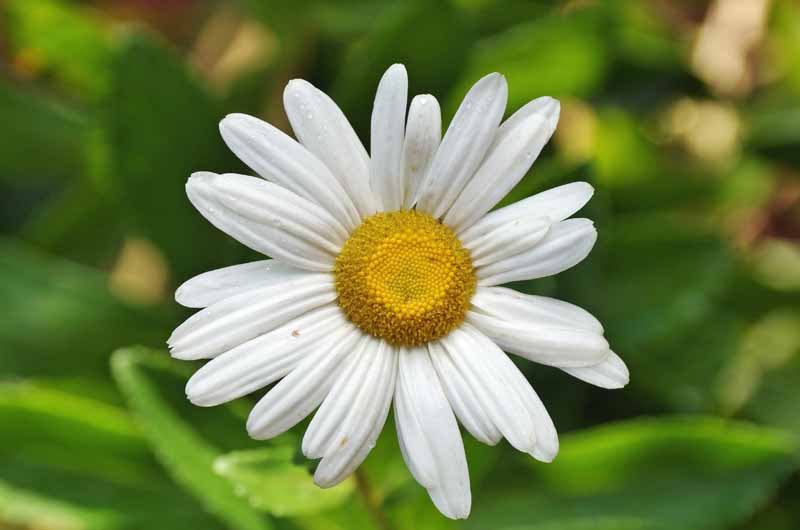
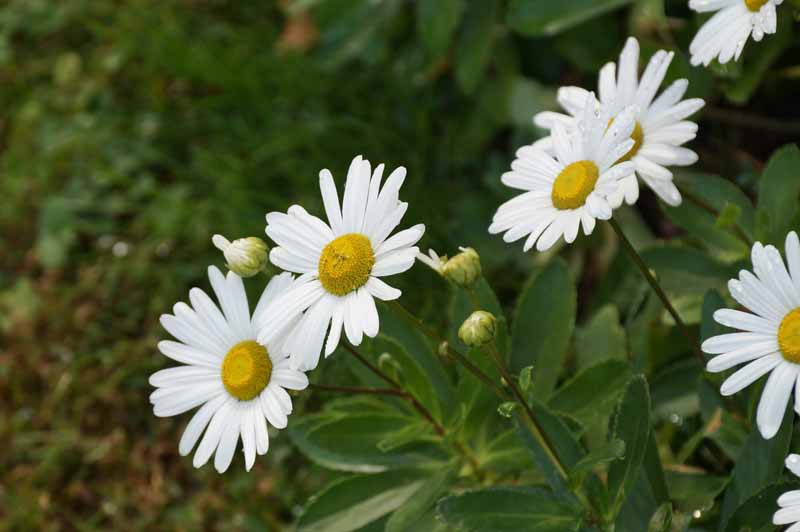
A Montauk daisy is a daisy in name alone.
Sharp-eyed readers will notice that Nipponanethmum is a combination of the words “Nippon” and “chrysanthemum,” a nod toward both the plants’ origins in Japan, and its close genetic relative the chrysanthemum.
It’s known as a Montauk daisy commonly because of the huge swaths of naturalized plants you’ll find growing in Montauk, New York. And it’s also sometimes referred to as Nippon daisy.
You’re likely interested in these perennials for their late-season blooms and general hardiness. They’re an excellent choice if you’ve got a rock garden, or a sunny and fast-draining area that needs some showy flowers.
It’s suitable for cultivation in USDA Hardiness Zones 5 through 9. This is a broad range and allows for these perennials to be used in a huge variety of gardens.
Propagation
While they can be grown from seed, Nippon daisies grow phenomenally well from cuttings and root division. These methods are also the most reliable ways to get strong and healthy plants.
The cuttings will look weak, pathetic, and generally half-alive throughout most of this process. Don’t worry, they’re alive, they just aren’t happy about it.
You can expect to see your cuttings perk back up after a week or two, depending on the conditions when they’ve been transplanted.
From Cuttings
Fortunately cuttings may be taken from Nippon daisies at just about any time of the year. However, you’ll find the best, most prolific specimens if you utilize the pieces you’ve cut back in spring or summer to start new plants.
Generally you want to start with smaller cuttings instead of big ones for many types of plants, but not with Montauk daisies.
You can take pieces that are a full eight to 10 inches in length to root and produce new plants. Heck, I’ve even had luck with rooting big whoppers a foot or more in length.
While bigger cuttings work if you’ve got the space and resources for it (bigger pots, lots of potting soil), you can just as easily start with cuttings that are a more modest three to five inches in length.
Snip your Nippon daisy cuttings with a sharp and clean pair of pruners, making sure you cut at an angle to maximize surface area for new roots to develop. Remove some of the bottom leaves so you have about five to eight sets of leaves remaining.
Montauk daisy cuttings set roots in water, or in wet sand or soil.
If you’re setting roots in water, make sure the water is dumped out and refreshed every few days. The cuttings will thank you profusely if they’re kept in a relatively cool location, away from direct sunlight.
After about two weeks, you should notice that roots have developed, a good signal that your cuttings are ready to be planted in their new home.
Otherwise you can root your stem cuttings in wet sand. This is my preferred method of starting most cuttings.
I suggest using an old six-pack nursery container from some marigolds or something. You can find dozens of these floating around at greenhouses, nurseries, and big box stores that sell live flowers.
Fill the tray wells with sand and keep it moist but not wet at all times, out of direct sunlight.
Whether your cuttings are three to five inches long or big whoppers, your aim is to sink them about half their full length into the growing medium.
For example, if your cuttings are five inches long, they should have about two and a half inches dug into the soil.
The exact depth for bigger cuttings might be a little deeper, but that’s only so the top half of the cutting doesn’t flop over under its own weight.
The roots should pop out of the bottom of the tray in about two weeks. If you can’t actually see them you can gently pull on a cutting – as long as it’s got a modicum of resistance, it should have roots developing.
Now it’s time to transplant them into a bigger container. I suggest filling a four-inch pot with a good quality potting mix.
Allow the rooted cuttings to get comfortable in their new home and stretch their legs, so to speak, for a few more weeks.
I like to wait until I can see some roots starting to poke out of the bottom of the container, but a good rule of thumb is to wait about two weeks after the cuttings have been transferred into a container before transplanting outdoors.
Transplanting
When they’re all grown up and picking out colleges, Montauk daisies can handle full-sun exposure in just about every growing location.
But as young rooted cuttings, they’re still babies, and they need some protection from the sun. This can be the shade of a tree or something artificial like a shade cloth.
Provide some space between them, about six to twelve inches between plants.
You have two options for transplanting. You can keep your Montauk plants in their containers until the fall, or you can plant them directly into the ground and transplant them when you’re ready.
Keeping the cuttings in their containers will reduce transplant shock when they go into their permanent home, but it requires more care and watering throughout the season.
On the other hand, cuttings planted directly tend to require less overall care throughout the season, but are at risk of transplant shock when they’re dug up and moved around.
This is a six of one, half a dozen of another scenario. The decision is up to you, based on which you’d prefer handling.
Plant the transplants so that they’re about a half inch higher than the soil grade. This helps ensure they won’t get waterlogged roots.
Most plants end up settling into the ground where they’re planted, and keeping them slightly elevated at planting ensures they sink below soil grade.
After your daisies are planted in the ground, be sure to keep them watered. They don’t need a lot, just enough to keep them from getting dry.
After about a month or so, they’re good to be transplanted from this shaded location and to their permanent home.
A little extra protection from the sun for the first few weeks is all the special attention they need to do their best.
From Root Division
Every two or three years, your Montauks will want to be divided. I tend to err on the side of caution and wait closer to three years before dividing.
No big reason why here, I just figure the plants are happier when they’re allowed to fill out a bit longer instead of being torn apart every two years.
These plants respond well to regular division. If you’re like me and you prefer to let your plants grow happily until they show signs that they’re not, your Montauks will indicate they need to be divided pretty clearly.
They will produce fewer flowers and, put simply, will begin to look weak and sad. It’s an obvious indication that they need to be divided and spread around to keep growing happily.
I’d wait until a cool day in the spring to do this. They can be divided in the summer but don’t expect the plants to be happy about it!
Dig them up with a generous amount of extra soil to prevent damaging too many of their roots. Some people do this after a good watering but I prefer to do it when the plants are closer to dry; it’s less of a mess and you’ll be able to have a more clear look at what you’re working with.
Unlike some perennials like hosta and astilbe, Montauks do not divide well when chopped in half with a shovel. When the whole plant is lifted out of the ground, work the roots apart with your hands instead.
Once they’re divided, place the new plants in a shady area, using the same method described above for transplanting cuttings, until they’ve recovered.
Then, simply dig them up and transplant them to their new and permanent home.
How to Grow
Montauks are pretty easy to work with. They want a lot of sunlight, just about as much as you can throw at them. The only time this changes is if you’re at the southern edge of their suitable range of growing zones.
In those locations where the sun might get too intense and hot, your Montauk daisies will thrive with a bit of afternoon shade to give them a reprieve from the sun.
Beyond that, the only major consideration to keep in mind is to give them well-draining soil. They absolutely cannot stand overly rich soil that holds onto moisture.
If the location is too wet, your Montauks will let you know by toppling over and looking limp and tired.
If you’re in doubt about selecting their ideal location, try your best to duplicate their native and naturalized environments. They prefer sandy and sunny locations with excellent drainage.
As for fertilization – don’t do it!
Montauks grow rapidly and vigorously, and they already need to be pruned back at least once a year. These perennials function in the same vein as some of my other favorites like gaillardia and black-eyed Susans, in that they don’t respond well to any supplementary fertilization.
I wouldn’t even add compost to the soil for these plants. They can make do with whatever’s going on in the soil around them naturally.
The same goes for watering. Montauk daisies are usually able to make do with rainwater alone. The general rule of thumb for most perennials is a solid inch of rain per week, and these plants are no different.
If you live in a very dry climate, have your Montauks set in an area that receives intense afternoon sun, or are experiencing an extended drought, you can water once a week if they’re looking sad.
Growing Tips
- Plant in well-draining soil.
- These love full sun! But if you’re in Zones 8+, consider giving them some afternoon shade.
- Don’t fertilize.
Pruning and Maintenance
Although Nippon daisies need a bit of extra pruning in the spring and sometimes the summer, they require no other maintenance.
It’s easy to do this little bit of pruning, and you get to enjoy that characteristic funky little smell these plants have.
You’ll notice that the base of the plants are rather woody. Cut stems back to a height of about 12 inches or so every spring; I aim to take care of this task by the end of May each year.
If your plants are particularly vigorous, you can knock another six inches or so off of their full height in July. Don’t worry, they can handle it!
If you don’t do any of this pruning, it’s okay, just expect to have some monstrous Montauks growing in your yard.
They can easily reach a height and spread of three or four feet if you let them get there without attentive pruning in the spring and sometimes the summer.
Where to Buy
You’re only going to find one type of Montauk daisy, so your search will be very narrow.
Your best bet to find them is going to be at a local garden center.
Managing Pests and Disease
You’re seriously going to have a difficult time finding a plant with fewer pest and disease issues than a Montauk daisy. Pest problems are essentially non-existent.
Indeed, they are not on the menu for deer or rabbits except in the rarest scenarios. In my experience working with Nippons, they’ve never been bothered by insects either.
The only potential issues you might come across are fungal diseases.
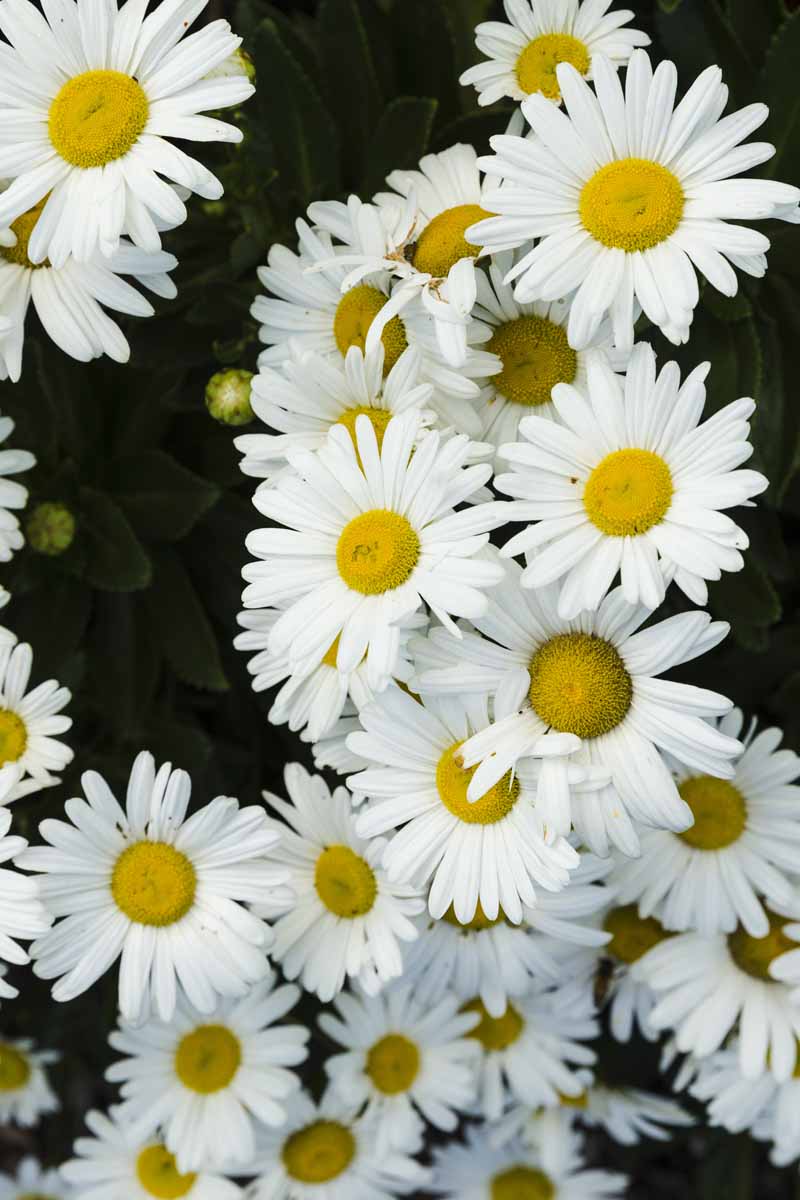
Do note that they tend to drop their lower leaves as the summer rages on, and it’s not a call for concern! In this situation the lowest leaves will wither and brown and fall or hang from the stems.
Not a problem at all, just a Nippon being a Nippon!
Disease
If they are planted in the right location, you will never see these issues. But say you had a very wet summer, or got a little too vigorous with the hose – you might see some of the fungal issues described below.

Both of these issues can be handled with a readily available store-bought fungicidal treatment like Bonide Fung-onil, available via Amazon.
I prefer to let these problems resolve themselves, but if I absolutely need to spray, I’m using something from Bonide most of the time.
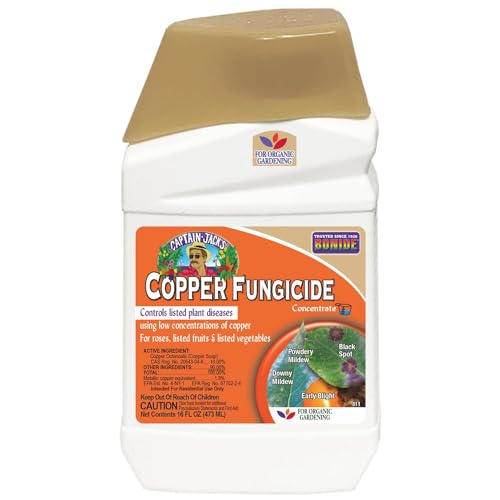
If you have a pump sprayer at home and would rather mix your own, consider this concentrated copper fungal treatment from Bonide instead, also available via Amazon.
Stem Rot
An ugly fungal issue, this type of rot will cause the stems of your plant to turn a slimy brown color – gross!
Cutting back on watering is usually enough to fix the issue. But in the case of prolonged wet and humid weather, for example, stem rot can become a more threatening issue and may require treatment.
If you’ve got an otherwise healthy plant with one or two infected stems, I’d just and remove the infected tissue. Cut into the green or woody uninfected tissue below the rotted area.
Wait to do this until you’ve got at least a few dry days in the forecast.
If all else fails, or to get ahead of the game, use one of the fungicidal sprays above during prolonged periods of wet weather.
Leaf Spot
Watch for brown and black spots on the leaves of your Nippon daisies. This is another issue related to overwatering, or at least having an environment that’s too wet for your plants to handle.
If you’ve got a handful of spotted leaves you can safely remove and destroy any that are infected. But if the entire plant is infected, a spray application is likely the best solution.
Best Uses
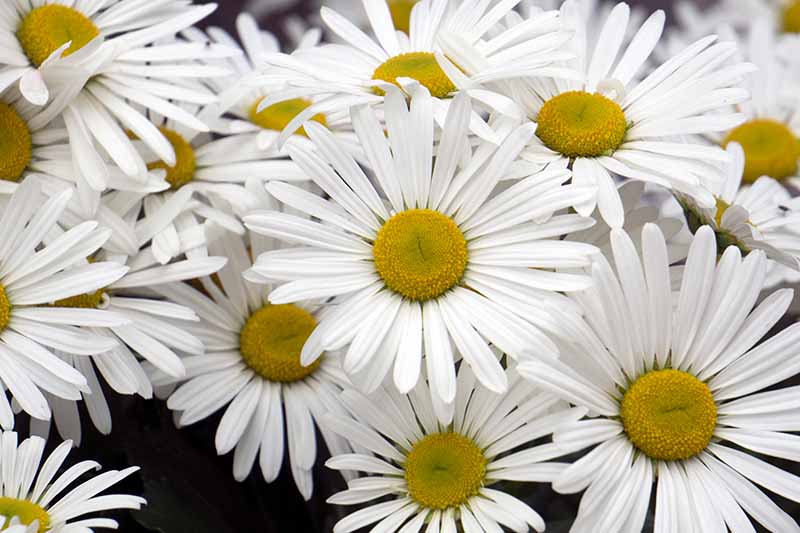
Large and in charge, Montauk daisies excel as “anchor plants” in the landscape. They flower late in the year but provide rich blue-green coloration throughout the entire spring and summer.
Their leaves are almost like that of succulents, and they are appealing by themselves.
The plants’ large and globular shape fits well in the corners of beds. I’ve seen them used in landscapes as the dominant plants that are scattered throughout a bed or growing area, surrounded by other perennials and annuals.
I’ve only seen them used in rock gardens and xeriscaping a handful of times, but they are excellent candidates for these types of gardens as well.
I’ve combined mine with dusty miller and a few of the more sun-tolerant heucheras in the garden with some strong success.
One of my favorite properties has scattered zig-zagging lines of Nippon daisies paired with some tall red-twig dogwoods in the background, and low-growing perennial geraniums and Hakonechloa in the foreground – a great combination of plants!
If you have a pond or stream on your property, you can’t find a better option to plant near it than Montauks. Their native habitat is near and around water, so as long as the soil they’re established in drains quickly, they can really thrive in a spot near the water.
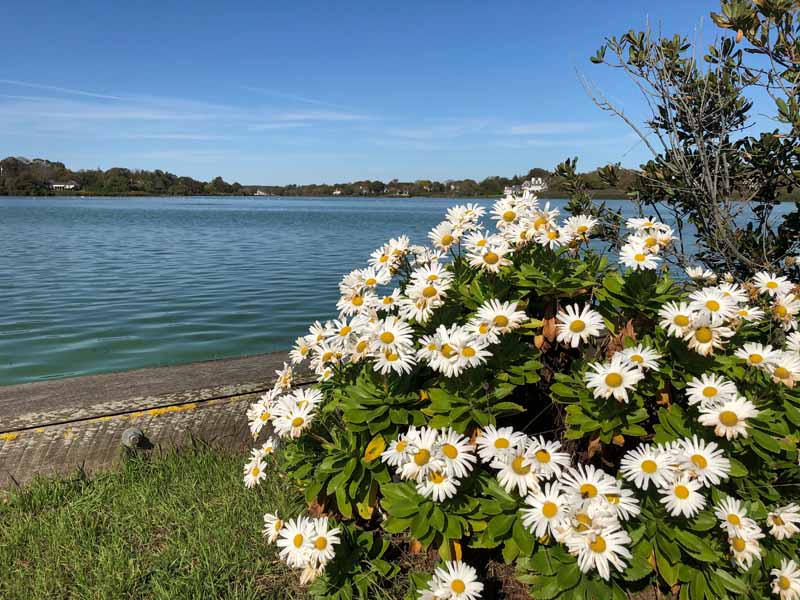
This is also a nice nod towards their native origins, and I think plants appreciate that kind of love and attention more than we expect they do.
If you’re adding these near a pond or stream, I’d suggest adding a small artificial hill or berm for them to grow on so they never get wet feet.
Montauk daisies are also excellent cut flowers. My wife makes lovely bouquets from these, mixed with their growing companions lavender and gaillardia.
They offer a funky little bit of aroma to the mixture as well, something hovering between pleasant and punchy.
Lastly, you could use Montauks in a container, but they can quickly crowd out other plants if they aren’t regularly cut back during the season.
They could work in large diameter pots, but anything smaller than 24 inches is just going to be too small for them.
Quick Reference Growing Guide
| Plant Type: | Flowering perennial | Flower / Foliage Color: | White with yellow center/emerald green |
| Native to: | Japan, naturalized in Montauk, NY | Tolerance: | Resistant to pests and disease |
| Hardiness (USDA Zone): | 5-9 | Maintenance: | Low |
| Bloom Time / Season: | Midsummer-fall, until frost | Soil Type: | Various |
| Exposure: | Full sun, afternoon shade in Zones 8-9 | Soil pH: | 5.6-6.5 |
| Spacing: | 6-12 inches | Soil Drainage: | Well-draining |
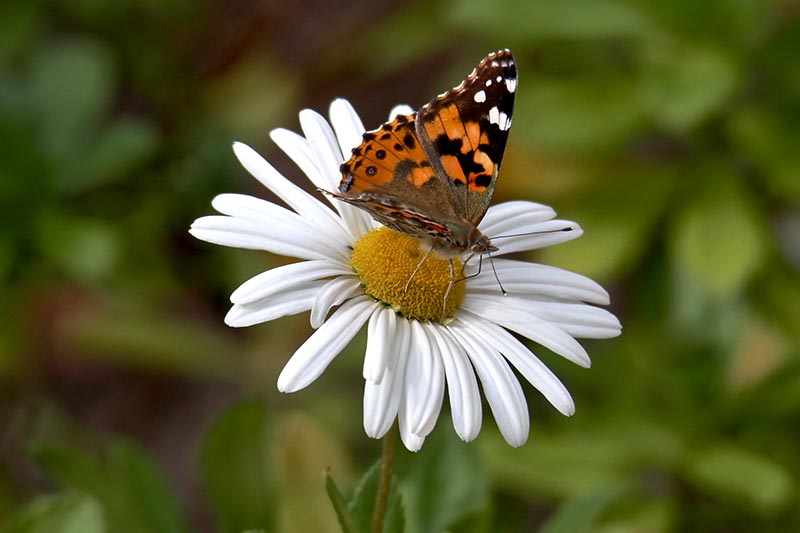
| Planting Depth: | Half an inch above soil grade (transplants) | Attracts: | Bees, butterflies, moths |
| Height: | 18-36 inches | Uses: | Borders, edging, rock or gravel gardens, cut flower |
| Spread: | 18-36 inches | Family: | Asteraceae |
| Water Needs: | Low | Genus: | Nipponanthemum |
| Common Diseases: | Stem rot, leaf spot | Species: | Nipponicum |
Meet Me in Montauk
Did you get that reference? Bonus points for you! Gold stars all around!
Nippon daisies offer everything I like to find in a landscape plant. They’re hardy, tolerant of just about all pests and diseases, and they don’t want to be bothered by human hands. What more could you ask for?
Do you have any questions about your Nippons, or maybe you just wanna reach out and say hi to us? Drop a line in the comments section below.
If you’ve now got daisies on the brain, like me, check out our other articles on these beautiful plants next: (Don’t worry, I won’t tell anyone if you don’t either!)


Very informative. I recently transplanted my MTK daisies. The article answered all my questions.
Can my huge Montauk daisy plant be split?
Absolutely! See our instructions for propagating via root division above. It’s a great idea to divide these plants every couple of years.
My montauk is thriving but I don’t have a single bud this year (august in MA). Why no buds with a healthy plant?
Hello Julie! My best guess here is that they may have received a nitrogen-rich fertilizer? That would make them put all their energy into leaf production. Or, if this is your first year growing them, it could just be the timing. If they weren’t planted early enough in spring, they may not have had time to form buds. I know we had late frosts here in Tennessee that kept me from transplanting or sowing a lot of flowering plants in a timely fashion. Some bloomed anyway, some did not, some still may. Montauk daisies may not even start blooming until… Read more »
Excellent article! All information is here and the author makes it fun to read! Keep up the great work ????
I just bought 3 MTD’s in 24″ pots and I now see that they should be planted in the Spring? Would it be ok to plant them now, late Oct., early Nov.? We’re having very warm temps here in midcoast Maine this year – 50’s at night and 60’s daytime.
I realize it’s too late to answer your question Nancy E Galland, but if other readers are wondering the same thing, I would recommend keeping the plants indoors over the winter and then planting them out in the spring. Thanks for reading!
First time gardener In zone six. My MTKs have been planted for about two years. This year they became very top heavy and I did not prune them. I was assuming they should be pruned in the fall. But now I see I was wrong. Would it be horrible to prune them now? I’m worried about the snow mushing them down. Mea culpa. Please advise. Thank you.
Great info, followed instruction last spring for root cuttings,transferred to ground late summer. Emerging leaves now, zigzag planted in a row, but they’re lined up like soldiers still. When would they start to become thicker plants and not look lije single stem plants?
Hello Susan! So glad to hear you’re growing Montauk daisies and they survived the transplanting. If you planted them in well-draining soil and lots of sun, they’ll start spreading within a few months, I’d say. Next spring, encourage them by pruning the way Matt described above: It’s easy to do this little bit of pruning, and you get to enjoy that characteristic funky little smell these plants have.You’ll notice that the base of the plants are rather woody. Cut stems back to a height of about 12 inches or so every spring; I aim to take care of this task… Read more »
Hi Matt, I really enjoyed your article-you’ve for a great writing style. I live on Long Island, NY and always wanted some – I just purchased 3 Montauk daisy pots and am trying to decide where to plant them. (A local deer took a nibble from one but must have decided he didn’t like them, so he dropped the pot-I am hoping he doesn’t change his mind!).
Thanks for the helpful information and wish me luck!
We are in Zone 5 and have two pots of Montauk daisies. If we keep them inside for the winter, (1) how should we care for them and (2) can they be planted next spring or should we wait until the fall to plant them outside?
Hey there, D.L. Montauks are pretty hardy plants and can tolerate the winters in Zone 5, even when they’re in a container. My first suggestion would be to keep them outside. If it’s possible to plant them in the ground now, do it! They are likely to overwinter just fine. My sister-in-law lives north of Syracuse and she planted some Montauks a few days after Thanksgiving and the plants are thriving now. If digging isn’t an option, my next suggestion is to place the containers somewhere protected from the worst of the cold but still outdoors. My favorite locations are… Read more »
Does the Montauk Daisy have 5 stalks, each with 5 blossoms?
I’m sorry but I don’t think I’ve ever heard of this before, Sheri! They don’t necessary grow in groups of 5.